Loading ...
Loading ...
Loading ...
12
INSTALLATION INSTRUCTIONS
3) Adjust the unit to the right position for
installation.
(Refer to the chapter "Preparations before installation"
on page 10.)
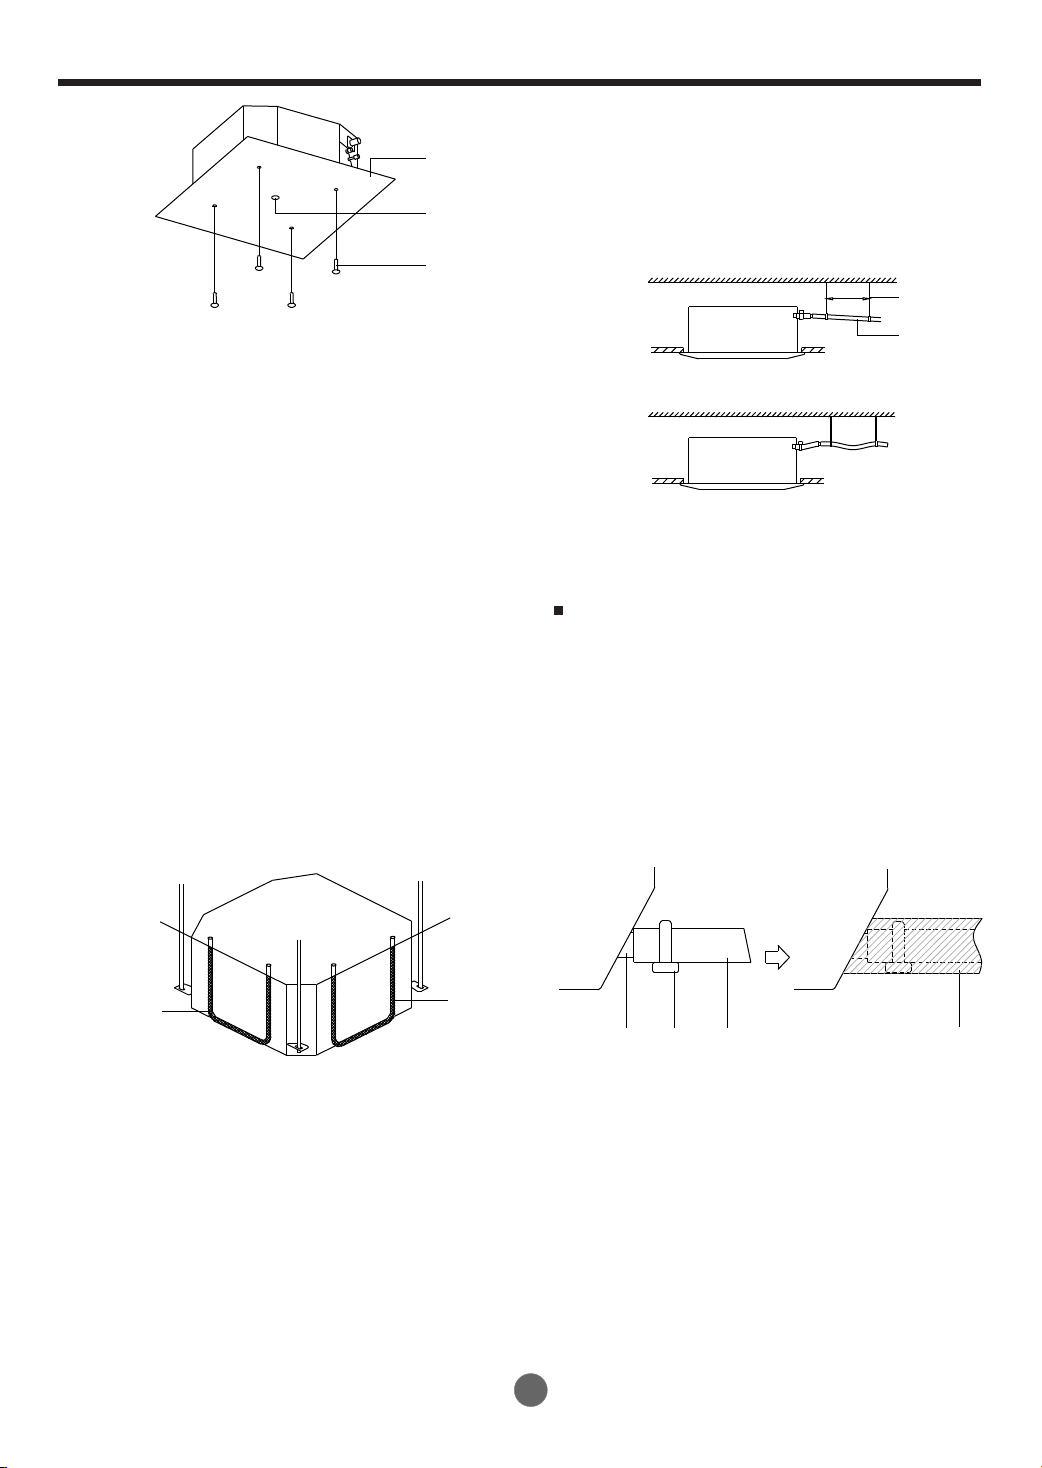
1 Paper pattern for installation (on some models)
2 Center of the ceiling opening
3 Screws (supplied with the decoration panel)
1
2
3
- Do not install the unit tilted. The indoor unit is
equipped with a built-in drain pump and float switch.
(If the unit is tilted against the direction of the
condensate flow (the drain piping side is raised),
the float switch may malfunction and cause water
to drip.)
- Check if the unit is levelled at all four corners with
a water level or a water-filled vinyl tube as shown
in figure below.
4) Check if the unit is horizontally levelled.
1 Water level
2 Vinyl tube
5) Remove the paper pattern for installation. (For
new ceiling only).
1
1
2
2
2.4 DRAIN PIPING WORK
Installation of drain piping
Install the drain piping as shown in figure below and
take measures against condensation. Improperly
rigged piping could lead to leaks and eventually wet
furniture and belongings.
- Keep piping as short as possible and slope it
downwards at a gradient of at least 1/100 so
that air may not remain trapped inside the pipe.
- Keep pipe size equal to or greater than that of
the connecting pipe (PVC pipe, nominal
diameter 20mm /0.79in in, outside diameter
25mm/0.98in).
- Push the drain hose as far as possible over the
drain socket, and tighten the metal clamp
securely.
- If the drain hose cannot be sufficiently set on a
slope, fit the hose with drain raising piping (field
supply).
- Make sure that heat insulation work is executed
on the following 2 spots to prevent any possible
water leakage due to dew condensation.
1 Indoor drain pipe.
2 Drain socket.
- Insulate the drain hose inside the building.
1 Hanging bar
2 ≥1/100 gradient
1 Drain socket (attached to the unit)
2 metal clamp
3 Drain hose
4 Insulation (field supply)
12
3
√
×
Install the drain pipes.
4
Fig.23
Fig.22
Fig.21
Fig.20
1-1.5m
1
2
3~5ft
Loading ...
Loading ...
Loading ...