Loading ...
Loading ...
Loading ...
Range Hood Installation
Installation- Ductingversion
Afterhaving chosentheventoption, proceedas
follows:
• Prepare duct and conduit cut outs as needed.
• If possible, disconnect and move freestanding
or slide-in range from cabinet opening to provide
easier access to rear wall. Otherwise put a thick,
protective covering over countertop, cooktop or
range to protect from damage and debris. Select
a flat surface for assembling the unit.
Cover that surface with a protective covering and
place all canopy hood parts and hardware in it.
° Determine and mark the centerline on the wall
where the canopy hood will be installed.
Select a mounting height comfortable for the user
and mark on wall.
° Prepare duct and conduit cut outs as needed.
° Remove the duct knockouts using a flat blade
screwdriver and a small hammer.
Use the screwdriver by knocking out the pannel in
similar fashion to a scalpel.
Take care of sharp edges.
Vertical
\
discharge
\
Horizontal
discharge
Attach exhaust adaptor/damper over knockout open-
ing with three exhaust adaptor screws. Make sure
damper pivot is nearest to top/back edge of hood.
Remove tape from damper flap.
NOTE: The exhaust adaptor/damper can be installed
up to 1 inch on either side of the hood center to ac-
commodate offcenter ductwork. Inextreme offcenter
installations, one end of the duct connector may need
to be trimmed to clear the electrical cable clamp.
Top/back
edge
/ \ Exhaust
Pivot transition/damper
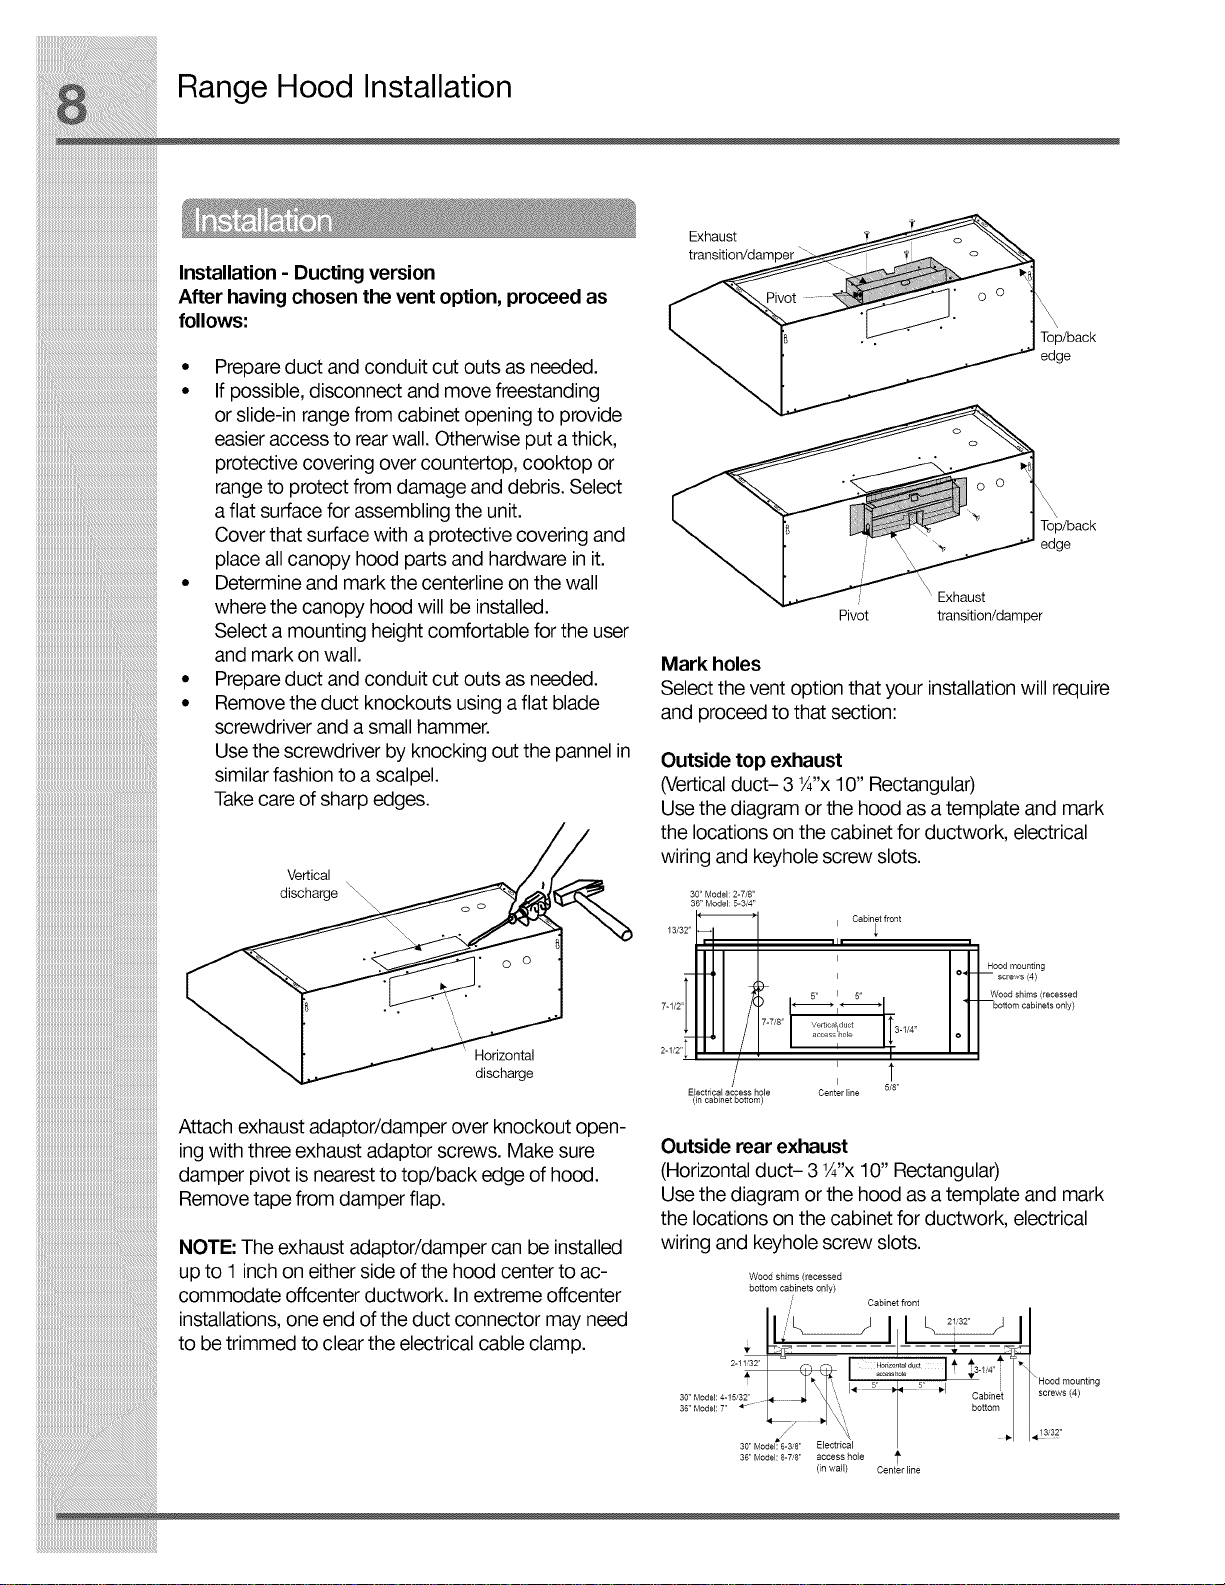
Mark holes
Select the vent option that your installation will require
and proceed to that section:
Outside top exhaust
(Vertical duct- 3 1A"x10" Rectangular)
Use the diagram or the hood as a template and mark
the locations on the cabinet for ductwork, electrical
wiring and keyhole screw slots.
30 _' Model: 2-7/8'
36 _' Model: 5-3/4"
13/32"
7-1/2'= t I!7/8,
2-1/2" U
Electrical access hole
(in cabinet bottom)
Cabinet front
' _
i1! i
I 1H°°d mounting
I O, --| _crews (4)
5" I 5" L wood shims (recessed
Ve_icailld ulct 3-t/4"
access _o e e
I
t
I
Center line 5/8"
Outside rear exhaust
(Horizontal duct- 3 W'x 10" Rectangular)
Use the diagram or the hood as a template and mark
the locations on the cabinet for ductwork, electrical
wiring and keyhole screw slots.
Wood shims (recessed
bottom cabinets only)
,/ Cabinet front
36' Model: 8-7'8' access hole
(in wall) Center line
i
Loading ...
Loading ...
Loading ...