Loading ...
Loading ...
Loading ...
Electrical connection
WARNING
Electrical Shock Hazard
Warning: Turn off power circuit at the service
panel before wiring this unit.
120 VAC, 15 or 20 Amp circuit required.
ELECTRICAL GROUNDING INSTRUCTIONS
THIS APPLIANCE IS FI-I-rEDWITH AN ELECTRICAL
JUNCTION BOX WITH 3 WIRES, ONE OF WHICH
(GREEN/YELLOW) SERVES TO GROUND THE
APPLIANCE. TO PROTECT YOU AGAINST
ELECTRIC SHOCK, THE GREEN AND YELLOW
WIRE MUST BE CONNECTED TO THE GROUND-
ING WIRE IN YOUR HOME ELECTRICAL SYSTEM,
AND IT MUST UNDER NO CIRCUMSTANCES BE
CUT OR REMOVED.
Failure to do so can result in death or electrical
shock.
• Remove the knockout and the Junction box
cover and install the conduit connector (cULus
listed) in junction box.
• Run 3 wires; black, white and green, according
to the National Electrical Code and local codes
and ordinances, in 1A"conduit from service
panel to junction box.
• Connect black wire from service panel to black
or red in junction box, white to white and green
to green-yellow.
• Close and secure junction box cover.
Final installation step
• Replace the 2 lateral supports.
• Replace filters.
• Check operation of the hood.
If range hood does not operate:
• Check that the circuit breaker is not tripped or
the house fuse blown.
• Disconnect power supply.
• Check that wiring iscorrect.
Keep your Installation Instructions and Use and Care
Guide close to range hood for easy reference.
@
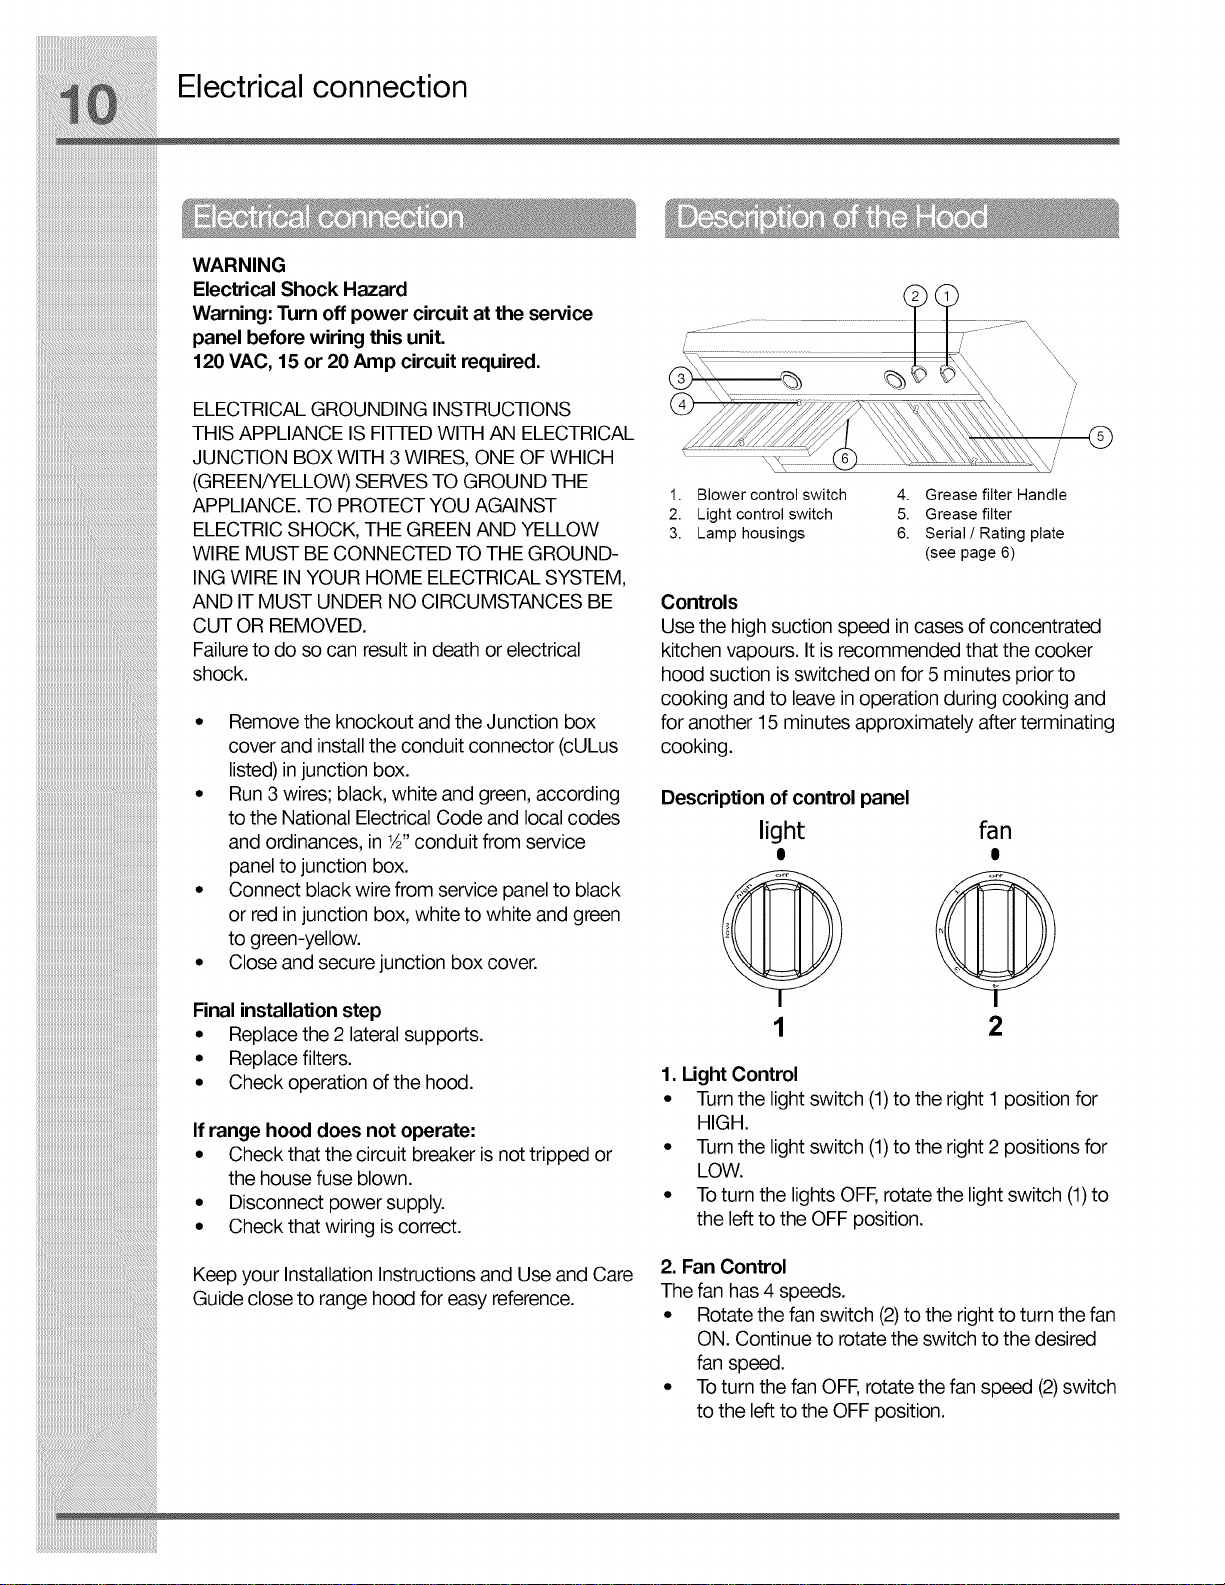
1. Blower control switch 4. Grease filter Handle
2. Light control switch 5. Grease filter
3. Lamp housings 6. Serial/Rating plate
(see page 6)
Controls
Use the high suction speed in cases of concentrated
kitchen vapours. It is recommended that the cooker
hood suction isswitched on for 5 minutes prior to
cooking and to leave in operation during cooking and
for another 15 minutes approximately after terminating
cooking.
Description of control panel
light fan
1 2
1. Light Control
• Turnthe light switch (1)to the right 1 position for
HIGH.
• Turnthe light switch (1)to the right 2 positions for
LOW.
• Toturn the lights OFF,rotate the light switch (1)to
the left to the OFF position.
2. Fan Control
The fan has 4 speeds.
* Rotate the fan switch (2)to the right to turn the fan
ON. Continue to rotate the switch to the desired
fan speed.
° Toturn the fan OFF,rotate the fan speed (2) switch
to the left to the OFF position.
Loading ...
Loading ...