Loading ...
Loading ...
Loading ...
6
work properly. Close the appliance lid. The press seal presses the bag onto the
welding wire, to create a smooth seam. Ensure that both corners of the appliance lid
closed. If necessary, press the upper cover again and so that the appliance lid clicks
into place and locks tightly. Press the Food button Mode Selection. If the choice is dry,
the dry indicator will light on. If the moist is chosen, the moist indicator will light on.
► Ensure that the weld seam is properly closed. A correct weld seam should be a
smooth, straight stripe without any creases.
► Fill the bag so that no food scraps or liquids can leak out during welding and get into
the appliance.
► Wait 15 seconds before sealing the next bag to allow the appliance to cool down.
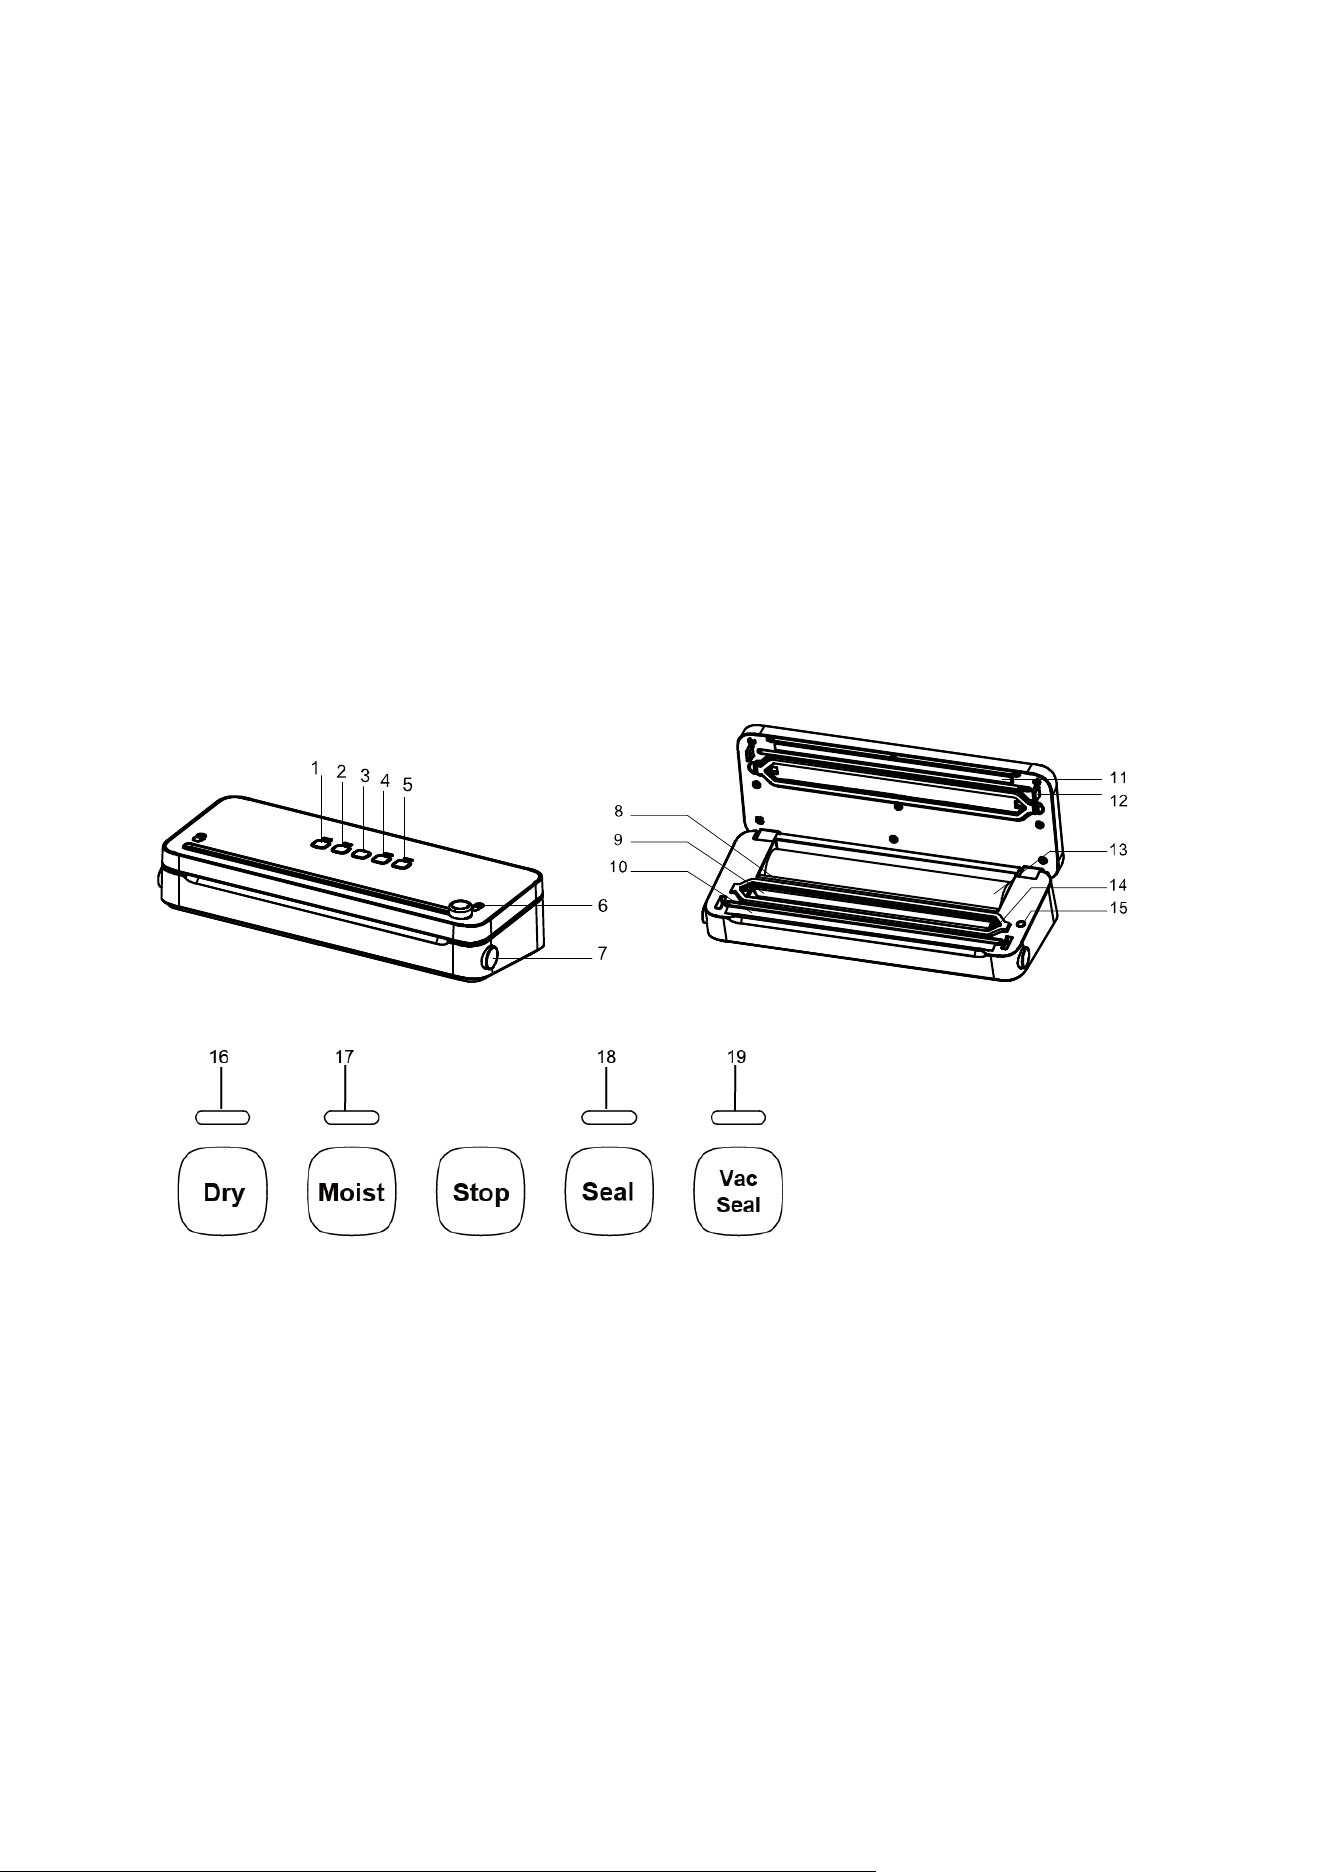
Parts
1. Buttons:
1)Dry 2)Moist 3)Stop 4)Seal
5)Vac Seal 15)External interface switch/Suction switch
2. Indicate Light:
16)Dry Indicator 17) Moist Indicator
18) Seal Indicator 19) Vac Seal Indicator
3. Other Parts:
6)Slide Cutter 7)Open Button 8)Vac Cotton
9)Vac Chamber 10)Heating Seal 11)Sealing Rubber Strip
12)Snap Lock 13)Roll holder 14)External Interface/Suction Interface
Loading ...
Loading ...
Loading ...