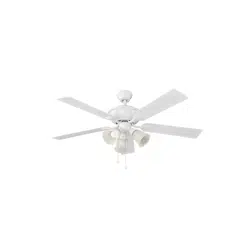
User's Manual Sailor Bay Ceiling Fan for Harbor Breeze RLG52BNK5L
Table of Contents
Safety Information
Package Contents
Hardware Contents
Preparation
Initial Installation
Downrod-Style Fan Mounting
Closemount-Style Fan Mounting
Wiring
Final Installation
Operating Instructions
Care and Maintenance
Troubleshooting
Limited Lifetime Warranty
Replacement Parts List
INITIAL INSTALLATION
1. Turn off circuit breakers or fuse and wall switch to the fan supply line leads
2. Determine mounting method to use.
Downrod mount (standard or angled ceiling)
Closemount (standard ceiling only)
IMPORTANT: If using the angle mount, ensure the ceiling angle is not steeper than 19°.
*Helpful Hint: Downrod-style mounting is best suited for ceilings 8 ft. or higher. For taller ceilings you may want to use a longer downrod (not included). Angle-style mounting is best suited for angled or vaulted ceilings. A longer downrod is sometimes necessary to ensure proper blade clearance.
3. Check to make sure blades (G) will be at least 30 inches from any obstruction. Check downrod (A) length to ensure blades (G) will be at least 7 ft. above the floor.
4. Secure mounting bracket (C) to outlet box (not included) using screws, spring washers and flat washers provided with the outlet box.
*NOTE: It is very important you use the proper hardware when installing the mounting bracket (C) as this will support the fan.
IMPORTANT: If using the angle mount, make sure open end of mounting bracket (C) is installed facing the higher point of the ceiling, and ensure the ceiling angle is not steeper than 19°.
5. Remove preassembled motor screws (J) and lock washers (K) from underside of motor housing (D). If there are plastic motor blocks installed with the motor screws (J), discard the plastic motor blocks.
Note: Make sure to keep loose hardware separate to avoid confusion during installation.
OPERATING INSTRUCTIONS
1. The fan pull chain, located on the switch housing of motor housing (D), has four positions to control fan speed. One pull is HIGH, two is MEDIUM, three is LOW and four turns the fan OFF.
2. The light pull chain, located in the middle, is used to turn the lights ON or OFF.
3. Use the fan reverse switch, located on the switch housing, to optimize your fan for seasonal performance. A ceiling fan will allow you to raise your thermostat setting in summer and lower your thermostat setting in winter without feeling a difference in your comfort.
NOTE: Wait for fan to stop before moving the reverse switch.
In warmer weather, setting the reverse switch in the DOWN position will result in downward airflow creating a wind chill effect.
In cooler weather, setting the reverse switch in the UP position will result in upward airflow that can help move stagnant, hot air off the ceiling area
IMPORTANT: Reverse switch must be set either completely UP or completely DOWN for fan to function. If the reverse switch is set in the middle position, fan will not operate.
CARE AND MAINTENANCE
At least twice each year, lower canopy (B) to check downrod (A) assembly, and then tighten all screws on the fan. Clean motor housing (D) with only a soft brush or lint-free cloth to avoid scratching the finish. Clean blades (G) with a lint-free cloth. You may occasionally apply a light coat of furniture polish to wood blades for added protection.
IMPORTANT: Shut off main power supply before beginning any maintenance. Do not use water or a damp cloth to clean the ceiling fan.
Bulb Replacement: Use standard-base 6.5-watt LED bulbs or CFL/incandescent equivalents.