Loading ...
Loading ...
Loading ...
25
INSTRUCTIONS FOR THE INSTALLER
Hot Plate Ignition Failure
• Check alignment of burner holes to electrode.
• Check aeration sleeve for adjustment for gas type,
location and ambient conditions.
• No spark, check ignition box failure or power supply.
Before Leaving
• Check all connections for gas leaks with soap and
water. DO NOT use a naked ame for detecting
leaks. Ignite all burners to ensure correct operation
of gas valves, burners and ignition.
• Turn gas taps to low ame position and observe
stability of the ame. When satised with the cooker,
please instruct the user on the correct method of
operation.
• In case the appliance fails to operate correctly
after all checks have been carried out, refer to the
authorised service provider in your area.
OVEN BURNER (g. 21)
The burner is installed on the oven base and is covered
by the bottom plate which must always remain in that
position during oven operation,
To adjust the primary air, is performed when the
burner is ignited, by adjusting the sleeve (B) and
unscrewing screw (A). Lock screw (A) in place once
the adjustments have been made.
CHANGING THE FLEXIBLE GAS HOSE
In order to guarantee that the gas hose is always in
excellent condition we strongly recommend changing
it on the date you will nd printed on it.
GAS CONVERSIONS
REPLACING THE INJECTORS
Our burners can be adapted to different types of gas
by simply installing the injectors suitable for the gas
you want to use. To help the installer, the table (see
TECHNICAL FEATURES
paragraph) gives the burner
nominal heat input, injector diameter and operating
pressure of the different gas types.
Comply with the following instructions:
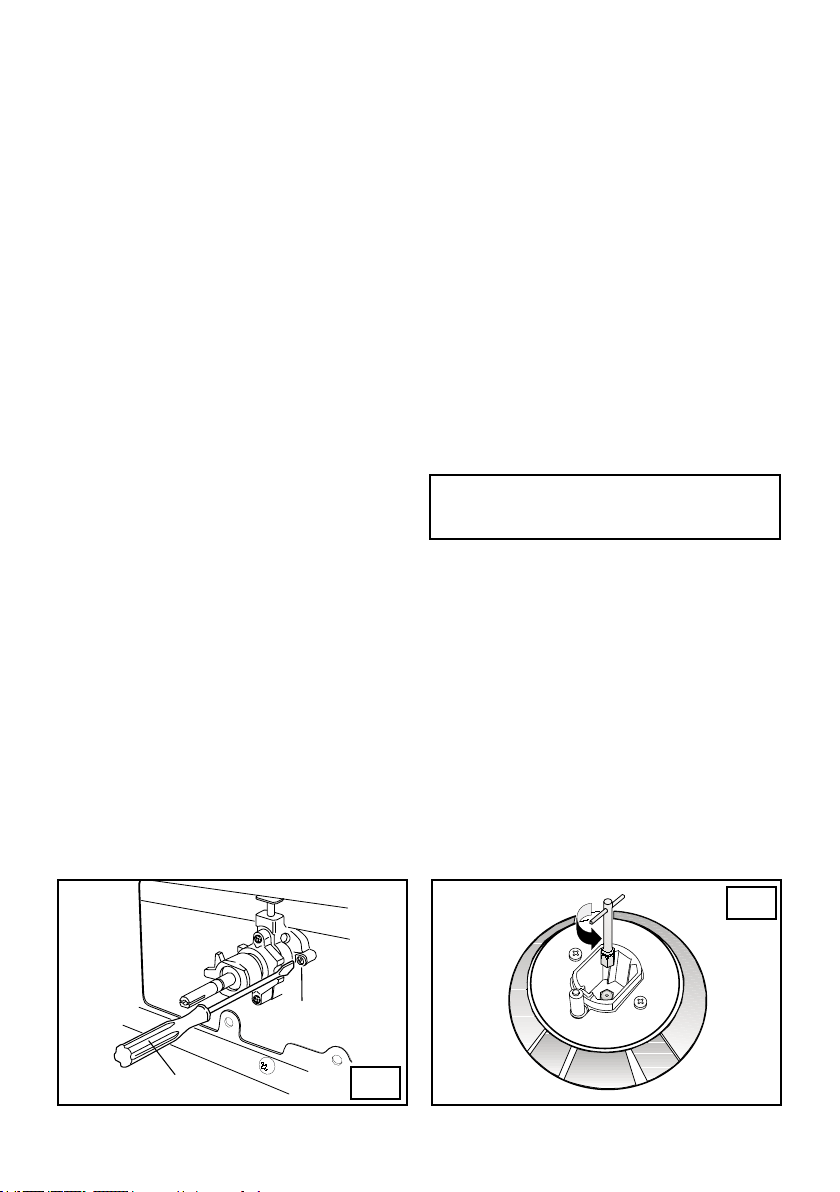
Injector replacement - Hob burners.
To change the injectors on the hob, remove the burner
cup and head and with a 7 mm Ø socket
spanner replace them (fig. 22).
After having replaced the injectors, it will be
necessary to proceed with burner adjustment as
explained in the previous paragraphs.
20
22
Loading ...
Loading ...
Loading ...