Loading ...
Loading ...
Loading ...
20
INSTRUCTIONS FOR THE INSTALLER
P
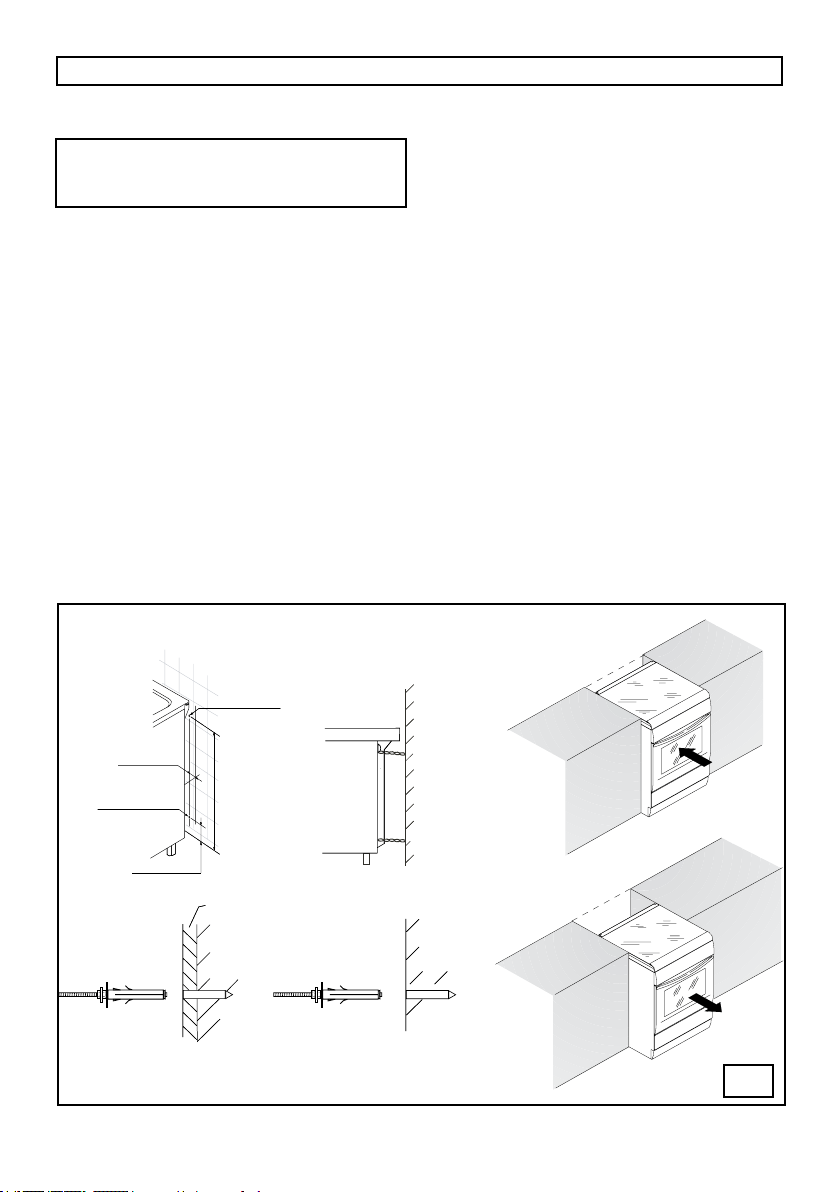
SECURING THE COOKER TO WALL (g. 18)
Note:- The installation of the chain provided
is for safety reasons, it must be installed as
indicated below.
To prevent the cooker tipping forwards in the event of
children standing on the oven door or where users put
extreme weight on the door when in open position, two
chains MUST BE xed to the back of the oven which
should at all times be secured to the threaded pins .
The threaded pins should be secured to the wall at
the back of the cooker. The chains should always be
attached to the upper threaded pins when the cooker
is in its position against the wall. Pay attention in fact
that the chain must be xed without slack.
WARNING: IF THE COOKER IS INSTALLED
BETWEEN TWO CUPBOARDS YOU MUST DRILL
A 16MM HOLE LEVEL TO THE SAFETY CHAIN
HEIGHT ON EITHER CUPBOARD AS FAR BACK
AS POSSIBLE, LOCATE THE COOKER INTO
POSITION AND PASS THE SAFETY CHAINS
THROUGH THE 16MM HOLES, WITH THE
COOKER IN FINAL POSITION PULL BOTH SAFETY
CHAINS AND SECURE THEM TO THE INSIDE OF
THE CUPBOARD WITH TWO SCREWS ON EACH
SAFETY CHAIN.
PLEASE TEST THAT THE COOKER DOES NOT
TILT FORWARD
.
Assembly instructions
• Secure threaded pins into wall immediately behind
and to the left-hand side about 770 mm from the
oor.
• Secure the chain under the nut before using or
cleaning etc. of the cooker (g.P).
• NOTE FOR INSTALLER
• To prevent strain on the Flexible Hose assembly, a
chain & hook is necessary approx. 100 mm up from
the oor (not provided).
• Attach the chain to the lower hooks if the cooker is
installed with a hose assembly so that there is no
strain on the hose when the cooker is pulled forward
for cleaning or maintenance.
• The socket or the switch must be accessible once
the appliance is installed.
Loading ...
Loading ...
Loading ...