Loading ...
Loading ...
Loading ...
Page 34 of 64
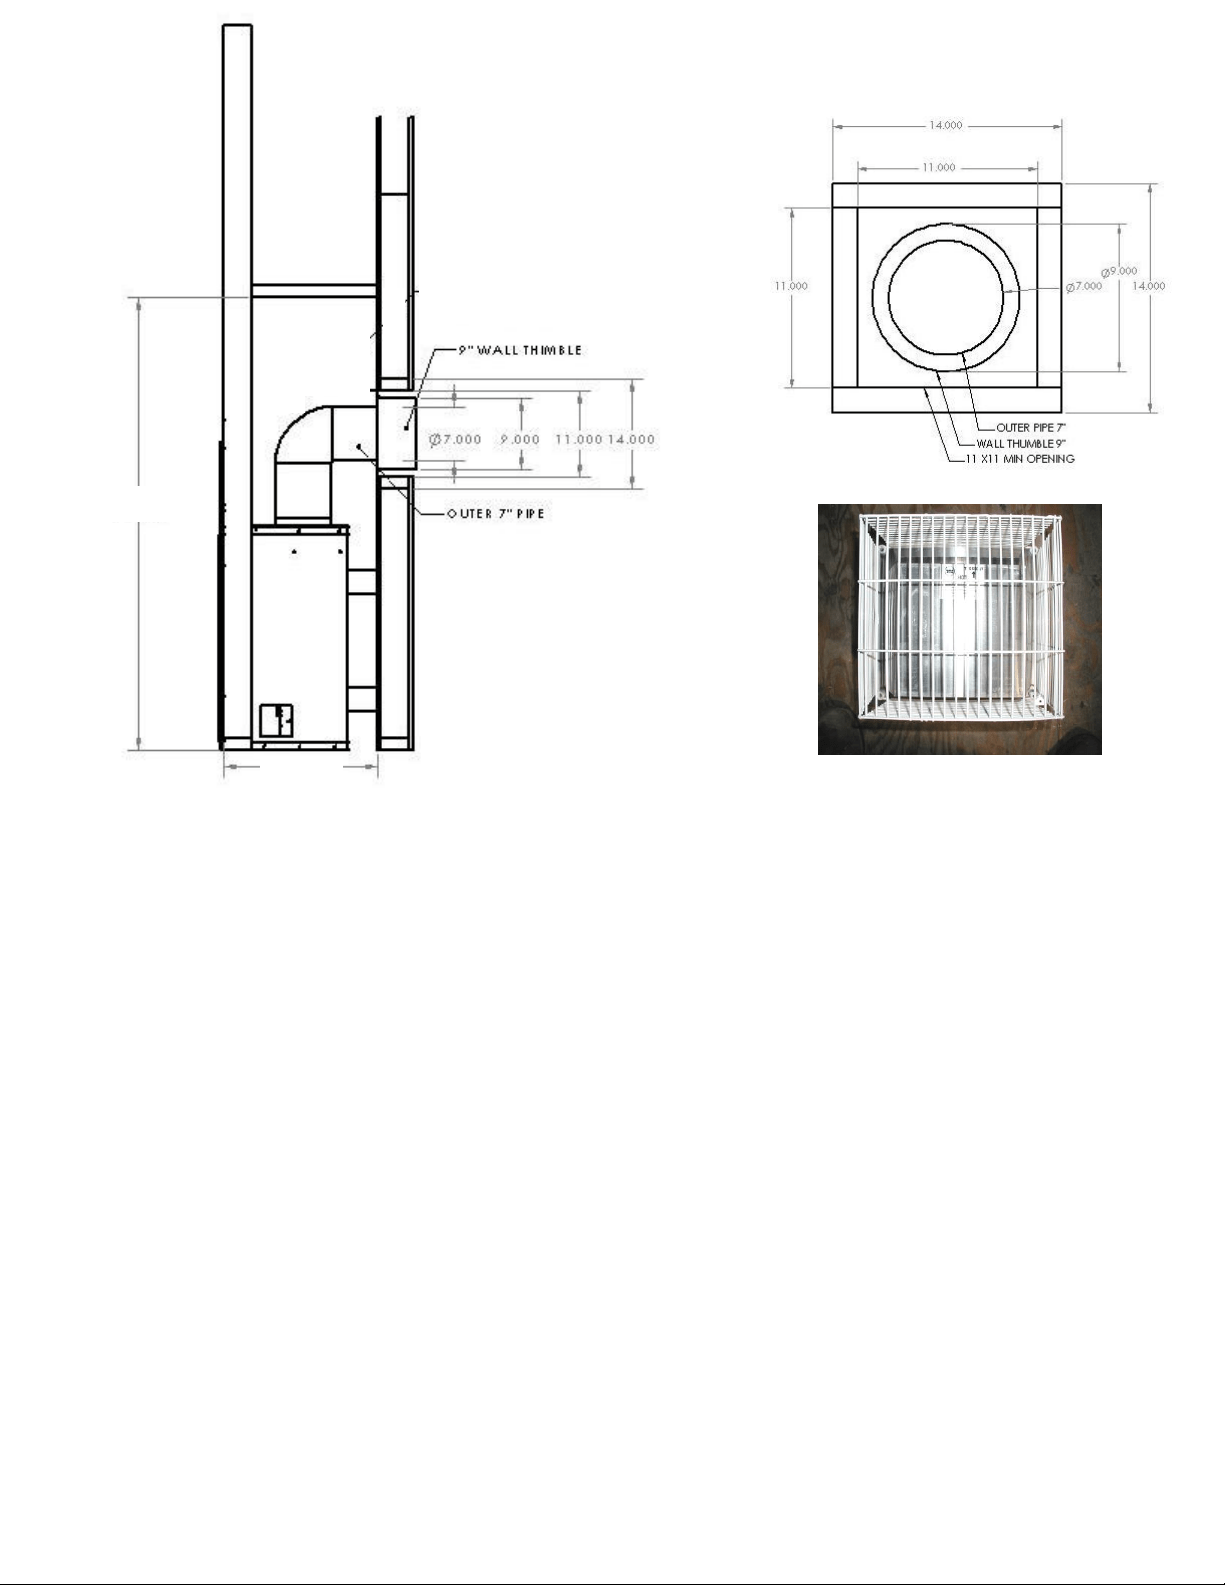
Safety Cage
Mark a 11” x 11” square around the center mark (inside dimensions). Cut and frame the exterior wall to accept
the wall thimble. Install the wall thimble, on the inside of the exterior wall, shield using wood screws.
Attach the venting to the termination using sheet metal screws, for Z-Flex installations a Sierra Flame’s
termination part # IMC1070A or IMC1070B shall be used and when using Simpson Dura-Vent or Security
Venting a Simpson Dura-Vent termination part # P574 shall be used. If termination is to be installed on vinyl
siding using vinyl siding standoff part # IMC1151.
To install the termination attach the 4” exhaust to the termination and fasten with 3 #8 x ½” hex head sheet
metal screws then attach the 7” vent to the termination and fasten with 4 #8 x ½” hex head sheet metal screws,
be sure that the flex vent overlaps the termination collars a minimum of 2”. Then attach the termination to the
exterior wall using four wood screws through the holes in the corner of the vent terminal.
The next step is to apply a bead of mil-pac or RTV 106 to top of the 4” exhaust collar on the unit and attach the
4” vent using screws (as described above), finally apply a bead of mil-pac or RTV 106 to top of the 7” vent and
attach (as described above).
Safety Cage / Cage de sécurité
A safety cage may be required on low terminations. Please check with your local safety authority.
Une cage de sécurité peut être nécessaire de faibles terminaisons. S'il vous plaît vérifiez auprès de
votre autorité de sécurité locale.
48.000”
15.500”
Loading ...
Loading ...
Loading ...