W10758628A
BACKSPLASH
Use & Care / Installation Instructions
PANNEAU ANTI-ÉCLABOUSSURE
Utilisation et entretien / Instructions d’installation
Table of Contents/Table des matieres
INSTALLATION REQUIREMENTS………………………….1 EXIGENCES D’INSTALLATION....………………....……....……............................3
INSTALLATION INSTRUCTIONS……………………………2 INSTRUCTIONS D’INSTALLATION…………………...………...............................4
BACKSPLASH USE & CARE………………………………..2 UTILISATION ET ENTRETIEN DU PANNEAU ANTI-ÉCLABOUSSURE.............4
INSTALLATION REQUIREMENTS
• Level
• Stud Finder
• Phillips Head Screwdriver
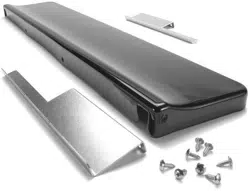
Parts Supplied
• Backsplash
• Wall brackets
• Screws, 8-18 x ½”
• Screws, 10-2 x 2”
Tools and Parts
Gather the required tools and parts before starting installation. Read and follow the instructions provided
with any tools listed here.
Tools Required
• Drill
• 1/8” Drill Bit
• Tape Measure
Location Requirements
The backsplash can be installed on the backwall behind a slide-in, commercial style range or cooktop.
Appliance must be level side to side and front to back.
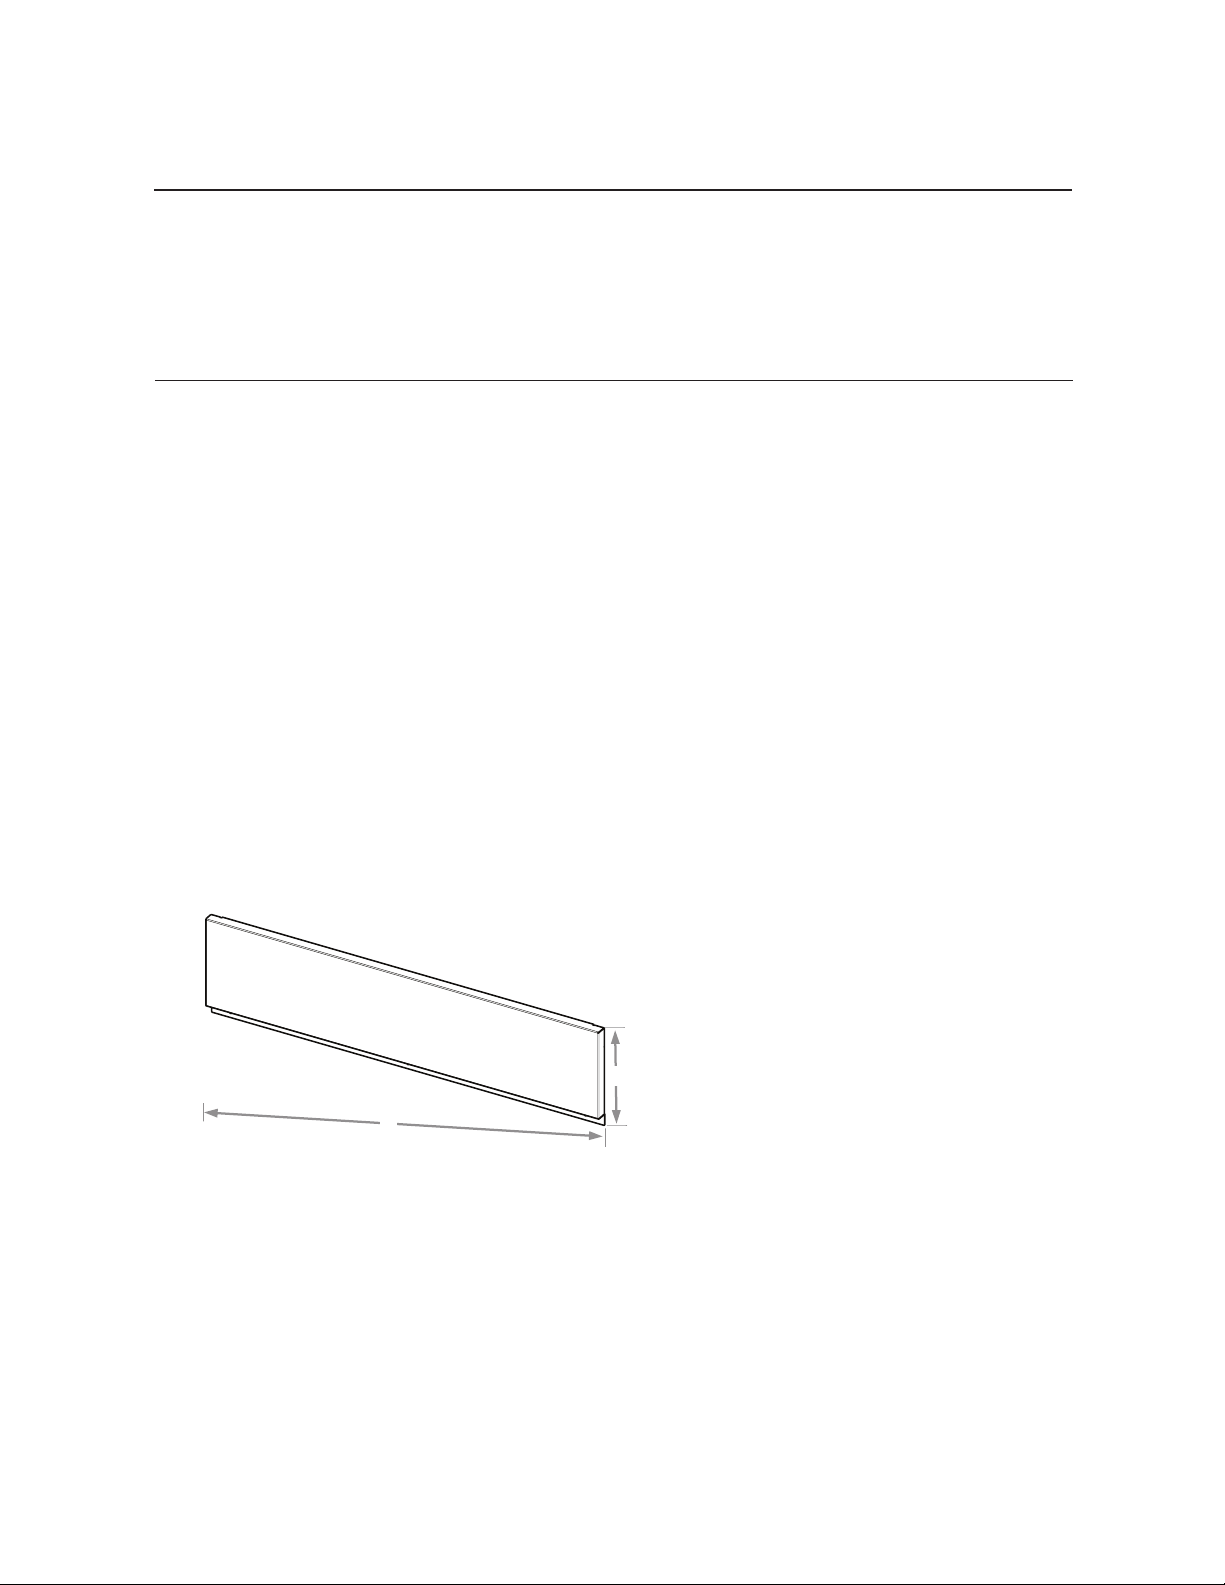
Backsplash Dimensions
W10273541 A
INSTALLATION REQUIREMENTS
Tools and Parts
Gather the required tools and parts before starting installation. Read and follow the instructions provided
with any tools listed here.
Tools Required
Drill
1/8” Drill Bit
Tape Measure
Level
Stud Finder
Phillips Head Screwdriver
Parts Included
Backsplash
Shelf
Shelf brackets
Wall brackets
Screws, 8-18 x ½”
Screws, 10-2 x 2”
Location Requirements
The backsplash can be installed on the backwall
behind a commercial style range or cooktop.
Appliance must be level side to side and front to
back. Proper installation is your responsibility.
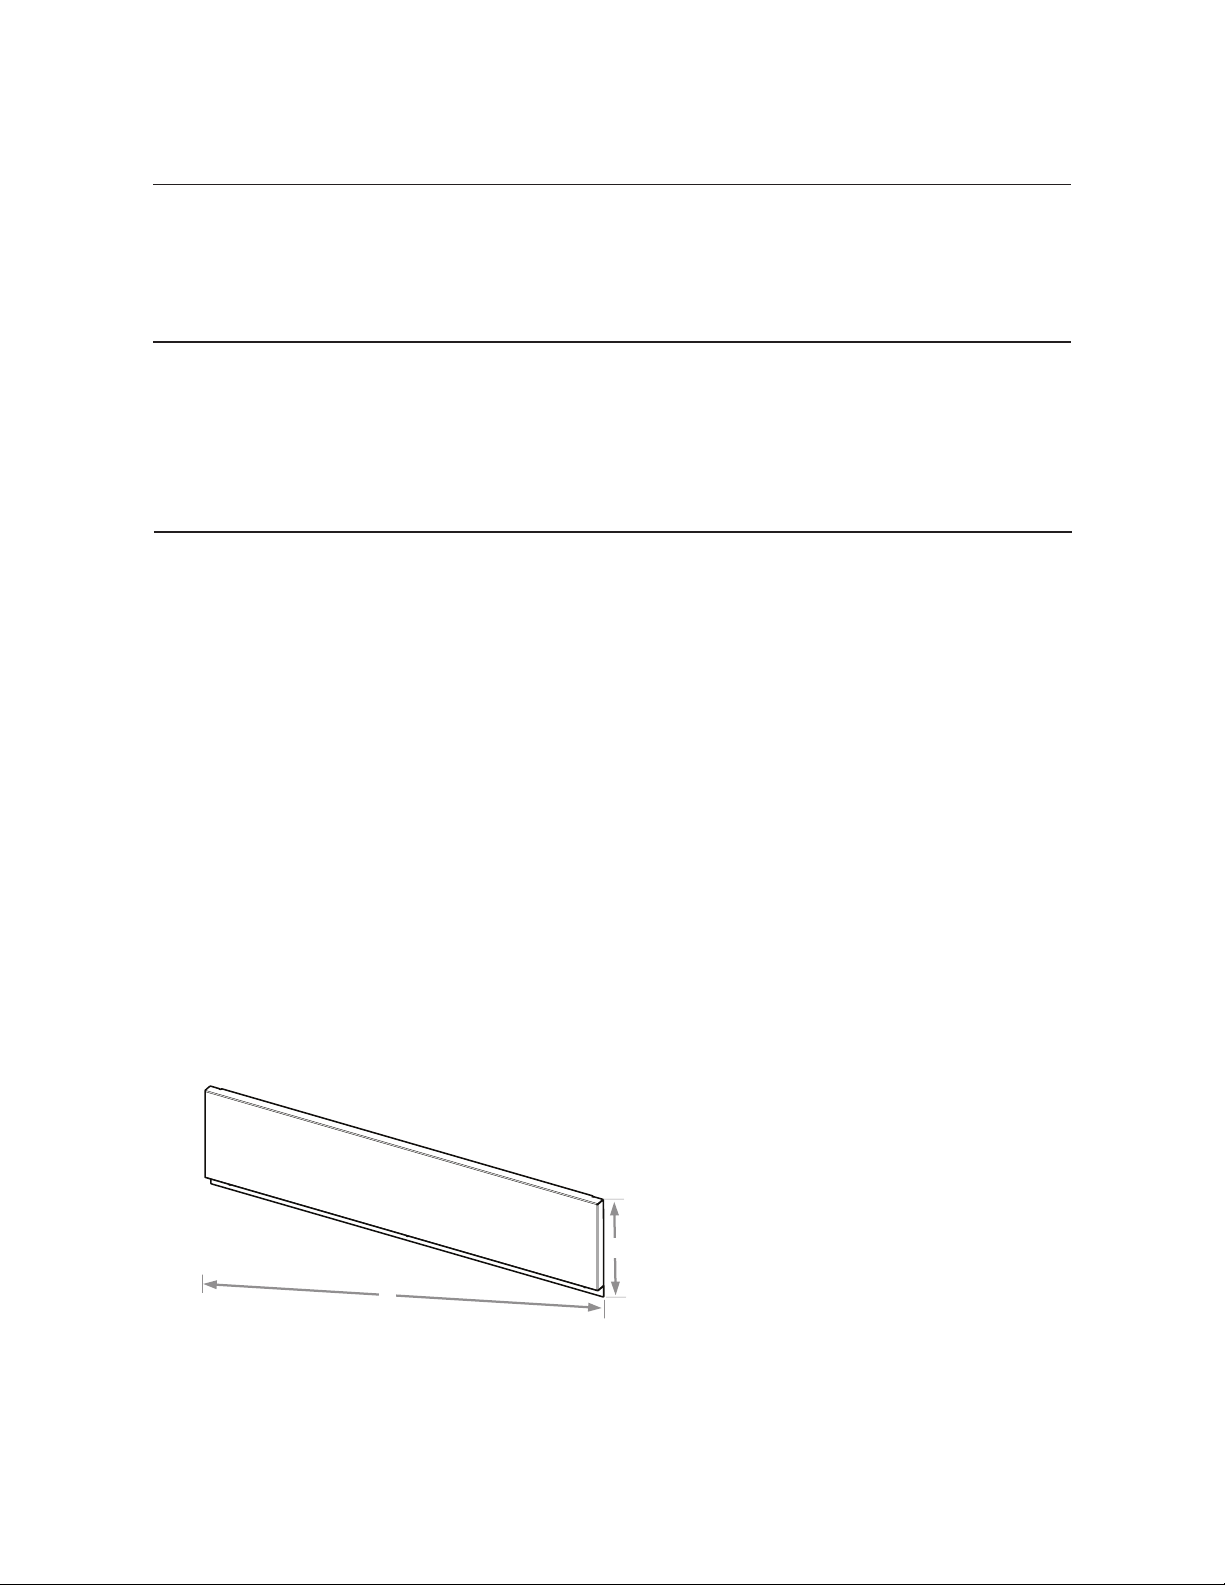
Backsplash Dimensions
B
A
A. Backsplash width, 30”
B. Backsplash height, 7 3/8”
INSTALLATION INSTRUCTIONS
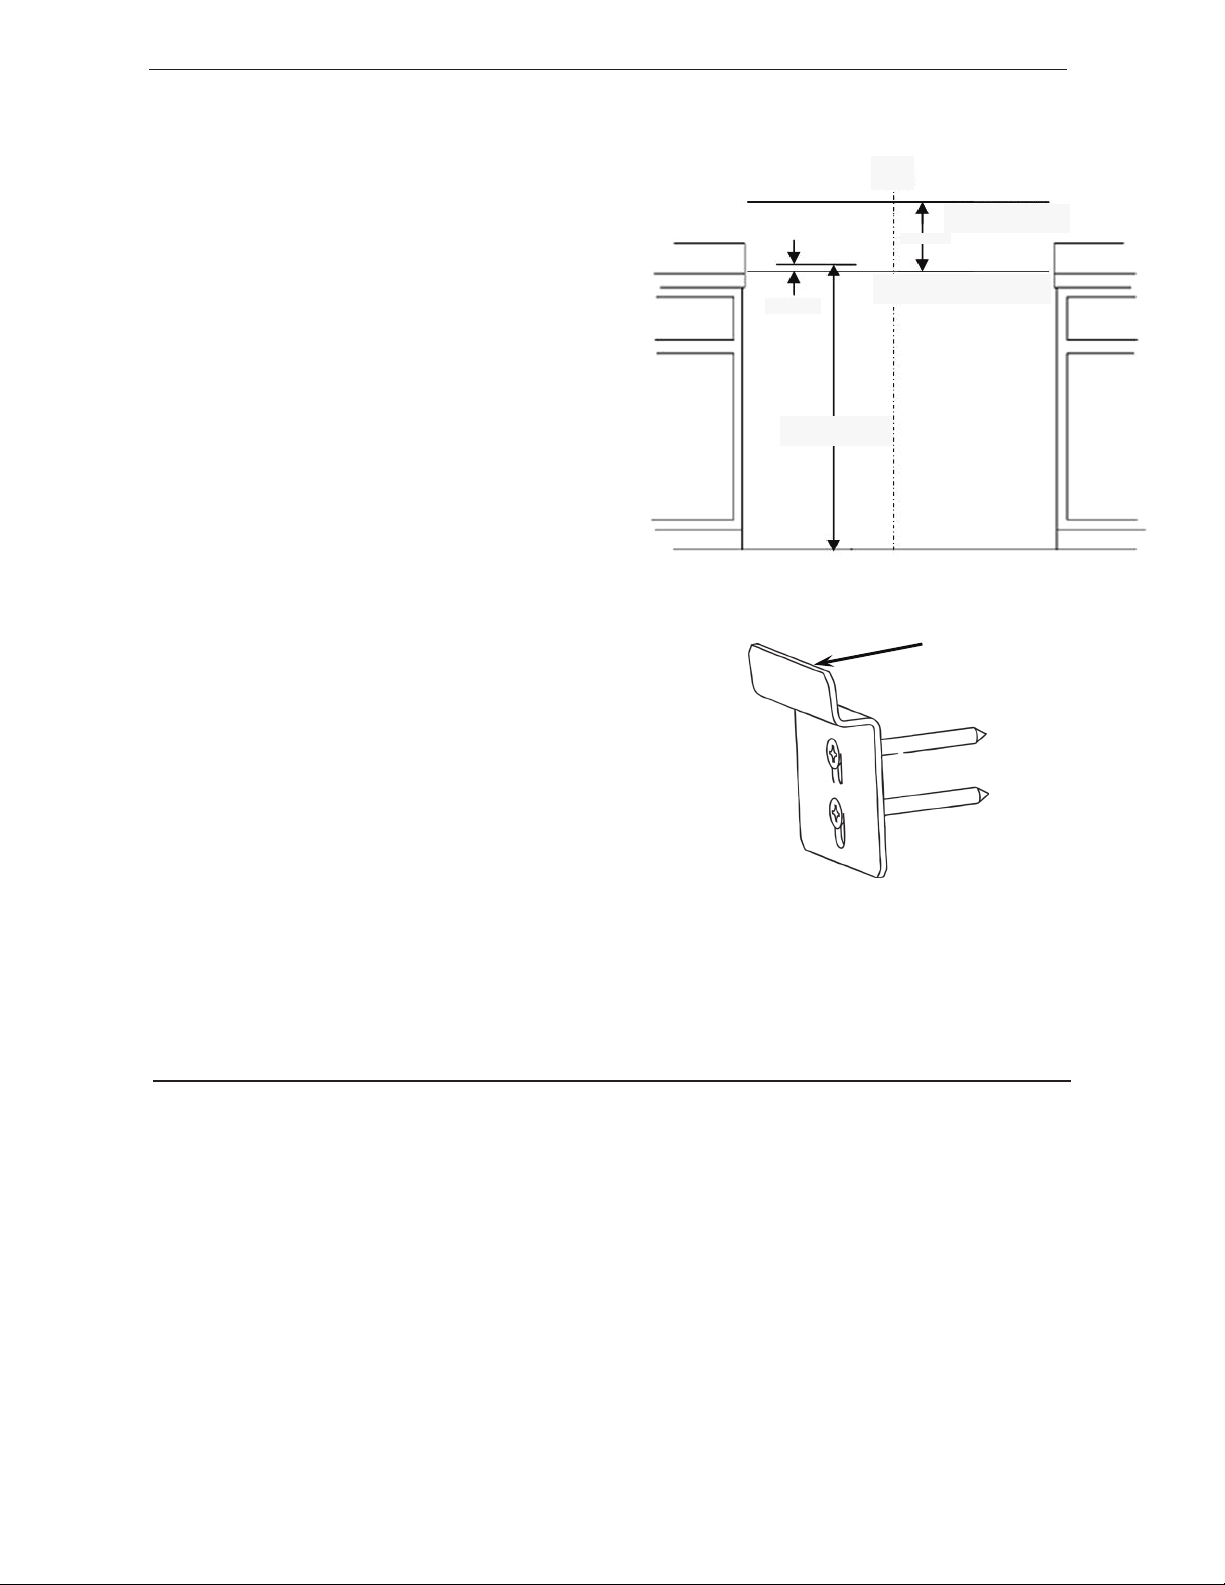
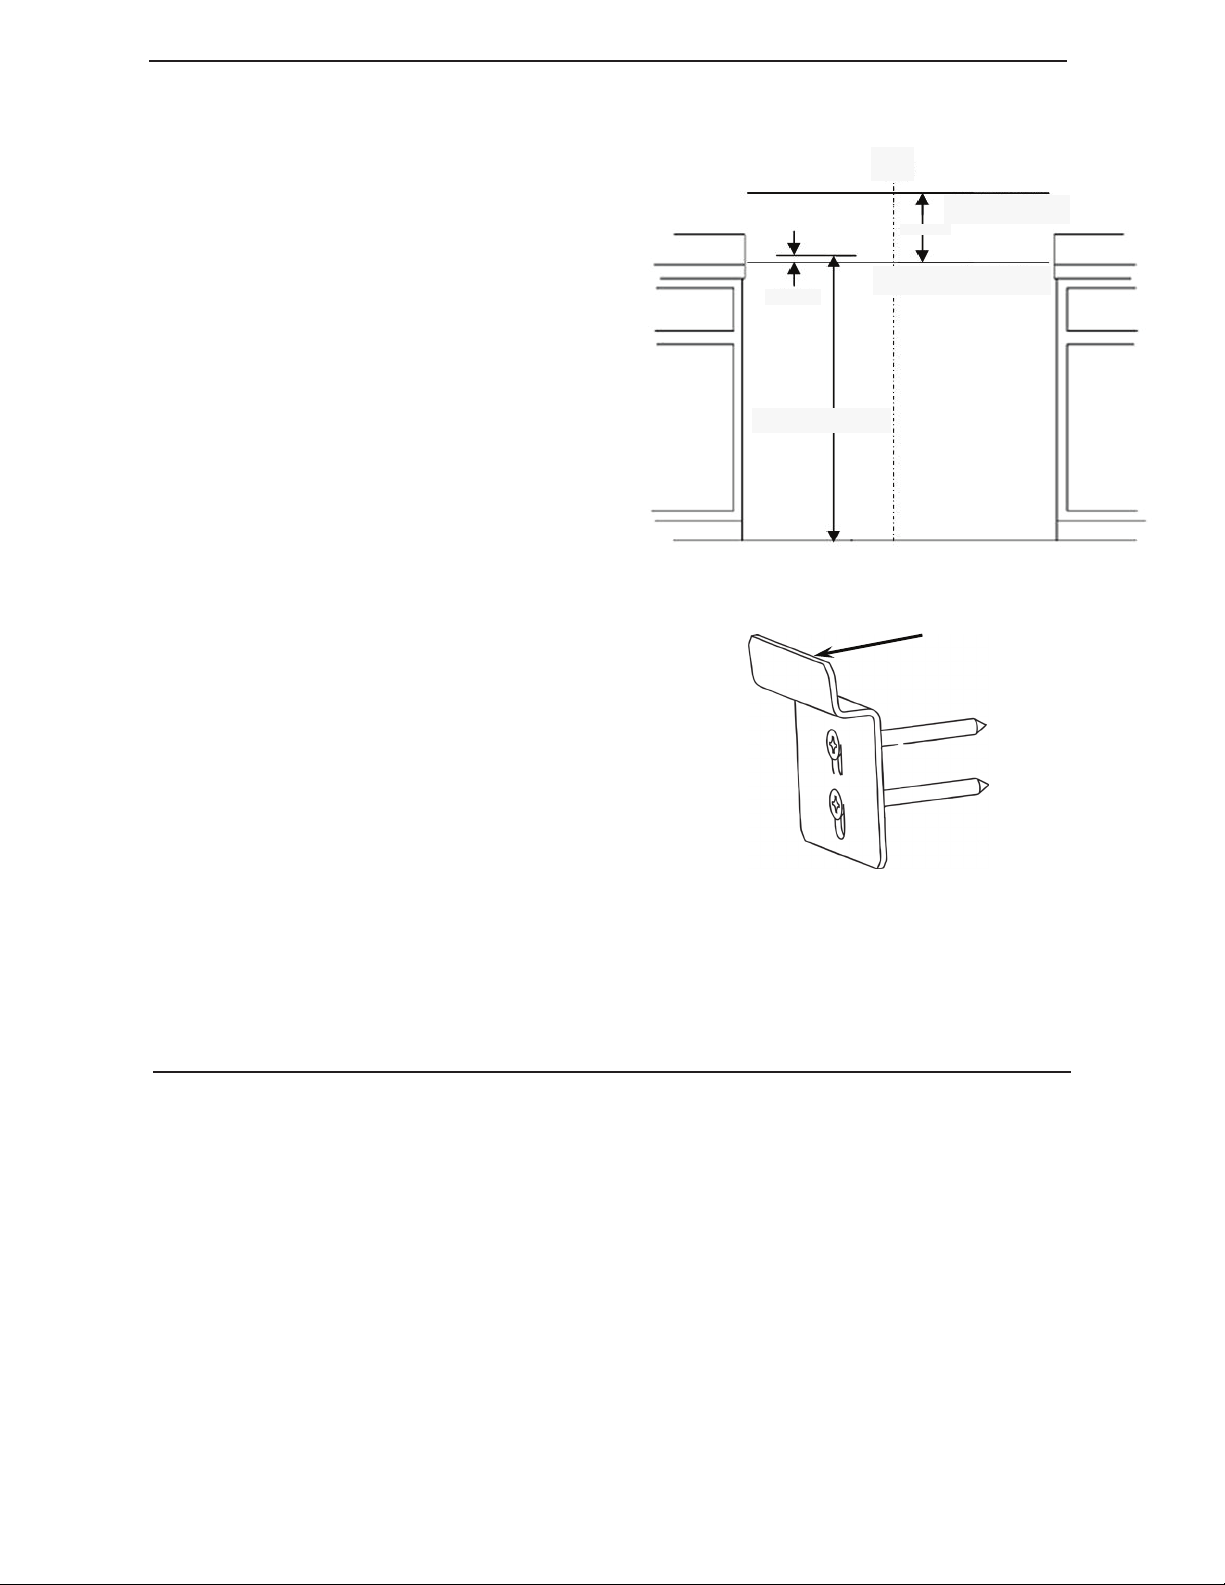
Mark Guide Lines
1. Mark a small line on the backwall at the height of the range
or cooktop.
2. Measure 1 3/8” down from this line and draw a level line the
full length of the installation space. This line represents the
bottom edge of backsplash line.
3. Position the bottom edge of the ange along the bottom
edge of backsplash line. Align the center of the backsplash
with the center of the appliance. Mark each mounting hole
(2 locations) with a pencil. Set panel aside.
4. Measure up 6 3/8” from the bottom edge of backsplash
line and draw a level line the full length of the installation
space. This mounting bracket guide line represents where
the mounting brackets will attach to the wall.
2
Align this surface
with the mounting
bracket guide line
Install Mounting Brackets
1. Usingastudnder,locatetheedgesofthewallstudswithin
the installation space.
2. Mark the center of each stud and draw a line down the center
of the stud.
3. Line up the top of the wall mounting bracket with the mounting
bracket guide line from “Mark Guide Lines” section.
4. Center a bracket along the centerline of each wall stud.
5. Mount each bracket to wall using two 10-12 x 2” screws
per bracket (included with kit). A minimum of two mounting
brackets should be installed for the 30” models.
Install Backsplash
1. HooktheangeonthebackoftheBacksplashoverthemountingbracketsattachedtothewall.
2. Center the Backsplash and align the two holes at the bottom of the Backsplash with the marks on the wall made in
the “Mark Guide Lines” section.
3. Attachbrackettowallusingthetwo10-12x2”screwsthroughtheholesatthebottomoftheange.
BACKSPLASH USE & CARE
General Cleaning
Donotusesoap-lledscouringpads,abrasivecleaners,CooktopPolishingCreme,steel-woolpads,grittywashcloths
or abrasive paper towels. Damage may occur, even with one-time or limited use. Rub in direction of grain to avoid
damaging.
Cleaning Method:
• Affresh® Stainless Steel Cleaner and Polish: Follow the instructions found on the label of the cleaner.
• Liquid detergent or all-purpose cleaner: Rinse with clean water and dry with soft, lint-free cloth.
Center
Line
Mounting Bracket
Guide Line
Bottom Edge of Backsplash
Range/Cooktop
Height
6 3/8”
1 3/8”
W10758628A
W10758628A
PANNEAU ANTI-ÉCLABOUSSURE
Utilisation et entretien / Instructions d’installation
Table des matieres
EXIGENCES D’INSTALLATION....………………....……....……............................3
INSTRUCTIONS D’INSTALLATION…………………...………...............................4
UTILISATION ET ENTRETIEN DU PANNEAU ANTI-ÉCLABOUSSURE.............4
EXIGENCES D’INSTALLATION
• Niveau
• Détecteur de poteaux structuraux
• Tournevis cruciforme Phillips
Pièces fournies
• Panneau anti-éclaboussure
• Supports muraux
• Vis 8-18 x ½”
• Vis 10-2 x 2”
Outils et pièces
Rassembler les outils et composants nécessaires avant d’entreprendre l’installation. Lire et observer les
instructions fournies avec chacun des outils de la liste ci-dessous.
Outillage nécessaire
• Perceuse
• Foret de 1/8”
• Ruban à mesurer
Exigences d’emplacement
Le panneau anti-éclaboussure peut être installé sur le mur du fond, derrière une cuisinière ou une table de
cuisson encastrée de style commercial. L’appareil doit être horizontal dans le sens latéral et en profondeur.
Dimensions du panneau anti-éclaboussure
W10273541 A
INSTALLATION REQUIREMENTS
Tools and Parts
Gather the required tools and parts before starting installation. Read and follow the instructions provided
with any tools listed here.
Tools Required
Drill
1/8” Drill Bit
Tape Measure
Level
Stud Finder
Phillips Head Screwdriver
Parts Included
Backsplash
Shelf
Shelf brackets
Wall brackets
Screws, 8-18 x ½”
Screws, 10-2 x 2”
Location Requirements
The backsplash can be installed on the backwall
behind a commercial style range or cooktop.
Appliance must be level side to side and front to
back. Proper installation is your responsibility.
Backsplash Dimensions
B
A
A. Largeur du panneau, 30”
B. Hauteur du panneau, 7 3/8”
3
W10758628A
© 2014.
All rights reserved.
Tous droits réservés.
11/2014
4
INSTRUCTIONS D’INSTALLATION
Marquage des lignes guide
1. Tracer une petite ligne sur le mur du fond, à la hauteur de la
cuisinière ou de la table de cuisson.
2. Mesurer 1 3/8” vers le bas à partir de cette ligne et tracer
une ligne horizontale sur toute la longueur de l’espace
d’installation. Cette ligne marque le bord inférieur du panneau
anti-éclaboussure.
3. Placer l’arête du rebord inférieur le long de la ligne
marquant le bord inférieur du panneau anti-éclaboussure.
Aligner le centre du panneau anti-éclaboussure avec le
centre de l’appareil. Repérer chaque trou de montage (2
emplacements) avec un crayon. Mettre le panneau de côté.
4. Mesurer 6 3/8” vers le haut à partir de la ligne marquant
le bord inférieur du panneau anti-éclaboussure et tracer
une ligne horizontale sur toute la longueur de l’espace
d’installation. Cette ligne marque la position où les supports
demontagesontxésaumur.
Aligner cette surface
avec la ligne guide de
support de montage
Installation des supports de montage
1. Utiliser un détecteur de poteaux structuraux pour localiser dans la
zone d’installation les limites des poteaux du colombage mural.
2. Marquer la position du centre de chaque poteau du colombage et
tracer l’axe vertical de chacun.
3. Aligner le haut du support de montage mural à la ligne guide de support
de montage à la section “Marquage des lignes guide”.
4. Centrer un support le long de l’axe de chaque poteau de colombage
mural.
5. Fixer chaque support au mur à l’aide de deux vis 10-12 x 2” (incluses
dans l’ensemble). Au moins deux supports de montage doivent être
installés pour les modèles de 30”.
Installation du panneau anti-éclaboussure
1. Accrocherlerebordàl’arrièredupanneauanti-éclaboussureauxsupportsdemontagexésaumur.
2. Centrer le panneau anti-éclaboussure et aligner les deux trous du bas avec les repères au mur tracés dans la section
“Marquage des lignes guide”.
3. Fixer le support au mur à l’aide des deux vis 10-12 x 2” à travers les trous en bas du rebord.
UTILISATION ET ENTRETIEN DU PANNEAU ANTI-
ÉCLABOUSSURE
Nettoyage général
Ne pas utiliser de tampons à récurer savonneux, de nettoyants abrasifs, de crème à polir pour table de cuisson, de
tampons en laine d’acier, de chiffons de lavage rudes ou d’essuie-tout abrasifs. Des dommages peuvent survenir,
même en cas d’utilisation limitée ou ponctuelle. Frotter dans la direction du grain pour éviter les dommages.
Méthode de nettoyage :
• Nettoyant et poli pour acier inoxydable KitchenAid® : Utiliser le produit de nettoyage conformément aux
instructions présentées sur l’étiquette.
• Détergent liquide ou nettoyant tout-usage : Rincer à l’eau propre et sécher avec un chiffon doux sans charpie.
Axe
central
Ligne guide de sup-
port de montage
Rebord inférieur du panneau
anti-éclaboussure
Hauteur de la cuisinière/
hotte de cuisson
6 3/8”
1 3/8”