Loading ...
Loading ...
Loading ...
. ,. . •
ASSEMBLY
Your Operator's ManuaJhas been developed to help you
assemble the unit and tounderstand its safe operation. It is
important that youreadyour manual completely to bacome
familiar with the unit before you begin assembly.
A, PREPARATION
1. READ YOUR OPERATOR'S MANUAL
2. Tools you will need: ' •
a. Slotted Screwdriver _'_
b.
11116inchwrench
(2)7/16inchwrenches
OF
(2)Adjustablewrenches
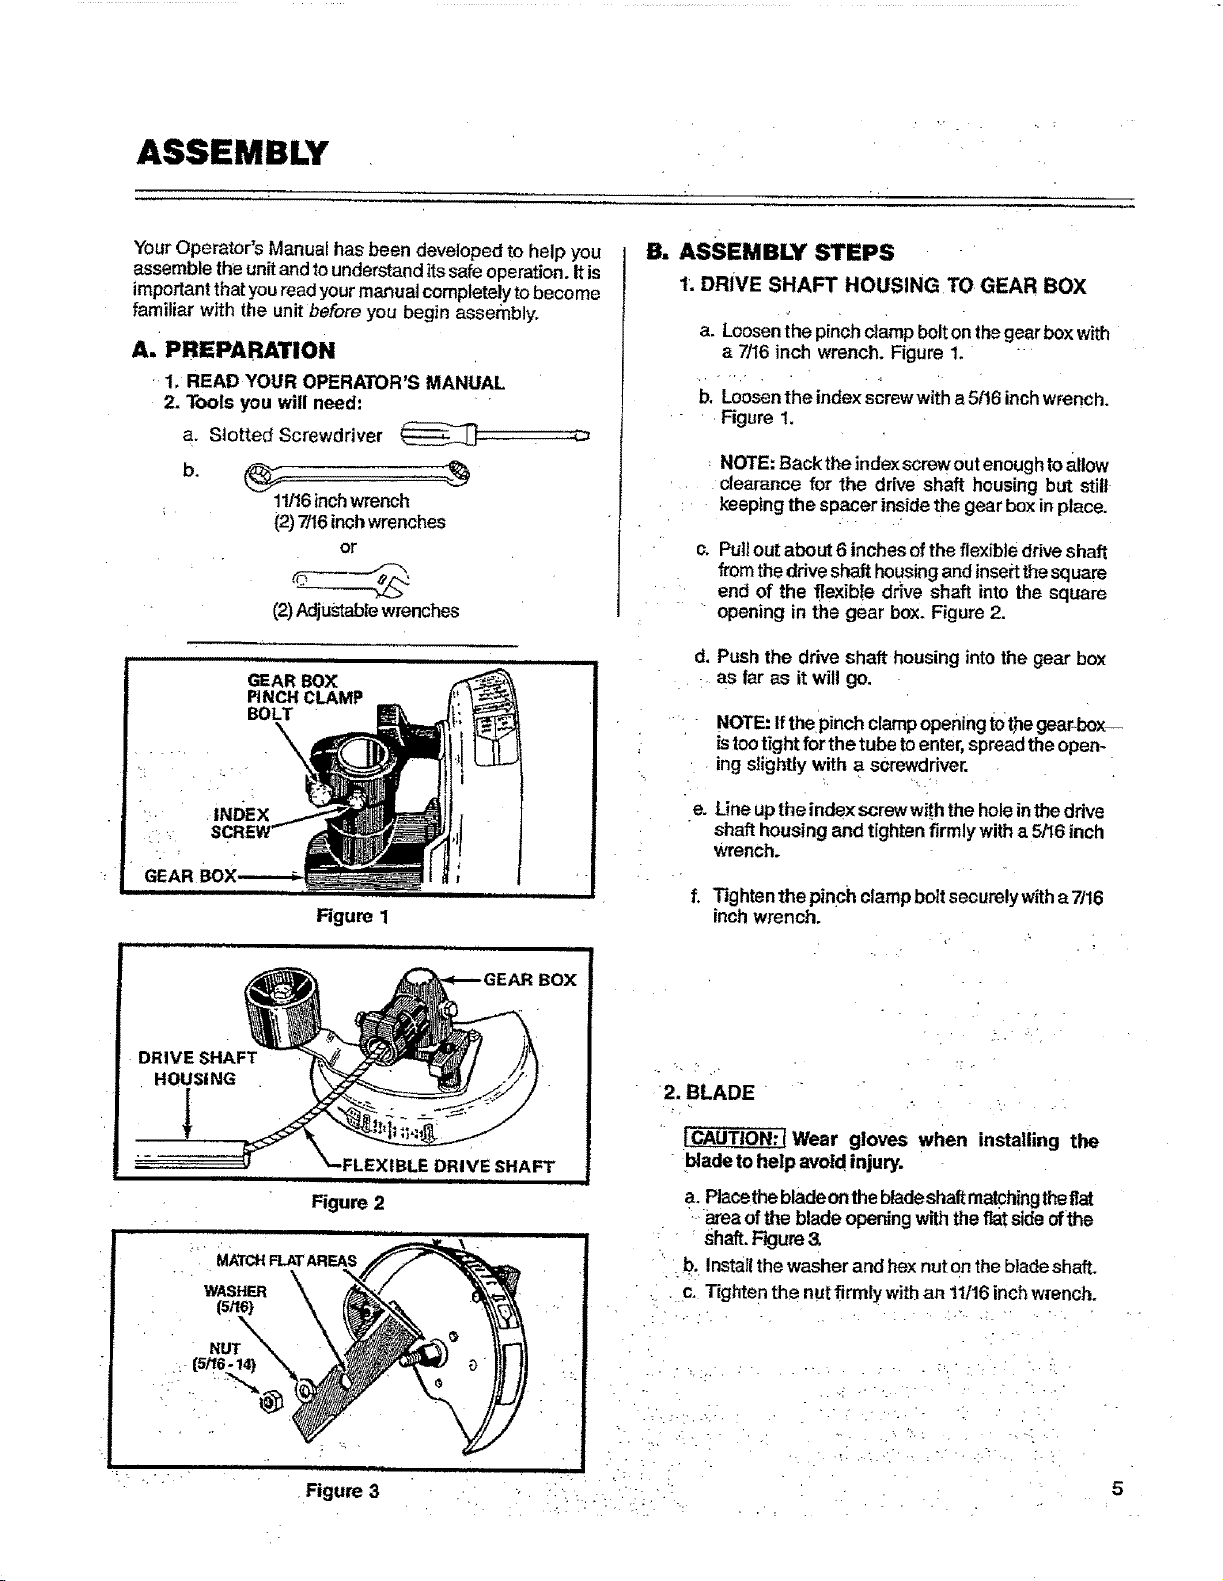
Figure 1
B. ASSEMBLY STEPS
1. DRIVE SHAFT HOUSING TO GEAR BOX
a. Loosenthe pinch clampbolt onthegear box with
a 7116inch wrench. Figure 1.
b, Loosenthe index screwwith a 5f16inch wrench.
Figure 1.
NOTE:Backthe indexscrewoutenoughtoallow
clearance for the drive shaft housingbut still
keeping the spacer insidethe gear box in place.
c. Pull out about 6 inches of the flexibleddve shaft
from the driveshaft housingand inse_tthesquare
end of the flexib!e drive shaft into the square
opening in the gear box. Figure 2.
d, Push the drive shaft housing into the gear box
as far as it will go.
" NOTE:IfthePinch clampopeningl:0thegear-box-.-
istootightforthetube toenter, spreadtheopen-
ing slightly with a screwdriver.
• L , ':
e. Lineuptheindexscrewwiththe holeintheddve
shafthousingand tightenfirmlywitha 5/16inch
Wrench.
f, _ghten the pinch clamp bolt securely witha 7/16
inchwrench.
DRIVE SHAFT
HOUSING
NUT
Figure 3
DRIVE SHAFT
iii iiii ii i
2. BLADE
Wear gloves when installing the
bladeto help avoid injury.
a. Placethebladeonthebladeshaft matchingtheflat
area ofthe blade openingwiththeflat sideofthe
Shaft.Figure
" b. Installthe washerand hex nut on the bladeshaft.
• c- Tighten the nutfirmty with an 11116inch wrench.
Loading ...
Loading ...
Loading ...