Loading ...
Loading ...
Loading ...
WALLSLEEVEINSTALLATIONINSTRUCTIONS
IMPORTANT: The wall sleeve is designed for walls that are 13 in.
(33 cm) in depth or less. For deeper walls, an accessory wall
sleeve extension is required.
• Provide a support lintel if the wall sleeve is installed in a
concrete or masonry wall.
• An accessory drain kit is required for the elimination of PTAC/
PTHP condensate.
When installing a drain kit, it is recommended that the
installation of the drain kit be completed before installing the
wall sleeve. See "Required Parts, Accessories and Options"
and "Drain Kit Installation Instructions."
• Unpack and dispose of packaging materials.
NOTE: Do not remove weatherboard and center support from
wall sleeve until ready to install chassis and outdoor grille.
IMPORTANT:
• If additional support for the wall sleeve is required, or the wall
sleeve projects more than 8 in. (20.3 cm) into the room, an
accessory subbase must be used. See "Subbase Installation
Instructions."
• If a hole is to be cut into an existing wall to install the sleeve,
disconnect power to all wires within the wall.
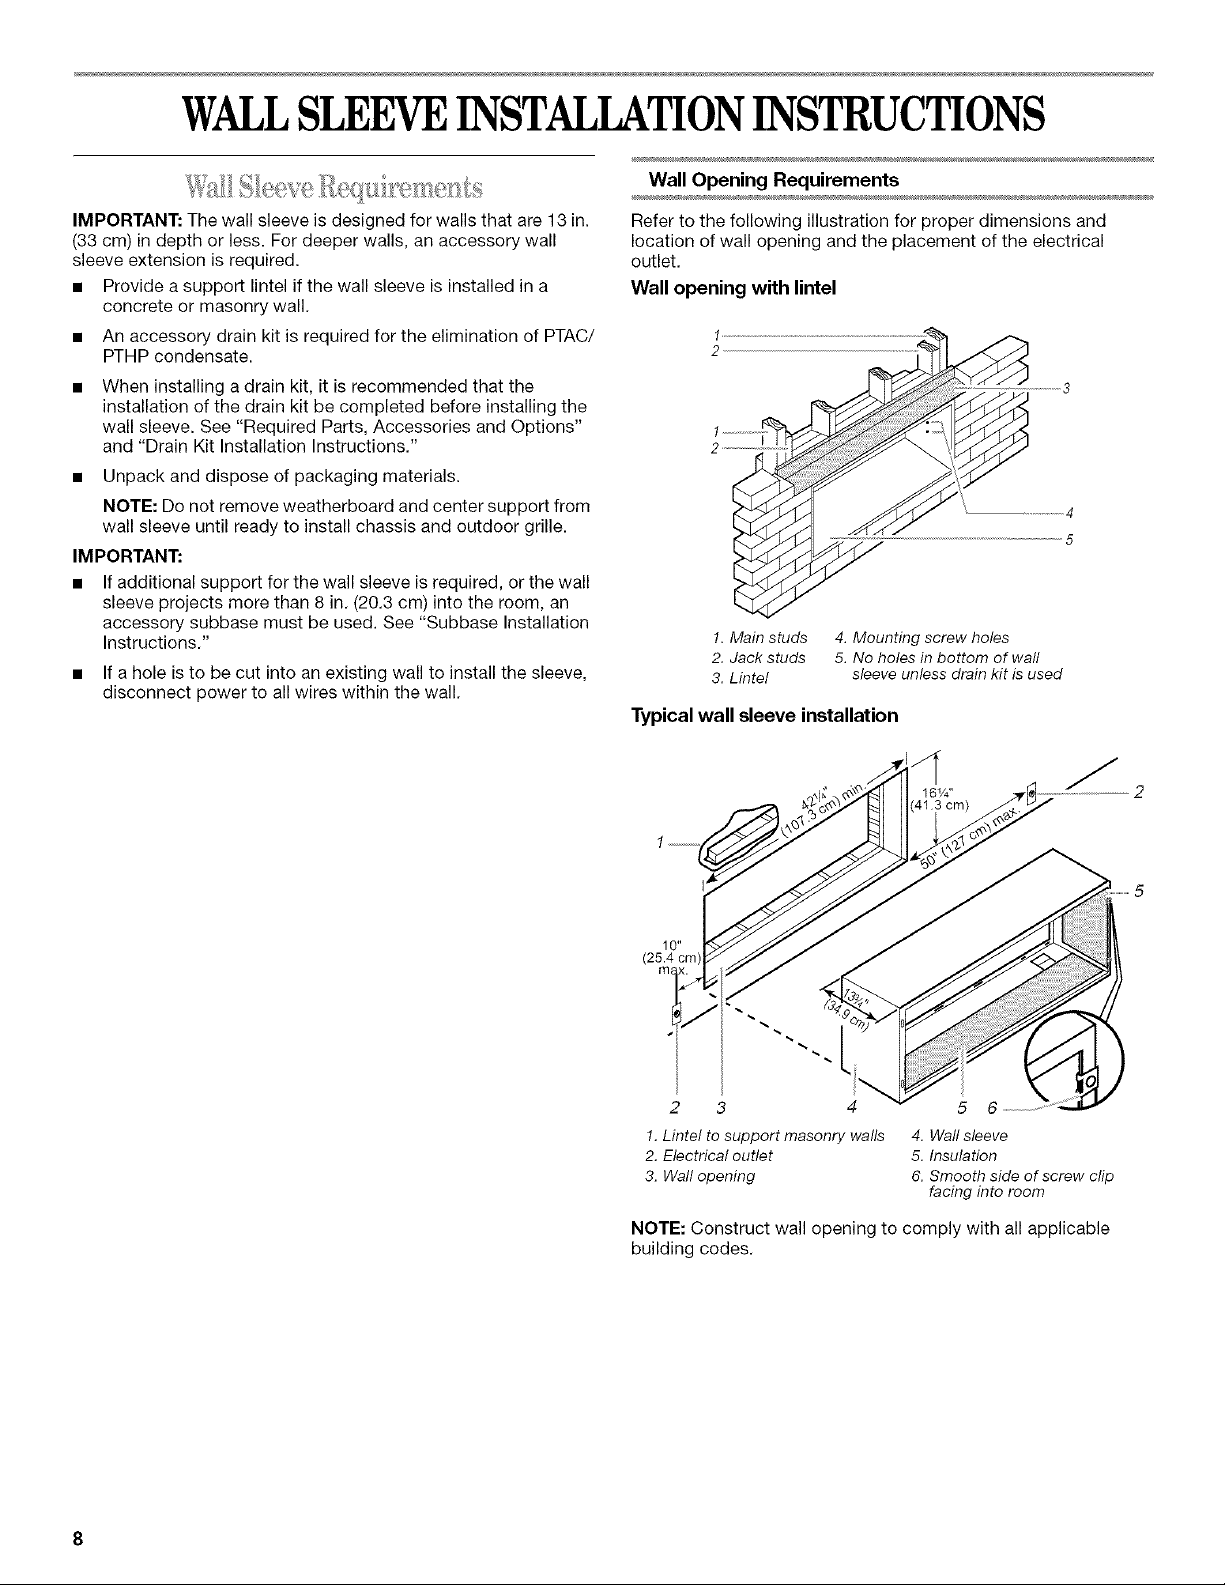
Wall Opening Requirements
Refer to the following illustration for proper dimensions and
location of wall opening and the placement of the electrical
outlet.
Wall opening with lintel
1. Main studs 4. Mounting screw holes
2. Jack studs 5. No holes in bottom of wall
3. Lintel sleeve unless drain kit is used
Typical wall sleeve installation
1. Lintel to support masonry walls
2. Electrical outlet
3. Wall opening
4. Wall sleeve
5. Insulation
6. Smooth side of screw clip
facing into room
NOTE: Construct wall opening to comply with all applicable
building codes.
Loading ...
Loading ...
Loading ...