Loading ...
Loading ...
Loading ...
Wall Sleeve Brands: #2Fedders
19 _" Deep
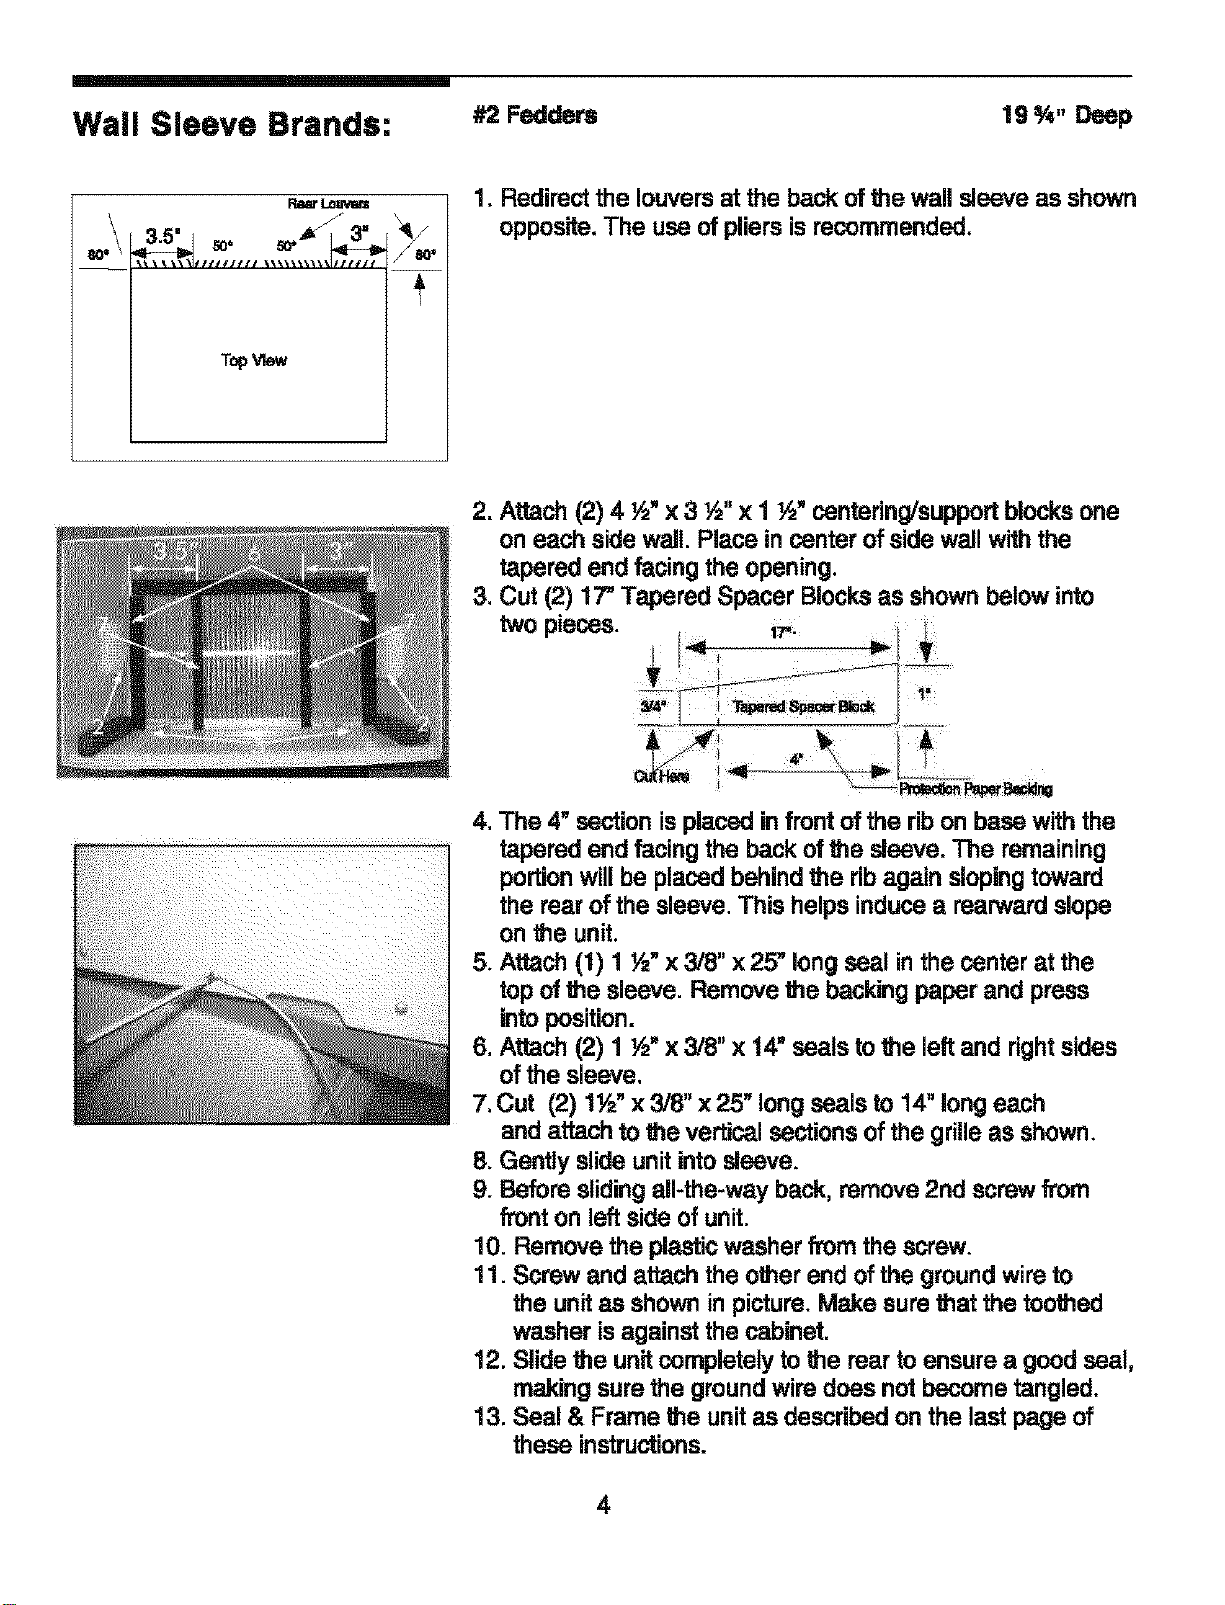
RearLoavam
ao_\ 3.5 eo. _ 3
TopView
/ I_O*
1. Redirect the louvers atthe back of the wall sleeve as shown
opposite. The use of pliers is recommended.
2. Attach (2) 4 ½" x 3 ½" x 1 ½" centering/supportblocks one
on each side wall. Place in center of side wall with the
tapered end facing the opening,
3, Cut (2) 17"Tapered Spacer Blocksas shown below into
two pieces.
4, The 4" section is pieced in frontof the ribon base with the
tapered end facing the back of the sleeve. The remaining
portionwill be placed behindthe rib again slopingtoward
the rear of the sleeve. This helps induce a rearward elope
on bheunit,
5oAttach (1) 1 _" x 3/8" x 25" longseal in the center at the
top of the sleeve. Remove the backing paper and press
into position.
6, Attach (2) 1 ½" x 3/8" x 14" seals to the left and rightsides
of the sleeve,
7, Cut (2) 1½" x 3/8" x 25" long seals to 14" long each
and attach to the vertical sections of the grilleas shown.
8. Gently slide unitinto sleeve.
9. Before slidingall-the-way back, remove 2nd screw fl'om
front on leftside of unit.
10. Remove the plasticwasher from the screw.
11. Screw and attach the other end of the ground wire to
the unitas shown in picture. Make sure that the toothed
washer is against the cabinet.
12, Slide the unit completely to the rear to ensure a good seal,
making sure the ground wire does not become tangled.
13, Seal & Frame the unitas described on the last page of
these instructions.
4
Loading ...
Loading ...
Loading ...