Loading ...
Loading ...
Loading ...
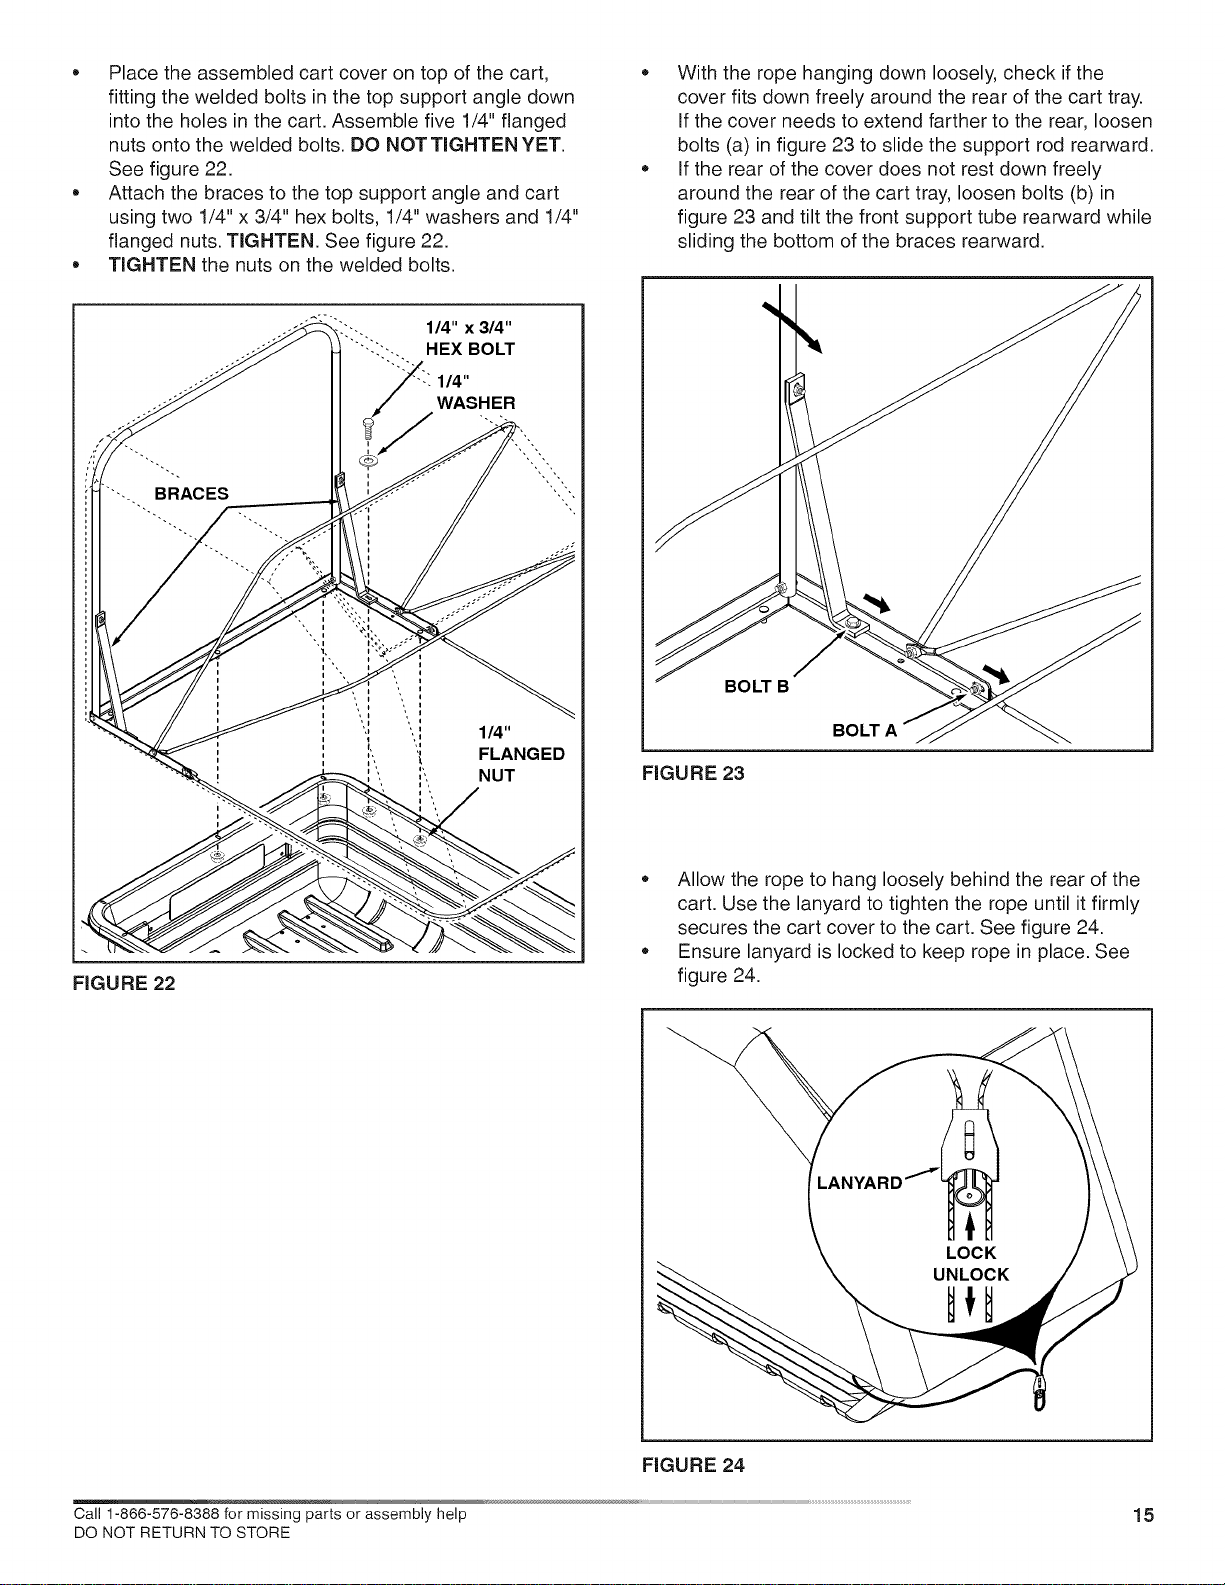
• Place the assembled cart cover on top of the cart,
fitting the welded bolts in the top support angle down
into the holes in the cart. Assemble five 1/4" flanged
nuts onto the welded bolts. DO NOT TIGHTEN YET.
See figure 22.
Attach the braces to the top support angle and cart
using two 1/4" x 3/4" hex bolts, 1/4" washers and 1/4"
flanged nuts. TIGHTEN. See figure 22.
TIGHTEN the nuts on the welded bolts.
With the rope hanging down loosely', check if the
cover fits down freely around the rear of the cart tray.
If the cover needs to extend farther to the rear, loosen
bolts (a) in figure 23 to slide the support rod rearward.
If the rear of the cover does not rest down freely
around the rear of the cart tray, loosen bolts (b) in
figure 23 and tilt the front support tube rearward while
sliding the bottom of the braces rearward.
FIGURE 22
114" x 314"
HEX BOLT
1/4"
WASHER
BOLT B
FIGURE 23
BOLT
Allow the rope to hang loosely behind the rear of the
cart. Use the lanyard to tighten the rope until it firmly
secures the cart cover to the cart. See figure 24.
Ensure lanyard is locked to keep rope in place. See
figure 24.
FIGURE 24
Call 1-866-576-8388 for missing parts or assembly help
DO NOT RETURN TO STORE
15
Loading ...
Loading ...
Loading ...