Loading ...
Loading ...
Loading ...
7
English
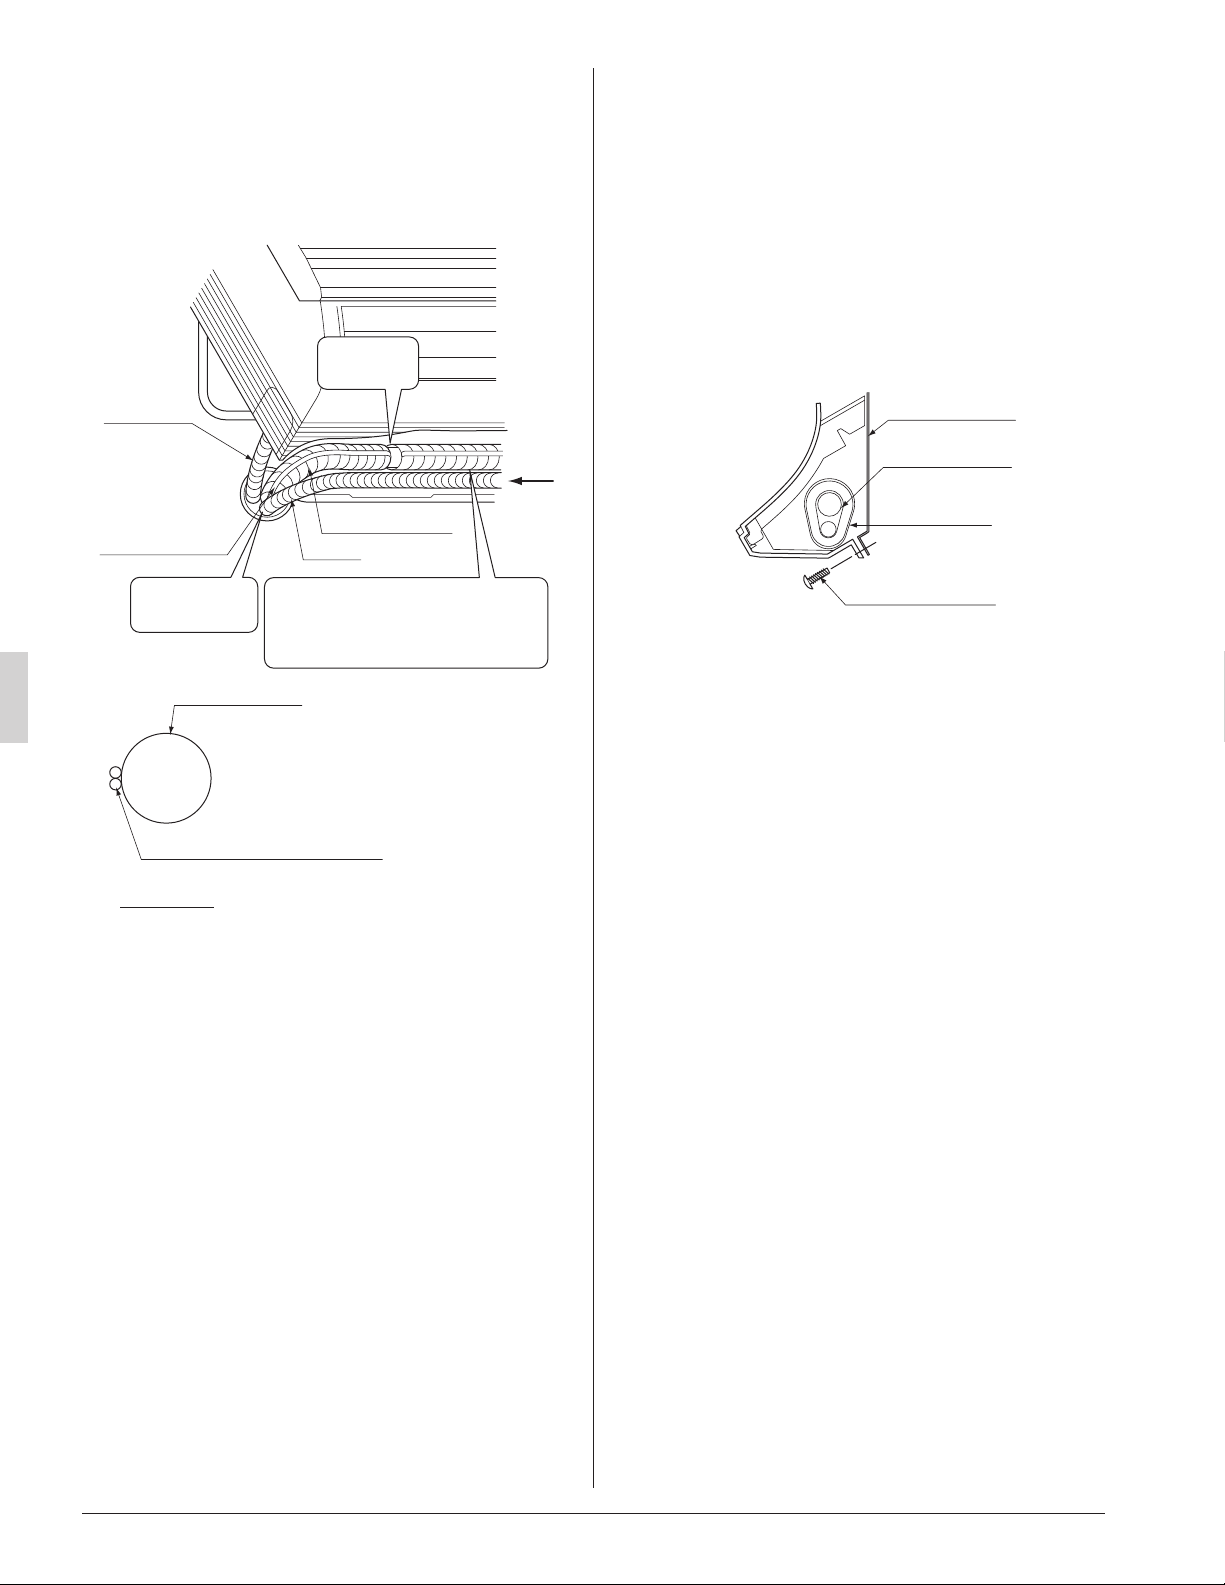
(7) Pass power supply wiring from conduit and control
wiring through the wiring guide in the back of the
unit, to the front of the unit. (For connecting the
power supply wiring to the unit, see “8-1 HOW TO
CONNECT WIRINGS”)
(8) Connect the piping. (See “5. REFRIGERANT PIPING
WORK” and Fig. 10)
Secure with
vinyl tape.
Drain hose
Transmission
wiring and remote
controller wiring
Fig. 10
A
A arrow view
Refrigerant piping
Transmission wiring and
remote controller wiring
Refrigerant piping
Conduit
Wrap the insulating tape overlapping
at least half the width with each wrap.
Wrap the insulating tape all the way
to the L-shaped bend.
Seal with putty
corking material.
• Seal the piping through-hole with putty corking mate-
rial.
(9) Push on both bottom edges of the indoor unit using
both hands and hook the tab on the back of the
indoor unit onto the installation panel (1).
(Refer to Fig. 9)
• At this time remove the buffering material placed in
step (6).
• Make sure power supply wiring, transmission wiring,
ground wiring and remote controller wiring are not
caught inside the indoor unit.
When screwing in the indoor unit
• Remove the front grille. (Refer to Fig. 7)
• Secure the indoor unit to the installation panel (1) with
the securing screws (6). (Refer to Fig. 11)
Installation panel
(accessory) (1)
Refrigerant piping
Insulating tape
(accessory) (4)
M4 × 12L
(accessory) (6)
Fig. 11
01_EN_3PN07521-5H.indd 7 7/9/2018 14:13:34
Loading ...
Loading ...
Loading ...