Loading ...
Loading ...
Loading ...

Part number 550-142-330/0421
14
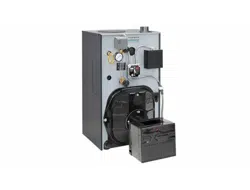
SGO
OIL-FIRED NATURAL DRAFT STEAM BOILER — SERIES 4 — Boiler Manual
SERVICETECHNICIANONLY—readandfollowcompletely.
Fiberglass wool and ceramic fiber materials are
possible cancer hazards. See warning on page 48.
Place boiler
1. Semi-packaged SGO-3 through 6 — position on site.
Smaller sized boilers may be top heavy. Use caution
when handling to avoid minor personal injury or
property damage.
a. Boiler is shipped for back flue outlet. To change to top flue
outlet (see Figure 6, page 15):
• Remove the jacket cap and the 8.00” diameter piece
of insulation that covers the vent opening from the
top jacket panel.
•Loosen two (2) screws holding flue cap strap
to collector hood. Remove strap and flue cap from
opening. Re-tighten screws.
• Check rope placement inside flue cap.
(Read
under Step #3 at right).
•Loosen two (2) screws on back flue outlet. Set flue
cap on outlet. Install strap by engaging slots in screws.
Tighten screws. Make sure cap is securely installed.
•Place the jacket cap insulation disc in the back opening
of the boiler covering the flue cap.
•Snap jacket cap in back outlet opening.
Jacket cap and insulation disc must be in place on
boiler to avoid requiring an 18” minimum clearance
from back of boiler to combustible material.
2. Knocked-down SGO-7, 8 & 9 — split the assembled block for
easier handling (see Figure 6):
a. Open burner mounting door and using utility knife, slit
floor insulation at joint to be separated.
b. Remove 5½" draw rod and the longest draw rod from each
side. Pull block apart. Save draw rods, nuts, washers and
sealing rings for reassembly.
c. Move divided block to location.
d. Clean port openings with clean rag.
Do not use petroleum-based compounds to clean
openings. Damage to system components can result
causing property damage.
e. Place rings in port openings. If ring slips out of groove,
stretch ring gently for several seconds, then place in groove.
f. Position sections so aligning lugs fit into sockets of next
section. Make sure sealing rope is in good condition and
in position.
Install boiler –
Semi-packaged and Knocked-down boilers only
g. Oil threads on draw rods. Install washer and nut on end
to be tightened. Use nut only on other end.
h. With wrench at washer/nut end, uniformly
tighten nuts starting with 5½" rod at large port, 5½" rod
at small port, bottom long rod and finally top long rod.
i. Torque on both 5½” rods and bottom long rod should
be 50-60 ft. lbs.; long top rod should be 20-25 ft. lbs. Do
not back-off nuts.
j. Metal-to-metal contact should be made around port
openings. If gap does exist, it should be less than .020”.
Check with feeler gauge.
k. If gap around port openings exceeds .020”, check for dirt
on port openings, sockets or misaligned lugs. If corrections
are made and gap still exists, contact our Technical Services
group for assistance before continuing installation.
3. Knocked-down SGO-3 through 9 — install flue collector hood
(see Figure 6):
Obtain gas-tight seal to prevent possible flue gas
leakage and carbon monoxide emissions, leading
to severe personal injury or death.
a. Thread Tinnerman clip on screw so that clip fits snugly
in notch of hold-down lug. Screw must not turn.
b. Remove paper on sealing rope. Starting at back section
near flue collar, position sealing rope around top of block
with adhesive side to sections. Do not stretch rope. Make
sure rope ends meet. Trim excess rope.
c. Position flue collector hood on top of boiler sections and
over screws and clips as shown in Figure 6.
d. Install washers and nuts. Tighten nuts until collector hood
makes contact with Tinnerman clip.
e. Position flue cap
• Back flue outlet boiler — Position flue cap and strap
over opening in flue collector hood. Make sure rope
in cap is in place and in good condition. Tighten strap
to hood with screws provided.
• Top flue outlet boiler — Position flue cap and strap
over opening in back section. Make sure rope in cap is
in place and in good condition. Tighten strap to boiler
with screws provided in section. Install remaining
screws in holes in flue collector hood.
4. Check level. Shim legs, if needed.
Tankless heater, if used
1. SGO-3 through 6 — remove knockout in left side jacket panel,
and for SGO-6 only, remove tankless heater control knockout.
2. Remove tankless heater cover plate and gasket.
3. Install new gasket and tankless heater over studs around open-
ing. Secure with 3/8” nuts.
Loading ...
Loading ...
Loading ...