Loading ...
Loading ...
Loading ...
en Operating the appliance
16
cooking compartment, remain visible on the display
after the appliance has been switched off.
Switch off your appliance when you do not need to use
it. If no settings are applied for a long time, the
appliance switches itself off automatically.
Switching on the appliance
Press the ÿ On/Off button to switch on the appliance.
The Bosch logo appears on the display, followed by the
selection list for the types of heating.
Note: In the basic settings, you can specify which
operating mode should appear after the appliance is
switched on. ~ "Basic settings" on page 21
Switching off the appliance
Press the ÿ On/Off button to switch off the appliance.
Any functions that may be running are cancelled.
The time, or if applicable, the residual heat indicator,
appears on the display.
Note: You can set whether or not the time should be
displayed when the appliance is switched off in the
basic settings. ~ "Basic settings" on page 21
Starting the operation
You must press the l Start/Stop button to start each
operation.
After starting the appliance, the time display is shown
on the display along with the settings. The display ring
and the heating line also appear.
Pausing the operation
You can also interrupt and then continue an operation
using the l Start/Stop button.
If you press and hold the l Start/Stop button for
approx. 3 seconds, the operation is cancelled and all
settings are reset.
Note: The fan may continue to run after an operation
has been paused or cancelled.
Selecting an operating mode
Once the appliance is switched on, the default
operating mode is displayed.
If you would like to select a different operating mode,
you can do so using the menu. You can find detailed
descriptions of the individual operating modes in the
corresponding sections.
The following always applies:
1. Touch the appropriate text field.
The function is highlighted.
2. Turn the rotary selector to change the highlighted
selection.
3. If necessary, apply other settings.
To do this, touch the appropriate text field and
change the value using the rotary selector.
4. Press the l Start/Stop button to start.
The appliance starts the operation.
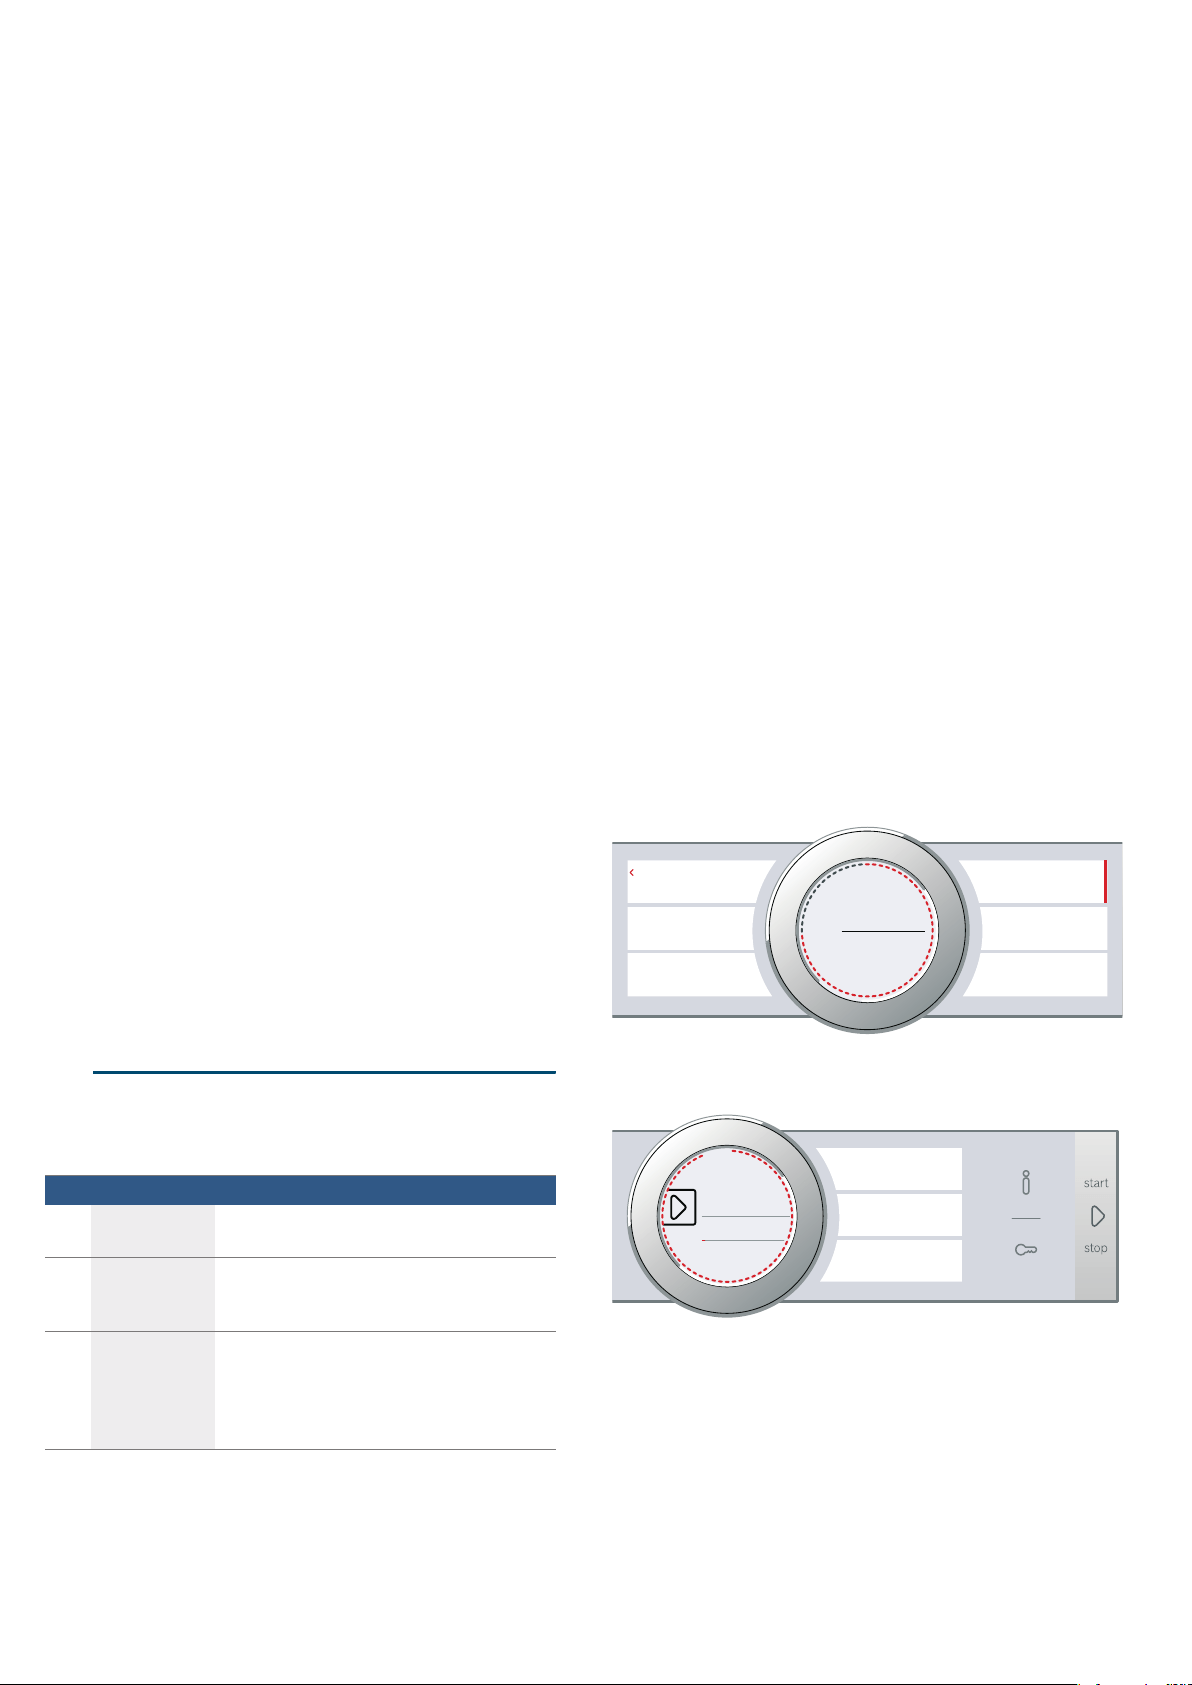
Setting the type of heating and temperature
If the "Types of heating" operating mode has not been
selected, touch the "Types of heating" text field in the
menu. The selection list for the types of heating appears
on the touch-screen displays.
Example in the picture: Hot air eco . at 195 °C.
1. Touch the text field with the required type of heating.
If necessary, scroll though the selection list using the
rotary selector.
The temperature is highlighted white.
2. Set the temperature using the rotary selector.
3. Press the l Start/Stop button to start.
The time on the display shows how long the
operation has already been running.
The appliance begins to heat up.
When your dish is ready, switch off the appliance using
the ÿ On/Off button.
Note: You can also set the cooking time and an end
time for the operation on the appliance. ~ "Time-
setting options" on page 17
Changing
After starting the appliance, the temperature is
highlighted. When you move the rotary selector, the
temperature is changed and applied immediately.
To change the type of heating, first use the l Start/Stop
button to interrupt the operation and then touch the
"Type of heating" text field. The selection list is
displayed. Touch the required type of heating. The
6HOHFW
+RWDLUHFR
+RWDLUJULOOLQJ
7RS_
ERWWRPKHDWLQJ
*ULOO
ODUJHDUHD
7RS_ERWWRP
KHDWLQJHFR
'KRWDLU
7\SHV
RIKHDWLQJ
`
&
7HPSHUDWXUH
(QG
PV
&RRNWLPH
+RWDLUHFR
7\SHRIKHDWLQJ
7HPSH
UDWXUH
P
V
a
&
&RRNWLPH
PV
(QG
Time-setting options en
17
corresponding default temperature appears on the
display.
Note: When you change the type of heating, the other
settings are also reset.
Rapid heating
With Rapid heating, you can shorten the heat-up time
for some heating types.
The heating types suitable for Rapid heating are:
■ < 4D hot air
■ % Top/bottom heating
To achieve an even cooking result, do not place your
food or accessories into the cooking compartment until
"Rapid heating" is complete.
Applying settings
Ensure you have selected a suitable type of heating and
set a temperature of at least 100 °C. Otherwise, rapid
heating cannot be activated.
1. Set the type of heating and temperature.
2. Touch the "Rapid heating" text field.
"On" is displayed in the text field. A confirmation
message appears on the display.
When rapid heating comes to an end, an audible signal
sounds and a message appears on the display. "Off" is
displayed in the text field. Place your dish in the
cooking compartment.
Note: The "Cooking time" time-setting option starts at
the same time as rapid heating. Therefore, only set a
cooking time when rapid heating has come to an end.
Cancelling
To cancel the rapid heating, touch the "Rapid heating"
text field again. "Off" is displayed in the text field.
OTime-setting options
Ti me- set t i ng opt i ons
Your appliance has different time-setting options.
You can call up the cooking time and the end time after
setting an operation using the touch-screen displays.
The timer has a separate field t and can be adjusted at
any time.
An audible signal sounds after a cooking time or timed
period has elapsed. You can cancel the audible signal
early by touching a field or touch-screen display.
Note: You can change how long the audible signal
sounds for in the basic settings. ~ "Basic settings"
on page 21
Setting the cooking time
You can set the cooking time for your dish on the
appliance. This means that the cooking time is not
unintentionally exceeded and you do not need to
interrupt other work in order to end the operation.
Applying settings
Depending on which direction you turn the rotary
selector first, the cooking time starts at a particular
default value: Left = 10 minutes, right = 30 minutes.
The cooking time can be set in one-minute increments
up to one hour, and then in five-minute increments.
The maximum setting is 23 hours and 59 minutes.
Example in the picture: It is 10:00, cooking time of 45
minutes.
1. Set the operating mode, and temperature or level.
2. Before starting the operation, touch the "Cooking
time" text field.
The cooking time is highlighted white in the display.
3. Turn the rotary selector to set the cooking time.
The end time is calculated automatically.
4. Press the l Start/Stop button to start.
The cooking time counts down.
The appliance begins to heat up.
Once the cooking time has elapsed, an audible signal
sounds. The appliance stops heating. The cooking time
00 m 00 s is shown on the display.
You can reset the cooking time using the "Cooking
time" text field or you can press the l Start/Stop button
to continue the operation without a cooking time.
When your dish is ready, switch the appliance off using
the ÿ On/Off button.
Time-setting option Use
q Cooking time After the set cooking time has elapsed, the
appliance ends the operation automatically.
r End Enter a cooking time and the required end
time. The appliance starts automatically so
that the operation ends at the required time.
t Timer The timer functions like an egg timer. It runs
independently of the operation and the other
time-setting options. After the set time has
elapsed, the appliance does not switch on or
off automatically.
T
P
V
(QG
&RRNWLPH
&
7HPSHUDWXUH
+RWDLUHFR
7\SHRIKHDWLQJ
&RRNWLPH
P
V
a
&
&RRNWLPH
PV
(QG
Loading ...
Loading ...
Loading ...