TO BE REMOVED BYTHE CUSTOMER AFTER iNSTALLATiON IS COMPLETE
f
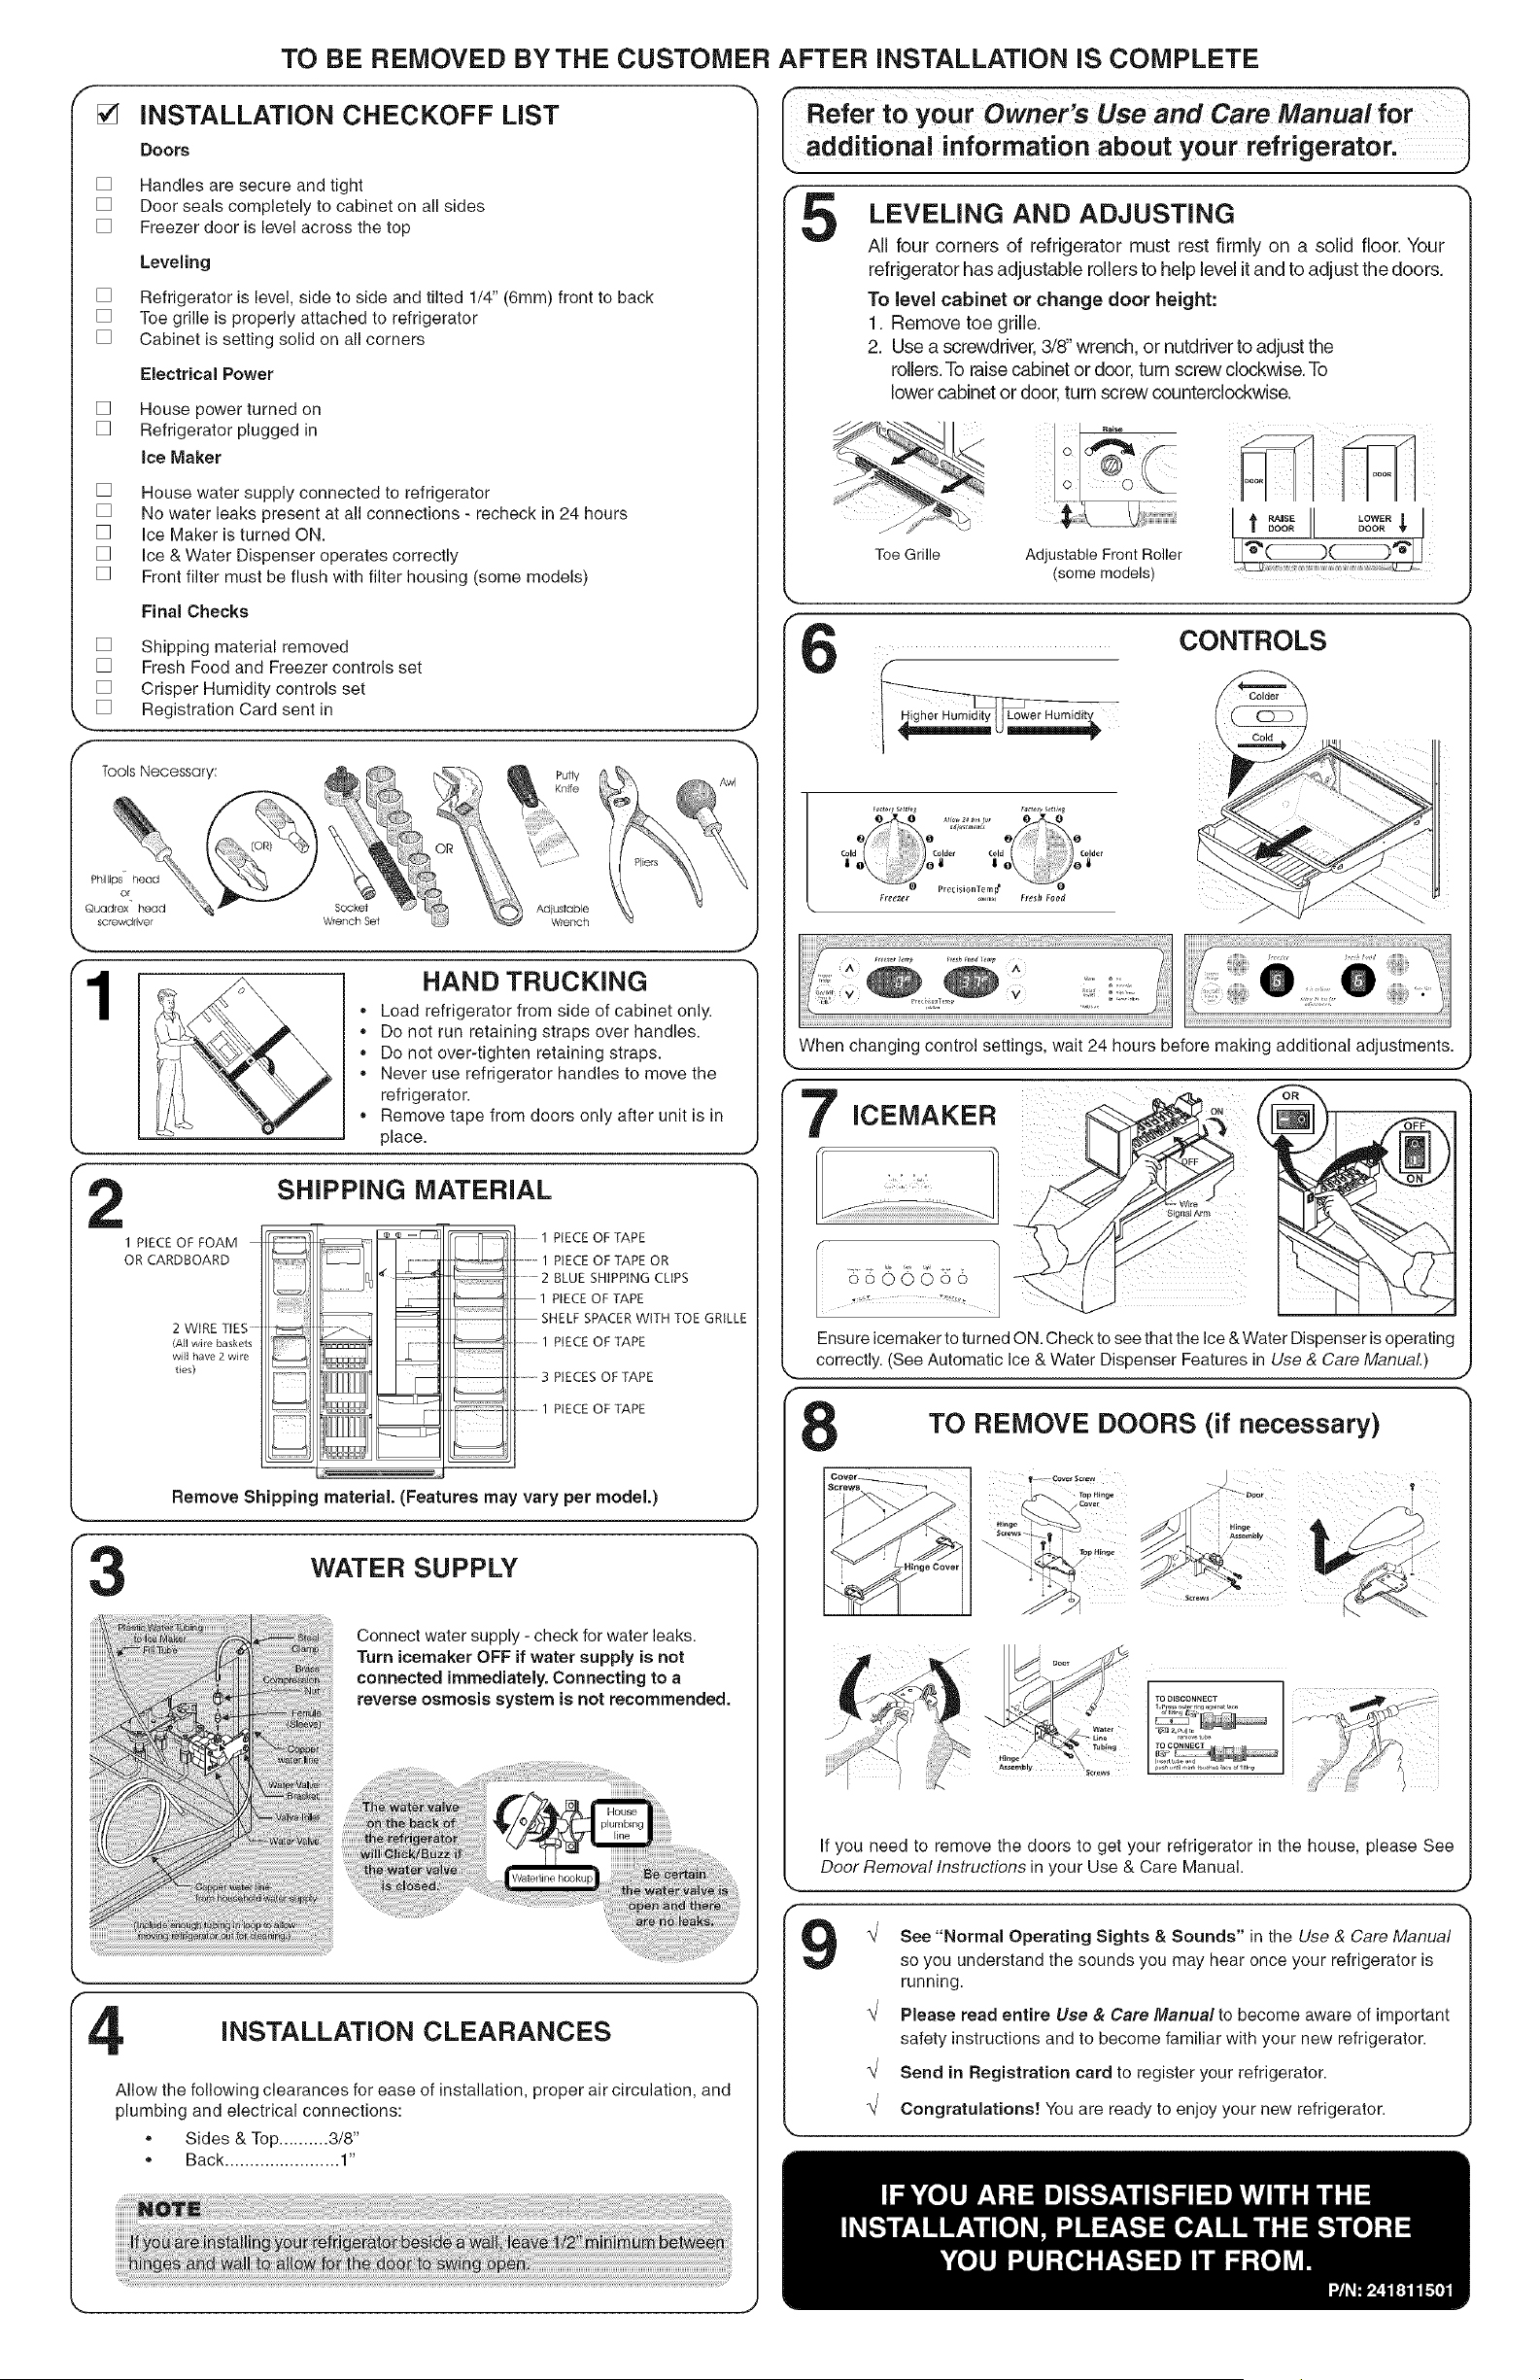
[] INSTALLATION CHECKOFF LiST
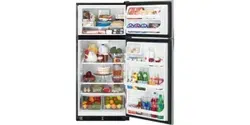
Doors
[] Handles are secure and tight
[] Door seals completely to cabinet on all sides
[] Freezer door is level across the top
Leveling
[] Refrigerator is level, side to side and tilted 1/4" (dmm) front to back
[] Toe grille is properly attached to refrigerator
[] Cabinet is setting solid on all corners
Electrical Power
[] House power turned on
[] Refrigerator plugged in
ice Maker
[] House water supply connected to refrigerator
[] No water leaks present at all connections - recheck in 24 hours
[] Ice Maker is turned ON.
[] Ice & Water Dispenser operates correctly
[] Front filter must be flush with filter housing (some models)
Final Checks
[]
[]
[]
[]
f,*
Shipping material removed
Fresh Food and Freezer controls set
Crisper Humidity controls set
Registration Card sent in
Tools Necessary:
Phillips" head
Quadlex head
screwdllve.r
Socket
Wrench Set
Adiustable
Wrench
1
f
2
HAND TRUCKING
,, Load refrigerator from side of cabinet only•
,, Do not run retaining straps over handles•
,, Do not over-tighten retaining straps•
,, Never use refrigerator handles to move the
refrigerator•
,, Remove tape from doors only after unit is in
place•
SHIPPING MATERIAL
J
1 PIECE OF FOAM
OR CARDBOARD
2 WIRE TIES .....
(Aflwire baskets
will have 2wire
ties)
..........1 PIECE OF TAPE
...... 1 PIECEOF TAPE OR
....... 2 BLUE SHIPPING CLIPS
1 PIECE OF TAPE
SHELF SPACER WITH TOE GRILLE
..... 1 PIECEOF TAPE
..........3 PIECES OF TAPE
.............1 PIECEOF TAPE
Remove Shipping material. (Features may vary per model.)
J
WATER SUPPLY
Connect water supply - check for water leaks•
Turn icemaker OFF if water supply is not
connected immediately. Connecting to a
reverse osmosis system is not recommended.
INSTALLATION CLEARANCES
Allow the following clearances for ease of installation, proper air circulation, and
plumbing and electrical connections:
,, Sides & Top.......... 3/8"
• Back ....................... 1"
k additional information about your refrigerator;
5 "
LEVELING AND ADJUSTING
All four corners of refrigerator must rest firmly on a solid floor. Your
refrigerator has adjustable rollers to help level itand to adjust the doors.
To level cabinet or change door height:
1. Remove toe grille.
2. Use a screwdriver, 3/8" wrench, or nutdriver to adjust the
rollers. To raise cabinet or door, turn screw clockwise. To
lower cabinet or door, turn screw counterclockwise.
RAISE LOWER
: Itooo II ooo
Toe Grille Adjustable FrontRoller _ _,_j
(some models)
CONTROLS
J
Ensure icemaker to turned ON. Check to see that the Ice& Water Dispenser ts operating
_._ co[[ec!!y: !See Automa!ic !ce & We!el Dispense [ Fea!u[es in Use & Care Manua{:) ,
[ "
_, TO REMOVE DOORS (if necessary)
| If you need to remove the doors to get your refrigerator in the house, please See
[,_ Door Removal Instructions in your Use & Care Manual.
I9 '
See "Normal Operating Sights & Sounds" in the Use & Care Manual
so you understand the sounds you may hear once your refrigerator is
running•
Please read entire Use & Care Manual to become aware of important
safety instructions and to become familiar with your new refrigerator.
Send in Registration card to register your refrigerator•
Congratulations! You are ready to enjoy your new refrigerator.
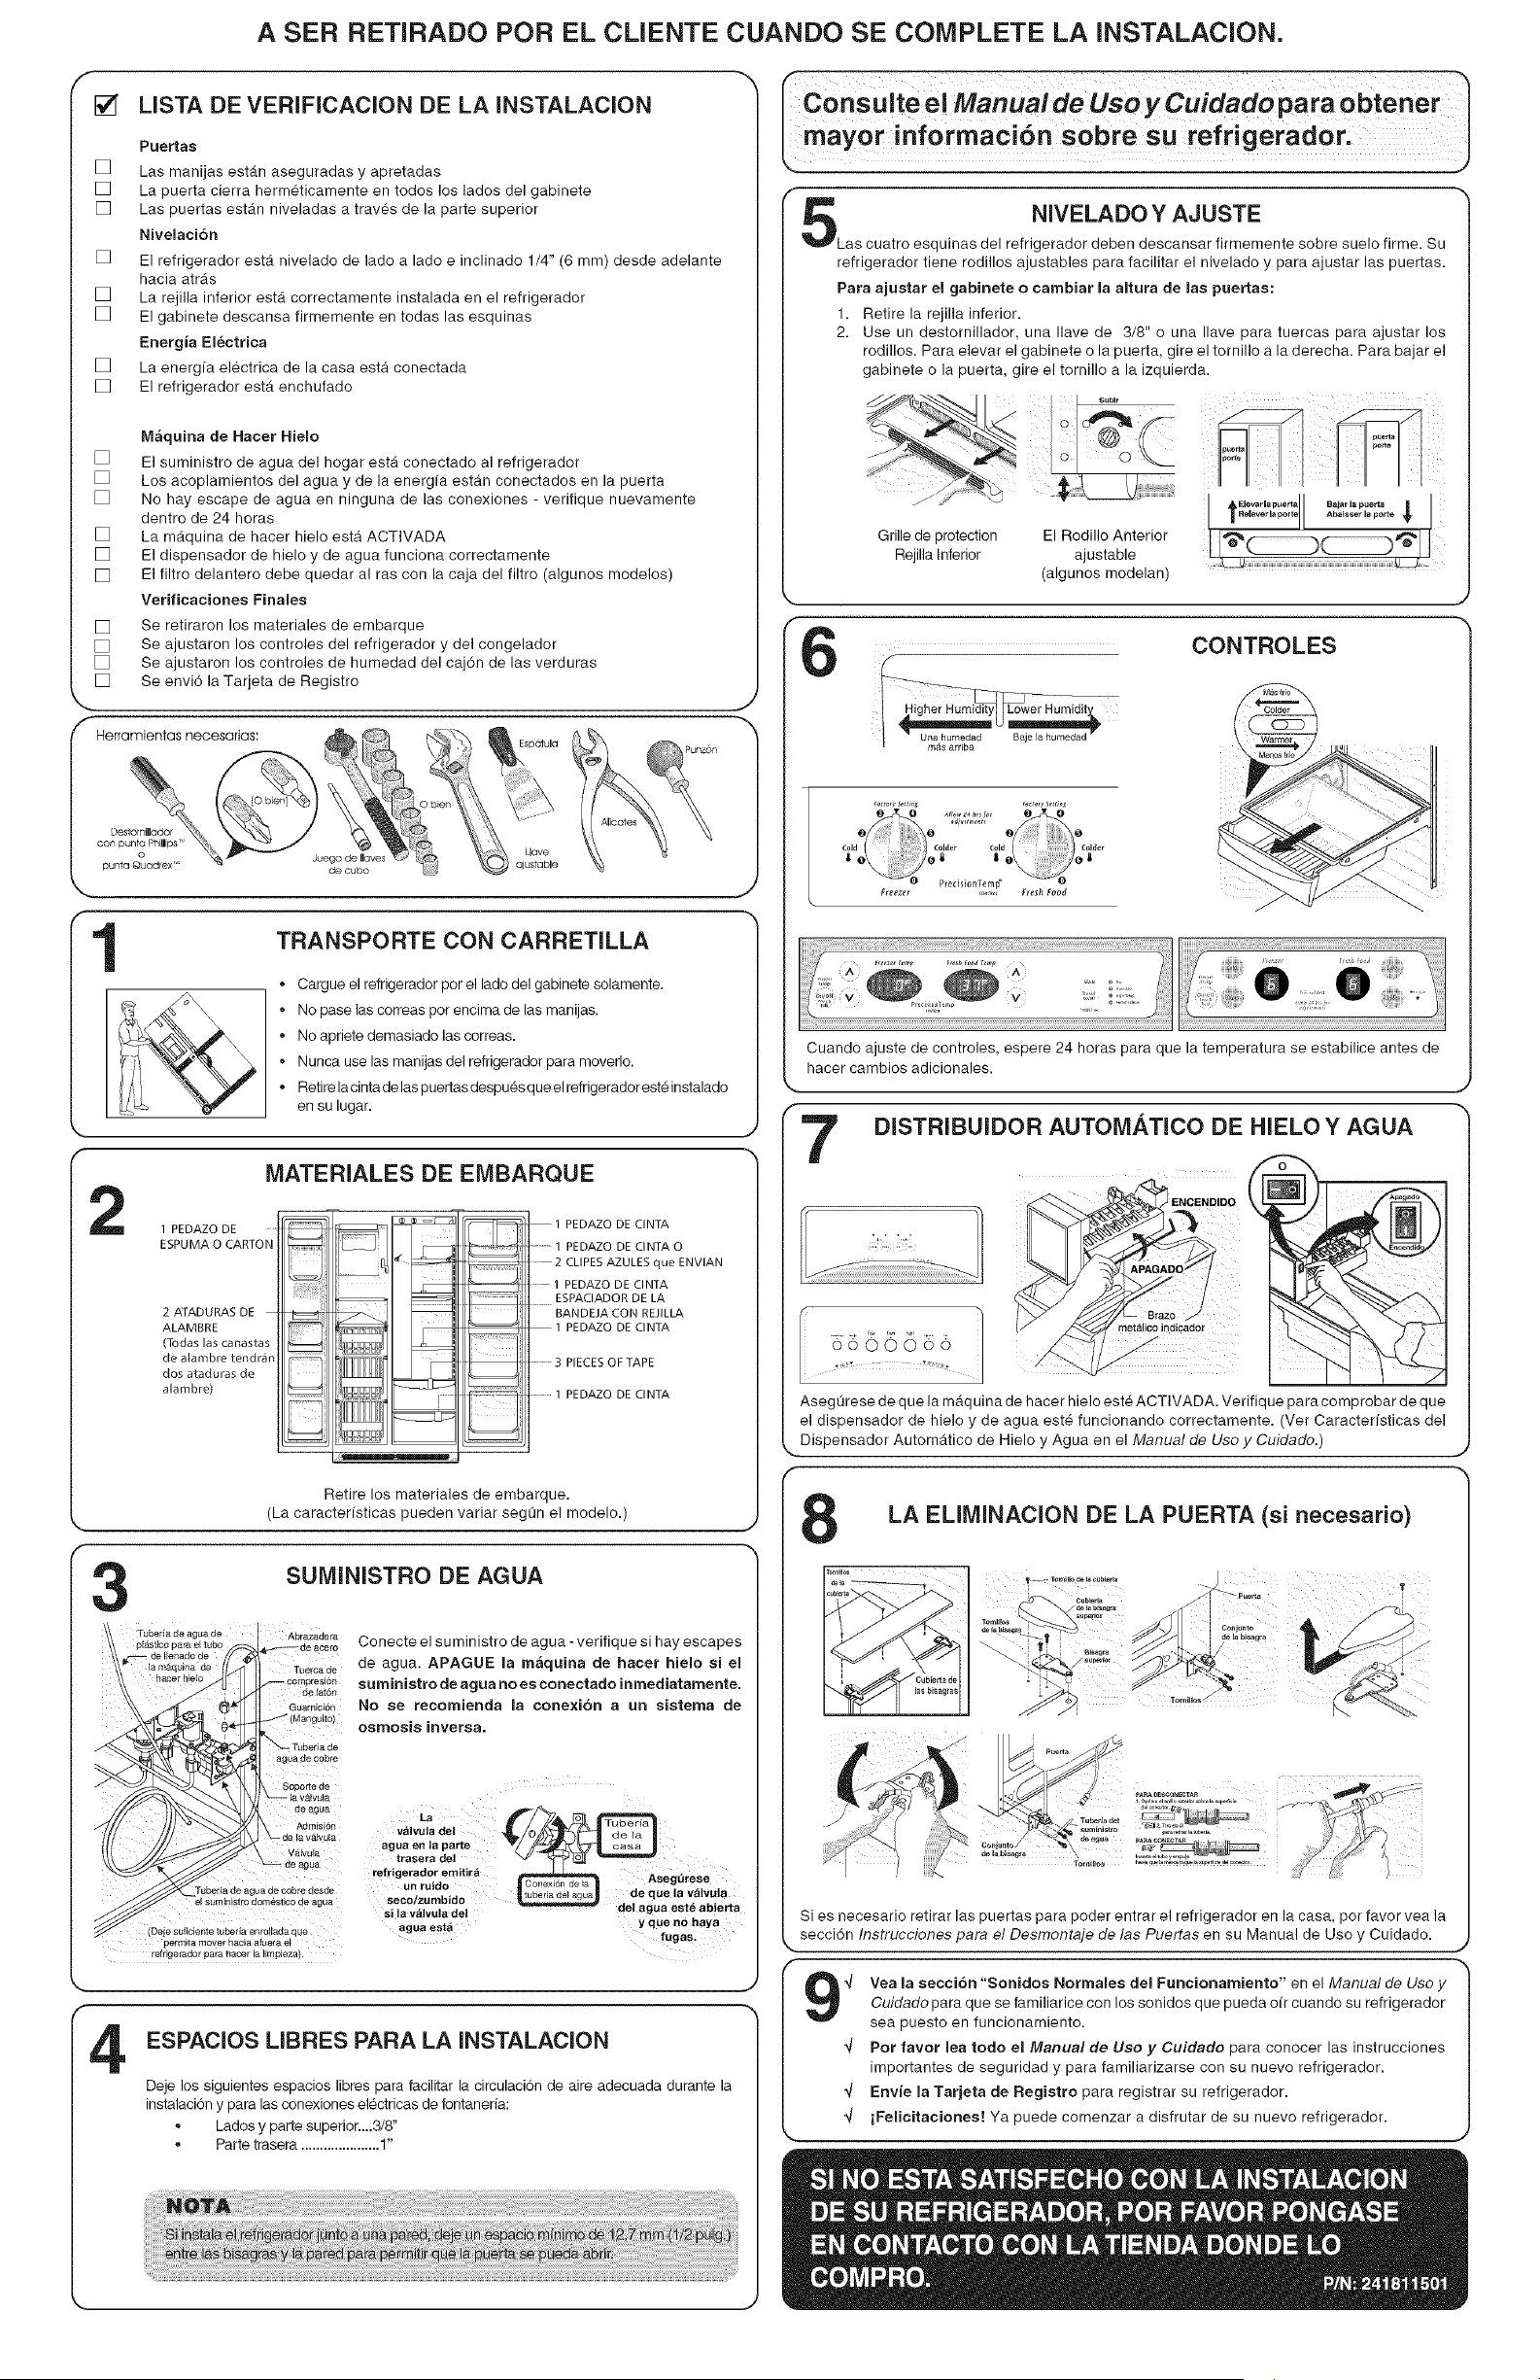
A SER RETIRADO POR EL CUENTE CUANDO SE COMPLETE LA INSTALACION.
f
[]
[]
[]
[]
[]
USTA DE VERIFICACION DE LA INSTALACION
Puertas
[] Las manijas est_.n aseguradas y apretadas
[] La puerta cierra herm_ticamente en todos los lades del gabinete
[] Las puertas estdm niveladas a trav_s de la parte superior
Nivelaci6n
[] El refrigerador estdt nivelado de lade a lade e inclinado 1/4" (6 mm) desde adelante
hacia atrdts
[] La rejilla inferior est,. correctamente instalada en el refrigerador
[] El gabinete descansa firmemente en todas las esquinas
Energia El_ctrica
[] La energfa el_ctrica de la casa esta conectada
[] El refrigerador est,. enchufado
Maquina de Hacer Hielo
[] El suministro de agua del hogar est& conectado al refrigerador
[] Los acoplamientos del agua y de la energfa estan conectados en la puerta
[] No hay escape de agua en ninguna de las conexiones - verifique nuevamente
dentro de 24 horas
[] La m_tquina de hacer hielo esta ACTIVADA
[] El dispensador de hielo y de agua funciona correctamente
[] El filtro delantero debe quedar al ras con la caja del filtro (algunos modelos)
Verificaciones Finales
Se retiraron los materiales de embarque
Se ajustaron los controles del refrigerador y del congelador
Se ajustaron los controles de humedad del caj6n de las verduras
Se envi6 ]a Tarjeta de Registro
punta Quadrex "_ de cubo
........... J
1
TRANSPORTE CON CARRETILLA
Cargue el refrigerador por el lade del gabinete solamente.
No pase las correas per encima de las manijas.
No apriete demasiado las correas.
Nunca use las manijas del refrigerador para moverlo.
Retirela cintade laspuertas despu_s queel refrigerador est_ instalado
en su lugar.
2
MATERIALES DE EMBARQUE
1 PEDAZO DE ....
ESPUMA O CARTON
2ATADURASDE _"_
ALAMBRE
(Todas las canastas
de alambre tendr_n
dos ataduras de
alambre)
1 PEDAZO DE CINTA
............1 PEDAZO DE CINTA O
2 CLIPES AZULES que ENVIAN
..... 1 PEDAZO DE CINTA
........ESPACIADOR DE LA
BANDEJA CON REJILLA
1 PEDAZO DE CINTA
.........3 PIECES OF TAPE
...........1 PEDAZO DE CINTA
Retire los materiales de embarque.
(La caracterfsticas pueden variar segOn el modelo.)
3
pld_stbo pala el t#bo _ de aoero
de Ilenado de
la m&qui_a de TuerGa de
hacer h_lo c0rnpresl6n
de lat6n
Guamicide
_ Tuberia de
agua de ¢0bre
Soporte de
la v_lvula
de 8g_a
Admisi6n
de la valvula
V&_vula
de agua
Tubeda de agua de oobre desde
el Sumlnist[o demestiso de agua
que
permita mover hacia af_era el
refrigerader para hacer la limpieza),
SUMINISTRO DE AGUA
Conecte el suministro de agua - verifique si hay escapes
de agua. APAGUE la maquina de hacer hielo si el
suministro de agua no es coneetado inmediatamente.
No se recomienda la conexi6n a un sistema de
osmosis inversa.
La __
valvuladel
agua en la parte _ //r""-_ _7]1 casa |
trasera del __
re{rigerador emitir_ segt_rese
un ruido
"z m-i- | _ube_a_e[_'_qua _ de que la valvula
secol u _ oo _ del aa't " i
"1 v'lv I I de aguaesteaberta
s_ a a uade h
agua esta y que no ay a
fugas,
ESPACIOS LIBRES PARA LA INSTALACION
Deje los siguientes espacios libres para facilitar la circulaci6n de aire adecuada durante la
instalaci6n ypara las conexiones el_ctricas de fontanerfa:
• Lades y parte superior....3/8"
° Parte trasera .....................1"
NIVELADO Y AJUSTE
Las cuatro esquinas del refrigerador deben descansar firmemente sobre suelo firme. Su
refrigerador tiene rodillos ajustables para facilitar el nivelado y para ajustar las puertas.
Para ajustar el gabinete o cambiar la altura de las puertas:
1. Retire la rejilla inferior.
2. Use un destornillador, una Ilave de 3/8" o una Ilave para tuercas para ajustar los
rodillos. Para elevar el gabinete o la puerta, gire el tornillo a la derecha. Para bajar el
gabinete o la puerta, gire el tornillo a la izquierda.
Grille de protection
Rejilla Inferior
El Rodillo Anterior
ajustable
(algunos modelan)
e o e
• Predei0nTem_ _)
Freezer ,o_,.,,t FreshFood
CONTROLES
Cuando ajuste de controles, espere 24 horas para que la temperatura se estabilice antes de
hacer cambios adicionales.
DISTRIBUIDOR AUTOMATICO DE HIELO Y AGUA
"_' ',, ]ENCENDIDO
met_lico indicador
Aseg0rese de que la mAquina de hacer hielo est_ ACTIVADA. Verifique para comprobar de que
el dispensador de hielo y de agua est_ funcionando correctamente. (Ver Caracterfsticas del
k..Dispensador Autom_.tico de Hielo y Agua en el Manual de Use y Cuidade.)
f
LA ELIMINACION DE LA PUERTA (si necesario)
"- p_rta
Si es necesario rer_rar ias puer_as para Doder entrar el refrigerador en a casa. DOtfavor vea la
seccion msrrucctones oara el Desmontaje oe las Puertas en su Manual de Uso Cuidado.
%.., • .,
/"
9
4
4
4
Yea la secci6n "Sonidos Normales del Funcionamiento" en el Manual de Uso y
Cuidado para que se familiarice con los sonidos que pueda oft cuando su refrigerador
sea puesto en funcionamiento.
Pot favor lea todo el Manual de Uso y Cuidado para conocer las instrucciones
importantes de seguridad y para familiarizarse con su nuevo refrigerador.
Envie la Tarjeta de Registro para registrar su refrigerador.
iFelicitaciones! Ya puede comenzar a disfrutar de su nuevo refrigerador.