Loading ...
Loading ...
Loading ...
49-1000491 Rev. 4 15
INSTALLATION INSTRUCTIONS
INSTALLING THE BEVERAGE CENTER (Cont.)
METHOD 1
UNDERCOUNTER INSTALLATION
Level the Beverage Center
Adjustment of the leveling legs under the beverage
center may be necessary for a proper fit in the cabinet
opening. Tilt the unit to adjust the height of the four
leveling legs.
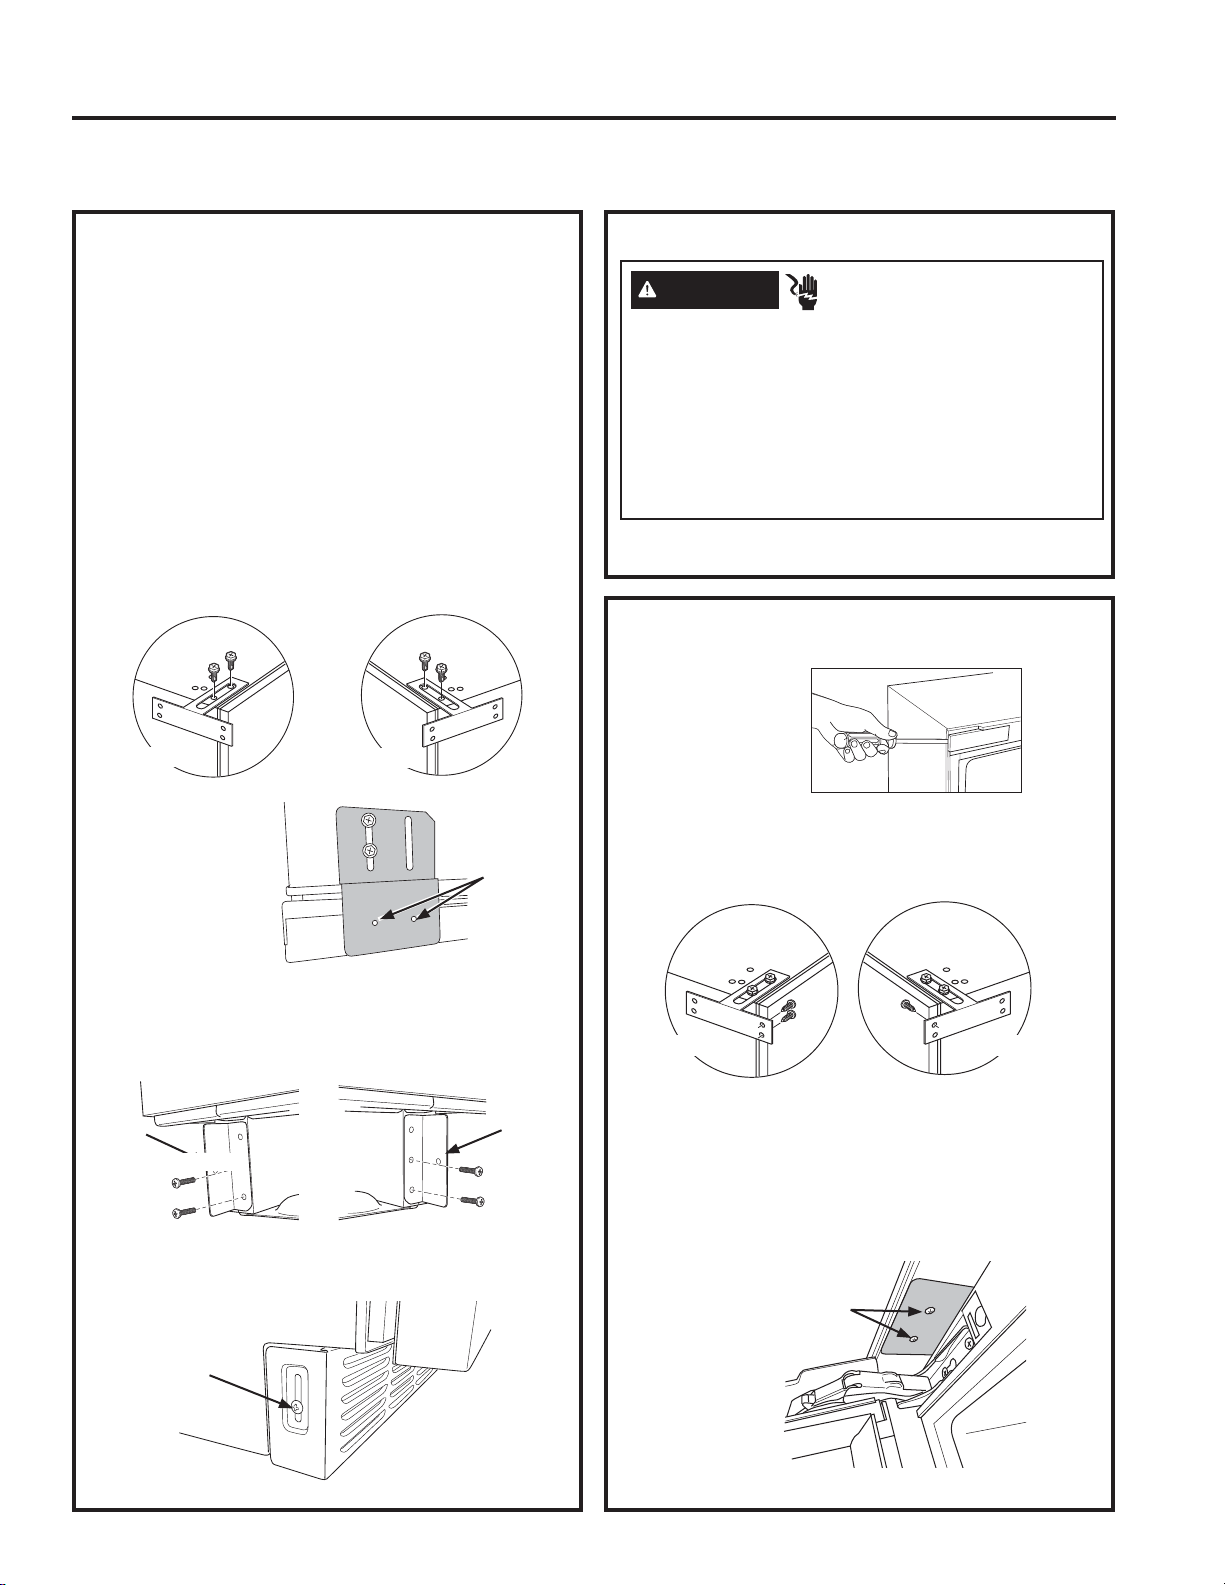
Attach the Anti-tip Brackets
1. Pry hole covers from the top of the beverage center to
reveal the holes used to install the anti-tip brackets.
2. Remove the anti-tip brackets and screws from the
accessory bag.
3. If installing to adjacent cabinets, use Screw A (Qty
4), fasten an anti-tip bracket to each side of the top
of the cabinet.
4. If installing to
countertop, use
Screw A (Qty 2),
to attach bracket
on hinge side.
Install Toe Kick
1. Using Screw B (Qty 4), attach the toe kick brackets
to each side of the bottom of the cabinet as shown
in the picture.
2. Install the toe kick. Use Screw B or Screw E
depending on the color of your toe kick.
Right Side
Left Side
Screw
CONNECT TO POWER
Ŷ3OXJLQWRDJURXQGHGSURQJRXWOHW
COMPLETE INSTALLATION - Installing to
Adjacent Cabinets
1. Remove cover.
2. Slide the beverage center under the counter.
3. Install beverage center to cabinetry using Screw C
(Qty 3).
4. Reinstall cover.
COMPLETE INSTALLATION - Installing to
Countertop
1. Slide the beverage center under the counter.
2. Install wine center to countertop using Screw C
(Qty 2).
WARNING
ELECTRICAL SHOCK
HAZARD
Plug into a grounded 3 prong outlet.
Do not remove the ground prong from the
power cord plug.
Do not use an adapter.
Do not use an extension cord.
Failure to do so can result in death, fire or
electrical shock.
Bracket
Bracket
Left Side
Right Side
Installation Instructions
Handle Side Hinge Side
Screw
holes for
countertop
attachment
Screws
Loading ...
Loading ...
Loading ...