Loading ...
Loading ...
Loading ...
49-1000491 Rev. 4 11
INSTALLATION INSTRUCTIONS
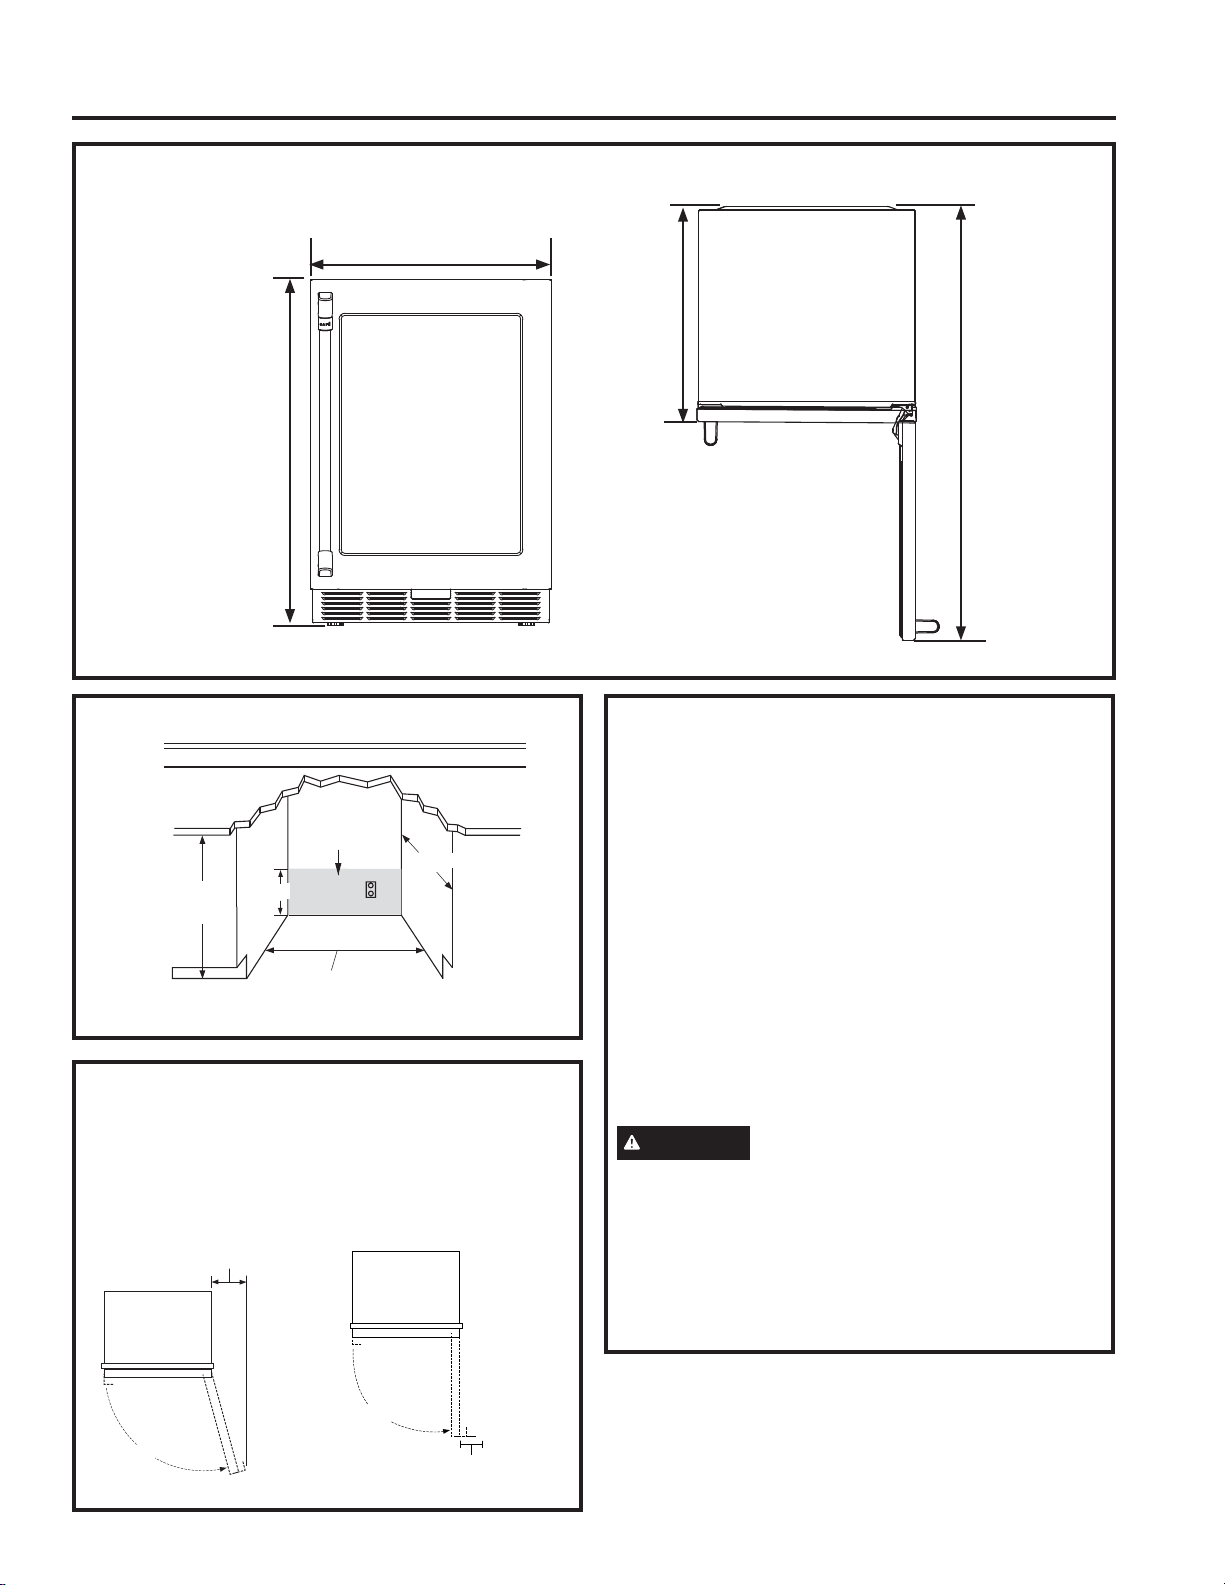
BEVERAGE CENTER DIMENSIONS
Installation Instructions
REMOVE PACKAGING
NOTE: The toekick and door handle (some models)
are included in the packaging which covers the top
of the unit. A wrench for the handle installation is
included in the accessory bag located inside the
beverage center.
• Remove tape and glue residue from surfaces before
turning on the beverage center. Rub a small amount
of liquid dish soap over the adhesive with your
fingers. Wipe with warm water and dry.
NOTE: Do not use sharp instruments, rubbing
alcohol, flammable fluids, or abrasive cleaners to
remove tape or glue. These products can damage
the surface of your beverage center. For more
LQIRUPDWLRQVHH³%HYHUDJH&HQWHU6DIHW\´
• Dispose of/recycle all packaging materials.
WARNING
Small objects are a choke hazard
for children. Remove and discard any parts not
used.
CLEAN BEFORE USING
After you remove all of the packaging materials, clean
the inside of the beverage center before using it. See
WKHFOHDQLQJLQVWUXFWLRQVLQ³%HYHUDJH&HQWHU&DUH´
THE INSTALLATION SPACE
PRODUCT CLEARANCES
When installed in a corner:
$OORZ´FPPLQFOHDUDQFHRQWKHKLQJHVLGHIRU
the 90° door swing and to allow racks to slide out.
$OORZ´FPPLQLPXPFOHDUDQFHRQWKHKLQJH
side for a full 115° door swing.
13" Minimum
to Wall
115°
90° Door Swing
4" Minimum
to Wall
90°
Ǝ
(60.3 cm)
Ǝ
(86.6-89.1 cm)
´RIDGMXVWPHQW
with leveling legs
Ǝ
(59.5 cm)
Ǝ
(119.4 cm)
Locate
Outlet in
Grey Area
34-1/2” - 35”
(87.63 - 88.9 cm)
24” (61.0 cm)
10” (25.4 cm)
Max.
24” (61.0 cm)
Loading ...
Loading ...
Loading ...