Loading ...
Loading ...
Loading ...
31
0.2 L
NOTE: The amount of water you select will be dispensed. Be sure
that the container is empty and can hold the entire volume. If ice is
in the container, you may need to adjust your selection.
IMPORTANT: Low water pressure may affect the accuracy of this
feature.
1. Press MEASURED FILL to turn the feature on. When the
feature is on, the Measured Fill screen appears on the display.
2. To dispense water, press a sturdy glass against the water
dispenser pad or place the glass below the water dispenser
and press the MEASURED FILL button. Hold the glass close
to the water dispenser spout to ensure that the water
dispenses into the glass.
3. The Measured fill button can be pressed to loop the preset
amounts. Each press advances the preset amount until the
end of the options are reached. Example - 8 oz to 16 oz to
24oz, END (0.2L to 0.5L to 1.0L, END).
NOTE:
� The dispenser will automatically turn off Measured Fill after
1 minute of inactivity. When Measured Fill is turned off, any
changes you have made will be lost and all defaults will be
restored.
� Most coffee cups are 4-6 oz (118-117 ml) and are not the same
size as an 8 oz (237 ml) measuring cup. You may need to
adjust the volume to avoid overfilling coffee cups.
� While dispensing water, the digital display will count down how
much water remains to be dispensed, according to the volume
you selected. The flow of water will automatically stop once the
desired volume has been dispensed.
Water Filtration System
Do not use with water that is microbiologically unsafe or of
unknown quality without adequate disinfection before or after the
system. Systems certified for cyst reduction may be used on
disinfected waters that may contain filterable cysts.
Water Filter Status Indicator
The water filter indicator, located on the control panel, will help
you know when to change the water filter.
Replace status:
� Replace the water filter cartridge when the water filter status
display changes to “Replace”.
Replace Overdue status:
� When the light turns red on the control panel, this tells you that
it is time to change the water filter cartridge.
� It is recommended that you replace the filter when the status
light turns red or water flow to your water dispenser or ice
maker decreases noticeably.
NOTE: If water flow to your water dispenser or ice maker
decreases noticeably, change the filter sooner. The filter should be
replaced at least every 6 months, depending on your water quality
and usage.
When dispensing water after the Replace Filter icon is on, the
Replace Filter icon blinks for the duration of dispensing. This
applies for both the Replace Filter status and Replace Overdue
status. Fourteen days after the Replace Filter indicator turns On, it
shall enter "Replace Overdue" mode.
Filter Reset
After changing the filter, press and hold Filter Reset button for
3 seconds. The button will no longer display once reset.
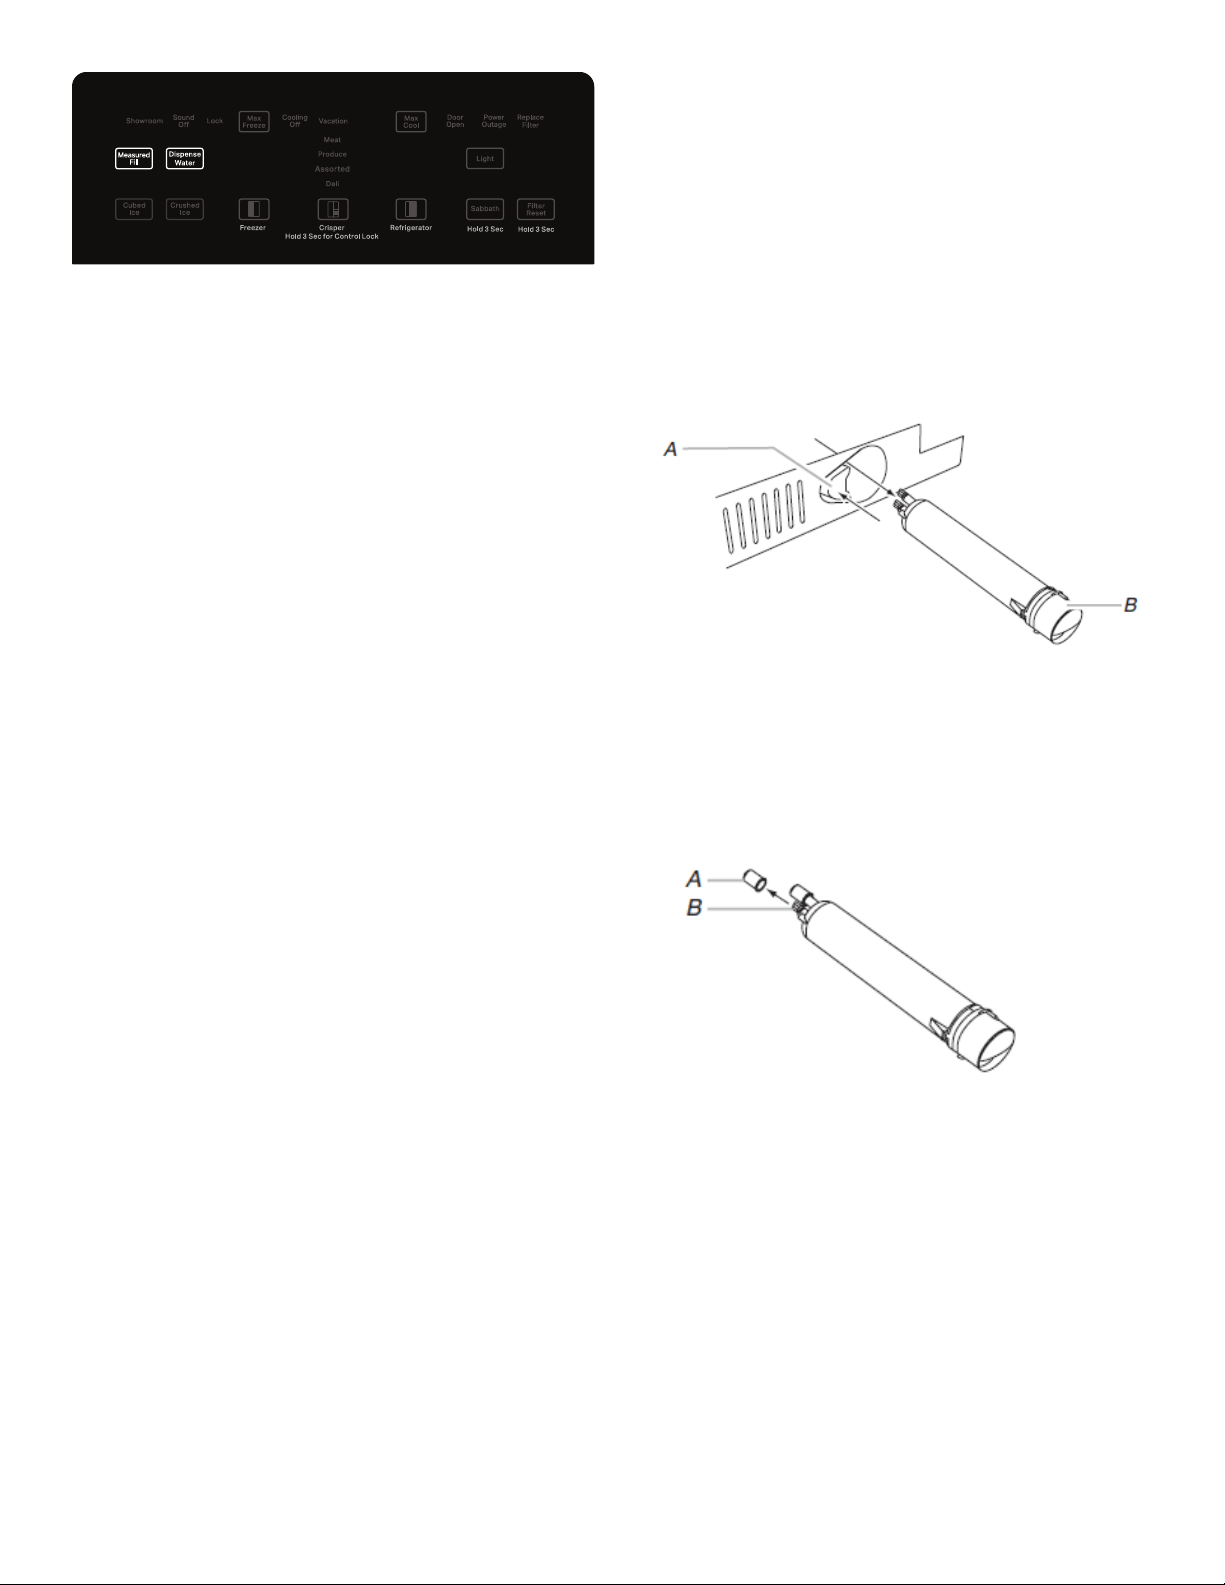
Changing the Water Filter
The water filter is located in the base grille below the freezer
compartment door. It is not necessary to remove the base grille to
remove the filter.
1. Remove the filter by pressing the eject button and pulling
straight out on the filter cap.
NOTE:
� Avoid twisting the cap when removing the filter because
this could cause the cap to come off. If this occurs, replace
the cap and pull the filter straight out.
� There will be water in the filter. Some spilling may occur.
A. Eject button
B. Filter cap
2.
Remove the cap by turning it counterclockwise until it stops.
IMPORTANT: Do not discard the cap. It is part of your refrigerator.
Keep the cap to use with the replacement filter.
3.
Align the ridge on the cap with the arrow on the new filter, and
turn the cap until it snaps into place.
A. Cover
B. O-rings
4.
Remove the covers from the O-rings. Make sure that O-rings
are still in place after the covers are removed.
Loading ...
Loading ...
Loading ...