Loading ...
Loading ...
Loading ...
KNOW YOUR SNOW BLADE
Readthis owner's manual and safety rules before operating your snowblade.
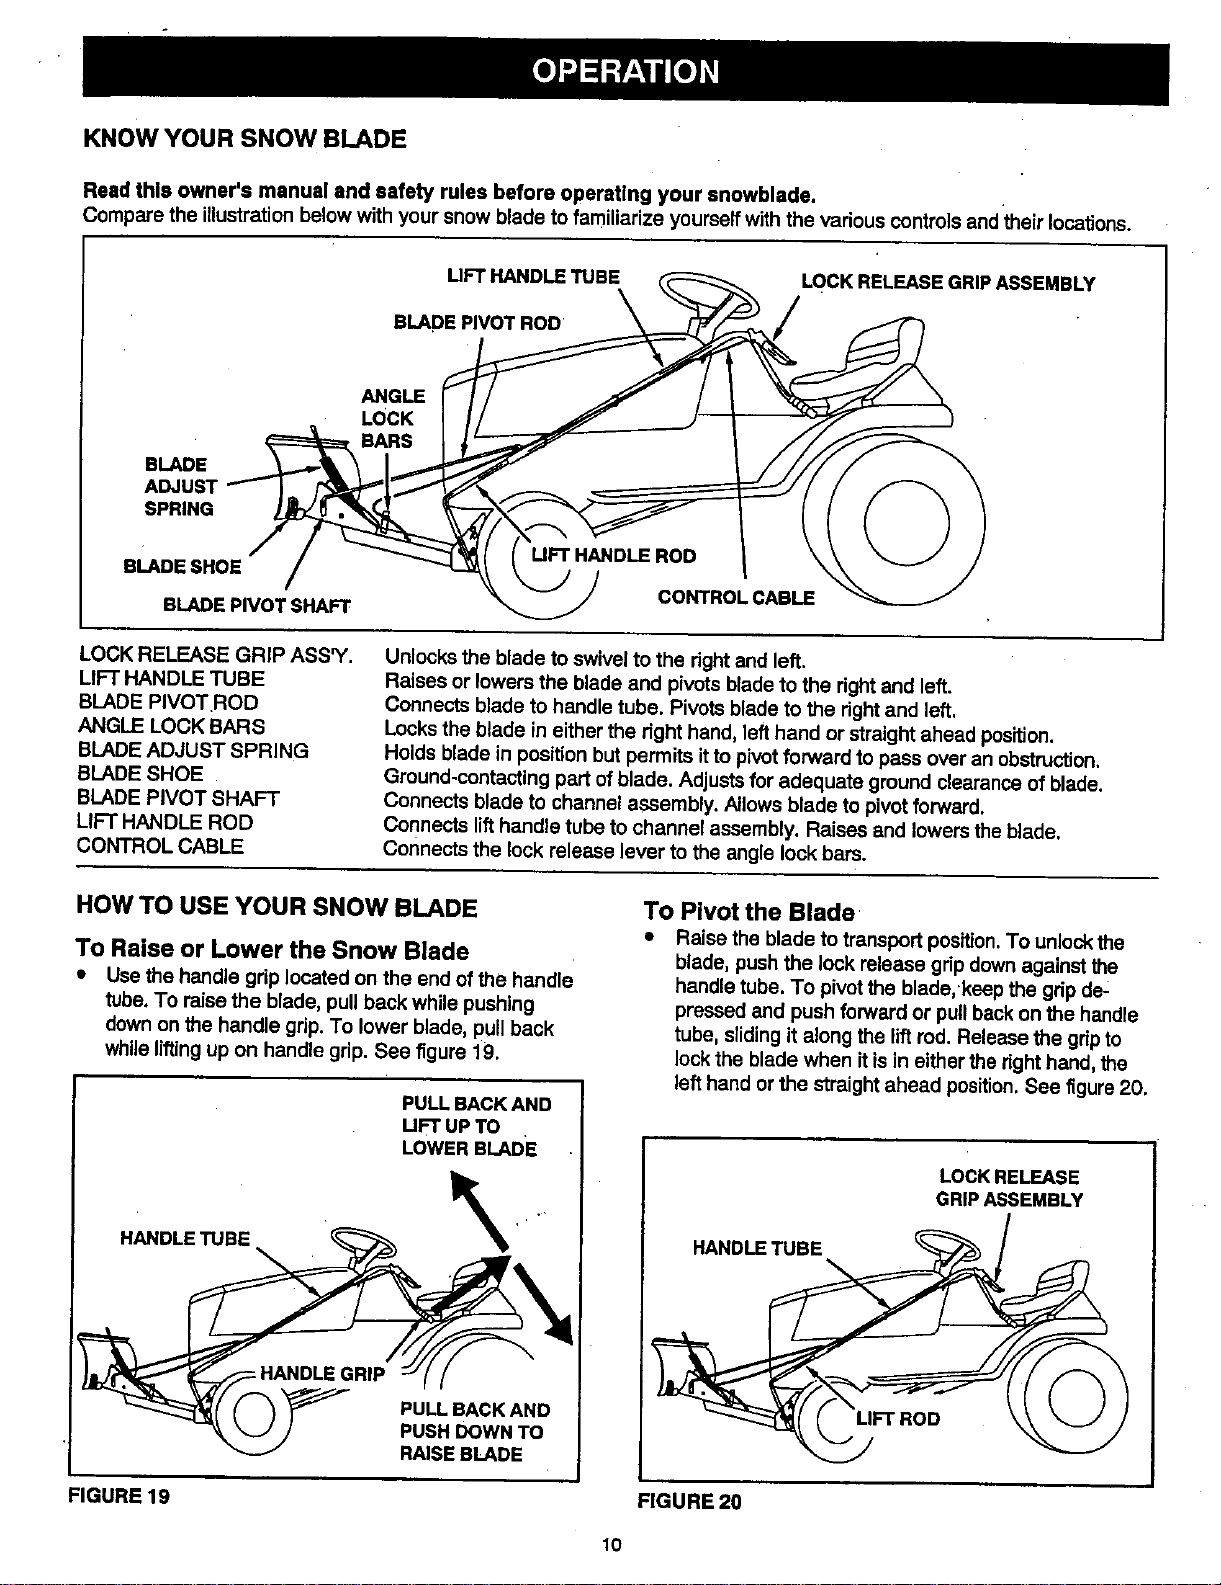
Comparethe illustrationbelowwithyoursnowbladetofamiliarizeyourseffwiththe variouscontrolsandtheirlocations.
UFT HANDLE TUBE
BLADE PIVOT ROD
LOCK RELEASE GRIP ASSEMBLY
BLADE
ADJUST
SPRING
ANGLE
LOCK
BARS
BLADE SHOE
BLADE PIVOT SHAFT
CONTROL CABLE
LOCK RELEASE GRIP ASS_'.
LIFT HANDLE TUBE
BLADE PIVOTROD
ANGLE LOCK BARS
BLADE ADJUST SPRING
BLADE SHOE
BLADE PIVOT SHAFT
LIFT HANDLE ROD
CONTROL CABLE
Unlocks the blade to swivel to the right and left.
Raises or lowers the blade and pivots blade to the right and left.
Connects blade to handle tube. Pivots blade to the dght and left.
Locks the blade in either the dght hand, left hand or straight ahead position.
Holds blade in position but permits itto pivotforward to pass over an obstruction.
Ground-contacting part of blade. Adjusts for adequate ground clearance of blade.
Connects blade to channel assembly. Allows blade to pivot forward.
Connects lift handle tube to channel assembly. Raises and lowers the blade.
Connects the lock release lever to the angle lock bars.
HOW TO USE YOUR SNOW BLADE
To Raise or Lower the Snow Blade
• Use the handle grip located on the end of the handle
tube. To raise the blade, pull back while pushing
down on the handle grip. To lower blade, pull back
whileliftingup on handle grip. See figure 19.
PULL BACK AND
UFT UP TO
LOWER BLADE
FIGURE 19
PULL SACK AND
PUSH DOWN TO
RAISE BLADE
To Pivot the Blade
• Raise the blade to transport position.To unlock the
blade, push the lock release gdp down against the
handle tube. To pivot the blade,keep the gdp de:
pressed and push forward or pull back on the handle
tube, sliding it along the lift rod. Release the gdpto
lock the blade when it isin either the right hand, the
left hand or the straight ahead position. See figure 20.
LOCKRELEASE
GRIP ASSEMBLY
HANDLETUBE
FIGURE 20
10
Loading ...
Loading ...
Loading ...