Loading ...
Loading ...
Loading ...
...... ,,,, ,, i i i
' C. ATTACHING THE BAR AND CHAIN
• Yoursaw is equipped with a Reduced-Kickback
Guide Barand a Low-Kickback Chain,
• Use orily the Reduced,Kickback Guide Bar and
Low.Kickback Chain specified for your chainsaw,
when replacing theseparts, See "Specifications,'
page 2.
ICAUTION: IWear protective gloves when hand-
Ungor operating yoursaw. The chain is sharp and
can-cut you even when it Is not moving! ,
:': -::"/ " "AWARNING ""
J
Avoid accidental starting. Always unplug the saw
from the power source before installing a bar and/or
cllain.
1. Turn .unit upside down on a flat surface,
Straightenoutchain, thenlayiton aflatsurface.
• 2. RemovetheB_rClamp Nuts&BarClampPlate.
Figure12.
3. "PJrn,the AdjustingScrew counterc]ock_/ise to
move the Adjusting Pin almost as far asitwill go
tothe rear.Figure 8. Do not remove Adjusting
Pin from the unit.
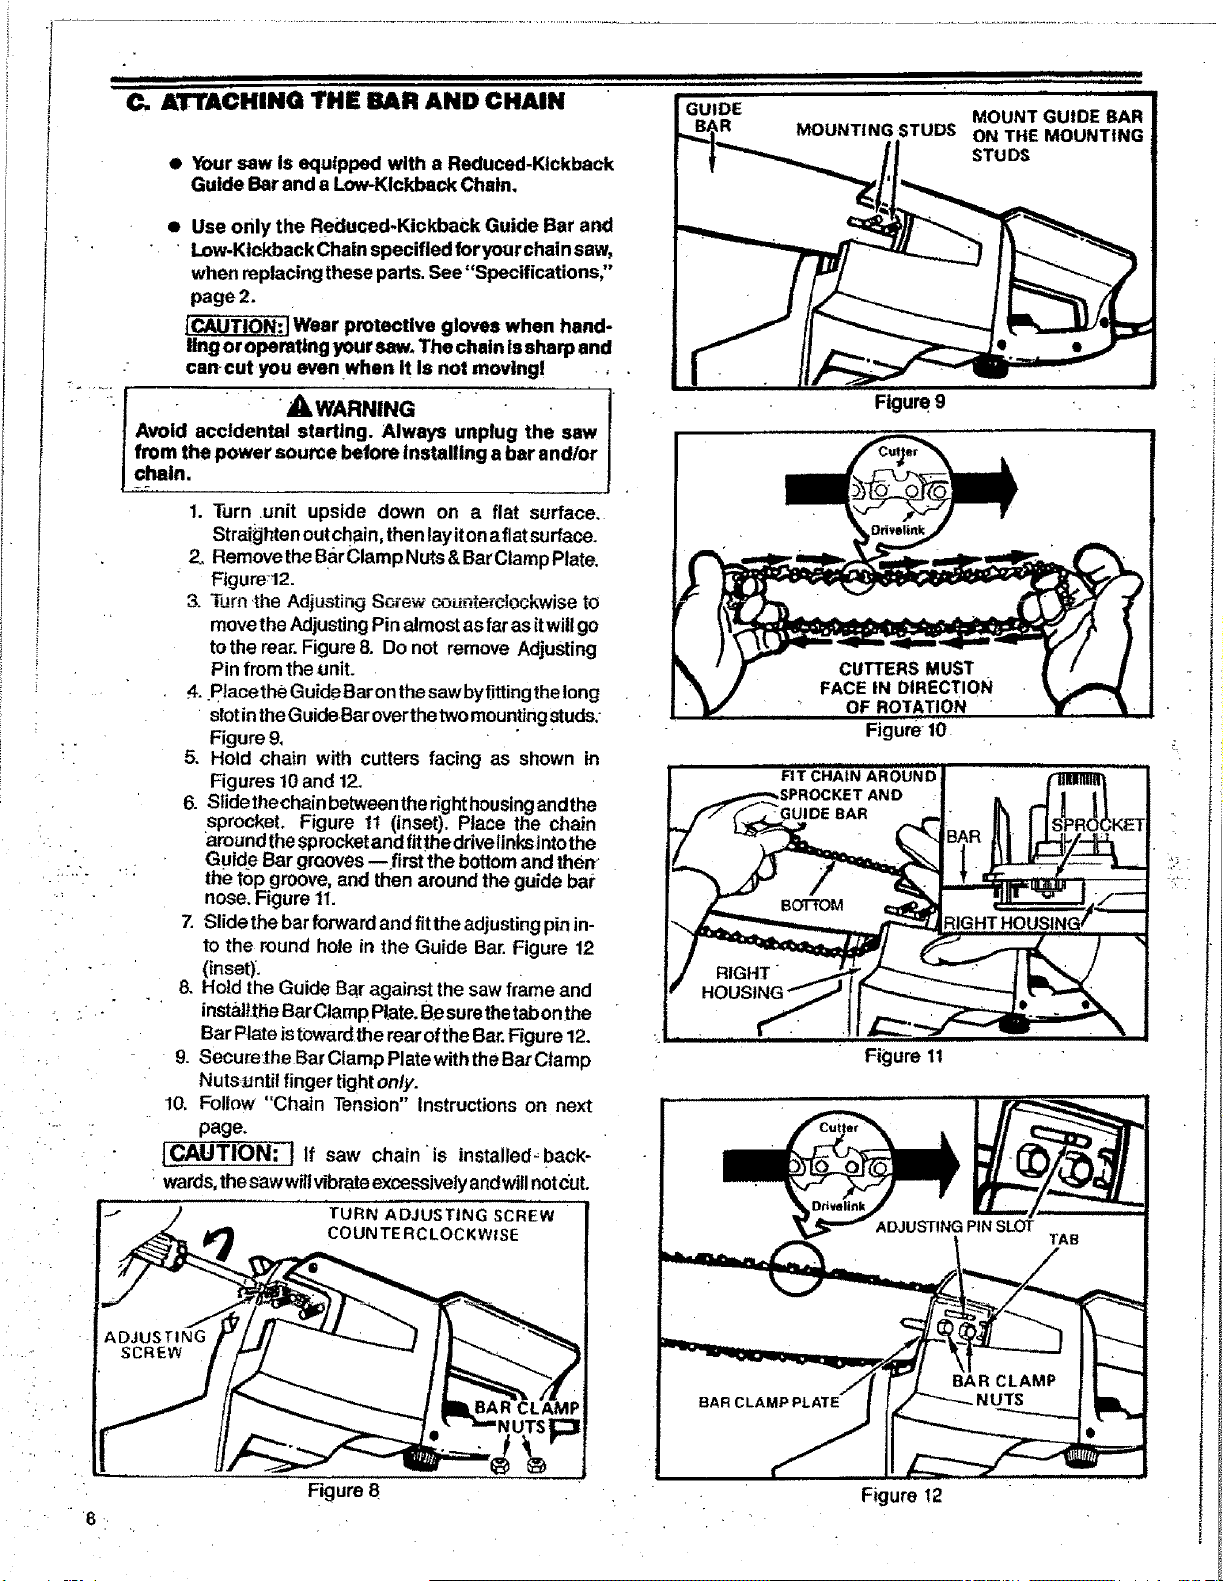
4. placethe GuideBaronthesaw byfittingthe long
slotinthe GuideBaroverthe two moun.tingstuds."
Figure 9.
5. Hold chain with cutters facing as shown in
Figures 10and 12.
6. Slide thechain between theright housing andthe
sprocket. Figure 1t (inset). Place the chain
around the sprocketand fitthedrivelinksintothe
Guidp Bar grooves--first the bottom and then
--- " - the top groove,and then around the guide bar
nose.Figure 11.
7. Slidethe bar forwardand fittheadjusting pinin-
to the round hole in the Guide Bar.Figure 12
(inset).
8. Hold the Guide Bar against the sawframe and
installtheBarClamppiate. Besurethetabonthe
Bar Plateistowardthe rear ofthe Bar.Figure 12.
9. Secure:the Bar ClampPlatewith the Bar Clamp
Nuts:_untitfingertightonly.
10, Follow "Chain Tension" Instructions on next
page.
If saw chain "is installed, back-
wards,thes_wwill vibrate excessivelyandwill notc_t.
TURN ADJUSTING SCREW
COUNTERCLOCKWISE
k
ii I I iiii i,iiil,, i ii iii i
ii " i iiiiii ii i
GUIDE MOUNT GUIDE BAR
R MOUNTINGSTUDS ONTHE MOUNTING
STUDS
Figure 9
CUTTERSMUST .
FACEIN DIRECTION
OF ROTATION
Figure 10
Figure 11
TAB
:i
• !
!
Figure 8
Figure 12
Loading ...
Loading ...
Loading ...