Loading ...
Loading ...
Loading ...
J
J
USING YOUR SAW
ii iii iiiii
A. CONTROl. DEVICES
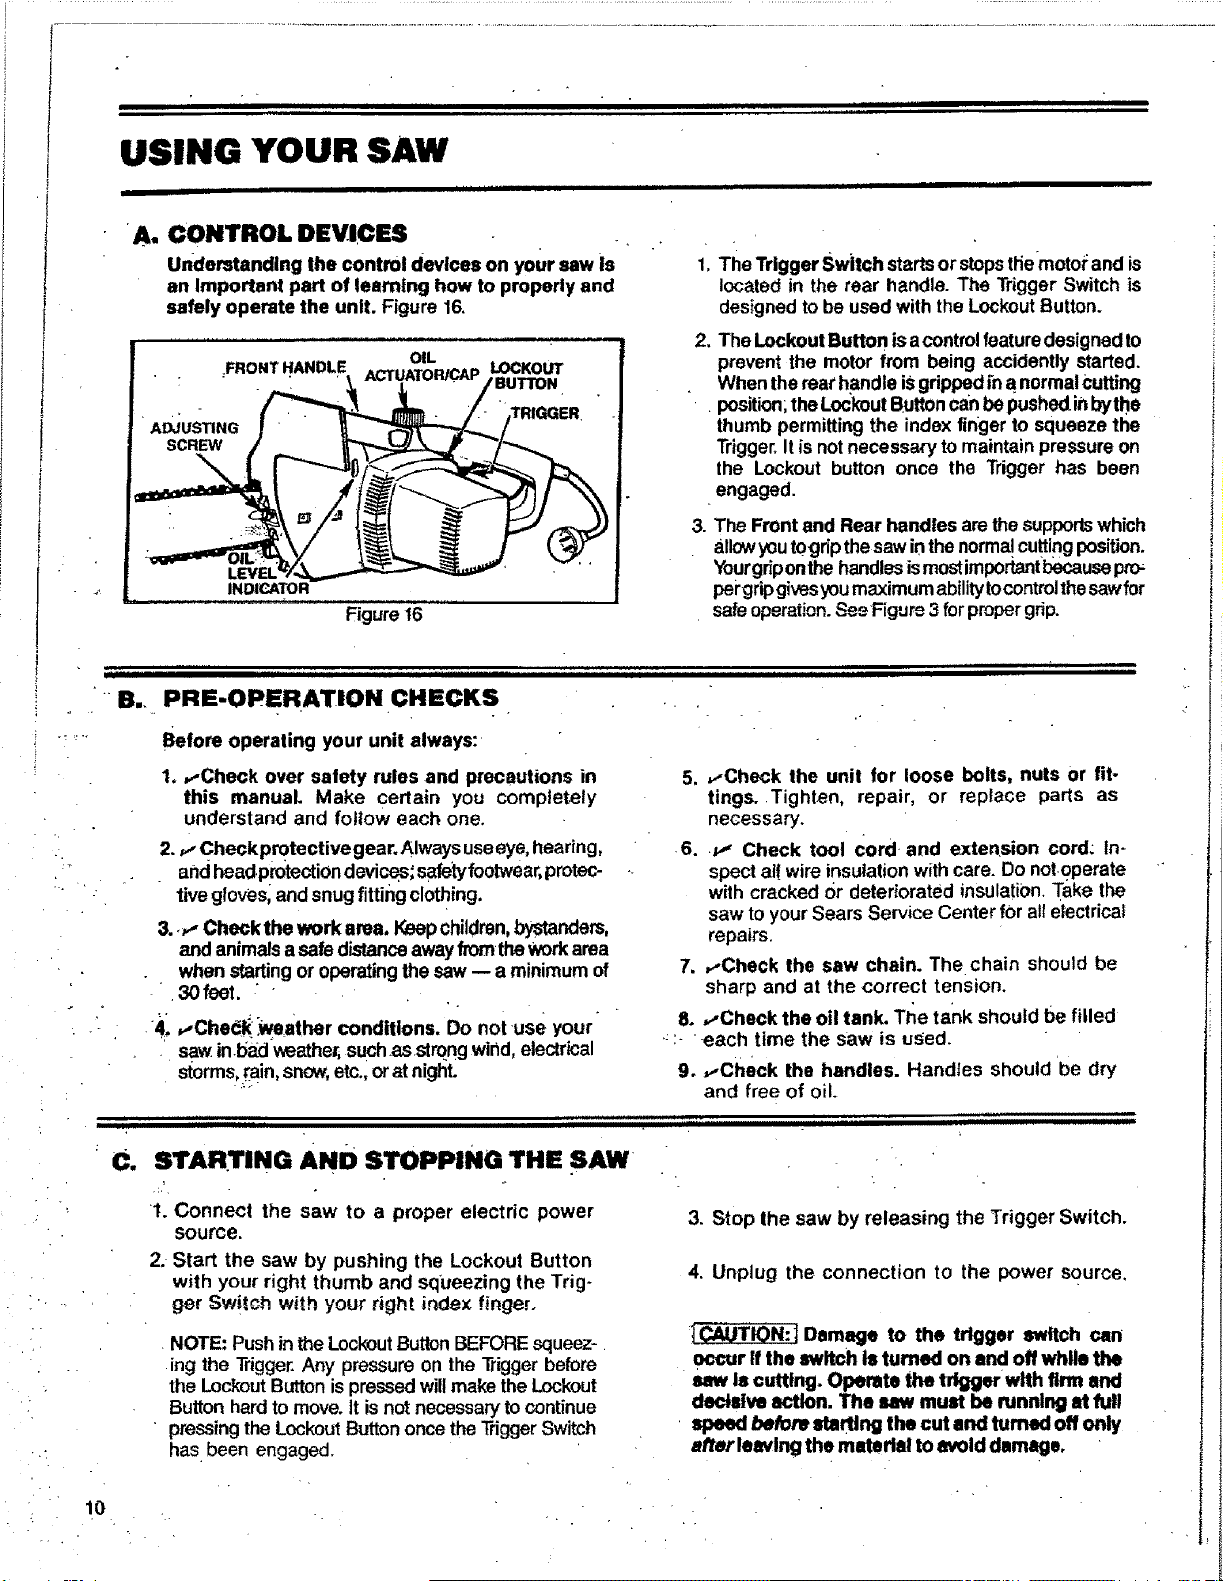
Understanding the control devices on your saw is
an Important part of learning how to properly and
safely operate the unit. Figure 16.
Figuret6
1, The Trigger Sw|tch startsor stopsttiemotoi:and is
located in the rear handle. The Trigger Switch is
designedto be used with the LockoutButton.
2. The LockoutButton isacontrolfeaturedesignedto
prevent the motor from being accidently started.
When therear handle isgrippedin a normalCutting
•position;theLockout Buttoncanbepushed.inbythe
thumb permitting the index finger to squeeze the
Trigger,It isnotnecessa_ rtomaintain pressure on
the Lockout button once the Trigger has been
engaged.
3. The Front and Rear handles arethe supportswhich
allowyoutogripthesaw inthe normal,cuttingposition.
Yourgriponthehandlesismostimportantbecausepro_
pei'gripgivesyoumaximumabilitytocontrol thesawfor
safeoperation.SeeFigum 3 forpropergrip.
iiiiii
= .
iiiiiii ii i i i iiii
PRE-OPERATION CHECKS
Before operating your unit always:
i iiiiiiiiiiiiiiiiiiiiiiiiii
1..,-Check over safety rules and precautions in
this manual. Make certain you completely
understand and follow each one.
2. ,...Checkpmtectivegear. Alwaysuseeye,hearing,
andheadprotectiondevic_, safe,/footwear, protec-
tivegloves,and snugfittingclothing.
3.._- Check the work area, Keepchildren,bystanders,
and animalsa safe distanceawayfrom theworkarea
when startingor operatingthe saw -- a minimumof
•. 30feet. "
4. ,.,Che(_l(:_weather conditions. Do not use your"
saw inbad weather,such.asstrongwind, electrical
dorms, rain,snow,etc.,or atnight.
5, ,.-Check the unit for loose bolts, nuts or fit-
tings. Tighten, repair, or replace parts as
necessary.
6..p- Check tool Cord and extension cord: In-
spect al!wire insulationwith care. Do notoperate
with cracked Ordeteriorated insulation.Take the
saw toyour Sears Serv_e Centerfor altelectrical
repairs.
7. ,.-Check the saw chain. The chain should be
sharp and at the correct tension.
8. ,,-Check the oil tank. Tl_e tank should be filled
'- _-each time the saw is used.
9. ,..Check the handles. Handles should be dry
and free of oil.
ii iiiii iii I ii 1,1,, ,i, HJ ,u,,JJ iillillli i"
C. STARTING AND STOPPING THE SAW
1. Connect the saw to a proper electric power
source.
2. Start the saw by pushing the Lockout Button
with your right thumb and squeezing the Trig-
ger Switch with your right index finger.
NOTE: Push in the LockoutButtonBEFOREsqueez-
ingthe Trigger.Any pressure on the Triggerbefore
the LockoutButtonispressedwillmake theLockout
Button hardto move. it isnot necessary to continue
• pressingtheLockoutButton oncethe "_iggerSwitch
has been engaged.
. ii
3. Stop the saw by releasing the Trigger Switch.
4. Unplug the connection to the power source,
Damage to the trigger switch can
occur If the switch isturned on and off while the
sew is cutting. Operate the trlggerwith firm and
decisive action. The saw must be running at full
speed before starting the cut and turned off only
after leevlng the material to avoid damage.
10
, . L.
Loading ...
Loading ...
Loading ...