Loading ...
Loading ...
Loading ...
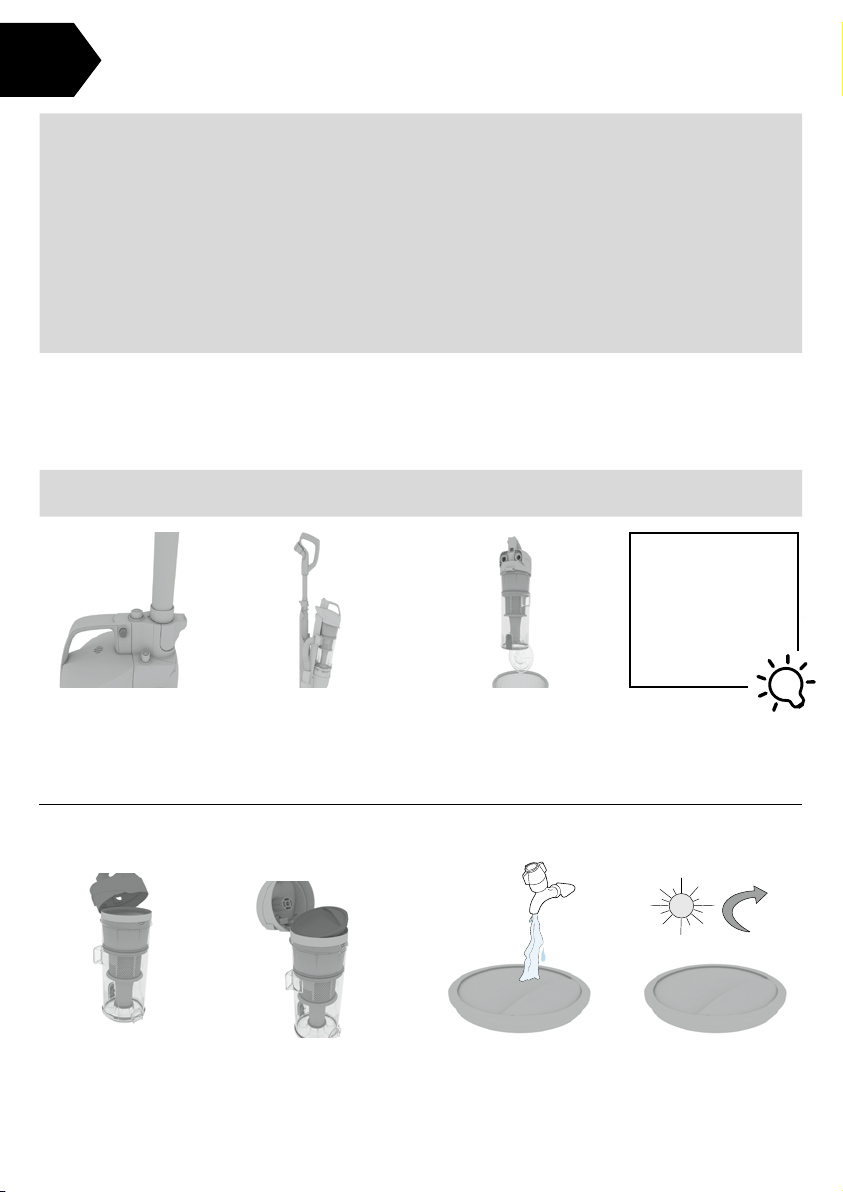
Press the dirt cup
release buttons located
the side of the carry
handle.
Lift the dirt cup lid
release clip. In a hinge
like manor lift the dirt
cup lid.
Tap the filter over a bin
to remove any dirt/
debris. Wash the filter
under running water
(40° C max).
Leave for 24 hrs or
until fully dry before
replacing.
Pull the rinseable and
replaceable filter tab
and remove the filter
from the dirt cup.
Emptying and cleaning the dirt cup
Cleaning the pre-motor filter
Taking care of your machine
For best cleaning results, filters should be tapped over a bin every 4-6 uses to remove dirt and
debris and washed every 3 to 6 months (depending on the level of use). Don’t use your vacuum
cleaner without all of the filters in place.
Pull and remove the
dirt cup o the
vacuum cleaner.
Hold the dirt cup over a
bin, press the dirt release
button to open and allow
the dirt to fall out.
MA
X
40˚C
TIP
To avoid blocking
the air flow through
the vacuum cleaner,
don’t overfill the dirt
cup, and replace
filters every 6-9
months.
24hrs
WARNING: To reduce the risk of personal injury - unplug before cleaning or servicing. Do not
use vacuum without dirt cup or filters in place.
104° F
MAX
NOTICE:
A Thermal Protector has been designed into your cleaner to protect it from overheating.
When the thermal protector activates the cleaner will stop running. If this happens
proceed as follows:
1. Turn cleaner OFF and unplug it from the electrical outlet.
2. Empty the dirt cup.
3. Inspect the nozzle inlet, hose connector, hose, dirt cup inlet, pre-motor filter, and HEPA
filter for any obstructions. Clear obstructions if present.
4. When cleaner is unplugged and motor cools o for 30 minutes, the thermal protector
will deactivate and cleaning may continue.
If the thermal protector continues to activate after following the above steps, your cleaner
needs servicing.
Loading ...
Loading ...
Loading ...