Loading ...
Loading ...
Loading ...
DischargeChute
The angle of the discharge chute controls the distance
that the snow is thrown. Tilt the discharge chute up for
greater distance; tilt down for less distance. Loosen the
hand knob on the side of the discharge chute to adjust.
Tilt the chute to the desired position, and tighten the
knob.
ChokeLever
The location of the choke lever is indicated in Figure 5
inset. You will have to use this lever to start the engine.
Push the lever all the way up to the FULL/ON position,
or all the way down to the OFF position as desired.
PrimerButton
Used to inject fuel directly into the carburetor to insure
fast starts in cold weather. Follow engine manual to
prime engine.
Ignition Key
Used to start engine. Put key in "ON" position to start
for both electric and recoil start engines. Follow starting
instructions given in the next section.
RecoilStarter
Used to manually start the engine.
ElectricStarter
Used to start engine with a 120V power source
Plugfor ElectricStart
Requires use of a three-prong outdoor extension cord
and a 120V power source
SparkPlugAccess
Spark plug located under the access cover.
SECTION4: OPERATINGYOURSNOWTHROWER
BeforeStarting
,_ WARNING: Read, understand, and follow all
instructions and warnings on the machine and
in this manual before operating.
• The spark plug wire was disconnected for safety.
Attach spark plug wire to spark plug before starting.
GasandOilFill-Up
• Check oil and gasoline level and add if necessary.
Follow related instructionsin the seperate engine
manual packed with your snow thrower.
,i_ WARNING: Use extreme care when
handling gasoline. Gasoline isextremely
flammable and the vapors are explosive. Never
fuel the machine indoors or while the engine is
hot or running. Extinguish cigarettes, cigars,
pipes and other sources of ignition.
ToStartEngine
• Insert ignition key into slot. Turn key to ON position.
• Now follow the instructions below as it pertains to
your unit. See Figure 6 for location of controls.
Electric Starter
4_ WARNING: The electric starter must be
used with a properly grounded three-prong
receptacle at all times to avoid the possibility of
electric shock. Follow all instructions carefully
prior to operating the electric starter.
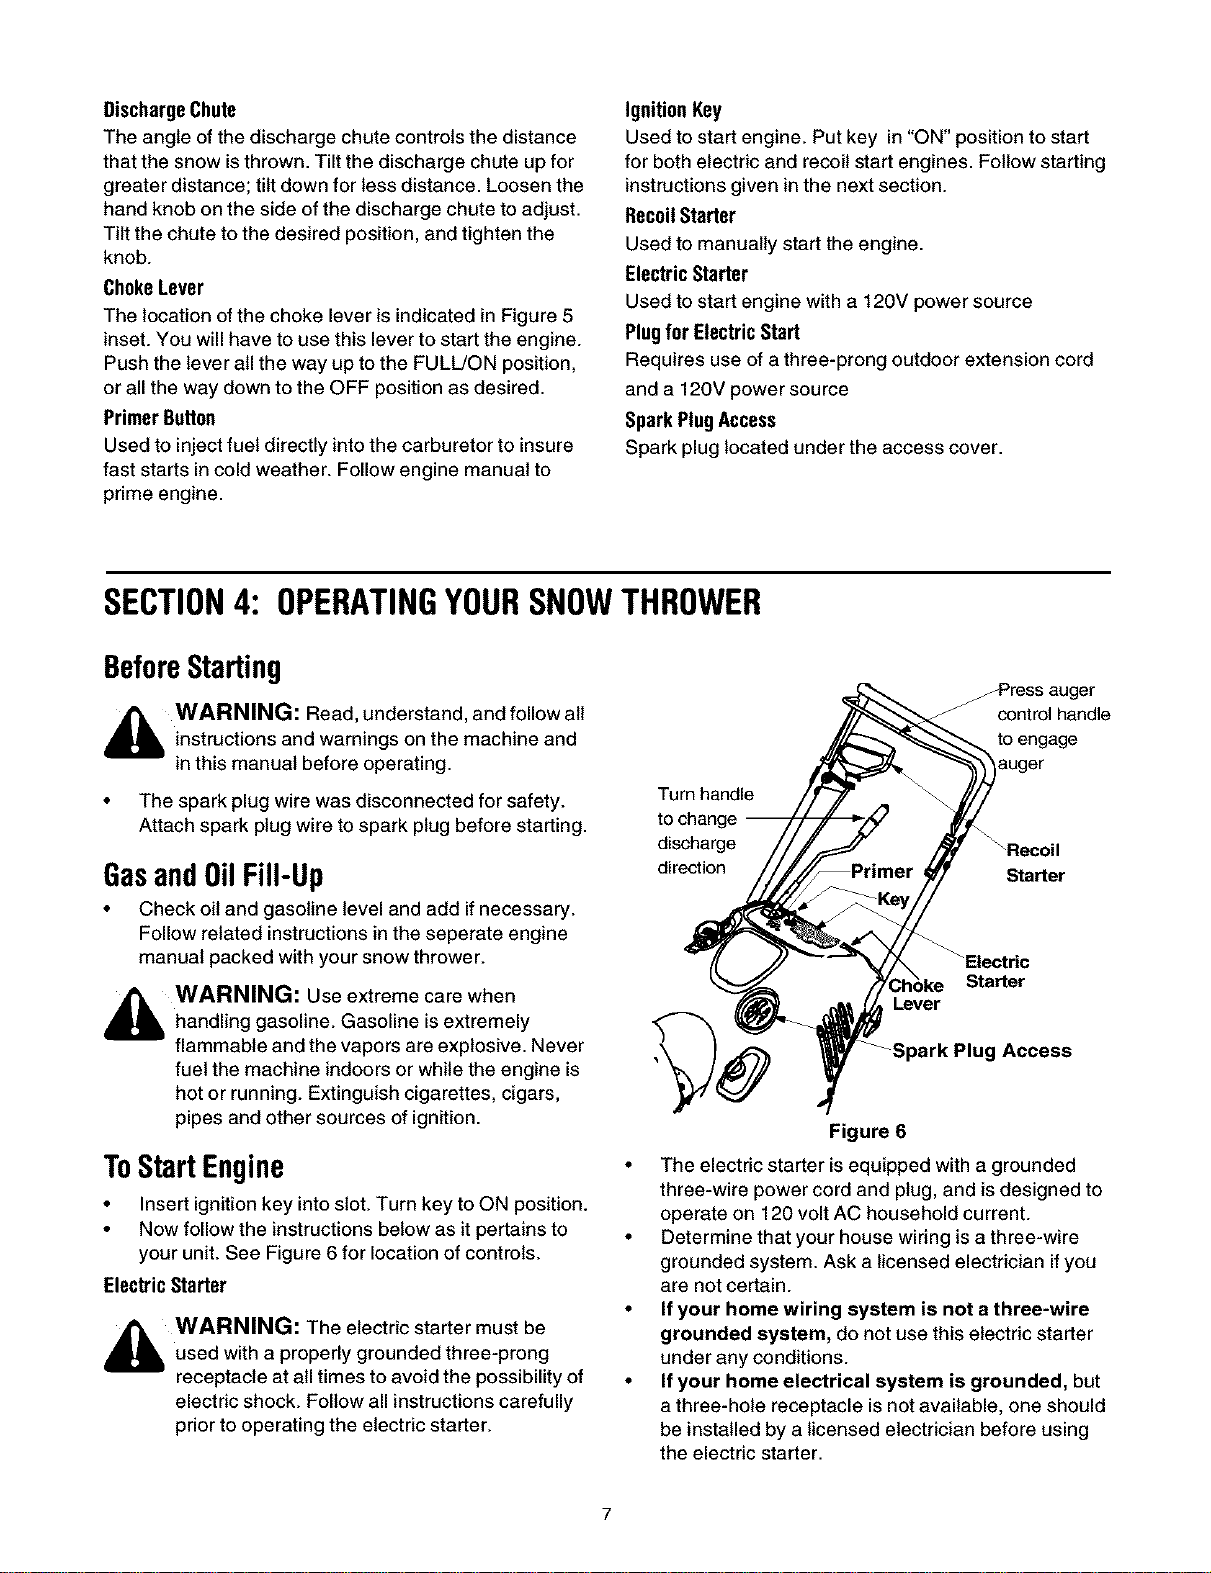
_ress auger
control handle
to engage
auger
Turn handle
to change
discharge _Recoil
direction Starter
_Electric
Starter
Lever
Access
Figure 6
• The electric starter is equipped with a grounded
three-wire power cord and plug, and isdesigned to
operate on 120 volt AC household current.
• Determine that your house wiring is a three-wire
grounded system. Ask a licensed electrician if you
are not certain.
• If your home wiring system is not a three-wire
grounded system, do not use this electric starter
under any conditions.
• If your home electrical system is grounded, but
a throe-hole receptacle isnot available, one should
be installed by a licensed electrician before using
the electric starter.
Loading ...
Loading ...
Loading ...