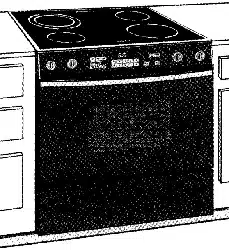
JENN-AIR ELECTRIC SMOOTHTOP
DOWNDRAFT SLIDE-IN RANGE
i¸¸i_i¸¸i_i¸¸i_i¸¸i_i¸¸i_i¸¸i_i¸¸i_i¸¸i_i¸¸i_i¸¸i_i¸¸i_i¸¸i_i¸¸i_i¸¸i_i¸¸i_i¸¸i_i¸¸i_i¸¸i_i¸¸i_i¸¸i_i¸¸i_i¸¸i_i¸¸i_i¸¸i_i¸¸i_i¸¸i_i¸¸i_i¸¸i_i¸¸i_i¸¸i_i¸¸i_i¸¸i_i¸¸i_i¸¸i_i¸¸i_i¸¸i_i¸¸i_i¸¸i_i¸¸i_i¸¸i_i¸¸i_i¸¸i_i¸¸i_i¸¸i_i¸¸i_i¸¸i¸i¸¸i¸i¸¸i¸i¸¸i¸i¸¸i¸i¸¸i¸i¸¸i¸i¸¸i¸i¸¸i¸i¸¸i¸i¸¸i¸i¸¸i¸i¸¸i¸i¸¸i¸i¸¸i¸i¸¸i¸i¸¸i¸i¸¸i¸i¸¸i¸i¸¸i¸i¸¸i¸i¸¸i¸i¸¸i¸i¸¸i¸i¸¸i¸i¸¸i¸i¸¸i¸i¸¸i¸i¸¸i¸i¸¸i¸i¸¸i¸i¸¸i¸i¸¸i¸i¸¸i¸i¸¸i¸i¸¸i¸i¸¸i¸i¸¸i¸i¸¸i¸i¸¸i¸i¸¸i¸i¸¸i¸i¸¸i¸i¸¸i¸i¸¸i¸i¸¸i¸i¸¸i¸i¸¸i¸i¸¸i¸i¸¸i¸i¸¸i¸i¸¸i¸i¸¸i¸i¸¸i¸i¸¸i¸i¸¸i¸i¸¸i¸i¸¸i¸i¸¸i¸i¸¸i¸i¸¸i¸i¸¸i¸i¸¸i¸i¸¸i¸i¸¸i¸i¸¸i¸i¸¸i¸i¸¸i¸i¸¸i¸i¸¸i¸i¸¸i¸i¸¸i¸i¸¸i¸i¸¸i¸i¸¸i¸i¸¸i¸i¸¸i¸i¸¸i¸i¸¸i¸i¸¸i¸i¸¸i¸i¸¸i¸i¸¸i¸i¸¸i¸i¸¸i¸i¸¸i¸i¸¸i¸i¸¸i¸i¸¸i¸i¸¸i¸i¸¸i¸i¸¸i¸i¸¸il¸_i_i_i_i_i_i_i_i_i_i_i_i_i_i_i_i_i_i_i_i_i_i_i_i_i_i_i_i_i_i_i_i_i_i_i_i_i_i_i_i_i_i_i_i_i_i_i_i_i_i_i_i_i_i_i____i
TABLE OF CONTENTS
Important Safety Instructions .....................................1-3
Ducting Information ...........................................................4
Care & Cleaning ..............................................................4-7
Maintenance .....................................................................7-8
Troubleshooting ...........................................................9-10
Surface Cooking .........................................................11-14
Oven Cooking ..............................................................15-21
Options ..........................................................................22-26
Favorites ...............................................................................27
Setup ..............................................................................28-30
Accessories .........................................................................30
Warranty & Service ...........................................................31
Guide d'utilisation et d'entretien .................................32
Gufa de uso y cuidado ....................................................64
JENN-AIR
Form No. A/10/05 Part No. 8113P528 60
@2005 Maytag Appliances Sales Co.
Litho U.S.A.
or replace any part of your appliance unless it is
specifically recommended in this guide. All other
servicing should be referred to a qualified servicer.
Always disconnect power to appliance before servicing.
General instructions
M
RTANT SAFETY
NSTR
Warning and Important Safety Instructions appearing in
this guide are not meant to cover all possible conditions
and situations that may occur. Common sense, caution,
and care must be exercised when installing,
maintaining, or operating the appliance.
Always contact the manufacturer about problems or
conditions you do not understand.
Recognize Safety Symbols, Wo s, Labels
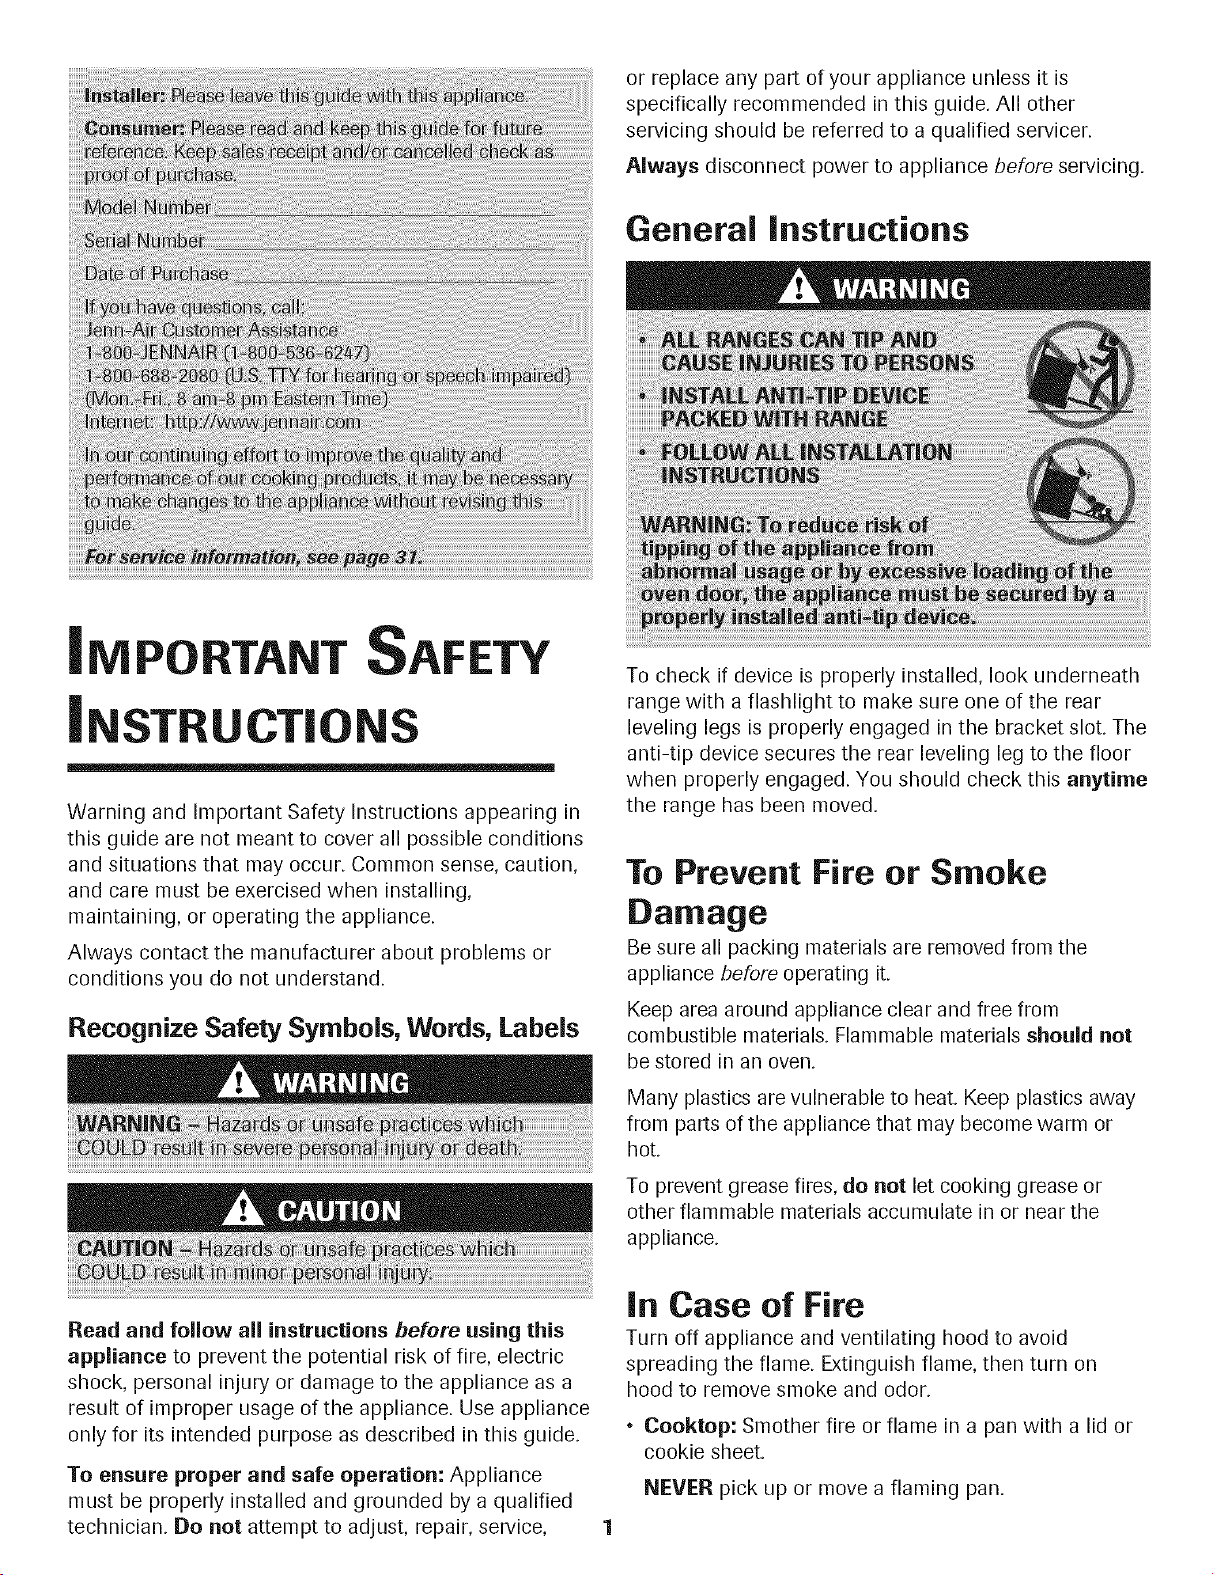
To check if device is properly installed, look underneath
range with a flashlight to make sure one of the rear
leveling legs is properly engaged in the bracket slot. The
anti-tip device secures the rear leveling leg to the floor
when properly engaged. You should check this anytime
the range has been moved.
To Prevent Fire or Smoke
Damage
Be sure all packing materials are removed from the
appliance before operating it.
Keep area around appliance clear and free from
combustible materials. Flammable materials should not
be stored in an oven.
Many plastics are vulnerable to heat. Keep plastics away
from parts of the appliance that may become warm or
hot.
To prevent grease fires, do not let cooking grease or
other flammable materials accumulate in or near the
appliance.
Read and follow all instructions before using this
appliance to prevent the potential risk of fire, electric
shock, personal injury or damage to the appliance as a
result of improper usage of the appliance. Use appliance
only for its intended purpose as described in this guide.
To ensure proper and safe operation: Appliance
must be properly installed and grounded by a qualified
technician. Do not attempt to adjust, repair, service,
In Case of Fire
Turn off appliance and ventilating hood to avoid
spreading the flame. Extinguish flame, then turn on
hood to remove smoke and odor.
* Cooktop: Smother fire or flame in a pan with a lid or
cookie sheet.
NEVER pick up or move a flaming pan.
Oven:Smotherfire orflamebyclosingthe ovendoor.
Do not usewaterongreasefires.Usebakingsoda,a
drychemicalorfoam-typeextinguisherto smotherfire
orflame.
Child Safety
NEVER leave children alone or unsupewised near the
appliance when it is in use or is still hot. Children
should never be allowed to sit or stand on any part of
the appliance as they could be injured or burned.
Children must be taught that the appliance and utensils
in it can be hot. Let hot utensils cool in a safe place, out
of reach of small children. Children should be taught
that an appliance is not a toy. Children should not be
allowed to play with controls or other parts of the
appliance.
About Your Appliance
To prevent potential hazard to the user and damage to
the appliance, do not use appliance as a space heater to
heat or warm a room. Also, do not use the oven as a
storage area for food or cooking utensils.
Do not obstruct the flow of air by blocking theoven vent.
DO NOT TOUCH HEATING ELEMENTS OR INTERIOR
SURFACES OF OVEN. Heating elements may be hot even
though they are dark in color. Interior surfaces of any
oven become hot enough to cause burns. During and
after use, do not touch, or let clothing or other flammable
materials contact heating elements or interior surfaces of
oven until they have had sufficient time to cool. Other
surfaces of the appliance may become hot enough to
cause burns - among these surfaces are: oven vent
opening and surface near this opening, oven door and
window of oven door.
Do not touch a hot oven light bulb with a damp cloth as
the bulb could break. Should the bulb break, disconnect
power to the appliance before removing bulb to avoid
electrical shock.
NEVER use aluminum foil to cover an oven rack or oven
bottom. Misuse could result in risk of electric shock, fire,
or damage to the appliance. Use foil only as directed in
this guide.
Cooking Safety
Never heat an unopened food container in the oven.
Pressure build-up may cause container to burst
resulting in serious personal injury or damage to the
appliance.
Use dry, sturdy potholders. Damp potholders may cause
burns from steam. Dish towels or other substitutes
should never be used as potholders because they can
trail across hot elements and ignite or get caught on
appliance parts.
Wear proper apparel. Loose fitting or long hanging-
sleeved apparel should not be worn while cooking.
Clothing may ignite and cause burns if garment comes
in contact with heating elements.
Always place oven racks in the desired positions while
oven is cool. Slide oven rack out to add or remove food,
using dry, sturdy potholders. Always avoid reaching into
the oven to add or remove food. If a rack must be
moved while hot, use a dry potholder. Do not let
potholder contact hot element in oven.
Use racks only in the oven in which they were shipped/
purchased.
Use care when opening the oven door. Let hot air or
steam escape before removing or replacing food.
PREPARED FOOD WARNING: Follow food
manufacturer's instructions. If a plastic frozen food
container and/or its cover distorts, warps, or is otherwise
damaged during cooking, immediately discard the food
and its container. The food could be contaminated.
Do not allow aluminum foil or meat probe to contact
heating element.
Always turn off all controls when cooking is completed.
Utensil Safety
Follow the manufacturer's directions when using oven
cooking bags.
This appliance has been tested for safe performance
using conventional cookware. Do not use any devices
or accessories that are not specifically recommended in
this guide. Do not use add-on oven convection systems.
The use of devices or accessories that are not expressly
Cont.
recommended in this guide can create serious safety
hazards, result in performance problems, and reduce the
life of the components of the appliance.
If pan is smaller than element, a portion of the element
will be exposed to direct contact and could ignite
clothing or potholder.
Only certain types of glass, glass/ceramic, ceramic,
earthenware, or other glazed utensils are suitable for
cooktop or oven service without breaking due to the
sudden change in temperature. Follow utensil
manufacturer's instructions when using glass.
Turn pan handle toward center of cooktop, not out into
the room or over another surface element. This reduces
the risk of burns, ignition of flammable materials, or
spillage if pan is accidently bumped or reached by small
children.
Cooktop
NEVER leave surface units unattended, especially when
using high heat. An unattended boilover could cause
smoking and a greasy spillover can cause a fire.
This appliance is equipped with different size surface
elements. Select pans with flat bottoms large enough to
cover element. Fitting pan size to element will improve
cooking efficiency.
GLASS-CERAMIC SURFACE: NEVER cook on broken
cooktop. If cooktop should break, cleaning solutions and
spillovers may penetrate the broken cooktop and create
a risk of electric shock. Contact a qualified technician
immediately.
Deep Fat Fryers
Use extreme caution when moving the grease pan or
disposing of hot grease. Allow grease to cool before
attempting to move pan.
Ventilating Hoods
Clean range hood and filters frequently to prevent grease
or other flammable materials from accumulating on hood
or filter and to avoid grease fires.
When flaming foods under the hood, turn the fan on.
Cleaning Safety
Clean cooktop with caution. Turn off all controls and wait
for appliance parts to cool before touching or cleaning.
Use care to avoid steam burns if a wet sponge or cloth is
used to wipe spills on a hot surface. Some cleaners can
produce noxious fumes if applied to a hot surface.
Clean only parts listed in this guide.
Self-Clean Oven
Do not clean door gasket. The door gasket is essential
for a good seal. Care should be taken not to rub,
damage, or move the gasket.
Do not use oven cleaners or oven liners of any kind in or
around any part of the self-clean oven.
Important Safety Notice
and Warning
The California Safe Drinking Water and Toxic
Enforcement Act of 1986 (Proposition 65) requires the
Governor of California to publish a list of substances
known to the State of California to cause cancer or
reproductive harm, and requires businesses to warn
customers of potential exposures to such substances.
Users of this appliance are hereby warned that when the
oven is engaged in the self-clean cycle, there may be
some low-level exposure to some of the listed sub-
stances, including carbon monoxide. Exposure to these
substances can be minimized by properly venting the
oven to the outdoors by opening the windows and/or
door in the room where the appliance is located during
the self-clean cycle.
IMPORTANT NOTICE REGARDING PET BIRDS: Never
keep pet birds in the kitchen or in rooms where the
fumes from the kitchen could reach. Birds have a very
sensitive respiratory system. Fumes released during an
oven self-cleaning cycle may be harmful or fatal to birds.
Fumes released due to overheated cooking oil, fat,
margarine and overheated non-stick cookware may be
equally harmful.
Save These instructions for Future Reference
3
DUCT|NG |NFORNIAT|ON
Jenn-Air's ventilation system is designed to capture both
cooking fumes and smoke from the cooktop surface. If the
system does not, here are some ducting installation situations
to check:
• 6" diameter round or 3 W' x 10" rectangular ducting should
be used for duct lengths 10'-60'.
Important: 5" diameter round ducting may be used if the
duct length is 10' or less.
• No more than three 90° elbows should be used. Distance
between elbows should be at least 18".
° Recommended Jenn-Air wall cap MUSTbe used. Make
sure damper moves freely when ventilation system is
operating.
° There should be a minimum clearance of 6" for cooktop
installed near a side wall.
If there is not an obvious improper installation, there may be a
concealed problem such as a pinched joint, obstruction in the
pipe, etc. Installation is the responsibility of the
installer and questions should be addressed
first by the installer. The installer should very
carefully check the ducting installation instruc-
tions.
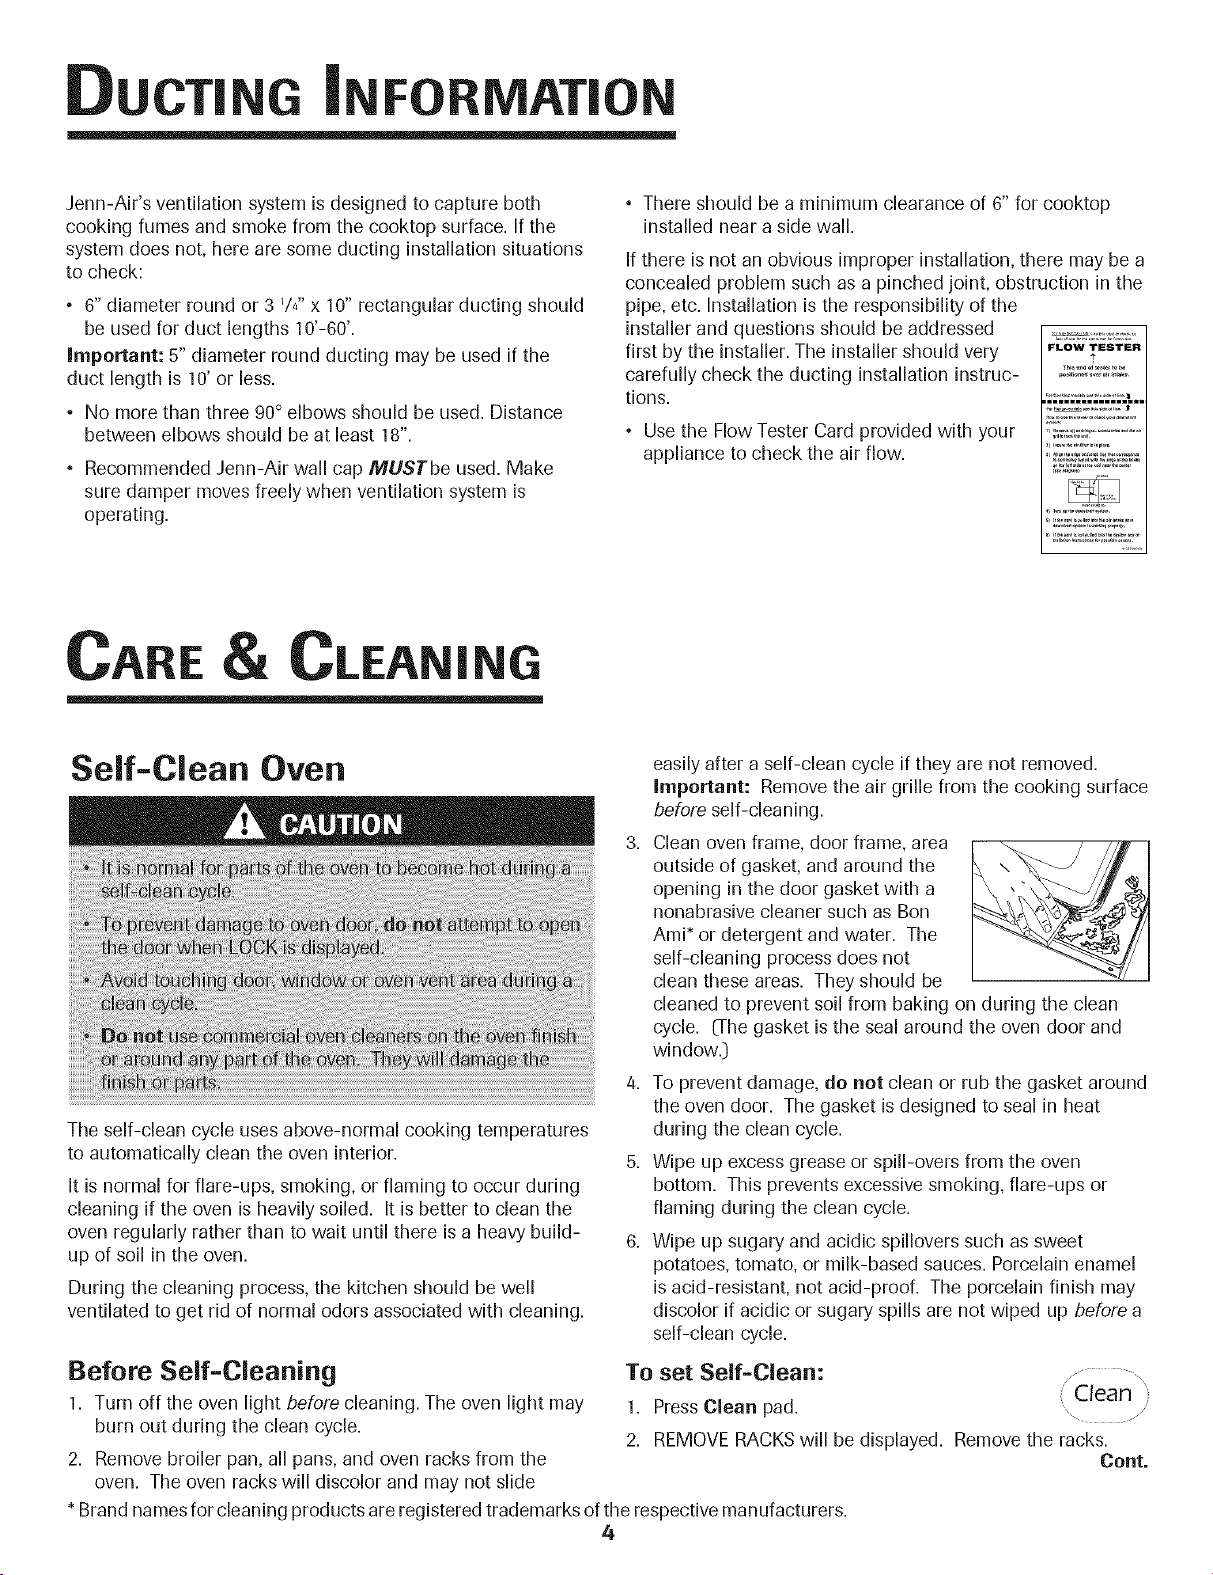
• Use the Flow Tester Card provided with your
appliance to check the air flow.
FLOW TESTER
t
CARE CLEANING
Self-Clean Oven
easily after a self-clean cycle if they are not removed.
Important: Remove the air grille from the cooking surface
before self-cleaning.
3, Clean oven frame, door frame, area
outside of gasket, and around the
opening in the door gasket with a
nonabrasive cleaner such as Ban
Ami* or detergent and water. The
self-cleaning process does not
clean these areas. They should be
cleaned to prevent soil from baking on during the clean
cycle. (The gasket is the seal around the oven door and
window.)
The self-clean cycle uses above-normal cooking temperatures
to automatically clean the oven interior.
It is normal for flare-ups, smoking, or flaming to occur during
cleaning if the oven is heavily soiled. It is better to clean the
oven regularly rather than to wait until there is a heavy build-
up of soil in the oven.
During the cleaning process, the kitchen should be well
ventilated to get rid of normal odors associated with cleaning.
4. To prevent damage, do not clean or rub the gasket around
the oven door. The gasket is designed to seal in heat
during the clean cycle.
5. Wipe up excess grease or spill-overs from the oven
bottom. This prevents excessive smoking, flare-ups or
flaming during the clean cycle.
6. Wipe up sugary and acidic spillovers such as sweet
potatoes, tomato, or milk-based sauces. Porcelain enamel
is acid-resistant, not acid-proof. The porcelain finish may
discolor if acidic or sugary spills are not wiped up before a
self-clean cycle.
Before Self=Cleaning
1. Turn off the oven light before cleaning. The oven light may
burn out during the clean cycle.
2. Remove broiler pan, all pans, and oven racks from the
oven. The oven racks will discolor and may not slide
To set Self=Clean:
Clean
1. PressClean pad.
2. REMOVERACKS will be displayed. Remove the racks.
Cant.
* Brand names for cleaning products are registered trademarks of the respective manufacturers.
4
3. Select CONTINUE using the Quickset pad. The Quickset
pads are located on either side of the control panel
display.
4. Set LIGHT soil level by entering 200 using the number
pads for two hours of cleaning time. Select MEDIUM soil
level using the Quickset pads.
OR
Select HEAVY for a heavily soiled oven and four hours of
cleaning time.
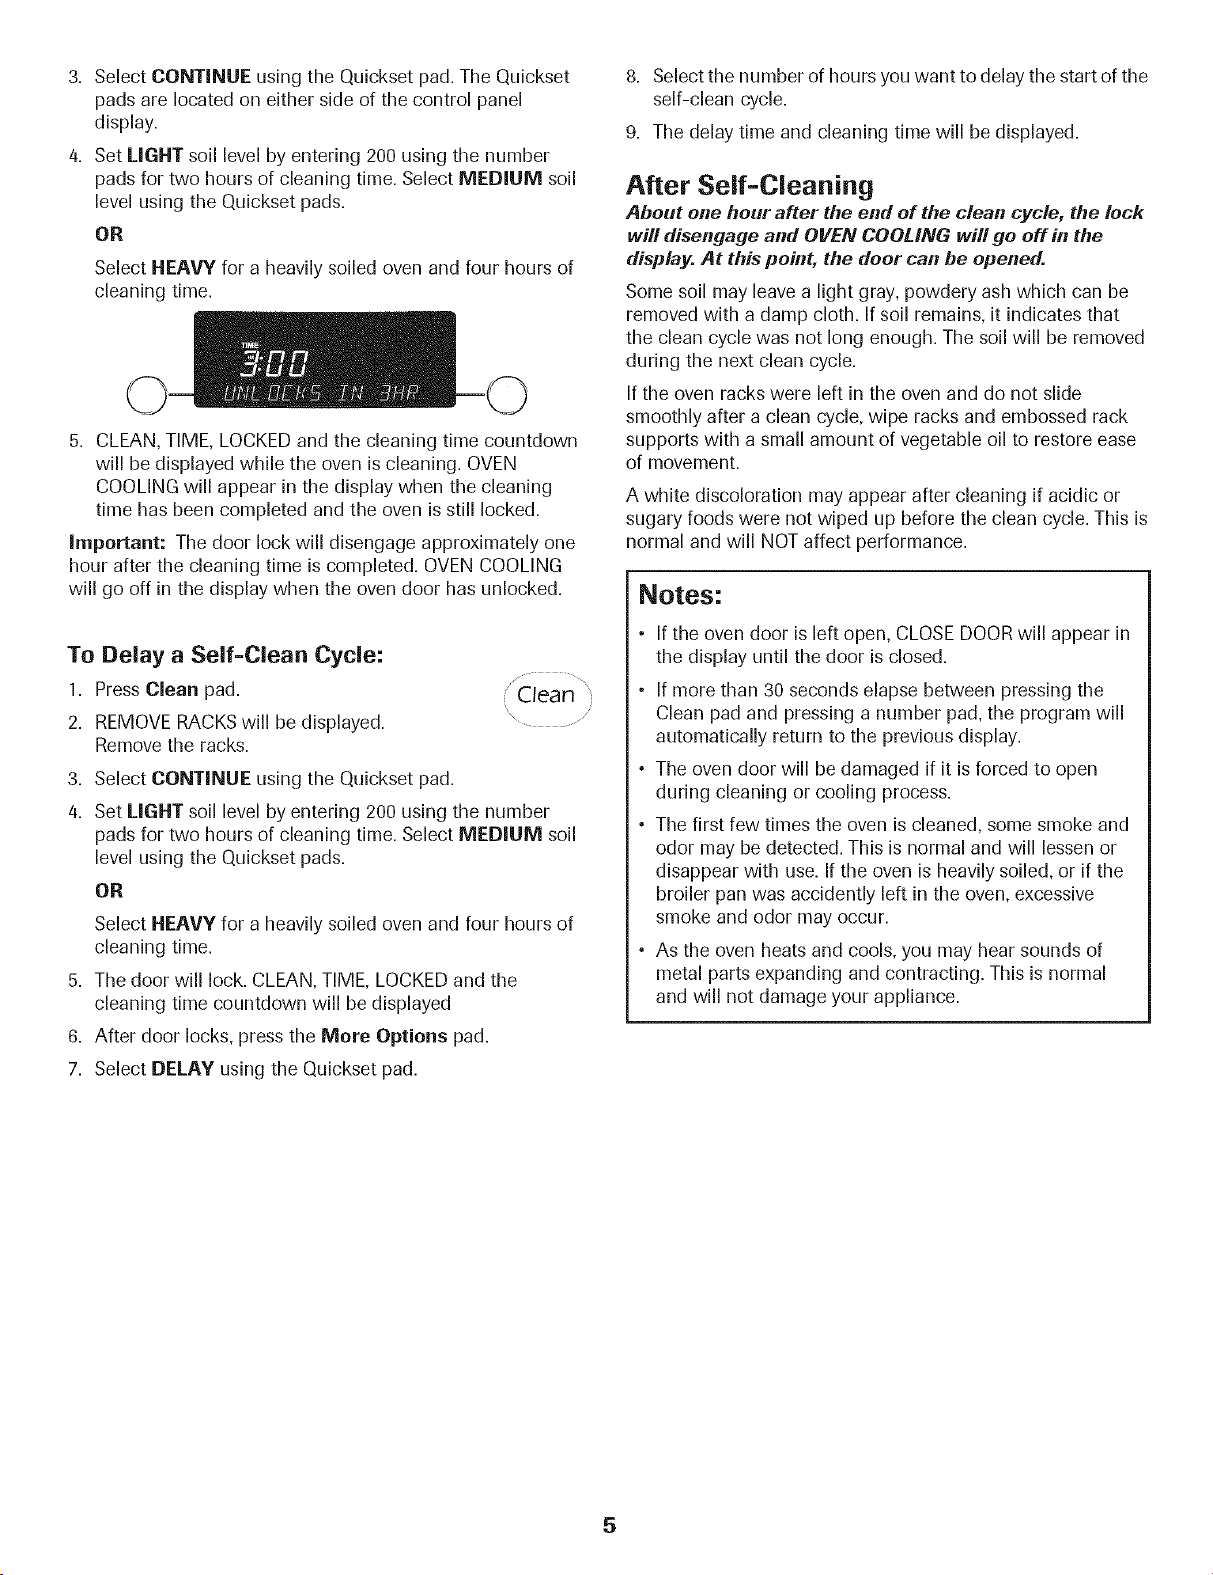
5. CLEAN, TIME, LOCKED and the cleaning time countdown
will be displayed while the oven is cleaning. OVEN
COOLING will appear in the display when the cleaning
time has been completed and the oven is still locked.
Important: The door lock will disengage approximately one
hour after the cleaning time is completed. OVEN COOLING
will go off in the display when the oven door has unlocked.
To Delay a Self=Clean Cycle:
1. Press Clean pad.
2. REMOVERACKS will be displayed.
Remove the racks.
/Clean
\
3. Select CONTINUE using the Quickset pad.
4. Set LIGHT soil level by entering 200 using the number
pads for two hours of cleaning time. Select MEDIUM soil
level using the Quickset pads.
OR
Select HEAVY for a heavily soiled oven and four hours of
cleaning time.
5. The door will lock. CLEAN, TIME, LOCKED and the
cleaning time countdown will be displayed
6. After door locks, press the More Options pad.
7. Select DELAY using the Quickset pad.
8. Select the number of hours you want to delay the start of the
self-clean cycle.
9. The delay time and cleaning time will be displayed.
After Self=Cleaning
About one hour after the end of the clean cycle, the lock
will disengage and OVEN COOLING will go off in the
display. At this point, the deer can be opened.
Some soil may leave a light gray, powdery ash which can be
removed with a damp cloth. If soil remains, it indicates that
the clean cycle was not long enough. The soil will be removed
during the next clean cycle.
If the oven racks were left in the oven and do not slide
smoothly after a clean cycle, wipe racks and embossed rack
supports with a small amount of vegetable oil to restore ease
of movement.
A white discoloration may appear after cleaning if acidic or
sugary foods were not wiped up before the clean cycle. This is
normal and will NOT affect performance.
Notes:
• If the oven door is left open, CLOSE DOOR will appear in
the display until the door is closed.
• If more than 30 seconds elapse between pressing the
Clean pad and pressing a number pad, the program will
automatically return to the previous display.
° The oven door will be damaged if it is forced to open
during cleaning or cooling process.
° The first few times the oven is cleaned, some smoke and
odor may be detected. This is normal and will lessen or
disappear with use. If the oven is heavily soiled, or if the
broiler pan was accidently left in the oven, excessive
smoke and odor may occur.
° As the oven heats and cools, you may hear sounds of
metal parts expanding and contracting. This is normal
and will not damage your appliance.
5

Cleaning Procedures
* Brand names are registered trademarks of the
respective manufacturers.
** To order call 1-800-JENNAIR (1-800-536-62471.
Control Panel
Control Knobs
Cooktop -
Glass=Ceramic
Oven Window
and Door =
Glass
• To activate control lock for cleaning, see Locking the Control, page 16.
• Wipe with damp cloth. Dry thoroughly.
• Glasscleaners may be used if sprayed on a cloth first. DO NOTspray directly on controlpads and
display area.
• Do not use other cleaning sprays, abrasive cleaners or large amounts of water on the panel.
• Remove knobs in the OFFposition by pulling forward.
• Wash, rinse and dry. Do not use abrasive cleaning agents as they may scratch the finish.
• Turn on each element to be sure the knobs have been correctly replaced.
Never use oven cleaners, chlorine bleach, ammonia or glass cleaners with ammonia.
Important: Carl an authorized servicer if the glass-ceramic top should crack, break or if metal or
aluminum foil should melt on the cooktop.
° Allow the cooktop to cool before cleaning.
° General - Clean cooktop after each use, or when needed, with a damp paper towel and Cooktop Cleaning
Creme* _PartNo. 200000011**.Then buff with a clean, dry cloth.
Important: Permanent stains will develop if soft is allowed to cook on by repeatedly using the cooktop when
soiled.
• Heavy Soils or Nletal Marks - Dampen a "scratchless" or "never scratch" scrubber sponge. Apply
Cooktop Cleaning Creme* and scrub to remove as much soil as possible. Apply a thin layer of the creme over
the soil, cover with a damp paper towel and let stand 30 to 45 minutes _2-3 hours for very heavy soil1. Keep
moist by covering the paper towel with plastic wrap. Scrub again, then buff with a clean, dry cloth.
Important: Only use a CLEAN,DAMP "scratchless"pad that is safe for non-stick cookware. Thepattern and
glass will be damaged ff the pad is not damp, ff the pad is soiled, or ff another type of pad is used.
• Burned=On or Crusty Soils - Scrub with a "scratchless" or "never scratch" scouring pad and
Cooktop Cleaning Creme*.
Important: Hold a razor blade scraper at 30° angle and scrape any remaining soil. Then,clean as described
above.Do not use the razor blade for daily cleaning as it may wear the pattern on the glass.
° Nlelted Sugar or Plastic - Immediately turn element to LOW and scrape sugar or plastic
from hot surface to a cool area. Then turn element OFF and allow to cool. Clean residue
with razor blade scraper and Cooktop Cleaning Creme*.
• Avoid using excessive amounts of water which may seep under or behind glass causing staining.
° Wash with soap and water. Rinse with clear water and dry. Glass cleaner can be used if sprayed on a
cloth first.
° Do not use abrasive materials such as scouring pads, steel wool or powdered cleaners as they will
scratch glass.
Oven Interior ° Follow instructionson pages 4-5 to set a self-clean cycle.
Oven Racks
• Clean with soapy water.
• Remove stubborn soil with cleansing powder or soap-filled scouring pad. Rinse and dry.
• Rackswill permanently discolor and may not slide smoothly if left in the oven during a self-clean operation.
If this occurs, wipe the rack edge and rack support with a small amount of vegetable oil to restore ease
of movement, then wipe off excess oil.
Cont.
6
Stainless Steel • DO NOT USE ANY CLEANING PRODUCT CONTAiNiNG CHLORINE BLEACH.
(select models) • DO NOT USE.ABRASIVE OR ORANGE CLEANERS.
• ALWAYS WiPE WITH THE GRAIN WHEN CLEANING.
• Daily Cleaning/Light Soil -- Wipe with one of the following - soapy water, white vinegar/water solution,
Formula 409 Glass and Surface Cleaner* or a similar glass cleaner - using a sponge or soft cloth. Rinse
and dry. To polish and help prevent fingerprints, follow with Stainless Steel Magic Spray* (Part No.
20000008)**.
° Moderate/Heavy Soil -- Wipe with one of the following - Bon Ami, Smart Cleanser, or Soft Scrub* -
using a damp sponge or soft cloth. Rinse and dry. Stubborn soils may be removed with a damp multi-
purpose Scotch-Brite* pad; rub evenly with the grain. Rinse and dry. To restore luster and remove streaks,
follow with Stainless Steel Magic Spray*.
• Discoloration -- Using a damp sponge or soft cloth, wipe with Cameo Stainless Steel Cleaner*. Rinse
immediatelyand dry. To remove streaks and restore luster, follow with Stainless Steel Magic Spray*.
• Brand names for cleaning products are registered trademarks of the respective manufacturers.
•* To order direct, call 1-800-JENNAIR (1-800-536-6247).
A|NTENANCE
Oven Door
° NEVER attempt to open or close door or operate oven until
door is properly replaced.
• NEVER place fingers between hinge and front oven frame.
Hinge arms are spring mounted. If accidentally hit, the
hinge will slam shut against oven frame and could injure
your fingers.
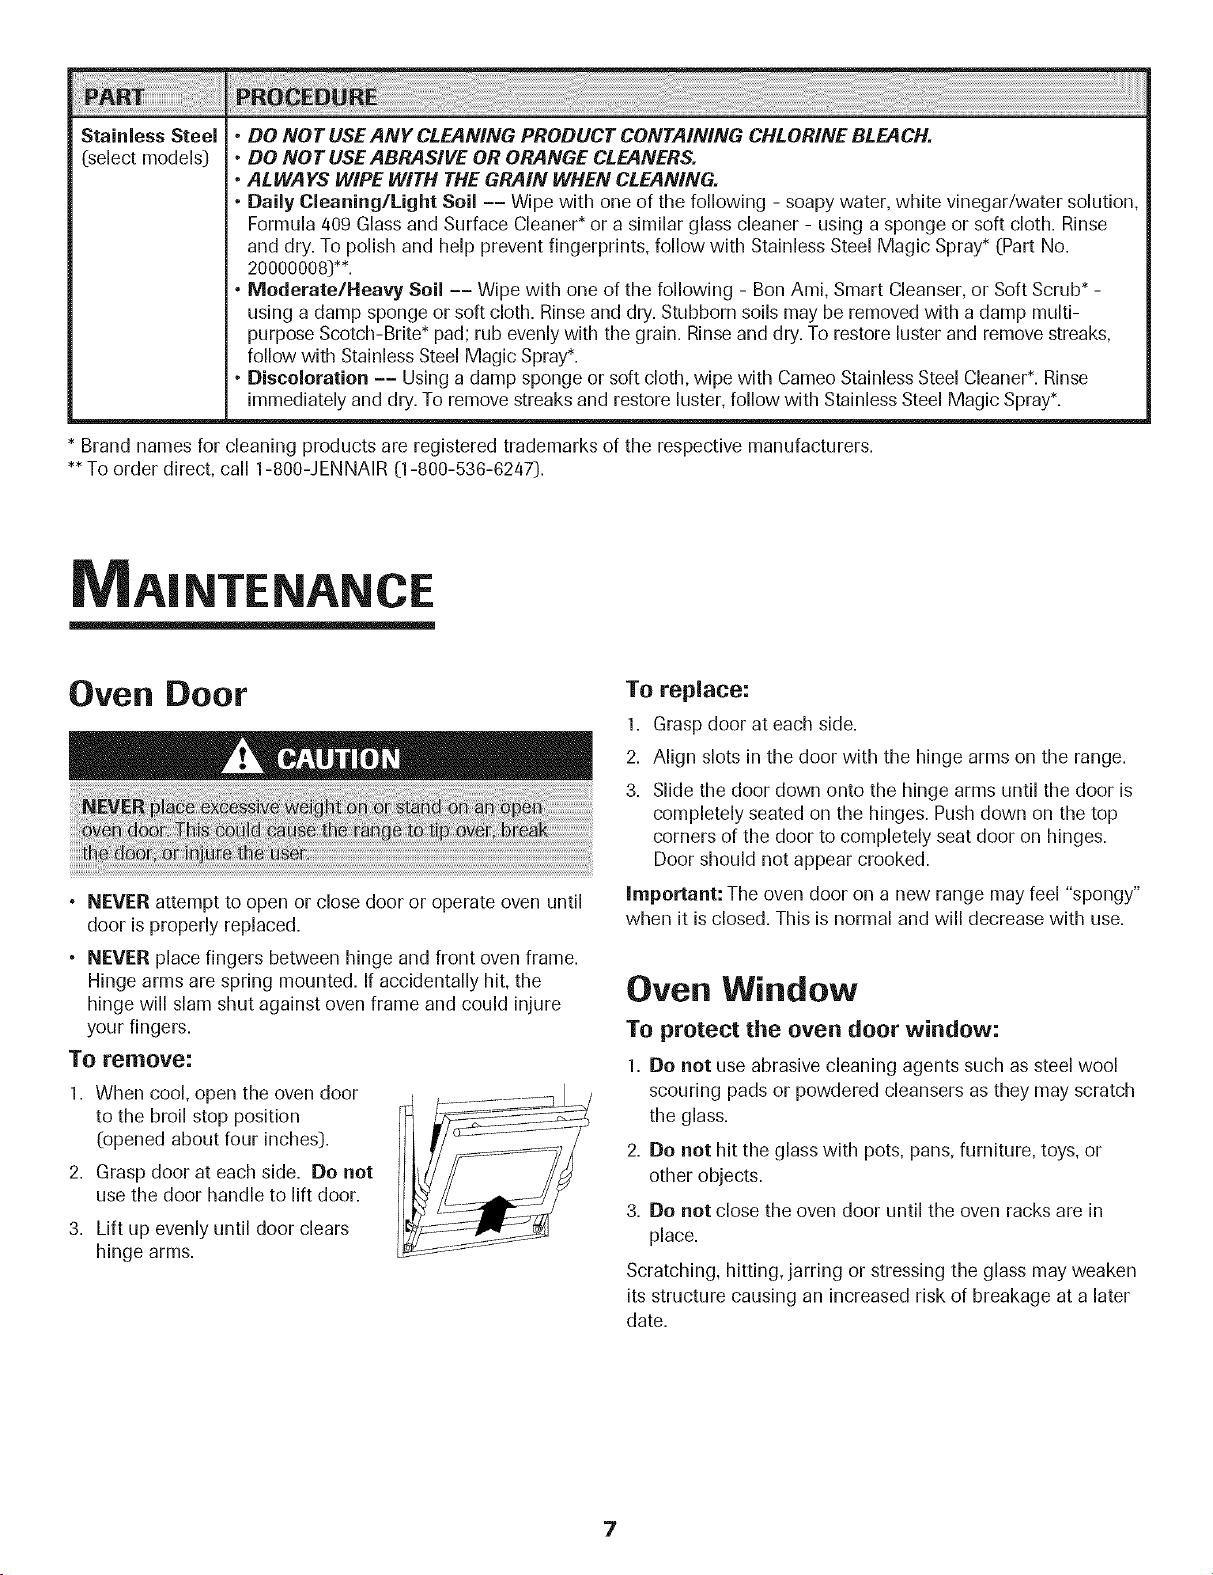
To remove:
1. When cool, open the oven door
to the broil stop position
(opened about four inches:).
2. Grasp door at each side. Do not
use the door handle to lift door.
3. Lift up evenly until door clears
hinge arms.
To replace:
1. Grasp door at each side.
2. Align slots in the door with the hinge arms on the range.
3. Slide the door down onto the hinge arms until the door is
completely seated on the hinges. Push down on the top
corners of the door to completely seat door on hinges.
Door should not appear crooked.
Important: The oven door on a new range may feel "spongy"
when it isclosed. This is normal and will decrease with use.
Oven Window
To protect the oven door window:
1. Do not use abrasive cleaning agents such as steel wool
scouring pads or powdered cleansers as they may scratch
the glass.
2. Do not hit the glass with pots, pans, furniture, toys, or
other objects.
3. Do not close the oven door until the oven racks are in
place.
Scratching, hitting, jarring or stressing the glass may weaken
its structure causing an increased risk of breakage at a later
date.
Leveling Legs Oven Light
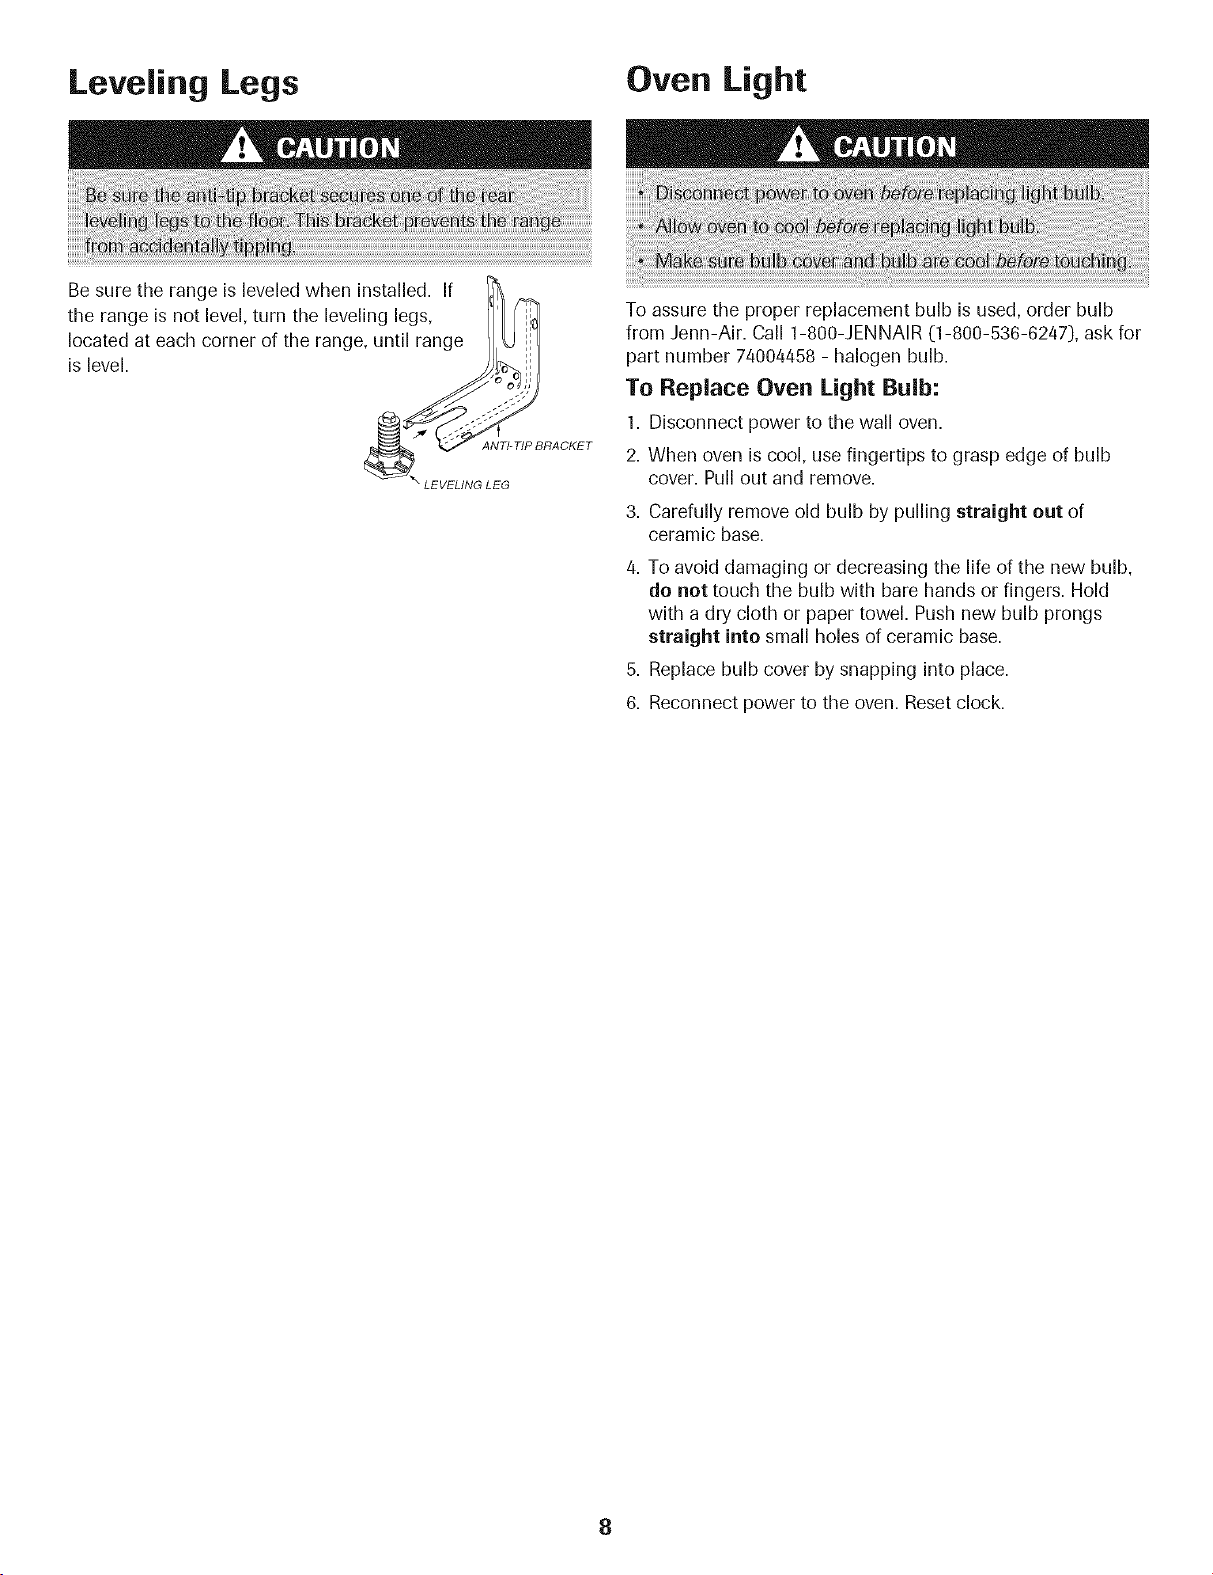
Be sure the range is leveled when installed. If
the range is not level, turn the leveling legs,
located at each corner of the range, until range J I
s eve oh I
NTI RACKET
LEVELING LEG
To assure the proper replacement bulb is used, order bulb
from Jenn-Air. Call 1-800-JENNAIR (1-800-536-6247), ask for
part number 74004458 - halogen bulb.
To Replace Oven Light Bulb:
1. Disconnect power to the wall oven.
2. When oven is cool, use fingertips to grasp edge of bulb
cover. Pull out and remove.
3. Carefully remove old bulb by pulling straight out of
ceramic base.
4. To avoid damaging or decreasing the life of the new bulb,
do not touch the bulb with bare hands or fingers. Hold
with a dry cloth or paper towel. Push new bulb prongs
straight into small holes of ceramic base.
5. Replace bulb cover by snapping into place.
6. Reconnect power to the oven. Reset clock.
T UBLE NG
For most concerns, try these first. • Check if oven controls have been properly set.
• Check to be sure plug is securely inserted into receptacle.
• Check or re-set circuit breaker. Check or replace fuse.
° Check power supply.
Part or all of appliance does not
work.
Clock, indicator words, and/or
lights operate but oven does
not heat.
Baking results are not as
expected or differ from
previous oven.
Food is not broiling properly or
smokes excessively.
Oven wiiJ not self=clean.
Oven did not clean properly.
Oven door wiil not unlock after
self=clean cycle.
There are no beeps and
no display.
° Check if surface and/or oven controls have been properly set. See pgs. 11, 12 & 17.
• Check if oven door is unlocked after self-clean cycle. See pg. 5.
• Check if oven is set for a delayed cook or clean program. See pgs. 17 & 5.
• Check if Control Lock is activated. See pg. 16.
• Check if control is in Sabbath Mode. See pg. 29.
° Oven may be set for a Cook & Hold or delay function.
° Control Lock may have been set. See pg. 16.
o
o
o
Make sure the oven vent has not been blocked. See pg. 21 for location.
Check to make sure range is level.
Temperatures often vary between a new oven and an old one. As ovens age, the oven
temperature often "drifts" and may become hotter or cooler. See pg. 29 for
instructions on adjusting the oven temperature. Important: It is not recommended
to adjust the temperature if only one or two recipes are in question.
• Check oven rack positions. Food may be too close to element.
• Broil element was not preheated.
• Aluminum foil was incorrectly used. Never line the broiler insert with foil.
• Oven door was closed during broiling. Leave the door open to the first stop position
(about 4 inches).
° Trim excess fat from meat before broiling.
° A soiled broiler pan was used.
° Voltage in house may be low.
• Check to make sure the cycle is not set for a delayed start. See pg. 5.
• Check if door is closed.
• Check if control is in Sabbath Mode. See pg. 29.
° Oven may be over 400° F. Oven temperature must be below 400° F to program a
clean cycle.
• Longer cleaning time may be needed.
• Excessive spillovers, especially sugary and/or acidic foods, were not removed prior
to the self-clean cycle.
° Oven interior is still hot. Allow about one hour for the oven to cool after the
completion of a self-clean cycle, The door can be opened when the LOCK indicator
word is not displayed,
• The control and door may be locked, See pg. 16.
° Oven may be in Sabbath Mode. See pg. 29.
9
Smoothtop surface
shows wear=
Moisture collects on oven
window or steam comes from
oven vent=
There is a strong odor or light
smoke when oven is turned on.
Cooktop does not get
hot enough.
Ventilation system is not
capturing smoke efficiently.
Fault Codes
Noises may be heard.
SAb flashing and then
displayed continuously.
1. Tiny scratches or abrasions.
• Make sure cooktop and pan bottom are clean. Do not slide glass or metal pans
across top. Make sure pan bottom is not rough. Use the recommended cleaning
agents. See page 6.
2. Metal marks.
• Do not slide metal pans across top. When cool, clean with Cooktop Cleaning Creme.
See page 6.
3. Brown streaks and specks.
° Remove spills promptly. Never wipe with a soiled cloth or sponge. Make sure cooktop
and pan bottom are clean.
4. Areas with a metallic sheen.
• Mineral deposits from water and food. Use recommended cleaning agents. See page 6.
5. Pitting or flaking.
• Remove sugary boilovers promptly. See page 6.
° Thisis normal when cooking foods high in moisture.
° Excessive moisture was used when cleaning the window.
° This is normal for a new range and will disappear after a few uses. Initiating a clean
cycle will "burn off" the odors more quickly.
° Turning on a ventilation fan will help remove the smoke and/or odor.
° Excessivefood soils on the oven bottom. Usea self-clean cycle.
• Surface controls may not be set properly.
• Voltage to house may be low.
• Check on cross ventilation in room or make up air.
° Outside wall cap may be trapped shut.
• Range may be improperly installed; check ducting information. See pg. 4.
° Air filter may be improperly installed. See pg. 14.
• The oven may detect a fault during programming or during operation. If a fault is
detected, the message FAULT DETECTED- PRESSPOWERTO CLEARor FAULT
DETECTED- PRESSENTERTO TRY AGAIN may appear. Follow directions in the display.
If the fault reappears or does not clear, call an authorized servicer or the toll-free number
in the display.
° If the same operation is attempted before having the wall oven repaired, the message
FEATURENOTAVAILABLE will appear. The feature will remain inoperable until service
is obtained.
° If the oven is heavily soiled, excessive fiareups may result in a fault code during cleaning.
Pressthe CANCEL pad and allow the oven to cool completely, wipe out excess soil, then
reset the clean cycle. If the fault code reappears, contact an authorized servicer.
° The oven makes several low-level noises. You may hear the oven relays as they go on
and off. This is normal.
° As the oven heats and cools, you may hear sounds of metal parts expanding and
contracting. This is normal and will not damage your appliance.
• Oven is in Sabbath Mode. To cancel, press and hold the Setup pad for five
seconds.
10
urFaceCOOKING
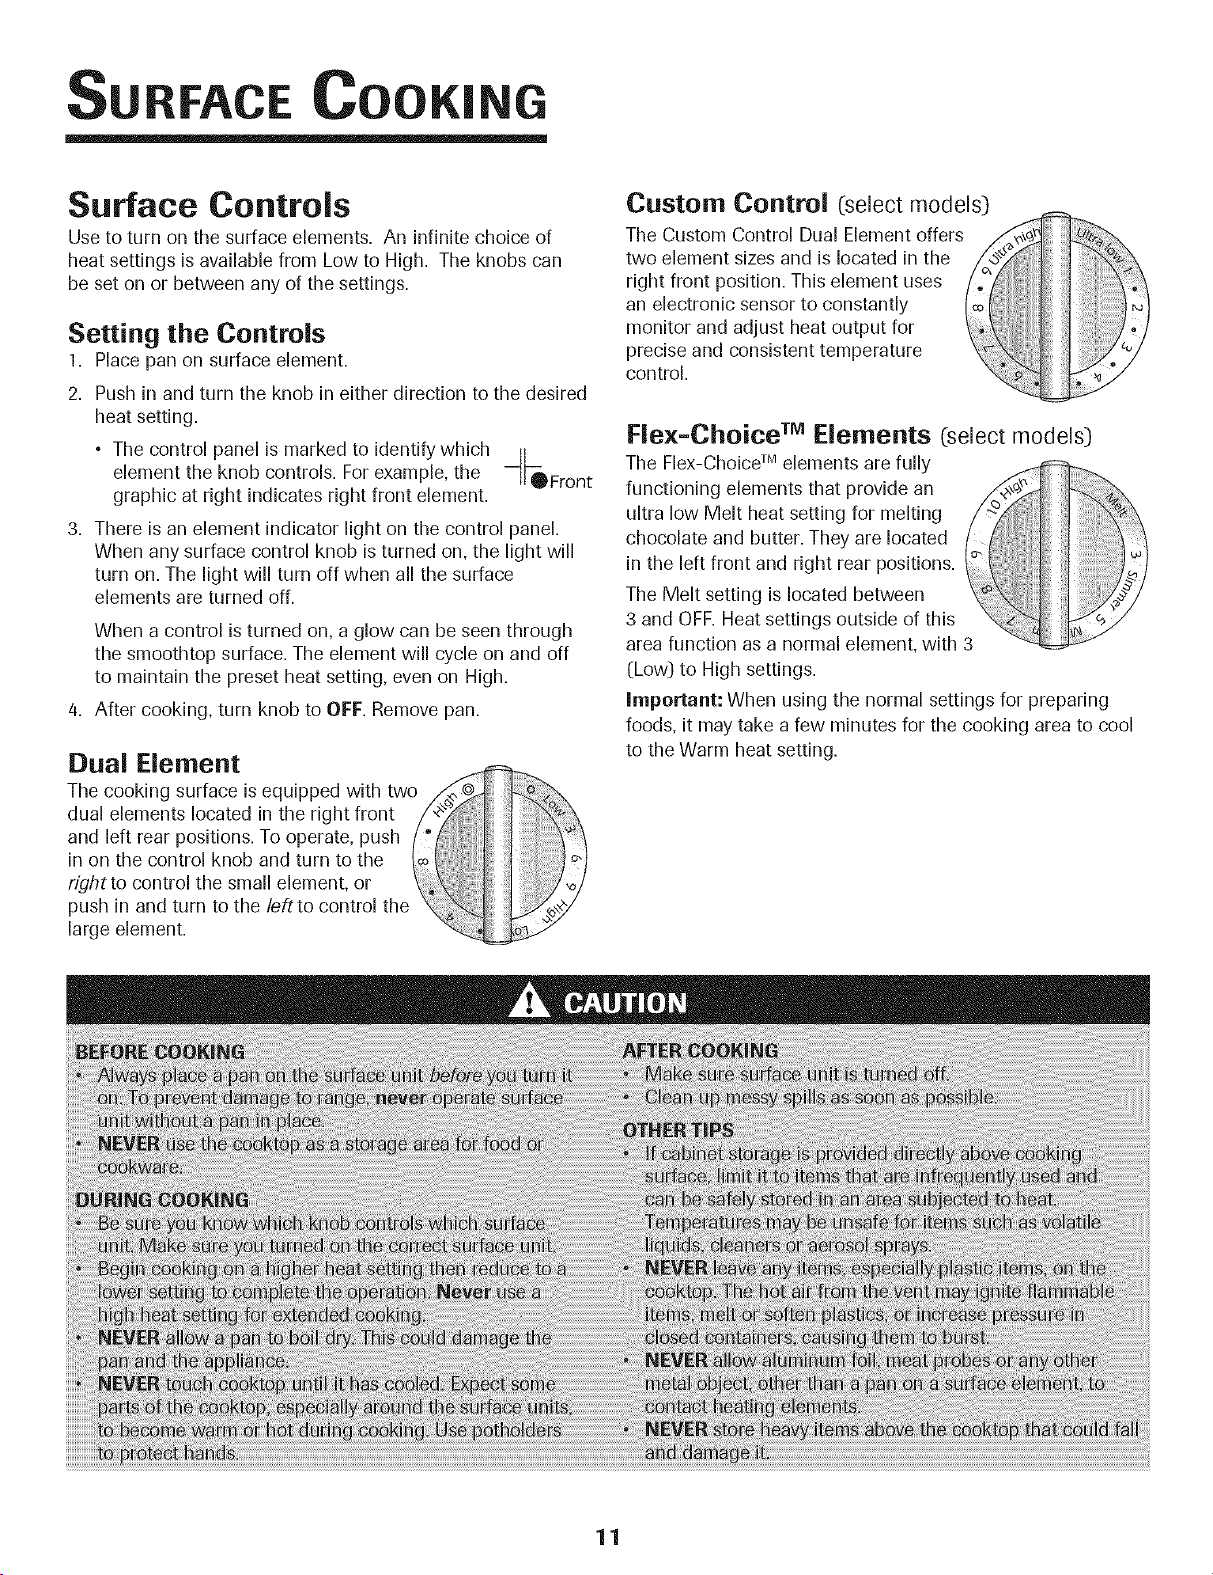
Surface Controls
Use to turn on the surface elements. An infinite choice of
heat settings is available from Low to High. The knobs can
be set on or between any of the settings.
Setting the Controls
1. Place pan on surface element.
2. Push in and turn the knob in either direction to the desired
heat setting.
• The control panel is marked to identify which /i
element the knob controls. For example, the --_Front
graphic at right indicates right front element.
3. There is an element indicator light on the control panel.
When any surface control knob is turned on, the light will
turn on. The light will turn off when all the surface
elements are turned off.
When a control is turned on, a glow can be seen through
the smoothtop surface. The element will cycle on and off
to maintain the preset heat setting, even on High.
4. After cooking, turn knob to OFF. Remove pan.
Dual Element
The cooking surface is equipped with tw( __
dual elements located in the right front
and left rear positions. To operate, push
in on the control knob and turn to the
rightto control the small element, or
push in and turn to the leftto control the
large element.
Custom Control (:select models:)
The Custom Control Dual Element offers
two element sizes and is located in the
right front position. This element uses
an electronic sensor to constantly
monitor and adjust heat output for
precise and consistent temperature
control.
Flex-Choice tm Elements (select models:)
The Flex-ChoiceTM elements are fully
functioning elements that provide an
ultra low Melt heat setting for melting
chocolate and butter. They are located
in the left front and right rear positions.
The Melt setting is located between
3 and OFF. Heat settings outside of this
area function as a normal element, with 3
CLow)to High settings.
Important: When using the normal settings for preparing
foods, it may take a few minutes for the cooking area to cool
to the Warm heat setting.
11
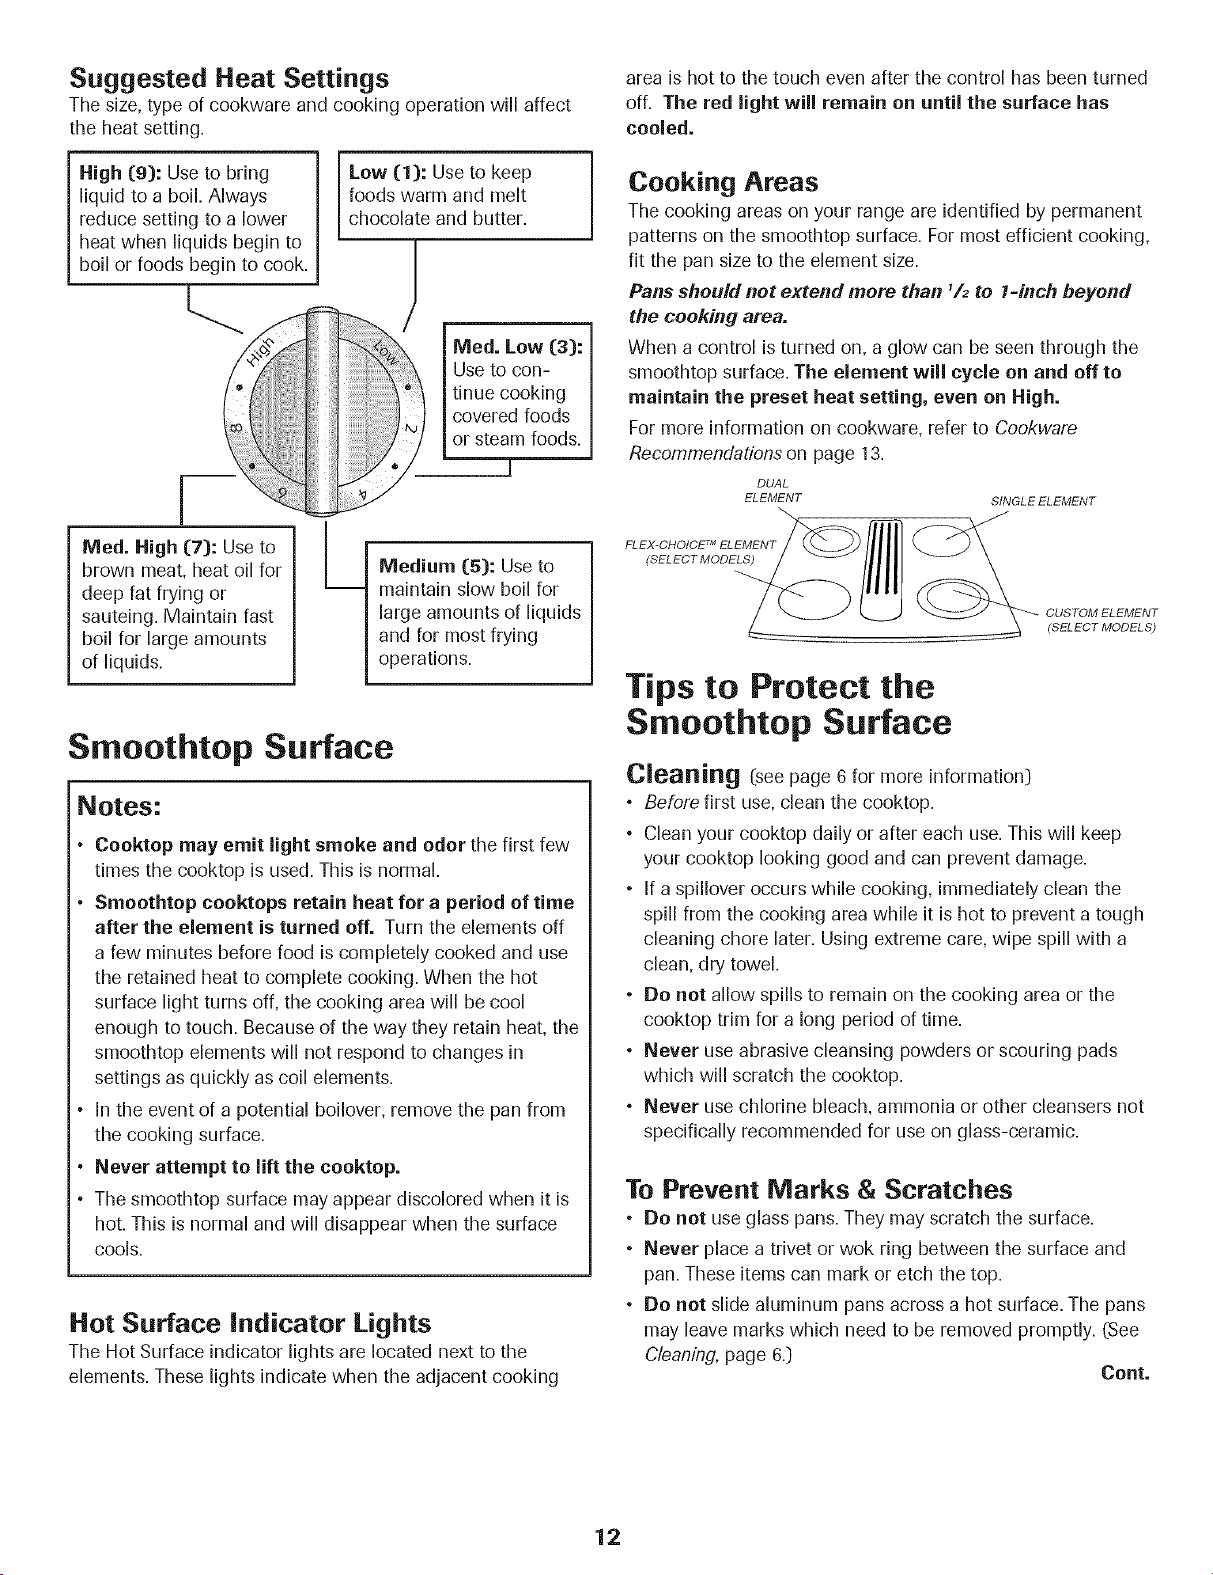
Suggested Heat Settings
Tile size, type of cookware and cooking operation will affect
the heat setting.
High (g): Use to bring
liquid to a boil. Always
reduce setting to a lower
heat when liquids begin to
boil or foods begin to cook.
Low (1): Use to keep
foods warm and melt
chocolate and butter.
IVied. High (7): Use to
brown meat, heat oil for
deep fat frying or
sauteing. Maintain fast
boil for large amounts
of liquids.
Ivied. Low (3):
Use to con-
tinue cooking
covered foods
or steam foods.
!
Mledium (5): Use to
maintain slow boil for
large amounts of liquids
and for most frying
operations.
Smoothtop Surface
Notes:
Cooktop may emit light smoke and odor the first few
times the cooktop is used. This is normal.
Smoothtop cooktops retain heat for a period of time
after the element is turned off. Turn the elements off
a few minutes before food is completely cooked and use
the retained heat to complete cooking. When the hot
surface light turns off, the cooking area will be cool
enough to touch. Because of the way they retain heat, the
smoothtop elements will not respond to changes in
settings as quickly as coil elements.
In the event of a potential boilover, remove the pan from
the cooking surface.
Never attempt to lift the cooktop.
The smoothtop surface may appear discolored when it is
hot. This is normal and will disappear when the surface
cools.
Hot Surface Indicator Lights
The Hot Surface indicator lights are located next to the
elements. These lights indicate when the adjacent cooking
area is hot to the touch even after the control has been turned
off. The red light will remain on until the surface has
cooled.
Cooking Areas
The cooking areas on your range are identified by permanent
patterns on the smoothtop surface. For most efficient cooking,
fit the pan size to the element size.
Pails should not extend more than 1/sto 1-inch beyond
the cooking area.
When a control is turned on, a glow can be seen through the
smoothtop surface. The element will cycle on and off to
maintain the preset heat setting, even on High.
For more information on cookware, refer to Cookware
Recommendations on page 13.
DUAL
ELEMENT
FLEX=CHOICE 7MELEMENT
(SELECT MODELS)
SINGLE ELEMENT
_CUSTOM ELEMENT
(SELECT MODELS)
Tips to Protect the
Smoothtop Surface
Cleaning (see page 6 for more information)
• Before first use, clean the cooktop.
• Clean your cooktop daily or after each use. This will keep
your cooktop looking good and can prevent damage.
• If a spillover occurs while cooking, immediately clean the
spill from the cooking area while it is hot to prevent a tough
cleaning chore later. Using extreme care, wipe spill with a
clean, dry towel.
• Do not allow spills to remain on the cooking area or the
cooktop trim for a long period of time.
° Never use abrasive cleansing powders or scouring pads
which will scratch the cooktop.
• Never use chlorine bleach, ammonia or other cleansers not
specifically recommended for use on glass-ceramic.
To Prevent Marks & Scratches
• Do not use glass pans. They may scratch the surface.
° Never place a trivet or wok ring between the surface and
pan. These items can mark or etch the top.
• Do not slide aluminum pans across a hot surface. The pans
may leave marks which need to be removed promptly. (See
Cleaning, page 6.)
Cont.
12
• Make sure the surface and the pan bottom are clean before
turning on to prevent scratches.
• To prevent scratching or damage to the glass-ceramic top,
do not leave sugar, salt or fats on the cooking area. Wipe
the cooktop surface with a clean cloth or paper towel
before using.
• Never slide heavy metal pans across the surface since
these may scratch.
To Prevent Stains
Never use a soiled dish cloth or sponge to clean the
cooktop surface. A film will remain which may cause stains
on the cooking surface after the area is heated.
° Continuously cooking on a soiled surface may/will result in
a permanent stain.
To Prevent Other Damage
° Do not allow plastic, sugar or foods with high sugar
content to melt onto the hot cooktop. Should this happen,
clean immediately. (See Cleaning, page 6.)
° Never let a pan boil dry as this will damage the surface and
pan.
• Never use cooktop as a work surface or cutting board.
° Never cook food directly on the surface.
° Do not use a small pan on a large element. Not only does
this waste energy, but it can also result in spillovers burning
onto the cooking area which requires extra cleaning.
• Do not use non-fiat specialty items that are oversized or
uneven such as round-bottom woks, rippled bottom and/or
oversized canners and griddles.
• Do not use foil or foil-type containers. Foil may melt onto
the glass. If metal melts on the cooktop, do not use. Call an
authorized servicer.
Cookware Recommendations
Using the right cookware can prevent many problems, such
as food taking longer to cook or achieving inconsistent
results. Proper pans will reduce cooking times, use less
energy, and cook food more evenly.
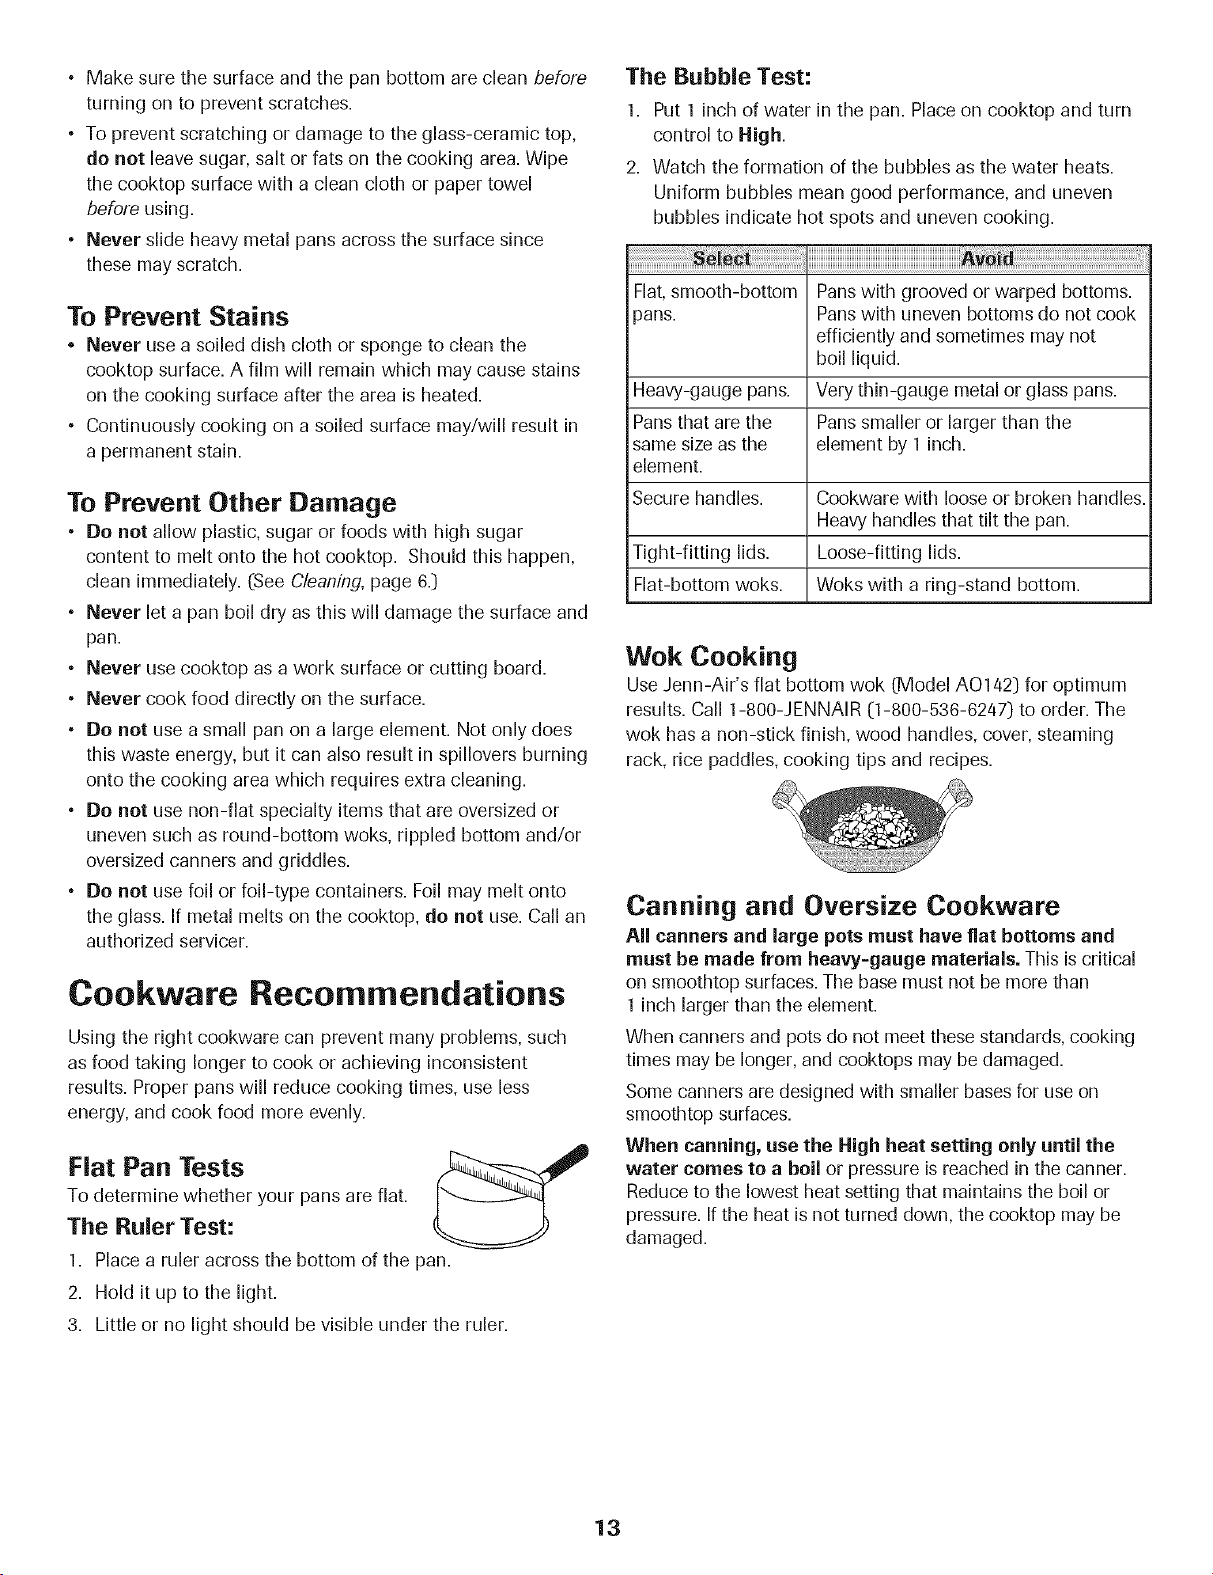
Flat Pan Tests
To determine whether your pans are flat.
The Ruler Test:
1. Place a ruler across the bottom of the pan.
2. Hold it up to the light.
3. Little or no light should be visible under the ruler.
The Bubble Test:
1. Put 1 inch of water in the pan. Place on cooktop and turn
control to High.
2. Watch the formation of the bubbles as the water heats.
Uniform bubbles mean good performance, and uneven
bubbles indicate hot spots and uneven cooking.
Flat,smooth-bottom Pans with grooved or warped bottoms.
)ans. Pans with uneven bottoms do not cook
efficiently and sometimes may not
boil liquid.
Heavy-gauge pans. Very thin-gauge metal or glass pans.
Pans that are the Pans smaller or larger than the
same size as the element by 1 inch.
element.
Secure handles. Cookware with loose or broken handles.
Heavy handles that tilt the pan.
Tight-fitting lids. Loose-fitting lids.
Flat-bottom woks. Woks with a ring-stand bottom.
Wok Cooking
Use Jenn-Air's flat bottom wok (Model A0142) for optimum
results. Call 1-800-JENNAIR (1-800-536-6247) to order. The
wok has a non-stick finish, wood handles, cover, steaming
rack, rice paddles, cooking tips and recipes.
Canning and Oversize Cookware
All canners and large pots must have fiat bottoms and
must be made from heavy-gauge materials. This iscritical
on smoothtop surfaces. The base must not be more than
1 inch larger than the element.
When canners and pots do not meet these standards, cooking
times may be longer, and cooktops may be damaged.
Some canners are designed with smaller bases for use on
smoothtop surfaces.
When canning, use the High beat setting only until the
water comes to a boil or pressure is reached in the canner.
Reduce to the lowest heat setting that maintains the boil or
pressure. If the heat is not turned down, the cooktop may be
damaged.
13

Ventilation System
The built-in ventilation system removes cooking vapors, odors
and smoke from foods prepared on your cooktop and grill.
• To operate the ventilation
system manually, push the _,. ,=_,_;_
ono,
Vent Fan pad located on the ..... _u_,
electronic control. Push once ................
for Low, push again for High
and a thirdtime to turn the
fan Off.
• The ventilation system will operate automatically when the
grill element is in use.
• The fan can be used to remove strong odors from the
kitchen, as when chopping onions near the fan.
Care and Cleaning of the
Ventilation System
• Air Grille: The air grille lifts off easily. Wipe clean or wash in
dishwasher or sink with mild household detergents. To
prevent scratching the surface, do not use abrasive
cleaners or scrubbing pads.
• Filter: Turn off ventilation system before removing. The filter
is a permanent type and should be cleaned when soiled.
Clean in sink with warm water and detergent or in
dishwasher.
AIR FILTER
IMPORTANT: DO NOT OPERATESYSTEMWITHOUT
FILTER.Filter should always be placed at an angle. As you
face the front of the range, the top of the filter should rest
against the left side of the vent opening. The bottom should
rest against the right side of the vent chamber at the
bottom. Important: If filter is flat against the fan wall,
ventilation effectiveness is reduced.
• Ventilation Chamber: This area, which houses the filter,
should be cleaned in the event of spills or whenever it
becomes coated with a film of grease. It can be cleaned with
paper towel, damp cloth, or sponge and mild household
detergent or cleanser.
Important: The oven vent is located under the right side of
the air grille. When using or cleaning the oven, hot and
moist air may be noticed in this area. The area near the vent
may become hot enough to cause burns. Be careful not to
spill anything into this vent. The air grille must be
removed before the self-clean cycle.
14
OVENCOOK=NG
Control Panel
AB CD
..............f
-Favorites
Bake on / off
_etup
12-on,o,ii
Conv Clean
Raid More
-- Preheat
J KL
TIMER1
On/Off
Verlt Ovell
Fan Ught CANCEL
°ni° I J
M N 0
G
TtMER2
On / Off
P
H
1 2 3
ABC DEF
4 5 6
GH_ JKL MNO
7 8 9
PORS R)V WXYZ
Back 0 Enter
1 Space I
Foc_
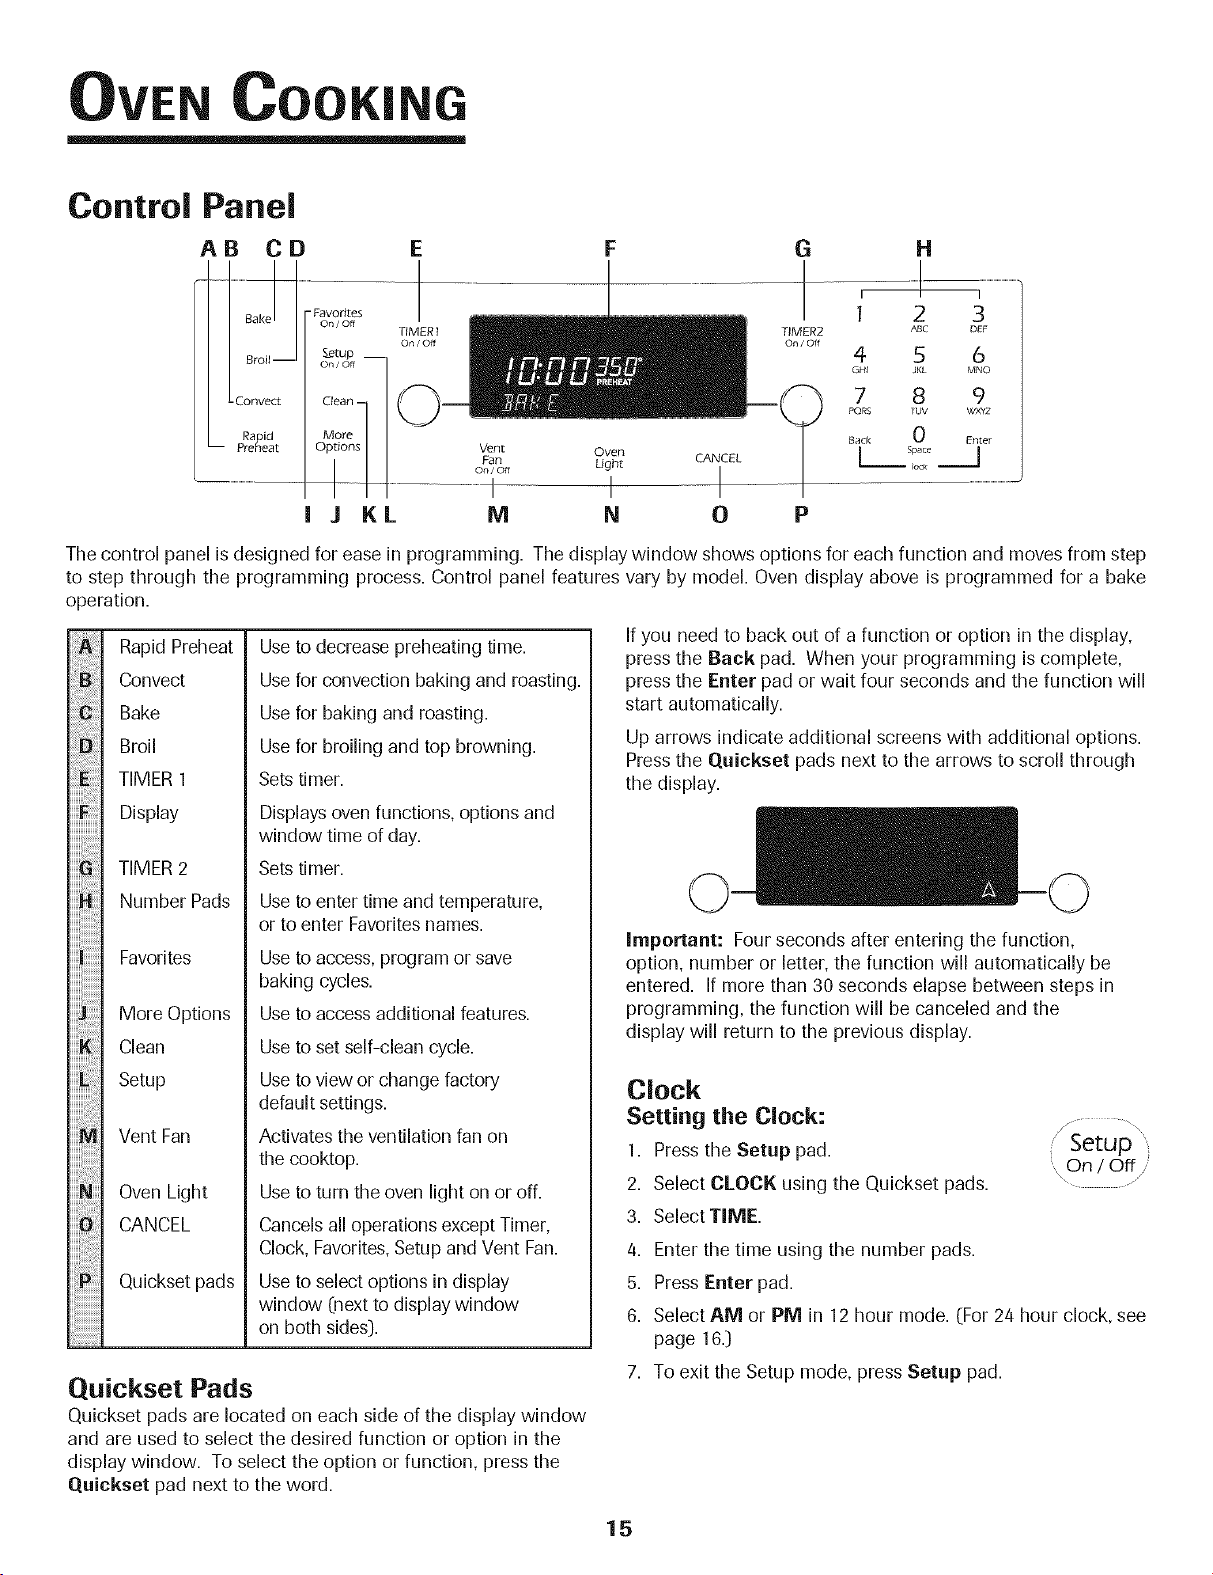
The control panel is designed for ease in programming. The display window shows options for each function and moves from step
to step through the programming process. Control panel features vary by model. Oven display above is programmed for a bake
operation.
Rapid Preheat
Convect
Bake
Broil
TIMER 1
Display
TIMER 2
Number Pads
Favorites
More Options
Clean
Setup
Vent Fan
Oven Light
CANCEL
Quickset pads
Useto decrease preheating time.
Usefor convection baking and roasting.
Usefor baking and roasting.
Usefor broiling and top browning.
Sets timer.
Displaysoven functions, options and
window time of day.
Sets timer.
Useto enter time and temperature,
or to enter Favoritesnames.
Useto access, program or save
baking cycles.
Useto access additional features.
Useto set self-clean cycle.
Useto view or change factory
default settings.
Activates the ventilation fan on
the cooktop.
Useto turn the oven light on or off.
Cancels all operations except Timer,
Clock, Favorites,Setup and Vent Fan.
Use to select options in display
window 0/ext to display window
on both sides].
Quickset Pads
Quickset pads are located on each side of the display window
and are used to select the desired function or option in the
display window. To select the option or function, press the
Quickset pad next to the word.
If you need to back out of a function or option in the display,
press the Back pad. When your programming is complete,
press the Enter pad or wait four seconds and the function will
start automatically.
Up arrows indicate additional screens with additional options.
Pressthe Quickset pads next to the arrows to scroll through
the display.
Important: Four seconds after entering the function,
option, number or letter, the function will automatically be
entered. If more than 30 seconds elapse between steps in
programming, the function will be canceled and the
display will return to the previous display.
Clock
Setting the Clock: , .............
1. Press the Setup pad. Setup :
k On/Off i
2. Select CLOCK using the Quickset pads. ...........
3. Select TIME.
4. Enter the time using the number pads.
5. Press Enter pad.
6. Select AM or PM in 12 hour mode. (For 24 hour clock, see
page 16.)
7. To exit the Setup mode, press Setup pad.
15
Activating and canceling the clock/day
of week display:
1. Press Setup pad. _ Setup
On / Off ji
2. Select CLOCK. ......
3. Press the arrow to scroll until DISABLE is displayed.
4. Select DISABLE.
5. Select OFF to turn the clock display off, or select ON to turn
the clock display on.
6. Select OFF to turn the day of the week display off Select
ON to turn the weekday display on.
7. To exit the Setup mode, press Setup pad.
Entering the day of the week:
1. Press Setup pad.
2. Select CLOCK.
/Setup
....., On / Off/
3. Press the arrow to scroll until DAY is displayed.
4. Use Quickset arrow to scroll through the days.
5. To exit the Setup mode, press Setup pad.
To set the clock for a 12 or 24 hour format:
The clock can be set to display time in either a 12 hour or 24
hour format.
/ ......... ....
1. Press the Setup pad. Setup
, On / Off /
2. Select CLOCK. \ /
3. Use the arrow to scroll to the next screen.
4. Select 12/24 HOUR.
5. Select 12 HR or 24 HR.
6. To exit Setup mode, press Setup pad.
Timers
Setting the Timers (Timer 1 or Timer 2):
1. Press TIMER 1 or TIMER 2 pad. /.................
" TIMER 1'
2. Press one of the displayed times using the ,_ On / Off j/
Quickset pads, or press the number pads to ...........
enter the desired time.
Important: Each press of the displayed time choices adds
additional time. For example, pressing "10 MIN" three
times provides 30 minutes on the timer (0:30).
3. Press Enter pad.
Changing the amount of time entered once the
Timer starts:
1. Press the TIMER 1 or TIMER 2 pad once.
2. Press the displayed times on the Quickset
pads until the desired time is entered.
OR
On / Off _/
3. Press the number pads to enter the new desired time.
4. Press Enter pad.
Canceling the Timer: ..................................
1. Press the TINIER 1 or TIMER 2 pad twice, i" TIMER
On/Off
If both Timers are active: ....................................
If the desired Timer is already in the foreground, press once
for edit mode and twice to cancel the Timer. If the desired
Timer is not in the foreground, follow the steps below.
1. Press the desired TINIER pad once. The selected Timer will
come to the foreground.
2. Press the TIMER pad a secondtime to access the edit
mode in order to make changes.
3. Pressing the TINIER pad a thirdtime will cancel the Timer.
Changing the Timer beeps:
The signal beeps for TIMER 1 and TIMER 2 can be changed.
The options available are two beeps every thirty seconds, two
beeps every sixty seconds or one beep only. The default
setting is one beep.
1. Press the Setup pad.
On/Off/
2. Select the arrow to scroll until TONES ..........................
is displayed.
3. Select TONES.
4. Select TIMERS TONES.
5. Select the desired timer beep format (2-30 SEC.,2-60 SEC.
or 1 BEEP).
6. Press Setup pad to exit Setup mode.
Locking the Control and Oven Door
The oven control and oven door can be locked to prevent
accidental programming. If an oven function is currently
being used, the control and door cannot be locked.
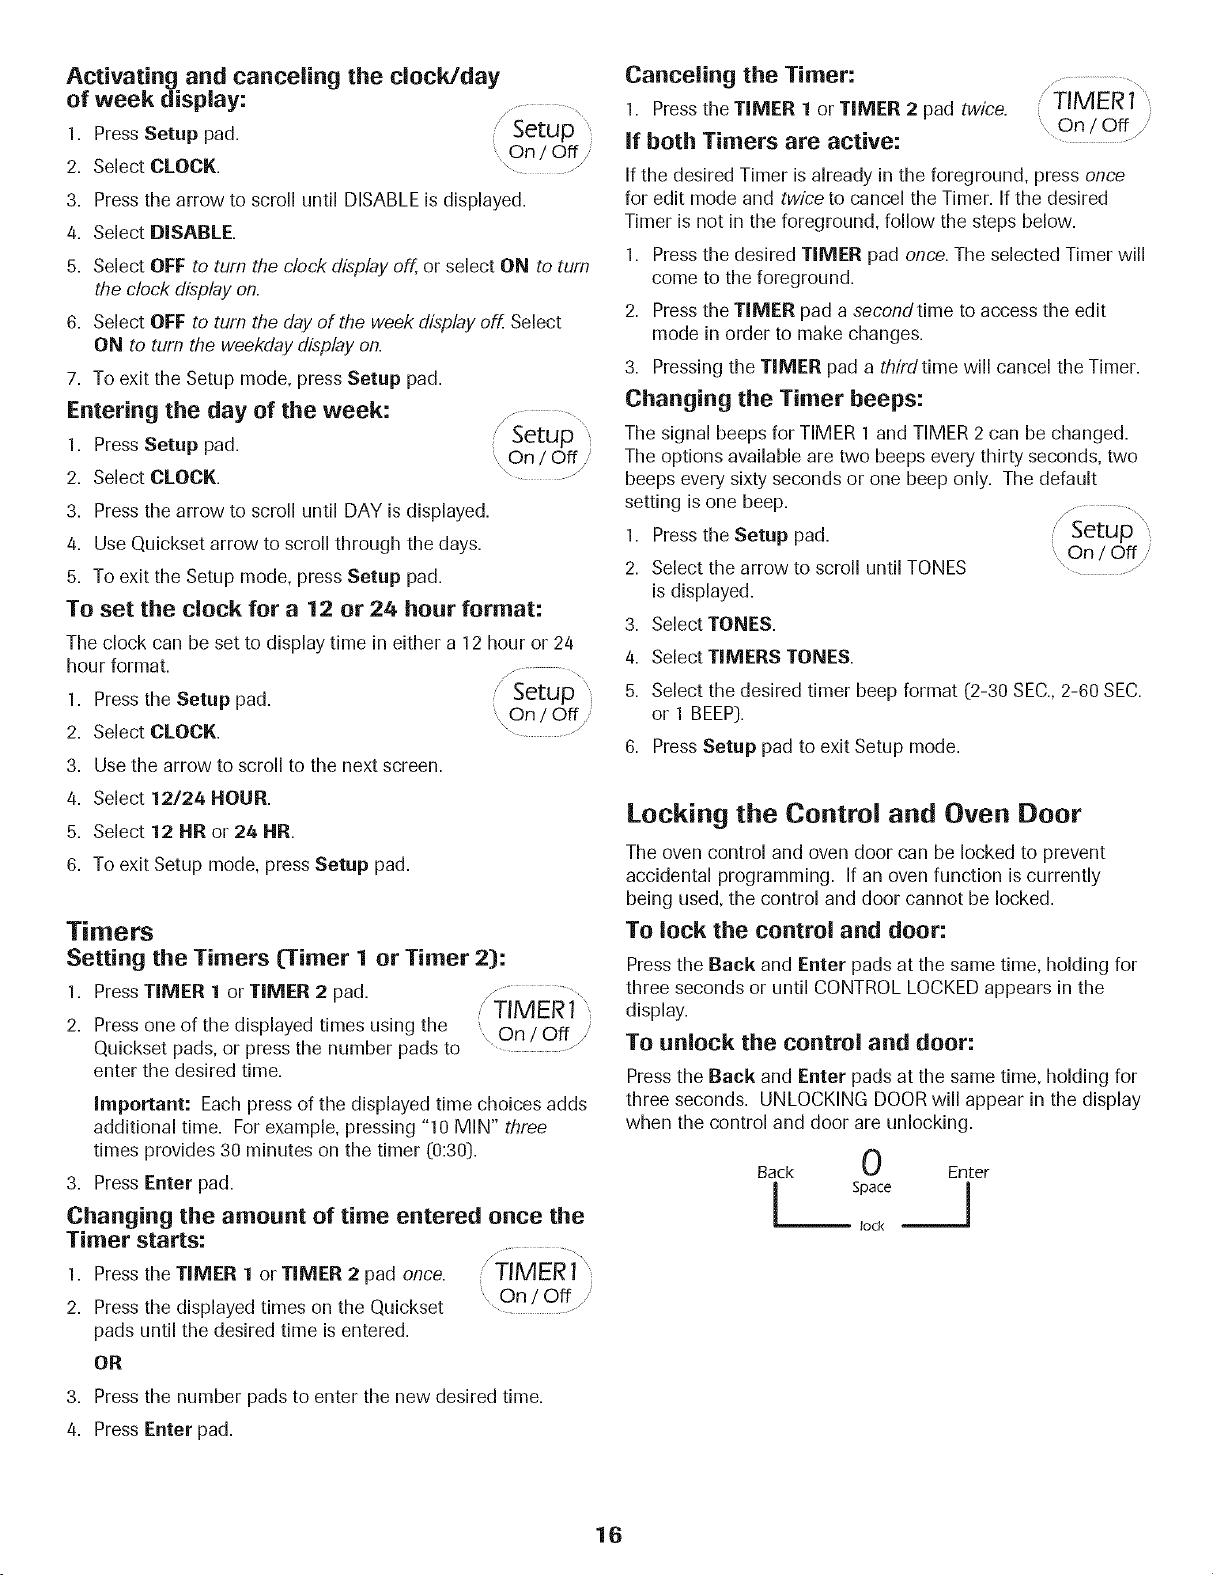
To lock the control and door:
Press the Back and Enter pads at the same time, holding for
three seconds or until CONTROL LOCKED appears in the
display.
To unlock the control and door:
Press the Back and Enter pads at the same time, holding for
three seconds. UNLOCKING DOORwill appear in the display
when the control and door are unlocking.
Back 0 Enter
lock
16
Baking
/ ................
To set Bake: J
Bake
1. Press the Bake pad.
2. Select the oven temperature using the Quickset pads.
OR
Enter the desired temperature using the number pads.
Press Enter pad to set.
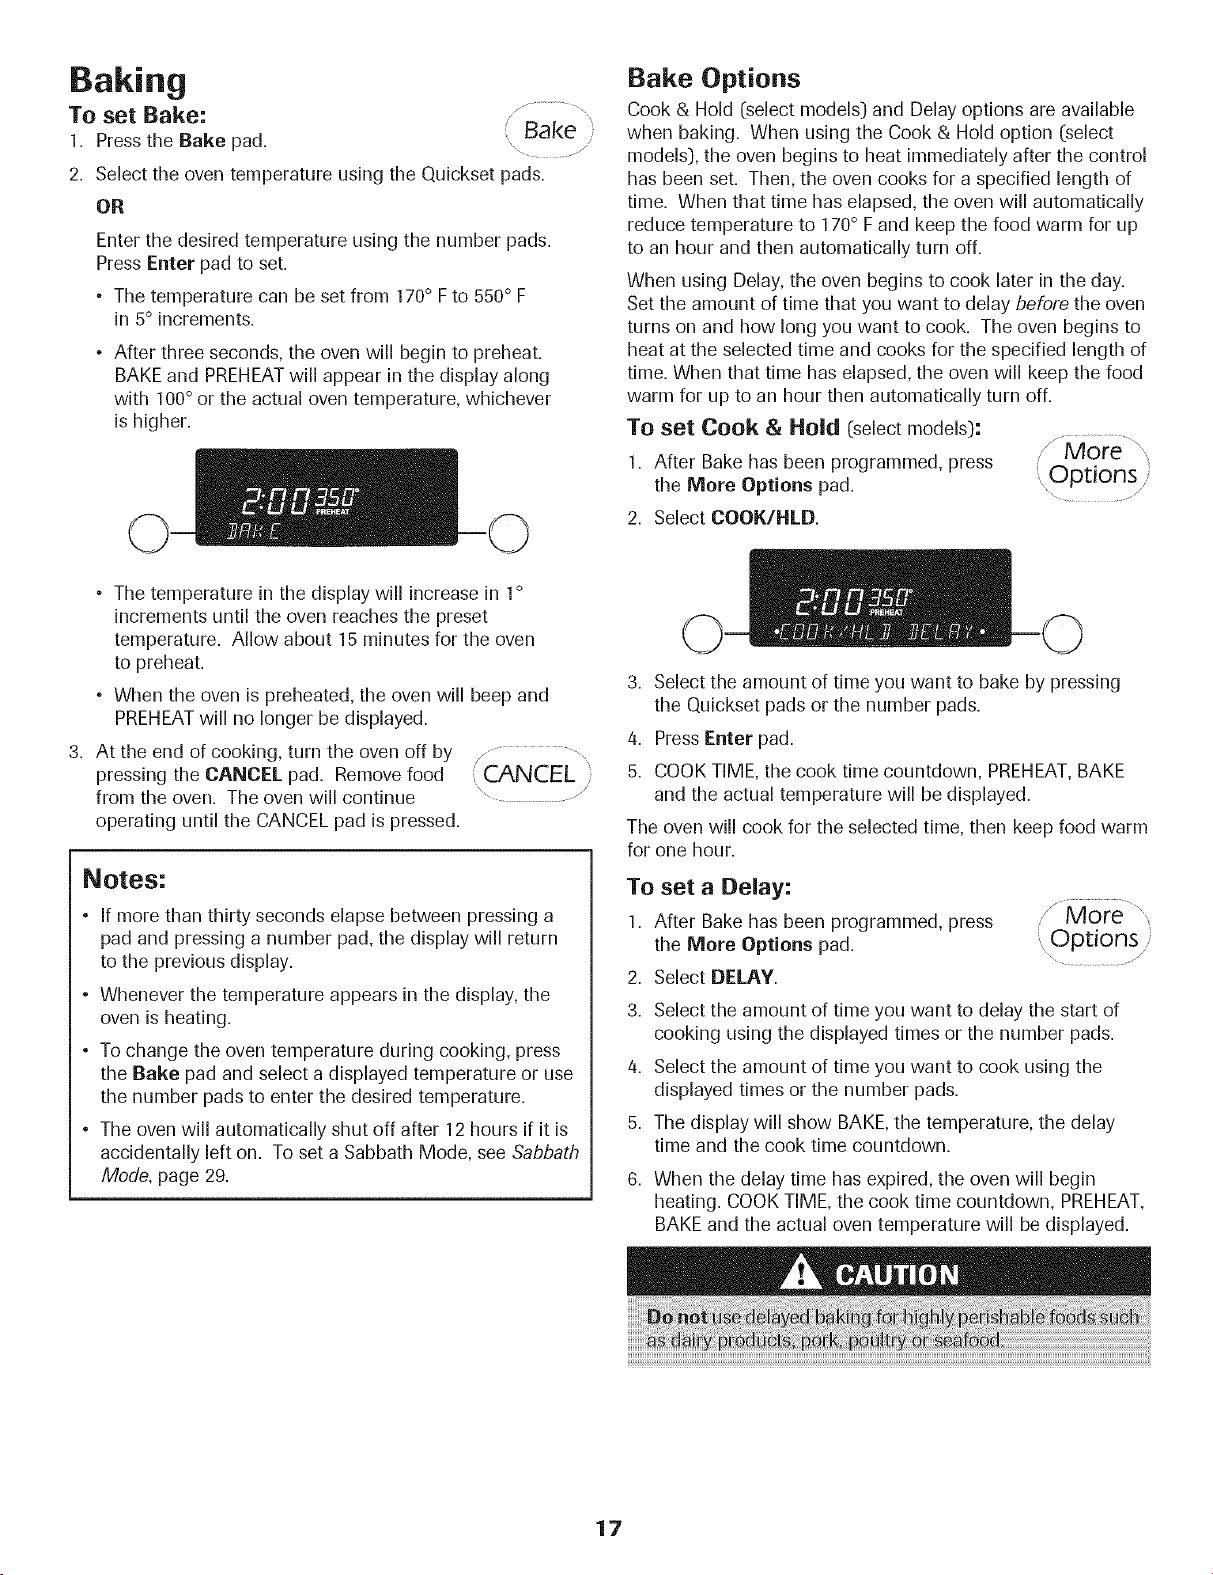
• The temperature can be set from 170° F to 550° F
in 5° increments.
• After three seconds, the oven will begin to preheat.
BAKE and PREHEATwill appear in the display along
with 100° or the actual oven temperature, whichever
is higher.
Bake Options
Cook & Hold (select models) and Delay options are available
when baking. When using the Cook & Hold option (select
models), the oven begins to heat immediately after the control
has been set. Then, the oven cooks for a specified length of
time. When that time has elapsed, the oven will automatically
reduce temperature to 170° F and keep the food warm for up
to an hour and then automatically turn off.
When using Delay, the oven begins to cook later in the day.
Set the amount of time that you want to delay before the oven
turns on and how long you want to cook. The oven begins to
heat at the selected time and cooks for the specified length of
time. When that time has elapsed, the oven will keep the food
warm for up to an hour then automatically turn off.
To set Cook & Hold (selectmodels):
I. AfterBake has beer,programmed,press ,/"More
the More Options pad. Options /
......... /
2. Select COOK/NLD.
• The temperature in the display will increase in 1°
increments until the oven reaches the preset
temperature. Allow about 15 minutes for the oven
to preheat.
° When the oven is preheated, the oven will beep and
PREHEATwill no longer be displayed.
3. At the end of cooking, turn the oven off by J_............ ,
pressing the CANCEL pad. Remove food CANCEL
from the oven. The oven will continue ..............
operating until the CANCEL pad is pressed.
Notes:
° If more than thirty seconds elapse between pressing a
pad and pressing a number pad, the display will return
to the previous display.
• Whenever the temperature appears in the display, the
oven is heating.
° To change the oven temperature during cooking, press
the Bake pad and select a displayed temperature or use
the number pads to enter the desired temperature.
• The oven will automatically shut off after 12 hours if it is
accidentally left on. To set a Sabbath Mode, see Sabbath
Mode, page 29.
3. Select the amount of time you want to bake by pressing
the Quickset pads or the number pads.
4. Press Enter pad.
5. COOK TIME, the cook time countdown, PREHEAT,BAKE
and the actual temperature will be displayed.
The oven will cook for the selected time, then keep food warm
for one hour.
To set a Delay:
1. After Bake has been programmed, press
the More Options pad.
2. Select DELAY.
!More"¸-,
Options
/
3. Select the amount of time you want to delay the start of
cooking using the displayed times or the number pads.
4. Select the amount of time you want to cook using the
displayed times or the number pads.
5. The display will show BAKE,the temperature, the delay
time and the cook time countdown.
6. When the delay time has expired, the oven will begin
heating. COOK TIME, the cook time countdown, PREHEAT
BAKE and the actual oven temperature will be displayed.
17
Convect
Convection uses a fan to circulate hot air evenly over, under
and around the food. As a result, foods are evenly cooked
and browned, often in shorter times, at lower temperatures
and with the flexibility of using more than one rack at a time.
Notes:
• The oven control comes from the factory set for Auto
Convect Conversion (select models]. When using
Convect Bake and Convect Pastry enter the conventional
baking temperature. The control automatically converts
the temperature to 25° less than the conventional
temperature.
° For Convect Roast, enter the conventionalroasting
temperature and time. The control then lets you know
when 750/0of the time has elapsed and alerts you to
check the food for doneness.
• To turn Auto Convect Conversion (select models] off,
see page 28.
Convect Options
Cook & Hold (select models] and Delay options are available
when convect cooking. See page 22 for information on how
to program a Cook & Hold (select models] or Delay option.
Multiple-rack
Baking of
Cookies/Biscuits
Breads
Casseroles
Tarts/Tortes
Cakes
Whole Chicken
Whole Turkey
Vegetables
Pork Roasts
Beef Roasts
Frozen Pie
Turnovers
Cream Puffs
Puff Pastry
Convect Bake
To set Convect Bake:
1. Pressthe Convect pad.
( Convect
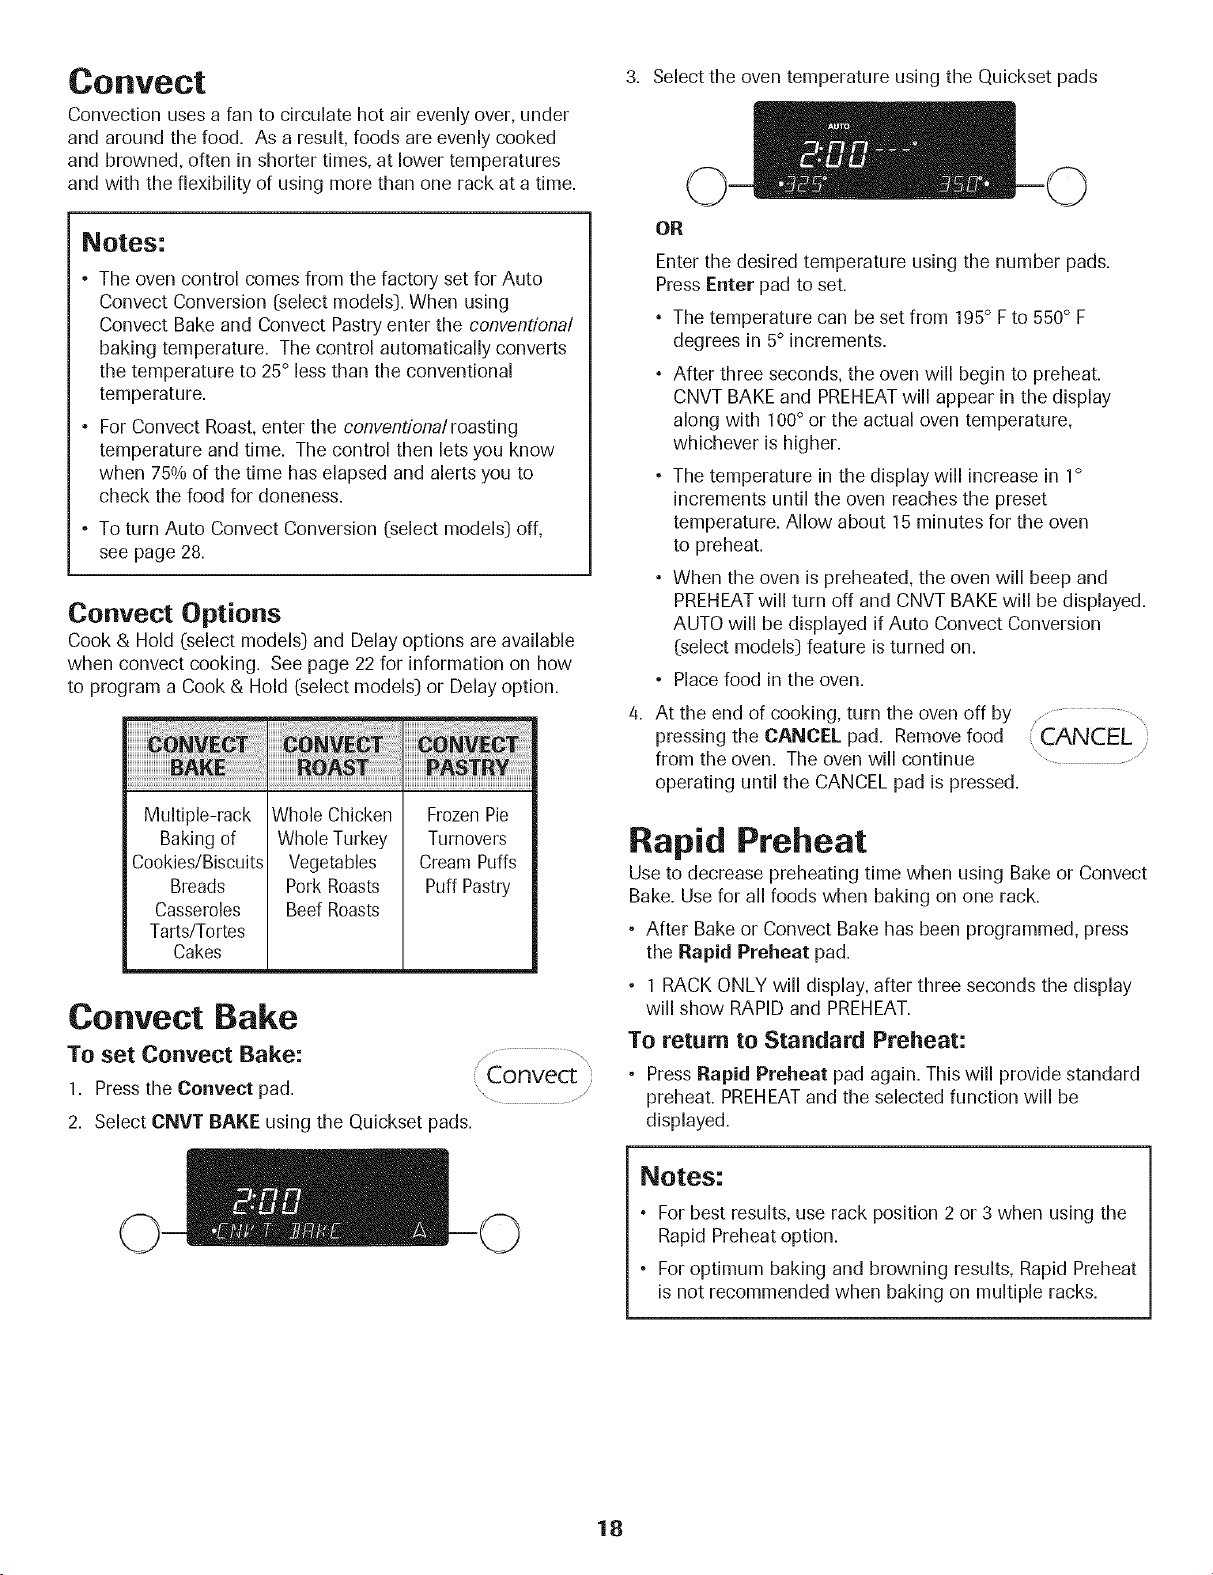
2. Select CNVT BAKE using the Quickset pads.
3. Select the oven temperature using the Quickset pads
OR
Enter the desired temperature using the number pads.
Press Enter pad to set.
° The temperature can be set from 195° F to 550° F
degrees in 5° increments.
° After three seconds, the oven will begin to preheat.
CNVT BAKEand PREHEATwill appear in the display
along with 100° or the actual oven temperature,
whichever is higher.
• The temperature in the display will increase in 1°
increments until the oven reaches the preset
temperature. Allow about 15 minutes for the oven
to preheat.
° When the oven is preheated, the oven will beep and
PREHEATwill turn off and CNVT BAKE will be displayed.
AUTO will be displayed if Auto Convect Conversion
(select models] feature is turned on.
• Place food in the oven.
4. At the end of cooking, turn the oven off by
pressing the CANCEL pad. Remove food
from the oven. The oven will continue
operating until the CANCEL pad is pressed.
CANCEL )
............. /
Rapid Preheat
Use to decrease preheating time when using Bake or Convect
Bake. Use for all foods when baking on one rack.
• After Bake or Convect Bake has been programmed, press
the Rapid Preheat pad.
• I RACK ONLY will display, after three seconds the display
will show RAPID and PREHEAT.
To return to Standard Preheat:
• Press Rapid Preheat pad again. This will provide standard
preheat. PREHEATand the selected function will be
displayed.
Notes:
For best results, use rack position 2 or 3 when using the
Rapid Preheat option.
For optimum baking and browning results, Rapid Preheat
is not recommended when baking on multiple racks.
18
Convect Roast
To set Convect Roast:
1. Place food in the oven. Tile two-piece broiler pan provided
with your oven can be used for convection roasting.
/, .........
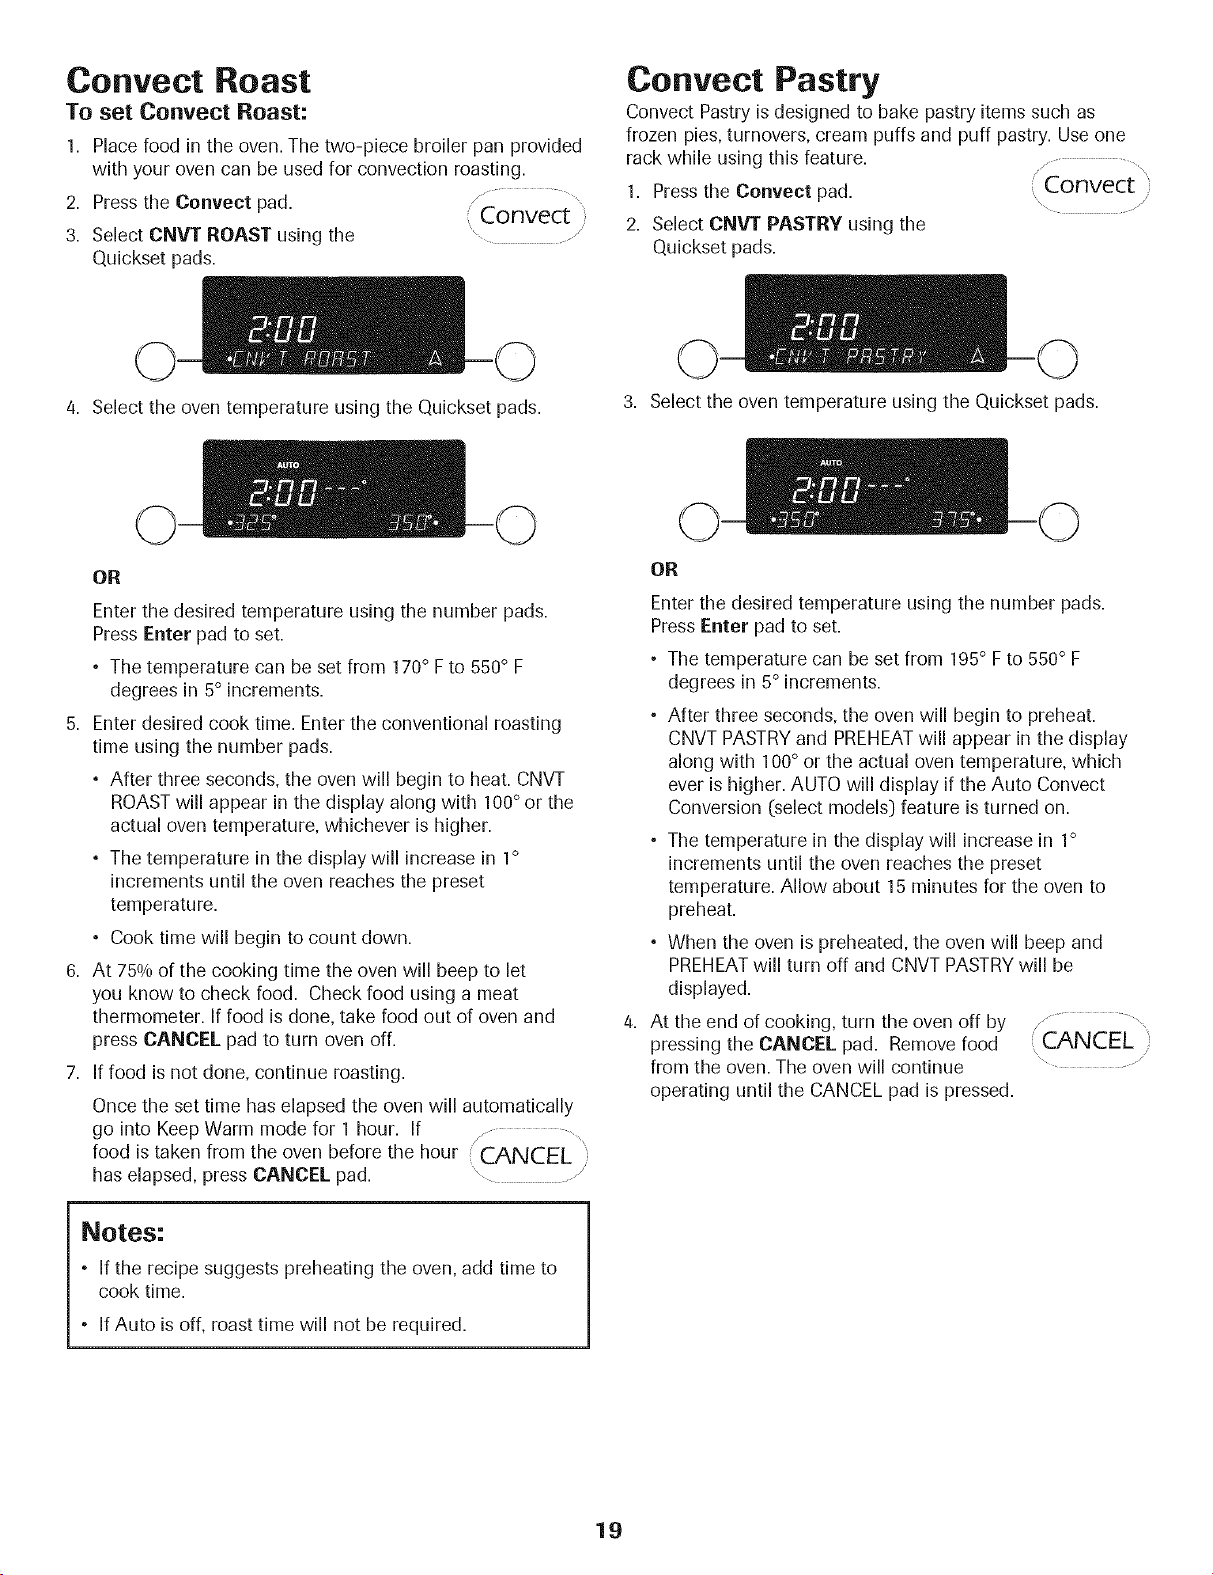
2. Press the Convect pad. Convect '
3. Select CNVT ROAST using the ...............
Quickset pads.
Convect Pastry
Convect Pastry is designed to bake pastry items such as
frozen pies, turnovers, cream puffs and puff pastry. Use one
rack while using this feature, j,...................,
1. Press the Cenvect pad. ( Convect )
2. Select CNVT PASTRY using the
Quickset pads.
4. Select the oven temperature using the Quickset pads.
3. Select the oven temperature using the Quickset pads.
OR
Enter the desired temperature using the number pads.
Press Enter pad to set.
• The temperature can be set from 170° F to 550° F
degrees in 5° increments.
5. Enter desired cook time. Enter the conventional roasting
time using the number pads.
° After three seconds, the oven will begin to heat. CNVT
ROASTwill appear in the display along with 100° or the
actual oven temperature, whichever is higher.
° The temperature in the display will increase in 1°
increments until the oven reaches the preset
temperature.
° Cook time will begin to count down.
6. At 750/0of the cooking time the oven will beep to let
you know to check food. Check food using a meat
thermometer. If food is done, take food out of oven and
press CANCEL pad to turn oven off.
7. If food is not done, continue roasting.
Once the set time has elapsed the oven will automatically
go into Keep Warm mode for 1 hour. If / ............... ,,
food is taken from the oven before the hour .-(,CANCEL j';
has elapsed, press CANCEL pad. ..........
OR
Enter the desired temperature using the number pads.
Press Enter pad to set.
• The temperature can be set from 195° F to 550° F
degrees in 5° increments.
• After three seconds, the oven will begin to preheat.
CNVT PASTRYand PREHEATwill appear in the display
along with 100° or the actual oven temperature, which
ever is higher. AUTO will display if the Auto Convect
Conversion (select models) feature is turned on.
• The temperature in the display will increase in 1°
increments until the oven reaches the preset
temperature. Allow about 15 minutes for the oven to
preheat.
° When the oven is preheated, the oven will beep and
PREHEATwill turn off and CNVT PASTRY will be
displayed.
At the end of cooking, turn the oven off by _.__J.................
\
pressing the CANCEL pad. Remove food (J-_NLEL
from the oven. The oven will continue ...............
operating until the CANCEL pad is pressed.
Notes:
° if the recipe suggests preheating the oven, add time to
cook time.
° If Auto is off, roast time will not be required.
19
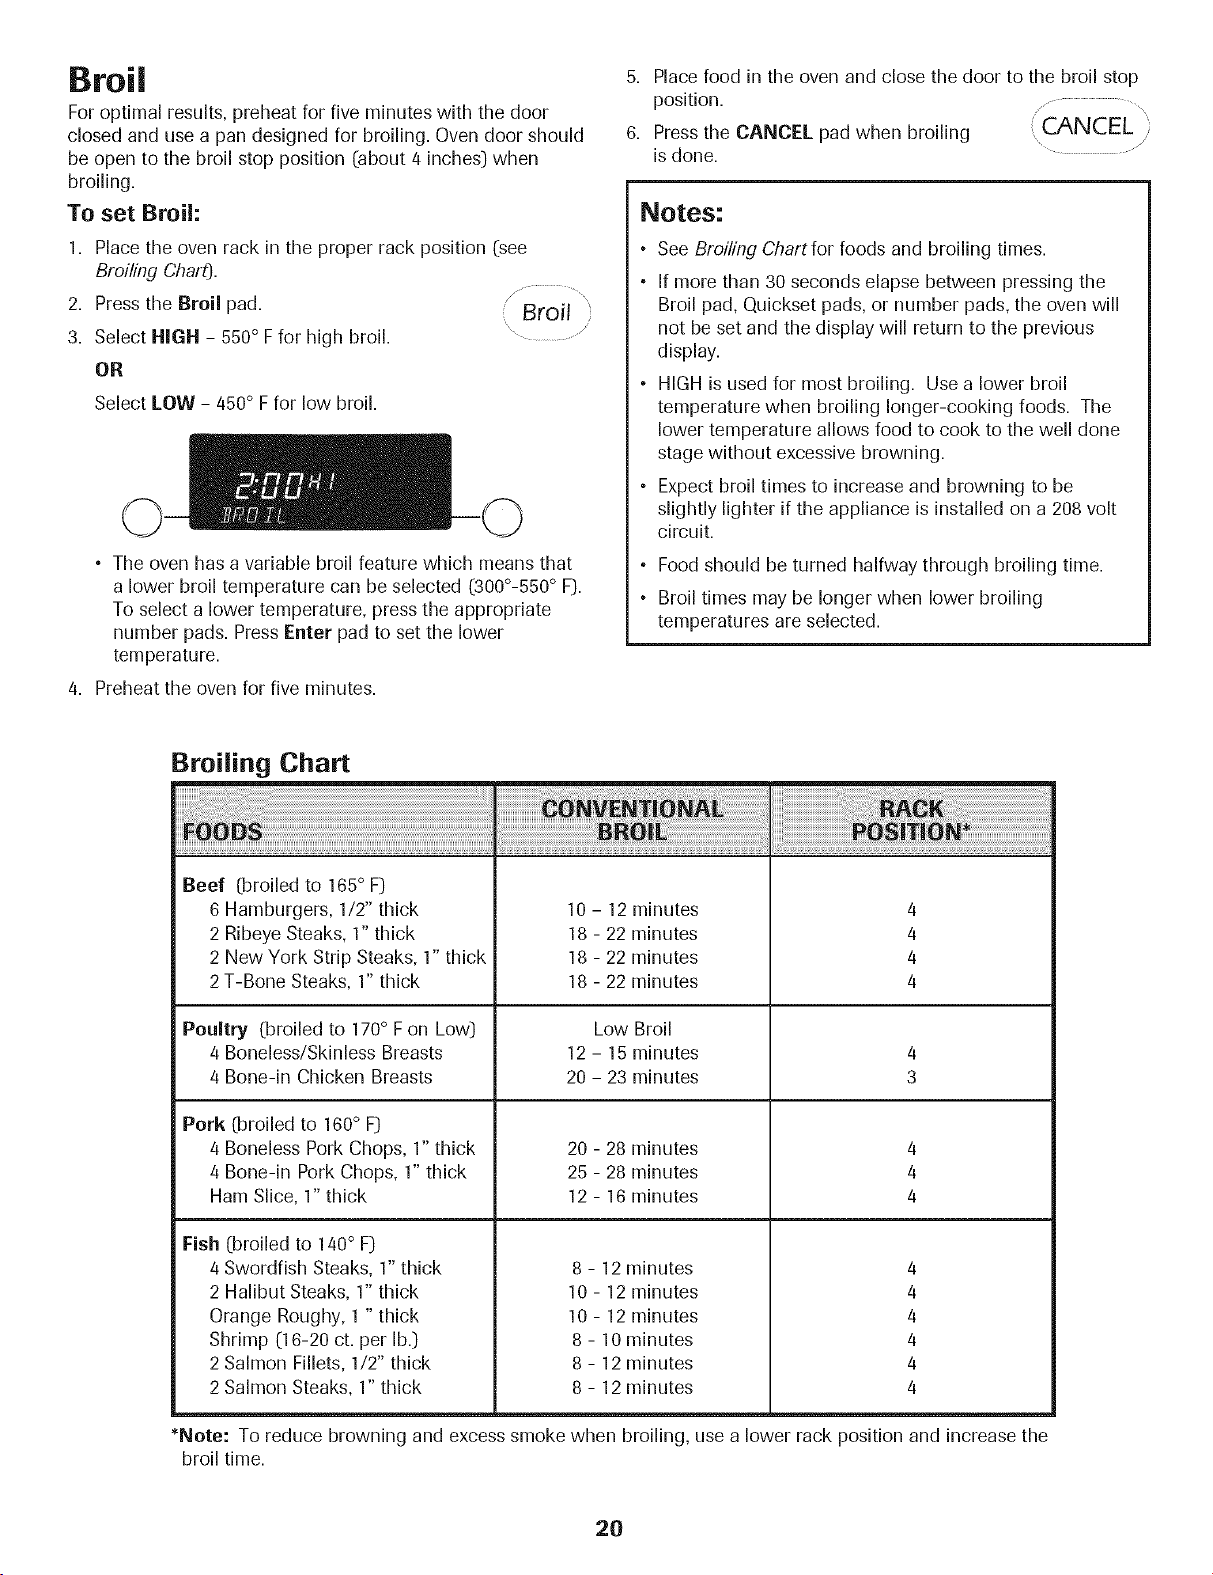
Broil
For optimal results, preheat for five minutes with the door
closed and use a pan designed for broiling. Oven door should
be open to the broil stop position (about 4 inches) when
broiling.
To set Broil:
1. Place the oven rack in the proper rack position (see
Broiling Chart).
2. Pressthe Broil pad.
3. Select HiGH - 550° F for high broil.
OR
Select LOW - 450° F for low broil.
• The oven has a variable broil feature which means that
a lower broil temperature can be selected (3000-550° El.
To select a lower temperature, press the appropriate
number pads. Press Enter pad to set the lower
temperature.
4. Preheat the oven for five minutes.
5. Place food in the oven and close the door to the broil stop
position.
6. Pressthe CANCEL pad when broiling CANCEL
is done. .............
Notes:
o
o
See Broiling Chartfor foods and broiling times.
If more than 30 seconds elapse between pressing the
Broil pad, Quickset pads, or number pads, the oven will
not be set and the display will return to the previous
display.
HIGH is used for most broiling. Use a lower broil
temperature when broiling longer-cooking foods. The
lower temperature allows food to cook to the well done
stage without excessive browning.
Expect broil times to increase and browning to be
slightly lighter if the appliance is installed on a 208 volt
circuit.
° Food should be turned halfway through broiling time.
• Broil times may be longer when lower broiling
temperatures are selected.
Broiling Chart
Beef (broiled to 165° F)
6 Hamburgers, 1/2" thick
2 Ribeye Steaks, 1" thick
2 New York Strip Steaks, 1" thick
2 T-Bone Steaks, 1" thick
Poultry (broiled to 170° F on Low)
4 Boneless/Skinless Breasts
4 Bone-in Chicken Breasts
Pork (broiled to 160° F)
4 Boneless Pork Chops, 1" thick
4 Bone-in Pork Chops, 1" thick
Ham Slice, 1" thick
Fish (broiled to 140° F)
4 Swordfish Steaks, 1" thick
2 Halibut Steaks, 1" thick
Orange Roughy, 1 "thick
Shrimp (16-20 ct. per lb.)
2 Salmon Fillets, 1/2" thick
2 Salmon Steaks, 1" thick
10 - 12 minutes
18 - 22 minutes
18 - 22 minutes
18 - 22 minutes
Low Broil
12 - 15 minutes
20 - 23 minutes
20 - 28 minutes
25 - 28 minutes
12 - 16 minutes
8 - 12 minutes
10 - 12 minutes
10 - 12 minutes
8 - 10 minutes
8 - 12 minutes
8 - 12 minutes
4
4
4
4
4
3
4
4
4
4
4
4
4
4
4
*Note: To reduce browning and excess smoke when broiling, use a lower rack position and increase the
broil time.
2O
Oven Fan
A convection fan (select models) is used to circulate hot air in
the oven when the convection feature is selected.
Important: The convection fan will automatically stop when
the oven door is opened.
Oven Vent
The oven vent is incorporated into the downdraft ventilation
system on the cooking surface.
When the oven is in use, the area near the oven vent may
become hot enough to cause burns. Do not block the vent
opening for best baking results.
Oven Light
The oven light automatically comes on when
the door is opened. When the door is closed,
press the Oven Light pad to turn the oven ......Light j,
light on and off. A beep will sound every time
the Oven Light pad is pressed. If the oven light is on when the
door is opened, the light will go off when the door is closed.
Oven Bottom
Protect the oven bottom against spillovers, especially acidic or
sugary spills, as they may discolor the porcelain enamel. Use
the correct pan size to avoid spillovers and boilovers. Do not
place utensils or aluminum foil directly on the oven
bottom.
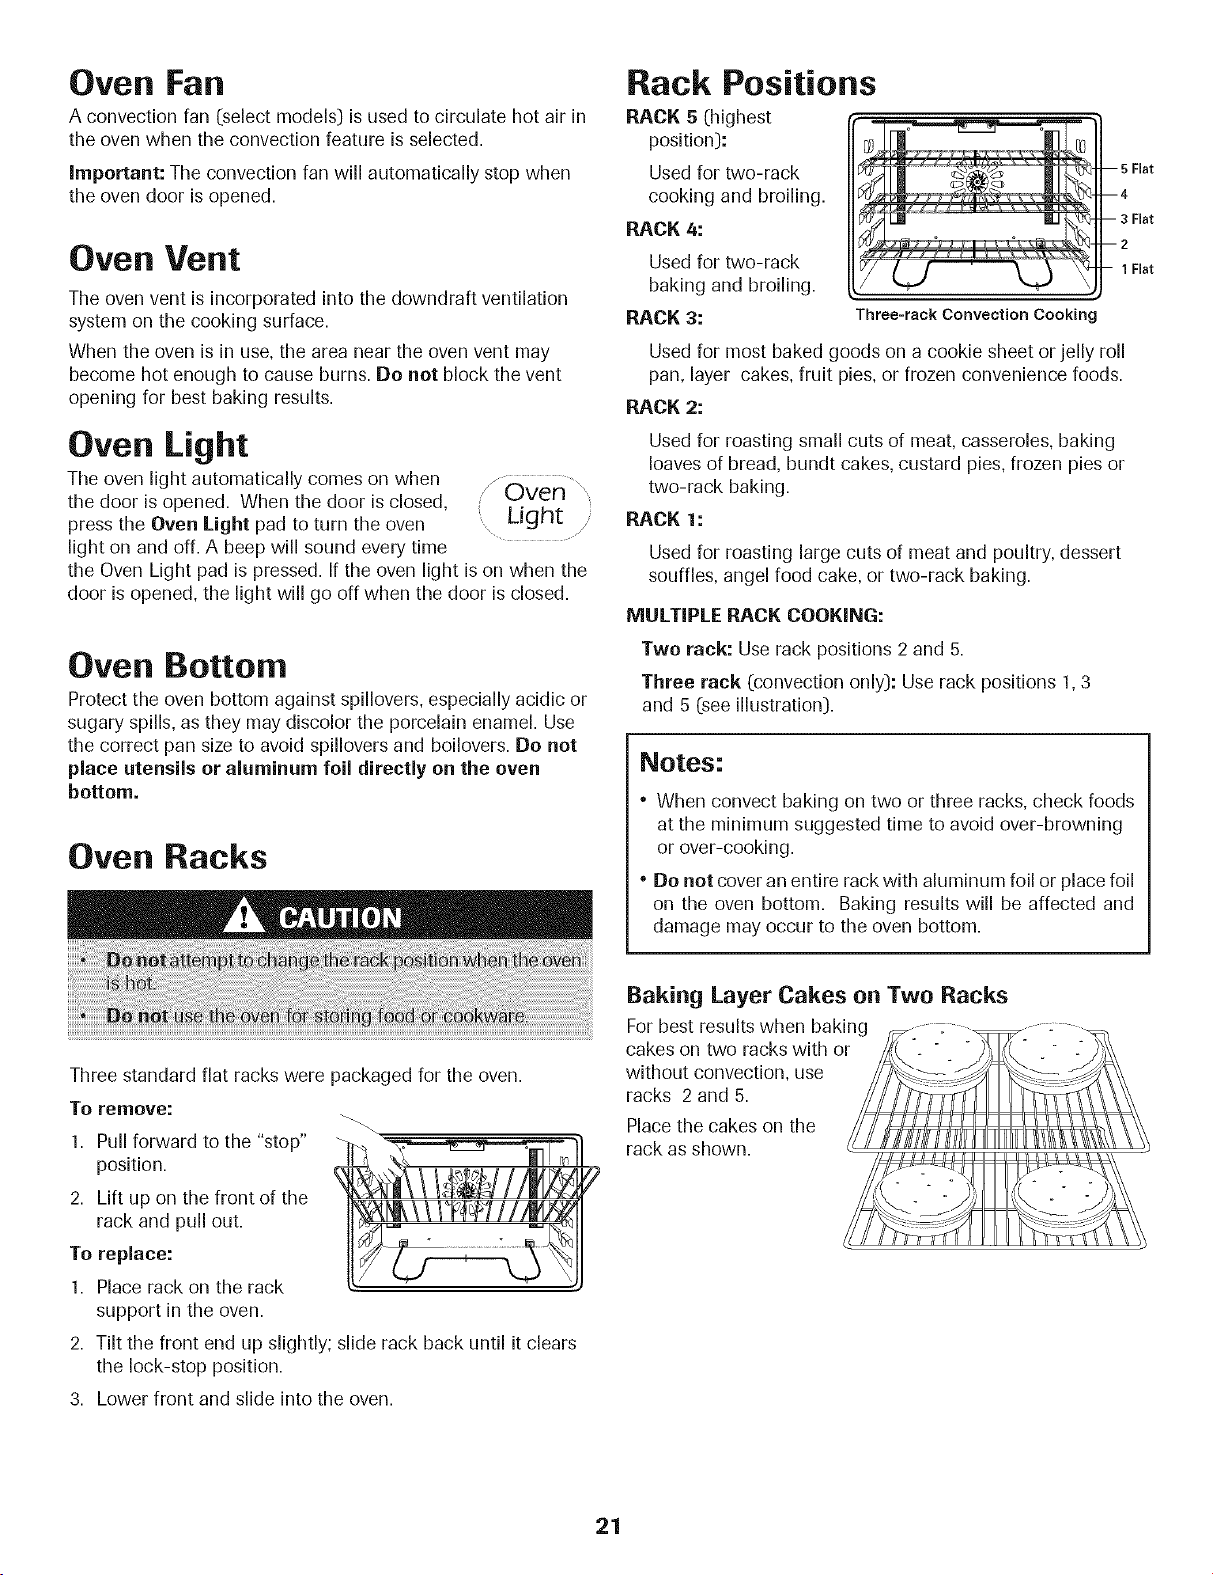
Oven Racks
Rack Positions
RACK 5 (highest
position):
Used for two-rack
cooking and broiling.
RACK 4:
Used for two-rack
baking and broiling.
RACK 3: Three=rack Convection Cooking
Used for most baked goods on a cookie sheet or jelly roll
pan, layer cakes, fruit pies, or frozen convenience foods.
RACK 2:
Used for roasting small cuts of meat, casseroles, baking
loaves of bread, bundt cakes, custard pies, frozen pies or
two-rack baking.
RACK 1:
Used for roasting large cuts of meat and poultry, dessert
souffles, angel food cake, or two-rack baking.
MULTIPLE RACK COOKING:
Two rack: Use rack positions 2 and 5.
Three rack (convection only): Use rack positions 1,3
and 5 (see illustration).
3 Flat
1 Flat
Notes:
" When convect baking on two or three racks, check foods
at the minimum suggested time to avoid over-browning
or over-cooking.
, Do not cover an entire rack with aluminum foil or place foil
on the oven bottom. Baking results will be affected and
damage may occur to the oven bottom.
Three standard flat racks were packaged for the oven.
To remove:
1. Pull forward to the "stop"
position.
2. Lift up on the front of the
rack and pull out.
To replace:
1. Place rack on the rack
support in the oven.
2. Tilt the front end up slightly; slide rack back until it clears
the lock-stop position,
3. Lower front and slide into the oven.
Baking Layer Cakes on Two Racks
For best results when g
cakes on two racks with or
without convection, use
racks 2 and 5.
Place the cakes on the
rack as shown.
21
OPT|
More Options
Cook & Hold ([selectmodels)
1. Press the More Options pad.
2. Select COOK/HOLD.
/More .............
Optionsj
3. Enter cook time using Quickset pads or the number pads.
4. Select RAKE or CONVECT.
5. When BAKE is pressed, select the temperature using
Quickset pads or the number pads.
6. When CONVECTis pressed, select CNV[ BAKE, CNVT
ROAST or CNV[ PASTRY, then select the desired
temperature using the Quickset pads or the number pads.
The oven will cook for the selected time, then Keep Warm for
one hour. The oven will automatically turn off.
Important: If the recipe recommends preheating the oven,
add time to the cook time.
Delay
1. Press the More Options pad.
2. Press the arrow until DELAY is displayed.
3. Select DELAY.
/More
,Options
\ .......... /
4. Select Delay time using Quickset pads or the number
pads.
5. Select BAKE, CONVECT or CLEAN, then select
temperature using the Quickset or number pads.
To set Delay Bake:
1. Follow "Delay" steps 1-4 (see above].
2. Select from the displayed temperatures or use the
number pads to enter the temperature.
3. Select the time to cook from the displayed times or use
the number pads to enter the cooking time.
4. The display will show DELAY TIME, the selected function,
the preset temperature and the delay time countdown.
When the delay time has expired, the cook time will be
displayed and the oven will begin to preheat.
To set Delay Convect: (select models]
1. Follow "Delay" steps 1-4 (see above].
2. Select RAKE, ROAST or PASTRY.
3. Select from the displayed temperatures or use the
number pads to enter the temperature.
4. Select the time to cook from the displayed times or use
the number pads to enter the cooking time.
5. The display will show CONVECT DELAY, the selected function,
the preset temperature and the delay time countdown. When
the delay time has expired, the cook time will be displayed and
the oven will begin to preheat.
To set Delay Clean:
1. Follow "Delay" steps 1-4 (see below left].
2. REMOVE RACKSwill show in the display. Remove the racks
from the oven and select CONTINUE.
Set LIGHT soil level by entering 200 using the number pads
for two hours of cleaning time. Select MEDIUM or HEAVY
soil level using the Quickset pads. There is a brief delay while
the door locks.
4. DELAY CLEAN, the cleaning time, the delay time and unlock
time (based on the selected soil level] will show in the display.
When the delay time has expired, the clean time will be
displayed and the oven will begin to preheat.
For more information on self-cleaning, see page 5.
Proofing (select models)
The Proofing feature can be used to raise yeast-based bread
products prior to baking. There are two proofing methods available
- Rapid and Standard.
Standard proofing in the oven protects dough from room
temperature changes or drafts that commonly affect proofing
done on the countertop.
Rapid proofing provides faster proofing results than countertop
or Standard proofing, without harming the yeast.
1. Press More Options pad.
2. Select PROOFING.
3. Select RAPID or STANDARD.
4. When proofing is complete, remove the
dough from the oven and press the CANCEL pad.
/!More
Options
, /
// ........
{ CANCEL )
\ /
Notes:
For any dough that requires one rise, either Standard or
Rapid Proofing can be used.
When using frozen bread dough, choose RAPID PROOFING.
There is no need to thaw dough before proofing.
For dough requiring two rises, Standard Proofing must be
used for the first rising period. Either Standard or Rapid
Proofing can be used for the second rise.
If oven temperature is too high for proofing, OVEN COOLING
will appear in the display.
22
Keep Warm
The Keep Warm feature is used to safely keep hot foods warm
or for warming breads and plates,
1. Press More Options pad. /More
2. Press the arrow to scroll. Options
............................. /
3. Select KEEP WARM.
4. Select one of the displayed temperatures or enter desired 3.
temperature using the number pads, Temperatures can be 4.
selected between 145° and 190° F.
5.
5. KEEPWARM and the temperature will be displayed.
6. When oven has preheated, a beep sounds and WARMING
and the temperature will be displayed.
/ ........ \
7. When finished, press the CANCEL pad and CANCEL :
remove food or plates from the oven. "................ J
To Warm Dinner Rolls:
• Cover rolls loosely with foil and place in oven.
• Press More Options pad.
° Select KEEP WARM.
• Select 170° temperature. Warm for 12-15 minutes.
To Warm Plates:
• Place two stacks of up to four plates each in the oven.
• Press More Options pad.
• Select KEEP WARM.
• Select 170° temperature.
/More .............
,Options
........ /
• Warm for five minutes. Turn off the oven by pressing the
CANCEL pad and leave plates in the oven for 15 minutes
more.
• Use only oven-safe plates, check with the manufacturer.
• Bo not set warm dishes on a cold surface as rapid
temperature changes could cause crazing or breakage.
Notes:
° Food should be hot when placed in oven.
• For optimal food quality, foods should be kept warm for
no Iongerthan 1 hour.
• To keep foods from drying, cover loosely with foil or a
glass lid.
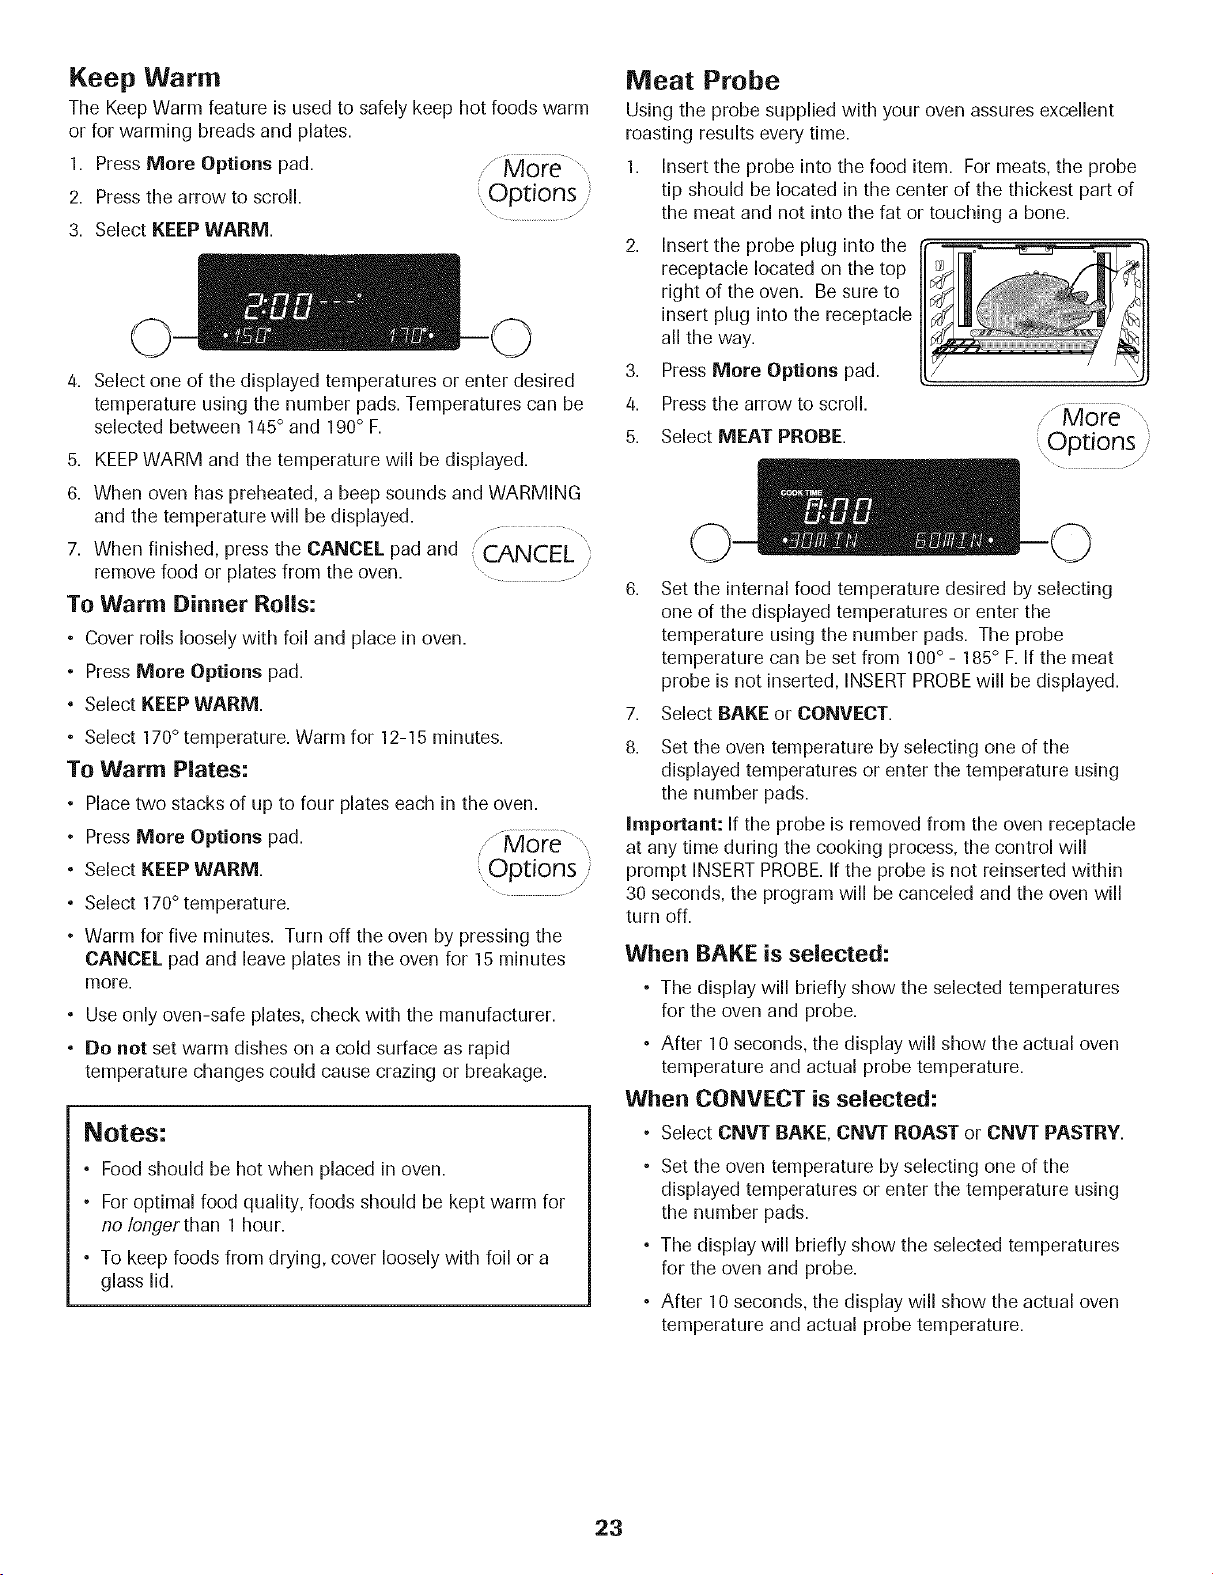
Meat Probe
Using the probe supplied with your oven assures excellent
roasting results every time.
1. Insert the probe into the food item. For meats, the probe
tip should be located in the center of the thickest part of
the meat and not into the fat or touching a bone.
2. Insert the probe plug into the
receptacle located on the top
right of the oven. Be sure to
insert plug into the receptacle
all the way.
Press More Options pad.
Pressthe arrow to scroll.
Select MEAT PROBE.
6. Set the internal food temperature desired by selecting
one of the displayed temperatures or enter the
temperature using the number pads. The probe
temperature can be set from 100° - 185° F. If the meat
probe is not inserted, INSERTPROBEwill be displayed.
7. Select BAKE or CONVECT.
8. Set the oven temperature by selecting one of the
displayed temperatures or enter the temperature using
the number pads.
Important: If the probe is removed from the oven receptacle
at any time during the cooking process, the control will
prompt INSERTPROBE. If the probe is not reinserted within
30 seconds, the program will be canceled and the oven will
turn off.
When BAKE is selected:
• The display will briefly show the selected temperatures
for the oven and probe.
• After 10 seconds, the display will show the actual oven
temperature and actual probe temperature.
When CONVECT is selected:
• Select CNVT RAKE, CNVT ROAST or CNVT PASTRY.
• Set the oven temperature by selecting one of the
displayed temperatures or enter the temperature using
the number pads.
• The display will briefly show the selected temperatures
for the oven and probe.
• After 10 seconds, the display will show the actual oven
temperature and actual probe temperature.
23
9. When the selected internal temperature of the food has
been reached, the oven will shut off and a beep will sound.
10. Remove the probe from the oven receptacle. The probe
will be hot. Hold probe plug with an oven mitt or
potholder when removing from the oven.
Notes:
• The probe must be removed from the oven when it is not
being used.
• Because of the excellent insulation of the oven, the
retained heat continues to cook the food after the beep
has sounded and the oven has turned off. For this
reason, it is important to remove the food from the oven
as soon as the beep sounds.
• Use the handle of the probe for inserting or removing.
Do not pull on the cable.
° The probe is hot after cooking - use a potholder or
oven mitt to remove.
° To protect the probe, if meat is not completely thawed,
insert probe after 1-2 hours of roasting.
• To clean cooled probe, wipe with a soapy dishcloth.
Do not submerge probe in water or wash in
dishwasher.
Suggested internal Food Temperatures
Ground Beef 165° F
FreshBeef, Veal, Lamb Medium Rare 145° F
Medium 160° F
Well Done 170° F
Chicken,Turkey Whole 180° F
Breast 170° F
Pork Medium 160° F
Well Done 170° F
Ham, Precooked 140° F
Drying
For best results, use a drying rack. A drying rack allows air to
circulate evenly around the food.
The convection fan will operate during the drying procedure.
To set Drying:
1. The oven door needs to be opened slightly to allow mois-
ture to escape from the oven during the drying process.
• Open the oven door slightly.
• Place the magnetic door spacer
(Part No. 8010P146-60) over the
plunger switch at the upper right
side of the oven frame. The spacer
provides a gap between the oven
frame and the oven door to allow
moisture to escape.
2,
3.
• Gently close the door until the spacer magnet makes
contact with the oven door. The magnet will hold the
spacer in the proper position during the drying process
and allows the door to be opened at any time during
drying without losing proper positioning.
Important: If the spacer is not placed correctly, the
convection fan will not operate.
PressConvect pad.
Pressthe arrow to scroll.
4. Select DRYING.
5. Select a displayed temperature or enter a temperature with
the number pads. Temperatures can be set between
100° F and 200° F.
6. DRYING and the temperature will be displayed. PREHEAT
will be displayed until the programmed temperature is
reached.
/ ..............
7. When drying is complete, remove food from ir_r,_r=_
oven and press CANCEL pad. ,--_J'J,,-LL,,......................................
/
Follow the Drying Guide on page 25 for drying times.
Check foods at minimum times given. Cool foods to room
temperature before testing for doneness.
Notes:
• To purchase a drying rack, contact your Jenn-Air
dealer for the "DRYINGRACK" Accessory Kit or call
1-800-JENNAIR (1-800-536-6247).
° Most fruits and vegetables dry well and retain their color
when dried at 140° F. Meat and jerky should be dried at
145° - 150° F. For optimal flavor, dry herbs at 100° F,
however, at this lower temperature expect extended
drying times of up to 8 hours.
• The length of drying times vary due to the following:
Water and sugar content of food, size of food
pieces, amount of food being dried, humidity in the
air.
° Check foods at the minimum drying time. Dry longer if
necessary.
° Fruits that turn brown when exposed to air should be
treated with an antioxidant. Try one of the following
methods:
1. Dip fruit in a mixture of two parts bottled lemon juice
to one part cool water.
2. Soak fruit in a solution of 1 tsp. ascorbic acid or
commercial antioxidant to 1 quart of cold water.
° Foods may drip during the drying process. After drying
high acid or sugary foods, clean the oven bottom with
soap and water. The porcelain oven finish may discolor if
acidic or sugary food soils are not wiped up prior to high
heat or a self-cleaning cycle.
• More than one rack of food may be dried at the same
time. However, additional drying time is needed.
• Refer to other resources at your local library or call your
local County Extension service for additional information.
24
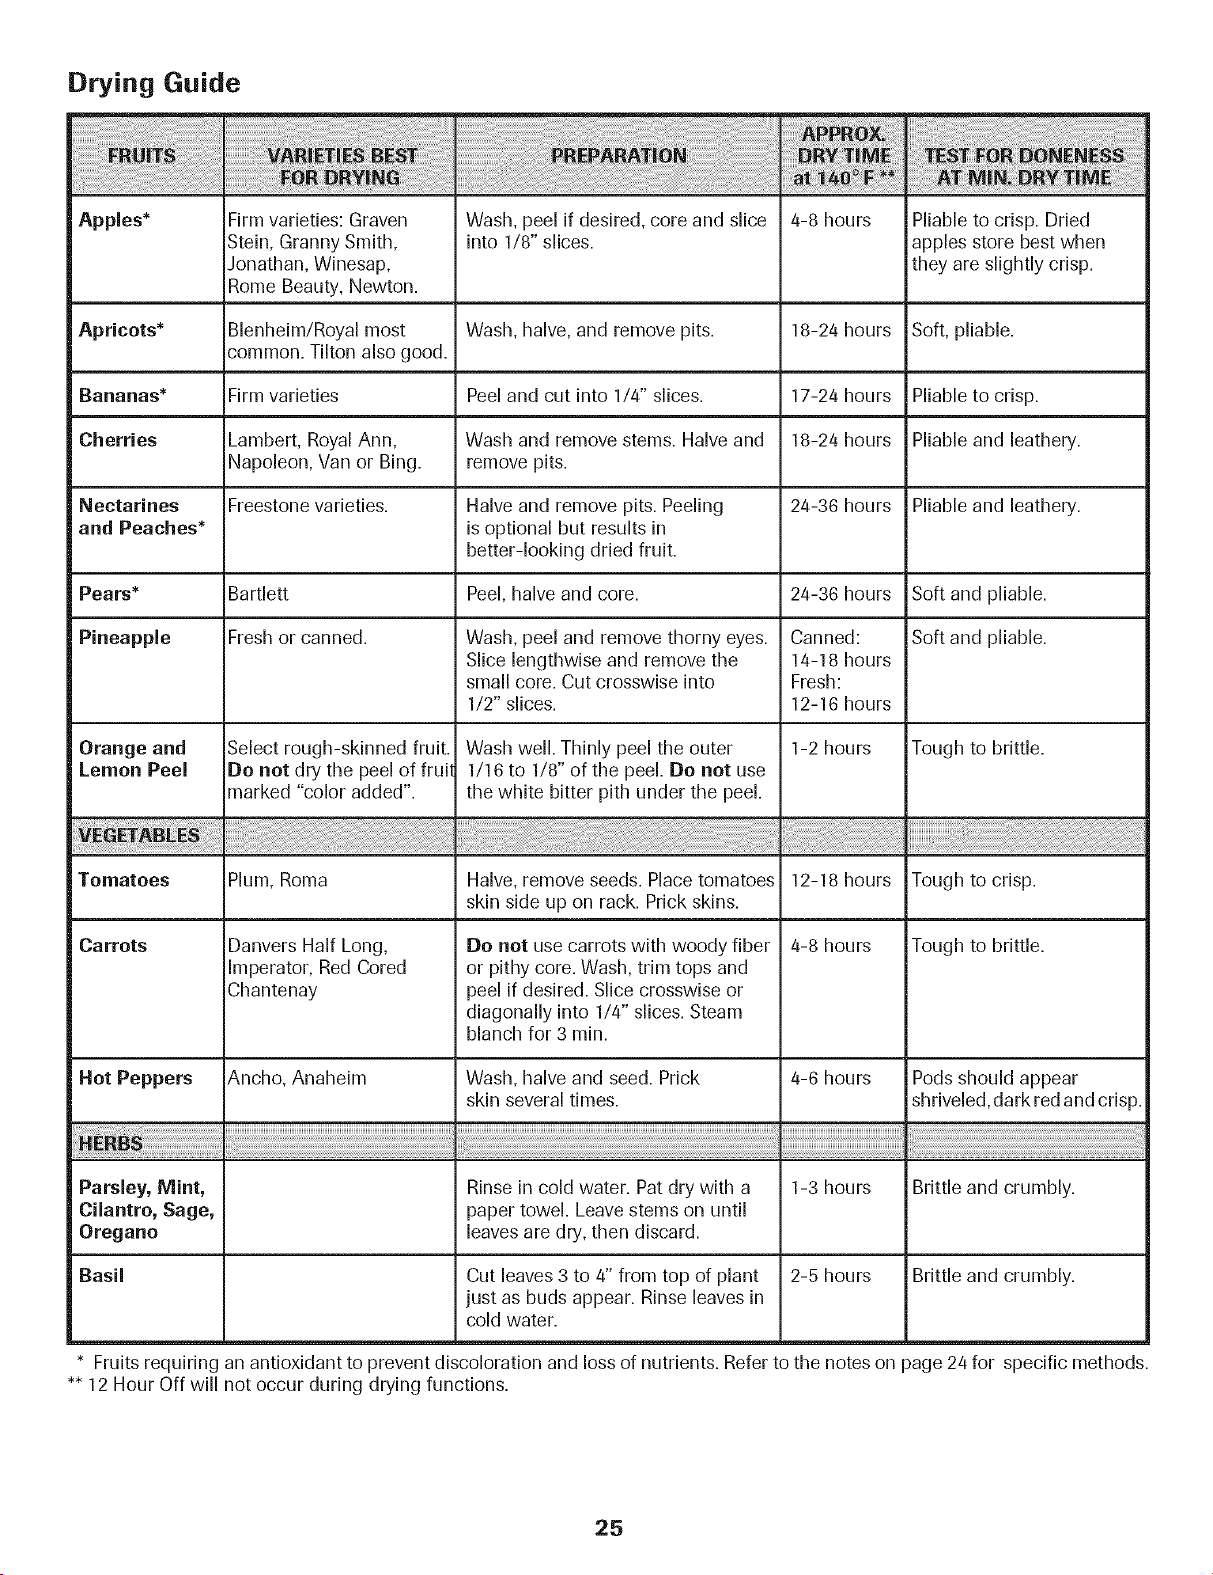
Drying Guide
Apples* Firm varieties: Graven Wash, peel if desired, core and slice 4-8 hours Pliable to crisp. Dried
Stein, Granny Smith, into 1/8" slices, apples store best when
Jonathan, Winesap, they are slightly crisp.
Rome Beauty, Newton.
Apricots* Blenheim/Royal most Wash, halve, and remove pits. 18-24 hours Soft, pliable.
common. Tilton also good.
Bananas* Firm varieties Peel and cut into 1/4" slices. 17-24 hours Pliable to crisp.
Cherries Lambert, RoyalAnn, Wash and remove stems. Halve and 18-24 hours Pliable and leathery.
Napoleon, Van or Bing. remove pits.
Nectarines Freestone varieties. Halve and remove pits. Peeling 24-36 hours Pliable and leathery.
and Peaches* is optional but results in
better-looking dried fruit.
Pears* Bartlett Peel, halve and core. 24-36 hours Soft and pliable.
Pineapple Fresh or canned. Wash, peel and remove thorny eyes. Canned: Soft and pliable.
Slice lengthwise and remove the 14-18 hours
small core. Cut crosswise into Fresh:
1/2" slices. 12-16 hours
1-2 hours Tough to brittle.Orange and
Lemon Peel
Select rough-skinned fruit.
Be not dry the peel of fruil
marked "color added".
Wash well. Thinly peel the outer
1/16 to 1/8" of the peel. Do not use
the white bitter pith under the peel.
Tomatoes Plum, Roma Halve, remove seeds. Place tomatoes 12-18 hours Tough to crisp.
skin side up on rack. Prick skins.
Carrots 4-8 hours Tough to brittle.
Hot Peppers
Danvers Half Long,
Imperator, Red Cored
Chantenay
Ancho, Anaheim
Do not use carrots with woody fiber
or pithy core. Wash, trim tops and
peel if desired. Slice crosswise or
diagonally into 1/4" slices. Steam
blanch for 3 min.
Wash, halve and seed. Prick
skin several times.
Parsley, Mint,
Cilantro, Sage,
Oregano
Basil
Rinse in cold water. Pat dry with a
paper towel. Leave stems on until
leaves are dry, then discard.
Cut leaves 3 to 4" from top of plant
just as buds appear. Rinse leaves in
cold water.
4-6 hours
Pods should appear
shriveled, dark red and crisp.
1-3 hours
2-5 hours
Brittle and crumbly.
Brittle and crumbly.
Fruits requiring an antioxidant to prevent discoloration and loss of nutrients. Refer to the notes on page 24 for specific methods.
** 12 Hour Off will not occur during drying functions.
25
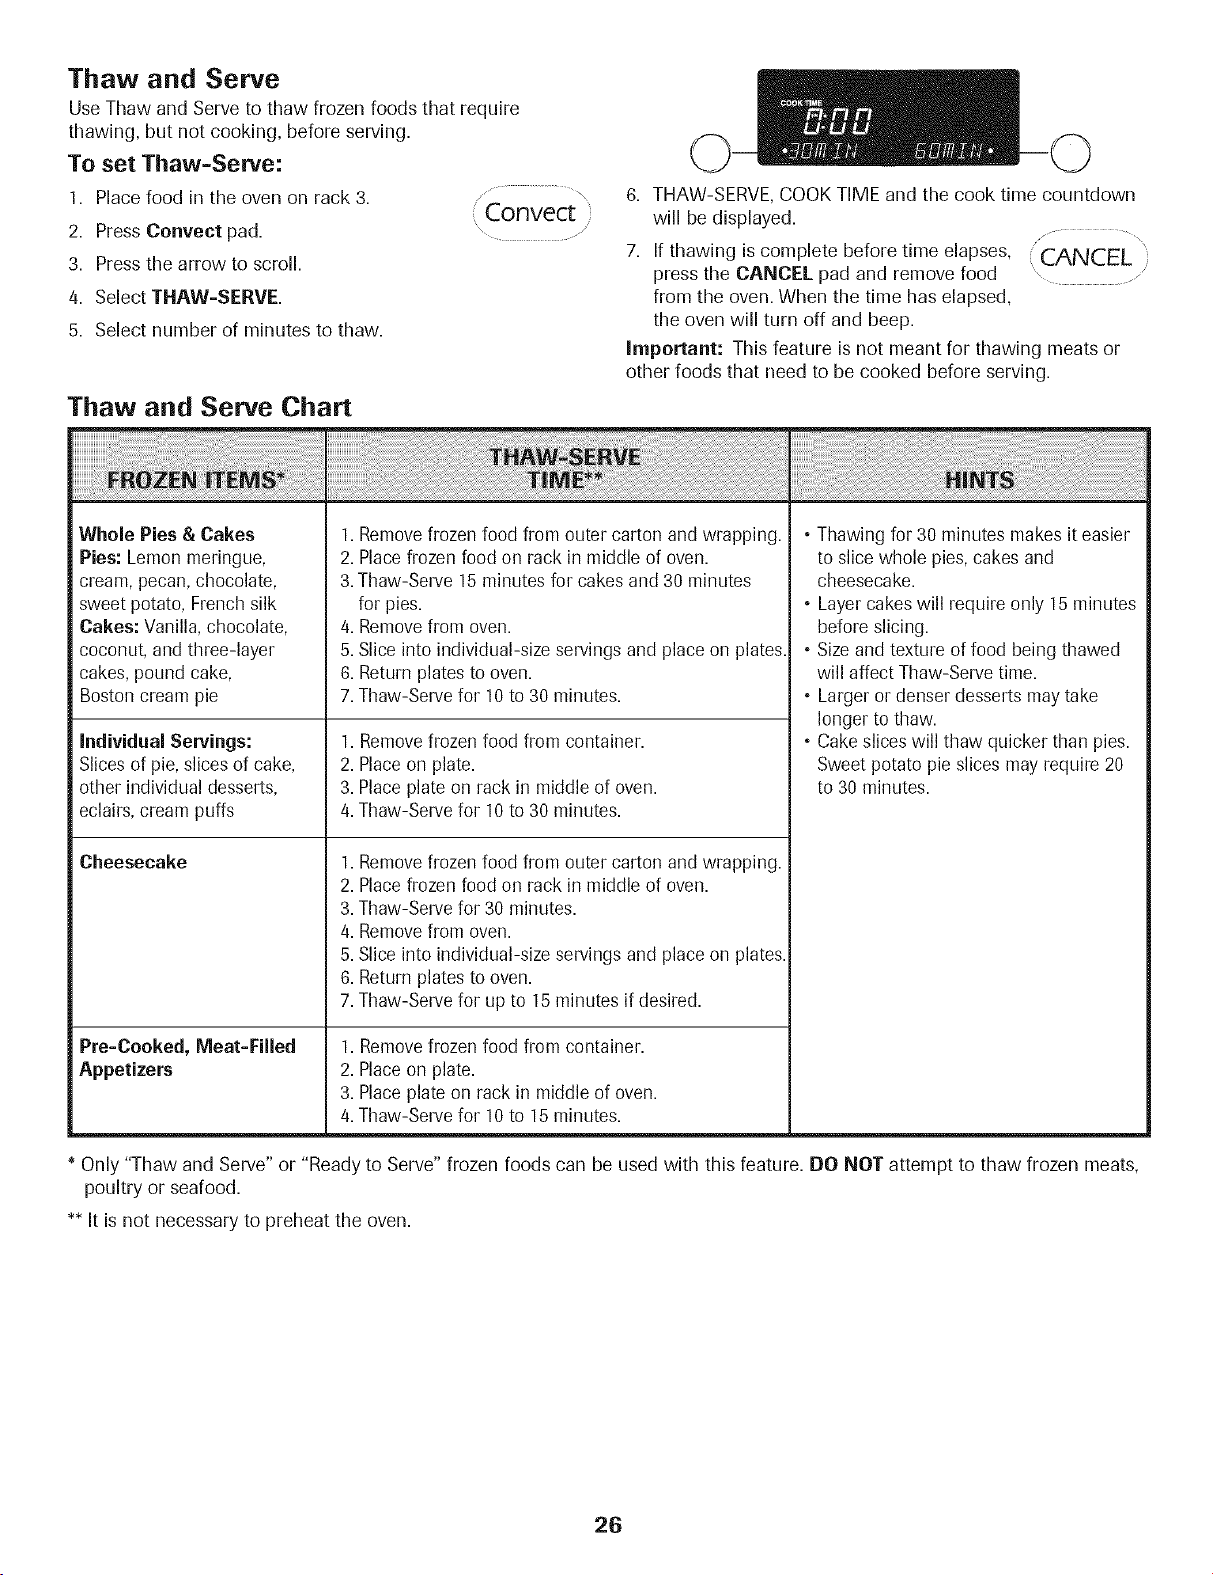
Thaw and Serve
Use Thaw and Serve to thaw frozen foods that require
thawing, but not cooking, before serving.
To set Thaw=Serve:
1. Place food in the oven on rack 3.
2. Press Convect pad.
3. Press the arrow to scroll.
4. Select THAW-SERVE.
5. Select number of minutes to thaw.
(Convect '
................................. /
Thaw and Serve Chart
6. THAW-SERVE,COOK TIME and the cook time countdown
will be displayed.
7. If thawing is complete before time elapses, "CANCEL
press the CANCEL pad and remove food ..................
from the oven. When the time has elapsed,
the oven will turn off and beep.
Important: This feature is not meant for thawing meats or
other foods that need to be cooked before serving.
Whole Pies & Cakes
Pies: Lemonmeringue,
cream, pecan,chocolate,
sweet potato, French silk
Cakes: Vanilla, chocolate,
coconut, and three-layer
cakes, pound cake,
Bostoncream pie
Individual Servings:
Slices of pie, slices of cake,
other individual desserts,
eclairs, cream puffs
Cheesecake
Pre-Ceeked, Meat-Filled
Appetizers
1. Removefrozen food from outer carton and wrapping.
2. Placefrozen food on rack in middle of oven.
3.Thaw-Serve 15 minutes for cakes and 30 minutes
for pies.
4. Removefrom oven.
5. Slice into individual-size servings and place on plates.
6. Returnplates to oven.
7. Thaw-Servefor 10to 30 minutes.
1. Removefrozen food from container.
2. Placeon plate.
3. Place plate on rack in middle of oven.
4. Thaw-Servefor 10to 30 minutes.
1. Removefrozen food from outer carton and wrapping.
2. Placefrozen food on rack in middle of oven.
3. Thaw-Servefor 30 minutes.
4. Removefrom oven.
5. Slice into individual-size servings and place on plates.
6. Returnplates to oven.
7. Thaw-Servefor up to 15minutes if desired.
1. Removefrozen food from container.
2. Placeon plate.
3. Placeplate on rack in middle of oven.
4. Thaw-Servefor 10to 15 minutes.
• Thawing for 30 minutes makes it easier
to slice whole pies, cakes and
cheesecake.
• Layer cakes will require only 15 minutes
before slicing.
• Size and texture of food being thawed
will affect Thaw-Serve time.
• Larger or denser desserts may take
longer to thaw.
• Cake slices will thaw quicker than pies.
Sweet potato pie slices may require 20
to 30 minutes.
* Only "Thaw and Serve" or "Ready to Serve" frozen foods can be used with this feature. DO NOT attempt to thaw frozen meats,
poultry or seafood.
** It is not necessary to preheat the oven.
26

AVOR|TES
Favorites
Favorites stores up to 10of your favorite recipes. Convection
ovens come with five preprogrammed recipes.
To select a recipe from the preset Recipe List:
1. Press Favorites pad.
2. Select RECIPE LIST.
3. Select desired recipe on screen or press
arrow key to scroll to the desired recipe.
Favorites
On / Off _/
5,
6.
7,
• After each desired letter wait three seconds until an
underline appears in the next space or press
Enter pad before moving on the next letter.
• Up to 14 letters including spaces can be used.
Select ENTER to save name.
Select cooking mode, such as BAKE, CONVECTBAKE,
CONVECT ROAST,etc.
Select the oven temperature using the Quickset pads.
OR
4. Once the recipe is selected, oven will begin preheating to
the set program.
• You may press the More Options pad to add
COOK/HOLD or DELAY.
5. When finished, press the CANCEL pad and remove food
from the oven.
To Save the Last Recipe Completed:
CBake,Convect Bake, Convect Roast,Convect Pastry,Convect
Broil, Drying, Keep Warm, Proofing)
1. Press Favorites pad.
2. Select SAVE LAST.
3. Enter the name using the keypads.
Favorites
On/Off
/
• For example, to save lasagna,press the <JKL> pad three
times for "L"; Press the <ARC> pad once for "A"; press
the <STU> pad once for "S". Continue until you've
finished the word.
4. After each desired letter wait three seconds until an
underline appears in the next space or press
Enter pad before moving on the next letter.
• Up to 14 letters including spaces can be used.
5. When the recipe name has been entered, the last settings
will be displayed for a few seconds.
6. RECIPELIST will then be displayed to scroll through the list.
7. Press Favorites pad to exit the Favorites menu.
To Create a New Favorite Recipe: / ...................."
Favorites ',
1. Press Favorites pad. , On/Off ,
........ /
2. Pressarrow key to scroll through selections.
3. Select CREATE NEW with touchpad on left.
4. Enter the name using the keypads.
• For example, to save lasagna, press the <.IKL> pad three
times for "L'; Press the <ARC> pad once for "A"; press
the <STU> pad once for "S". Continue until you've
finished the word.
27
Enter the desired temperature using the number pads.
8. Add Cook/Hold by selecting YES or omit Cook/Hold by
selecting NO.
9. If you selected YES,enter cook time using the Quickset
pads or the number pads.
10.Add Delay by selecting YES or omit Delay by selecting
NO.
11.If you selected YES,enter the delay time by using the
Quickset pads or the number pads.
12.The control will display programmed settings then return
to the Favorites menu.
13. Press Favorites pad to exit the Favorites menu.
To Edit a Saved Recipe:
1. Press Favorites pad.
2. Pressarrow key to scroll.
3. Select EDIT RECIPE.
4.
5,
6.
7,
To
1.
2.
3.
4.
Favorites
......,On / Off /
Select desired recipe to edit. You may need to press arrow
key to find desired recipe.
Follow menu to revise recipe settings as desired.
The display will return to the Favorites menu. RECIPELIST
will be displayed.
Press Favorites pad to exit Favorites menu.
Delete a Favorite Recipe:
Press Favorites pad.
Pressarrow key to scroll.
Select DELETE RECIPE.
i Favorites
On/Off /
Find recipe to be deleted. You may need to press arrow
key to find desired recipe.
5. The Control will ask again to make sure you want to delete
that recipe. Select YES or NO.
6. Press Favorites pad to exit Favorites menu.
To exit out of Favorites at any time, press the Favorites pad.
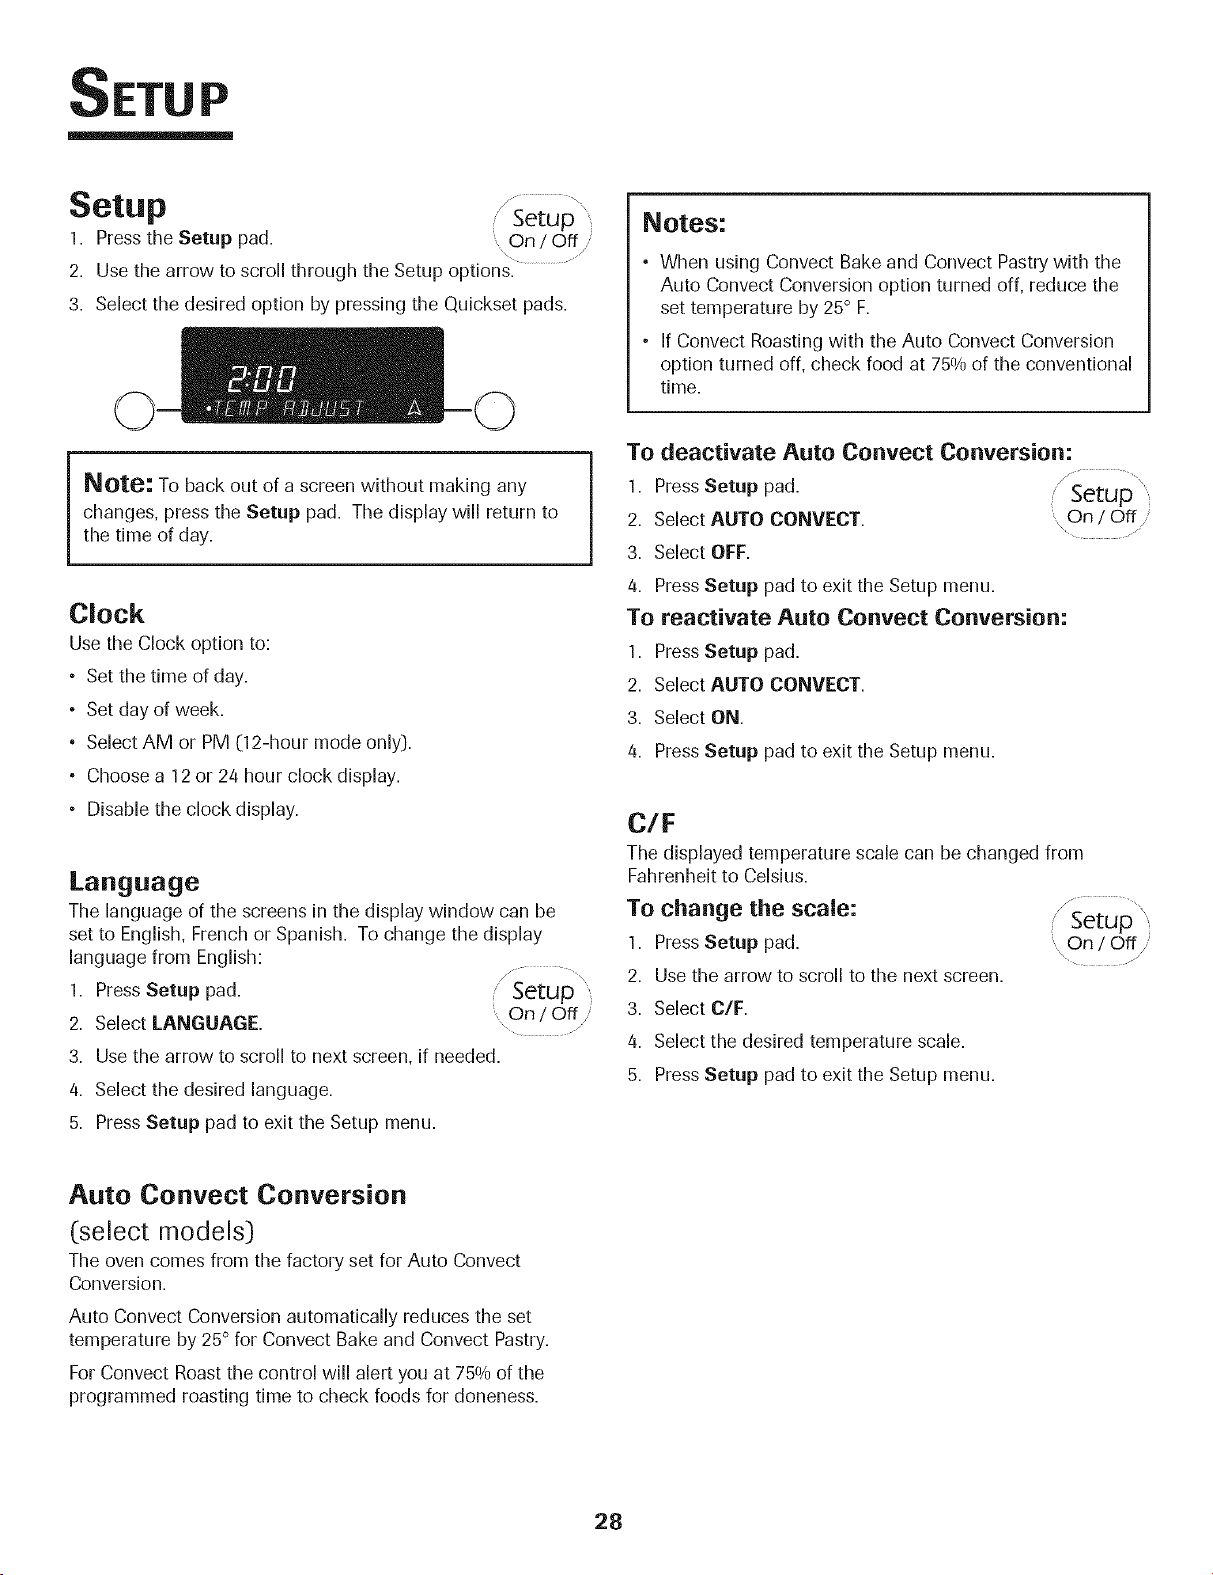
SETUP
t n
_'eLUV Setup
1. Press the Setup pad. On / Offji
2. Use the arrow to scroll through the Setup options.
3. Select the desired option by pressing the Quickset pads.
Notes:
• When using Convect Bake and Convect Pastry with the
Auto Convect Conversion option turned off, reduce the
set temperature by 25° F.
• If Convect Roasting with the Auto Convect Conversion
option turned off, check food at 750/0of the conventional
time.
Note." To back out of a screen without making any
changes, press the Setup pad. The display will return to
the time of day.
Clock
Use the Clock option to:
• Set the time of day.
• Set day of week.
° Select AM or PM (12-hour mode only).
° Choose a 12 or 24 hour clock display.
• Disable the clock display.
Language
The language of the screens in the display window can be
set to English, French or Spanish. To change the display
language from English:
x .....
1. Press Setup pad. Setup
2. Select LANGUAGE. On / Off _,
3. Use the arrow to scroll to next screen, if needed.
4. Select the desired language.
5. Press Setup pad to exit the Setup menu.
To
1. Press Setup pad.
2. Select AUTO CONVEOT.
3. Select OFF.
4. Press Setup pad to exit the Setup menu.
To reactivate Auto Convect Conversion:
deactivate Auto Convect Conversion:
Setup
,On / Off /
....... /
1. Press Setup pad.
2. Select AUTO CONVEOT.
3. Select ON.
4. Press Setup pad to exit the Setup menu.
C/F
The displayed temperature scale can be changed from
Fahrenheit to Celsius.
To change the scale:
1. Press Setup pad. On / Off,
\ .........
2. Use the arrow to scroll to the next screen.
3. Select C/F.
4. Select the desired temperature scale.
5. Press Setup pad to exit the Setup menu.
Auto Convect Conversion
(select models)
The oven comes from the factory set for Auto Convect
Conversion.
Auto Convect Conversion automatically reduces the set
temperature by 25° for Convect Bake and Convect Pastry.
For Convect Roast the control will alert you at 750/0of the
programmed roasting time to check foods for doneness.
28
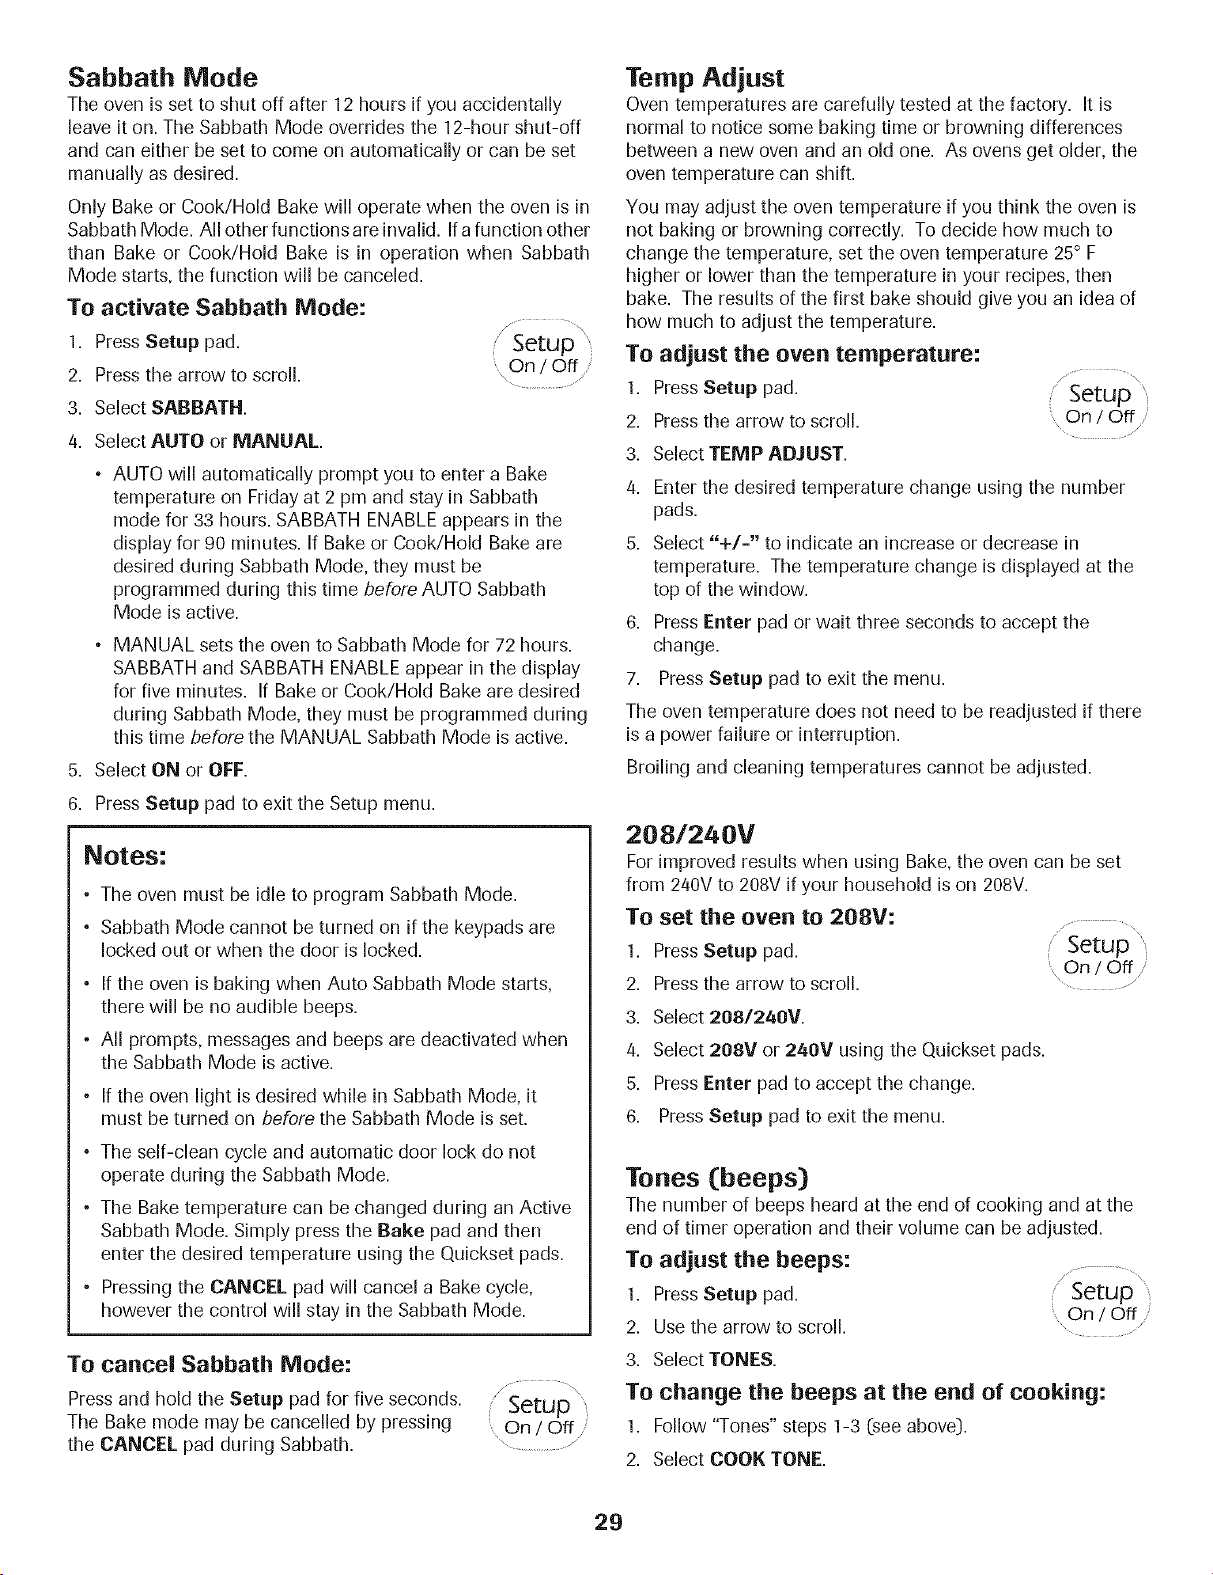
Sabbath Mode
The oven is set to shut off after 12 hours if you accidentally
leave it on. The Sabbath Mode overrides the 12-hour shut-off
and can either be set to come on automatically or can be set
manually as desired.
Only Bake or Cook/Hold Bake will operate when the oven is in
Sabbath Mode. All other functionsare invalid. Ifa function other
than Bake or Cook/Hold Bake is in operation when Sabbath
Mode starts, the function will be canceled.
To activate Sabbath Mode:
1. PressSetup pad.
2. Pressthe arrow to scroll.
3. Select SABBATH.
Setup
\On / Off'
4. Select AUTO or MANUAL.
• AUTO will automatically prompt you to enter a Bake
temperature on Friday at 2 pm and stay in Sabbath
mode for 33 hours. SABBATH ENABLE appears in the
display for 90 minutes. If Bake or Cook/Hold Bake are
desired during Sabbath Mode, they must be
programmed during this time before AUTO Sabbath
Mode is active.
• MANUAL sets the oven to Sabbath Mode for 72 hours.
SABBATH and SABBATH ENABLE appear in the display
for five minutes. If Bake or Cook/Hold Bake are desired
during Sabbath Mode, they must be programmed during
this time before the MANUAL Sabbath Mode is active.
5. Select ON or OFF.
6. PressSetup pad to exit the Setup menu.
Notes:
• The oven must be idle to program Sabbath Mode.
• Sabbath Mode cannot be turned on if the keypads are
locked out or when the door is locked.
• If the oven is baking when Auto Sabbath Mode starts,
there will be no audible beeps.
• All prompts, messages and beeps are deactivated when
the Sabbath Mode is active.
• If the oven light is desired while in Sabbath Mode, it
must be turned on before the Sabbath Mode is set.
° The self-clean cycle and automatic door lock do not
operate during the Sabbath Mode.
• The Bake temperature can be changed during an Active
Sabbath Mode. Simply press the Bake pad and then
enter the desired temperature using the Quickset pads.
• Pressing the CANCEL pad will cancel a Bake cycle,
however the control will stay in the Sabbath Mode.
To cancel Sabbath Mode:
Press and hold the Setup pad for five seconds.
The Bake mode may be cancelled by pressing
the CANCEL pad during Sabbath.
/ .......... \
Setup
On/Off
Temp Adjust
Oven temperatures are carefully tested at the factory. It is
normal to notice some baking time or browning differences
between a new oven and an old one. As ovens get older, the
oven temperature can shift.
You may adjust the oven temperature if you think the oven is
not baking or browning correctly. To decide how much to
change the temperature, set the oven temperature 25° F
higher or lower than the temperature in your recipes, then
bake. The results of the first bake should give you an idea of
how much to adjust the temperature.
To adjust the oven temperature:
1. PressSetup pad.
2. Pressthe arrow to scroll.
3. Select TEMP ADJUST.
/ ........ %
" Setup
On/Off
4. Enter the desired temperature change using the number
pads.
5. Select "+/-" to indicate an increase or decrease in
temperature. The temperature change is displayed at the
top of the window.
6. PressEnter pad or wait three seconds to accept the
change.
7. Press Setup pad to exit the menu.
The oven temperature does not need to be readjusted if there
is a power failure or interruption.
Broiling and cleaning temperatures cannot be adjusted.
208/240V
For improvedresultswhen using Bake, the oven can be set
from 240V to 208V if your household is on 208V.
To set the oven to 208V:
1. PressSetup pad.
2. Pressthe arrow to scroll.
3. Select 208/240V.
4. Select 208V or 240V using the Quickset pads.
5. PressEnter pad to accept the change.
6. Press Setup pad to exit the menu.
/ ........... ,
' Setup
On/Off/
.......... /
Tones (beeps)
The number of beeps heard at the end of cooking and at the
end of timer operation and their volume can be adjusted.
To adjust the beeps:
,/, ..........
1. PressSetup pad. Setup
On/Off /
2. Use the arrow to scroll. ,"
3. Select TONES.
To change the beeps at the end of cooking:
1. Follow "Tones" steps 1-3 (see above).
2. Select COOK TONE.
29
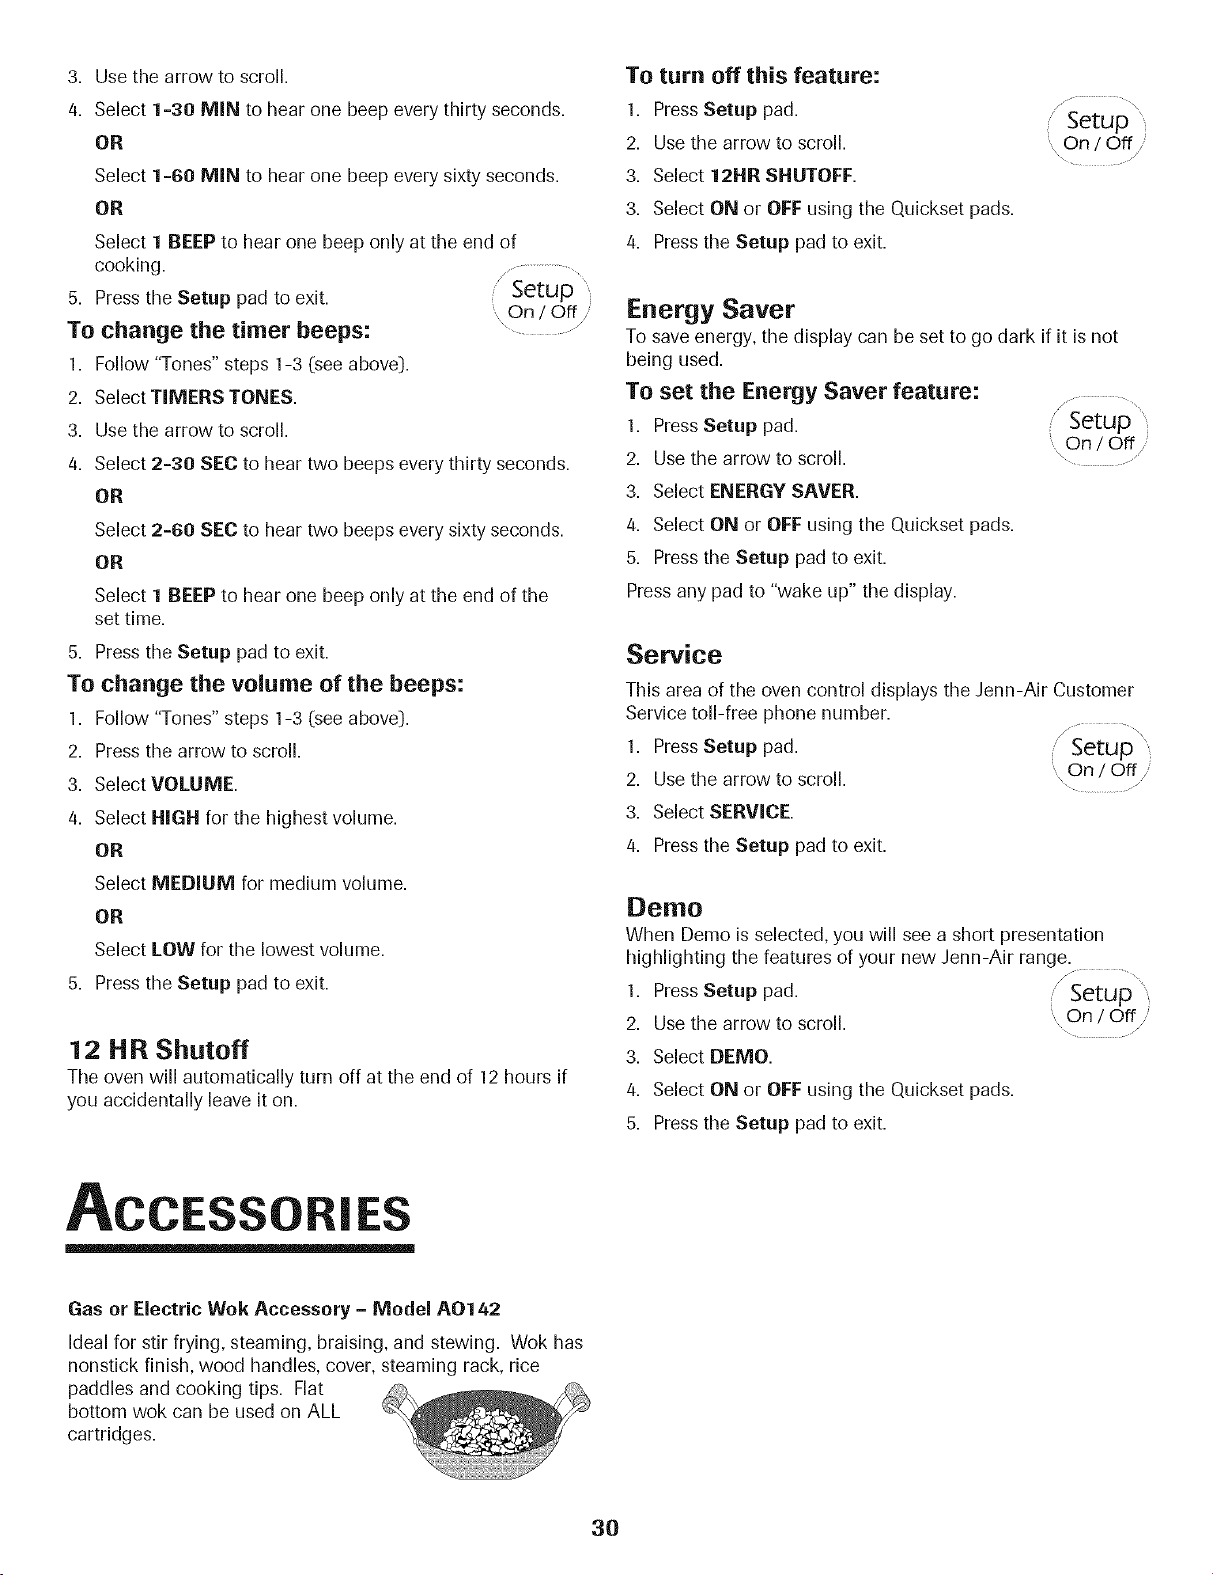
3. Use the arrow to scroll.
4. Select 1=30 MIN to hear one beep every thirty seconds.
OR
Select 1=60 IVlIN to hear one beep every sixty seconds.
OR
Select 1 BEEP to hear one beep only at the end of
cooking.
5. Pressthe Setup pad to exit.
To change the timer beeps:
1. Follow "Tones" steps 1-3 Cseeabove:).
2. Select TIMERS TONES.
3. Use the arrow to scroll.
4. Select 2=30 SEC to hear two beeps every thirty seconds.
OR
Select 2=60 SEC to hear two beeps every sixty seconds.
OR
Select 1 BEEP to hear one beep only at the end of the
set time.
5. Pressthe Setup pad to exit.
To change the volume of the beeps:
1. Follow "Tones" steps 1-3 (see above:).
2. Pressthe arrow to scroll.
3. Select VOLUME.
4. Select HIGH for the highest volume.
OR
Select MEDIUM for medium volume.
OR
Select LOW for the lowest volume.
5. Pressthe Setup pad to exit.
/ ........................ •....
/Setup
On/Off
/
12 l-! R Shutoff
The oven will automatically turn off at the end of 12 hours if
you accidentally leave it on.
To turn off this feature:
1. PressSetup pad.
2. Use the arrow to scroll.
3. Select 12HR SHUTOFF.
3. Select ON or OFF using the Quickset pads.
4. Pressthe Setup pad to exit.
// -\
Setup
....On/Off /
/
Energy Saver
To save energy, the display can be set to go dark if it is not
being used.
To set the Energy Saver feature:
/, .............. ....
1. PressSetup pad. J Setup
On/Off/
2. Use the arrow to scroll. - ........
3. Select ENERGY SAVER.
4. Select ON or OFF using the Quickset pads.
5. Pressthe Setup pad to exit.
Press any pad to "wake up" the display.
Service
This area of the oven control displays the Jenn-Air Customer
Service toll-free phone number,
/, .........
1. PressSetup pad. ; Setup
On/Off /
2. Use the arrow to scroll. ,
................. /
3. Select SERVICE.
4. Pressthe Setup pad to exit.
[:}ellrio
When Demo is selected, you will see a short presentation
highlighting the features of your new Jenn-Air range.
1. PressSetup pad. Setup
[
2. Use the arrow to scroll. On / Off
3. Select DENIO.
4. Select ON or OFF using the Quickset pads.
5. Pressthe Setup pad to exit.
ACCESSOR|
Gas or Electric Wok Accessory - Model A0142
Ideal for stir frying, steaming, braising, and stewing. Wok has
nonstick finish, wood handles, cover, steaming rack, rice
paddles and cooking tips. Flat
bottom wok can be used on ALL
cartridges.
3O

WARRANTY & SERVICE
What is Not Covered By These Warranties:
1. Conditions and damages resulting from any of the following:
a. Improper installation, delivery, or maintenance.
b. Any repair, modification, alteration, or adjustment not authorized by the
manufacturer or an authorized servicer.
c. Misuse, abuse,accidents, unreasonable use, or acts of God.
d. Incorrect electric current, voltage, or supply.
e. Improper setting of any control.
2. Warranties are void if the original serial numbers have been removed,altered, or
cannot be readily determined.
3. Light bulbs.
4. Products purchased for commercial or industrial use.
5. The cost of service or service call to:
a. Correct installation errors.
b. Instruct the user on the proper use of the product.
c. Transport the appliance to the servicer and back.
6. Consequential or incidental damages sustained by any person as a result of any
breach of these warranties.
Some states do not allow the exclusion or limitation of consequential or incidental
damages, so the above exclusion may not apply.
If You Need Service
Firstsee the Troubleshooting section in your Use and Care Guide or call Maytag
Services, LLC,Jenn-Air Customer Assistance at 1-800-JENNAIR (1-800-536-6247]
U.S.A.and Canada.
To Obtain Warranty Service
To locate an authorized service company in your area, contact the dealer from
whom your appliance was purchased or call Maytag Services, LLC, Jenn-Air
Customer Assistance. Should you not receive satisfactory warranty service,
call or write:
Maytag Services, LLC
Attn: CAIR_ Center
P.O.Box 2370, Cleveland, TN 37320-2370
U.S. and Canada 1=800=JENNAJR (1 =800=536=6247)
U.S. customers using TTY for deaf, hearing impaired or speech
impaired, call 1=800=688=2080.
Note: When contacting Maytag Services, LLC,Jenn-Air Customer
Assistance about a service problem, please include the following:
a. Your name, address and telephone number.
b. Model number and serial number of your appliance.
c. Name and address of your dealer and date appliance was purchased.
d. A clear description of the problem you are having.
e. Proofof purchase.
Use and Care guides, service manuals and parts information are available from Maytag Services, LLC, Jenn-Air Customer Assistance.
31
CUISINII_RE ENCASTRABLE I_LECTRIQUE A I_VACUATION
DESCENDANTE JENN-AIR _;- DESSUS LISSE
TABLE DES MATIERES
Instructions de securite importantes ..................33-36
Informations sur les conduits .......................................36
Entretien et nettoyage ..............................................37-39
Entretien ........................................................................39-40
Depannage ...................................................................41-42
Cuisson sur la surface .............................................43-46
Cuisson au four ..........................................................47-53
Options ..........................................................................54-58
Reglage favori .............................................................59-60
Reglage ..........................................................................60-62
Accessoires .........................................................................62
Garantie et service ...........................................................63
Guia de uso y cuidado ....................................................64
JENN-AIR
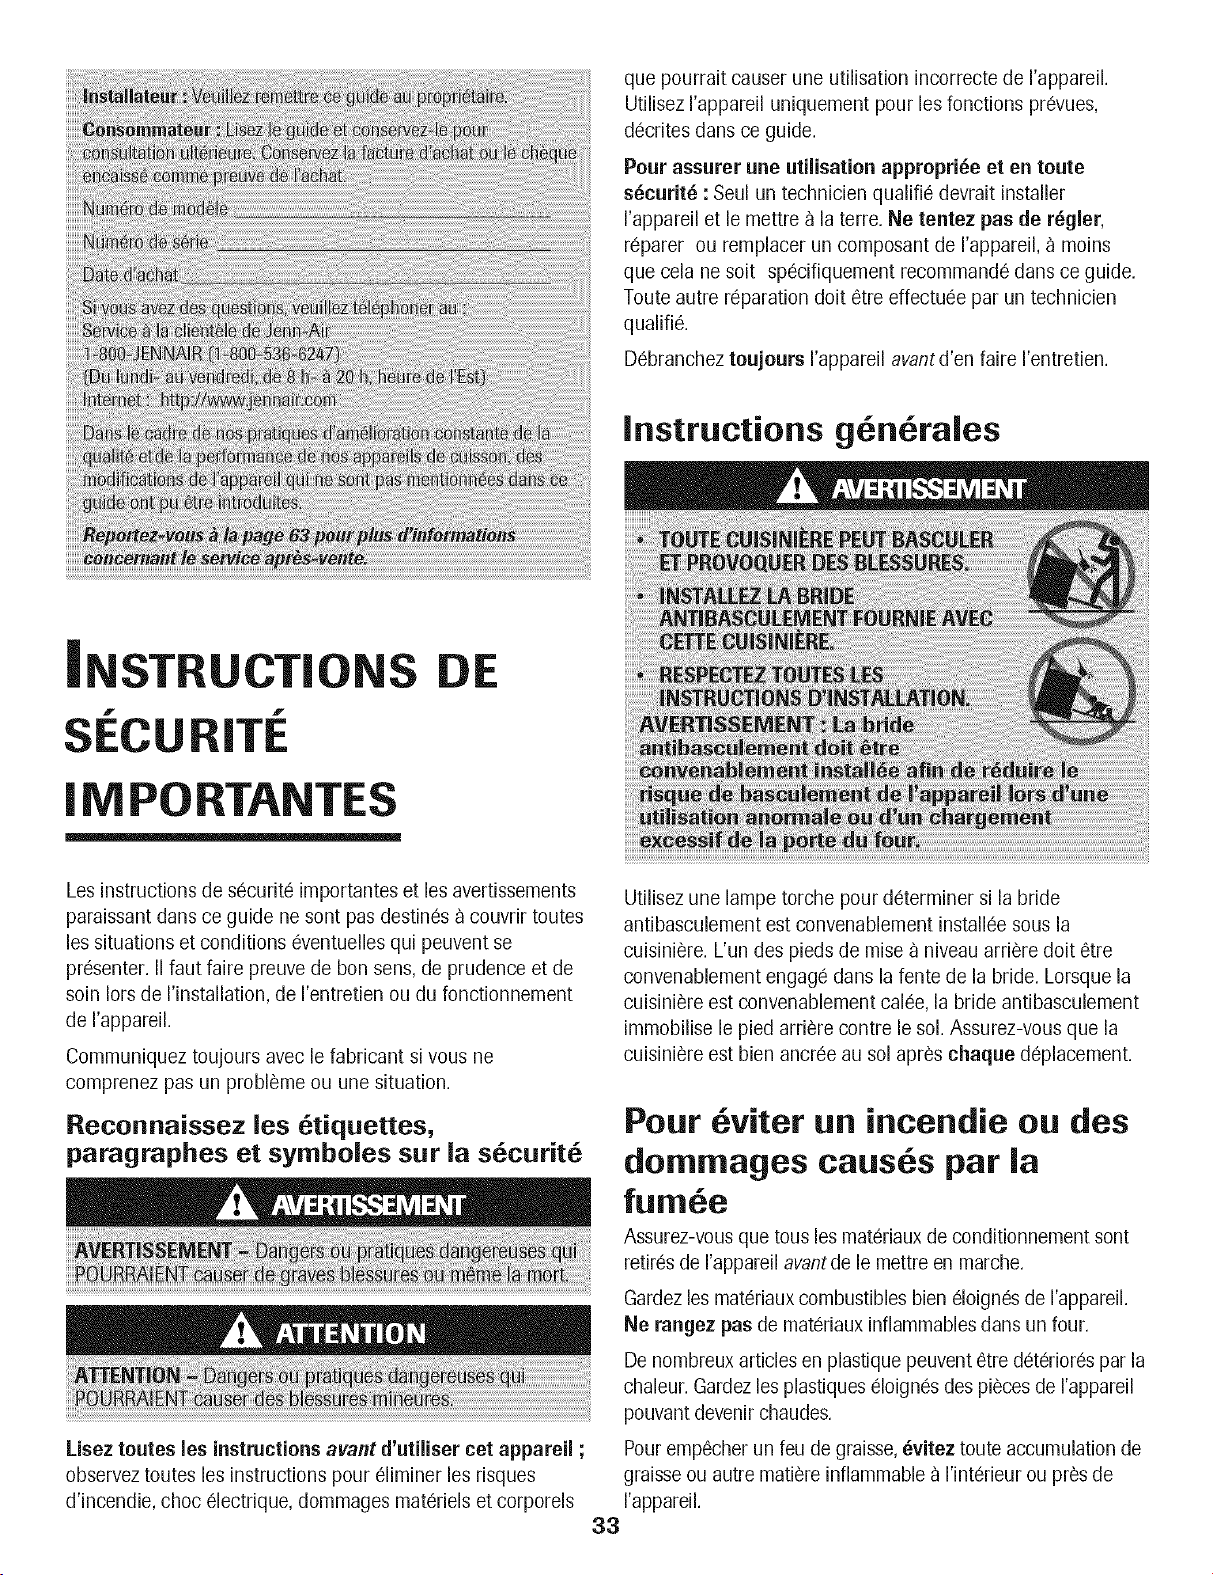
que pourrait causer une utilisation incorrecte de rappareil.
Utilisez rappareil uniquement pour los fonctions prevues,
decrites darts ce guide.
Pour assurer une utilisation appropri_e et en toute
s_curit_ : Seul un technicien qualifie devrait installer
rappareil et le mettre _ la terre. Ne tentez pas de r_gler,
reparer ou remplacer un composant de rappareil, _ moins
que cela ne soit specifiquement recommande darts ce guide.
Toute autre reparation doit ¢tre effectuee par un technicien
qualifi&
Debranchez toujours rappareil avant d'en faire rentretien.
Instructions g n rales
DE
Les instructions de securite importantes et les avertissements
paraissant darts ce guide ne sont pas destines _ couvrir toutes
los situations et conditions eventuelles qui peuvent se
presenter. II faut faire preuve de bon sens, de prudence et de
soin Iors de rinstallation, de rentretien ou du fonctionnement
de rappareil.
Communiquez toujours avec le fabricant si vous ne
comprenez pas un probleme ou une situation.
Reconnaissez les etiquettes,
paragraphes et symboles sur la securit_
Lisez toutes los instructions avant d'utiliser cet appareil ;
observez toutes les instructions pour eliminer les risques
d'incendie, choc electrique, dommages materiels et corporels
Utilisez une lampe torche pour determiner si la bride
antibasculement est convenablement installee sous la
cuisiniere. L'un des pieds de mise _ niveau arriere dolt ¢tre
convenablement engage dans la fente de la bride. Lorsque la
cuisiniere est convenablement calee, la bride antibasculement
immobilise le pied arriere contre le sol. Assurez-vous que la
cuisiniere est bien ancree au sol apres chaque deplacement.
Pour viter un incendie ou des
dommages causes par la
fum e
Assurez-vous que tous les materiaux de conditionnement sont
retires de rappareil avantde le mettre en marche.
Gardez les materiaux combustibles bien eloignes de rappareil.
Ne rangez pas de materiaux inflammables dans un four.
De nombreux articles en plastique peuvent etre deteriores par la
chaleur. Gardez les piastiques eloignes des pieces de rappareil
pouvant devenir chaudes.
Pour empecher un feu de graisse, _vitez toute accumulation de
graisse ou autre matiere inflammable _ rinterieur ou pres de
rappareil.
33
En cas d'incendie
Debranchez ['appareil et [a hotte de ventilation, pour minimiser
la propagation des flammes. Eteignez les flammes, puis mettez
la hotte en marche pour evacuer la fumee et les odeurs.
* Table de caisson : Utiiisez un couvercle ou une plaque
biscuits pour etouffer les flammes d'un feu qui se declare
dans un ustensile de cuisine.
NE saisissez ou d_placez JAMAIS un ustensile de cuisine
enflamm&
• Four : Fermez la porte du four pour etouffer les flammes.
Ne jetez pas d'eau surun feu de graisse. Utiiisez du
bicarbonate de sodium, un extincteur _ mousse ou un produit
chimique sec pour eteindre les flammes.
Secarit des enfants
NE TOUCHEZ JAMAIS LES ELEMENTSDE CUISSON NI LES
PAROISINTERIEURESDU FOUR. Les elements chauffants
peuvent etre brOlants, meme s'ils ne sont plus rouges. Les
surfaces interieures du four peuvent atteindre une temperature
suffisamment elevee pour infliger des brOlures. Pendant et apres
usage, ne touchez pas les elements de cuisson ni les parois
interieures du four. Evitez leur contact avec les vetements ou
autres materiaux inflammables, jusqu'_ ce qu'iis aient
suffisamment refroidL D'autres surfaces peuvent egaiement
atteindre une temperature suffisamment elevee pour brQier :
I'ouverture de I'event et les surfaces avoisinantes, ainsi que la
porte et le hublot du four.
Ne touchez pas I'ampouie chaude du four avec un linge
humide car eiie pourrait se casser. Si I'ampouie se casse,
debranchez I'appareil avant de retirer I'ampouie afin d'eviter un
choc eiectrique.
N'utilisez JAMAIS de feuiiie d'aluminium pour recouvrir la sole
ou une grille du four. Ceci pourrait endommager I'appareil ou
causer un risque de choc eiectrique ou d'incendie. Utiiisez le
papier d'aiuminium uniquement seion les instructions donnees
dans ce guide.
NE laissez JAMAIS des enfants seuis ou sans supervision
Iorsque I'appareil est en service ou encore chaud. Ne laissez
jamais un enfant s'asseoir ou se tenir sur une partie
queiconque de I'appareil. II pourrait se blesser ou se brQier.
II est important d'enseigner aux enfants que la cuisiniere et les
ustensiies places dessus ou _ I'interieur peuvent etre chauds.
Laissez refroidir les ustensiies en un lieu sQr, hors d'atteinte
des enfants. Les enfants doivent comprendre que I'appareil
n'est pas un jouet, lis ne doivent pas jouer avec les boutons
ou toute autre piece de I'appareil.
Familiarisation avec I'appareil
Pour eviter d'endommager I'appareil ou de mettre en danger
I'utilisateur, n'utilisez pas cet appareil comme appareil de
chauffage pour chauffer ou rechauffer une piece. N'utilisez
pas non plus le four pour ranger des aliments ou des
ustensiles de cuisine.
N'entravez pas la circulation d'air en obstruant
I'event du four.
Caisson et s carit
NE faites JAMAiS chauffer un recipient non ouvert dans le
four. L'accumulation de press[on dans le recipient pourrait le
faire eclater, provoquant ainsi de graves blessures corporeiles et
des dommages materiels.
Utilisez des maniques robustes et seches. Des maniques
humides peuvent provoquer la formation de vapeur brelante.
N'utilisez jamais un torchon _ vaisselle ou autre article textile
la place de maniques. Cesarticles pourraient trainer surun
breleur et s'enflammer, ou encore, s'accrocher _ une piece de
I'appareil.
Portez des vetements appropries. Evitez de porter des vetements
amples ou _ Iongues manches pendant I'utilisation de rappareil.
IIs peuvent prendre feu et provoquer des brelures s'ils entrent en
contact avec un element chauffant.
Placeztoujours les grilles _ la position appropriee dans le four
Iorsqu'il est froid. Faites couiisser la grille vers I'exterieur avant
d'ajouter ou d'enlever un plat _ ['aide de maniques robustes et
seches. Evitez d'introduire la main darts le four pour deposer ou
retirer un plat. S'ii est necessaire de d@iacer une grille
Iorsqu'eiie est chaude, utilisez une manique seche. Ne touehez
pas un element chaud avec une manique.
Utiiisez les grilles dans leur four d'origine seuiement.
Ouvrez toujours tres prudemment [a porte du four. Laissez Fair
chaud ou la vapeur s'echapper avantde retirer ou d@oser un
plat.
AVERTISSEMENT - METS PREPARitS : Suivez les instructions
du fabricant. Sile contenant ou le couverde en plastique d'un
mets surgele se deforme ou est endommage durant la cuisson,
Suite
34

jetez imme,diatement le re,cipient et son contenu. Les aliments
pourraient e,trecontamine,s.
Ne laissez pas le papier d'ahminium ou la sonde _ viande
entrer en contact avec les e,le,mentschauffants.
Eteignez toujours toutes les commandes une fois la cuisson
termine,e.
Ustensiles et s curit
Suivez [es instructions du fabricant [ors de ['emploi d'un sachet
pour cuisson au four.
La se,curite,de fonctionnement de cet appareil a e,te,teste,e
I'aide d'ustensiles de cuisine conventionnels. N'utiiisez pas
un ustensile ou accessoire qui n'est pas spe,cifiquement
recommande, dans ce guide. N'utiiisez pas de syste,mede
convection additionnei. L'utilisation d'un dispositif ou
accessoire qui n'est pas expresse,ment recommande, dans ce
guide peut entra[ner de graves dangers, entraver le rendement
de I'appareilet re,duire la Ionge,vite,de ses composants.
Si un ustensile est plus petit que I'e,ie,mentutilise,, une partie
de I'e,le,mentchauffant est expose,eet peut provoquer
I'infiammationd'un ve,tement ou des maniques.
Seuls certains mate,riauxen verre, vitroce,ramique, ce,ramique,
gre,s,ou certains ustensiles vitrifie,s/e,maille,speuvent e,tre
utilise,ssur la table de cuisson ou dans le four, sans risque de
se casser sous I'effet du choc thermique. Observez les
instructions du fabricant Iors de I'utilisationd'un ustensile en
verre.
Orientez la poigne,e de chaque ustensile vers le centre de la
table de cuisson, et non vers I'exte,rieurou vers un autre
e,le,ment.Vous re,duirezainsi le risque de brQlure,
d'infiammation des matie,rescombustibles ou de renversement
cause, par un jeune enfant qui pourrait saisir ou renverser
accidentellement un ustensile dont le manche est oriente,vers
Fexte,rieur.
surface de cuisson endommage,e et entrainer un risque de
choc e,lectrique. Communiquez imme,diatement avec un
technicien qualifie,.
Friteuses
Exercez une prudence extra,me Iors du de,placement du
re,cipient de graisse ou Iorsde I'e,limination de graisse chaude.
Laissez la graisse refroidir avantde de,placer I'ustensile.
Hottes d'extraction
Nettoyez fre,quemment les filtres et la hotte de la cuisinie,re,
pour empe,cher la graisse ou d'autres produits inflammables
de s'accumuler sur le filtre ou la hotte et provoquer des feux
de graisse.
Sivous flambez des aliments sous la hotte, mettez le
ventilateur en marche.
Nettoyage et s curit6
Nettoyez la table de cuisson avec pre,caution. Arre,tez toutes
les commandes et attendez le refroidissement de tousles
composants avantde les toucher ou d'entreprendre le
nettoyage. Travaillez prudemment afin d'e,viter les brQlures par
la vapeur si vous utilisez un chiffon ou une e,ponge humide
pour nettoyer les renversements sur une surface chaude.
Certains produits de nettoyage peuvent ge,ne,rerdes vapeurs
nocives Iorsqu'ilssont applique,s sur une surface chaude.
Nettoyez uniquement les pie,ces mentionne,esdarts ce guide.
Four autonettoyant
Table de cuisson
NE laissez JANIAIS un e,le,mentde surface allume, sans
surveillance, particulie,rement _ un re,glage e,leve,.Le
de,bordement du contenu de I'ustensile pourrait ge,ne,rerune
fume,e abondante et la graisse qu'il contient pourrait
s'enfiammer.
Cet appareil comporte des e,le,mentschauffants de diffe,rentes
tailles. Utilisez toujours un ustensile _ fond plat, de taille
suffisante pour qu'il puisse recouvrir comple,tement I'e,le,ment.
Pour optimiser I'efficacite,, choisissez un ustensile de me,me
taille que I'e,le,ment.
SURFACE DE CUISSON EN VITROCERAMIQUE : N'utiiisez
JAIVIAIS une surface de cuisson endommage,e. Les solutions
de nettoyage et les de,bordements pourraient pe,ne,trerdans la
Ne nettayez pas le joint de porte. Le joint est essentiel
I'e,tanche,ite,de I'appareil.Veillez _ ne pas frotter,
endommager ou de,placer le joint.
N'utilisez pas de protection pour couvrir la sole ou de
nettoyant pour four _ I'inte,rieur du four autonettoyant ou pre,s
de ses composants.
35
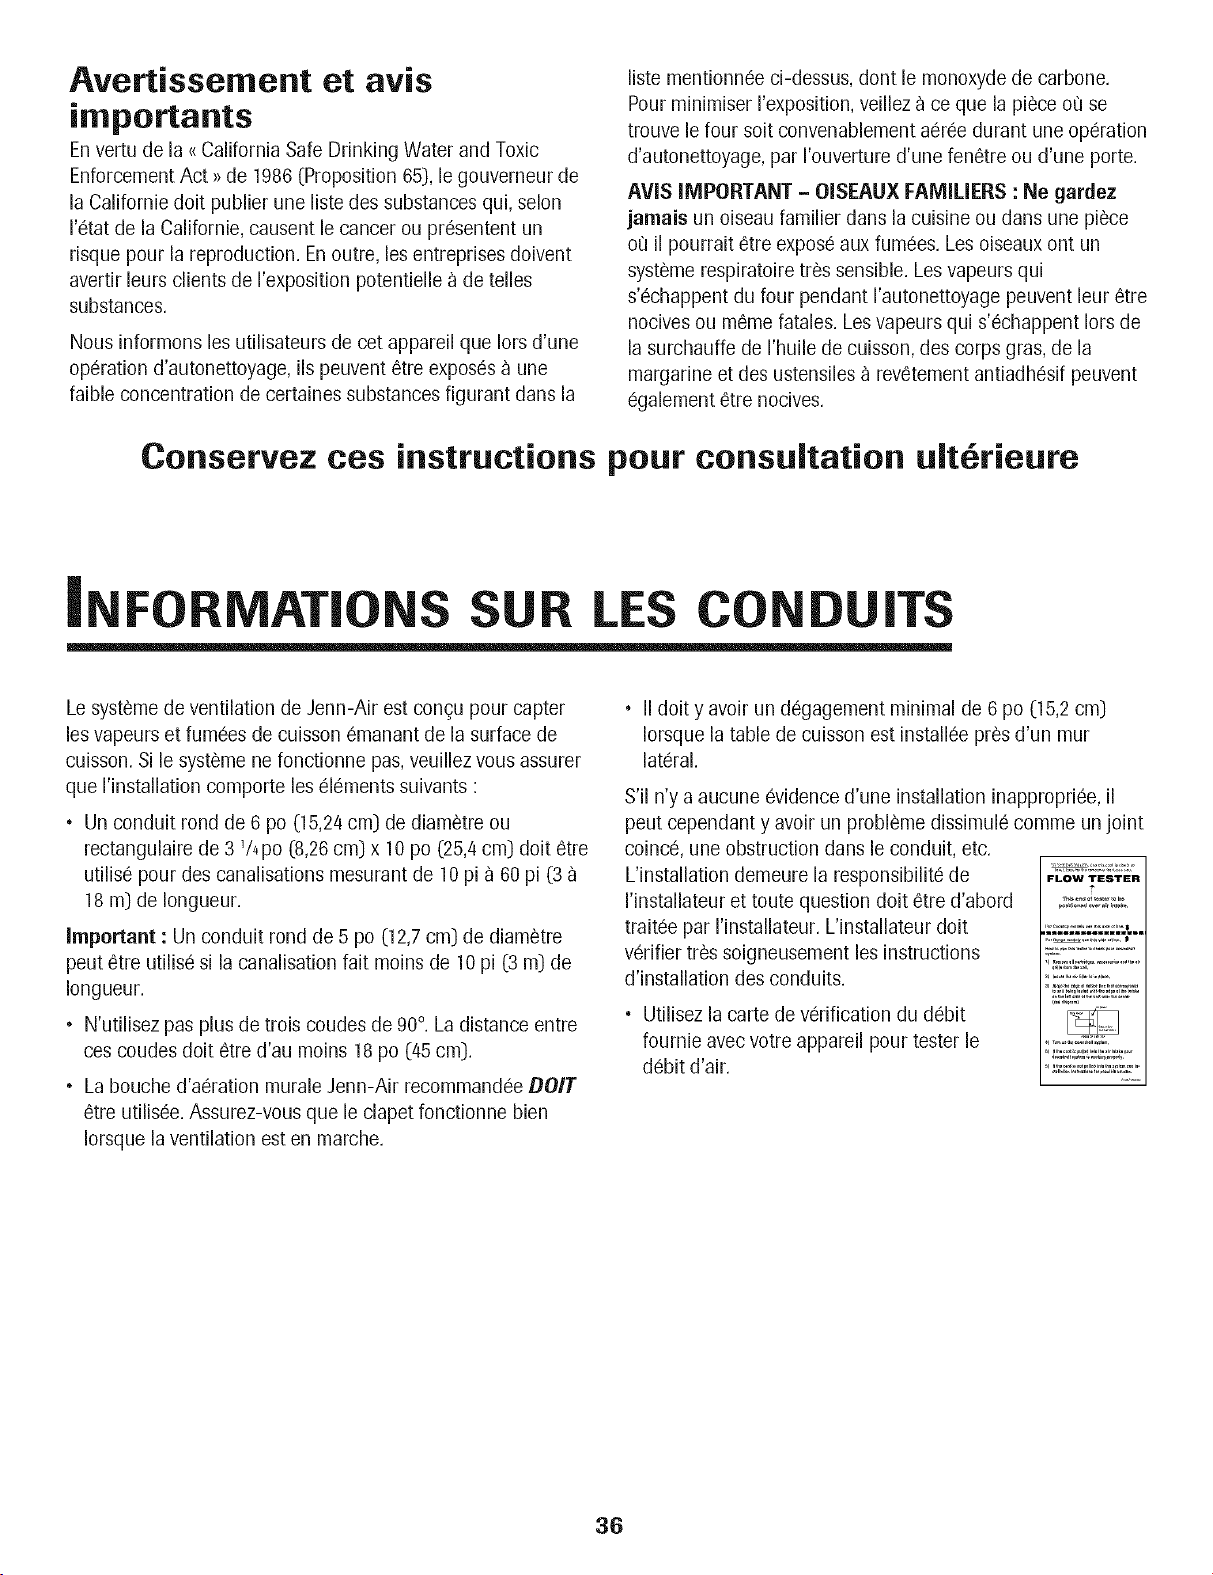
Avertissement et avis
importants
Envertu de la _ California Safe Drinking Water and Toxic
Enforcement Act >>de 1986 (Proposition 65), le gouverneur de
la Californie doit publier une liste des substances qui, selon
re,tat de la Californie, causent le cancer ou pre,sentent un
risque pour la reproduction. Enoutre, les entreprises doivent
avertir leurs clients de rexposition potentielle _ de telles
substances.
Nous informons les utilisateurs de cet appareil que Iors d'une
ope,ration d'autonettoyage, ils peuvent e,treexpose,s_ une
faible concentration de certaines substances figurant dans la
Conservez ces instructions
liste mentionne,e ci-dessus, dont le monoxyde de carbone.
Pour minimiser rexposition, veillez _ ce que la pie,ce ou se
trouve le four soit convenablement ae,re,edurant une ope,ration
d'autonettoyage, par rouverture d'une fene,tre ou d'une porte.
AVIS IMPORTANT - OISEAUX FAMILIERS : Ne gardez
jamais un oiseau familier dans la cuisine ou dans une pie,ce
ou il pourrait e,treexpose,aux fume,es.Les oiseaux ont un
syste,merespiratoire tre,ssensible. Les vapeurs qui
s'e,chappent du four pendant rautonettoyage peuvent leur e,tre
nocives ou me,me fatales. Les vapeurs qui s'e,chappent Iors de
la surchauffe de rhuile de cuisson, des corps gras, de la
margarine et des ustensiles _ reve,tement antiadhe,sif peuvent
e,galement e,trenocives.
pour consultation ult rieure
LES
Le syste,mede ventilation de Jenn-Air est con% pour capter
les vapeurs et fume,es de cuisson e,manant de la surface de
cuisson. Si le syste,mene fonctionne pas, veuillez vous assurer
que rinstallation comporte les e,le,mentssuivants :
• Un conduit rond de 6 po (15,24 cm] de diame,tre ou
rectangulaire de 3 %po (8,26 cm] x 10 po (25,4 cm] doit e,tre
utilise, pour des canalisations mesurant de 10 pi _ 60 pi (3
18 m] de Iongueur.
Important : Un conduit rond de 5 po (12,7 cm] de diame,tre
peut e,treutilise,si la canalisation fait moins de 10 pi (3 m] de
Iongueur.
• N'utilisez pas plus de trois coudes de 90°. La distance entre
ces coudes doit e,tred'au moins 18 po (45 cm].
• La bouche d'ae,ration murale Jenn-Air recommande,e DOlT
e,treutilise,e.Assurez-vous que le clapet fonctionne bien
Iorsque la ventilation est en marche.
• II dolt y avoir un de,gagement minimal de 6 po (15,2 cm)
Iorsque la table de cuisson est installe,e pre,sd'un mur
late,ral.
S'il n'y a aucune e,vidence d'une installation inapproprie,e, il
peut cependant y avoir un proble,me dissimule,comme un joint
coince,,une obstruction dans le conduit, etc.
L'installation demeure la responsibilite, de ,Low-,_,,
rinstallateur et toute question doit e,tre d'abord p:_,'.o:_:::_'_:
traite,e par rinstallateur. L'installateur doit
ve,rifier tre,ssoigneusement les instructions
d'installation des conduits.
• Utilisez la carte de ve,rification du de,bit
foumie avec votre appareil pour tester le
de,bit d'air.
31}
ENTRET|EN ET NETTOYAGE
Four autonettoyant
Lecycle d'autonettoyageutilisedes tempdraturesde cuisson
supdrieuresa la normaleafin de nettoyerautomatiquementI'int6rieur
du four.
r6sistancelimit6eaux compos6sacides. IIpeut se ddcolorersi
les r6sidus acidesou sucr6s ne sont pasenlev6savantle cycle
d'autonettoyage.
Programrnation de l'autonettoyage : .................
'_Clean _
1. Appuyezsur latouche Clean [Nettoyage). , .........................,
2. ENLEVERGRILLEseraaffich& Retirezles grilles.
3. SdlectionnezCONTINUER a I'aidede la touche rapide.Les
touches rapidessont situ6esde chaquec6td de I'afficheurdu
tableau de commande.
4. Choisissezle niveaude saletd LE6ERen entrant 200) I'aidedes
touches numdriquesafin de programmerdeux heuresde
nettoyage.Choisissezle niveaude saletdMOYEN _ I'aidedes
touches rapides.
Si le four esttr6s sale, il estnormal d'observerla formation de fum6e
ou deflammes durant le nettoyage. II estprd_rable de nettoyerle
four a intervallesr6guliers,plut6t que d'attendre que lesr6sidus
s'accumulent.
Durant leprocessusd'autonettoyage,il convient de bien adrer la
cuisinepour dliminer lesodeurs normalement6misesdurant le
nettoyage.
Avant I'autonettoyage
1. Eteignezla lampede four avantle nettoyage.Celle-cirisqueraitde
griller durant lecycle de nettoyage.
2. Enlevezla I_chefrite,tous les plats et les grilles du four.Sivous
n'enlevezpas les grilles, elles risquentde se d6coloreret de ne
plus glisser aussifacilementapr_s le cycled'autonettoyage.
important :AvantI'autonettoyage,enlevezla grille d'a6rationde la
surfacede cuisson.
3. Nettoyezle cadredu four, le cadre de la porte,la zone _ I'extdrieur
du joint et autour de I'ouverturedujoint de la porte _ I'aided'eau
et deddtergent ou d'un nettoyantnon abrasif commeBonAmi*.
Le processusd'autonettoyagenenettoie pasces zones. Elles
doivent6tre nettoydespour emp6cherla salet6de s'incruster
pendant le cyclede nettoyage. (Le joint assureI'dtanch6itdautour
de la porte et du hublot du four.)
4. Pouremp6chertout dommage,ne
nettoyez pas et nefrottez pas le joint
qui se trouve autour de la porte du
four. Cejoint est concupour 6viter les
pertesde chaleur pendantle cycle
d'autonettoyage.
5. Eliminezles rdsidusde graisseou de produits renvers6ssur la
sole avant le nettoyage. Ceciemp6chelaformation de flammes
ou de fum6edurant le nettoyage.
6. Essuyezlesrdsidussucrdset acides,commeles patatesdouces,la
tomate ou lessaucesa basede lait. L'dmailvitrifi6 poss_deune
\
OU
S61ectionnez INTENSE et quatre heures de nettoyage, pour un
niveau de salet6 important.
5. NETTOYAGE,TIME [Duree), VERROUILLAGEet le compte
rebours de la dur6e de nettoyage seront affich6s pendant le
nettoyage du four. REFROIDISSs'affichera Iorsque le nettoyage
sera terrain6, le four _tant toujours verrouill&
Important : La porte sera d6verrouillde environ une heure apr_s la
fin du nettoyage. La mention REFROIDISSdisparaitra de I'afficheur
Iosque la porte sera ddverrouill6e.
Pour differer I'autonettoyage :
1. Appuyezsur latouche Clean.
2.
3.
4,
Clean i
ENLEVERGRILLEseraaffich& Retirezles grilles.
Sc!lectionnezCONTINUER a I'aidede la touche rapide.Les
touches rapidessont situ6esde chaquec6td de I'afficheurdu
tableau de commande.
Choisissezle niveaude saletc!LE6ERen entrant 200 _ I'aidedes
touches numdriquesafin de programmerdeux heuresde
nettoyage.Choisissezle niveaude saletdIVlOYEN_ I'aidedes
touches rapides.
OU
Sdlectionnez iNTENSE et quatre heures de nettoyage, pour un
niveau de salet6 important.
5. La porte se verrouillera. NETTOYAGE,TIME, VERROUILLAGE et le
compte a rebours de la dur_e de nettoyage seront affichds.
6. Apr_s le verrouillage de la porte, appuyez sur la touche More
Options [Autres options).
7. Sc!lectionnez DEMARR DiFFERE a I'aide de la touche rapide.
* Lesnoms de marquedes produitsde nettoyagesont des marquesdc!pos_esdesdiffdrents fabricants.
37
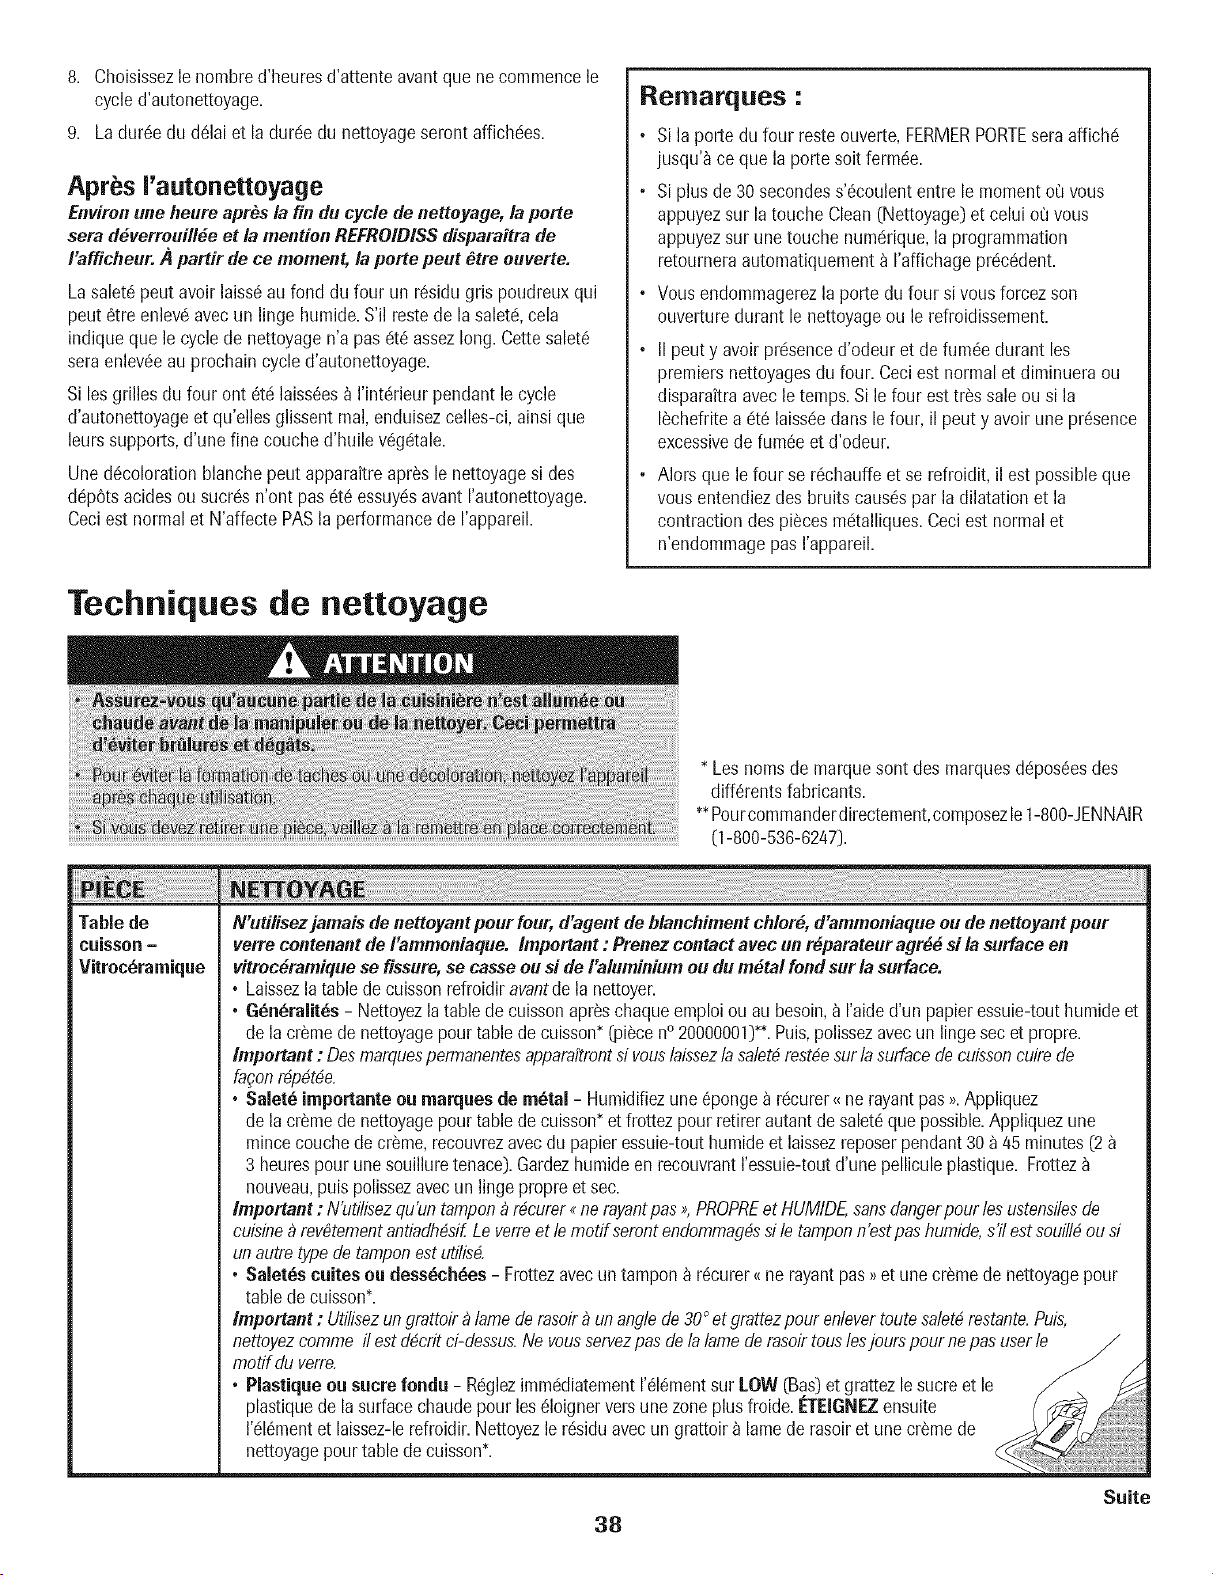
8. Choisissezlehombre d'heuresd'attenteavantque necommencele
cycle d'autonettoyage.
9. La dur6edu d_lai et la durc!edu nettoyageserontaffich6es.
Aprbs I'autonettoyage
Environ une heure apr_s la fin du cycle de nettoyage, la porte
sera d_verrouill_eet la mention REFROIDISSdisparaitrade
I'afficheur. A partir de ce momen_ la porte peut _tre ouverte.
Lasalet6 peut avoir laiss6au fond dufour un r6sidugris poudreuxqui
peut 6tre enlev6avecun linge humide.S'il restede la saletc!,cela
indiqueque le cyclede nettoyagen'a pas6t6 assezlong.Cettesalet6
sera enlev6eau prochain cycled'autonettoyage.
Si les grilles du four ont 6t6 laiss6es_ I'int6rieur pendant le cycle
d'autonettoyageet qu'ellesglissent real,enduisezcelles-ci,ainsi que
leurssupports,d'une fine couched'huile v_g6tale.
Uned6coloration blanchepeut apparaitreapr_s le nettoyagesi des
d_p6tsacides ou sucr6sn'ont pas6t6 essuyc!savant ['autonettoyage.
Ceciest normal et N'affectePASla performancede I'appareil.
Techniques de nettoyage
Remarques :
• Si la porte du four reste ouverte,FERMERPORTEseraaffichc!
jusqu'_ ce que la porte soitferm6e.
, Si plus de 30 secondess'_coulententre le momentoQvous
appuyezsur latouche Clean(Nettoyage)et celui ou vous
appuyezsur une touche num6rique,la programmation
retourneraautomatiquementa I'affichage prc!c6dent.
• Vousendommagerezla porte du four si vousforcez son
ouverturedurant le nettoyageou le refroidissement.
• IIpeut y avoir prc!senced'odeur et de fum6e durant les
premiersnettoyagesdu four. Ceciest normalet diminueraou
disparaitraavec le temps.Si le four est tr_s saleou si la
I_chefritea €!t6laissc!edans le four, il peut y avoir une pr6sence
excessivede fum6eet d'odeur.
Alors que le four se r6chauffeet se refroidit, il est possibleque
vousentendiezdes bruits caus6spar la dilatation et la
contractiondes pi_cesm_talliques.Ceciest normalet
n'endommagepas I'appareil.
* Leshemsde marquesont des marquesdc!pos6esdes
diff6rentsfabricants.
**Pourcommanderdirectement,composezle1-800-JENNAIR
(1-800-536-6247].
Table de
cuisson-
Vitrocbramique
N'utilisezjamais de nettoyantpour four, d'affentde blanchimentchlor_,d'ammoniaqueou de nettoyantpour
verreconteuantde I'ammoniaque. Important: Prenezcontactavec un r_parateuragr_ si la surfaceen
vitroc_ramiquese fissure,se casse ousi de I'aluminiumou du metal fond sur la surface.
• Laissezla table de cuissonrefroidiravantdela nettoyer.
. G_n_ralit_s - Nettoyezlatable de cuissonapr_schaqueemploi ou au besoin,_ I'aided'un papieressuie-touthumideet
de la cr_mede nettoyagepourtablede cuisson*(pieceno20000001)**.Puis,polissezavecun lingesec et propre.
important: Desmarquespermanentesappara_trontsi vouslaissezlasaiet4rest4esurla surfacedecuissoncuirede
fagonr4p_t_e.
• $alet_ importante ou marques de m_tal - Humidifiezune 6pongea re!curer_ne rayantpas>>.Appliquez
de la cr_mede nettoyagepourtamede cuisson*et frottezpour retirerautantdesalet6que possible.Appliquezune
mincecouchede cr_me,recouvrezavecdu papieressuie-touthumideet laissezreposerpendant30a 45minutes(2
3 heurespour unesouilluretenace).Gardezhumideenrecouvrantressuie-toutd'une pelliculeplastique. Frottez
nouveau,puis polissezavecun linge propre et sec.
Important: N'utilisezqu'un tampon_ r4curer_nerayantpas ,_,PROPREet ftUMIDE,sansdangerpour Iesustensiiesde
cuisine_ rev_tementantiadh4sif.Leverreet ie motif semntendommag4sdie tamponn'estpas humide,s'ilestsouill4ou d
unautretypedetamponestutilis4.
• Salet_s cuites oudess_ch_es - Frottezavecun tampon_ r6curer_ ne rayantpas_>et unecr_me de nettoyagepour
table de cuisson*.
Important: Utilisezun grattoir_ lamederasoir_ un anglede80°et grattezpour enievertoute saiet4restante.Puis,
nettoyezcomme il est d4critci-dessus.Alevousservezpasdelalame derasoirtousIesjours pourne pasuserIe
motif du verre.
• Piastiqueou sucrefondu- R_glezimm_!diatementI'_l_mentsur LOW (Bas)et grattezle sucreet le
plastiquede la surfacechaudepour les61oignerversune zoneplusfroide.ETEIGNEZensuite
I'_!l_mentet laissez-lerefroidir.Nettoyezle r6siduavec un grattoir _ lamede rasoiret unecr_mede
nettoyagepourtable de cuisson*.
38
Suite
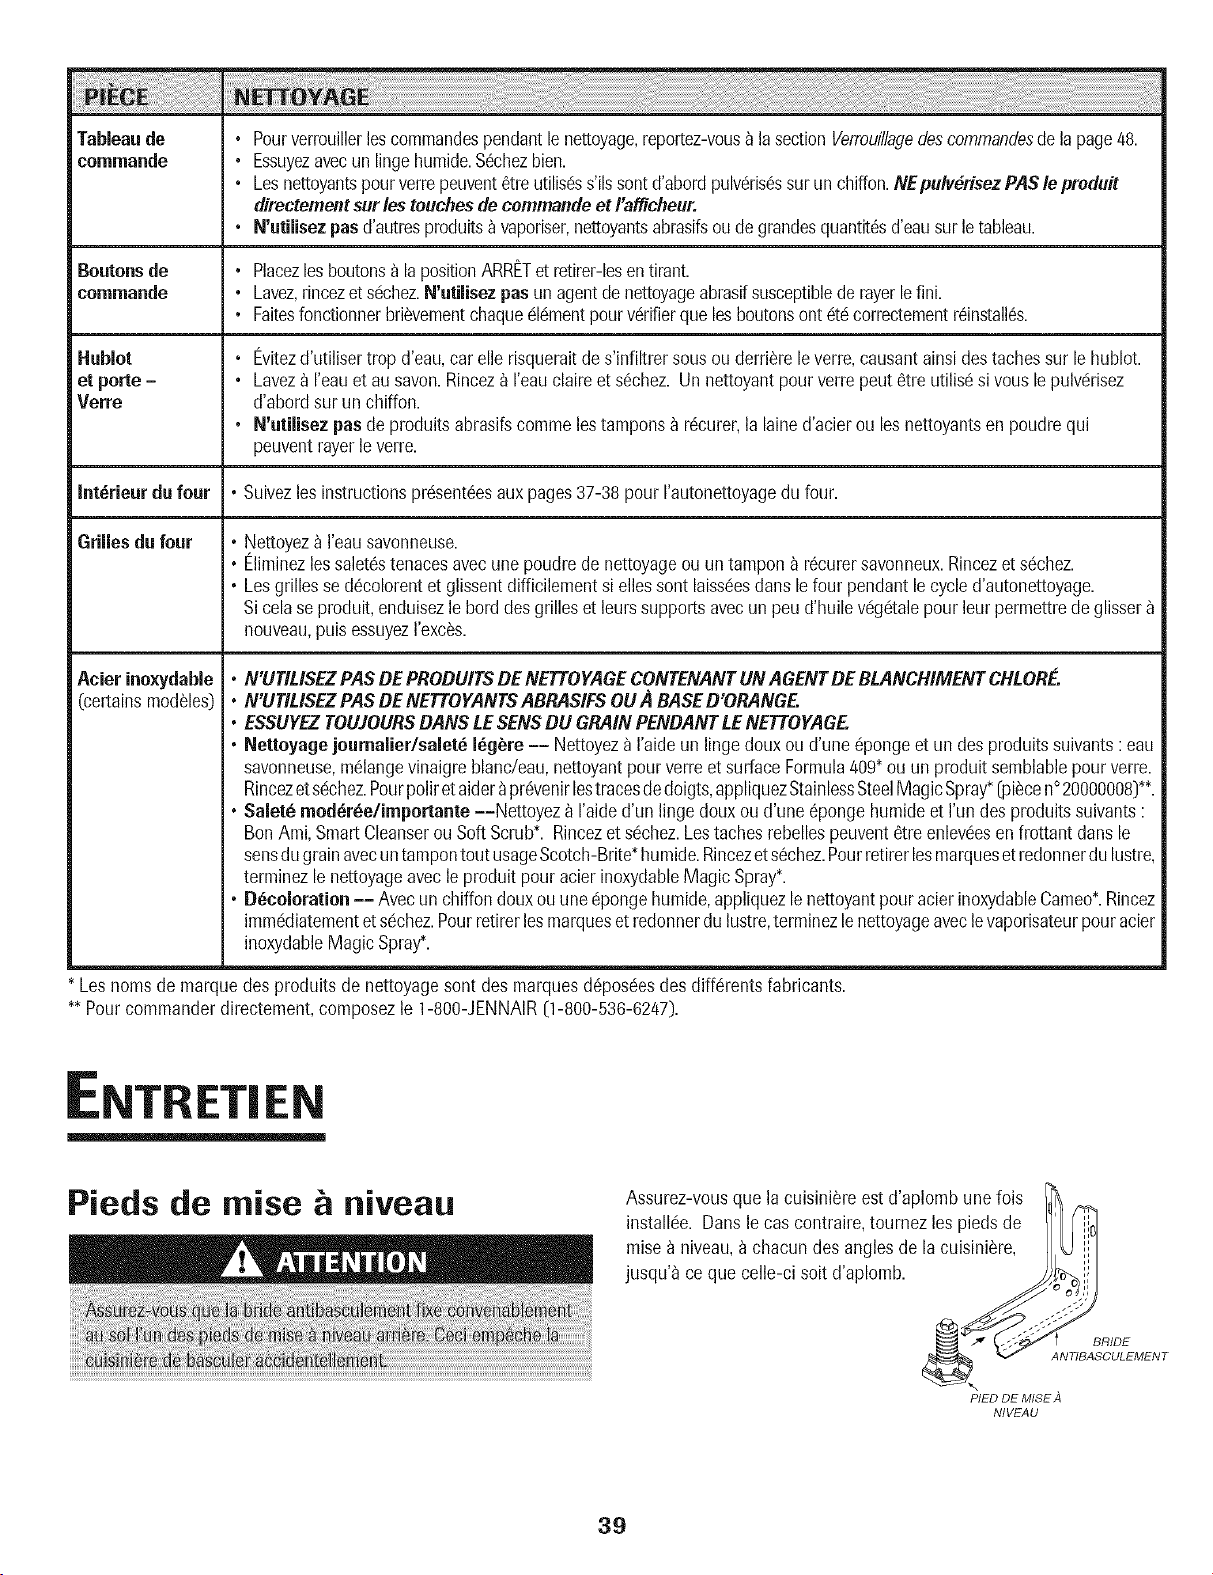
Tableaude • Pourverrouillerloscommandospendantle nettoyage,reportez-vous_ la sectionVerrouillagedescommandosdela page48.
eemmande • Essuyezavecun linge humide.S6chezbien.
• Losnettoyantspour verrepeuvent6treutilis6ss'ilssont d'abordpulvc!ris6ssurun chiffon.NEpulv#risezPASle preduit
directementsur les touchesde commande et I'afticheur.
• N'utilisez pas d'autresproduitsa vaporiser,nettoyantsabrasifsoude grandesquantit6sd'eausurle tableau.
Boutons de • Placezlesboutonsa la positionARRETet retirer-lesentirant.
commando , Lavez,rincezet s6chez.N'utilisez pasun agentde nettoyageabrasifsusceptiblederayerlefini.
• Faitesfonctionnerbri_vementchaquec!16mentpourvc!rifierque losboutonsont c!t_correctementr6install6s.
Hublot • Evitezd'utilisertrop d'eau,car elle risqueraitde s'infiltrersousou derriereleverre,causantainsidestachessur le hublot.
et porte - , Lavez_ I'eauet au savon.Rincez_ I'eauclaireet s_chez. Un nettoyantpourverrepout 6tre utilis6si vousle pulvc!risez
Verre d'abordsurun chiffon.
, N'utilisezpas de produitsabrasifscommelestampons_ r6curer,la lained'acierou lesnettoyantsen poudre qui
peuventrayerle verre.
Int_rieur de four ° Suivezlesinstructionsprc!sent6esaux pages37-38pour I'autonettoyagedu four.
Grillesdu four ° Nettoyeza I'eausavonneuse.
° Eliminezlessalet6stenacesavecune poudrede nettoyageou un tampon_ r6curersavonneux.Rincezet s(!chez.
° Lesgrillesse d6colorentet glissentdifficilementsi ellessont laissc!esdans le four pendantle cycled'autonettoyage.
Sicelaseproduit,enduisezle borddes grilleset leurssupportsavecunpeu d'huilevc!gc!talepour leurpermettredeglisser
nouveau,puisessuyezI'exc_s.
Aeier inoxydable ° N'UTILISEZPAS DE PRODUITSDE NETTOYAGECONTENANTUNAGENT DE BLANCHIMENTCNLORE.
(certainsmodules) ° N'UTILISEZPAS DE NETTOYANTSABRASIFSOUA BASED'ORANGE.
° ESSUYEZTOUJOURSDANS LE SENSDU GRAINPENDANTLE NETTOYAGE.
• Nettoyage journalier/salet_ I_g_re -- Nettoyeza I'aideun lingo douxou d'une 6pongeet un des produitssuivants: eau
savonneuse,m61angevinaigreblanc/eau,nettoyantpourverreet surfaceFormula409*ou un produitsemblablepourverre.
Rincezetsc!chez.Pourpoliret aiderapr6venirlostracesde doigts,appliquezStainlessSteelMagicSpray*[piecen° 20000008)**.
• Salet_ mod_r_e/importante --Nettoyez _ I'aided'un lingodoux oud'une @onge humideet I'undes produitssuivants:
BonAmi, SmartCleanserou SoftScrub*. Rincezet s6chez.Lestachesrebellespeuvent6tre enlev(_esen frottantdans le
sonsdu grainavecuntampontoutusageScotch-Brite*humide.Rincezet s_chez.Pourretirerlosmarqueset redonnerdu lustre
terminezle nettoyageavec leproduit pour acier inoxydableMagic Spray*.
• D_eoloration -- Avecun chiffondouxouune c!pongehumide,appliquezlenettoyantpouracierinoxydableCameo*.Rincez
immc!diatementets_chez.Pourretirerlosmarqueset redonnerdu lustre,terminezle nettoyageavecle vaporisateurpour acier
inoxydableMagic Spray*.
Losnoms de marquedes produitsde nettoyagesont des marquesd@osc!esdes diffc!rentsfabricants.
•* Pourcommanderdirectement,composezle 1-8O0-JENNAIR[1-800-536-6247).
ENTRET|EN
Pieds de raise & niveau
Assurez-vousque la cuisini_reest d'aplombune lois
install_e. Danslecas contraire,tournezlos pieds de
raisea niveau,achacun des anglesde la cuisini_re,
jusqu'_ ce qua celle-ci soit d'aplomb.
__ BRIDE
ANTIBASCULEMENT
PIED DE MIBE A
NIVEAU
39
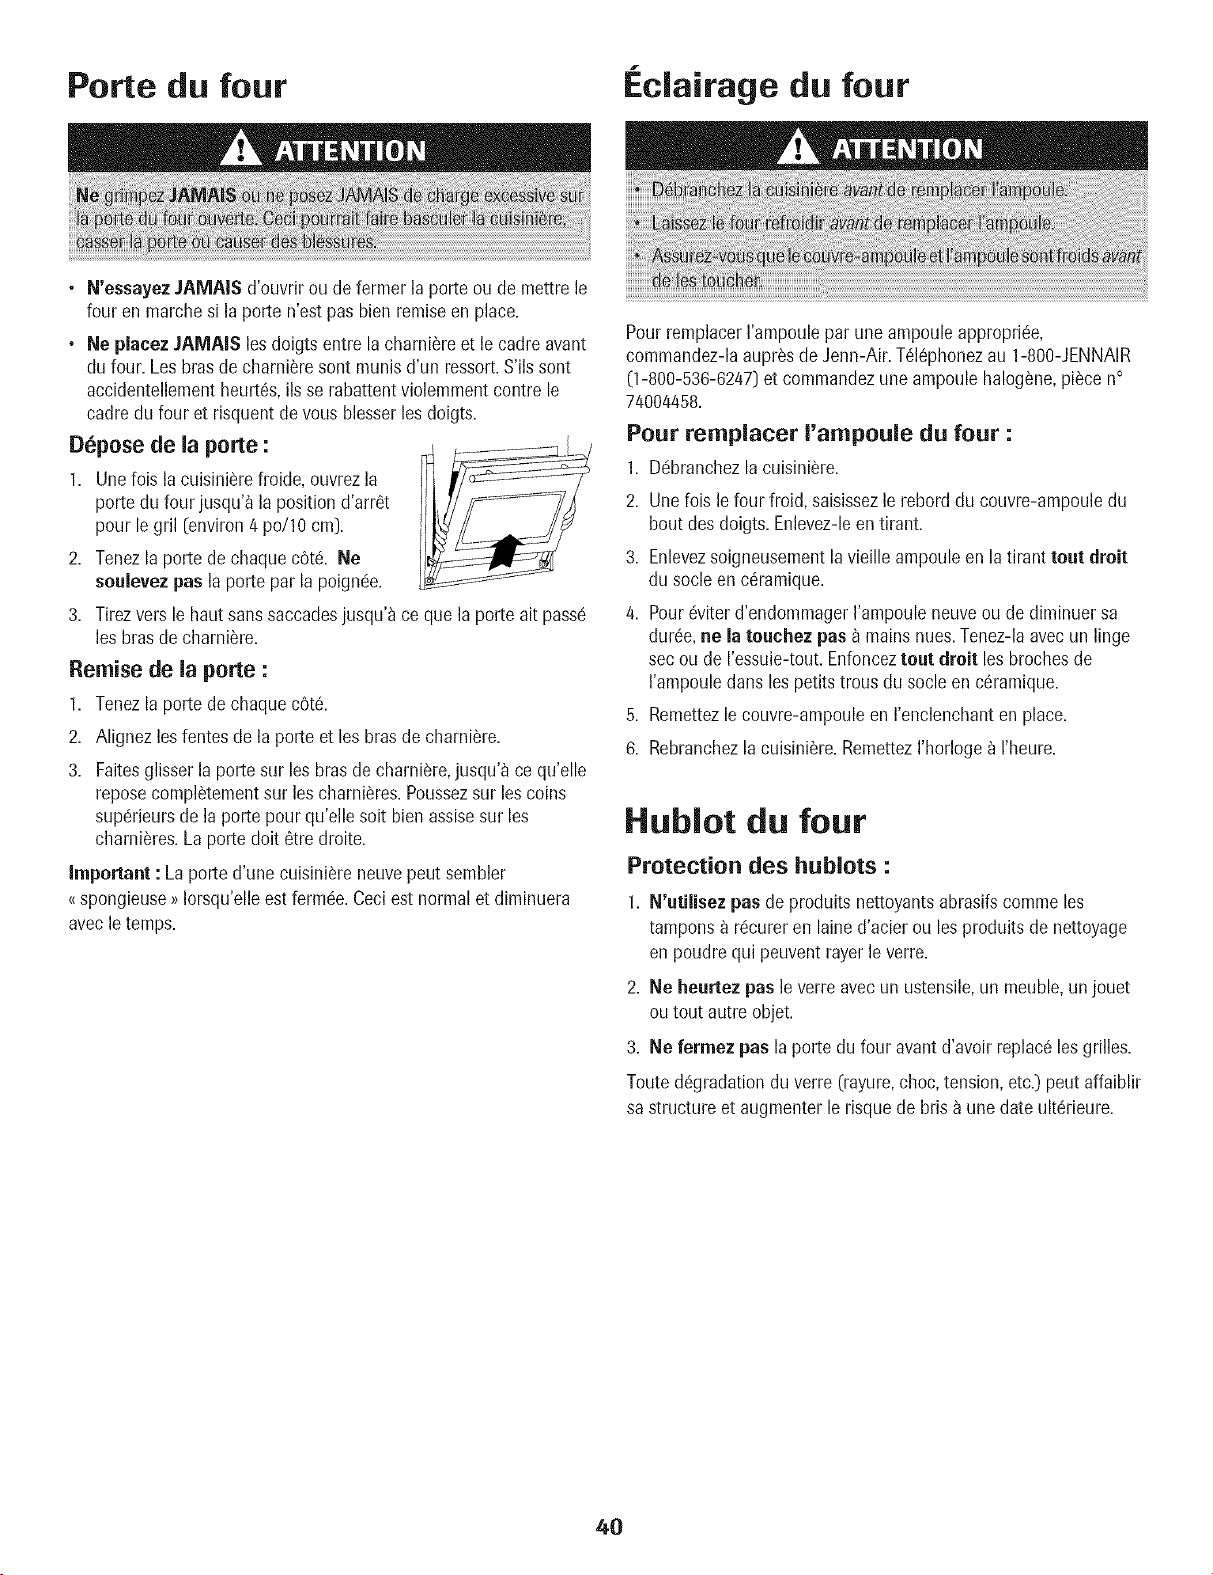
Porte du four i clairage du four
, N'essayez JAMAIS d'ouvrir ou de fermer la porte ou de mettre le
four en marchesi la porte n'est pas bien remiseen place.
, Ne placez JAMAIS lesdoigts entre la charni_reet le cadreavant
du four. Les brasde charni_resont munis d'un ressort.S'ils sont
accidentellementheurt6s,ils se rabattentviolemmentcontre le
cadre du four et risquentde vous blesserlesdoigts.
D6pose de la porte : __
1. Unefois la cuisini_re froide,ouvrezla
portedu four jusqu'_ la positiond'arr6t
pour legril [environ/4po/10 cm].
2. Tenezla porte de chaquec6t& Ne
soulevez pus la porte par la poignc!e.
3. Tirezvers le haut sanssaccadesjusqu'a ce que la porte ait passe
les brasde charni_re.
Remise de la porte :
1. Tenezla porte de chaquec0t_.
2. Alignez les fentesde la porte et les bras decharniSre.
3. Faitesglisser la porte sur les bras de charni_re,jusqu'_ ce qu'elle
reposecompl_tementsur les charni_res.Poussezsur les coins
sup(!rieursde la porte pour qu'elle soit bien assisesur les
charni_res.La porte doit 6tre droite.
Important : La porte d'une cuisini6reneuvepeut sembler
{{spongieuse>>Iorsqu'elleest fermc!e.Ceci est normalet diminuera
avecle temps.
PourremplacerI'ampoulepar une ampouleappropri6e,
commandez-laaupr_sde Jenn-Air.T61@honezau 1-800-JENNAIR
[1-800-536-6247]et commandezune ampoulehalog_ne,piece n°
74004458.
Pour remplacer I'ampoule du four :
1. Dc!branchezla cuisini_re.
2. Une fois le four froid, saisissezle rebord du couvre-ampouledu
bout des doigts. Enlevez-leen tirant.
3. Enlevezsoigneusementlavieille ampouleen la tirant teat aroit
du socleen c6ramique.
4. Pour6viter d'endommagerI'ampouleneuveou de diminuer sa
dur6e,ne la touchez pus _ mainsnues.Tenez-laavecun linge
secou de ressuie-tout. Enfonceztout droit les brochesde
I'ampouleduns les petitstrous du socleen c6ramique.
5. Remettezle couvre-ampouleen I'enclenchanten place.
6. Rebranchezla cuisini_re.RemettezI'horlogea I'heure.
Hublot du four
Protection des hublots :
1. N'utilisez pus de produits nettoyantsabrasifscommeles
tampons a rc!cureren laine d'acier ou les produitsde nettoyage
en poudrequi peuventrayer leverre.
2. Ne heurtez pas le verre avecun ustensile,un meuble,unjouet
ou tout autre objet.
3. Ne lermez pas laporte du four avantd'avoir replac6les grilles.
Touted_gradationduverre (rayure,choc,tension,etc.) peut affaiblir
sa structure et augmenterle risque de bris a unedate ult6rieure.
4O
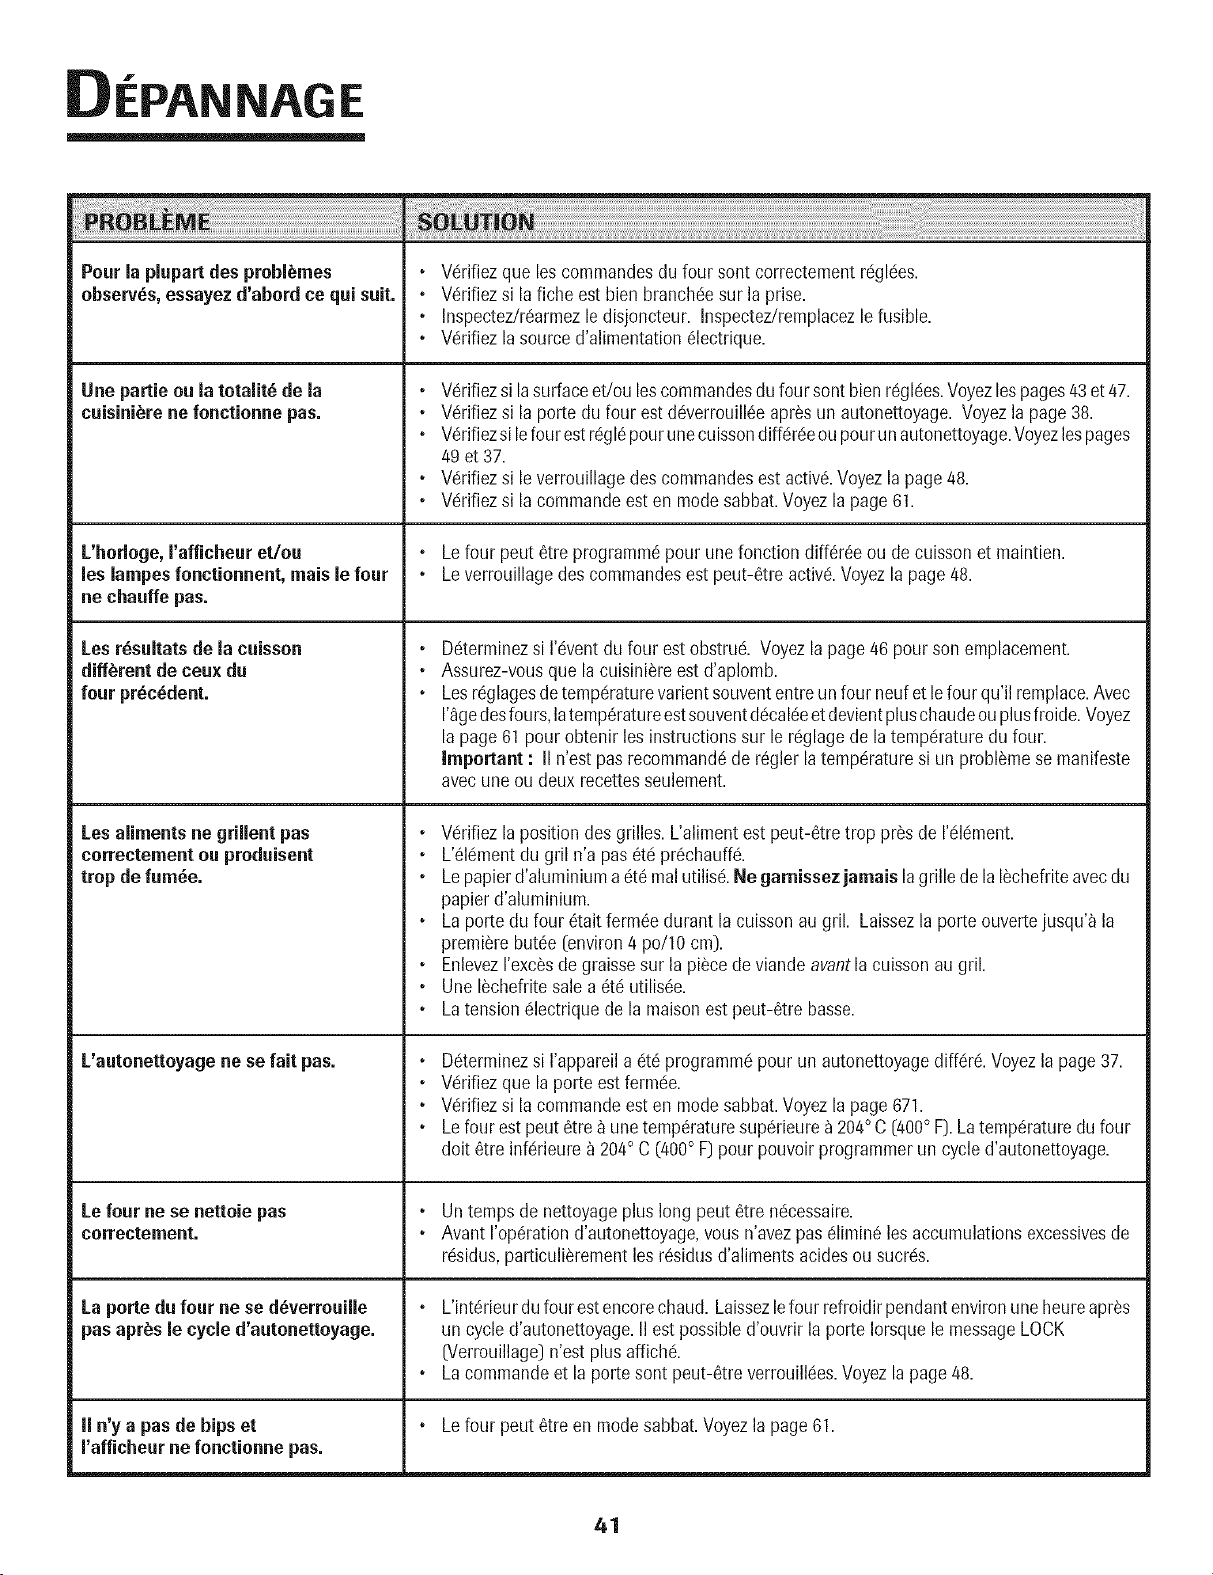
f
EPANNAGE
Pour la plupart des problbrnes
observes,essayez d'abord ce qui suit.
Une pattie ou la totaJit_de la
cuisini_re ne fonctionne pas.
L'horloge,I'afficheur et/ou
les larnpesfonctionnent, mais le four
ne chauffe pas.
Les r6sultats de la cuisson
different de ceux du
four precedent.
Les aliments ne grillent pas
correctement ou produisent
trop de furn6e.
L'autonettoyage ne se fait pas.
Le four ue se nettoie pas
correctement.
La porte du four ne se d_verrouille
pas aprbsle cycle d'autonettoyage.
il n'y a pas de hips et
I'afficheur ne fonctionne pas.
V6rifiezque lescommandesdufour sont correctementr6gl6es.
V6rifiezsi la fiche estbien branch6esur la prise.
Inspectez/r6armezle disjoncteur. Inspectez/remplacezlefusible.
V6rifiezla source d'alimentation61ectrique.
o
o
o
V6rifiezsi la surfaceet!ou lescommandesdu four sontbien r6gl6es.Voyezles pages43et 47.
V6rifiezsi la porte du four est d6verrouill6eapr_sun autonettoyage.Voyezla page38.
V6rifiezsi lefourestr6g18pourune cuissondiff6r6eou pouru nautonettoyage.Voyezlespages
49 et 37.
V6rifiezsi le verrouillagedescommandesestactiv6.Voyezla page48.
V6rifiezsi la commandeest en modesabbat.Voyezla page61.
Lefour peut 6tre programm6pour une fonction diff6r6eou de cuissonet maintien.
Leverrouillagedescommandesestpeut-6tre activ6.Voyezla page48.
D6terminezsi I'@entdu four est obstru6. Voyezlapage 46 pour son emplacement.
Assurez-vousque la cuisini6reest d'aplomb.
Lesr6glagesde temp6raturevarient souvententreun four neuf et lefour qu'il remplace.Avec
I'_gedesfours,latemp6ratureestsouventd6cal6eet devientpluschaudeouplusfroide.Voyez
la page61 pour obtenir les instructionssur le r6glagede la temp6raturedu four.
important : II n'est pasrecommand6de r6gler latemp6raturesi un probl_mese manifeste
avecune ou deux recettesseulement.
V6rifiezla position des grilles.L'alimentest peut-6tretrop pros de 1'616ment.
L'616mentdu gril n'a pas 6t6 pr6chauff6.
Lepapierd'aluminiuma 6t6 malutilis6.Ne garnissez jamais lagrillede la I_chefriteavecdu
papier d'aluminium.
Laporte du four 6taitferm6e durant la cuissonaugril. Laissezla porte ouvertejusqu'_ la
premiere but6e (environ4 pc/10 cm).
EnlevezI'excSsdegraissesur la piece deviande avantla cuissonaugril.
Une 18chefritesalea 6t6 utilis6e.
Latension 61ectriquede la maisonest peut-6tre basse.
D6terminezsi I'appareila 6t6 programm6pourun autonettoyagediff6r6.Voyezla page 37.
V6rifiezque la porte est ferm6e.
V6rifiezsi la commandeest en modesabbat.Voyezla page671.
Lefour estpeut 6tre _ une temp6raturesup6rieurea204° C (400° F].Latemp6raturedu four
doit 6tre inf6rieure a 204° C (400° F] pour pouvoirprogrammerun cycle d'autonettoyage.
Untemps de nettoyageplus long peut 6tre n6cessaire.
Avant I'op6rationd'autonettoyage,vous n'avezpas61imin6les accumulationsexcessivesde
r6sidus,particuli_rementles r6sidusd'alimentsacidesou sucr6s.
L'int6rieurdufour est encorechaud. Laissezle four refroidirpendantenvironuneheureapr_s
un cycle d'autonettoyage.II estpossibled'ouvrir laporte Iorsquele messageLOCK
[Verrouillage]n'est plus affich6.
Lacommandeet la porte sont peut-6tre verrouill6es.Voyez lapage48.
Lefour peut 6tre en modesabbat.Voyezla page61.
41
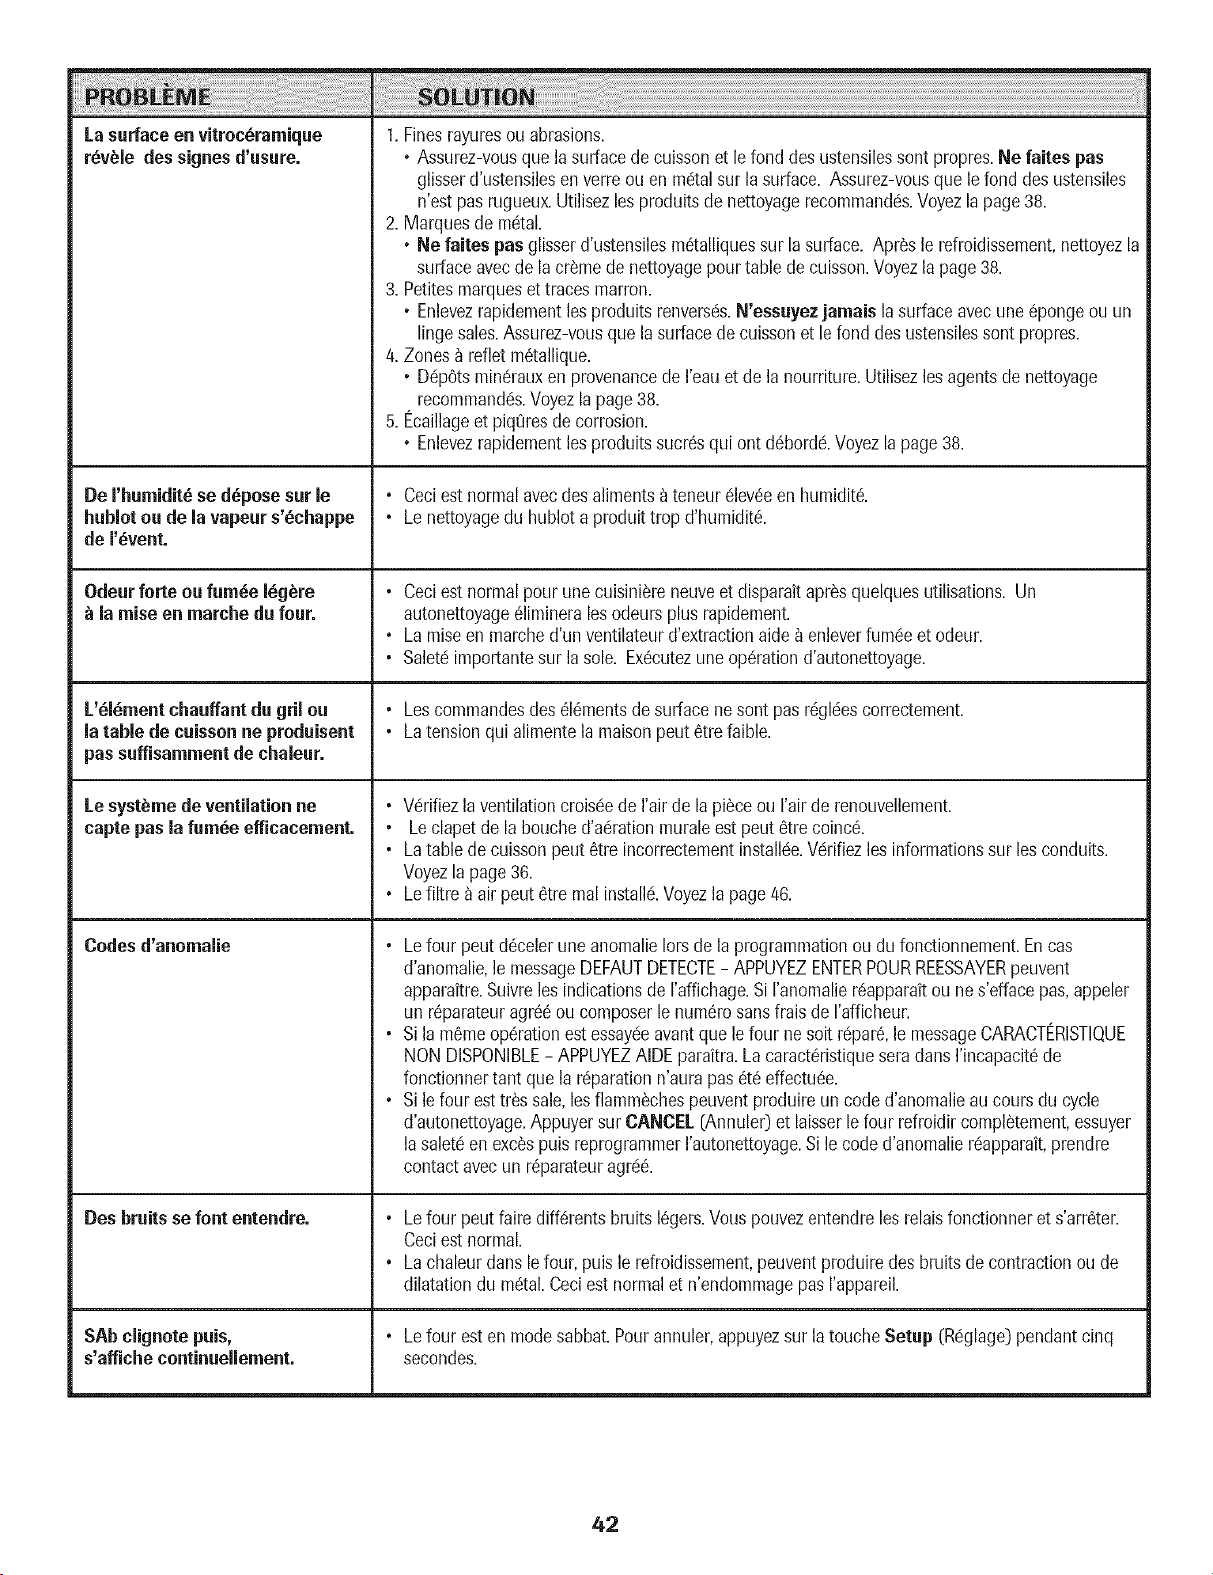
La surface en vitroc_ramique 1. Finesrayuresouabrasions.
r_v_le dessignes d'usure. • Assurez-vousque lasurfacedecuissonet le fond desustensilessentpropres.Ne faites pus
glisserd'ustensilesen verreou en m_!talsur la surface. Assurez-vousque le fond desustensiles
n'estpas rugueux.Utilisezlesproduitsde nettoyagerecommand_!s.Voyezlapage 38.
2. Marquesde m(!tal.
• Ne faites pas glisserd'ustensilesm_talliquessur la surface. Apr_sle refroidissement,nettoyezla
surfaceavecde la cr_mede nettoyagepour table decuisson.Voyezlapage 38.
3. Petitesmarqueset tracesmatron.
• Enlevezrapidementlesproduitsrenvers_s.N'essuyezjamais lasurfaceavec une@ongeou un
lingesales.Assurez-vousque lasurfacedecuissonet le fond desustensilessentpropres.
4. Zones _ refletm_tallique.
• D_!p0tsmin_!rauxen provenancede I'eauet de la nourriture.Utilisezlesagentsde nettoyage
recommand_!s.Voyezla page38.
5. Ecaillageet piqOresde corrosion.
• Enlevezrapidementlesproduitssucresqui ont d_bord_!.Voyezlapage38.
De I'bumidit_ se d_posesat le • Ceciestnormalavecdes alimentsa teneur_lev_een humidit&
bublot ou de la vapeurs'ecbappe • Lenettoyagedu hublota produittrop d'humidit&
de I'_vent.
Odeur forte ou fum_e I_g_re • Ceciestnormalpour une cuisini_reneuveet disparaitapr_squelquesutilisations. Un
la raiseen marebe dufour. autonettoyage_limineralesodeursplus rapidement.
• Lamiseen marched'un ventilateurd'extractionaide_ enleverfum_!eet odeur.
• Salet_importantesur lasole. Ex_cutezuneoperationd'autonettoyage.
L'_i_rnentchauffantdu gril ou • Lescommandesdes _l_mentsde surfacene sent pus r_gl_!escorrectement.
la tame de cuisson ne produisent • Latensionqui alimentela maisonpout _trefaible.
pussuffisamment de cbaieur.
Le syst_me de ventilationne • Vdrifiezlaventilationcroisdede rair de la pieceou I'airde renouvellement.
capte pas la fum_e efficaeement. • Leclapetde la bouched'a_rationmuraleestpout _tre coinc&
• Latablede cuissonpout _tre incorrectementinstallde.Vdrifiezlos informationssur lesconduits.
Voyezla page36.
• Lefiltre a air pout _tre real install&Voyezla page 46.
Codesd'anomalie • Lefour peut d_celeruneanomalieIorsde la programmationou du fonctionnement.Encas
d'anomalie,le messageDEFAUTDETECTE- APPUYEZENTERPOURREESSAYERpeuvent
apparaitre.Suivrelos indicationsde I'affichage.Si I'anomalier_apparaitou ne s'effacepus,appeler
un r@arateuragr_8ou composerle num_rosansfraisde I'afficheur.
• Si la mSmeoperationest essay(!eavantque lefour ne soitr@ar_,le messageCARACTERISTIQUE
NONDISPONIBLE- APPUYEZAIDEparaitra.LacaractSristiqueseradunsI'incapacit_de
fonctionnertant que la r@arationn'aurapus _t_effectu_e.
• Si le four esttr_s sale,losflamm_chespeuventproduire uncode d'anomalieau coursdu cycle
d'autonettoyage.Appuyersur CANCEL(Annuler)et laisserle four refroidircompl_tement,essuyer
lasalet(!en exc_spuis reprogrammerI'autonettoyage.Sile coded'anomalier_!apparait,prendre
contactavec un r@arateuragr_!_.
Des bruits se font entendre. • Lefour peut faire diff_rentsbruits I_gers.Vouspouvezentendrelos relaisfonctionneret s'arr_ter.
Ceciestnormal.
• Lachaleurdunslefour, puis le refroidissement,peuventproduiredesbruitsde contractionou de
dilatationdu m_tal.Ceciestnormalet n'endommagepusrappareil.
SAbciignotepuis, • Lefour esten modesabbat.Pourannuler,appuyezsur la touche Setup (R_glage)pendantcinq
s'affiehe eontinuellernent, secondes.
42
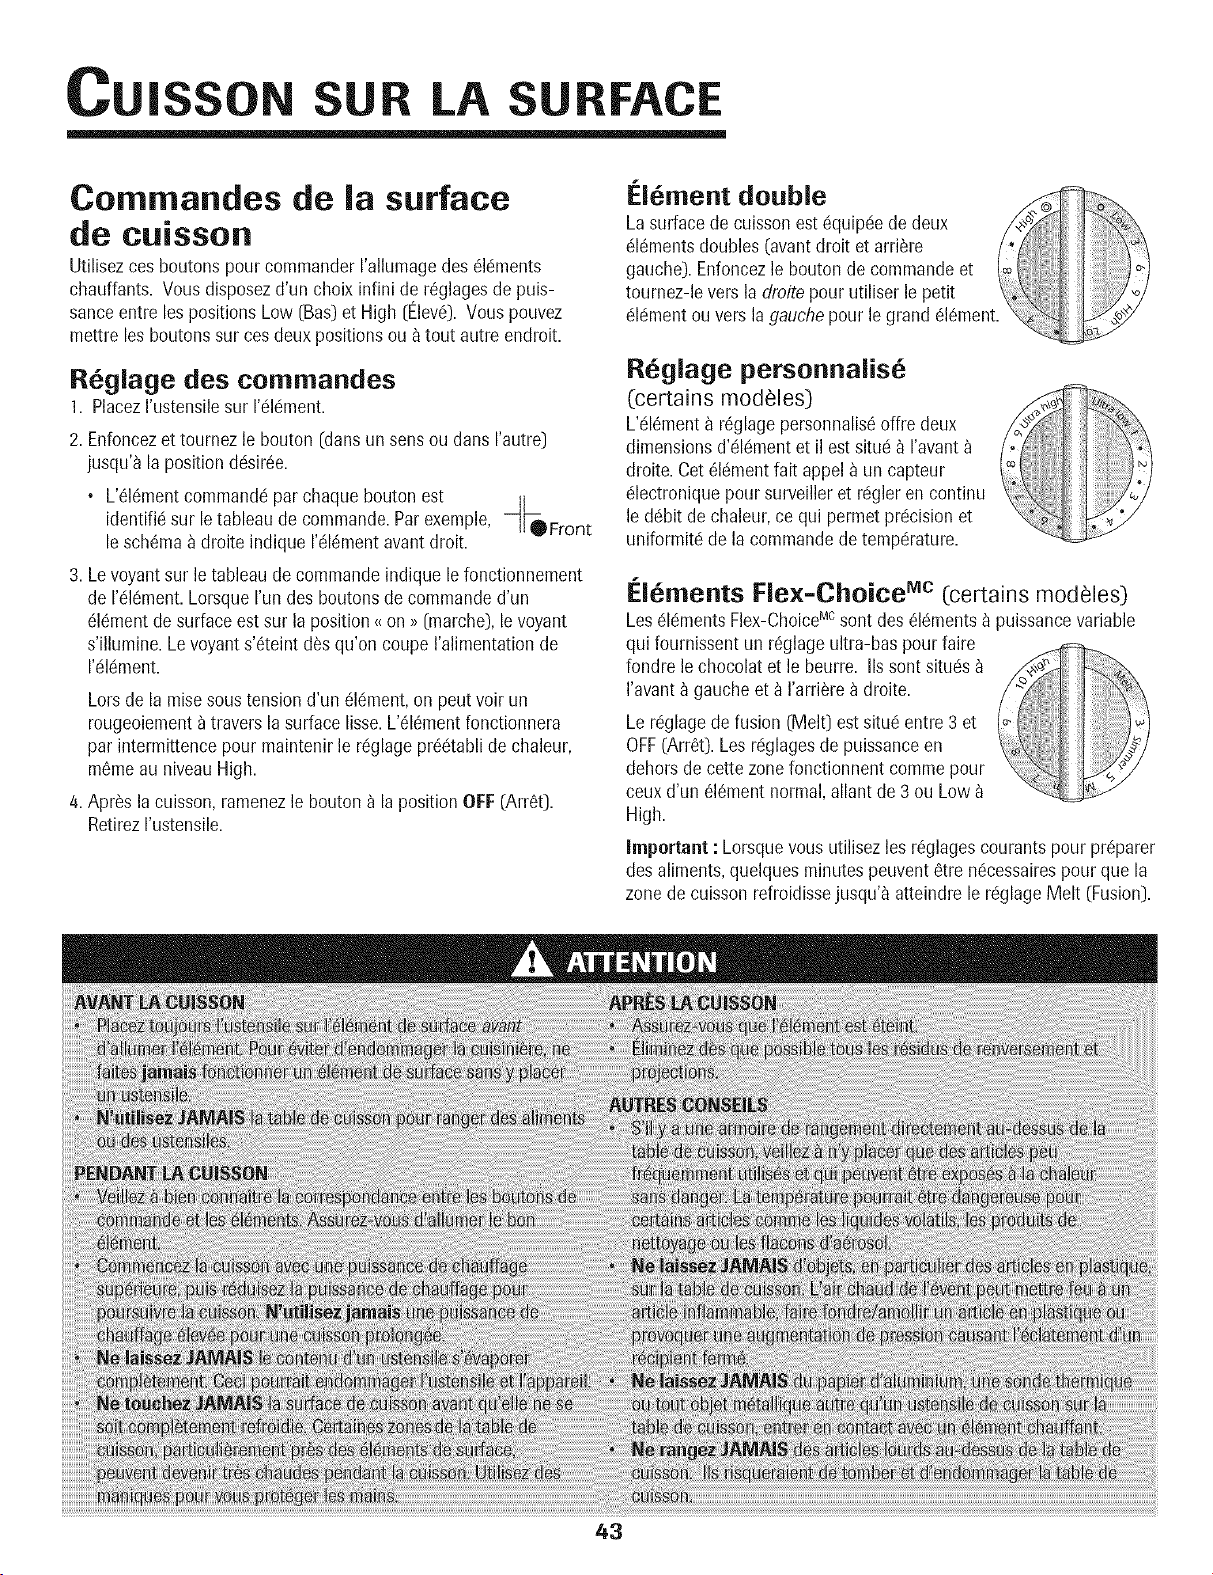
N UR LA RFACE
Commandes de la surface
de cuisson
Utilisezcesboutons pour commanderI'allumagedes 6ldments
chauffants. Vousdisposezd'un choix infini de r6glagesde puis-
sanceentre les positions Low [Bas) et High [Elev6).Vous pouvez
mettre les boutonssur cesdeuxpositions ou_ tout autre endroit.
Rbglage des commandes
1. PlacezI'ustensilesur I'c!ldment.
2. Enfoncezet tournezle bouton (clansun sons ou dans I'autre)
jusqu'a la positiond6sir6e.
• L'_16mentcommanddpar chaque boutonest It
identifidsur le tableau de commando.Parexemple, -1_Front
leschema_ droite indique I'dl6mentavantdroit.
3. Levoyantsur letableau de commandeindique lefonctionnement
de I'dl_ment.LorsqueI'un des boutonsdecommandod'un
616mentde surfaceestsur la position{{on >>(marche),levoyant
s'illumine. Levoyants'_teintd_s qu'on coupe I'alimentationde
I'dldment.
Lorsde la mise soustensiond'un 6ldment,on peutvoir un
rougeoiementa traversla surface lisse.L'616mentfonctionnera
par intermittencepour maintenir le rdglagepr6dtablide chaleur,
m6meau niveauHigh.
4. Apr_s la cuisson,ramenezle bouton a la position OFF(Arr6t].
RetirezI'ustensile.
[.16merit double
Lasurfacede cuisson estdquipdede deux
dl6mentsdoubles (avantdroit et arri_re
gauche).Enfoncezle bouton de commandeet
tournez-levers la droitepour utiliser le petit
dldmentou versla gauchepour le grand 61_ment
R6glage personnalis_
(certains modeles)
L'dl_ment_ r6glagepersonnalis6offre deux
dimensionsd'dl6ment et il est situd _ I'avant
droite.Cot 61dmentfait appel_ un capteur
dlectroniquepour surveilleret rdgleren continu
le ddbit de chaleur,ce qui permet prdcisionet
uniformitdde la commandede tempdrature.
@
[:.l_ments Fie×=Choice Mc (certains modeles]
LosdldmentsFlex-ChoiceMcsent des _ldments_ puissancevariable
qui fournissentun r6glage ultra-baspourfaire
fondre le chocolatet le beurre. IIssontsituds
I'avant_ gaucheet _ I'arri6rea droite.
Le rdglagede fusion (Melt) estsitu_ entre 3 et
OFF(Arr60. Lesrdglagesde puissanceen
dehorsde cette zonefonctionnentcommepour
ceuxd'un 618mentnormal,allant de 3 ou Low
High.
important : Lorsquevous utilisezlos r_glagescourantspour prdparer
desaliments,quelques minutespeuvent_tre ndcessairespour que la
zone de cuissonrefroidissejusqu'_ atteindrele rdglage Melt (Fusion).
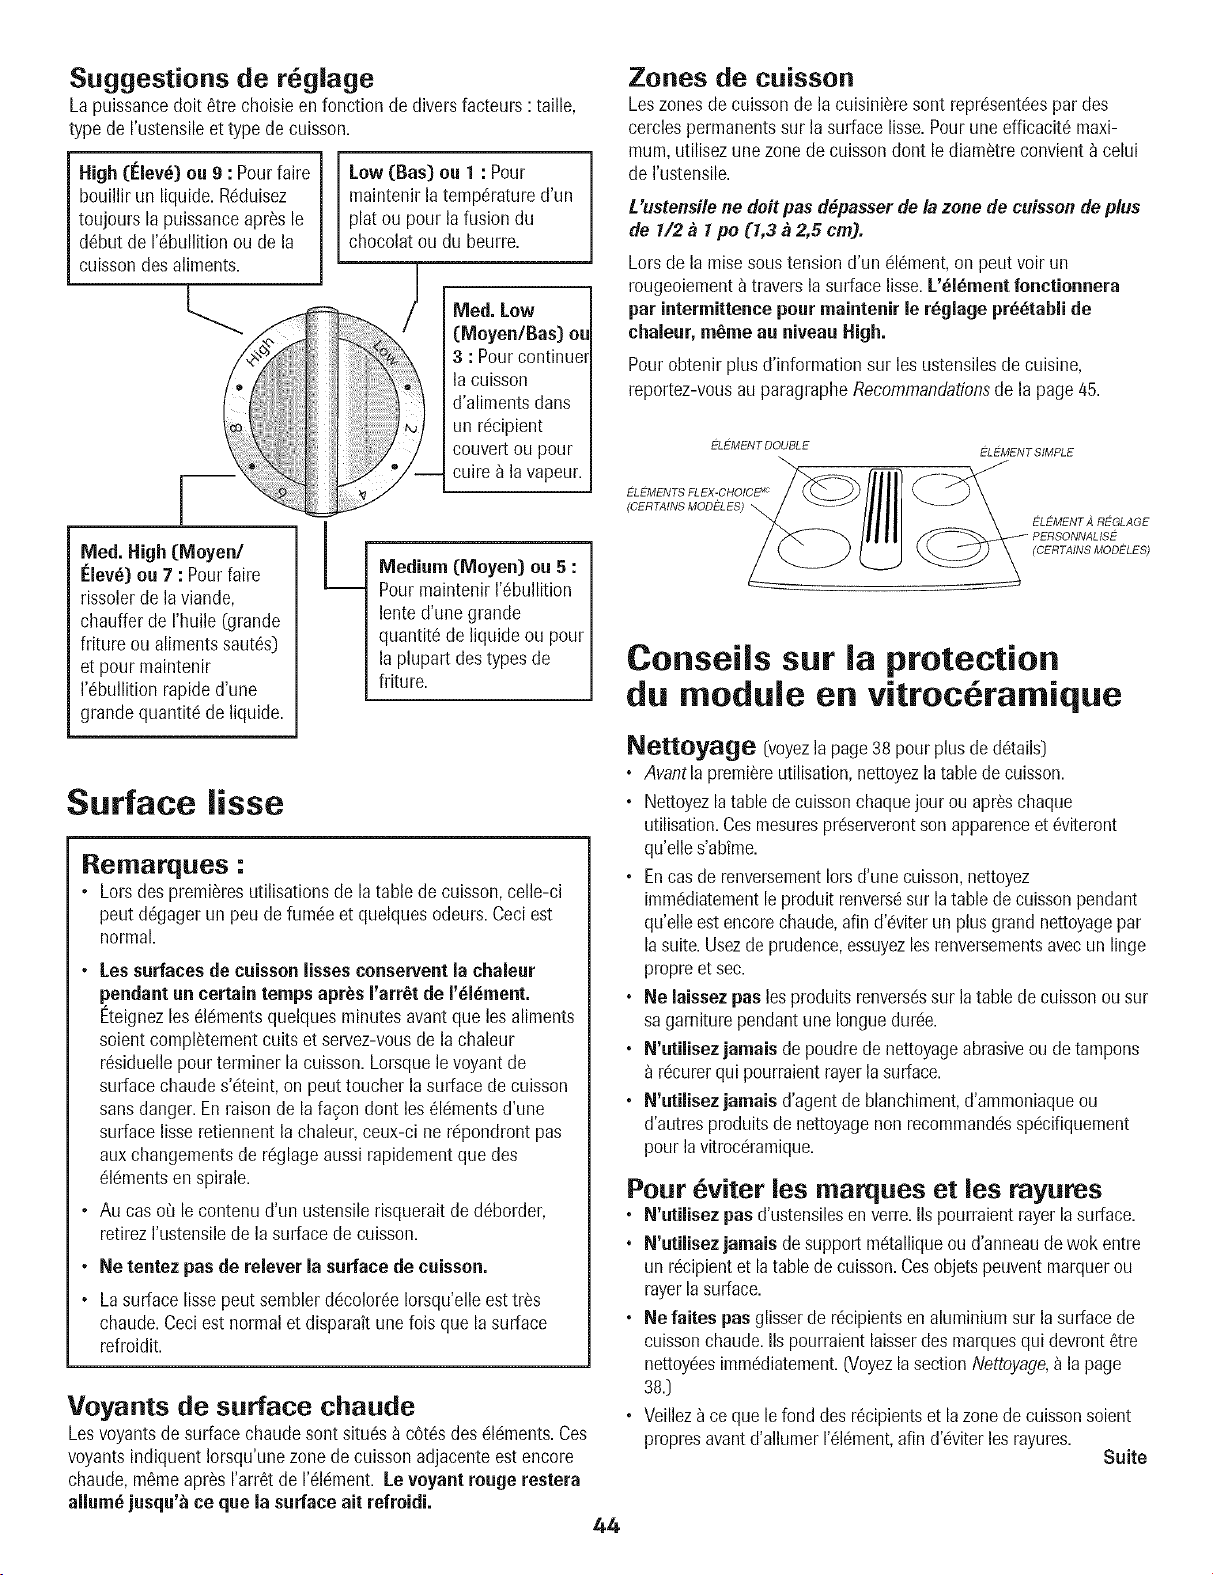
Suggestions de r6glage
Lapuissancedolt 6tre choisie enfonction de diversfacteurs : taille,
type de I'ustensileet type de cuisson.
High (Elev_} ou 9 : Pour faire
bouillirun liquide. R(_duisez
toujours la puissanceapr_sle
d_but de I'dbullitionou de la
cuissondes aliments.
Low (Bas) ou 1 : Pour
maintenirla temp6ratured'un
plat ou pour la fusion du
chocolat ou du beurre.
Med. Low
(Moyen/Bas) m
3 : Pourcontinuel
la cuisson
d'alimentsduns
un rdcipient
couvertou pour
-cuire _ la vapeur.
Meal. High (Moyen/
Elev_) ou 7 : Pourfaire
rissolerde laviande,
chauffer de I'huile (grande
friture ou alimentssaut6s)
et pourmaintenir
1'6bullitionrapided'une
grandequantit6 de liquide.
Medium (Moyen) ou 5 :
Pourmaintenir 1'6bullition
lente d'une grande
quantit6de liquide ou pour
la plupart des typesde
friture.
Surface lisse
Remarques :
• Lorsdes premieresutilisationsde la table de cuisson,celle-ci
pout d6gager un peude fumdeet quelquesodeurs.Ceciest
normal.
• Lessurfaces de cuissonlisseseonserventla chaleur
pendantun certain temps apr_s rarr_t de r_l_ment.
Eteignezlos 61dmentsquelques minutesavantque losaliments
soient compl_tementcults et servez-vousde la chaleur
r6siduellepour terminer la cuisson.Lorsquele voyantde
surface chaudes'dteint,on pouttoucher la surfacede cuisson
sansdanger.Enraison de la fa£on dont les_16mentsd'une
surface lisse retiennentlachaleur, ceux-ci ne r@ondront pas
auxchangementsde rdglageaussi rapidementque des
61c!mentsen spirale.
• Au caso0 le contenud'un ustensilerisquerait de d_border,
retirezI'ustensilede la surfacede cuisson.
• Ne tentez pas de relever la surface de caisson.
• Lasurface lissepeut sembler ddcolor6eIorsqu'elleest tr_s
chaude.Ceciest normal et disparaft unefois que la surface
refroidit.
Voyants de surface chaude
Lesvoyantsde surfacechaudesont situ6s_ cOt(_sdes dldments.Ces
voyantsindiquent Iorsqu'unezone de cuissonadjacenteest encore
chaude,m6meapr6sI'arr6t de 1'61dment.Le voyant rouge restera
allum_ jusqu'_ ce que la surface nit refroidi.
44
Zones de caisson
Leszonesde cuissonde la cuisini_re sont reprdsentdespardes
cerclespermanentssur la surface lisse.Pourune efficacit6 maxi-
mum,utilisez unezonede cuissondont le diam6tre convient_ celui
de I'ustensile.
L'ustensilene doit pusd#passerde la zone de cuissonde plus
de 1/2 _ 1po {1,3 _ 2,5 cm).
Lorsde la raisesoustensiond'un dl6ment,on peut voir un
rougeoiement_ travers lasurface lisse.L'_i_ment fonctionnera
par intermittence pour maintenir le r_giage pr_tabii de
chaleur, meme au niveau High.
Pourobtenir plus d'informationsur les ustensilesde cuisine,
reportez-vousau paragrapheRecommandationsde la page45.
_-LEMENTDOUBLE
_-LEMENTS FLEX-CHOICE Mc
(CERTAINS MODELES) \
_-L_-MENT SIMPLE
EL_-MENTA REGLAGE
PERSONNALIS_-
(CERTAINS MODELES)
Conseils sur la protection
du module en vitroc ramique
Nettoy8ge [voyezla page 38pour plusde d6tails)
• Avantla premiereutilisation,nettoyezla tablede cuisson.
• Nettoyezla tablede cuissonchaquejour ou apr_schaque
utilisation.Ces mesuresprdserverontson apparenceet 6viteront
qu'elles'abime.
• Encasde renversementlotsd'une cuisson,nettoyez
immddiatementleproduit renvers6sur latable decuissonpendant
qu'elleestencorechaude,afind'dviter un plusgrand nettoyagepar
lasuite.Usezde prudence,essuyezlesrenversementsavecun lingo
propreet sec.
• Ne laissez pas losproduits renversdssur latable de cuissonou sur
sa garniturependantune Ionguedurde.
• N'utilisez jamais depoudrede nettoyageabrasiveou detampons
rdcurerqui pourraientrayerlasurface.
• N'utilisez jamais d'agentde blanchiment,d'ammoniaqueou
d'autresproduitsde nettoyagenonrecommanddsspdcifiquement
pourla vitrocdramique.
Pour viter los marques et les rayures
• N'utilisez pasd'ustensilesen verre.IIspourraientrayerla surface.
• N'utilisez jamais desupportmdtalliqueou d'anneaude wok entre
un r_cipientet latablede cuisson.Cosobjetspeuventmarquerou
rayerla surface.
• Ne faites pas glisserde rdcipientsenaluminium sur lasurfacede
cuissonchaude.IIspourraientlaisserdes marquesqui devront8tre
nettoy_!esimm_!diatement.(Voyezla sectionNettoyage,a la page
383
• Veillezace que lefond des r_cipientset lazonedecuissonsoient
propresavantd'allumerI'dldment,afin d'dviterlesrayures.
Suite
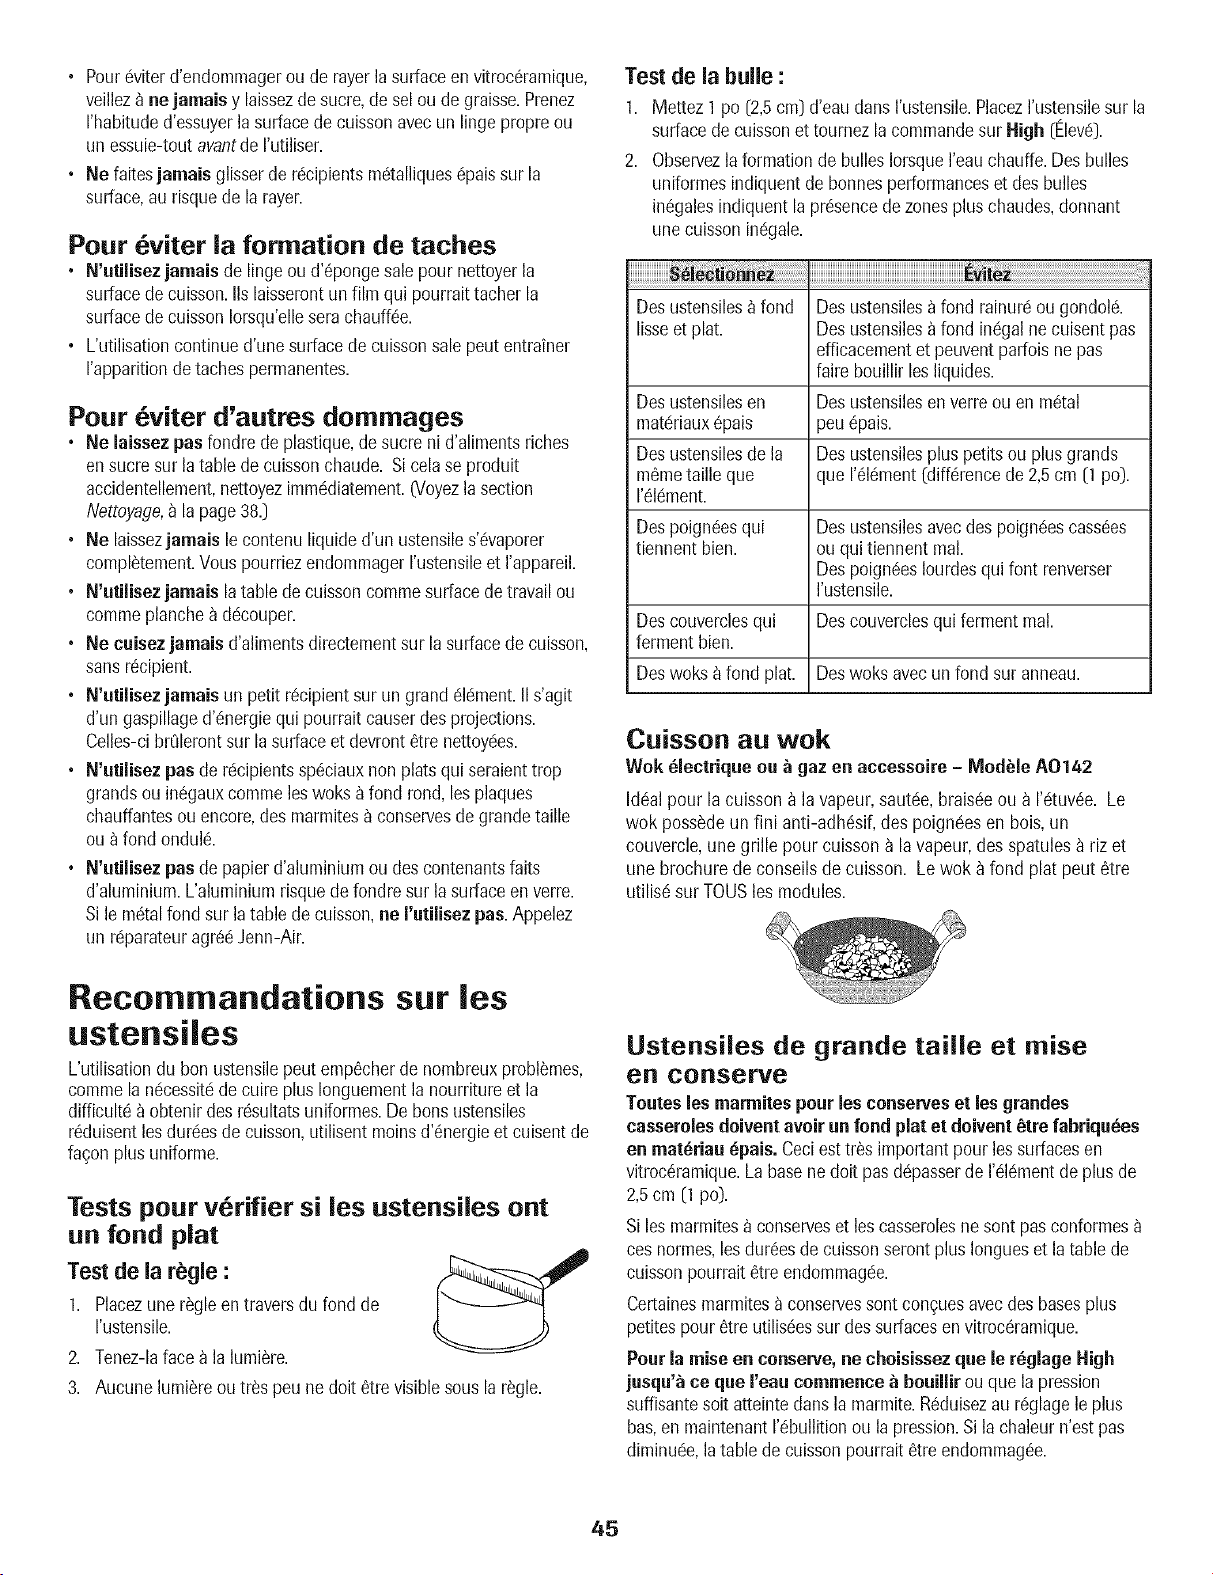
• Pour@iterd'endommagerou de rayerlasurfaceen vitroc6ramique,
veillez_ ne jamais y laissezde sucre,de solou de graisse.Prenez
I'habituded'essuyerla surfacede cuissonavecun lingopropre ou
un essuie-toutavantde I'utiliser.
• Ne faitesjamais glisserde rc!cipientsmc!talliquesc!paissur la
surface,at] risquede la rayer.
Pour viter la formation de taches
• N'utilisez jamais de Iingeou d'6pongesalepournettoyerla
surfacede cuisson.IIs laisserontun film qui pourraittacherla
surfacede cuissonIorsqu'elleserachauff6e.
, L'utilisationcontinued'unesurfacede cuissonsale poutentrainer
I'apparitionde tachespermanentes.
Pour viter d'autres dommages
, Ne laissezpas fondre deplastique,de sucreni d'alimentsriches
ensucre sur latable decuissonchaude. Si colase produit
accidentellement,nettoyezimmc!diatement.(Voyezla section
Nettoyage,_ la page38.]
• Ne laissezjamaJs le contenuliquided'un ustensiles'_vaporer
compl_tement.VouspourriezendommagerI'ustensileet rappareil.
• N'utilisez jamais la table de cuissoncommesurfacedetravail ou
commeplanchea ddcouper.
• Ne cuisez jamais d'alimentsdirectementsur la surfacede cuisson,
sansr6cipient.
° N'utilisez jamais un petit r6cipientsurun granddl6ment.II s'agit
d'un gaspillaged'dnergiequi pourraitcauserdes projections.
Celles-cibr01erontsur la surfaceet devront6trenettoy6es.
° N'utilisez pas de rdcipientssp6ciauxnon platsqui seraienttrop
grandsou in6gauxcommeloswoks_ fond rond, lesplaques
chauffantesou encore,des marmites_ conservesde grandetaille
ou afond ondul&
° N'utilisez pas de papierd'aluminiumou descontenantsfairs
d'aluminium.L'aluminiumrisquedefondre sur lasurfaceen verre.
Sile m_talfond sur latable de cuisson,ne rutilisez pas. Appelez
un rdparateuragr66Jenn-Air.
Test de la bulle :
1. Mettez1 po (2,5cm] d'eau dansI'ustensile.PlacezI'ustensilesur la
surfacede cuissonet tournezlacommandosur High [Elev6).
2. Observezla formationde bullesIorsqueI'eauchauffe.Des bulles
uniformesindiquentde bonnesperformanceset deshullos
in6galesindiquentla pr6sencedezonespluschaudes,donnant
unecuissonindgale.
Desustensiles_ fond Des ustensilesa fond rainurc!ougondol&
lisseet plat. Desustensilesa fond inc!galnecuisentpas
efficacementet peuventparfoisnepas
faire bouillir lesliquides.
Desustensilesen Desustensilesenverreou en m6tal
mat_riaux_pais peu6pals.
Desustensilesde la Des ustensilesplus petitsou plus grands
m6metaille que que 1'616ment(diff6rencede 2,5cm (1 po).
1'61c!ment.
Despoign6esqui Desustensilesavecdes poign6escass_es
tiennent bien. ouqui tiennent real.
Despoign6esIourdesqui font renverser
I'ustensile.
Descouverclesqui Descouverclesqui fermentmal.
ferment bien.
Deswoks _ fond plat. Deswoks avecun fond sur anneau.
Caisson au wok
Wok _lectrique ou _ gaz en accessoire - Mod_le A0142
Idc!alpour la cuisson_ la vapeur,sautc!e,brais6eou a I'c!tuv6e.Le
wok poss_deun fini anti-adh6sif,des poign6esen bois,un
couvercle,une grille pour cuissona la vapeur,desspatules_ riz et
une brochurede conseilsde cuisson. Lewok _ fond plat pout _tre
utilis_sur TOUSlos modules.
Recornmandations sur los
ustensiles
L'utilisationdu bon ustensilepeut emp_cherde nombreuxprobl_mes,
commela ndcessitdde cuire plus Ionguementla nourritureet la
difficult_a obtenir desr_sultatsuniformes.De bonsustensiles
r_duisentlesdurdesde cuisson,utilisent moinsd'dnergieet cuisentde
fa_on plusuniforme.
Tests pour v rifier si los ustensiles ont
un fond plat
Test de la r_gle :
1. Placezune r%le en traversdu fond de
I'ustensile.
2. Tenez-laface a la lumi_re.
3. Aucunelumi_reou tr_s peu ne dolt _trevisiblesouslar_gle.
Ustensiles de grande taille et raise
en conserve
Toutesles marmites pourles conserveset les grandes
casserolesdoiventavoir unfond plat et doivent_tre fabriqubes
en mat_riau _pais. Ceciesttr_s importantpour lessurfacesen
vitroc_ramique.La basene dolt pasd_!passerde I'_!k!mentde plus de
2,5cm [1 po).
Siles marmites_ conserveset leacasserolesnesent pasconformes
cesnormes,lesdur@esde cuissonserontplus Iongueset la table de
cuissonpourrait@treendommag_!e.
Certainesmarmitesaconservessent conguesavecdes basesplus
petitespour 6tre utilis_essur dessurfacesen vitroc_ramique.
Pourla raise en conserve, ne choisissezque le r_glage High
jasqu'_ ce que reau commence_ bouillirou que la pression
suffisantesoit atteintedarts la marmite.R_duisezau r_glagele plus
bas,en maintenantI'_bullitionou lapression.Si la chaleurn'est pas
diminu_!e,la table decuissonpourrait8treendommag_e.
45
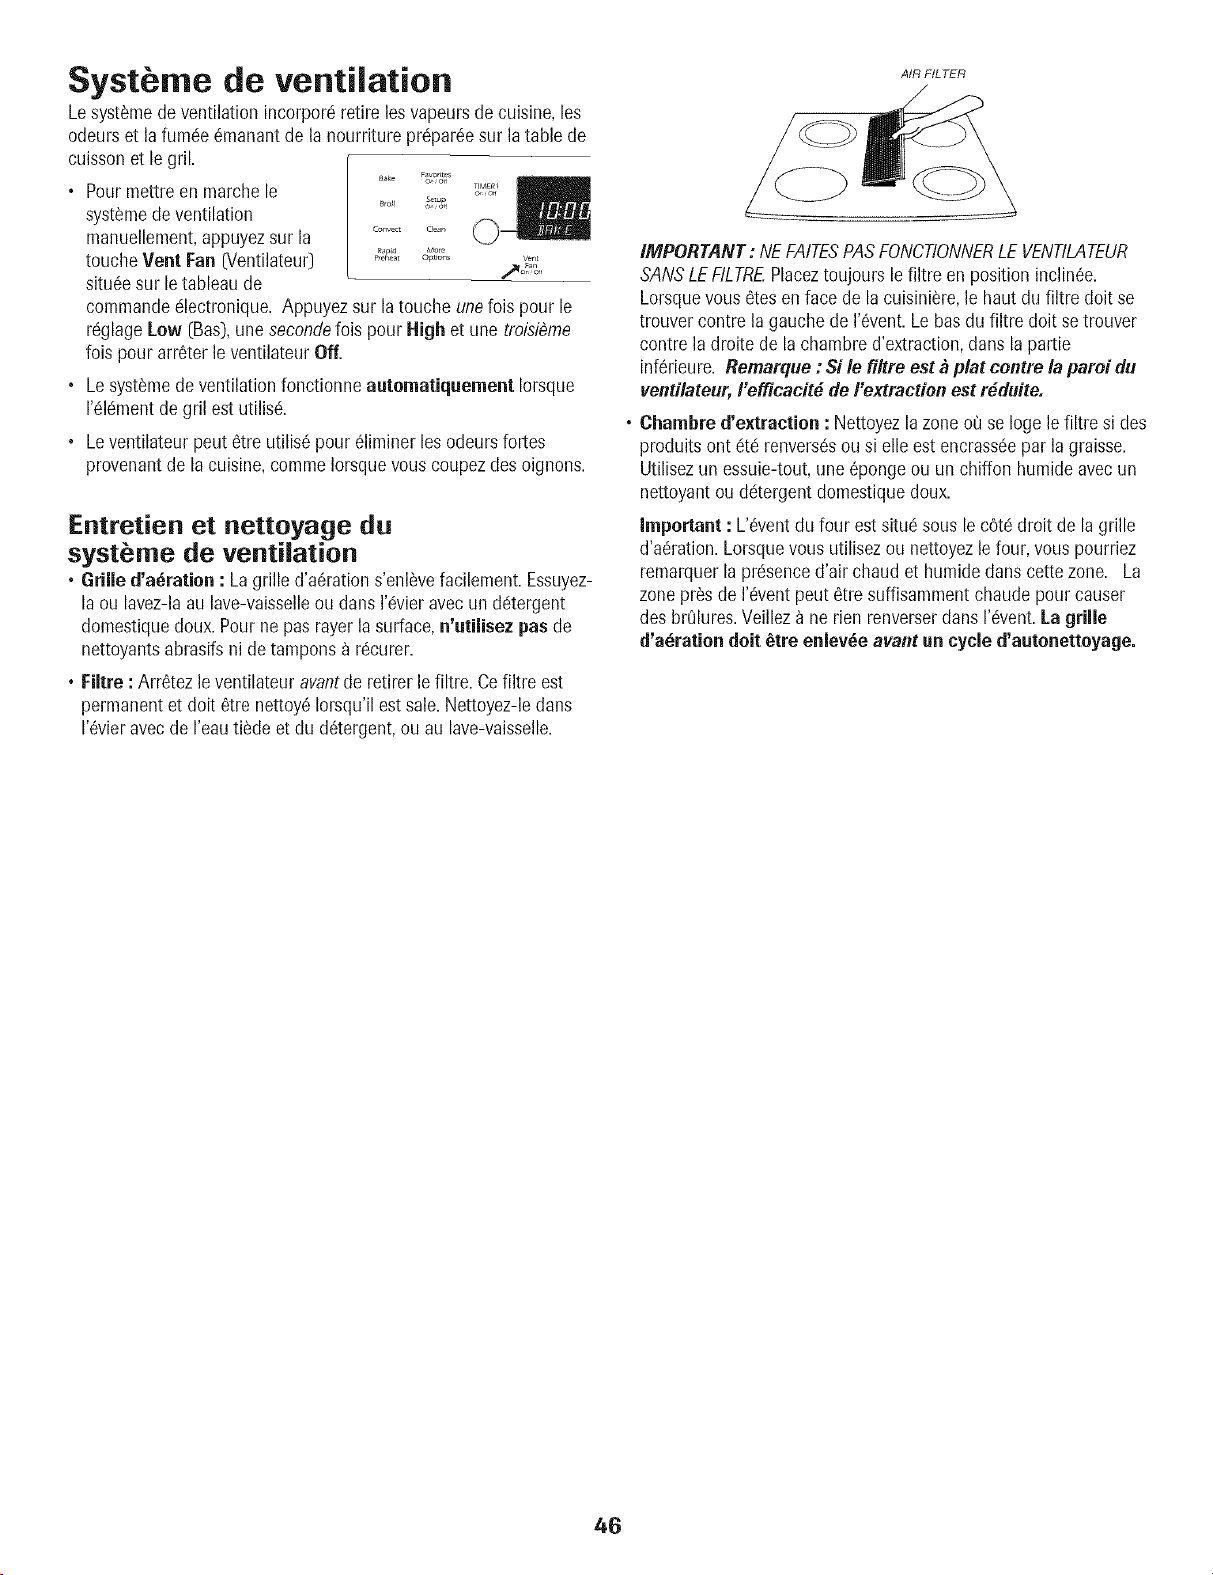
Syst rne de ventilation
Lesyst_mede ventilation incorpor6retire les vapeursde cuisine,los
odeurset la fumde 6manantde la nourriture prdparGesur latable de
cuissonet le gril.
Favar_tr _
Bake a, al
, Pourmettreen marche le ......o,
_ro_J so,up
syst_mede ventilation '.........
manuellement,appuyezsur la .............
MO,.
touche Vent Fan Nentilateur] _._:_:I..........
situGesur le tableaude
commandodlectronique. Appuyezsur la touche unefois pour le
rGglageLow [Bas),une secondelois pour Nigh et une troisieme
lois pourarrGterle ventilateurOff.
• Lesyst_mede ventilationfonctionne automatJquement Iorsque
I'dldmentde gril est utilisd.
• Leventilateur peut 6tre utilis6pour 61iminerles odeursfortes
provenantde la cuisine,commeIorsquevouscoupezdesoignons.
IFntretien et nettoyage du
syst me de ventilation
* Grille d'a_ration : La grille d'aGrations'enl_vefacilement.Essuyez-
laou lavez-laau lave-vaisselleou dans 1'Gvieravec un ddtergent
domestiquedoux. Pournepas rayer la surface,n'utJlisez pas de
nettoyantsabrasifsni de tamponsa rGcurer.
° Filtre : ArrGtezleventilateur avantde retirer le filtre. Cefiltre est
permanentet dolt 6tre nettoy6 Iorsqu'ilest sale.Nettoyez-ledans
1'Gvieravecde I'eautilde et du d_tergent,ou au lave-vaisselle.
AIR FILTER
iMPORTANT: NEFAITESPASFONCTIONNERLE VENTILATEUR
SANSLEFILTREPlaceztoujours lefiltre en position inclin_e.
Lorsquevous 6tesen face de la cuisini_re,le haut du filtre doit se
trouver contrela gauchede 1'6vent.Le basdu filtre dolt se trouver
contre la droite de la chambre d'extraction,dans lapartie
infGrieure.Remarque : $1le filtre est _ plat centre la pare/du
ventilateur, I'efficacit_ de/'extraction est r_duite.
• Chambre d'extraction : Nettoyezla zoneot'Jse logo le filtre si des
produits ont tit6 renversGsou si elle est encrass_epar la graisse.
Utilisezun essuie-tout,une @onge ou un chiffon humideavecun
nettoyantou dc!tergentdomestiquedoux.
important : L'Gventdu four est situc!sousle cGtddroit de la grille
d'aGration.Lorsquevousutilisezou nettoyezlefour,vous pourriez
remarquerla prdsenced'air chaud et humideclanscettezone. La
zone prosde 1'Gventpeut 6tre suffisammentchaudepour causer
des brQlures.Veilleza ne rien renverserdans 1'Gvent.La grille
d'a_ration dolt _tre enlev_e avant un cycle d'autonettoyage.
46
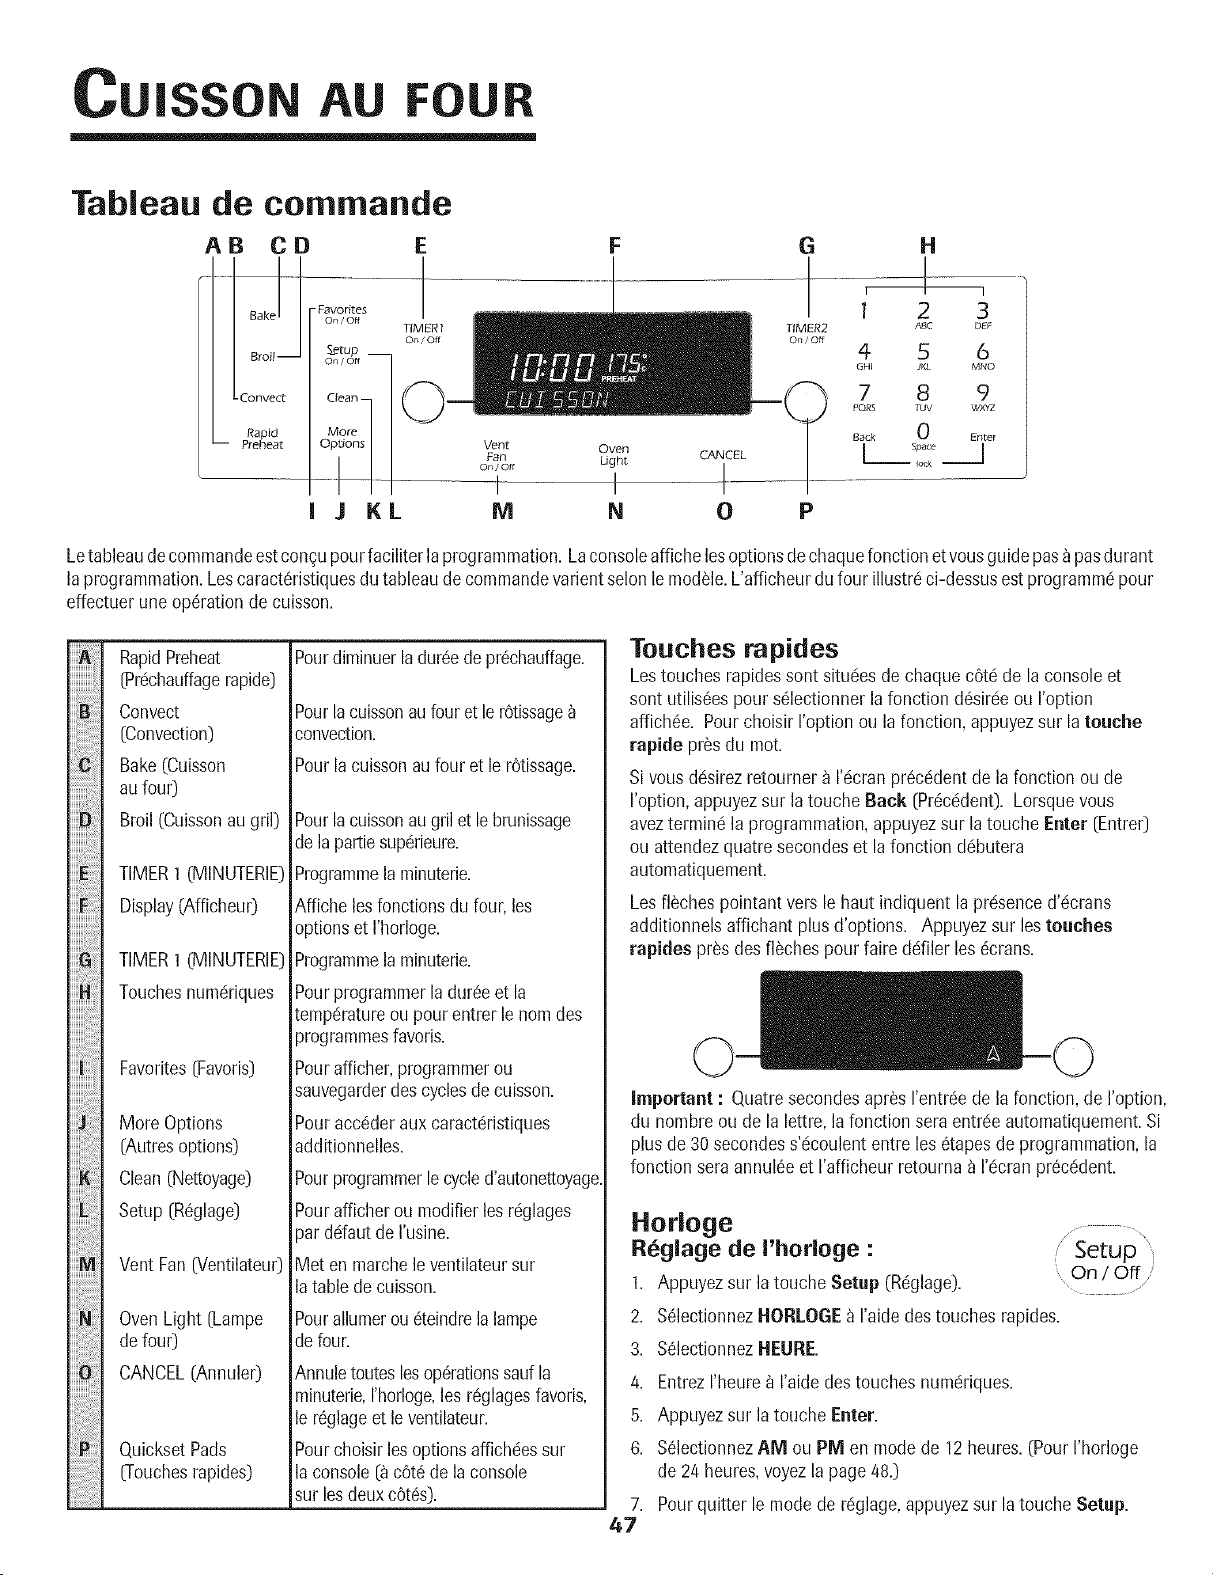
CU|SSON AU FOUR
Tableau de cornmande
AB CD
Rapid
-- Preheat
"Favorites
On/Off
&etup
On/Off
Clean
J KL
TIMER I
on/off
F G
Vent Oven
Fan Light CANCEL
M N O
TIMER2
on/off
H
!
2 3
ABC DEF
4 5 6
GHI JKL MNO
P
7 8 9
PQRS TUV _@0¢Z
Back 0 Enter
l space I
lock
Letableaudecommandeest concu pourfaciliter la programmation. Laconsoleaffichelesoptionsdechaquefonctionet vousguidepusapusdurant
la programmation.Loscaract6ristiquesdu tableaude commandovarientsolon le module.L'afficheurdu four illustrc!ci-dessusestprogrammc!pour
effectuerune op6rationde cuisson.
iiiiiii_i
iiiiiiiiiiiiiiiiil;;!i
iiiiii_iiiiiiiiii_ii_i!_
RapidPreheat
[Prc!chauffagerapide]
Convect
(Convection)
Bake(Cuisson
au fou0
Broil(Cuissonau gril]
TIMERI(MINUTERIE
Display(Afficheur]
TIMERI(MINUTERIE
Touchesnumc!riques
Favorites(Favoris]
More Options
(Autresoptions)
Clean(Nettoyage)
Setup (R_glage]
Vent Fan (Ventilateur
Oven Light (Lampe
de four)
CANCEL(Annuler]
QuicksetPads
[Touchesrapides)
Pourdiminuerla dur6ede pr_chauffage.
Pourlacuissonat]four et le rOtissage
convection.
Pourla cuissonaufour et le rOtissage.
Pourlacuissonaugril et le brunissage
dela pattiesup_!rieure.
Programmela minuterie.
Affiche losfonctionsdu four, los
optionset I'horloge.
Programmela minuterie.
Pourprogrammerladur6eet la
tempc!ratureou pour entrerle norades
programmesfavoris.
Pourafficher,programmerou
sauvegarderdescyclesde cuisson.
Pouracc6deraux caractc!ristiques
additionnelles.
Pourprogrammerlecycled'autonettoyage.
Pourafficherou modifierlos rc!glages
)at dc!fautde I'usine.
_4eten marchele ventilateursur
la tablede cuisson.
Pourallumerou 6teindrela lampe
defour.
Annuletouteslosop6rationssaul la
minuterie,I'horloge,les r6glagesfavoris,
le r6glageet le ventilateur.
Pourchoisirlos optionsaffichc!essur
la console(acOt6de la console
sur lesdeux c0t6s).
Touches rapides
Lestouches rapidessont situc!esde chaquecOtc!de la consoleet
sent utilis6espour s61ectionnerlafonction d6sirc!eou I'option
affich6e. Pourchoisir roption ou la fonction,appuyezsur la touche
rapide prosdu mot.
Si vousdc!sirezretournera I'c!cranpr_cc!dentde la fonction ou de
I'option,appuyezsur latouche Back (Pr6c6dent).Lorsquevous
avezterminc!la programmation,appuyezsur la touche Enter (Entrer)
ou attendezquatre secondeset lafonction dc!butera
automatiquement.
Lesfl_ches pointantvers le haut indiquent laprc!senced'c!crans
additionnelsaffichant plus d'options. Appuyezsur lostouches
rapidespros des%ches pour faire driller los _crans.
important : Quatresecondesapr_sI'entrc!ede la fonction,de I'option,
du nombreou de la lettre,la fonction sera entr_!eautomatiquement.Si
plus de 30 secondess'_!coulententre los _tapesde programmation,la
fonction seraannul_eet I'afficheur retournaa I'_!cranpr6c_!dent.
Horloge ..................
R_glage de l'hodoge : Setup "
1. Appuyezsur latouche Setup (R_glage]. On / Off
...... ,/
2. S_lectionnezHORLOGEa I'aidedestouches rapides.
3. S_lectionnezItEURE.
4. Entrezrheure_ raide destouches num_!riques.
5. Appuyezsur latouche Enter.
6. S_lectionnezAM ou PM en mode de 12 heures.(PourI'horloge
de 24 heures,voyezla page 48.]
7. Pourquitter le modede r_!glage,appuyezsur latouche Setup.
47
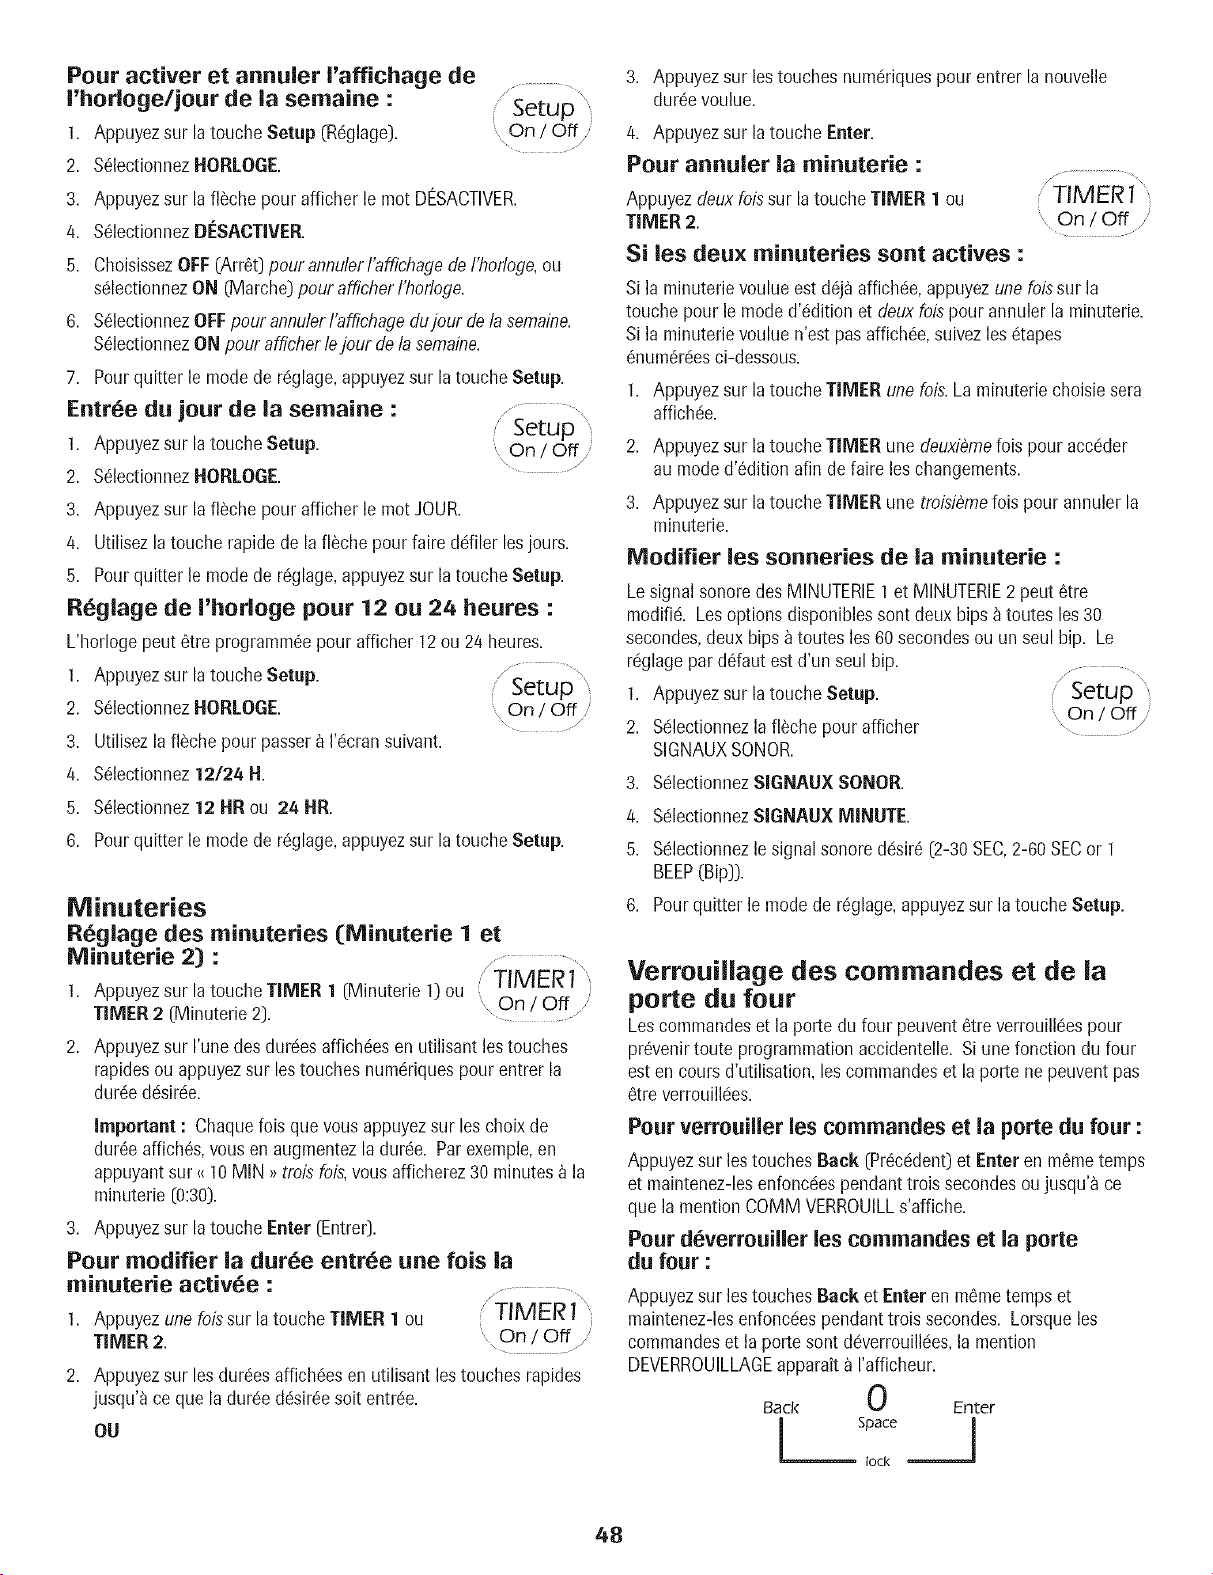
Pour activer et annulet i'affichage de
I'horloge/jour de la semaiue :
1. Appuyezsur la toucheSetup (R6glage].
2. S61ectionnez HORLOGE
// .... \
i Setup'
On/Off i
/
3. Appuyezsur la fl_chepour afficher le mot DESACTIVER.
4. S@ctionnez DI_SACTIVER.
7,
Entree du jour de la semaiue :
1. Appuyezsur la toucheSetup.
2. S@ctionnez HORLOGE.
ChoisissezOFF (Arr6t] pour annulerI'affichagedeI'horloge,ou
s61ectionnezON (Marche]pour afficherI'horloge.
S@ctionnez OFFpour annulerI'affichagedujour de la semaine.
S@ctionnez ON pour afficherlejour de la semaine.
Pourquitter le modede r6glage,appuyezsur latouche Setup.
, Setup'
......On / Off/
3. Appuyezsur la fl_che pourafficher le mot JOUR.
4. Utilisezla touche rapidede la fl_che pour faire driller losjours.
5. Pourquitter le modede r6glage,appuyezsur latouche Setup.
Reglage de I'horloge pour 12 on 24 heures :
L'horlogepeut 6tre programm@pour afficher 12 ou 24 heures.
/
1. Appuyezsur la toucheSetup. Setup
2. S61ectionnezHORLOGE On / Off
3. Utilisezla fl_chepour passer_ 1'6cransuivant.
4. S61ectionnez12/24 H.
5. S61ectionnez 12 HR ou 24 HR.
6. Pourquitter le modede r6glage,appuyezsur latouche Setup.
1,
2.
Minuteries
Reglage des miuuteries (IVliuuterie 1 et
Nlinuterie 2) : 4FIMERi,
Appuyezsur la toucheTIMER 1 (Minuterie 1) ou ,\ On / Off
TIMER 2 (Minuterie 2].
Appuyezsur rune des dur@s affich6es en utilisant lestouches
rapidesou appuyezsur los touchesnum6riquespour entrer la
dur6ed6sir6e.
important : Chaquefois que vousappuyezsur loschoix de
dur6eaffich6s,vousen augmentezladur6e. Par exemple,en
appuyantsur <<10MIN >>trois fois,vous afficherez30 minutes_ la
minuterie{0:30).
3. Appuyezsur la toucheEnter (Entre0.
Pour modifier la duree entree uue lois la
miuuterie activee :
/, .....
1. Appuyezune lois sur latouche TIMER 1 ou " TIMER 1
TIMER 2. On / Off,/
2. Appuyezsur los dur6esaffich@sen utilisant lostouches rapides
jusqu'a ce que la dur6ed6sir6esoit entr6e.
OU
3. Appuyezsur lostouches num6riquespour entrer la nouvelle
dur6evouhe.
4. Appuyezsur latouche Enter.
Pour anuuler la miuuterie :
Appuyezdeuxfois sur latouche TIMER 1 ou
TIMER2.
Si los deux minuteries sont actives :
/ "x
' TIMER 1
On/Off /
Sila minute@voulue est ddjDaffichde, appuyezunefoissur la
touchepour le moded'6dition et deux lois pour annulerla minuterie.
Sila minute@voulue n'est pus affich6e,suivezlos6tapes
6num6r6esci-dessous.
1. Appuyezsur latouche TIMER unelois.La minuteriechoisiesera
affich6e.
2. Appuyezsur latouche TIMER unedeuxiemefois pour acc6der
au mode d'6dition afin de faire los changements.
3. Appuyezsur latouche TIMER une troisiemefois pour annulet la
minuterie.
Modifier los souueries de la minuterie :
Lesignal sonoredes MINUTERIE1 et MINUTERIE2 pout 6tre
modifi6. Losoptions disponiblessont deux hips _toutes lea30
secondes,deux hips_ toutes los 60 secondesou un soul hip. Le
r6glagepar ddaut estd'un soul hip.
1. Appuyezsur latouche Setup. /Setup"
On/Off
2. S61ectionnezla fl_che pourafficher "............ "
SlGNAUXSONOR.
3. S61ectionnez SIGNAUX SONOR.
4. S61ectionnezSIGNAUX MINUTE.
5. S61ectionnezle signal sonored6sir6 (2-30SEC,2-60SECor 1
BEEP(Bip]).
6. Pourquitter le mode de r6glage,appuyezsur la toucheSetup.
Verrouillage des commandos et de la
porte du four
Lescommandeset la porte du four peuvent6tre verrouill@spour
pr6venirtoute programmationaccidentelle. Si une fonction du four
est en coursd'utilisation, lescommandeset laporte nepeuvent pas
6tre verrouill6es.
Pour verrouiller los commandes et la porte du four :
Appuyezsur lestouches Back {Pr6cddent)et Enteren m6me temps
et maintenez-lesenfonc6espendanttrois secondesoujusqu'_ ce
que la mentionCOMM VERROUILLs'affiche.
Pour deverrouiller los commandes el la porte
du four :
Appuyezsur lestouches Back et Enteren m6metemps et
maintenez-lesenfonc6espendanttrois secondes. Lorsqueles
commandeset la portesont d6verrouill6es,la mention
DEVERROUILLAGEapparaita rafficheur.
Back 0 Enter
! s. o l
lock _
48
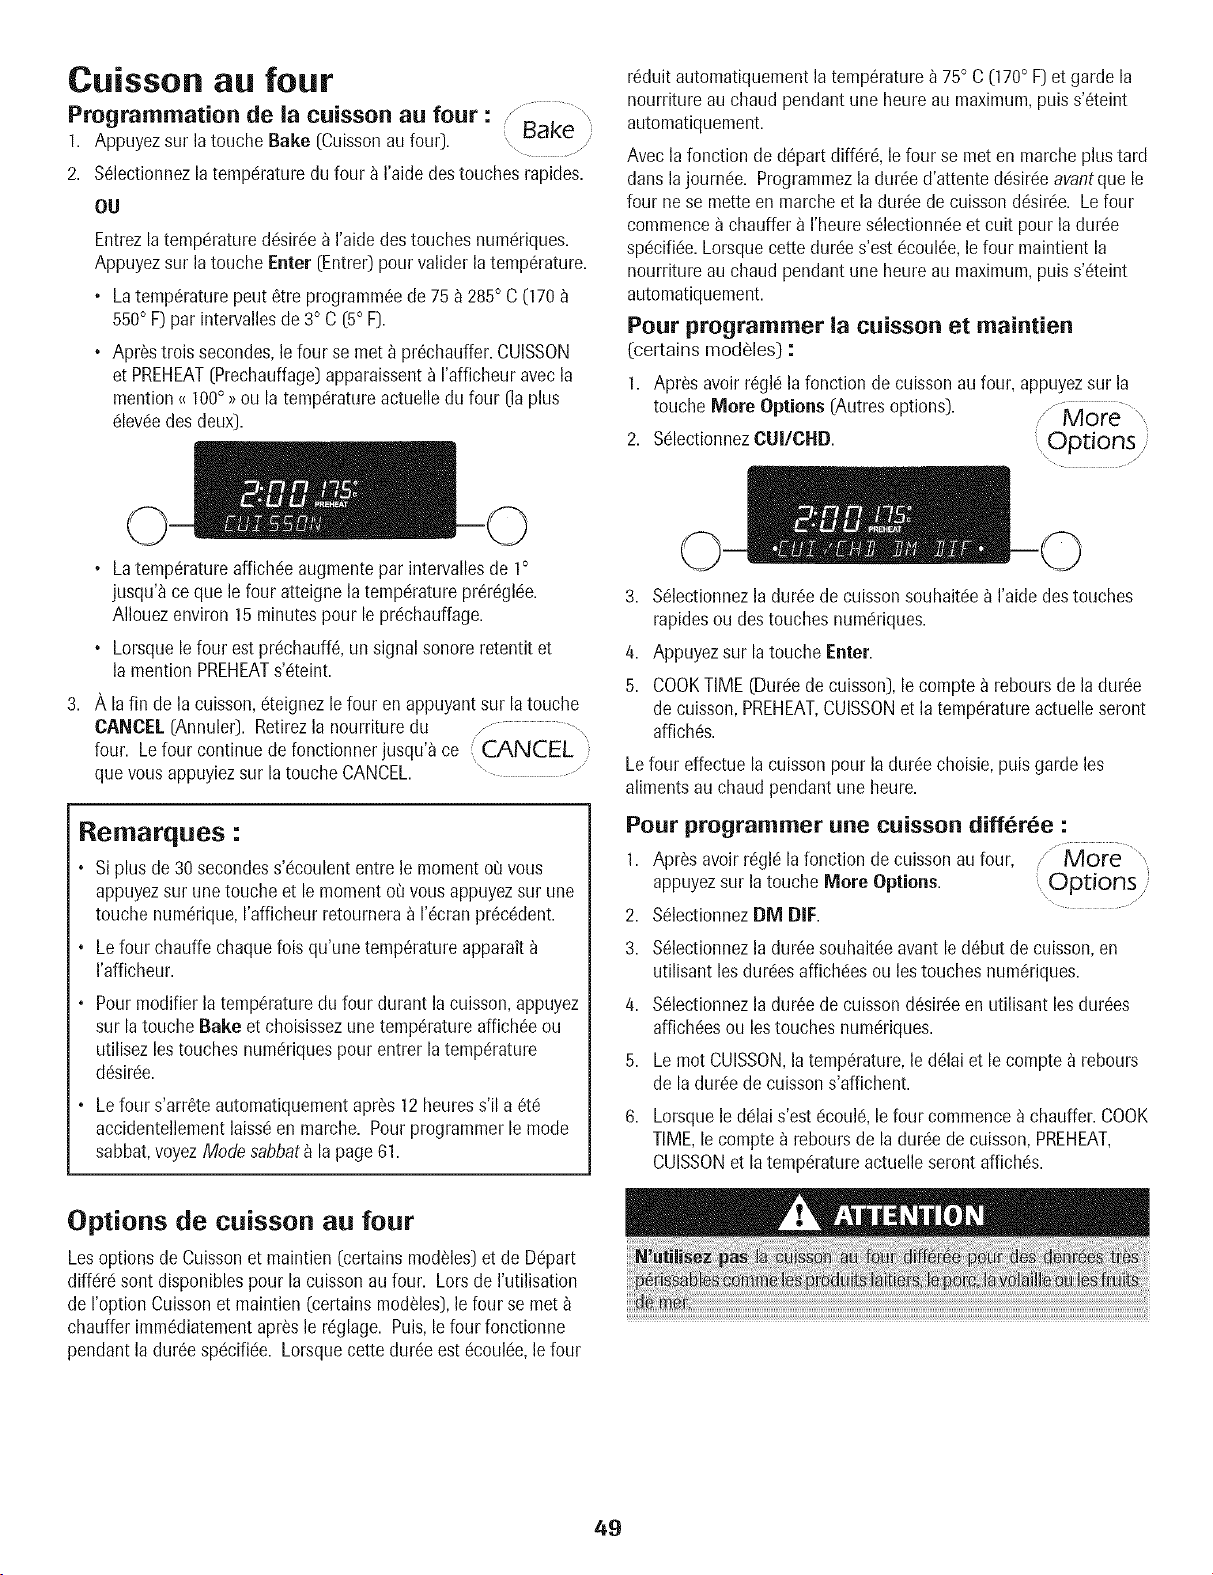
Caisson au four
/ ............
Programmation de la caisson aa four : , Bake "i
1. Appuyezsur latouche Bake (Cuissoil au four). ..............
2. S61ectionnezla tempc!raturedu four _ I'aidedestouches rapides.
OU
Entrezla temperatured6sir6e_ I'aide destouches num6riques.
Appuyezsur latouche Eater (Entre0 pourvalider la temp6rature.
, Latemp6raturepeut 6tre programm6ede 75_ 285° C (170
550° F) par intervallesde 3° C [5° F).
, Apr_strois secondes,le four se met _ pr_chauffer.CUISSON
et PREHEAT(Prechauffage)apparaissenta I'afficheur avecla
mention_{100° >>ou la tempc!ratureactuelledu four (In plus
c!levc!edes deux).
r6duit automatiquementla temperature_ 75° C (170° F)et gardela
nourriture au chaud pendantune heureau maximum,puis s'6teint
automatiquement.
Avecla fonction de d@art diffc!r&lefour se met en marcheplus tard
dartsla journ_e. Programmezla dur_e d'attented6sir_eavantque le
four nese mottoen marche et la dur6e decuisson d6sir_e. Le four
commencea chauffer _ I'heures_lectionn_eet cuit pour ladur6e
sp6cific!e.Lorsquecette dur6e s'est_coul6e,le four maintient la
nourriture au chaud pendantune heureau maximum,puis s'6teint
automatiquement.
Pour programmer la caisson et maintien
(certains modules) :
1. Apr_s avoir r6gk!la fonction de cuissonau four, appuyezsur la
touche More Options (Autresoptions). / More
2. Sc!lectionnezCUI/CHD. ,Options /
• Latemp6ratureaffichc!eaugmentepar intervallesde 1°
jusqu'_ ceque lefour atteignela temp(!raturepr6r6gk!e.
AIIouezenviron 15minutespour le prc!chauffage.
• Lorsquele four est prc!chauff6,un signal sonoreretentit et
la mention PREHEATs'_teint.
3. A lafin de la cuisson,c!teignezlefour en appuyantsur latouche
CANCEL(Annulet). Retirezla nourrituredu / .................
four. Le four continue de fonctionnerjusqu'a ce i CANCEL ii
quevous appuyiezsur latouche CANCEL. ..............
Reilrlarqt=es :
• Siplus de 30secondess'_coulententre le momentot'Jvous
appuyezsur une touche et le momentot] vous appuyezsur une
touche num#rique,I'afficheur retourneraa 1'6cranpr6c6dent.
• Lefour chauffe chaquefois qu'une temp6ratureapparait
I'afficheur.
Pourmodifier la temp(_raturedu four durant lacuisson,appuyez
sur la touche Bake et choisissezunetemp6ratureaffich6e ou
utilisezlos touches numc!riquespour entrer la tempc!rature
dc!sirc!e.
Le four s'arr6te automatiquement apr_s 12 heures s'il a 6t(!
accidentellement laiss(! en marche. Pour programmer le mode
sabbat, voyez Mode sabbat_ la page 61.
3. S61ectionnezla dur_ede cuissonsouhait_!e_ I'aidedes touches
rapidesou des touches num_!riques.
4. Appuyezsur latouche Enter.
5. COOKTIME (Dur_!ede cuisson),le compte_ reboursde la dur_e
de cuisson,PREHEAT,CUISSONet la temp_!ratureactuelleseront
affich_s.
Lefour effectue la cuissonpour la dur_e choisie,puis gardeles
aliments au chaud pendant une heure.
Pour programmer ane caisson differee :
1. Apr_s avoirr_gl_ la fonction decuisson au four, More
sur la touche More Options. OptlODS
appuyez
2. S_lectionnezDM DIF.
3. S_lectionnezla dur_esouhait_eavant le d_but de cuisson,en
utilisant les dur_!esaffich_!esou lestouches num_riques.
4. S_lectionnezla dur_ede cuissond_sir_!een utilisant les dur_es
affich_esou lestouches num_!riques.
5. Le mot CUISSON,la temperature,le d_lai et lecompte _ rebours
de la dur_!ede cuissons'affichent.
6. Lorsquele d_lai s'est _coul& le four commence a chauffer.COOK
TIME,le comptea reboursde ladur_ede cuisson,PREHEAT,
CUISSONet la temperatureactuelleseront affich_s.
Options de ct=isson at= four
Lesoptions de Cuissonet maintien (certainsmodules)et de D@art
diff_r_!sont disponiblespour la cuissonaufour. Lorsde I'utilisation
de I'option Cuissonet maintien(certainsmodules),le four se met
chauffer imm_diatementapr_s le r_glage. Puis,le four fonctionne
pendant la dur_e sp_!cifk!e.Lorsquecette dur_e est _!couk!e,le four
49
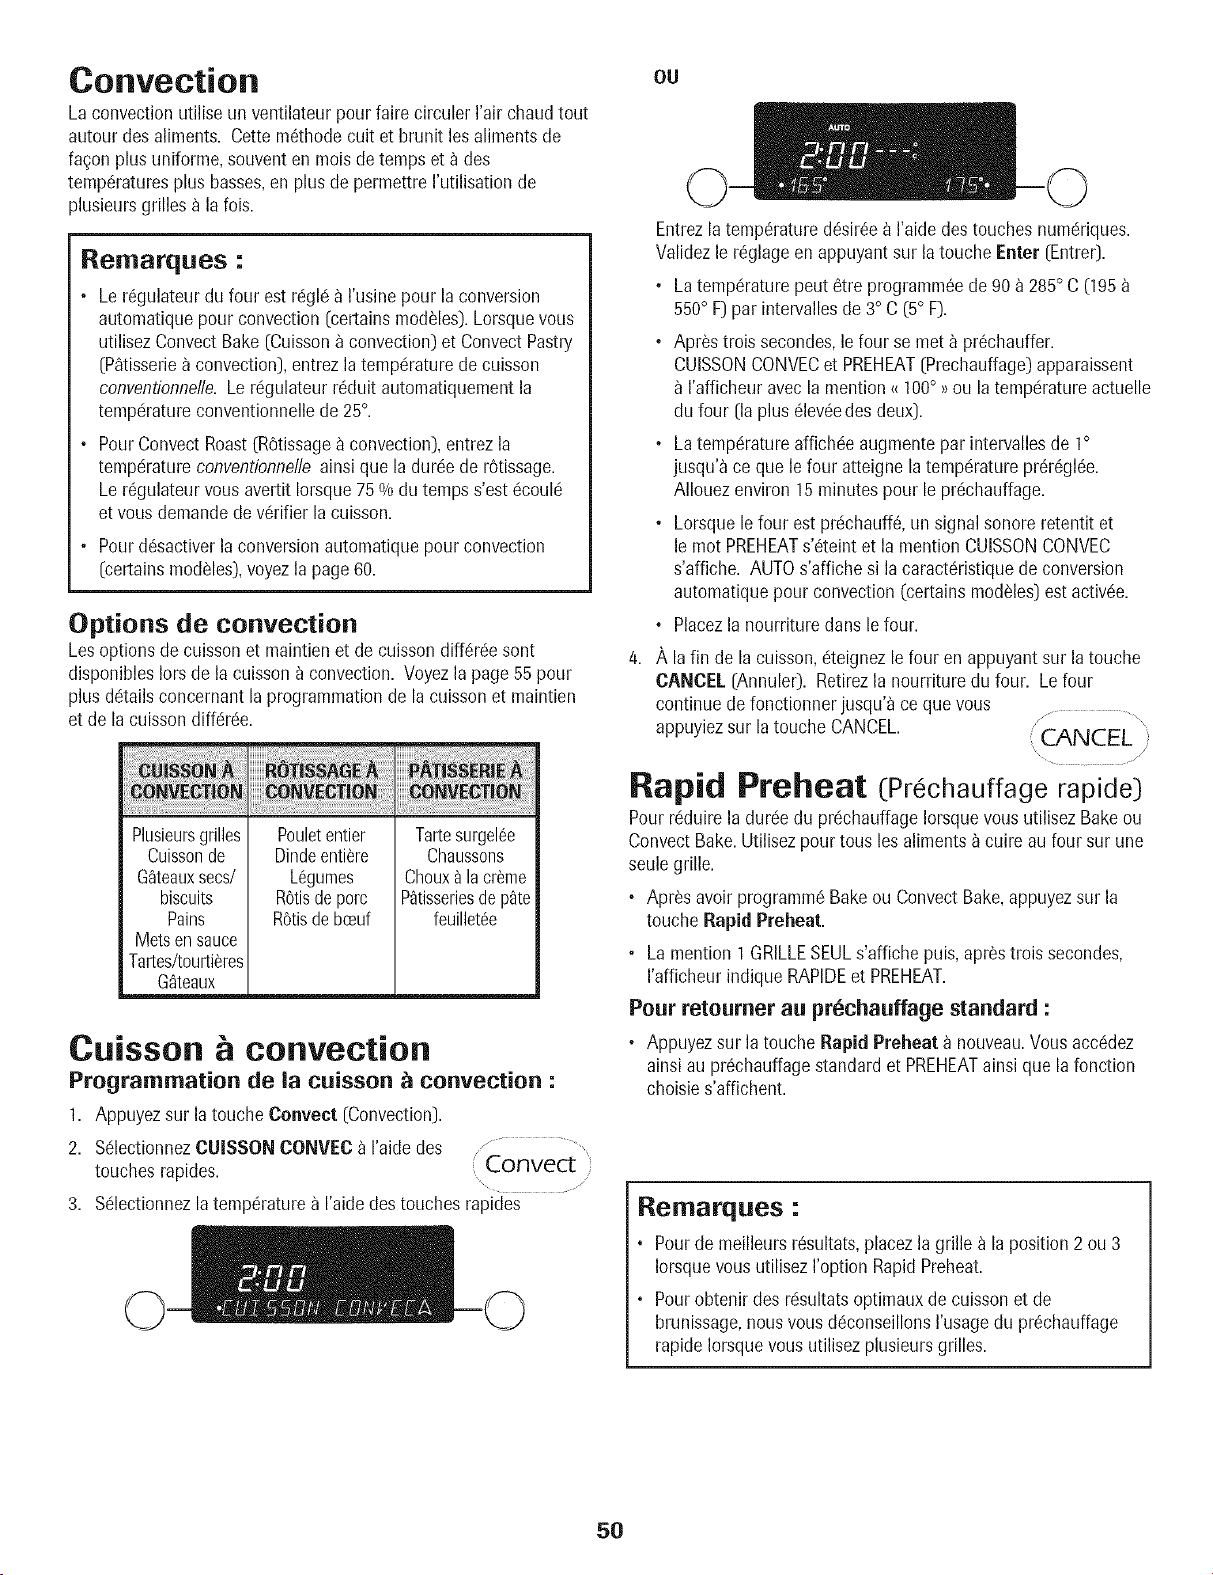
Convection
La convectionutilise un ventilateur pour faire circuler I'air chaud tout
autour des aliments. Cette m6thodecult et brunit les alimentsde
fa_onplus uniforme,souventen moisde temps eta des
temp6raturesplus basses,en plus de permettreI'utilisationde
plusieursgrilles a la fois.
Remarques :
• Le r6gulateurdu four est rdgld _ I'usinepour la conversion
automatiquepour convection (certainsmoddles).Lorsquevous
utilisez ConvectBake[Cuisson_ convection)et ConvectPastry
(P_tisserieaconvection),entrezla tempdraturede cuisson
conventionnelle.Le rc!gulateurr6duit automatiquementla
tempdratureconventionnellede 25°.
, PourConvectRoast(ROtissage_ convection),entrezla
tempdratureconventionnelleainsi que la durdede rOtissage.
Le r6gulateurvous avertit Iorsque75 % du temps s'estdcoul6
et vous demandede v6rifier la cuisson.
. Pourd_sactiverla conversionautomatiquepourconvection
(certainsmodules),voyezla page 60.
Options de convection
Lesoptions de cuissonet maintienet de cuissondiff6rdesont
disponiblesIorsde la cuissona convection. Voyezla page55 pour
plus ddtails concernantla programmationde lacuissonet maintien
et de lacuissondiffdrde.
Plusieursgrilles
Cuissonde
G_teauxsecs/
biscuits
Pains
Metsen sauce
Tartes/tourtieres
Gfiteaux
Pouletentier
Dindeentiere
Legumes
Retisdeporc
Retisde bceuf
Tartesurgelee
Chaussons
Choux_ lacreme
P_tisseriesdepate
feuilletee
Cuisson & convection
Programmation de la cuisson _ convection :
1. Appuyezsur latouche Convect (Convection).
2. Sc!lectionnezCIJlSSOBCONVECa I'aidedes " ..................
touches rapides. ( Convect /:
3. Sdlectionnezla temp6raturea I'aidedes touchesrapides
OU
Entrezlatemp6ratured6sir_e_ I'aidedes touchesnumdriques.
Validezle r6glage enappuyantsur la touche Enter (Entre0.
, Latempdraturepeut 6tre programm6ede 90 _ 285° C (195
550° F] par intervallesde 3° C (5° F].
, Apres trois secondes,le four se met _ pr6chauffer.
CUISSONCONVECet PREHEAT(Prechauffage]apparaissent
I'afficheuravecla mention _ 100° ;_ou la tempdratureactuelle
du four (la plus 61ev6edesdeux].
° Latempdratureaffichdeaugmentepar intervallesde 1°
jusqu'_ ce que le four atteignela tempdraturepr6r6gl6e.
AIIouezenviron 15minutespour le pr6chauffage.
, Lorsquele four est prc!chauff6,un signalsonore retentit et
le mot PREHEATs'6teintet la mentionCUISSONCONVEC
s'affiche. AUTOs'affichesi la caract6ristiquedeconversion
automatiquepour convection (certainsmodeles]estactiv6e.
, Placezla nourriture dans le four.
A la fin de la cuisson,dteignez le four en appuyantsur la touche
CANCEl. (Annule0. Retirezla nourriture du four. Le four
continuede fonctionner jusqu'a ce que vous
appuyiezsur la touche CANCEL. ( CANCEL i,
Rapid Preheat (Prechauffage rapide)
Pourrdduire la durde du prdchauffageIorsquevous utilisez Bakeou
ConvectBake.Utilisezpour tous les aliments_ cuire au four sur une
seulegrille.
• Apresavoir programmdBakeou ConvectBake,appuyezsur la
toucheRapid Preheat.
. La mention I GRILLESEULs'affiche puts,aprdstrois secondes,
I'afficheur indique RAPIDEet PREHEAT.
Pour retoumer au pr_chauffage standard :
• Appuyezsur la touche Rapid Preheat a nouveau.Vousacc6dez
ainsi au pr_chauffagestandardet PREHEATainsi que lafonction
choisies'affichent.
Remarques :
• Pourde meilleursr_sultats,placezla grille a la position2 ou 3
Iorsquevousutilisez I'option RapidPreheat.
° Pourobtenir des rdsultatsoptimauxde cuissonet de
brunissage,nousvousddconseillonsI'usagedu prdchauffage
rapideIorsquevous utilisezplusieursgrilles.
5O
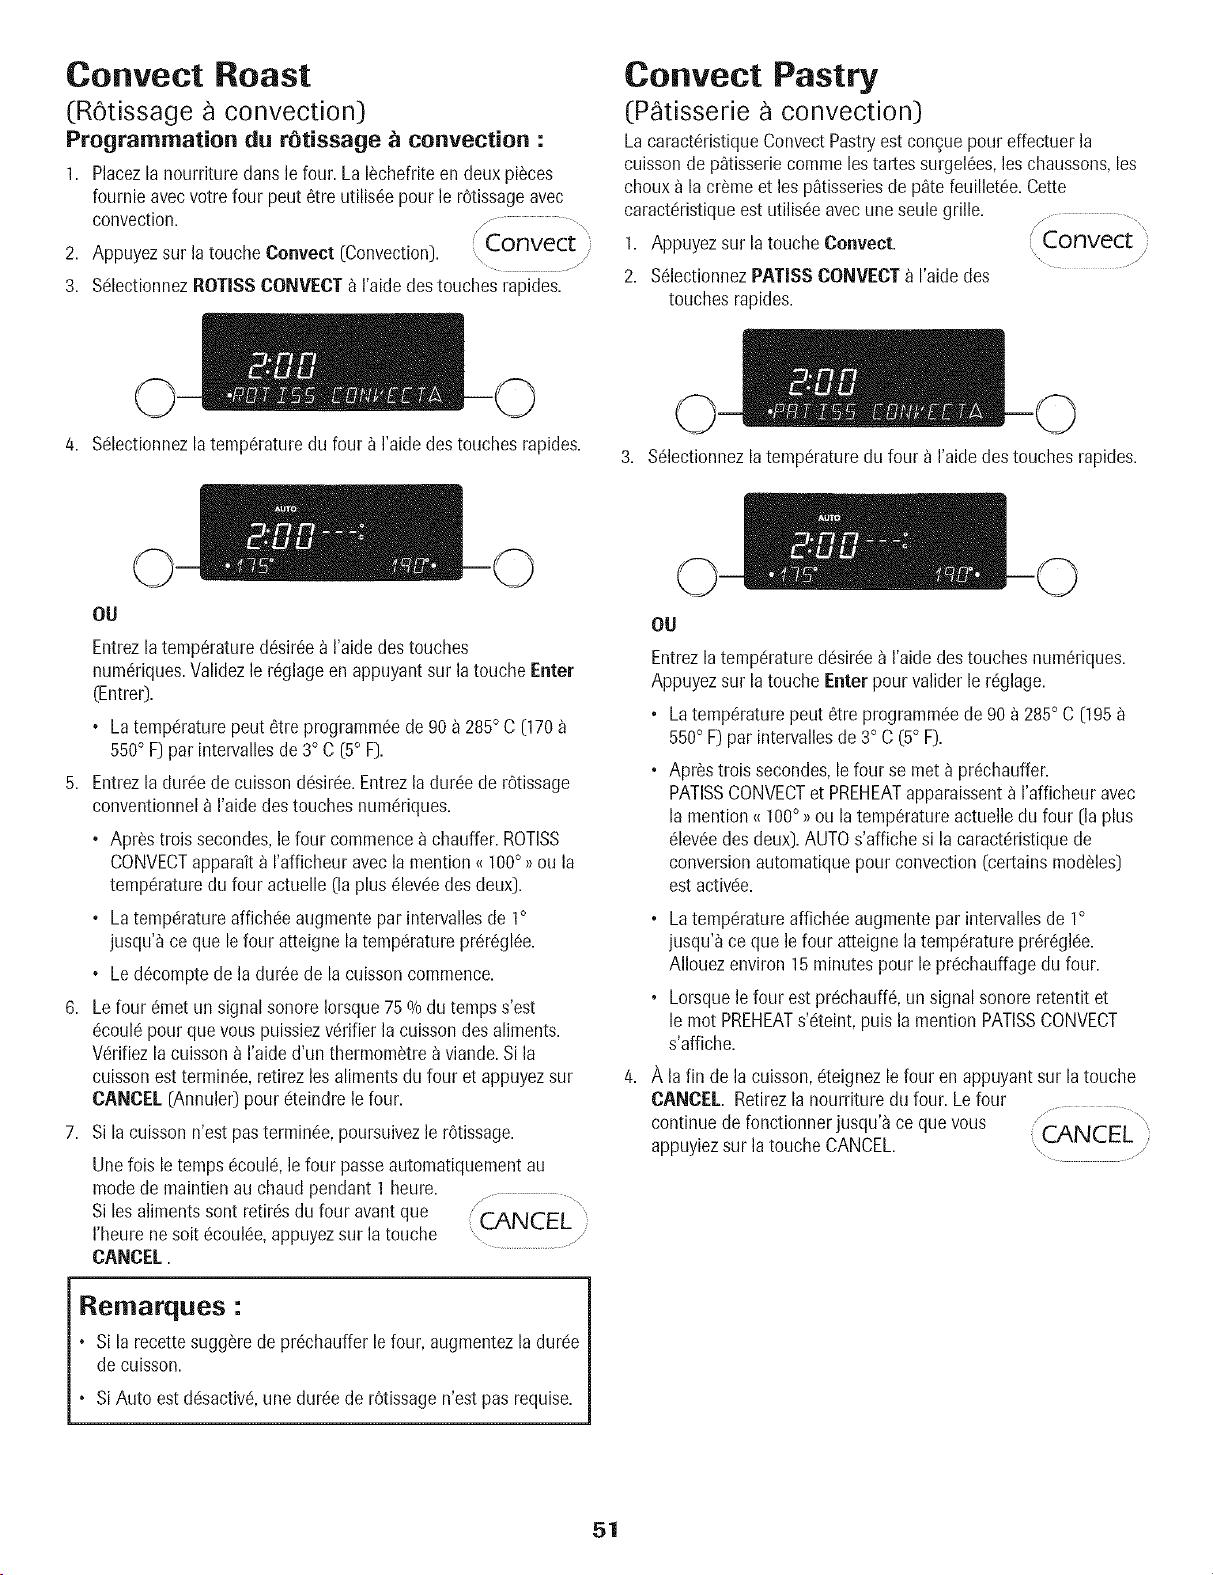
Convect Roast
(R6tissage a convection)
Programmation du rStissage _ convection :
1. Placezla nourrituredans le four. LaI_chefrite endeux pi_ces
fournie avecvotre four pout 6tre utilisCepour le rCtissageavec
convection. /, .............
2. Appuyezsur la touche Cenvect [Convection). ( Convect )
\ //
3. SClectionnezROTISSCONVEC]") I'aidedestouches rapides.
Convect Pastry
(P tisserie a convection)
Lacaract@istiqueConvectPastryest concuepour effectuer la
cuissonde p_tisseriecommelos tares surgelCes,los chaussons,los
chouxa la cr_me et los p_tisseriesde p_te feuilletCe.Cette
caractCristiqueestutilisc!eavec une seule grille. .................................
/
1. Appuyezsur latouche Coavect.
Convect
........... /
2. SClectionnezPATISSCONVEOTa I'aidedes
touches rapides.
4. SClectionnezla temp@aturedu four _ I'aide destouches rapides.
3. SClectionnezla temp@aturedu four a I'aidedes touches rapides.
OU
EntrezlatempCraturedCsirCe_ I'aidedes touches
numCriques.Validezle rCglageen appuyantsur la touche Eater
(Entre0.
• Latemp@aturepeut 6tre programmCede 90 _ 285° C [170
550° F] par intervallesde 3° C [5° F].
5. Entrezla durCede cuissondCsirCe.Entrezla durCede rOtissage
conventionnel_ I'aide destouches num@iques.
• Apr_strois secondes,le four commence_chauffer.ROTISS
CONVECTapparaita I'afficheur avecla mention_ 100° _>ou la
temp@aturedu four actuelle (laplus 61evc!edesdeux].
• LatempCratureaffichc!eaugmentepar intervallesde 1°
jusqu'_ ce que lefour atteignela temp@atureprCrCglCe.
• Le d_comptede la durCede la cuissoncommence.
6. Lefour 6met un signal sonore Iorsque75% du tempss'est
c!coul(!pour que vouspuissiezvc!rifierla cuissondes aliments.
VCrifiezla cuisson_ I'aide d'un thermom_trea viande.Si la
cuissonest termin(!e,retirezlos alimentsdu four et appuyezsur
CANCEL[Annulet) pour c!teindrele four.
7. Si lacuisson n'est pasterminCe,poursuivezle rCtissage.
Unelois le temps _coul& lefour passeautomatiquementau
modede maintienau chaud pendant 1 heure.
Si lesalimentssont retir(_sdu four avantque CANCEL
I'heurene soitc!coulde,appuyezsur latouche _
CANCEL.
Reilrlarques :
° si la recettesugg_rede prCchaufferle four, augmentezla durc!e
de cuisson.
° SiAuto estdc!sactiv&une durCede rCtissagen'est pas requise.
OU
Entrezla temperaturedc!sirc!ea I'aidedestouches num_riques.
Appuyezsur latouche Eater pour valider le r_glage.
. Latemp@aturepout _tre programm_!ede 90 a 285° C [195
550° F) par intervallesde 3° C (5° F).
. Apr_strois secondes,le four se met _ pr_chauffer.
PATISSCONVECTet PREHEATapparaissenta I'afficheur avec
la mention_{100° >>ou la temperatureactuelledu four 0a plus
_lev_edesdeux]. AUTOs'affichesi la caract@istiquede
conversionautomatiquepour convection[certainsmodules]
est activ_e.
. LatempSratureaffich_e augmentepar intervallesde 1°
jusqu'_ ce que lefour atteignela temperaturepr_r_gl_e.
AIIouezenviron 15minutes pour lepr_!chauffagedu four.
. Lorsquele four est pr_chauff& unsignal sonore retentit et
le mot PREHEATs'_!teint,puis la mention PATISSCONVECT
s'affiche.
A lafin de la cuisson,_!teignezle four en appuyantsur latouche
CANCEL. Retirezla nourriture du four. Lefour
continuede fonctionnerjusqu'a ce quevous _"................
appuyiezsur la touche CANCEL. , CANCEL
51
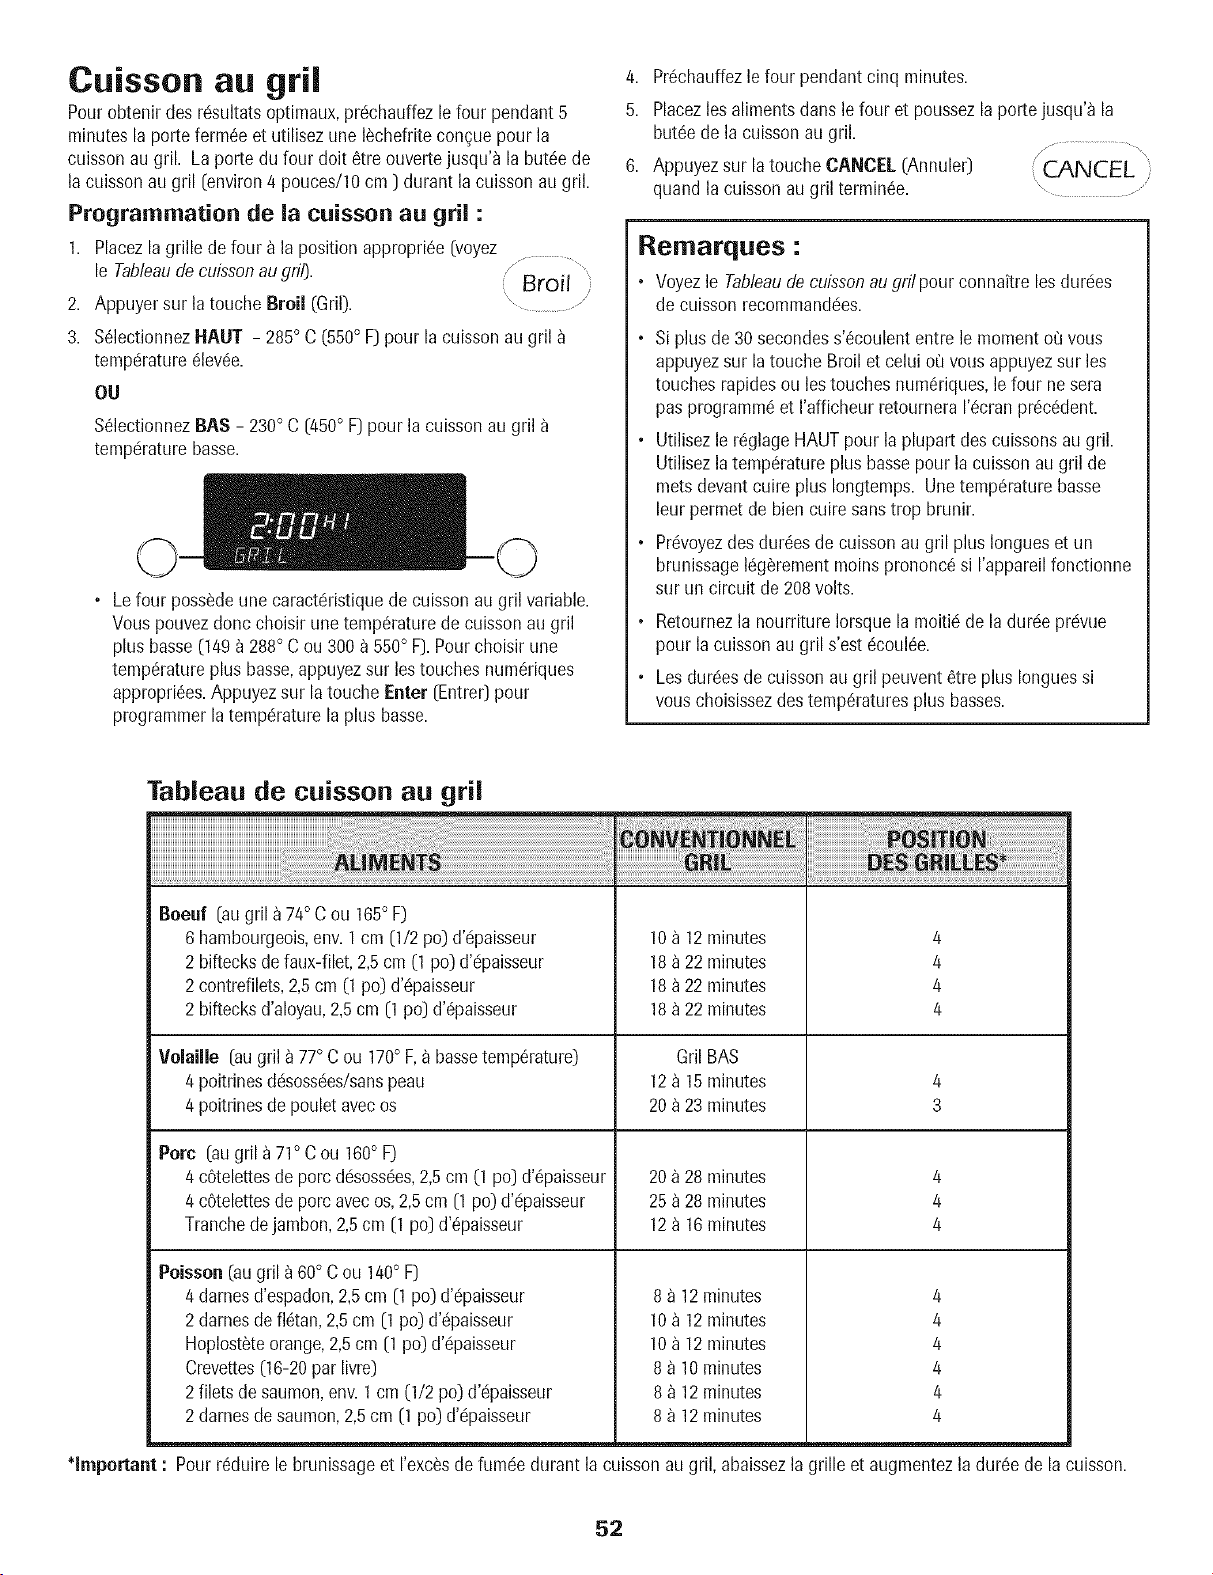
Cuisson au gril
Pourobtenir des rdsultatsoptimaux,prdchauffezle four pendant 5
minutesla porte ferm6eet utilisez une 16chefriteconquepour la
cuisson au gril. La porte du four dolt 6tre ouvertejusqu'a la but6ede
lacuisson augril [environ4 pouces/lO cm ) durant lacuisson au gril.
Programmation de la cuisson au gril :
1. Placezlagrille de four _ la position appropri6e [voyez
le Tableaude cuissonaugril). _...........................
Broil
2. Appuyersur la touche Broil (Gril). .....................
3. S61ectionnezHAUT - 285° C (550° F) pour la cuissonau gril
tempdrature61ev6e.
OU
S61ectionnezBAS - 230° C [450° F) pourla cuissonau gril
tempdraturebasse.
• Lefour poss_deune caract6ristiquede cuissonau gril variable.
Vouspouvezdonc choisir unetemp6raturede cuissonau gril
plus basse (149a 288° C ou300 a 550° F).Pour choisirune
temp6ratureplus basse,appuyezsur lestouches num6riques
appropri6es.Appuyezsur la touche Enter (Entre0 pour
programmerla tempdraturela plus basse.
4. Pr6chauffezle four pendantcinq minutes.
5. Placezlesaliments dansle four et poussezlaporte jusqu'a la
but6e de la cuissonau gril.
// ............................
6. Appuyezsur latouche CANCEL (Annuler) CANCEL
quand la cuissonau gril termin_e. .....................................
Remarques :
• Voyezle Tableaude cuissonau gril pour connaitre les durc!es
decuisson recommand6es.
• Si plus de 30secondess'6coulententre le momentot'Jvous
appuyezsur la touche Broil et celui oQvousappuyezsur les
touches rapidesou les touchesnum6riques,le four nesera
pasprogramm6et I'afficheur retournera1'6cranpr6c6dent.
. Utilisezle r6glageHAUTpour la plupart descuissonsaugril.
Utilisezla temp6ratureplus bassepour la cuissonau gril de
metsdevant cuire plus Iongtemps. Unetemp6raturebasse
leur permetde bien cuire sanstrop brunir.
• Prdvoyezdes dur6esde cuissonau gril plus Iongueset un
brunissageIdg_rementmoinsprononc6si I'appareilfonctionne
sur un circuit de208 volts.
• Retournezla nourritureIorsque la moitid de la durdeprdwJe
pour lacuissonau gril s'est6coul6e.
. Lesdur6esde cuissonau gril peuvent 6tre plus Ionguessi
vouschoisissezdestemp6raturesplus basses.
Tableau de cuisson au gril
Boeuf [au gril a 74° C ou 165° F)
6 hambourgeois,env. 1cm (1/2 po) d'dpaisseur
2 biftecksde faux-filet,2,5cm (1 po)d'dpaisseur
2 contrefilets,2,5cm (1 po) d'dpaisseur
2 biftecksd'aloyau,2,5cm [1 po) d'6paisseur
VolaJlle(au gril _ 77° C ou 170° F,_ bassetemperature)
4 poitrinesddsossdes/sanspeau
4 poitrinesde pouletavec os
Porc [au gril a 71° C ou 160° F)
4 cOtelettesde porcddsoss6es,2,5cm (1 po] d'6paisseur
4 cOtelettesde porcavecos,2,5cm (1 po) d'dpaisseur
Tranchede jambon,2,5cm [1 po) d'6paisseur
Poisson(augril a 60° C ou 140° F)
4 damesd'espadon,2,5cm (1 po) d'dpaisseur
2 damesde fl6tan,2,5cm (1po) d'dpaisseur
Hoplost_teorange,2,5cm [1 po)d'dpaisseur
Crevettes(16-20parlivre)
2 filets de saumon,env. 1 cm (1/2 po) d'dpaisseur
2 damesde saumon,2,5cm [1 po) d'dpaisseur
10 a 12 minutes
18 a 22 minutes
18 a 22 minutes
18 a 22 minutes
Gril BAS
12 a 15 minutes
20 a 23 minutes
20 _ 28 minutes
25 a 28 minutes
12 a 16 minutes
4
4
4
4
4
3
4
4
4
8 a 12 minutes
10 a 12 minutes
10 a 12 minutes
8 a 10 minutes
8 _ 12 minutes
8 a 12 minutes
4
4
4
4
4
4
*important : Pourr_duire le brunissageet I'exc_sde fumdedurant la cuissonau gril, abaissezla grille et augmentezla dur6e de la cuisson.
52
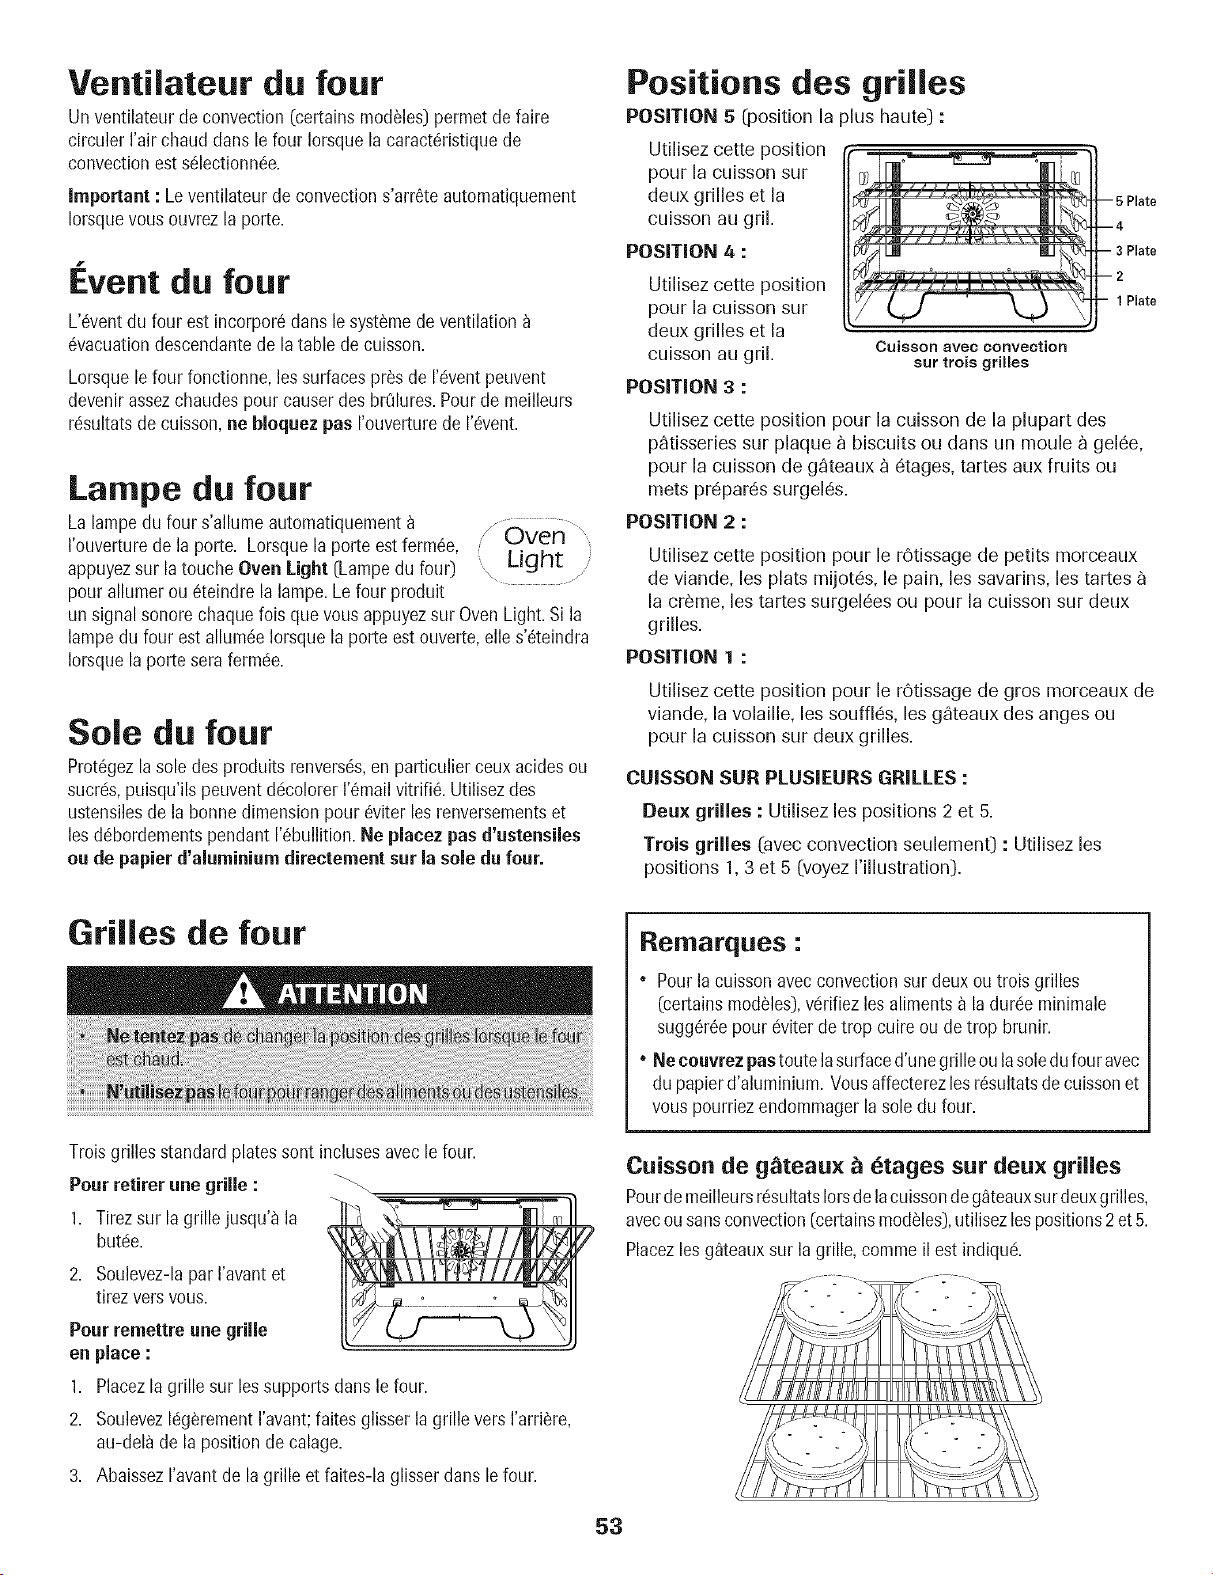
Ventilateur du four
Un ventilateurde convection (certainsmodules]permetde faire
circuler I'airchaud dans le four Iorsquela caract6ristiquede
convectionest s61ectionn6e.
important : Le ventilateur de convections'arr6teautomatiquement
Iorsquevousouvrez laporte.
f
Event du four
L'6ventdu four est incorpor6dans [esyst_medeventilation
6vacuationdescendantede la table de cuisson.
Lorsquele four fonctionne,les surfacespros de 1'6ventpeuvent
devenirassezchaudespour causerdes brCJlures.Pour de meilleurs
rc!sultatsde cuisson,ne bloquez pas I'ouverturede 1'6vent.
Lampe du four
La lampedu four s'allume automatiquementa / Oven
I'ouverturede la porte. Lorsquela porte est ferm6e,
appuyezsur latouche Oven Light [Lampedu four) Light
pourallumer ou 6teindre la lampe.Le four produit
un signalsonore chaquelois que vousappuyezsur OvenLight. Si la
lampedu four est allum6e Iorsquela porte estouverte,elle s'_teindra
Iorsquela porte serafermc!e.
Sole du four
Prot6gezla soledes produits renvers6s,en particulier ceuxacidesou
sucre!s,puisqu'ilspeuventdc!colorer1'6mailvitrifi6. Utilisezdes
ustensilesde la bonne dimensionpour _viterles renversementset
lesd6bordementspendant 1'6bullition.Ne plaeez pas d'ustensiles
ou de papier d'aluminium direeternentsur la sole dufour.
Positions des grilles
POSITION 5 _position la plus haute] :
Utilisez cette position
pour la cuisson sur
deux grilles et la
cuisson au gril.
POSITION 4 :
Utilisez cette position
pour la cuisson sur
deux grilles et la
cuisson au gril.
POSITION 3 :
Cuissor! avec CORVeCtioR
sur trois grilles
-- 5 Plate
--4
-- 3 Plate
--2
-- 1 Plate
Utilisez cette position pour la cuisson de la phpart des
p_tisseries sur plaque _ biscuits ou dans un moule _ gel6e,
pour la cuisson de g_teaux _ 6tages, tartes aux fruits ou
mets pr6par6s surgel6s.
POSITION 2 :
Utilisez cette position pour le rOtissage de petits morceaux
de viande, les plats mijot6s, le pain, les savarins, los tartes
la cr6me, los tartes surgel6es ou pour la cuisson sur deux
grilles.
POSITION 1 :
Utilisez cette position pour le r0tissage de gros morceaux de
viande, la volaille, les souffl6s, les g_teaux des anges ou
pour la cuisson sur deux grilles.
CUISSON SUR PLUSIEURS GRILLES :
Deux grilles : Utilisez les positions 2 et 5.
Trois grilles (avec convection seulement) : Utilisez les
positions 1, 3 et 5 (voyez rillustration).
Grilles de four
Troisgrilles standardplatessont inclusesavecle four.
Pour rotifer une grille :
1. Tirezsur lagrille jusqu'_ la
butc!e.
2. Soulevez-lapar I'avantet
tirezvers vous.
Pour remettre une grille
en place :
1. Placezlagrille sur lessupports dartslefour.
2. SoulevezI%_rement I'avant;faites glisserla grille vers I'arri_re,
au-delade la position de calage.
3. AbaissezI'avantde lagrille et faites-la glisser darts lefour.
Reilrlarques :
• Pourla cuissonavecconvectionsur deux ou trois grilles
(certainsmodules),vcgrifiezles aliments_ la durcgeminimale
sugg6r_epour cgviterde trop cuire ou de trop brunir.
• Ne couvrezpastoutelasurfaced'unegrilleoula soledufour avec
du papierd'aluminium. Vousaffecterezles r6sultatsdecuissonet
vouspourriezendommagerlasole du four.
Cuisson de g_teaux _ etages sur deux grilles
Pourde meilleursr6sultatsIorsdelacuissondeg_teauxsur deuxgrilles,
avecousansconvection(certainsmodules),utilisezlospositions2 et5.
Placezlos g_teauxsur lagrille, comme il est indiquc!.
53
Autres options
Cuisson et maintien (certains modules)
1. Appuyezsur latouche More Options (Autres
options]. Options
2. SdlectionnezCUISS/CHAUD. \ ......... /
3. Entrezla durdede cuisson_ I'aidedes touchesrapidesou des
touches numdriques.
4. S61ectionnezCUISS ou CONVECT.
5. Apr_s avoir appuy6 sur CUBS, s_lectionnez la tempdrature a I'aide
des touches rapides ou des touches numdriques.
6. Apr_s avoir appuyd sur CONVECT,s61ectionnez CUISSON
CONVEC, ROTISS CONVECT ou PATISS CONVECT, puis
sdlectionnez la temperature _ I'aide des touches rapides ou des
touches numdriques.
Le four effectue la cuisson pour la durde choisie, puis garde les
aliments au chaud pendant une heure. Le four s'arr6tera
automatiquement.
important : Si la recette recommande de pr6chauffer le four,
augmentez la dur6e de cuisson.
D marrage diff6r
1. Appuyezsur latouche More Options. Options/
2. Appuyezsur la%che pour afficher DEMARRDIFFERE.
3. S61ectionnezDEMARR DIFFERE.
4. Entrezla durdede d61aisouhait6savant le d6but de I'opdration
I'aidedes touches rapidesou destouches numdriques.
5. S61ectionnezCUiSSON,CONVECTou NETFOYAGE,puis
sdlectionnezla tempdrature_ I'aidedes touchesrapidesou des
touches numdriques.
Programmation de la cuisson differ6e :
1. Suivezles_tapes I _ 4 du _d6marragediff6r6 _ (voirci-dessus).
2. S61ectionnezla tempdratureparmi cellosaffichdesou utilisezles
touches numdriquespour entrer la temp6raturedevotre choix.
3. S61ectionnezla dur6ede cuissond6sir6een utilisant los dur6es
affich6esou lestouches numdriques.
4. La mentionDELAY(Diffdrd)apparaita I'afficheur,la fonction
choisie,la tempdraturepr6ddinie et le d_comptede la durde du
d61ai.Lorsque led6compteest terrain& la dur6ede cuisson
s'affiche et le four commence_ prdchauffer.
Programmation de la cuisson _ convection differee :
(certainsmodules)
1. Suivezlos 6tapes I a 4 du _d_marragediffdrd ))(voir a gauche).
2. SdlectionnezCUBS CONVECT,ROTISSCONVECT ou PATISS
CONVECT.
3. Sdlectionnezla temperatureparmi cellosaffichdesou utilisez les
touches num_riquespour entrer latemperaturedevotre choix.
4. Sdlectionnezla durdede cuissonddsir_een utilisant los durdes
affichdesou lostouches num_riques.
5. Lamention DELAYapparait _ I'afficheur,lafonction choisie,la
tempdratureprdddinie et le ddcomptede la durde du ddlai.Lorsque
led_compteesttermin& la durdede cuissons'affiche et le four
commence_ prdchauffer.
Programmation de l'autonettoyage diff_r_ :
1. Suivezles _tapes I a 4 du _d_marragediff_!r_!_(voir a gauche).
2. ENLEVERGRILLEapparaita I'afficheur.Retirezlos grilles du four et
s_lectionnezCONTINUER.
3. Choisissezle niveaude salet_ LEGERen entrant200a I'aidedes
touches num_riquesafin de programmerdeux heuresde nettoyage.
Choisissezle niveaude saletd MOYEN ou INTENSEa I'aidedes
touches rapides.Attendezquelques instantspendantque la porte se
verrouille.
4. DELAYapparaita I'afficheur,ainsi que la durdedu nettoyage,le ddlai
et le ddverrouillage(solonle niveaude saletd choisi).Lorsquele
ddcompteest terrain& la duroc du nettoyages'afficheet le four
commence_ pr_chauffer.
Pourplus de ddtailsconcernantI'autonettoyage,voyezla page37.
Fermentation (certains modeles)
La caract_ristique de fermentation est utilis_e pour faire lever des
produitsde boulangerie_ basede levureavantde loscuire. IIy a deux
m_thodesde fermentationdisponible: rapide et standard.
Lafermentationstandard effectudeclanslefour protege la p_tedes
changementsde tempdratureou des courantsd'air qui affectent
courammentles rdsultatsd'une fermentationfaite sur le comptoir.
Lamdthode de fermentationrapidepermetd'obtenir une
fermentationplus rapidesans faire de tort a la levure.
1. Appuyezsur latouche More Options.
2. S61ectionnezFERMENTATION.
3. %lectionnez RAPIDEou NORMALE.
4. Lorsquela fermentation estterminde, retirezla
p_te du four et appuyezsur latouche
CANCEL(Annule0.
,,Options j
// ................
:CANCEL:
............ /
Suite
54
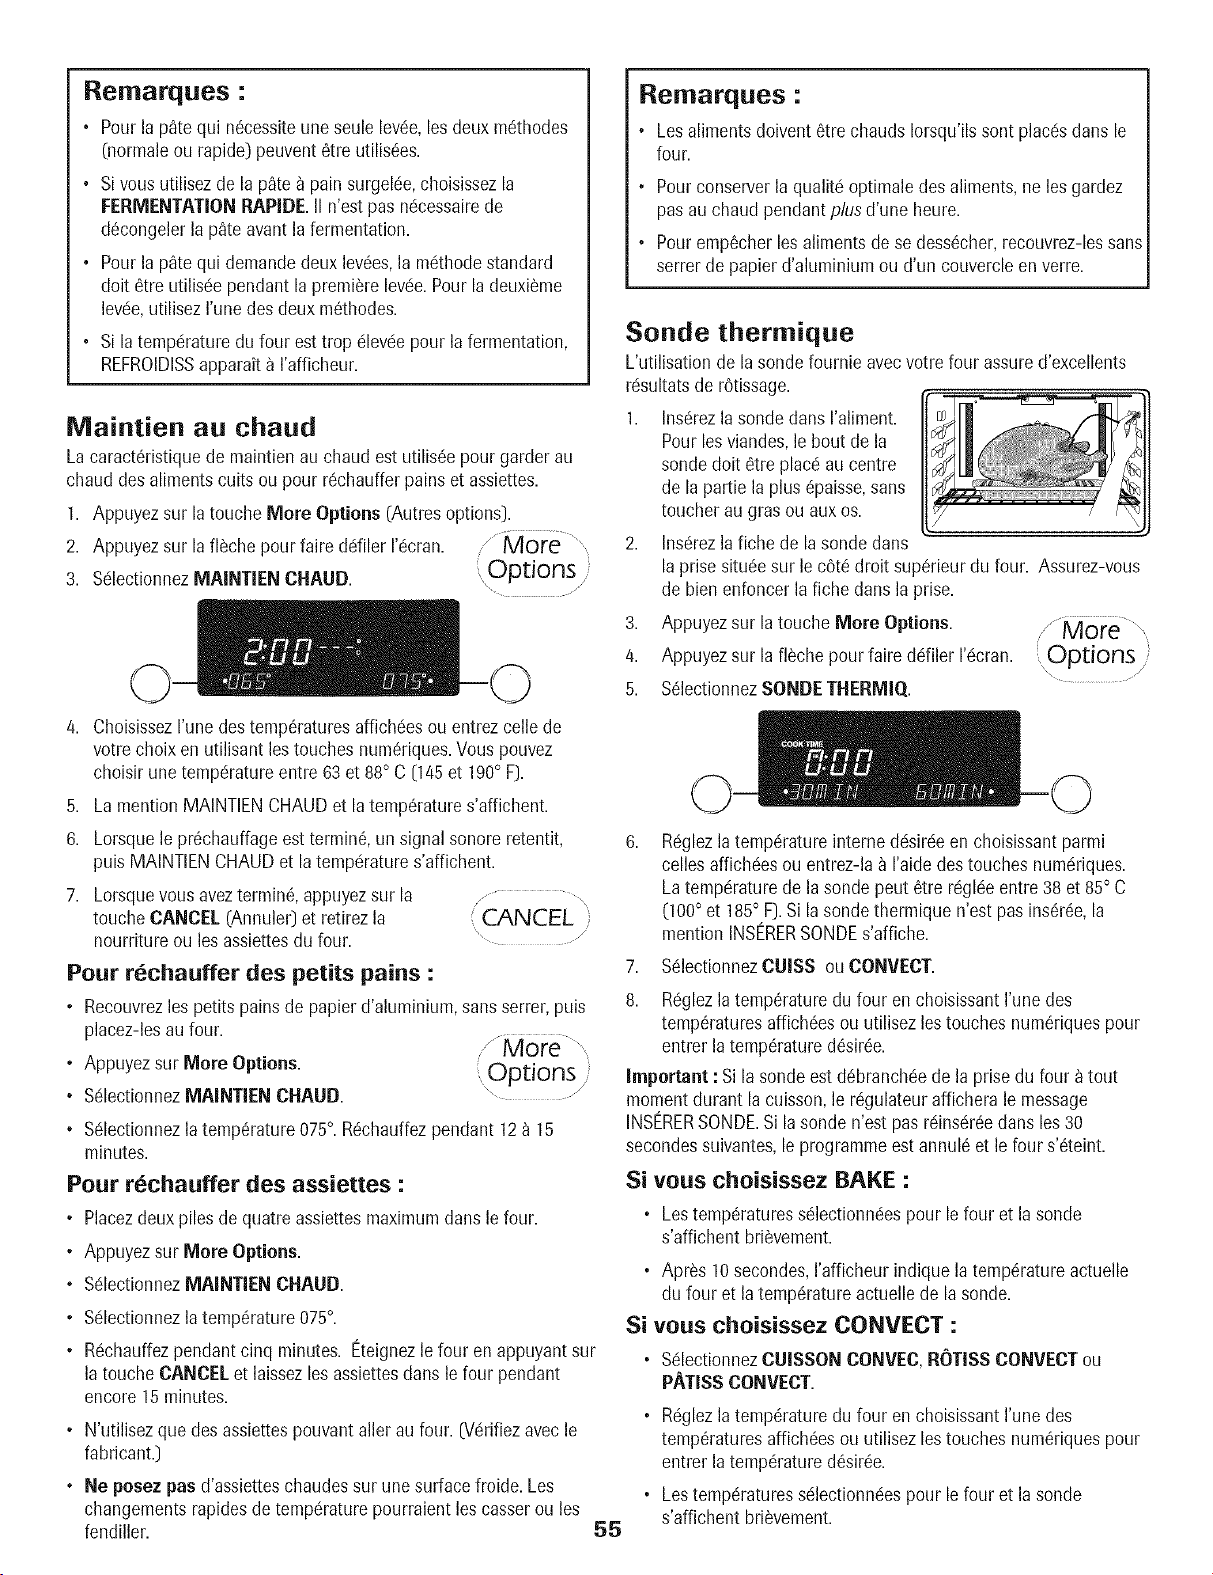
Remarques :
. Pourla p_te qui n_cessiteune seulelove!e,los deux m6thodes
(normaleou rapide) peuvent6tre utilis6es.
. Sivous utilisezde la p_te _ painsurgel6e,choisissezla
FERMENTATIONRAPIDE.II n'est pas n6cessairede
d6congelerla p_te avantla fermentation.
. Pourla p_te qui demandedeux lev6es,la m6thodestandard
dolt 6tre utilisc!ependant la premierele%e. Pourladeuxi_me
le%e, utilisez I'unedes deux m6thodes.
• Si latempc!raturedu four est trop c!levc!epour lafermentation,
REFROIDISSapparait a I'afficheur.
Maintien au chaud
Lacaract6ristiquede maintien auchaud est utilis6e pourgarder au
chaud desaliments cults ou pour r6chaufferpains et assiettes.
1. Appuyezsur latouche More Options (Autresoptions).
2. Appuyezsur lafl_che pour faire driller I'c!cran. / More "',
3. Sc!lectionnezMAINTIEN CHAUD. Options
........... /
Remarqaes :
• Losaliments doivent6tre chaudsIorsqu'ilssont placc!sdans le
four.
. Pourconserverla qualitc!optimale desaliments,ne losgardez
pas au chaud pendant plusd'une heure.
• Pouremp6cherlos alimentsde se dess_cher,recouvrez-lessans
serrerde papier d'aluminium ou d'un couvercleenverre.
Sonde thermique
L'utilisationde la sonde fournie avecvotre four assured'excellents
rc!sultatsde rOtissage.
1. Insc!rezla sonde clansI'aliment.
Pourlosviandes,le bout de la
sondedolt 6tre placc!au centre
de la pattie la plus 6paisse,sans
toucher augras ou aux os.
2. Insc!rezla fiche de lasonde darts
laprise situ6esur le c6t6 droit sup6rieurdu four. Assurez-vous
de bien enfoncer la fiche dartsla prise.
3. Appuyezsur latouche More Options. ./" M0re
4. Appuyezsur la fl_chepour faireddiler I'c!cran. Options
........................... /
5. S61ectionnezSONDETHERMIO.
4. ChoisissezI'une destemp6raturesaffichc!esou entrezcello de
votrechoix en utilisant lostouches num6riques.Vouspouvez
choisir unetempc!ratureentre 63et 88° C (145 et 190° F).
5. Lamention MAINTIENCHAUDet la temp6ratures'affichent.
6. Lorsquele pr6chauffageest terrain& un signal sonore retentit,
puis MAINTIENCHAUDet la tempc!ratures'affichent.
7. Lorsquevous avezterrain& appuyezsur la j ........
touche CANCEL(Annuler)et retirez la ( CANCEL
nourritureou losassiettesdu four. ............
Pour r_chauffer des petits pains :
• Recouvrezlos petits painsde papier d'aluminium,sanssorter, puis
placez-lesau four.
• Appuyezsur More Options. ,ODtiOnS
r
• Sc!lectionnezMAINTIEN CHAUD. ...............
• S_lectionnezla temp6rature075°. R6chauffezpendant 12a 15
minutes.
Pour r_chauffer des assiettes :
• Placezdeux piles de quatre assiettesmaximumdartslefour.
• Appuyezsur More Options.
• Sc!lectionnezMAINTIEN CHALID.
° Sc!lectionnezla temp6rature075°.
• R_chauffezpendant cinq minutes. Eteignezle four en appuyantsur
la toucheCANCELet laissezlosassiettesdartsle four pendant
encore 15 minutes.
• N'utilisezque des assiettespouvantallot au four. Nc!rifiezavec le
fabricant.)
• Ne posez pas d'assietteschaudessur une surfacefroide. Los
changementsrapidesde tempc!raturepourraient loscasserou los
fendiller.
55
6,
Reglezla temp6ratureinternedc!sirc!een choisissantparmi
cellosaffichc!esou entrez-la_ I'aidedestouches numc!riques.
Latempc!raturede la sonde pout 6tre r_gk!eentre 38 et 85° C
(100° et 185° F).Si lasondethermique n'est pas ins_r_e,la
mentionINSERERSONDEs'affiche.
7. S_!lectionnezCUISSou CONVECT.
8. R_glezla temperaturedu four en choisissantI'unedes
temperaturesaffich_esou utilisez lostouches num_riquespour
entrer latemperatured_sir_e.
Important : Sila sondeest d_branch_!ede la prise du four _tout
momentdurant la cuisson,le r_!gulateuraffichera le message
INSERERSONDE.Si la sonden'est pasr_!ins_r_edans los 30
secondessuivantes,le programmeest annul8 et le four s'Steint.
Si vous choisissez BAKE :
• Lostemperaturess_lectionn_!espour le four et la sonde
s'affichent bri_vement.
• Apr_s 10secondes,I'afficheurindique la temperatureactuelle
du four et la temperatureactuelle de lasonde.
Si vous choisissez CONVECT :
• SdlectionnezCUISSON CONVEC,ROTISSCONVECTou
PATISSCONVECT.
• R_!glezla temperaturedu four en choisissantI'unedes
temperaturesaffich_esou utilisez lostouches num_riquespour
entrer latemperatured_sir_e.
• Lostemperaturess_!lectionn_!espour lefour et lasonde
s'affichent bri_vement.
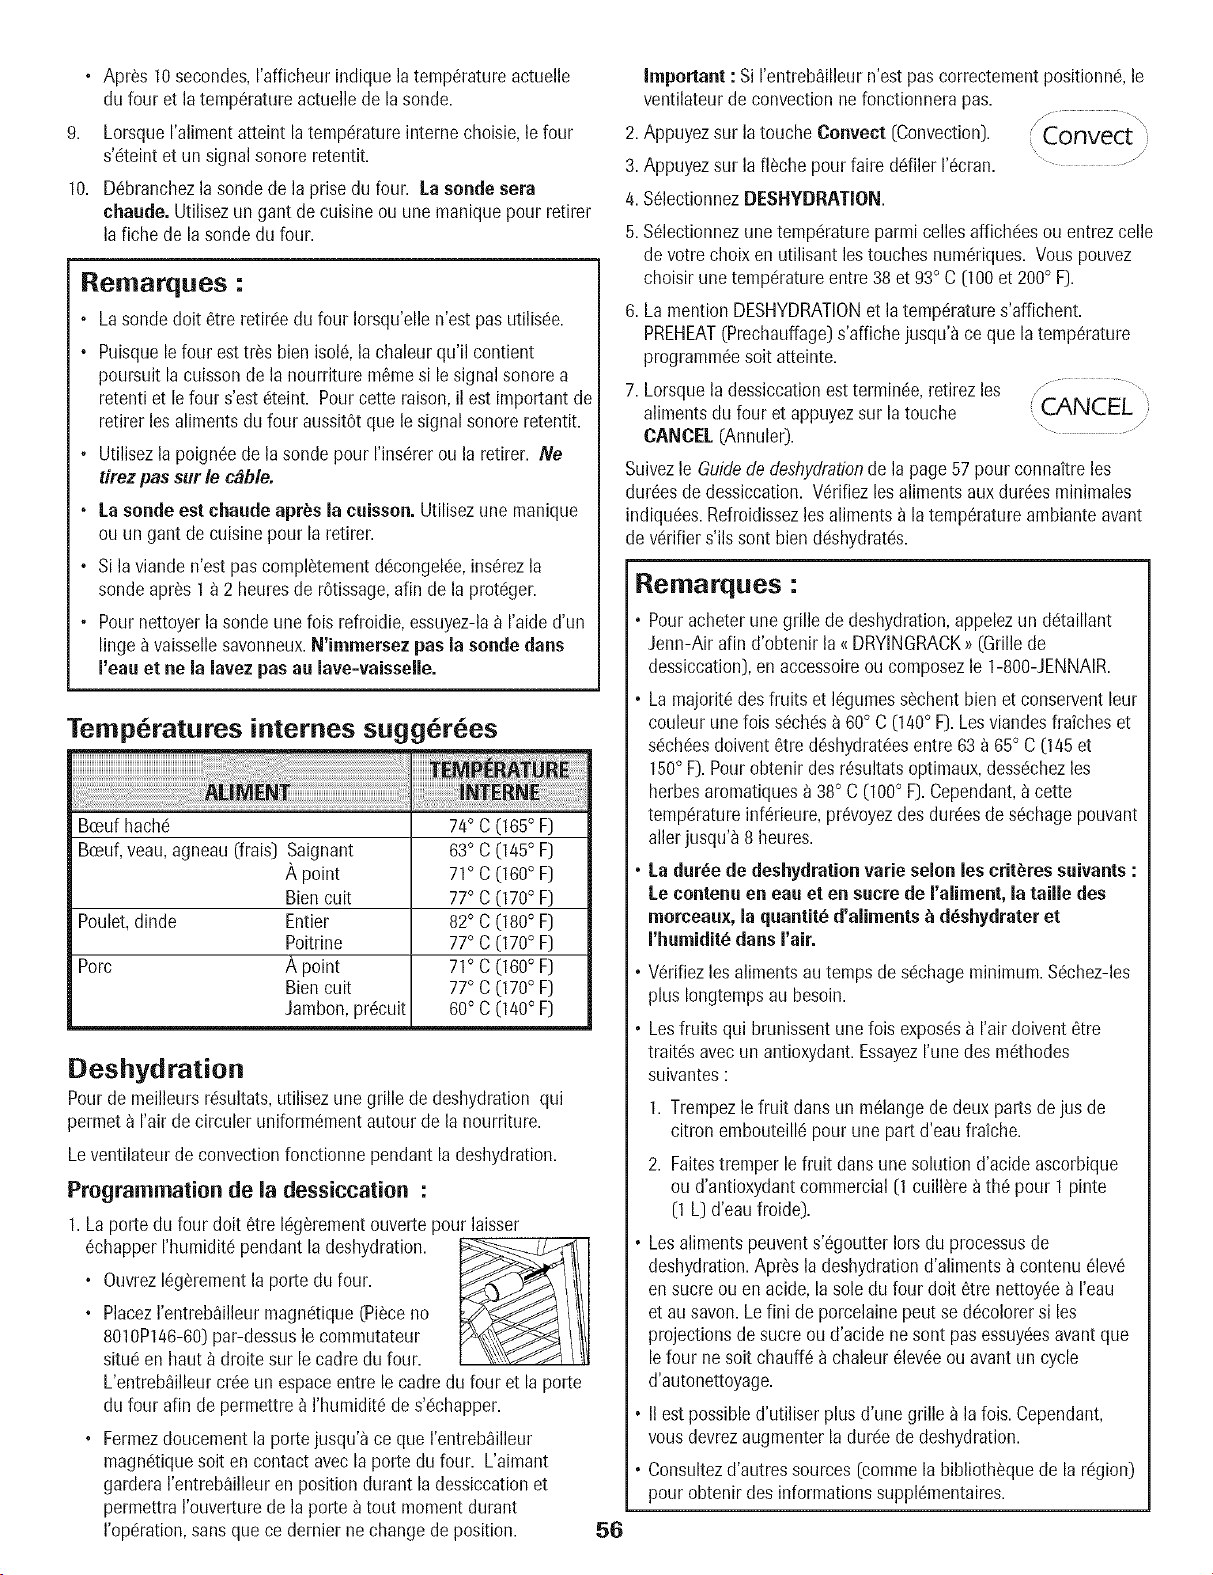
9,
10.
" Apr_s 10secondes,I'afficheurindique la tempCratureactuelle
du four et latempCratureactuellede la sonde.
LorsqueI'alimentatteint la tempCratureinternechoisie,le four
s'c!teintet un signalsonore retentit.
DCbranchezla sondede laprise du four. La sonde sera
chaude. Utilisezun gant de cuisineou une maniquepour retirer
lafiche de la sondedu four.
Remarques :
• La sondedolt 6tre retirc!edu four Iorsqu'ellen'est pas utilisCe.
, Puisquele four esttr_s bien isol& lachaleur qu'il contient
poursuit lacuissonde la nourriture mCmesi lesignal sonorea
retenti et lefour s'est6teint. Pour cette raison,il est importantde
rotifer los alimentsdu four aussitOtque lesignal sonore retentit.
° Utilisezla poignCede la sonde pour I'insCrerou la retirer. Ne
tirez pas sur le c_ble.
• La sonde est chaude apr_s la caisson.Utilisezune manique
ou un gant decuisine pour la retirer.
, Si laviande n'est pas compl_tementdCcongel(ge,insCrezla
sondeapr_s I a 2 heuresde rCtissage,afin de la protCger.
° Pournettoyerla sonde unefois refroidie, essuyez-la_ raide d'un
lingo _vaissellesavonneux.N'immersez pas la sonde darts
I'eau et ne la lavez pas aa lave-vaisselle.
Temperatures internes sugg6rees
Bceuf hach6 74° C (165° F]
Bceuf,veau,agneau (frais) Saignant 63° C (145 ° F)
A point 71° C (160° F)
Biencult 77° C (170° F)
Poulet,dinde Entier 82° C (180° F)
Poitrine 77° C (170° F)
Porc A point 71° C (160° F)
Biencult 77° C (170° F)
Jambon,prCcuit 60° C (140° F)
Deshyd ration
Pourde meilleursrc!sultats,utilisez une grille de deshydration qui
permet a rair de circuler uniformCmentautour de la nourriture.
Leventilateurde convectionfonctionne pendant la deshydration.
Programmation de la dessiccation :
1. La porte du four dolt 6tre 16g_rementouvertepour laisser
6chapper I'humiditc!pendant la deshydration.
° Ouvrez16gCrementla porte du four.
, PlacezI'entrebailleurmagnCtique(PiCceno
8010P146-60}par-dessusle commutateur
situc!en haut _ droite sur lecadre du four.
L'entreb_illeurcrCeun espaceentre le cadredu four et la porte
du four afin de permettre_ I'humidit6de s'Cchapper.
, Fermezdoucementla portejusqu'a ceque I'entrebailleur
magnCtiquesoiten contact avec la portedu four. L'aimant
garderaI'entreb_illeuren position durant ladessiccationet
permettraI'ouverturede la porte a tout momentdurant
I'opCration,sans que ce dernier nechange deposition.
56
important : Sirentreb_illeur n'est pas correctementpositionn& le
ventilateur de convectionnefonctionnerapas.
, ....... \
2. Appuyezsur la touche Convect (Convection). Convect i
3. Appuyezsur la fl_che pour faire dc!filer1'Ccran. ...............
4. SClectionnezDESHYDRATION.
5. SClectionnezunetempCratureparmi cellesaffichCesou entrezcelle
de votrechoix en utilisant lestouches numCriques.Vous pouvez
choisir unetempCratureentre 38 et 93° C (100 et 200° F).
6. Lamention DESHYDRATIONet la tempCratures'affichent.
PREHEAT(Prechauffage)s'affiche jusqu'a ce que la tempCrature
programmCesoit atteinte.
7. Lorsquela dessiccationest terminCe,retirezles
alimentsdu four et appuyezsur la touche ' CANCEL
/
CANCEL(Annuler}. ...........
Suivezle Guidede deshydrationde la page57 pour connaitre les
durCesde dessiccation. VCrifiezles alimentsaux durCesminimales
indiquCes.Refroidissezles alimentsa la tempCratureambianteavant
de vc!rifiers'ils sont bien dc!shydratc!s.
Remarques :
Pouracheterune grille de deshydration,appelezun dc!taillant
Jenn-Air afin d'obtenir la _{DRYINGRACK>>(Grillede
dessiccation),en accessoireou composezle 1-800-JENNAIR.
La majorit6des fruits et 16gumessCchentbienet conserventleur
couleur une fois sCch_sa 60° C (140° F). Lesviandesfraiches et
sSch_esdoivent6tre d_shydratSesentre 63 a 65° C 045 et
150° F).Pourobtenir desr_sultatsoptimaux,dess(gchezlos
herbesaromatiquesa 38o C (100oF).Cependant,a cette
temp_!ratureinf_rieure,pr_voyezdes dur_esde sSchagepouvant
allerjusqu'_ 8 heures.
La dar_e de deshydrationvarie solon les crit_res saivants :
Le contenu en eaa et en sucre de I'aliment, la taille des
morceaax, la qaantit_ d'aliments _ d_shydrateret
I'hamidit_ dans rair.
V_rifiezlos alimentsautemps de s_!chageminimum.SCchez-les
plus Iongternpsau besoin.
Losfruits qui brunissentune lois exposCs_ I'airdoivent_tre
trait_savec un antioxydant.Essayezrune des mCthodes
suivantes:
1. Trempezle fruit darts un mClangede deux partsdejus de
citron embouteill_pour une part d'eau fraiche.
2. Faitestremper le fruit clansunesolution d'acideascorbique
ou d'antioxydantcommercial(1 cuill_re ath6 pour 1 pinto
(1L) d'eau froide).
Losaliments peuvents'_goutterIorsdu processusde
deshydration.Apr_s ladeshydrationd'aliments_ contenu 61ev_
ensucre ou en acide, la sole du four dolt 8tre nettoy_ea I'eau
et au savon.Lefini de porcelainepout se d_colorersi los
projectionsde sucre ou d'acidene sont pasessuy_!esavantque
lefour ne soit chauff6 a chaleur61evCeouavant un cycle
d'autonettoyage.
IIest possibled'utiliser plus d'une grille _ la fois. Cependant,
vousdevrezaugmenterla dur_!ede deshydration.
Consultezd'autressources (commela biblioth_quede la r_!gion)
pour obtenir des informationssuppl_mentaires.
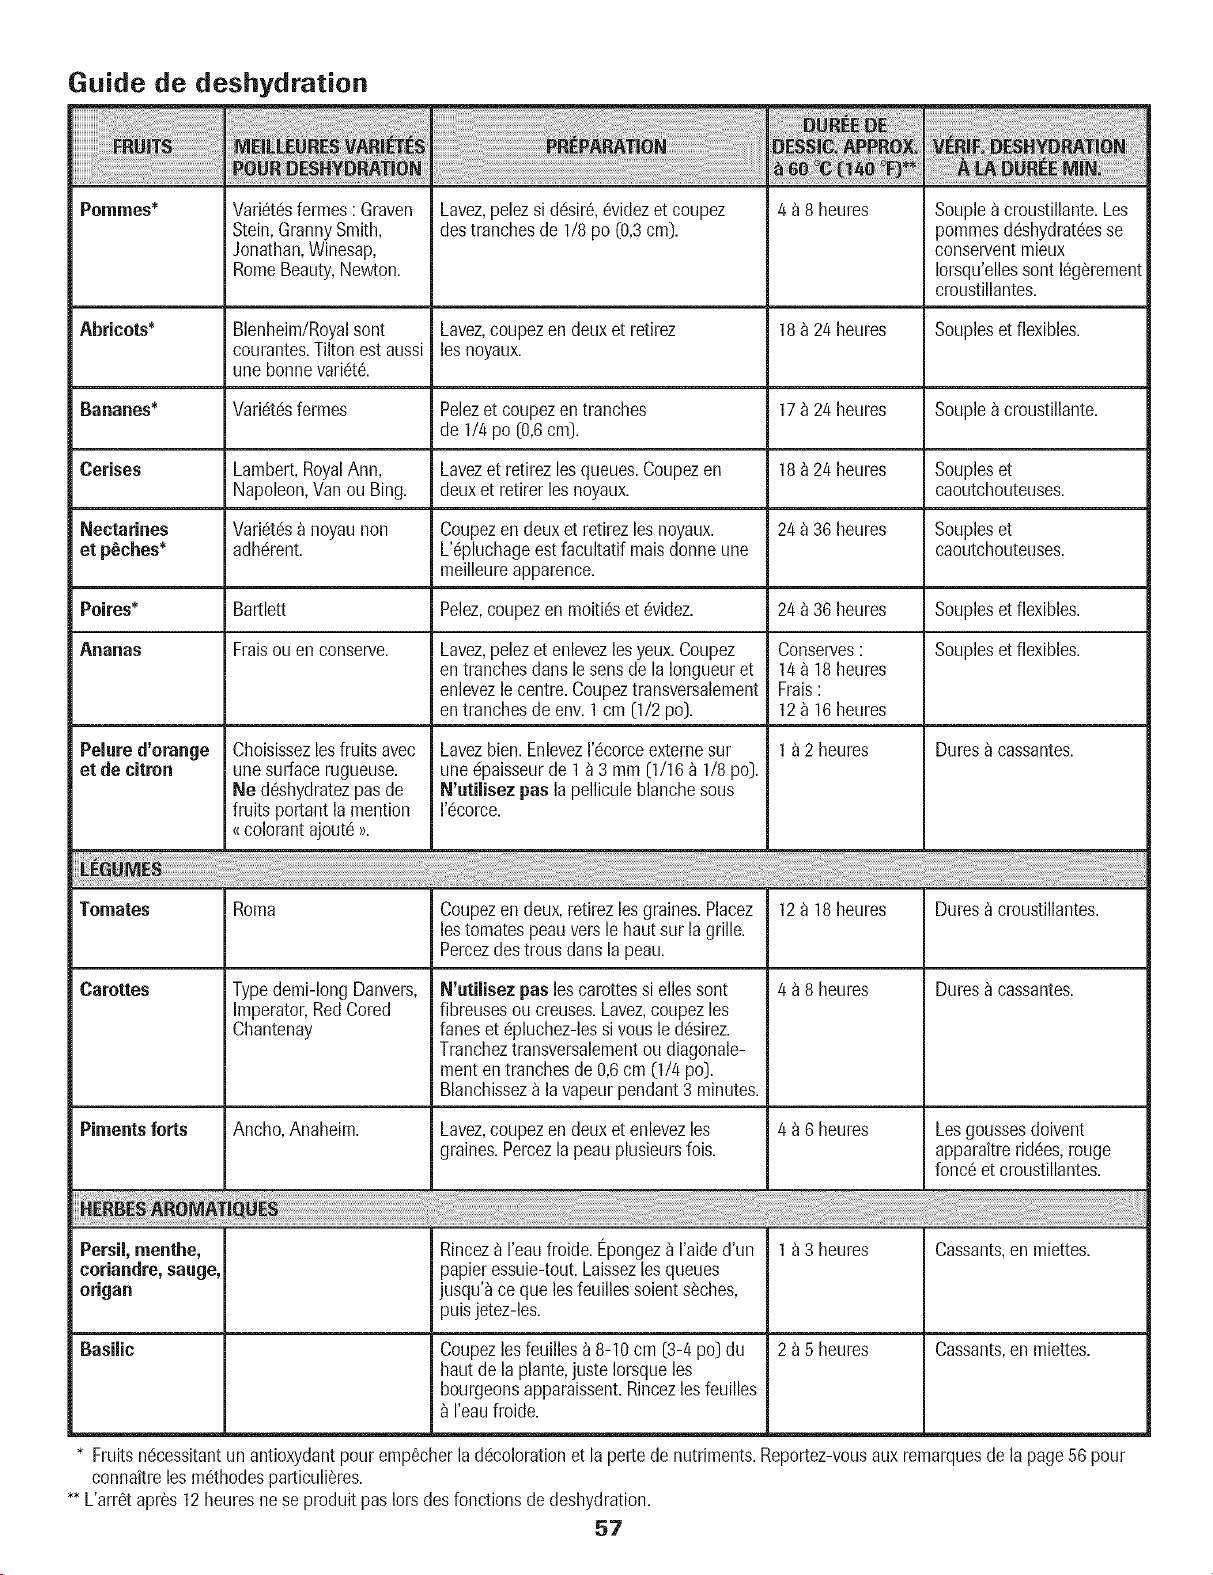
Guide de deshydration
Potatoes* Vari6t6sfermes: Graven Lavez,pelezsi d6sir6,6videzet coupez 4 a 8 heures Soupleacroustillante.Les
Stein,GrannySmith, destranchesde 1/8 pc (0,3cm). potatoesd6shydrat6esse
Jonathan,Winesap, conserventmieux
RomeBeauty,Newton. Iorsqu'ellessont16g_rement
croustillantes.
Abricots* Blenheim/Royalsont Lavez,coupezen deuxet retirez 18 _24 heures Soupleset flexibles.
courantes.Tiltonestaussi lesnoyaux.
une bonnevaric!t&
Bananes* Vari6t6sfermes Pelezet coupezen tranches 17 _2/4heures Soupleacroustillante.
de 1/4 pc (0,6cm).
Cerises Lambert,RoyalAnn, Lavezet retirezlesqueues.Coupezen 18_ 24 heures Soupleset
Napoleon,Van ou Bing. deuxet retirer losnoyaux, caoutchouteuses.
Nectarines Vari6t(!sa noyaunon Coupezendeuxet retirezles noyaux. 24 a36 heures Soupleset
et p_ches* adhc!rent. L'6pluchageest facultatif maisdonneune caoutchouteuses.
meilleureapparence.
Poires* Bartlett Pelez,coupezen moiti6set 6videz. 24 _ 36 heures Soupleset flexibles.
Ananas Fraisou enconserve. Lavez,pelezet enlevezlosyeux.Coupez Conserves: Soupleset flexibles.
entranchesdartsle sons de laIongueuret 14 _ 18heures
enlevezle centre.Coupeztransversalement Frais:
entranchesde env.1 cm (1/2 pc). 12_ 16 heures
Pelure d'orange Choisissezlosfruits avec Lavezbien.EnlevezI'c!corceexternesur 1a 2 heures Dures_ cassantes.
et de citron une surfacerugueuse, unec!paisseurde 1a 3 mm (1/16_ 1/8 pc).
Ne d6shydratezpasde N'utilisezpas lapelliculeblanchesous
fruits portant la mention I'c!corce.
_colorantajout_>>.
Tolmates
Carottes
Piments forts
Roma
Typedemi-longDanvers,
Imperator,RedCored
Chantenay
Ancho,Anaheim.
Coupezen deux,retirezlosgraines.Placez
lestomatespeau versle haut sur lagrille.
Percezdes trousdansla peau.
N'atilisez paslos carottessi ellessont
fibreusesou creuses.Lavez,coupezlos
faneset 6pluchez-lessi vousle d(_sirez.
Trancheztransversalementou diagonale-
meriten tranchesde0,6cm 0//4 pc).
Blanchisseza la vapeurpendant3 minutes.
Lavez,coupezen deuxet enlevezles
graines.Percezlapeauplusieurslois.
12 a 18 heures
4 a 8 heures
4 a 6 heures
Dures _ croustillantes.
Dures_ cassantes.
Losgoussesdoivent
apparaitrerid6es,rouge
fonc6et croustillantes.
Persil,menthe, Rincez_ I'eaufroide.Epongez_ I'aided'un I a 3 heures Cassants,en miettes.
coriandre,saage, papieressuie-tout.Laissezlosqueues
origan jusqu'aceque lesfeuillessoient s_ches,
puisjetez-les.
Basilic Coupezlesfeuillesa 8-10cm (3-4 pc) du 2 a 5 heures Cassants,en miettes.
haut de la plante,juste Iorsqueles
bourgeonsapparaissent.Rincezlesfeuilles
I'eaufroide.
Fruitsnc!cessitantunantioxydantpour emp6cherla dc!colorationet la perte de nutriments.Reportez-vousaux remarquesdela page56 pour
connaitrelosm_thodesparticuliSres.
** L'arr6tapr_s12 heuresnese produitpas Iorsdesfonctions de deshydration.
57
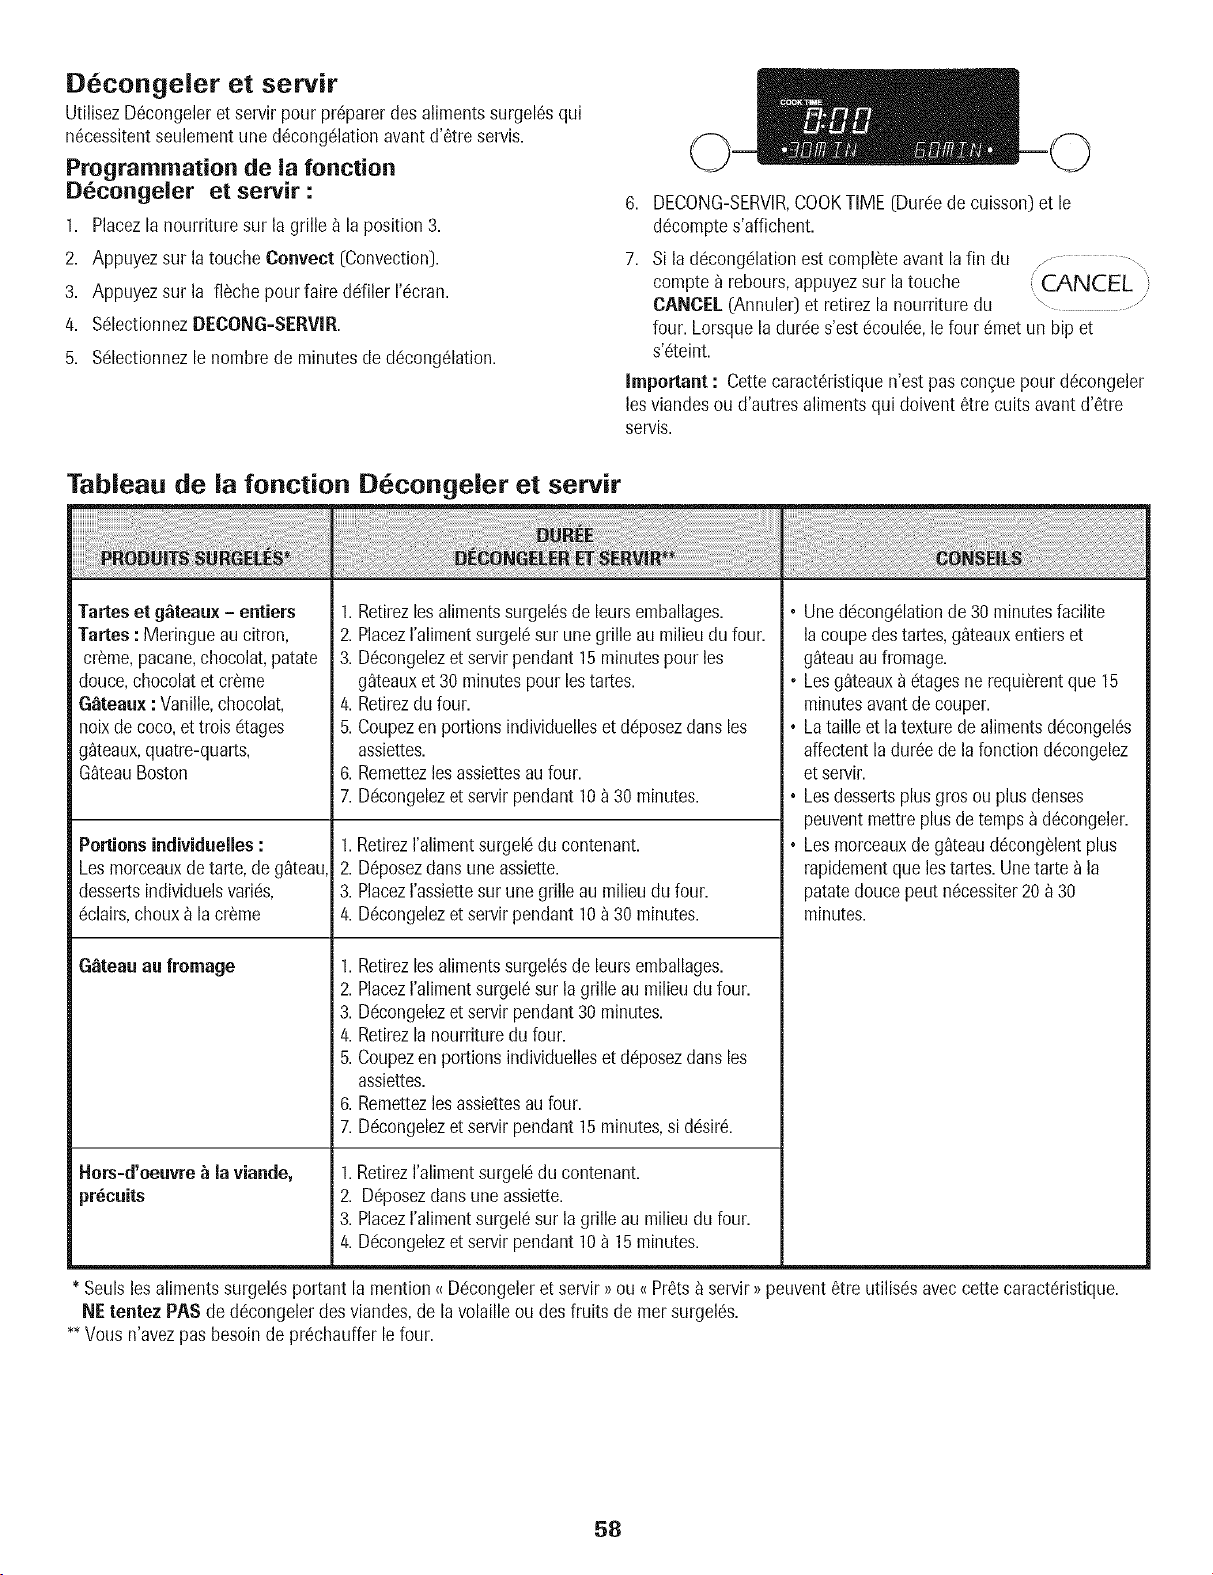
D congeler et servir
UtilisezD6congeleret servir pour pr@arer des alimentssurgel6squi
n6cessitentseulementune d_cong_lationavantd'6tre servis.
Programmation de ia fonction
D_congeler et servir :
1. Placezla nourrituresur la grille _ la position3.
2. Appuyezsur la touche Convect [Convection).
3. Appuyezsur la fl_che pour faire driller I'c!cran.
4. S61ectionnezDECONG-SERVIR.
5. Sc!lectionnezle hombre de minutesde d6cong_lation.
6. DECONG-SERVlR,COOKTIME (Durc!ede cuisson)et le
d_comptes'affichent.
7. Si ladecong61ationest completeavantlafin du
compte a rebours,appuyezsur latouche ( CANCEL i
CANCEL (Annuler_et retirezla nourriture du
four. Lorsquela durc!es'estc!coulc!e,le four 6met un hip et
s'6teint.
Important : Cettecaract6ristiquen'est pus con£uepourd6congeler
lesviandesou d'autres alimentsqui doivent 6tre cults avantd'6tre
servis.
Tableau de la fonction Decongeler et sewir
Tartes et g_teau× - entiers
Tartes : Meringue au citron,
cr_me, pacane, chocolat, patate
douce, chocolat et cr_me
G_teau× : Vanille, chocolat,
noix de coco, et trois 6tages
g_teaux, quatre-quarts,
G_teau Boston
Portionsindividuelles:
Lesmorceauxde tarte,de g_teau,
dessertsindividuelsvaric!s,
c!clairs,choux_ la cr_me
G_teau au frornage
Hers=d'oeuvre_ la viande,
pr_euits
1. Retirezlesalimentssurgel6sde leursemballages.
2. PlacezI'alimentsurgel6sur unegrille au milieudu four.
3. D6congelezet servirpendant 15minutespour les
g_teauxet 30 minutespour lestares.
4. Retirezdu four.
5. Coupezenportionsindividuelleset d@osezdartsles
assiettes.
6. Remettezles assiettesau four.
7. Dc!congelezet servirpendant 10a 30minutes.
1.Retirezralimentsurgelc!du contenant.
2. D@osezdunsuneassiette.
3. PlacezI'assiettesur une grille au milieudu four.
4. D6congelezet servir pendant 10a 30 minutes.
1. Retirezlesalimentssurgel6sde leursemballages.
2. PlacezI'alimentsurgel_sur la grilleau milieudu four.
3. D6congelezet servirpendant30minutes.
4. Retirezlanourrituredu four.
5. Coupezenportionsindividuelleset d@osezdunsles
assiettes.
6. Remettezles assiettesau four.
7. Dc!congelezet servirpendant 15minutes,si ti!!sir6.
1.RetirezI'alimentsurgel_du contenant.
2. D@osezdunsune assiette.
3. PlacezI'alimentsurgel6sur la grilleau milieudu four.
4. Dc!congelezet servirpendant 10a 15minutes.
• Uneddcong61ationde 30 minutesfacilite
lacoupedestartes,ggteauxentierset
ggteauau fromage.
° Lesg_teauxa dtagesne requi_rentque 15
minutesavantde couper.
, Lataille et la texturede alimentsddcongel_s
affectentla dur6ede la fonctionddcongelez
et servir.
• Lesdessertsplusgros ouplus denses
peuventmettreplusde tempsad_congeler.
• Lesmorceauxde g_teauddcong_lentplus
rapidementque lestartes. Unetarte a la
patatedoucepeut nScessiter20 _ 30
minutes.
Seulsles alimentssurgeldsportant la mention_ Ddcongeleret servir))ou _ Pr_ts_ servir;) peuvent6tre utilisds aveccette caractdristique.
NEtentez PAS deddcongelerdes viandes,de la volaille ou des fruits de mer surgelds.
** Vous n'avezpus besoin depr_chauffer le four.
58
f
EGLAGE FAVOR|
R6glage favori
Lafonction R6glagefavorigarde en m_moirejusqu'a 10de yes
recettesprd6rc!es. Losfours a convectionsent livr6savec 5 recettes
pr@rogramm6es.
Pour s_lectionuer uue recette de la liste
pr_tablie : _............
Favorites
1. Appuyezsur latouche Favorites (R6glagefavori). On / off.,
2. S61ectionnezLIST[ RECETTES.
3. Choisissezla recette d6sir6eouappuyezsur
lafi_che pour loire ddiler 1'6cran.
4. Unelois la recettes61ectionnc!e,lefour commencele pr_chauffage
solon le programmec!tabli.
• Vous pouvezappuyersur [atouche Mere Options [Autres
options)pour ajouter unefonction de CUI/CHDou DEM DIF.
5. Lorsquevous aveztermin_, appuyezsur la touche CANOE[
[Annule0 et retirezla nourriture du four.
Pour sauvegarder la derni_re recette compl_t_e :
(Cuissonau four, Cuissona convection,R0tissage_convection,
P_tisseriea convection,Gril a convection,Dc!shydratation,Maintien au
chaud,Fermentation)
1. Appuyezsur la toucheFavorites. "Favorites
2. S61ectionnezGARDERDERNI[R. un/u_,,,
3. Entrezle nom a I'aidedes touches.
. Parexemple,poursauvegarderune lasagne,appuyezsur la
touche/-,,IK[> trois fois pour la lettre _ L _;appuyezsur la touche
/--.ABC>une foispour la lettre _A _; appuyezsur latouche
<STU> unefois pour la lettre _ S_.Continuezjusqu'a ce que vous
oyezcompl6t6le mot.
4. Chaquefois que la lettre recherch6eapparait,attendeztrois
secondespour que leprochain espacesoit soulign6ou appuyez
surla touche Enter (Entrer)avantde passera la prochainelettre.
° Vous pouvezutiliser un maximumde 14 lettresincluant los
espaces.
5. Lorsquele hem de la recetteeat entr6,losderniers r6glages
s'affichent pendant quelquessecondes.
6. La mentionLISTERECETTESapparait pourloire driller 1'6cran.
7. Appuyezsur la toucheFavorites pour quitter le menu desr6glages
favoris.
Pour crier une nouvelle recette favorite :
/ ......................................
1. Appuyezsur la toucheFavorites. _Favorites"
2. Appuyezsur la fl_chepour loire driller los choix. On / Off
3. Sc!lectionnezCREERNOUVEAU_ I'aidede la touche_ gauche.
4. Entrezle noraa I'aidedestouches.
5,
6.
• Parexemple,pour sauvegarderune lasagne,appuyezsur la
touche<'JK[> troisfois pour la lettre _ L ));appuyezsur la touche
<ABC> unefob pour la lettre _A ));appuyezsur la touche
<STU> unefois pour la lettre _S ;).Continuezjusqu'a ce quevous
oyezcompl6t6 le mot.
° Chaquefois que la lettrerecherch6eapparait,attendeztrois
secondespour que le prochain espacesoit soulignc!ou appuyez
sur la toucheEnter avant de passera la prochaine lettre.
• Vouspouvezutiliserun maximumde 14lettres incluant los
espaces.
S_!lectionnezENTERpour sauvegarderle hem.
Selectionnezle modede cuisson,par exemple: CUISSON,CUISSON
CONVEC,ROTISSCONVECT,etc.
S_!lectionnezla temp@aturedu four _ I'aidedes touches rapides.
OU
EntrezlatempSratured_sirSe8 I'aidedes touchesnum@iques.
8. Ajoutez lafonction de Cuissonet maintienen choisissantOUI ou
cuisinezsans Cuissonet maintienen choisissantNON.
9. Sivous s_lectionnezYES,entrezla dur_e de cuissona I'aidedes
touches rapidesou destouches num_riques.
10.Ajoutez la fonction de D@artdiff_r_ en choisissantOUI ou cuisinez
sansD@art diff_r_ en choisissantNON.
11.Si vouss_lectionnezOUI,entrezladur_e du d_!lai_ I'aide des
touches rapidesou destouches num_riques.
12.Le r_gulateur affiche los r_glagesprogramme!s,puis retourne au
menudes r_glagesfavoris.
13.Appuyezsur la toucheFavorites pourquitter
le menudes r_!glagesfavoris.
Pour modifier uue recette sauvegard_e :
1. Appuyezsur la toucheFavorites.._./Favorites"
2. Appuyezsur la fl_chepour faire driller I'_cran. On / Off
3. S_!lectionnezMODIF RECE]]'E.
4. Choisissezla recette_ modifer. Au besoin,utilisez leaflSchespour
rep@erla recetted_sir_e.
5. Modifer lear_glagesde la recette en suivant le menu.
6. L'afficheurretourneau menudes r_glagesfavoris.Lamention
LISTERECETTESs'affiche.
7. Appuyezsur la toucheFavorites pour quitter le menudes r_glages
favoris.
59
Pour supprimer une recette favorite :
1. Appuyezsur latouche Favorites (R6glagefavori).
2. Appuyezsur lafl_che pour faire driller 1'6cran. Favorites
3. %lectionnez EFFACRECETTE. ,\ On / Off
................................... /
/4. Trouvezla recettea supprimer.Au besoin,utilisez lesfl_ches
pour rep6rerla recettedc!sirc!e.
5. Le rc!gulateurvousdemanderaa nouveausi vousd6sirez
supprimercette recette. S61ectionnezOUI ou NON.
6. Appuyezsur latouche Favorites pour quitter le menu des
recettesfavorites.
Entout temps,vous pouvezquitter le menudes rc!glagesfavorisen
appuyantsur latouche Favorites.
f
EGLAGE
Reglage , setup
1. Appuyezsur la toucheSetup (R6glage). ,,,On / Off /
2. Utilisezlafl_che pour faire driller lesoptionsde 1'6crander6glage.
3. ChoisissezI'option d6sir6een appuyantsur les touches rapides.
Remarque : Pourquitter 1'6cransansfaire de changements,
J
[appuyez sur a touche Setup. L heuredu jour apparait _ afficheur.]
Horioge
UtilisezI'option Clock (Horloge)pour :
, R6glerI'heure.
• R6glerle jour de la semaine.
• S(!lectionnerAM ou PM (modede 12 heuresseulement).
° ChoisirI'affichage_ 12ou 24 heures.
• D6sactiverI'affichagede I'horloge.
Langue
Lesc!cransde la consolepeuvent6tre affich6s en anglais,fran_aisou
espagnol. Pourchoisir une autre langueque I'anglais
/ ................
1. Appuyezsur latouche Setup. ; Setup "'
2. %lectionnez LANGUES. , On / Off
.......... ,/
3. Au besoin,utilisezla fl_che pour passera I'c!cransuivant.
/4. Choisissezla langue d6sirc!e.
5. Appuyezsur latouche Setup pour quitter le menude rc!glage.
Conversion automatique pour
convection (certains modules)
Lefour est r6g16a I'usine pour laconversionautomatiquepour
convection.
Laconversionautomatiquepourconvection r_duit automatiquement
latemp6rature rc!gl6ede 25° pour lescaract6ristiquesde Cuisson
convectionet de P_tisserie_ convection.
6O
Pourle ROtissage_ convection,le r_gulateurvousavertit Iorsque
75% du temps de r6tissages'est6coul6 et vous demandede vc!rifier
la cuisson.
Remarques :
• Lorsquevous utilisezla Cuisson_ convectionet la P_itisserie
convectionalorsque I'option de Conversionautomatiquepour
convectionestd6sactiv6e,rc!duisezlatempc!raturede cuisson
de 14° C (25° F).
• Sivous utilisezle ROtissage_ convectionalors que la
Conversionautomatiquepour convectionest d_sactivc!e,v6rifiez
lacuisson desaliments Iorsque75% du tempsde cuisson
conventionnels'est_coul_.
Pour desactiver la conversion automatique
pour convection : ..................
1. Appuyezsur la toucheSetup. _'SetUp '
On/Off
2. %lectionnez CONVECTAUTO. _ ......... Y
3. S61ectionnez ARRET.
/4. Appuyez sur la toucheSetup pour quitter le menu de r6glage.
Pour reactiver la conversion automatique pour
convection :
1. Appuyezsur la toucheSetup.
2. S61ectionnezCONVECTAUTO.
3. ChoisissezMARCHE.
/ Setup
....On/Off
/
/4. Appuyez sur la toucheSetup pour quitter le menu de r6glage.
C/F
L'_!chellede tempc!raturepeut 6tre indiquc!een Fahrenheitou en
Celsius.
Pour modifier l'echelle de temperature :
1. Appuyezsur la toucheSetup.
2. Utilisezla fl_che pourpasser_ I'c!cransuivant.
3. %lectionnez C/F.
/4. Choisissez1'6chellede temperatured_sir_!e.
/ Setup
On / Off /
/
5. Appuyezsur la toucheSetup pour quitter le menu de r_glage.
Mode sabbat
Lefour est programm6pour s'c!teindreapr_s 12 heuress'il est
accidentellementlaiss6en marche.Lemode sabbat annuleI'arrCt
automatiqueapr_s12heureset pout 6tre rc!gl6pour s'activer
automatiquementou manuellement,au choix.
Le modesabbat permetlefonctionnementdela cuissonau four et de
la cuisson et maintien seulement. Toutes les autres fonctions sont
dCsactivCes.Si unefonction autre quela cuissonaufour ou la cuisson
et maintienestutilisc!equandlemodesabbatcommence,cettefonction
seraannulCe.
Pour activer le mode sabbat :
1. Appuyezsur latouche Setup (R_glage].
2. Appuyezsur lafl_che pour faire driller I'c!cran.
3. SelectionnezSABBAT.
Setup
On / Off /
...................... /
4. Sc!lectionnezAUTO ou MANUEL.
• Lafonction AUTOvousdemandeautomatiquementd'entrer
unetemp(Traturede cuisson pour vendredi _ 14h et demeure
en modesabbat pendant33 heures.La mention MODESABBA
ACTapparaita I'afficheurpendant90 minutes.Si vous
dCsirezutiliserla fonction de cuissonau four ou de cuisson et
maintien,durant le modesabbat,vousdevezlos programmer
durant cette pCriode,avantque le mode sabbat
automatiquene soit activC.
• Lafonction MANUAL r_glele four pour le modesabbatde 72
heures.LosmentionsMODESABBAACTapparaissent
I'afficheurpendant cinq minutes. Si vous dCsirez utiliser
la fonction de cuisson au four ou de cuisson et maintien
durant le mode sabbat, celle-ci doit 6tre programmCe
durant cette pCriode, avantque le mode sabbat
MANUEL ne soit activC.
5. SClectionnez MARCHE ou ARRET.
6. Appuyez sur la touche Setup pour quitter le menu de
rCglage.
Remarques :
• Le four dolt 6tre inactif pour programmerle modesabbat.
, Le modesabbat ne peut pus 6tre misen marchesi lostouches
ou la porte sont verrouilldes.
• Si la cuissonau four est encours Iorsquele mode sabbatse
met en marche,il n'y aurapus de signal sonore.
• Touslos messageset los bips sent dCsactivdsIorsque le mode
sabbatest en marche.
° Sivous voulezque la lampedu four soit allure(Topendantle
mode sabbat,allumez-laavantde rCglerle mode.
° L'autonettoyageet leverrouillageautomatiquedes portes ne
fonctionnentpus pendant le modesabbat.
, LatempCraturede cuisson peut 6tre changCependantque le
mode sabbat estactif.Appuyez simplementsur la touche
Bake (Cuissonau four) et entrezensuite latempc!rature
dCsirCea I'aidedes touches rapides.
° Appuyezsur latouche CANCEL (Annule0 pour annulet la
cuissonau four. Le rCgulateurdemeureraen modesabbat.
Pour auuuler le mode sabbat :
// ..........
Appuyezsur la touche Setup et maintenez-laenfoncCe" Setup
pendant cinq secondes.Vouspouvezannuler le mode ,On / Off /
de cuissonen appuyantsur la touche CANCEL ........... /
durant le modesabbat.
Ajustement de la temperature
La prCcisiondes rc!glagesde tempCraturea €1t_7soigneusement
vCrifi_ea I'usine. II est normalde remarquerquelquesdiffc!rences
duns la durCede cuissonentre un four neuf et unfour )lusancien.
LatempCraturedes fours peut 6ventuellementse dCcaler.
Vouspouvezajuster la temp(Traturedu four si vous pensezqu'il ne
cuit pus oune dore pus correctement. Pour dCciderde I'ajustement
apporter,rCglezlefour _ unetempCraturede 14°C [25 °F)plus
c!levc!eou plus bassoque latempc!ratureindiquCeduns la recette,
puis faites cuire la pr(Tparation.Los rCsultatsdu premieressaide
cuissondoivent donnerune idc!edu nombrede degrc!spar lequel la
tempCraturedoit 6tre ajustCe.
Pour ajuster la temperature du four :
1. Appuyezsur la toucheSetup.
2. Appuyezsur la fl_chepour faire driller I'c!cran.
3. %lectionnez REGLERTEMP.
/ Setup
On / Off '
x ......................... /
4. Entrezla modificationde tempCraturedCsirCe_ I'aidedes
touches numCriques.
5. %lectionnez {{ +/- _ pour indiquer une augmentationou une
rCductionde tempCrature. La modificationdetempCratureest
affichc!een haut de 1'Ccran.
6. Appuyezsur la toucheEnter (Entre0ou attendezpendanttrois
secondespour valider le changement.
7. Appuyezsur latouche Setup pour quitter le menu.
II n'est pas nCcessairede rCajusterlatempc!raturedu four en casde
panneou d'interruption de courant.
LostempCraturesde cuissonau gril et de nettoyagene peuventpas
6tre ajustCes.
2081240 V
Pouram_liorerles r_sultatsIorsquevousutilisez la cuissonau four,
le four peut 8tre r_gl6 pourfonctionner _ 240V ou 208V, selon le
circuit de votre maison.
Pour regler le four _ 208 V :
1. Appuyezsur la toucheSetup.
2. Appuyezsur la %che pour faire driller I'_!cran.
3. %lectionnez 208/240V.
/ Setup
On / Off,
,\ /
4. SClectionnez208V ou 240V D I'aidedestouches rapides.
5. Appuyezsur la toucheEnter pour validerle changement.
6. Appuyezsur latouche Setup pour quitter le menu.
61
Signaux sonores (bips)
Vous pouvezajuster levolumeet le nombre de bipsentendus a la fin
de la cuissonet du dc!comptede la minuterie.
Pour ajuster les hips :
/, ......
1. Appuyezsur latouche Setup (R6glage). / Setup '
2. Appuyezsur lafl_che pour faire driller 1'6cran. On / Off /
3. SelectionnezSIGNAU× SONOR.
Pour modifier les hips euteudus _ la fin
de la cuisson :
1. Suivezlesc!tapes1 a 3 de la section<<Signauxsonores_ ci-dessus.
2. S61ectionnezSIGNAU× CUISS.
3. Appuyezsur lafl_che pour faire ddiler 1'6cran.
4. S_lectionnez1=30 MIN pour entendreun bip a toutes los 30
secondes.
OU
S61ectionnez1=60 MIN pour entendreun bip a toutes los 60
secondes.
OU
S61ectionnez1 BIP pour entendreun soul hip _ la fin de la
CUiSSOil.
5. Appuyezsur latouche Setup pour quitter le menu.
Pour modifier los sonneries de la miuuterie :
1. Suivezlesc!tapes1 a 3 de la section<<Signauxsonores_ ci-dessus.
2. SelectionnezSIGNAUX MINUTE
3. Appuyezsur lafl_che pour faire ddiler 1'6cran.
4. S61ectionnez2=30 MIN pour entendredeux bips a toutes los30
secondes.
OU
S61ectionnez2=60 MIN pour entendredeux bips a toutes los60
secondes.
OU
S61ectionnez1 BlElEP[Bip) pourentendre un soul hip _ la fin de
ladurc!erc!gk!e. _..................
Setup
5. Appuyezsur latouche Setup pour quitter le menu. On / Off /
Pour modifier le volume des hips : ..............................
1. Suivezlesc!tapes1 a 3 de la section_Signauxsonores>7ci-dessus.
2. Appuyezsur lafl_che pour faire ddiler 1'6cran.
3. S61ectionnezVOLUME
4. S61ectionnez14AUTpour le volumele plus c!le%.
OU
S61ectionnezMOYIENpour un volumemoyen.
OU
S61ectionnezBAS pour le volume le plus bus.
5. Appuyezsur latouche Setup pour quitter le menu.
Arret automatique 12 heures
Lefour s'arr_teautomatiquementapr_s 12heuress'il est
accidentellementlaiss6en marche.
62
Pour desactiver cette caract_ristique :
1. Appuyezsur latouche Setup. Setup
2. Appuyezsur la%the pour faire ddiler 1'6cran. \On / Off/
3. S61ectionnezARRlETAUT 12 H.
3. S61ectionnezMARCHIEou ARRlETa I'aidedestouches rapides.
4. Appuyezsur latouche Setup pour quitter lemenu.
_:conomie d'energie
Pourc!conomiserI'c!nergie,I'afficheur peut 6tre rc!gl6pour s'c!teindre
Iorsqu'il n'est pus enfonction.
Pour r_gler ia caract_ristique
d'_conomie d'_uergie :
1. Appuyezsur latouche Setup.
2. Appuyezsur la%che pour faire ddiler I'_cran.
3. S61ectionnezECONOM ENERGllE.
/
i Setup
On/Off '
4. S61ectionnezMARCHIEou ARRlETa I'aidedestouches rapides.
5. Appuyezsur latouche Setup pour quitter lemenu.
Appuyer sur n'importequelletouche pour r6activerI'afficheur.
Sewice & la clientele
Cettezonedu r6gulateurdefour affiche le numSrosansfrais du
servicea la clienteleJenn-Air.
1. Appuyezsur latouche Setup. " Setup
On/Off
2. Appuyezsur laflSche pourfaire ddiler I'_cran. ..........
3. S_lectionnezENTRIETllEN.
4. Appuyezsur latouche Setup pour quitter lemenu.
Demonstration
Sivous s_lectionnezla d_monstration,vousverrez unecourte
presentationdes caract@ristiquesprincipalesde votre nouvelle
cuisini_reJenn-Air.
/, .........
1. Appuyezsur latouche Setup. Setup
2. Appuyezsur la%che pour faire ddiler I'_cran. ',,On/Off'
......... /
3. S_lectionnezDIEMO.
4. S_lectionnezMARCHIEou ARRlETa I'aidedestouches rapides.
5. Appuyezsur latouche Setup pour quitter lemenu.
ACCESSO|RES
Wok _leetrique ou _ gaz en aecesseire - Med_le A0142
Id_!alpour la cuisson_ la vapeur,saute!e,brais_eou a I'_!tuv_e.Le
wok poss_deun fini anti-adh_sif,des poign_!esen bois,un
couvercle,une grille pour cuissona la
vapeur,desspatules_ riz et une brochure
deconseilsde cuisson. Le wok _ fond plat
peut _tre utilis_sur TOUSlos modules.

ARANTIE ET SERVICE
Ne sont pas couverts par ces garanties :
1. Lesdommagesou d6rangementsdus _ce qui suit :
a. Installation,livraisonou entretieneffectuds incorrectement.
b. Touterdparation,modification,altdrationet tout r_glage nonautoris6spar
lelubricant ou par un prestatairedeserviceapr_s-venteagrc!6.
c. Mauvaisemploi, emploi abusif,accidents,usage non raisonnable,ou catastrophe
naturelle.
d. Alimentation dlectrique (tension,intensitd) incorrecte.
e. R_glageinappropri6de toute commande.
2. Lesgarantiesne peuvent 6tre honor6essi les num6rosde s6ried'origine ont €!t6
enlev6s,modific!sou ne sont pasfacilementlisibles.
3. Lesampoules.
4. Lesproduits achet6sa desfins commercialesou industrielles.
5. Lesfrais de d@annageou de visite pour :
a. Correctiond'erreursd'installation.
b. Initiation de I'utilisateura I'emploide I'appareil.
c. Assurerle transport de I'appareiljusqu'_ I'entreprisedeserviceapr_s-venteet
son retour.
6. Dommagesindirectsou accessoiressubis par toute personne_ la suite d'une
quelconqueviolation des garanties.
Certains6tats ou provincesnepermettentpas I'exclusionou la limitation de responsabilitd
ence qui concerne les dommagesdirectsou indirects.L'exclusionci-dessuspeut en
cons6quencenepas s'appliquer_ votre cas.
Si vous avez besoin d'aide
Consultezd'abord lasection sur le d@annagedu manueld'utilisation et d'entretien ou
appelezle service_ la clientele de Maytag,LLC,soci6t6 a responsabilitdlimit6e,Servicea la
clientSledeJenn-Air au 1-800-JENNAIR(1-800-536-6247)aux Etats-Uniset au Canada.
Pour obtenir un service en vertu de la garantie
PourIocaliserune agenceagrd6ede serviceapr_s-ventedansvotre r6gion,prenez
contactavec le d6taillantoQvous avezachet6 I'appareil;ou appelezMaytagServices,
LLC,soci6tda responsabilitdlimit(_e,Servicea la clientele deJenn-Air.Si le service
obtenuen vertu de la garantie ne vous satisfait pas,veuilleztdl(_phonerou _crire a :
MaytagServices,LLC,soci6tda responsabilitdlimit6e
I'attentiondu CAIR:" Center
P.O.Box2370,Cleveland,TN37320-2370ETATS-UNIS
Etats=Uniset Canada : I=SO0=JENNAIR(1=800=536=62b,7)
Remarque : Lorsde tout contact aupr_sde MaytagServices,LLC,socidt6
responsabilitc!limit6e,servicea laclientSlede Jenn-Air concernantun probl_me,
veuillezfournir [information suivante:
a. Vos nora, adresse et numdro de tall@hone ;
b. Les num6ros de module et de s6rie de votre appareil ;
c. Le nora et I'adresse du ddtaillant et [a date d'achat de I'appareil ;
d. Une description claire du problSme observ6 ;
e. Une preuve d'achat.
Lesguides d'utilisation,les manuelsde serviceet les renseignementssur lespi_cessont disponiblesaupr_sde MaytagServices,LLC,
cidt6 _ responsabilit6limitc!e,Service_ la clientSlede Jenn-Air.
63
ESTUFAEL¢CTRICA DESLIZANTE DE CORRIENTE
DESCENDENTE JENN-AIR - CUBIERTA LiSA
____i_i_i_i_i_i_i_i_i_i_i_i_i_i_i_i_i_i_i_i_i_i_i_i_i_i_i_i_i_i_i_i_i_i_i_i_i_i_i_i_i_i_i_i_i_i_i_i_i_i_i_i_i_i_i_i_i_i_i_i_i_i_i_i_i_i_i_i_i_i_i_i_i_i_i_i_i_i_i_i_i_i_i_i_i_i_i_i_i_i_i_i_i_i_i_i_i_i_i_i_i_i_i_i_i_i_i_i_i_i_i_i_i_i_i_i_i_i_i_i_i_i_i_i_i_i_iiiiiiiiiiiiiiiiiiiiiiiiiiiiiiiiiiiiiiiiiiiiiiiiiiiiiiiiiiiiiiiiiiiiiiiiiiiiiiiiiiiiiiiiiiiiiiiiiiiiiiiiiiiiiiiiiiiiiiiiiiiiiiiiiiiiiiiiiiiiiiiiiiiiiiiiiiiiiiiiiiiiiiiiiiiiiiiiiiiiiiiiiiiiiiiiiiiiiiiiiiiiiiiiiiiiiiiiiiiiiiiiiiiiiiiiiiiiiiiiiiiiiiiiiiiiiiiiiiiiiiiiiiiiiiiiiiiiiiiiiiiiiiiiiiiiiiiiiiiiiiiiiiiiiiiiiiiiiiiiiiiiiiiiiiiiiiiiiiiiiiiiiiiiiiiiiiiiiiiiiiiiiiiiiiiiiiiiiiiiiiiiiiiiiiiiiiiiiiiiiiiiiiiiiiiiiiiiiiiiiiiiiiiiiiiiiiiiiiiiiiiiiiiiiiiiiiiiiiiiiiiiiiiiiiiiiiiiiiiiiiiiiiiiiiiiiiiiiiiiiiiiiiiiiiiiiiiiiiiiiiiiiiiiiiiiiiiiiiiiiiiiiiiiiiiiiiiiiiiiiiiiiiiiiiiiiiiiiiiiiiiiiiiiiiiiiiiiiiiiiiiiiiiiiiiiiiiiiiiiiiiiiiiiiiiiiiiiiiiiiiiiiiiiiiiiiiiiiiiiiiiiiiiiiiiiiiiiiiiiiiiiiiiiiiiiiiiiiiiiiiiiiiiiiiiiiiiiiiiiiiiiiiiiiiiiiiiiiiiiiiiiiiiiiiiiiiiiiiiiiiiiiiiiiiiiiiiiiiiiiiiiiiii_i_i¸¸¸i_!_!
TABLA DE CONTENIDO
Instrucciones importantes sobre seguridad __65-68
InformaciOn sobre los conductos ...............................68
Cuidado y limpieza ....................................................69-71
Mantenimiento ...........................................................71-72
Localizaci0n y soluci0n de averias ......................73-74
Cocci0n en la cubierta .............................................75-78
Cocci0n en el homo .................................................79-85
Opciones .......................................................................86-90
Favo ritos ...............................................................................91
Aj uste .............................................................................92-9/4
Accesorios ...........................................................................9/4
Garantia y servicio ....................................01tima p_gina
JENN-AIR
electrodomestico como resultado de su uso inapropiado.
Utilice este electrodomestico solamente para el prop6sito para
el cual ha sido destinado segQnse describe en esta gu{a.
Para asegurar el funcionarniento correcto y seguro del
electrodorn_stico: El electrodom_stico debe ser instalado
debidamente y puesto a tierra por un tecnico calificado. No
instente ajustar, reparar, realizar servicio o reemplazar
cualquier pieza de su electrodomestico a menos que se
recomiende espedficamente en esta gu{a.Todas las demos
reparaciones deben set hechas por un tecnico calificado.
Siempre desenchufe el electrodomestico antes de realizar
reparaciones.
lnstrucciones generales
|NSTRUCC|
| NIPORTANTES
UR|DAD
Las advertencias e instrucciones importantes sobre seguridad
que aparecen en esta gufa no est_n destinadas a cubrir todas
las posibles circunstancias y situaciones que puedan ocurrir.
Se debe ejercer sentido comt_n, precauci6n y cuidado cuando
se instale, se realice mantenimiento o se haga funcionar el
electrodomestico.
Siempre p6ngase en contacto con el fabricante si surgen
problemas o condiciones que no entienda.
Reconozca los simbolos, advertencias y
etiquetas de seguridad
Lea y siga todas las instrucciones antes de usar este
electrodorn_stico para evitar el riesgo potencial de incendio,
choque electrico, lesiones personales o da_o al
65
Paraverificar si el dispositivo est_ debidamente instalado,mire
debajo de la estufa con una linterna para asegurarse de que
uno de los tornillos niveladores traseros est(Bdebidamente
enganchado en la ranura del soporte. El dispositivo antivuelco
asegura el tornillo nivelador trasero al piso cuando est_
debidamente enganchado. Verifique este dispositivo carla vez
que la estufa sea movida.
Para evitar da os a causa de
un incendio o hurno
Aseg_rese de que se hayan retirado todos losmateriales de
empaque del electrodomestico antes de su uso.
Mantenga el _rea que rodea el eiectrodomestico libre de
materiales combustibles. Los materiales combustibles no
[leben ser almacenados en el interiorde un horno.
Muchos pl_sticos son afectados por el calor. Mantenga los
pl_sticos alejados de las piezas del eiectrodomestico que se
puedan entibiar o calentar.
Paraevitar incendios de grasa, no deje que se acumu[e grasa
de cocinar ni otros materiales inflamables en la estufa o cerca
de ella.
En case de incendio
Apague el electrodom6stico y la campana de ventilaci6n para
evitar esparcir las llamas. Apague las llamas y luego encienda
la campana para expulsar el humo y el olor.
• En la cubierta: Apague el fuego o la llama en una sart6n
con una tapa ouna bandeja de hornear.
NUNCA levante o mueva una sart6n en llamas.
• En el homo: Apague el fuego o la llama del homo cerrando
la puerta del horno.
No use agua en los incendios de grasa. Use bicarbonato de
sodio, un producto qufmico seco o un extinguidor de espuma
para apagar un incendio o llama.
Seguridad para los nifios
NO TOQUE LOS ELEMENTOSCALENTADORESO LAS
SUPERFICIESINTERIORESDEL HORNO. Los elementos
calentadores pueden estar calientes at_ncuando se vean de
color oscuro. Las superficies interiores de cualquier homo se
calientan Io suficiente como para causar quemaduras. Durante
y despu6s del uso, no toque ni deje que la ropa u otros
materiales infiamables entren en contacto con los elementos
calentadores o con las _reas del interior del homo hasta que
se hayan enfriado completamente. Otras superficies del
electrodom6stico pueden calentarse Io suficiente como para
causar quemaduras - entre estas se encuentran las siguientes:
la abertura del respiradero del homo y la superficie cercana a
esta abertura, la puerta del homo y la ventana de la puerta del
horno.
No toque una bombilla de homo caliente con un paso
ht_medoya que se puede romper. Si la bombilla se rompe,
desconecte el suministro el6ctrico al electrodom6stico antes
de retirar la bombilla para evitar un choque el6ctrico.
NUNCA use papel de aNminio para cubrir una parrilh o la
parte inferior del horno. El mal uso puede crear riesgos de
choque el6ctrico, incendio o da_os al electrodom6stico. Use el
papel de aluminio solamente como se indica en esta gufa.
NUNCA deje a los ni_os solos o sin supervisi6n cerca del
electrodom6stico cuando est6 en uso o est6 caliente. Nunca
permita que los nifios se sienten o se paren en ninguna parte
del electrodom6stico pues se pueden lesionar o quemar.
Se le debe ensefiar a los ni_os que el electrodom6stico y los
utensilios que est_n en 61pueden estar calientes. Deje enfriar
los utensilios calientes en un lugar seguro, fuera del alcance
de los ni_os pequefios. Se le debe ensefiar a los ni_os que un
electrodom6stico no es un juguete. No se debe permitir que
los nifios jueguen con los controles u otras piezas del
electrodom6stico.
Informaci6n sobre su
electrodom6stico
Para evitar exporter al usuario a un potencial riesgo y para
evitar dafios al electrodom6stico, no use este
electrodom6stico como calefactor de _rea o para calentar una
habitaci6n. Tampece utilice el homo como _rea de
almacenamiento para alimentos o utensilios de cocina.
No obstruya el fiujo del aire bloqueando el respiradero del
horno.
Informaci6n de seguridad
sobre la cocci6n
Nunca caliente un envase de alimento cerrado en el horno. La
acumulaci6n de presi6n puede hacer que el envase explote y
causar lesiones personales graves o da_os al
electrodom6stico.
Use tomaollas secos y gruesos. Los tomaollas ht_medos
pueden causar quemaduras por vapor. Nunca use pa_os para
secar platos u otros artfculos similares como tomaollas ya que
pueden arrastrarse sobre la superficie caliente de los
elementos y se pueden encender o enredar en las piezas del
electrodom6stico.
Use ropa adecuada. No se debe usar ropa holgada o con
mangas muy largas durante la cocci6n. La ropa podrfa
encenderse y causar quemaduras si la tela entra en contacto
con los elementos calentadores.
Siempre coloque las parrillas del homo en las posiciones
deseadas cuando el homo est6 fifo. Deslice la parrilla hacia
afuera para colocar o retirar alimentos usando tomaollas secos
y gruesos. Siempre evite introducirsus manos en el homo
para colocar o retirar alimentos. Si se debe mover una parrilla
mientras est_ caliente, use un tomaollas seco. No deje que el
tomaollas entre en contacto con el elemento caliente en el
horno.
S61ouse las parrillas en el homo con el cual se adquirieron o
enviaron.
Tenga cuidado cuando abra la puerta del horno. Permita que
el aire o vapor caliente escape antes de retirar o colocar el
alimento.
66 Cont.
ADVERTENCIA SOBRE ALUVlENTO$ PREPARADOS: Siga
las instruccionesdel fabricante. Si un envase de pl_stico con
alimento congelado y/o su tapa se deforman, se comban o se
da_an de alguna manera durante la cocci6n, elimine el
alimento y el envase. El alimento puede estar contaminado.
No permita que el papel de aluminio o la sonda de came
entren en contacto con el elemento calentador.
Siempre apague todos los controles cuando haya terminado
de cocinar.
Inforrnaci6n de seguridad
sobre los utensiiios
Siga las instrucciones del fabricante cuando utilice bolsas para
homear.
El rendimiento y funcionamiento seguro de este
electrodomestico se han comprobado usando utensilios de
cocina convencionales. No use ningQn dispositivo o accesorio
que no haya sido espedficamente recomendado en esta gufa.
No use sistemas de convecci6n incorporados para hornos. El
uso de dispositivos o accesorios que no esten expresamente
recomendados en esta gufa puede crear peligros graves de
seguridad, afectar el rendimiento y reducir la vida _til de los
componentes de este electrodomestico.
Si el utensilio es m_s peque_o que el elemento, una porci6n
del elemento quedar_ expuesta y puede encender la ropa o un
tomaollas.
Solamente ciertos tipos de utensilios de vidrio, vidrio/cer_mico,
cer_mica, gres u otros utensilios vidriados son convenientes
para cocinar en la cubierta o en el homo sin que se quiebren
debido al cambio repentino de temperatura. Siga las
instruccionesdel fabricante del utensilio cuando use vidrio.
Gire las manijas de los utensilios hacia el centro de la cubierta,
no hacia la habitaci6n o sobre otto elemento superior. Esto
reduce el riesgo de quemaduras, de encendido de materiales
infiamables o de derrames si el sart8n es tocado
accidentalmente o alcanzado por ni_os peque_os.
SUPERRCIE DE VIDRIO CERANllCO: NUNCA cocine sobre
una cubierta rota. Si la cubierta de la estufa se rompe, los
agentes de limpieza y los derrames pueden penetrar la
cubierta rota y crear un riesgo de choque electrico. P6ngase
en contacto con un t6cnico calificado inmediatamente.
Ollas freidoras
Seaextremadamente cuidadoso cuando mueva la olla con
aceite o descarte la grasa caliente. Deje que la grasa se enfrie
antes de intentar mover la olla.
Campanas de ventilaci6n
Limpie la campana de ventilaci6n de la estufa y los filtros con
frecuencia para evitar que se acumule grasa u otros
materiales infiamablesen la campana o en el filtro y tambien
para evitar incendios de grasa.
Cuando fiamee alimentos debajo de la campana, encienda el
ventilador.
Informaci6n de seguridad
sobre la limpieza
Limpie la cubierta con cuidado. Apague todos los controles y
espere hasta que las piezas del electrodomestico se enfrfen
antes de tocarlas o limpiarlas. Tenga cuidado si utiliza un paso
o esponja mojada para limpiar derrames en una superficie
caliente para evitar quemaduras por vapor. Algunos
limpiadores pueden producir vapores nocivos si se aplican a
una superficie caliente.
Limpie Qnicamente las piezas que se indican en esta gufa.
Homo autolimpiante
Cubierta
NUNCA deje los elementos superiores sin supervisi6n,
especialmente cuando este usando los ajustes de calor altos.
Un derrame que no reciba la debida atenci6n puede causar
humo y un derrame de grasa puede causar un incendio.
Esteelectrodomestico tiene diferentes tama_os de elementos
superiores. Seleccione utensilios que tengan bases planas Io
suficientemente grandes para cubrir el elemento. La relaci6n
adecuada entre el utensilio y el elemento mejorar_ la
eficiencia al cocinar.
No limpie la junta de la puerta. La junta de la puerta es
esencia[ para obtener un seilado hermetico. Tenga cuidado de
no frotar, daffar o mover la junta.
No use limpiadores o forros para hornos de ningOn tipo dentro
o cerca de ninguna pieza del homo autolimpiante.
67
Aviso y adverntencia
importantes de seguridad
La propuesta 65 de la Ley sobre Seguridad y Contaminaci6n
de[ Agua Potable del estado de California de 1986 (California
Safe Drinking Water and Toxic Enforcement Act of 1986) exige
que el gobernador de California publJque una lista de las
sustancias que segQn el Estado de California causan c_ncer o
daffos al sistema reproductor, y exige que los negocios
adviertan a sus clientes de la exposici6n potencial a tales
sustancias.
Los usuarios de este electrodomestico quedan advertidos de
que cuando el homo est8 en e[ ciclo de autolimpieza, puede
resultar en una exposici6n de bajo nivel a algunas de las
sustancias publicadas, inchyendo el mon6xido de carbono. La
exposici6n a estas sustancias puede set minimizada
ventilando el homo adecuadamente al exterior durante el ciclo
de autolimpieza abriendo las ventanas y/o la puerta de la
habitaci6n donde se encuentra el electrodomestico.
AVISO IMPORTANTE RESPECTO A LOS PAJARO$
DONIESTICOS: Nunca mantenga a los p_jaros dom_sticos
en la cocina o en habitaciones hasta donde puedan Ilegar los
humos de la cocina. Los pSjaros tienen un sistema respiratorio
muy sensible. Los vapores producidos durante el ciclo de
autolimpieza de[ homo pueden ser perjudiciales o mortaies
para los p_jaros. Los vapores que despiden el aceite de
cocina, la grasa y la margarina sobrecalentados y la vajilla
antiadherente sobrecaientada pueden tambien set
perjudiciales.
Conserve estas instrucciones para referencia futura
f
Elsistema de ventiiaci6n Jenn-Air rue diseffado para capturar
el vapor producido durante [a cocci6n y el humo de [a
superficie de [a cubierta. Si el sistema no funciona, verifique
[as siguientes situaciones en [a instalaci6n de los conductos:
• Se deben usar conductos redondos de 15,24cm (6"_ o
rectanguiares de 8,26 cm (3 %"_ x 25,4 cm (1"[} para longi-
tudes de 3 a 18 m (10 a 60 pies).
[mportante: Si [a [ongitud del conducto es de 3 m (10 pies_o
menos, se puede usar un conducto redondo de 12,7cm (5"[}de
di_metro.
• No se deben utJlizar m_s de tres codos de 90°. La distancia
entre los codos debe ser de por 1omenos 45 cm (18"[}.
• Se DEBE usar la tapa de pared Jenn-Air recomendada.
AsegOrese de que el humidificador se mueva libremente
cuando el sistema est6 en funcionamiento.
• Debe haber una distancia m{nima de despeje de 15,24 cm
(6") entre [as cubiertas que sean [nstaiadas cerca de una
pared lateral y la pared.
Si no existen problemas obvios de instalaci6n, puede existir un
problema oculto ta[ como una junta atascada, un conducto
obstruido, etc. La instalaci6n es responsabilJdad del instalador,
y las preguntas deben ser dirigidas a[ mismo en
primer lugar. El instalador debe verificar muy
cuidadosamente las instrucciones de instalaci6n
de los conductos.
• Use [a tar]eta de pruebas de flujo
proporcionada con su electrodomestico para
verificar e( fiujo de aire.
FLOW TESTER
68
CU| Y L|MP|EZA
Homo autolimpiante
6. Limpielos derramesazucaradosy _cidos talescomo los
derramesde batatas,tomato o salsasa basede leche.La
porcelanaes resistenteal _cido,no a pruebadel mismo.El
acabadode porcelanase puededecolorarsi los derrames_cidos
o azucaradosno se limpianantesde un ciclo de autolimpieza.
Para programar la autolimpieza:
1. Oprimala tecla "Clean" (Limpieza_ .............
2. RETPARRILLASse desplegar_.Retirelas parrillas.
3. SeleccioneCONTINUAR usandola tecla r_pida. Lasteclas
r_pidasest_n ubicadasa cada lado de la pantalla del panel de
control.
Elciclo de autolimpiezausatemperaturassuperioresalas
temperaturasnormalesde cocciOnpara limpiarautom_iticamenteel
interior del homo.
4, Seleccioneel nivel de suciedadLEVEintroduciendoel n0mero
200con las teclas numc!ricaspara programardos horas de
limpieza.Seleccioneel nivelde suciedad MED usandolas teclas
r_pidas.
Esnormal ver Ilamaradas,humo o llamas durante elciclo de
autolimpiezasi el homo est_ muysucio. Esmejor limpiar el homo con
regularidaden vezde esperara que haya unaacumulaci6ngrande
de sucioen el homo.
O
Duranteel procesode autolimpieza,ventile bienla cocinapara
deshacersede losolores normalesasociadoscon la limpieza.
Antes de la autolimpieza
1. Apague la luz del homo antesde la autolimpieza.La luz del horno
se puedefundir durante el ciclo de autolimpieza.
2. Retirela asadera,todos los utensiliosy las parrillas del homo.Si
no se retiran del homo,las parrillasse decolorar_ny se deslizardn
con dificultad despu6sdel ciclo de autolimpieza.Importante:
Retirela rejilla de ventilaci6n de la superficie decocci6n antesde
la autolimpieza.
3. Limpieel marco del homo,el marcode _.. / /
la puertay el _rea pot fuera de la junta \
y alrededorde la abertura de la misma
con un limpiadorno abrasivotal como
el "BonAmi"* o detergente y agua. El
procesode autolimpiezano limpia
estas_reas.Lasmismasdebenser
limpiadasparaevitar que el sucio se fije
duranteel ciclo de autolimpieza.(Lajunta es el sello alrededorde
la puertay de la ventanadel homo.)
4. Paraevitardaffos,no limpie o frote lajunta alrededorde la puerta
del homo.La junta est_disefiadapara sellarel calor dentro del
homo durante el ciclo de autolimpieza.
5. Limpieel excesodegrasa o los derramesdel rondodel homo.
Estoevitael humo excesivo,las llamas y lasIlamaradasduranteel
ciclo deautolimpieza.
SeleccioneiNTENSOy cuatro horasde tiempo de limpiezasi el
homo est_ muy sucio.
5. LIMPIEZA,"TIME" _l-iempo),BLOQUEOy el conteoregresivode
la autolimpiezase desplegar_nen pantallamientrasel homo se
limpia.Cuandotermineel tiempode limpiezay la puertatodavia
est6bloqueada,ENFRIAMIENTOaparecer_ien pantalla.
Importante: Elbloqueo de la puertase desenganchar_
aproximadamentetJnahora despuc!sdeque se hayaterminadola
limpieza.ENFRIAMIENTOdesaparecer_de la pantallacuando la
puertadel homo se hayadesbloqueado.
Para diferir un ciclo de autolirnpieza:
1. Oprimala tecla "Clean".
2. RETPARRILLASse desplegar_.Retirelas parrillas.
3. SeleccioneCONTiNUAR usandola tecla r_ipida.
4.
(Clean
.......... /
Seleccioneel nivel de suciedadLEVEintroduciendoel n0mero
200con las teclas num6ricaspara programardos horas de
limpieza.Seleccioneel nivelde suciedad IVIEDusandolas teclas
r_pidas.
O
SeleccioneINTENSOy cuatro horasde tiempo de limpiezasi el
homo est_ muy sucio.
5. La puertase bloquear_i.LIMPIEZA,"TIME" 0-iempo),BLOQUEOy
el conteoregresivode la autolimpiezase desplegar_inen pantalla
6. Despu6sde que la puertase bloquee,optima la tecla "More
Options" (M_s opciones).
7. Seleccione#1FERIRusando la tecla r_pida.
Los nombres de los productos son marcas registradas de sus respectivos fabricantes.
69
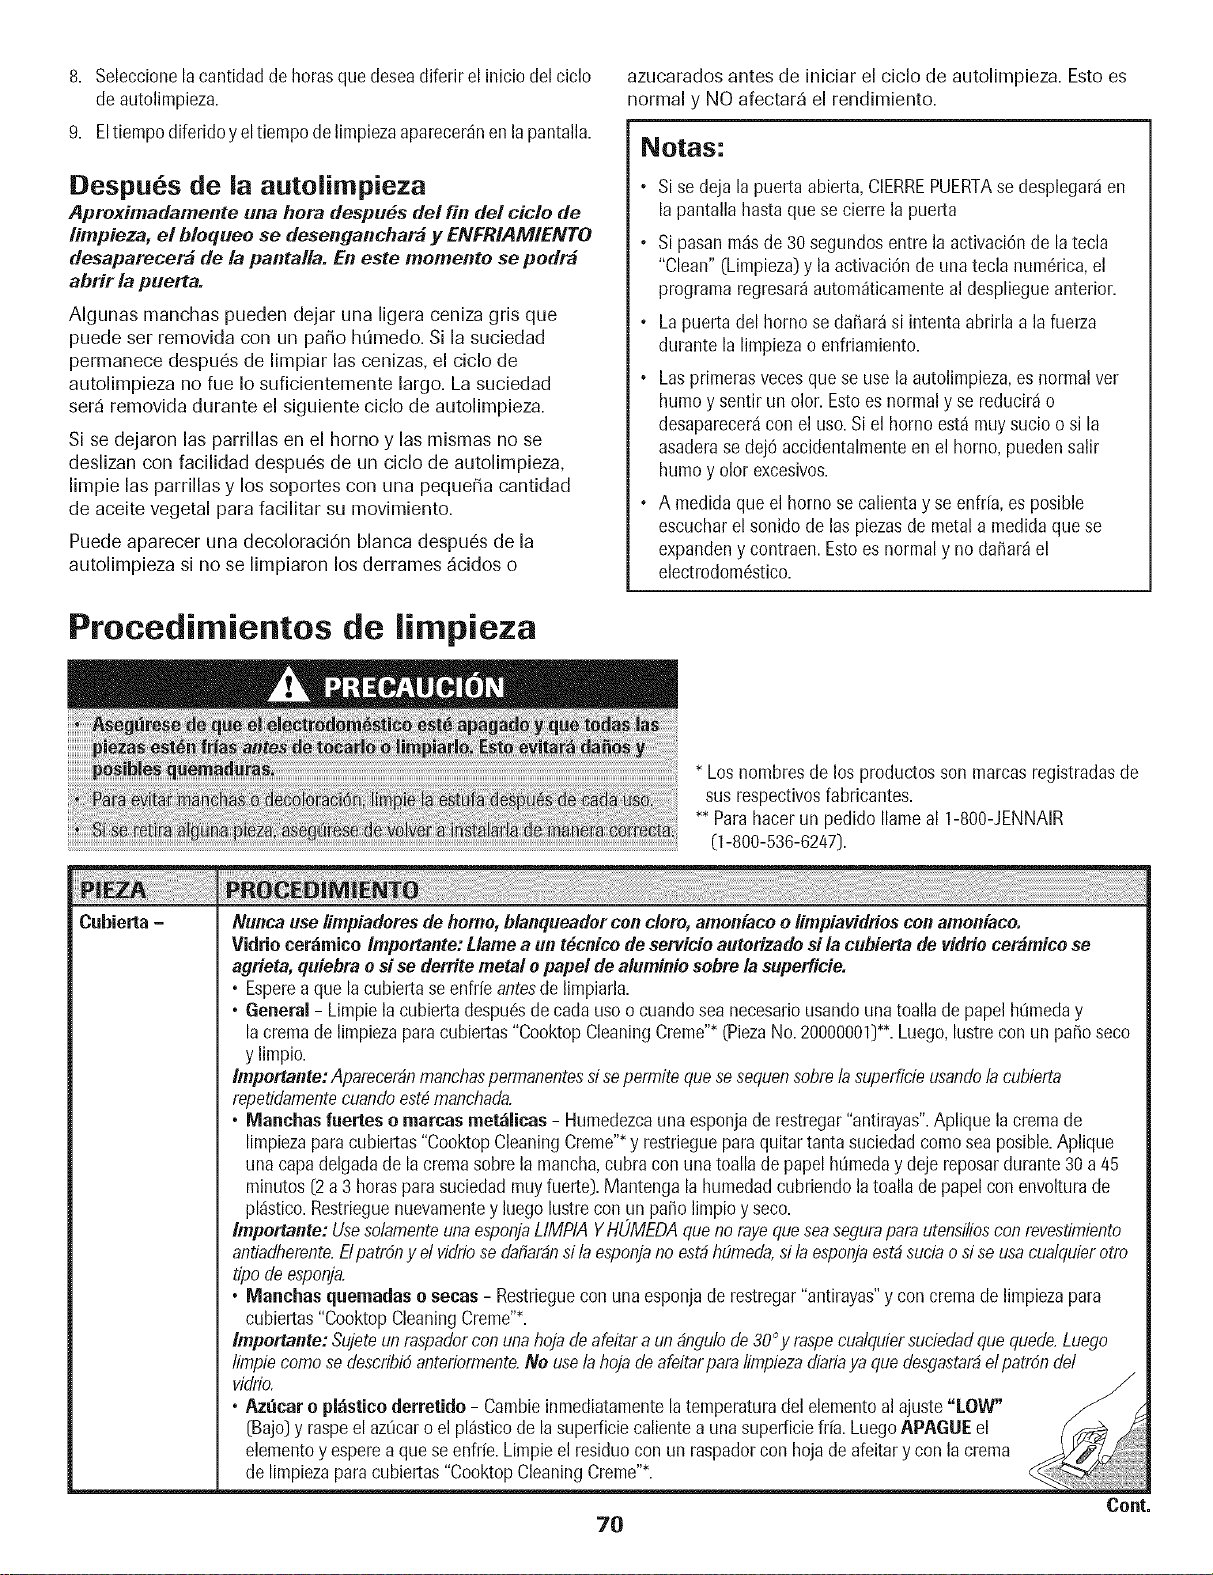
8. Seleccionela cantidadde hornsque deseadiferir el inicio del ciclo
deautolimpieza.
9. Eltiempodiferidoy eltiempode limpiezaaparecer_nen la pantalla.
Despu s de la autolimpieza
Apreximadamente una hera despu_s de/fin de/title de
limpieza, el blequee se desenganchatd y ENFRIAMIENTO
desaparecet_ de la pantal/a. En este memento se pedt_
abrir la puerta.
AIgunas manchas pueden dejar una ligera ceniza gris que
puede ser removida con un paso hQmedo. Si la suciedad
permanece despu6s de limpiar las cenizas, el ciclo de
autolimpieza no rue Io suficientemente largo. La suciedad
ser_ removida durante el siguiente ciclo de autolimpieza.
Si se dejaron las parrillas en el homo y las mismas no se
deslizan con facilidad despu6s de un ciclo de autolimpieza,
limpie las parrillas y los soportes con una peque_a cantidad
de aceite vegetal para facilitar su movimiento.
Puede aparecer una decoloraciOn blanca despu6s de la
autolimpieza si no se limpiaron los derrames _cidos o
Procedimientos de limpieza
azucarados antes de iniciar el ciclo de autolimpieza. Esto es
normal y NO afectar_ el rendimiento.
Notas:
Sise deja lapuerta abierta,CIERREPUERTAse desplegar_ien
la pantallahasta que se cierre la puerta
Sipasan m_sde 30segundos entre la activaciOnde la tecla
"Clean"(Limpieza)y la activaciOnde unatecla num6rica,el
programaregresar_autom_ticamenteal despliegueanterior.
Lapuerta del homo se daffar_si intenta abrirla a la fuerza
durante la limpiezao enfriamiento.
Las primerasvecesquese use la autolimpieza,es normalver
humo y sentir un olor. Estoes normaly se reducir_io
desaparecer_icon el uso.Si el homo est_ muysucio o si la
asaderase dej6 accidentalmenteen el homo, puedensalir
humo y olor excesivos.
A medida que el homo se calientay se enfr[a,es posible
escucharel sonido de Ins piezasde metal a medidaque se
expandeny contraen.Estoes normaly no daffar_el
electrodom6stico.
* Los nombresde los productos son marcasregistradasde
sus respectivosfabricantes.
** Parahacerun pedido Ilameal 1-800-JENNAIR
(1-800-536-6247).
Cubierta -
Nuncause limpiadoresde home, blanqueadorcon cloro,amen[aceo limpiavidriesconamen[ace.
Vidrio cer_mieo Importante:Llame aun t_cnico de servicio autorizadosi la cubierta de vidrio cerbmice se
agrieta, quiebra o si se derrite metal o papel de aluminio sobre la superficie.
* Espereaque la cubiertaseenfrie antesde limpiarla.
. General - Limpiela cubiertadespu6sde cada usoo cuandoseanecesariousandounatoallade papel hQmeday
lacretande limpiezapara cubiertas"CooktopCleaningCreme"*(PiezaNo.20000001)**.Luego,lustrecon un pasoseco
y limpio.
Importante: Aparecer_nmanchaspermanentessi sepermiteque se sequensobre/a superficieusando/a cubierta
repetidamentecuandoest_manchada.
o Manehas faeries o marcas met_licas- Humedezcauna esponjade restregar"antirayas".Apliquela cretande
limpiezapara cubiertas"CooktopCleaningCreme"*y restriegueparaquitar tanta suciedadcomosea posible.Aplique
una capadelgadade la cretansobre la mancha,cubracon unatoalla depapel h_meday deje reposardurante30a 45
minutos[2 a 3 hornsparasuciedadmuy fuerte).Mantengala humedadcubriendola toalla depapel con envolturade
pl_istico.Restrieguenuevamentey luegolustrecon un paso limpio y seco.
Importante- Usesolamenteuna esponjaLIMPIA YHOMEDAque norayequeseasegurapara utensilioscon revestimiento
antiadherente.ElpatrSny d vidriose daflar#nsi laesponjano est#hEimeda,si la esponjaest_suciaosi se usacualquierotto
tipo de esponja.
. Manchas quemadas o seeas - Restrieguecon unaesponjade restregar"antirayas"y con cremade limpiezapara
cubiertas"CooktopCleaningCreme"*.
Impertante: Sujeteunraspadorcon unahoja de afeitara un#ngulode 30°y raspecualquiersuciedadquequede.Luego
limpiecomo sedescribi6anteriormente.No uselahojade afeitarparalirnpiezadiariaya quedesgastar#elpatrSndel
vidrio.
. Az_ear o pl_stieoderretido - Cambieinmediatamentelatemperaturadel elementoal ajuste"LOW"
[Bajo]y raspeel az_caro el pl_sticode la superficiecalientea unasuperficiefr[a. LuegoAPAGUEel
elementoy esperea quese enfrie.Limpieel residuocon un raspadorcon hojade afeitar y con la cretan
de limpiezaparacubiertas"CooktopCleaningCreme"*.
Cont.
70
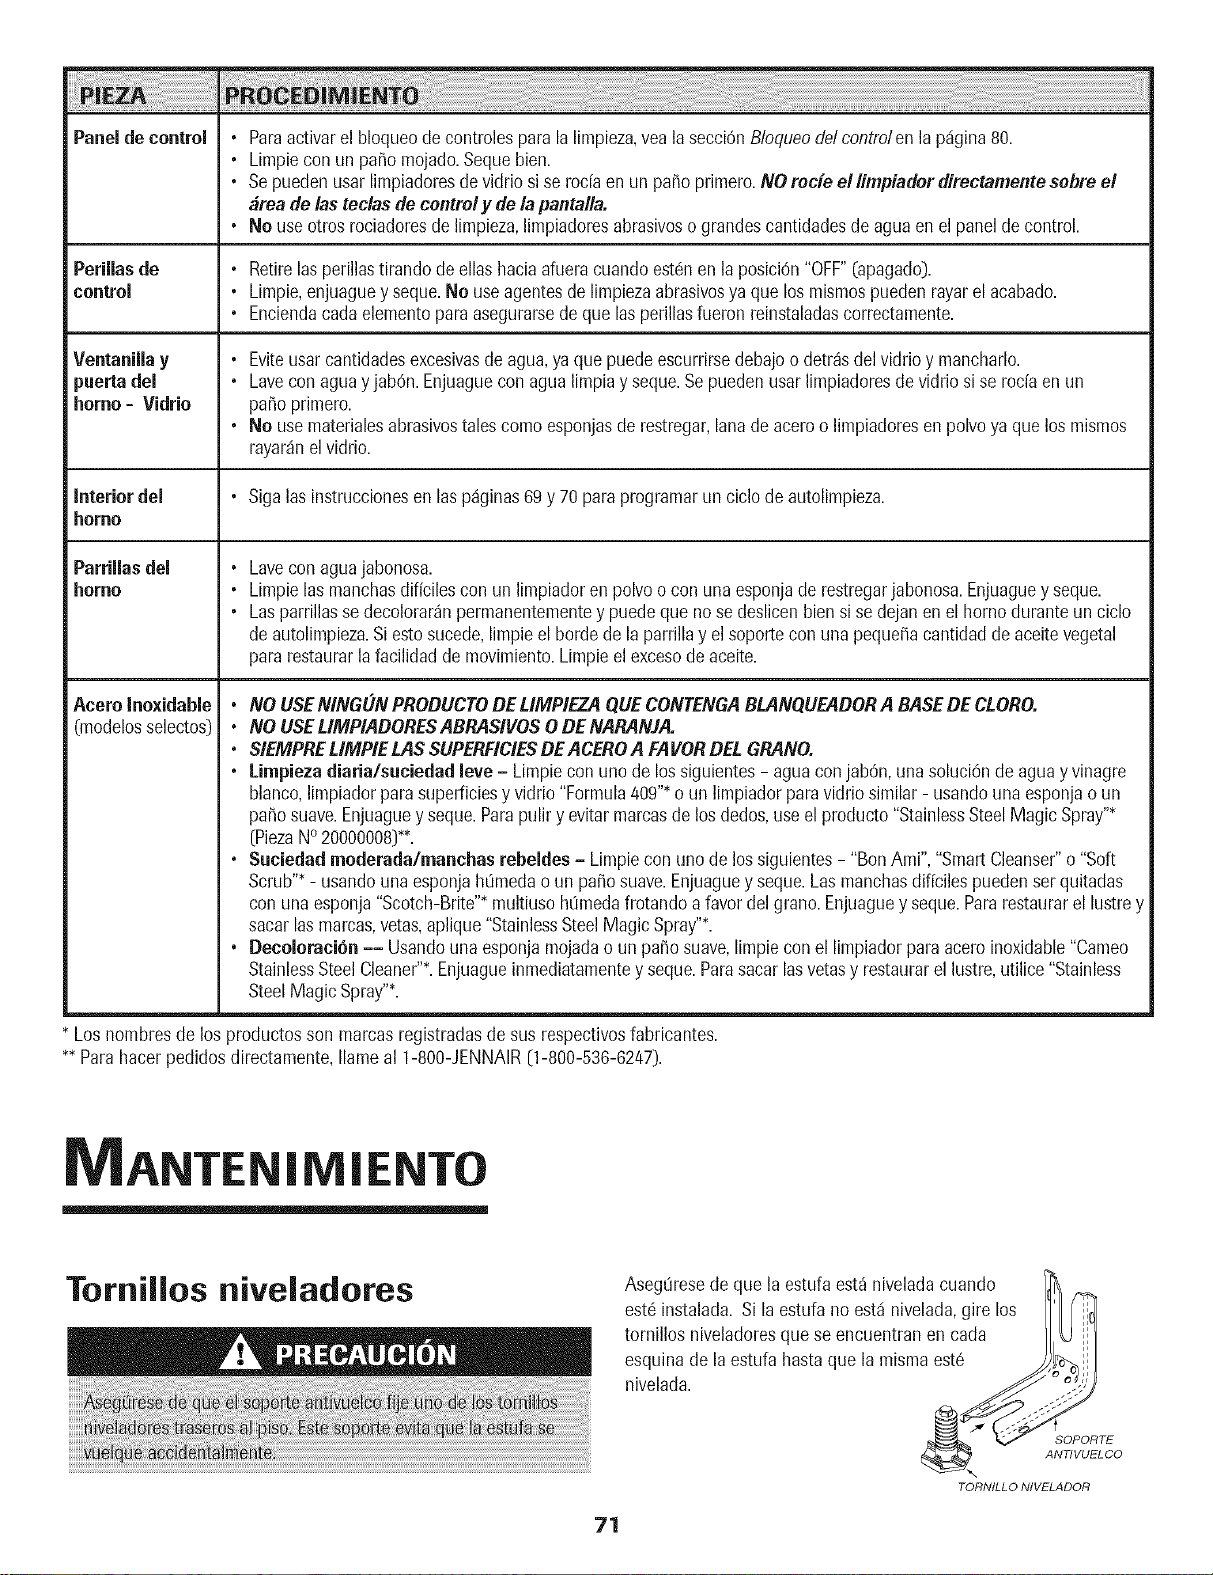
_i!ii_i!i_!i_!_!i!i!i!i!i!i!_i_!!_i_!_!i_!i_!i_!i_!i_!i_!i_!i_!i_!i_!i_!i_!i_!i_!i_!i_!i_!i_!i_!i_!i_!i_!i_!i_!i_!_!iii!i_i!!!!!i!Pli_i_!_iiEii_ii!ii!ii_!!i iiiiilEi_ilTii_!i !!ii!ii!i!!ii!ii!iiiiiiiiiiiiiiiiiiiiiiiiiiiiiilii_ii_ii_ii_ii_ii_ii_ii_ii_ii_ii_ii_ii_ii_ii_ii_ii_ii_ii_ii_ii_ii_ii_ii_i_i_ii_ii_ii_ii_ii_ii_ii_ii_ii_ii_ii_ii_ii_ii_iiiiiiiiiiiiiiiiiiiiiiiiiiiiiiiiiiiiiiiiiiii!i!i!i!i!i!i!i!i!iiiiiiiiiiilliiiiiiiiiiiiiiiiiiiiiilli__i__i__i__i_iii_i_iii____i_i_i_ii_ii_iiiiii_i_i_i_i_i_i_i_i_i!i!i!i!i!i!i!i!i!i_i_iiiiiiiiiiiiiiiiiiiiiiiiiiiiiiiiiiiiiiiiiiiiiiiiiiiiiiiiiiiiiiiiiiiiiiiiiiiiiiiiiiiiiiiiiiiiiiiiiiiiiiiiiiiiiiiiiiiiiiiiiiiiiiiiiiiiiiiiiiiiiiiiiiiiiiiiiiiii_iiiiiiiiiii_i_i_i_i__________!_!_!_!_!i!!!!i!i!i!i!iiiii!i!ii!ii!iiiiiiiiiiiiiiiiiiiiiiiiiiiiiiiii!i!i!i!i!i!i!i!i!iili!i!i!i!i!i!i!i!iiiiiiiiiiiiiiiiiiiiiiiiiiiiiiiiiiiiiiiiiiiiiiiiiiiiiiiiiiiiiiiiiiiiiiiiiiiiiiiiiiiiiiiiiiiiiiiiiiiiiiiiiiiiiiiiiiiiiiiiiiiiiiiiiiiiiiiiiiiiiiiiiiiiiiiiiiiiiiiiiiiiiiiiiiiiiiiiiiiiiiiiiiiiiiiiiiiiiiiiiiiiiiiiiiiiiiiiiiiiiiiiiiiiiiiiiiiiiiiiiiiiiiiiiiiiiiiiiiiiiiiiiiiiiiiiiiiiiiiiiiiiiiiiiiiiiiiiiiiiiiiiiiii!ii!iiiiiiiiiiiiiiiiiiiiiiiiiiiiiiiiii!i!i!i!i!i!i!i!i!iiiiiiiiiiiiiiiiiiiiiiiiiiiiiiiiiiiiiiiiiiiii________________________________________________________________________________________________________________________________________________________________________________________________________________________
Panelde control • Paraactivarel bloqueode controlesparalalimpieza,vea lasecci6nBloqueodelcontrolen lap_igina80.
• Limpiecon un paso mojado.Sequebien.
• Sepuedenusar limpiadoresde vidriosi se roc[aen un paso primero.NO recie el limpiader directamente sebre el
#tea de las teclasde controly de lapantalla.
• No useotros rociadoresde limpieza,limpiadoresabrasivoso grandescantidadesde aguaen el panelde control.
Perillasde • Retirelas perillastirando de eliashaciaafueracuandoestdnen la posici6n"OFF"(apagado).
control • Limpie,enjuaguey seque.No useagentesde limpiezaabrasivosya quelos mismospuedenrayarel acabado.
• Enciendacada elementoparaasegurarsede que las perillasfueron reinstaladascorrectamente.
Ventanillay • Eviteusarcantidadesexcesivasde agua,yaque puedeescurrirsedebajoo detr_sdel vidrioy mancharlo.
puertadel • Lavecon aguay jab6n.Enjuaguecon agua limpiay seque.Sepuedenusarlimpiadoresde vidriosi se roda en un
homo = Vidrio paso primero.
• No use materialesabrasivostalescomo esponjasde restregar,lanadeaceroo limpiadoresen polvoya que los mismos
rayar_nel vidrio.
interiordel • Siga lasinstruccionesen laspdginas69y 70 para programarun ciclo de autolimpieza.
homo
Parrillasdel • Lavecon aguajabonosa.
homo • Limpie lasmanchasdiffcilescon un limpiadoren polvoo con unaesponjade restregarjabonosa.Enjuaguey seque.
• Lasparrillasse decolorar_npermanentementey puede quenose deslicenbiensi se dejan enel homo duranteun ciclo
de autolimpieza.Si estosucede,limpieel horde de la parrillay el soportecon unapeque_acantidadde aceitevegetal
pararestaurarla facilidaddemovimiento.Limpieel excesode aceite.
Acero InoxidaMe • NO USENING(IN PRODUCTODE LIMPIEZA QUECONTENGABLANQUEADORA BASEDE CLORO.
(modelosselectos) • NO USELIMPIADORESABRASIVOSO DE NARANJA.
• SIEMPRELIMPIE LASSUPERFICIESDEACEROA FAVORDEL GRANO.
• Limpiezadiaria/suciedadlove - Limpiecon unode los siguientes- agua conjab6n, una soluci6nde aguay vinagre
blanco,limpiadorpara superficiesy vidrio"Formula409"*o un limpiadorparavidrio similar- usandouna esponjao un
paso suave.Enjuaguey seque.Parapuliry evitar marcasde los dodos,use elproducto "StainlessSteelMagicSpray"*
(PiezaNO20000008)**.
• Suciedad moderada/manchas rebeldes - Limpiecon uno de lossiguientes- "BonAmi","SmartCleanser"o "Soft
Scrub''*- usandouna esponjah_medao un pasosuave.Enjuaguey seque.Lasmanchasdificiles puedenserquitadas
con una esponja"Scotch-Brite"*multiusohOmedafrotandoa favordelgrano.Enjuaguey seque.Pararestaurarel lustrey
sacarlasmarcas,vetas,aplique "StainlessSteelMagicSpray"*.
• Decoloraci6n=- Usandouna esponjamojadao unpaso suave,limpiecon el limpiadorpara aceroinoxidable"Cameo
StainlessSteelCleaner"*.Enjuagueinmediatamentey seque.Parasacarlasvetasy restaurarel lustre,utilice"Stainless
SteelMagic Spray"*.
Loshombres de los productosson marcasregistradasde sus respectivosfabricantes.
•* Parahacer pedidosdirectamente,Ilameal 1-800-JENNAIR[1-800-536-6247).
ANTEN|M
Tornillos niveladores
Asegt_resede que la estufaest_ niveladacuando
est6instalada. Si laestufa no estdnivelada,sire los
tornillos niveladoresque se encuentran en cada
esquinade la estufa hastaque la mismaest6
nivelada. _,_ SOPORTE
ANTIVUEL CO
TORNILLO NIVELADOR
71
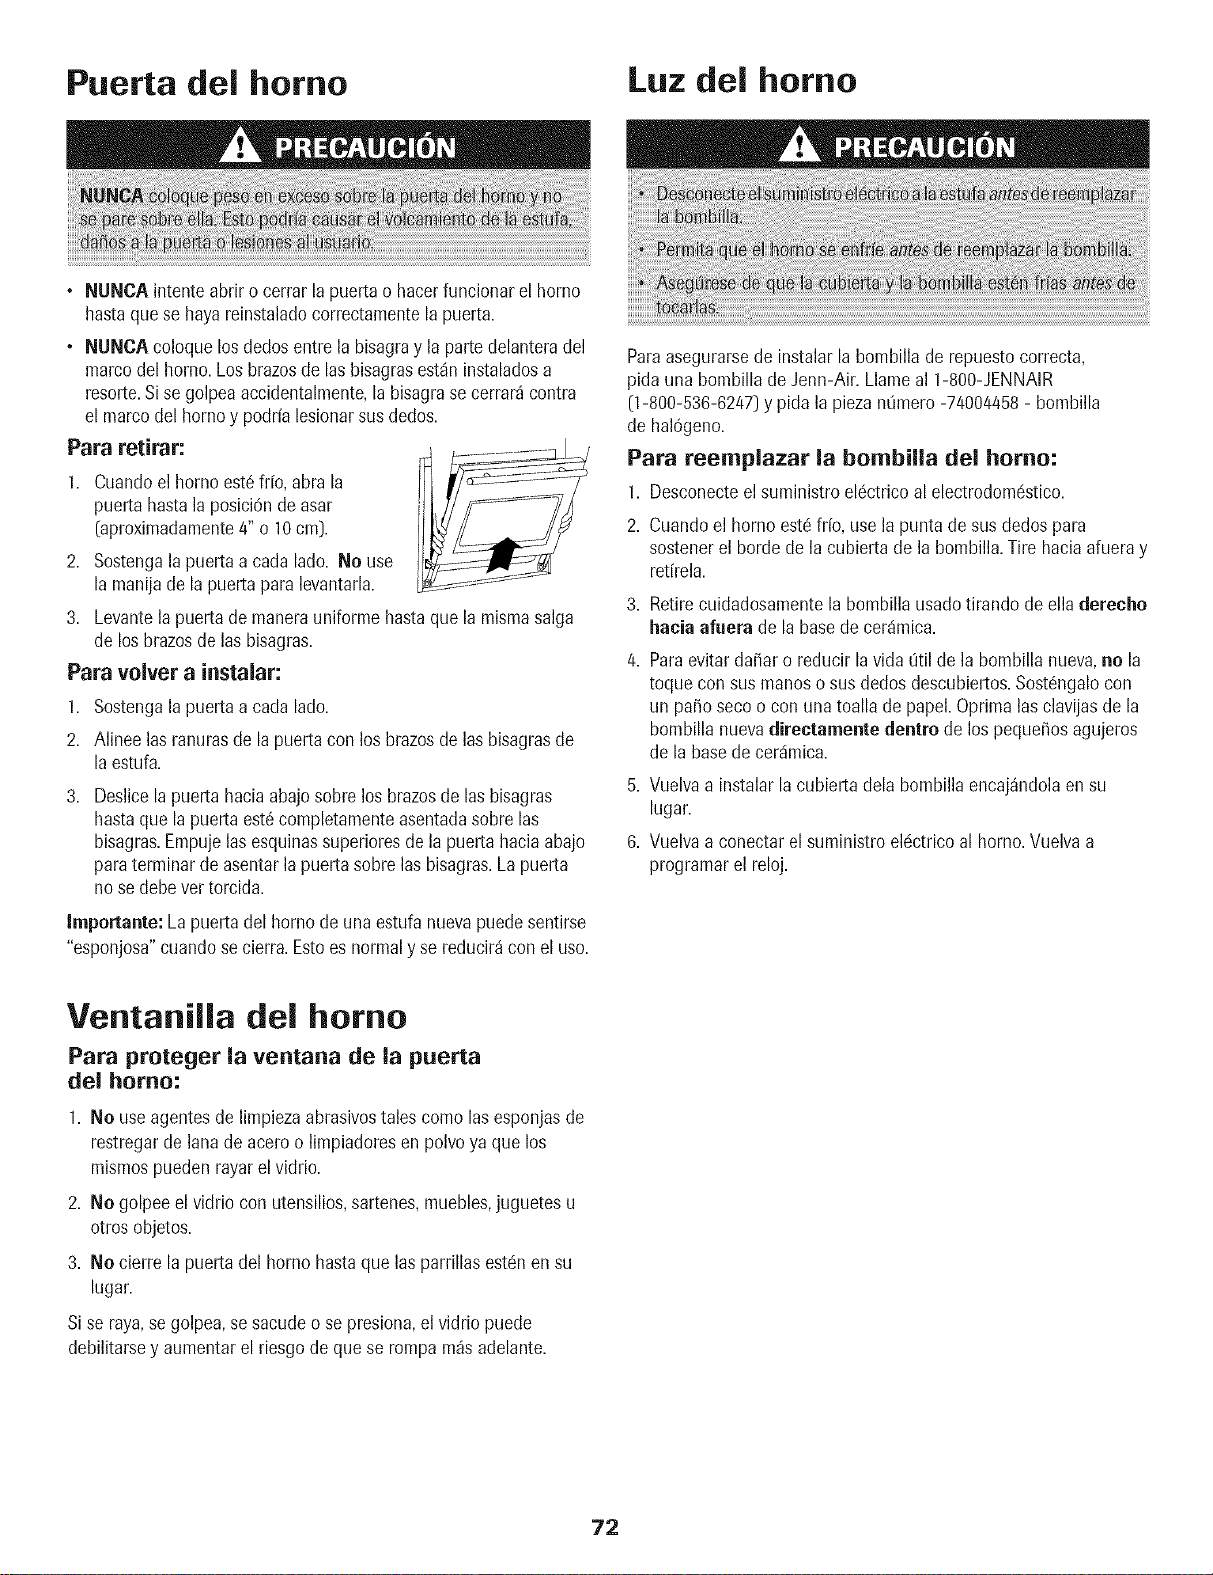
Puerta del homo Luz del homo
• NUNCA intenteabrir o cerrar la puertao hacerfuncionarel homo
hastaqua se hayareinstaladocorrectamentela puerta.
• NUNCA coloque losdedosentre la bisagray la partedelanteradel
marcodel homo. Los brazosde las bisagrasestdninstaladosa
resorte.Si se golpea accidentalmente,la bisagrase cerrar_contra
el marcodel homoy podria lesionarsusdedos.
Para retirar:
1. Cuandoel homo est6fr[o, abrala
puerta hastala posiciOnde asar
[aproximadamente4" o 10 cm).
2. Sostengala puertaa cada lado. No use
la manijade la puerta paralevantarla.
3. Levantelapuerta de manerauniforme hastaquala mismasalga
de los brazosde las bisagras.
Para velvet a instalar:
1. Sostengala puertaa carla lado.
2. Alinee las ranurasde la puertacon losbrazosde las bisagrasde
la estufa.
Deslicela puerta haciaabajosobrelos brazosde las bisagras
hastaqua la puertaest6 completamenteasentadasobre las
bisagras.Empujelasesquinassuperioresde la puertahacia abajo
paraterminarde asentarla puertasobre las bisagras.La puerta
no sedebe ver torcida.
Importante: Lapuertadel homo de una estufanuevapuedesentirse
"esponjosa"cuandose cierra.Estoes normaly se reducir_con el uso.
Paraasegurarsede instalar labombilla de repuestocorrecta,
pida una bombillade Jenn-Air. Llamaal ]-800-JENNAIR
(1-800-536-6247)y pida la piezan0mero -74004458- bombilla
de halOgeno.
Para reemplazar la bombilla del homo:
1. Desconecteel suministroel6ctricoal electrodomdstico.
2. Cuandoel homo estc!fifo, usela punta de susdedos para
sostenerel horde de la cubiertade la bombilla.Tire hacia afueray
ret[rela.
3. Retirecuidadosamentela bombillausadotirando deella derecho
hacia afuera de la basede cer_mica.
Paraevitarda_ar o reducir la vida 0til de la bombilla nueva,ne la
toque con sus manoso sus dedosdescubiertos.Sost6ngalocon
un paso secoo con una toalla de papal.Oprimalas clavijasde la
bombillanuevadirectamente dentro de los peque_osagujeros
de la basede cer_imica.
5. Vuelvaa instalar la cubiertadela bombillaencaj_ndolaen su
lugar.
6. Vuelvaa conectarel suministro elc!ctricoal homo.Vuelvaa
programarel reloj.
Ventanilla del homo
Para proteger la ventana de la puerta
del homo:
1. No use agentesde limpiezaabrasivostalescomo las esponjasde
restregarde lana deacero o limpiadoresen polvoya qua los
mismospuedenrayar elvidrio.
2. No golpeeel vidrio con utensilios,sartenes,muebles,juguetes u
otrosobjetos.
3. No cierre la puerta del homo hastaqua las parrillasestc!nen su
lugar.
Si se raya,se golpea,se sacudeo se presiona,el vidrio puede
debilitarsey aumentarel riesgode qua se rompa m_s adelante.
72
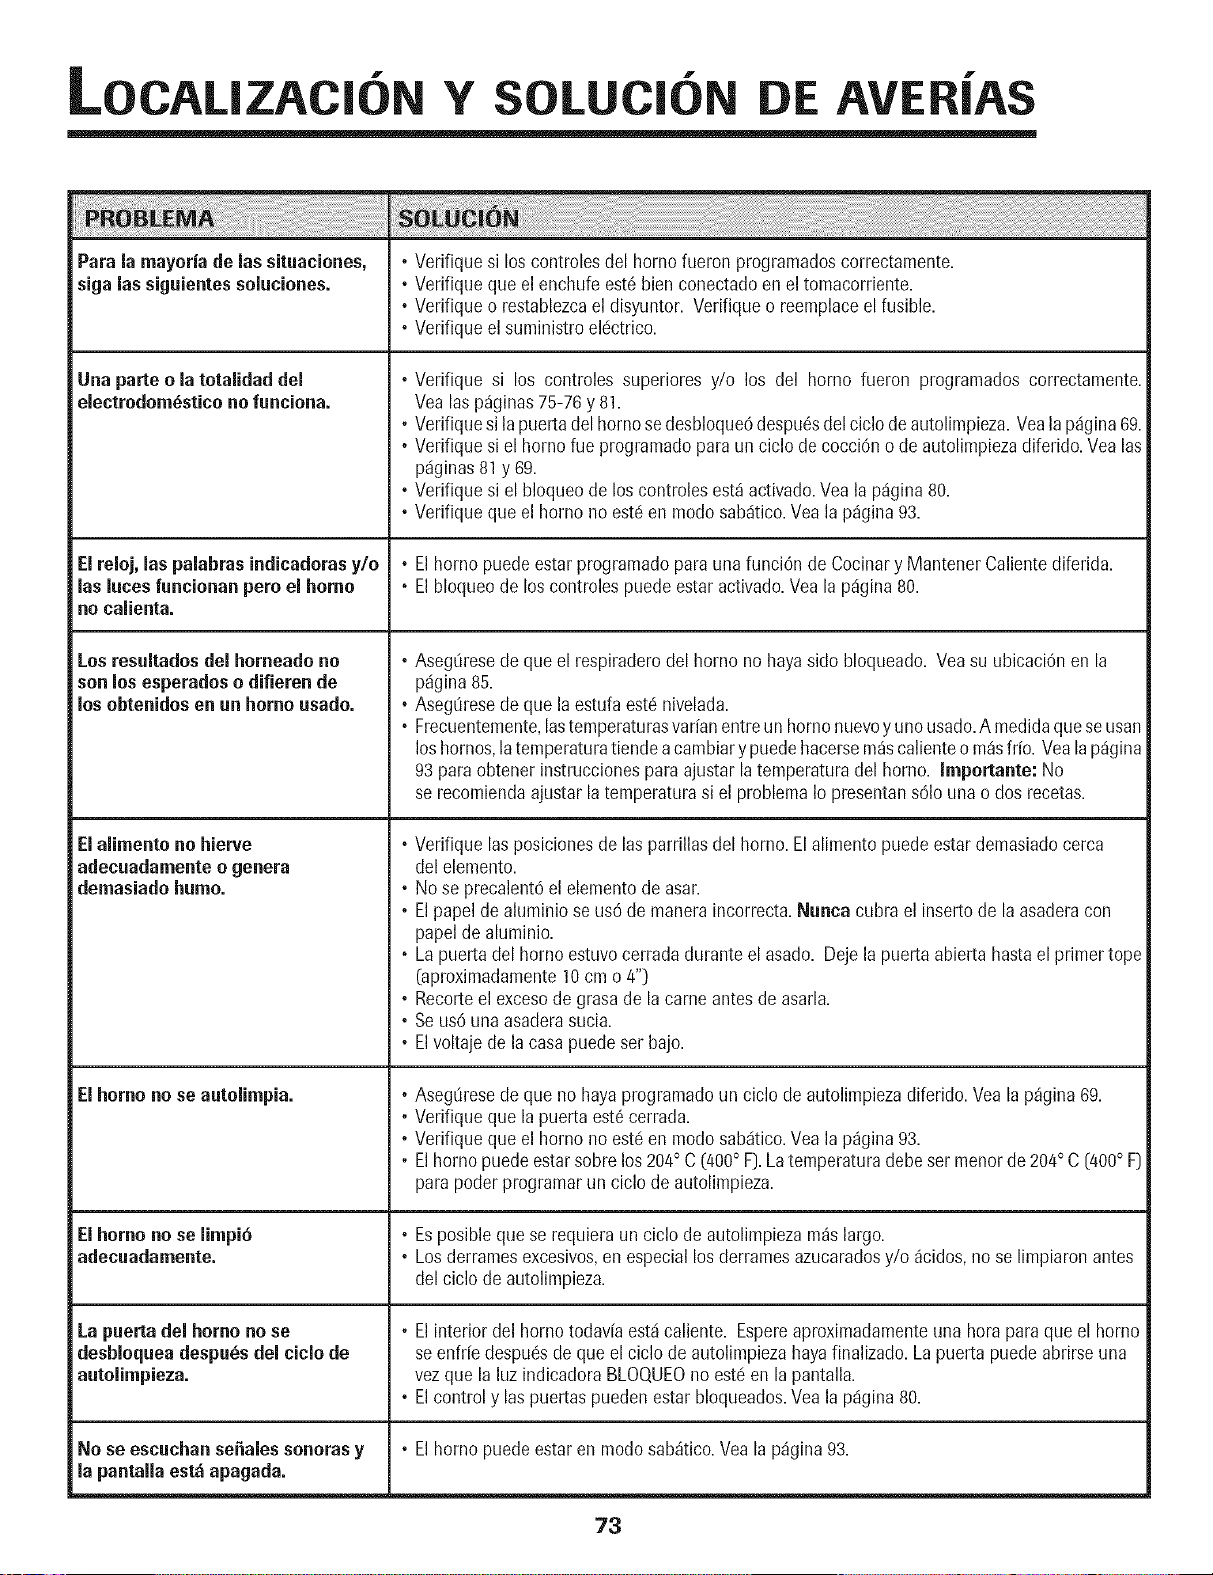
I-OCAL|
Y LU DE
Para la mayeria de las situacienes, • Verifiquesi los controlesdel homo fueron programadoscorrectamente.
siga las siguientes selucienes. • Verifiqueque el enchufe est6 bien conectadoen el tomacorriente.
, Verifiqueo restablezcaeldisyuntor. Verifiqueo reemplaceel fusible.
, Verifiqueel suministro ek!ctrico.
Una parte e la totalidad del
electredem_stice no fanciena.
El relej, las palabras indicadoras y/e
las luces funcienan pete el home
no calienta.
Losresultades del herneado no
sen los esperades o difieren de
losebtenides en un home usade.
Eialimente no hierve
adecuadamente e genera
demasiade hume.
El home no se aatelimpia.
Elherne no se limpi6
adecuadamente.
La puerta del home no se
desblequea despa_s del ciclo de
autolimpieza.
Nose escuchanse[=alessonorasy
la pantalla est_ apagada.
, Verifique si los controles superiores y/o los del homo fueron programados correctamente.
Vealas p_ginas75-76 y 81.
° Verifiquesi la puertadelhomo sedesbloque0despu6sdel ciclo deautolimpieza.Vealap_igina69.
° Verifiquesi el homo rueprogramadopara un ciclo decocciOno de autolimpiezadiferido.Vealas
p_iginas81y 69.
, Verifiquesi el bloqueo de los controlesest_activado.Vea la p_gina80.
, Verifiqueque el homo no est6 en modesab_itico.Veala p_gina93.
• El homo puedeestar programadopara unafunci6n de Cocinary MantenerCalientediferida.
° El bloqueode loscontroles puedeestaractivado.Veala p_igina80.
• Aseg0resede que el respiraderodel homo no hayaside bloqueado. Vea su ubicaciOnen la
pdgina85.
• Aseg0resede que la estufa est6nivelada.
• Frecuentemente,lastemperaturasvarianentreun homo nuevoy unousado.A medidaque seusan
los homes,latemperaturatiendea cambiary puedehacersem_scalienteo m_sfrio. Veala pdgina
93 paraobtener instruccionespara ajustar latemperaturadel homo. Impertante: No
se recomiendaajustar la temperaturasi el problemaIo presentans61ouna o dos recetas.
, Verifique lasposicionesde las parrillasdel homo. El alimentopuedeestar demasiadocerca
del elemento.
, No se precalent6el elementode asar.
° Elpapel dealuminio se us0 de maneraincorrecta.Nunca cubra el insertode la asaderacon
papelde aluminio.
° La puertadel homo estuvocerradaduranteel asado. Dejela puerta abiertahastael primertope
(aproximadamente10cm o 4")
, Recorteel excesode grasade la came antes deasarla.
, Seus6 unaasaderasucia.
, Elvoltaje de la casa puedeser bajo.
° Aseg0resede que no haya programadoun ciclo de autolimpiezadiferido. Veala p_gina69.
° Verifiqueque la puerta est6 cerrada.
° Verifiqueque el homo no estc!en modesab_itico.Vea la p_gina 93.
° Elhomo puedeestarsobrelos 204° C (400° F).Latemperaturadebeser menorde204° C [400° F)
para pealerprogramarun ciclo de autolimpieza.
, Esposible quese requieraun ciclo de autolimpiezam_slargo.
, Los derramesexcesivos,en especiallos derramesazucaradosy/o _cidos,no se limpiaron antes
del ciclo de autolimpieza.
° El interior del homo todav[aest,1caliente. Espereaproximadamenteuna hera para que el homo
se enfr[e despu6sde queel ciclo de autolimpiezahayafinalizado.Lapuerta puedeabrirse una
vezque la luz indicadoraBLOO,UEOno estc!en la pantalla.
, Elcontrol y laspuertaspuedenestarbloqueados.Veala p_gina80.
, El homo puede estaren mode sab_tico.Veala p%ina 93.
73
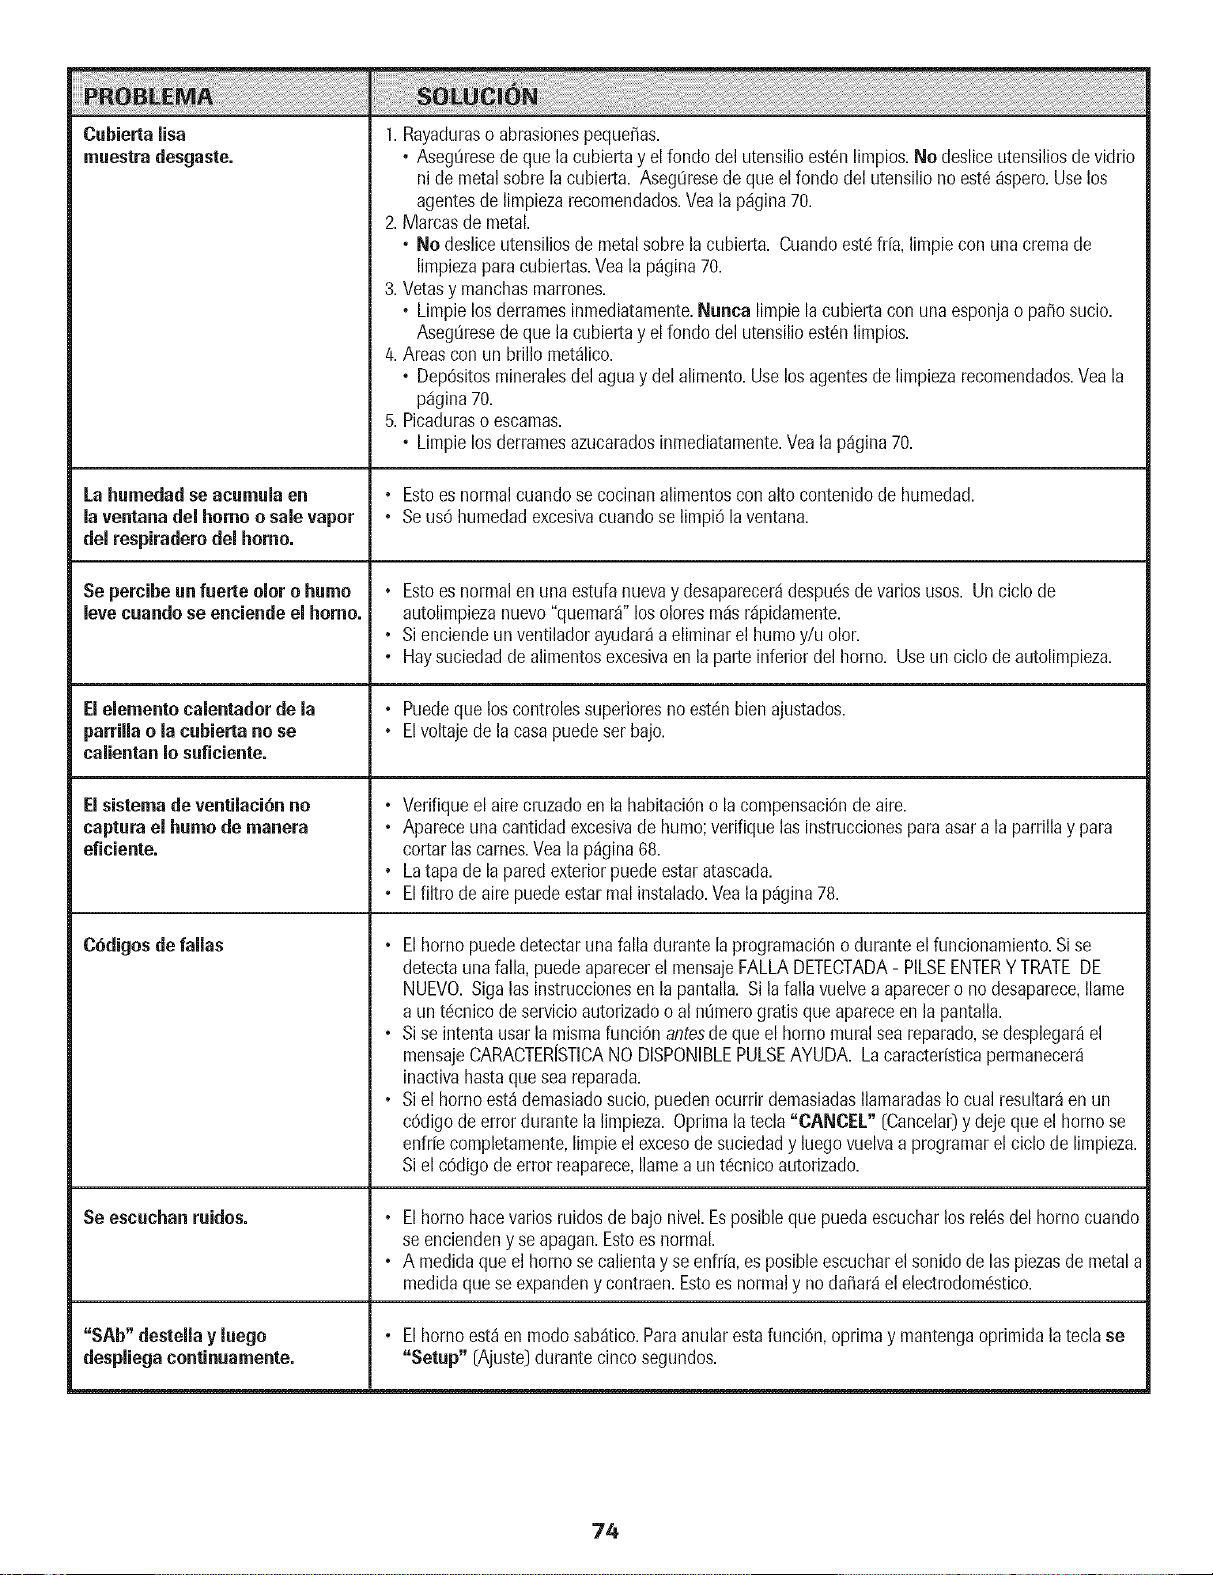
Cubierta lisa 1.Rayaduraso abrasionespeque_as.
muestradesgaste. , AsegOresede que la cubiertay elfondo del utensilioest6nlimpios.No desliceutensiliosde vidrio
ni de metalsobre la cubierta. AsegOresede que elrondodel utensiliono est6_spero.Uselos
agentesde limpiezarecomendados.Veala p_igina70.
2. Marcasde metal.
, No desliceutensiliosde metalsobrela cubierta. Cuandoestc!if[a, limpiecon unacremade
limpiezaparacubiertas.Vea la p%ina 70.
3. Vetasy manchasmarrones.
• Limpielos derramesinmediatamente.Nunea limpielacubiertacon unaesponjao pa_osucio.
AsegOresede que la cubiertay elrondodel utensilioest6nlimpios.
4. Areascon un brillomet_lico.
• DepOsitosmineralesdel aguay delalimento.Uselosagentesde limpiezarecomendados.Vea la
p%ina 70.
5. Picaduraso escamas.
, Limpielos derramesazucaradosinmediatamente.Veala p_igina70.
La hurnedadse acumula en • Estoes normalcuandosecocinanalimentosconalto contenidode humedad.
la ventana del homo o sale vapor • Se us0humedadexcesivacuandose limpi6laventana.
del respiraderodel homo.
Se percibeun fuerte olor o humo • Estoes normalenunaestufa nuevay desaparecer_idespu6sdevariosusos. Un ciclo de
loveeuandose enciende el homo. autolimpiezanuevo"quemar_"losoloresm_isr_ipidamente.
• Sienciendeun ventiladorayudar_a eliminarel humoy/u olor.
, Haysuciedadde alimentosexcesivaen laparte inferiordel homo. Useun ciclo de autolimpieza.
Elelementocalentadorde la • Puedeque los controlessuperioresno estc!nbienajustados.
parrillao la cubierta no se • Elvoltajede lacasa puedeser bajo.
ealientanIo sufieiente.
Elsistema de ventilaci6nno • Verifiqueel aire cruzadoen la habitaci0no la compensaci6ndeaire.
eaptura el humode mar=era • Apareceuna cantidadexcesivade humo;verifiquelas instruccionesparaasara la parrillay para
eficiente, cortarlas carnes.Veala p%ina 68.
• Latapa de laparedexteriorpuedeestar atascada.
, Elfiltro de aire puedeestar realinstalado.Veala pdgina78.
C6digosde falias • Elhomo puededetectarunafalla durantela programaciOno duranteel funcionamiento.Si se
detectauna falla,puedeaparecerel mensajeFALLADETECTADA- PILSEENTERY TRATEDE
NUEVO.Siga las instruccionesen la pantalla. Si lafalla vuelvea aparecero no desaparece,Ilame
a un t6cnicode servicioautorizadoo al nQmerogratis queapareceen la pantalla.
• Sise intentausarla mismafunciOnantesde que el homo muralseareparado,se desplegardel
mensajeCARACTER[STICANO DISPONIBLEPULSEAYUDA. Lacaracteristicapermanecerd
inactivahastaque seareparada.
• Siel homo est_demasiadosucio,puedenocurrir demasiadasIlamaradasIocual resultar_en un
c0digode error durantela limpieza.Oprimala tecla "CANCEL" [Cancelar_y dejeque el homo se
enfr[ecompletamente,limpieel excesode suciedady luego vuelvaa programarel ciclo de limpieza.
Siel c0digode error reaparece,Ilamea unt6cnico autorizado.
Se escuchan ruidos. • Elhomo hacevariesruidosde bajo nivel.Esposibleque puedaescucharlosrel_sdel homo cuando
se enciendeny seapagan.Estoes normal.
, A medidaque el homo secalientay seenfria,esposibleescucharel sonidode las piezasde metala
medidaque se expandeny contraen.Estoes normaly no da_ar_el electrodomc!stico.
"SAb" destella y luego , Elhomo est_en modosab_tico.Paraanularestafunci0n,oprimay mantengaoprimidalateclase
despliegacontinuamente. "Setup" [Ajuste_durantecinco segundos.
74
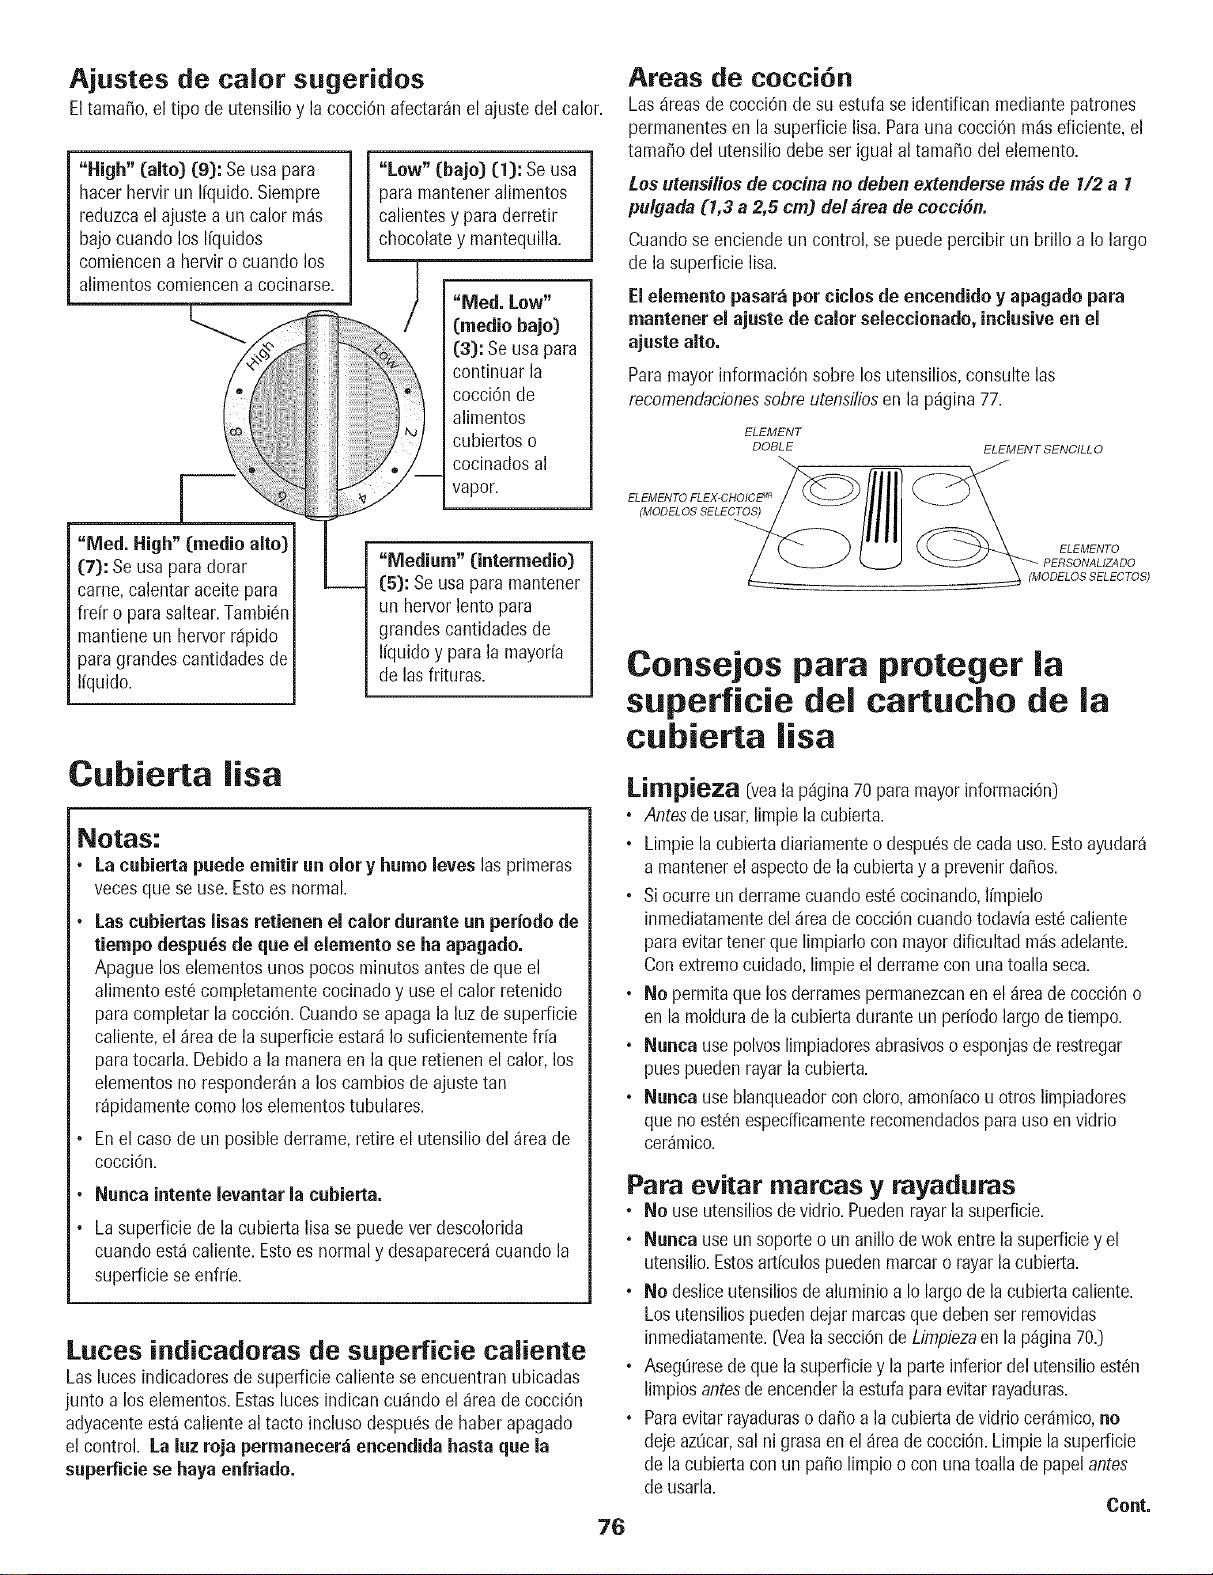
Ajustes de caior sugeridos
Eltamafio,el tipo de utensilio y la cocci6n afectaranel ajuste del calor.
"High" (alto) (9): Seusa para
hacerhervir un I[quido.Siempre
reduzcaelajuste a un calor mas
bajocuandolos Ifquidos
comiencena hervir o cuando los
alimentoscomiencena cocinarse.
"Low" (halo) (1]: Se usa
para manteneralimentos
calientesy para derretir
L__co ate y mantequi a.
"Meal. Low"
(medic bajo)
(3): Se usapara
continuarla
cocci6n de
alimentos
cubiertoso
cocinadosal
vapor.
"Meal. High" (medic alto)
(7): Seusa paradorar
came, calentar aceitepara
freff o parasaltear.Tambic!n
mantieneun hervor rapido
paragrandescantidadesde
Ifquido.
"Medium" (intermedio)
(5): Seusa paramantener
un hervorlento para
grandescantidadesde
Ifquidoy para la mayorfa
de las frituras.
Cubierta lisa
Notas:
• La cubierta puede emitir un clot y humo leves las primeras
vecesque se use. Estoes normal.
Las cubiertasIJsasretJenenel calor durante un periodode
tiempo despu_s de queel elemento se ha apagado.
Apaguelos elementosunos pocos minutosantesdeque el
alimentoest6 completamentecocinadoy use elcalor retenido
paracompletar la cocci6n.Cuandose apagala luz desuperficie
caliente,el area de lasuperficie estaraIo suficientementefr[a
paratocarla. Debidoa la maneraen la que retienenel calor, los
elementosno responderana los cambiosde ajustetan
rapidamentecomolos elementostubulares.
Enel caso de un posiblederrame,retire el utensilio del areade
cocci6n.
Nunca intente Jevantar Ja cubierta.
La superficiede la cubierta lisa se puedever descolorida
cuando esta caliente.Estoes normaly desapareceracuando la
superficiese enfrfe.
Lutes indicadoras de superficie caliente
Lasluces indicadoresde superficiecaliente se encuentranubicadas
junto a los elementos.Estaslucesindican cuandoel area de cocci6n
adyacenteestacalienteal tacto incluso despuc!sde haber apagado
el control. La luz roja permanecerziencendida hasta que la
superficie se haya enfriado.
Areas de cocci6n
Lasareasde cocciOndesu estufase identifican mediante patrones
permanentesen lasuperficie lisa. Paraunacocci6n m_iseficiente,el
tamafio del utensiliodebe ser igualal tamafio del elemento.
Los utensi/iosde cocina no deben extenderserobs de 1/2 a 1
pulgada (1,3 a 2,5 cm) de/#tea de cocciSn.
Cuandose enciendeun control,se puedepercibir un brillo a Io largo
de lasuperficie lisa.
El elemento pasarziper ciclos de encendidoy apagado para
mantener el ajuste de calor seleccionado, inclusiveen el
ajuste alto.
Paramayorinformaci6nsobre los utensilios,consulte las
recomendacionessobreutensiliosen la pagina77.
ELEMENT
DOBLE
ELEMENTO FLEX-CHOICE _n
(MODELOS SELECTOS)
ELEMENTSENCILLO
(_M ELEMENTO
PERSONALIZADO
ODELOS SELECTO_
76
Consejos para proteger la
superficie del cartucho de la
cubierta lisa
Limpieza (veala p4gina70 paramayorinformaci6n)
• Antesdeusar, limpiela cubierta.
• Limpiela cubiertadiariamenteo despu6sde cadauso.Estoayudara
a mantenerel aspectode lacubiertay a prevenirdafios.
• Si ocurreun derramecuandoest_ cocinando,limpielo
inmediatamentedel areade cocci6ncuandotodaviaest_caliente
paraevitartenorque limpiarlocon mayordificultadmas adelante.
Conextremocuidado,limpieel derramecon una toalla seca.
• No permitaque losderramespermanezcanen el areade cocciOno
en lamoldurade la cubiertadurante unper[odolargodetiempo.
• Nunca usepolvoslimpiadoresabrasivoso esponjasde restregar
puespuedenrayarla cubierta.
• Nunca useblanqueadorcon cloro,amoniacou otros limpiadores
queno est6nespecfficamenterecomendadosparauso envidrio
ceramico.
Para evitar marcas y rayaduras
• No useutensiliosdevidrio. Puedenrayarla superficie.
• Nunca useun soporteo un anillo dewok entre la superficiey el
utensilio.Estosart[culospuedenmarcaro rayarla cubierta.
• No desliceutensiliosde aluminioa Io largode lacubiertacaliente.
Losutensiliospuedendejarmamasquedebenser removidas
inmediatamente.[Vealasecci6nde Limpiezaenla pagina70.)
• Aseg0resede quela superficiey la parteinferior delutensilioest6n
limpiosantesdeencenderlaestufapara evitarrayaduras.
• Paraevitar rayadurasodafio a la cubiertade vidriocer4mico,no
dejeaztJcar,sal ni grasaen el areade cocci6n.Limpiela superficie
de lacubiertacon un patio limpio o con una toallade papelantes
deusarla.
Cont.
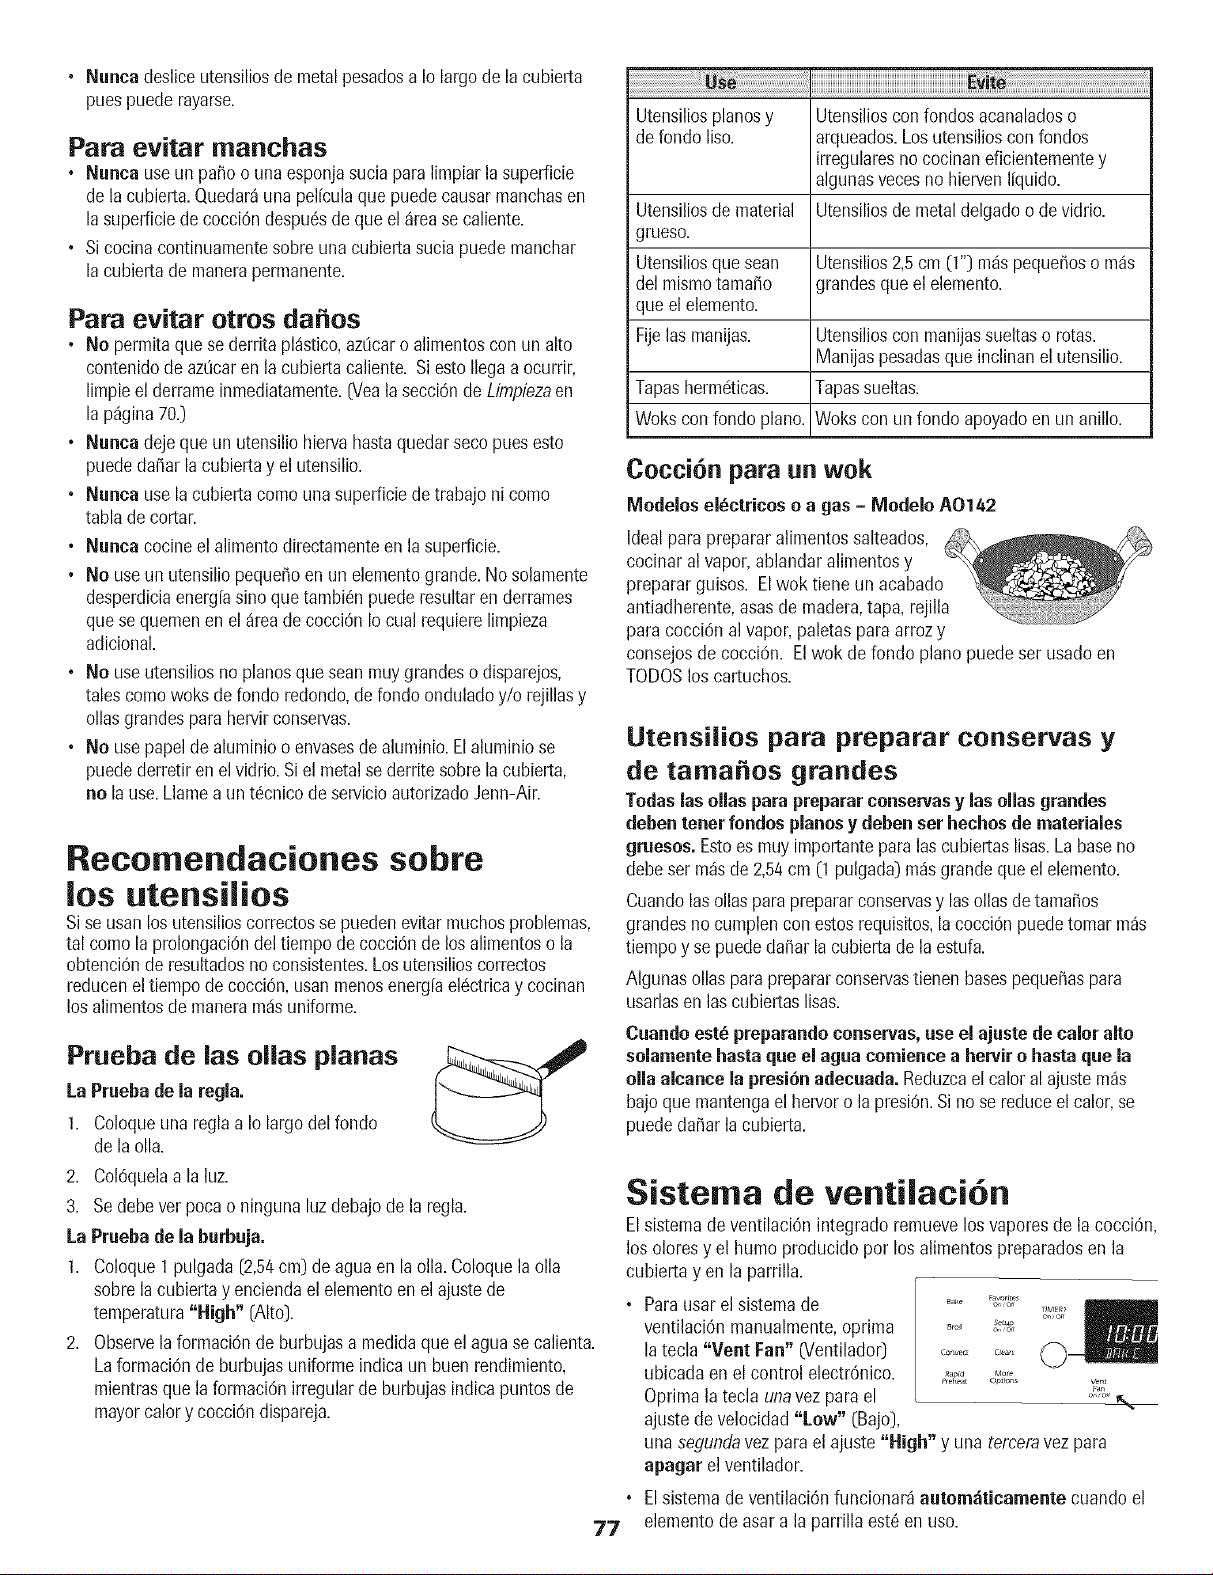
• Nunca desliceutensiliosde metalpesadosa Io largode la cubierta
puespuede rayarse.
Para evitar manchas
, Nanca useun patio o unaesponjasuciapara limpiarla superficie
de lacubierta.Quedarauna pel[culaqua puedecausarmanchasen
lasuperficiedecocciOndespu6sde quael arease caliente.
° Si cocinacontinuamentesobreunacubiertasuciapuede manchar
lacubierta de manerapermanente.
Para evitar etres da es
° Ne permitaquase derritaplastico,az_caro alimentoscon un alto
contenidodeaz[_caren lacubierta caliente. Siesto Ilegaa ocurrir,
limpieel derrameinmediatamente.[Veala secciOnde Limpiezaen
la pagina70.)
° Nunca dejequeun utensiliohiervahastaquedarsecopuesesto
puededafiar la cubiertay el utensilio.
° Nunca usela cubiertacome unasuperficiede trabajoni come
tabla de cortar.
° Nunca cocineel alimentodirectamenteen la superficie.
°Ne useun utensiliopequefioen unelementogrande.Nosolamente
desperdiciaenerg[asine quatambi_n puederesultaren derrames
quasequemenen elareade cocciSnIocual requiemlimpieza
adicional.
, Ne useutensiliosno planesque seanmuy grandeso disparejos,
talescome woksde fondo rationale,defondo onduladoy/o rejillasy
eliasgrandesparahervirconservas.
, Ne usepapal dealuminioo envasesde aluminio.Elaluminiose
puedederretiren el vidrio.Siel metalse derritesobre lacubierta,
ne la use.Llamaa un t6cnico deservicioautorizadoJenn-Air.
Recomendaciones sobre
los utensilios
Sise usanlos utensilioscorrectosse puedenevitar muchosproblemas,
tal come la prolongaci6ndel tiempo decocci6nde los alimentoso la
obtenci6nde resultadosno consistentes.Losutensilioscorrectos
reducenel tiempode cocci6n,usanmenosenerg[aeldctricay cocinan
los alimentosdemanerarodsuniforme.
Prueba de las elias planas
La Praeba de la regla.
1. Coloqueuna reglaa Io largo del rondo
de laella.
2. ColOquelaa la luz.
3. Sedebe ver pocao ningunaluzdebajode la regla.
La Prueba de la barbuja.
I1 ColoqueIpulgada[2,54cm)deagua en la ella.Coloquela ella
sobre la cubiertay enciendael elementoen elajustede
temperatura"Nigh" [Alto).
2. Observela formaciOnde burbujasa medidaqua el aguasecalienta.
LaformaciOnde burbujasuniformeindica un buenrendimiento,
mientrasqua la formaciOnirregularde burbujasindicapuntosde
mayorcalory cocciOndispareja.
77
Utensiliosplanesy Utensiliosconrondosacanaladoso
de rondoliso. arqueados.Losutensilioscon fondos
irregularesno cocinaneficientementey
algunasvecesno hiervenI[quido.
Utensiliosde material Utensiliosdemetaldelgadoo de vidrio.
grueso.
Utensiliosqua sean Utensilios2,5cm (1") maspequefioso mas
del mismotamafio grandesqua el elemento.
qua el elemento.
Fijelas manijas. Utensilioscon manijassueltaso rotas.
Manijaspesadasqua inclinanel utensilio.
Tapashermdticas. Tapassueltas.
Wokscon fondo plane. Wokscon un rondoapoyadoen un anillo.
Cocci6n para un wok
Medeles el_ctrices e a gas - Medele A0142
Ideal para prepararalimentossalteados,
cocinaral vapor,ablandar alimentosy
prepararguises. Elwok tiene un acabado
antiadherente,asasde madera,tapa, rejilla
paracocci6n alvapor, paletas paraarrozy
consejosde cocci6n. El wok de fondo piano puede ser usadoen
TODOSlos cartuchos.
Utensilios para preparar conservas y
de tamales grandes
Tedas las elias pars prepararcenservasy las elias grandes
debentoner fendes planesy deben set hechesde materiales
grueses. Estoes muy importantepara lascubiertaslisas.Labaseno
debeser masde 2,54cm (1 pulgada)mas grandequael elemento.
Cuandolas eliaspara prepararconservasy laselias detamafios
grandesno cumplencon estosrequisites,la cocciOnpuedetomar mas
tiempoy se puede dafiar lacubiertade la estufa.
Algunaselias paraprepararconservastienen basespequefiaspara
usarlasen lascubiertaslisas.
Cuandeest_ preparande censervas,use el ajaste de caler alto
selarnentebasraque el agua cemience a hervire basraque la
ella alcance la presi6n adecuada.Reduzcael caloral ajuste mas
bajoque mantengaelhervoro la presiOn.Si no se reduceelcalor, se
puededafiar la cubierta.
Sistema de ventilaci6n
Elsistemade ventilaci6n integradoremuevelos vaporesde la cocci6n,
los oloresy el humo producidoper los alimentospreparadosen la
cubiertayen la parrilla.
• Parausar el sistemade .... ........ooo,
On On
ventilaci6n manualmente,opnma ..... _,I,_
latecla Vent Fan (Ventilador) ..............
ubicadaen el control electr6nico. _"_¢,;I,oo,,oo,_°'° _I,_'
Optimala tecla unavez para el .....&,,
ajustede velocidad"Lew" (Bajo),
una segunda vez para el ajuste "High" y una tercera vez para
apagar el ventilador.
El sistema de ventilaci6n funcionara atltOm_iticamente cuando el
elemento de asar a la parrilla est_ en use.

, Elventilador puedeser usado pararemoveroloresfuertes de la
cocinatales como los producidosal picar cebollascerca del
ventilador.
Cuidado y limpieza dei sistema
de ventilaci6n
• Rejilla de aire: Larejilla de aire se levantafacilmente.Limpiecon
un patio o lave en el lavavajillaso en el fregaderocon detergente
del hogarsuave.Paraevitarrayar lasuperficie, no uselimpiadores
abrasivoso esponjasde restregar4/RFILTER
" Filtre:Apagueel sistema deventilaciOnantesde retirar el filtro. El
filtro es de tipo permanentey debeser limpiadocuando estc!sucio.
Limpieen el fregaderocon aguatibia y detergenteo en el
lavavajillas.
IMPORTANTE:NO USEEL S/STEMASINELFILTRO.Elfiltro
siempredebe set instaladoen angulo.Si observala partedelantera
de la estufa, la partesuperior del filtro debe estar apoyadasobreel
ladoizquierdode la aberturade ventilaciOn.La parte inferior debe
estarapoyadasobre el lado derechode la c_imarade ventilaciOn
en su parte inferior. Importante:Si el filtre est_ instalado
paralele y centra la pared de/ventilader, se reducir_ la
efectividad de la ventilaci6n.
• C_mara de ventUaci6n"Estaarea,la cual alojaal filtro, debe ser
limpiadaen casode derrameso carla vezque quede recubiertade
grasa.Puedeser limpiadacon una toalla de papel,un patio
ht_medoo una esponjay un detergenteo limpiadorsuavedel
hogar.
importante: El respiraderodel homo esta ubicado debajo del lado
derecho de la rejilla de aire.Cuandouse o limpie el homo, podra
sentir airecaliente y hOmedoen esta area. Elarea cercana al
respiraderopuedecalentarseIo suficientecomo para causar
quemaduras.Tengacuidado de no derramarnada dentro de este
respiradero.La rejilla de aire debe ser rernovidaantes del
cicio de autoJimpieza.
78
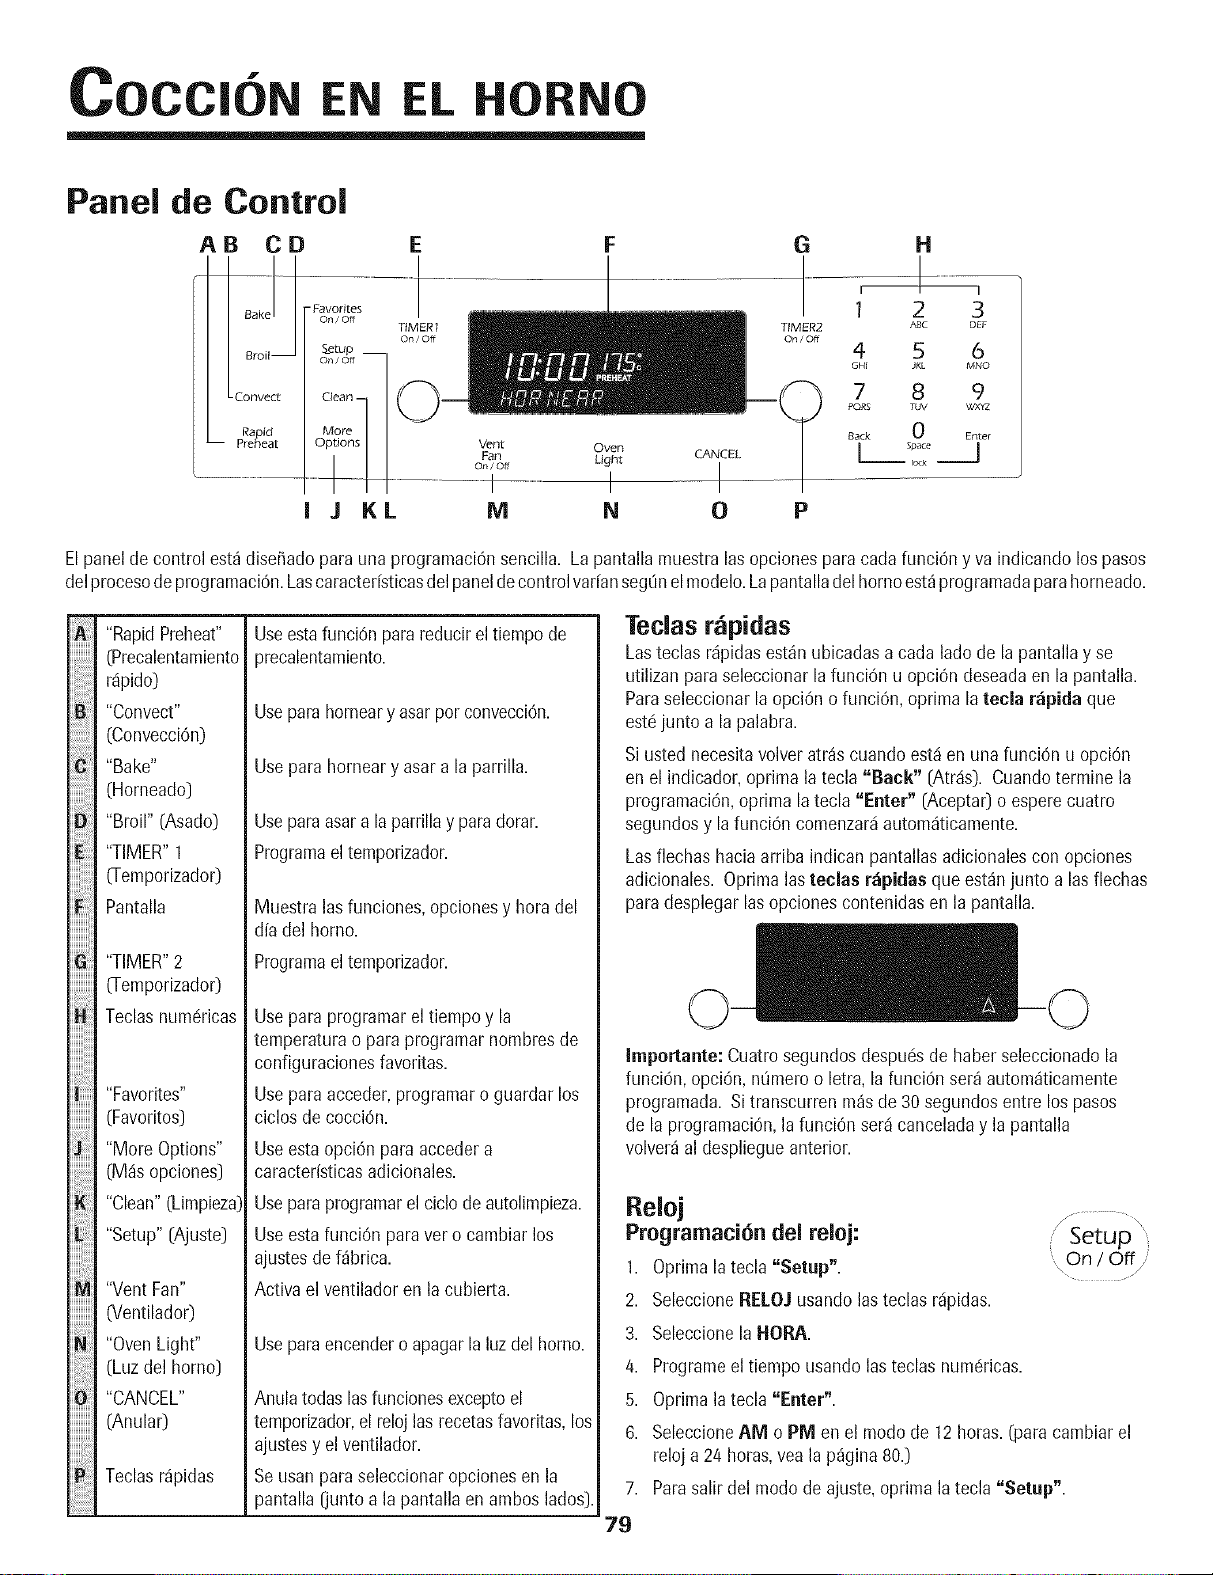
Cocc|oN EN EL HORN
Panel de Control
AB CD E
I Bake I
I Broil--
LConvect
Rapid
-- Preheat
•Favorites
On/Off
TtMER1
On/Off
Setup __
On/Off
__Clean
More
J KL
F
Vent Oven
Fan Light CANCEL
On/Off
] I
M N O
G
TIMER2
On/Off
P
H
!
2
ABC DEF
4 5 6
GHI JKL MNO
7 8 9
POR$ TUV WXYZ
Back O Enter
Space J
rock
Elpanelde control est_dise_adopara una programaciOnsencilla. Lapantalla muestralasopcionesparacadafunciOny va indicando lospasos
delprocesodeprogramaciOn.Lascaracteristicasdelpaneldecontrol varianseg_nelmodelo.Lapantalladelhomoest_programadapara horneado.
"RapidPreheat"
(Precalentamiento
rdpido)
"Convect"
(ConvecciOn)
"Bake"
(Horneado)
"Broil" (Asado)
"TIMER"1
0-emporizado0
Pantalla
"TIMER"2
0-emporizador)
Teclasnum6ricas
"Favorites"
(Favoritos)
"More Options"
(M_sopciones]
"Clean"(Limpieza:
"Setup"[Ajuste]
"Vent Fan"
(Ventilador)
"OvenLight"
(Luz del homo)
"CANCEL"
(Anula0
Teclas r_pidas
Useestafunci6n parareducirel tiempo de
precalentamiento.
Usepara horneary asarpor convecciOn.
Usepara hornear y asar a la parrilla.
Useparaasara la parrillay paradorar.
Programaeltemporizador.
Muestra lasfunciones,opcionesy horadel
dia del homo.
Programaeltemporizador.
Usepara programarel tiempo y la
temperaturao paraprogramarnombresde
configuracionesfavoritas.
Usepara acceder,programaro guardar los
ciclos de cocciOn.
Useesta opciOnparaaccedera
caracterfsticasadicionales.
Useparaprogramarel ciclode autolimpieza.
Useesta funciSnparaver o cambiarlos
ajustesde f_brica.
Activael ventilador en la cubierta.
Useparaencendero apagarla luzdel homo.
Anulatodaslas funcionesexceptoel
temporizador,el relojlas recetasfavoritas,los
ajustesy el ventilador.
Seusanparaseleccionaropcionesen la
pantalla [junto a la pantallaen ambos lados).
Tedas rfipidas
Lasteclas r_pidasest_nubicadasacada lado de la pantallay se
utilizanpara seleccionarla funciOnu opci6n deseadaen la pantalla.
Paraseleccionarla opci6n o funci6n,optima la tecla r_pida que
estc!junto a la palabra.
Si ustednecesitavolveratr_scuando est,1en una funciOnu opciOn
en el indicador,optima la tecla "Back" [Atr_s). Cuandotermine la
programaciOn,optima la tecla "Enter" [Acepta0 o esperecuatro
segundosy lafunci6n comenzar_iautom_ticamente.
Lasflechashacia arribaindican pantallasadicionalescon opciones
adicionales. Oprimalasteclas r_pidasque est_njunto alas flechas
paradesplegarlasopcionescontenidasen la pantalla.
Importaute: Cuatrosegundosdespuc!sde haberseleccionadola
funciOn,opci6n,n0meroo letra, la funciOnser_ autom_ticamente
programada.Si transcurren m_sde 30 segundosentre los pasos
de la programaciOn,la funci6n ser_icanceladay la pantalla
volver_al despliegueanterior.
Reloj
Programaci6n del reloj:
1. Oprimala tecla "Setup".
2. SeleccioneRELOJusandolas teclas r_ipidas.
3. Seleccionela HORA.
4. Programeel tiempo usando lasteclas numc!ricas.
5. Optimala tecla "Enter".
6. SeleccioneAM o PM en el modo de 12horas. (para cambiarel
reloj a24 horas,vea la p_gina80.)
7. Parasalir del modo de ajuste,optima la tecla "Setup".
79
/ Setup
......On/Off
\ /
Activaci6n y anulaci6n del despliegue del
reloj/dia de la semana: ,,......................
1. Oprima la tecla "Setup" [Ajuste]. " Setup "'
On/Off
2. SeleccioneRELOJ. "...............
3. Optima lafiecha para navegarentre Ins opcioneshasta quese
muestreel DESACTIVAR.
4. SeleccioneDESACTIVAR.
Seleccione"OFF" (Apagar)paradesactivarel desplieguedel reloj
o seleccione"ON" [Encender]para activarel desplieguedelreloj.
Seleccione"OFF" paraeliminareldesplieguedel dfade la
semana.Seleccione"ON" paramostrarel dfadela semanaen
pantalla.
7. Parasalir del modede ajuste,optima la tecla "Setup".
Programaci6n del din de la semana:
// .................
1. Oprima la tecla "Setup". ' Setup '
On/Off
2. SeleccioneRELOJ. .......... ,"
3. Optima lafiecha para navegarentre Ins opcioneshasta quese
muestreel DIA.
4. Usela tecla r_pida flechada paranavegarentre Insopcionesde
dfas.
5. Parasalir del modede ajuste,optima la tecla "Setup".
Para programar el reloj en formate de
12 o 24 horns:
Elreloj puede set ajustadoparadesplegarla hera ya sea enformate
de 12horns o24 horns.
/, .....
1. Optima latecla "Setup". / Setup
2. SeleccioneRELOJ. On / Off;
\ ..................... /
3. Usela flecha para pasara la pantallasiguiente.
4. Seleccione12/24 HR.
5. Seleccione 12HR o 24HR.
0
3. Optimalas teclas num6ricaspara programarel tiempo nuevo
deseado.
4. Optimala tecla "Enter".
Anulaci6n del temporizador: " "
/ TIMER 1 '
Oprimala tecla "TIMER 1" o "TIMER 2" dosveces. On / Off/
Si ambos temporizadores est_n activos:
Si el temporizadordeseadoya se encuentra en la pantalla,oprima la
tecla unavez para entrar en la funciOnde ediciOny dosvecespara
anularel temporizador.Siel temporizadordeseadono est_ en
pantalla,sign estospasos:
1. Optimala tecla "TIMER" deseadauna vez.Eltemporizador
seleccionadoaparecer_ien pantalla.
2. Oprimala tecla "TIMER" una segundavezparaactivar lafunci6n
de edici6n para hacer los cambios.
3. Sioprime la tecla "TIMER" una terceravez,anular4el
temporizador.
gamble de las sefiales seneras del temperizader:
Lassefialessonorasparael TEMPORIZADOR1y parael
TEMPORIZADOR2 puedenser cambiadas. Las opciones
disponiblesson dosse_alescada treinta segundos,dos se_alescada
sesentasegundoso una serial solamente. El ajuste predeterminado
es una solaserial.
1. Oprimala tecla "Setup".
2. Seleccionela flecha y opr[malahastaque
SONIDOSaparezcaen pantalla.
3. SeleccioneSONIDOS.
// ................. •....
Setup
On/Off /
\ ......... /
4. SeleccioneSONIDOS TEMPER.
5. Seleccioneel formate deseadode la sepalsonoradel
temporizador[2-30SEC,2-60SECo 1 BIP).
6. Parasalir del mode de ajuste,optima la tecla "Setup".
6. Parasalir del modede ajuste,optima la tecla "Setup".
"Timers" (Temporizadores)
Programaci6n de los temporizadores ("Timer
1" o "Timer 2"):
1. Oprima la tecla "TIMER 1" o "TIMER 2".
2. Optima unode los tiempos mostradosusando las , On.........../ Off ,/
teclas r4pidaso presioneuna de lasteclas num6ricaspara
programarel tiempo deseado.
Importante: Cadavez que oprime una de Ins opcionesde
tiempo mostradas,se agregatiempo adicional. Per ejemplo,si
oprime "10 MIN." tres veces,agrega30 minutesen el
temporizador(0:30).
3. Optima latecla "Enter" [Aceptar).
Para cambiar el tiempo programado una vez
que el temporizador comienza: .............
TIMER 1
1. Oprima la tecla "TIMER 1" o "TIMER 2" una vez On / Off /
2. Seleccioneunode los tiemposdesplegados
usando Insteclas r@idas hastaque el tiempo deseadosea
programado. 80
Bloqueo del control y de la puerta
del homo
Loscontrolesdel homo y de lapuerta del homo puedenset
bloqueadosparaevitar programaci6naccidental. Si se est,1usando
unafunci6n del homo, el control y la puerta no puedenser
bloqueados.
Para bloquear los centreles y la puerta:
OprimaIns teclas"Back" [Atr_s)y "Enter" al mismotiempo,
manteni6ndolasoprimidasdurantetres segundoso hasta que las
palabrasCONTROLBLOQaparezcanen la pantalla.
Para desbloquear los controles y la puerta
del homo:
OptimaIns teclas"Back" y "Enter" al mismo tiempo,
manteni6ndolasoprimidasdurantetres segundos. DESBLOQUEO
aparecer_en la pantallacuando el control y la puerta se estc!n
desbloqueando.
Back 0 Enter
lock
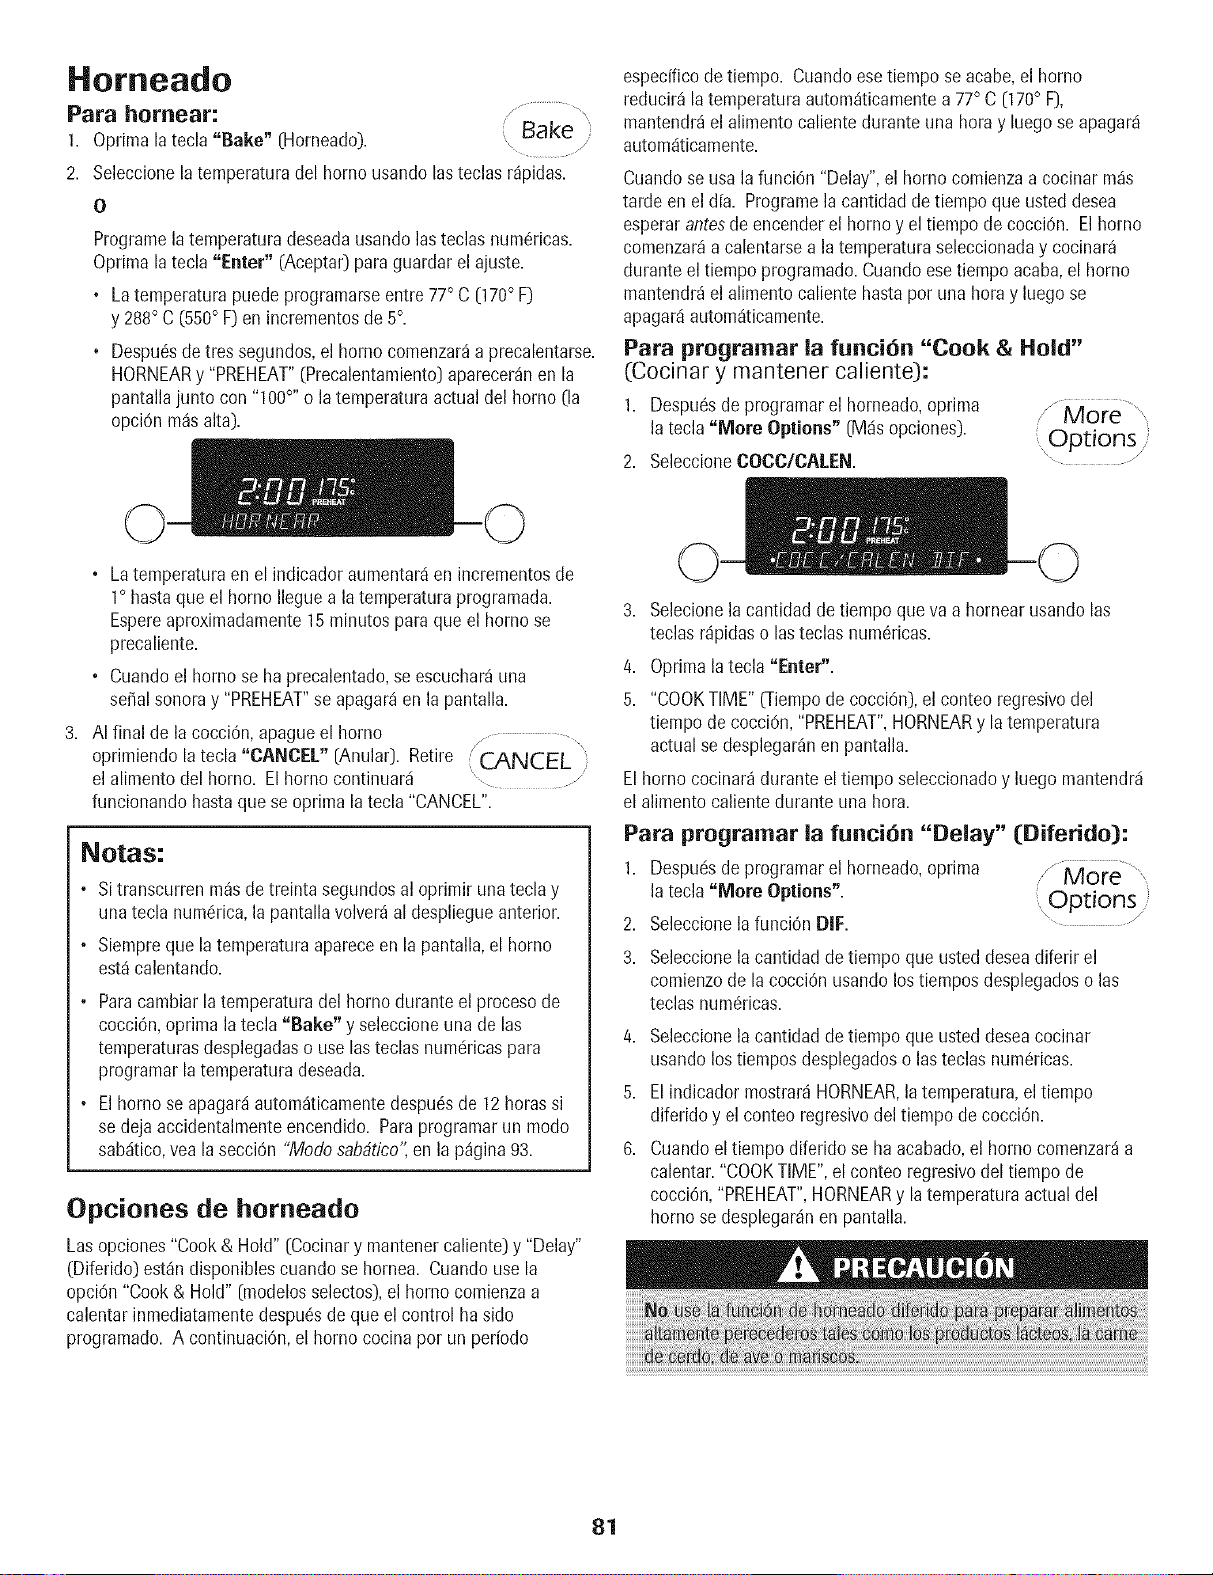
Horneado
Para hornear:
Bake
1. Oprima la tecla "Bake" (Horneado). ,
2. Seleccionelatemperaturadel horno usandoInsteclas r_pidas.
Programela temperaturadeseadausandoIns teclas num6ricas.
Optima latecla "Enter" (Aceptar)paraguardar el ajuste.
. La temperaturapuede programarseentre 77° C (170° F)
y 288° C (550° F) en incrementosde 5°.
. Despu6sdetres segundos,el homo comenzar_a precalentarse.
HORNEARy "PREHEAT"(Precalentamiento)aparecer_nen la
pantallajunto con "100°'' o la temperaturaactual del homo (In
opci6n m_salta).
espedfico de tiempo. Cuandoesetiempo seacabe, el homo
reducir_ la ternperaturaautom_ticamentea 77° C (170° F),
mantendr_el alimentocaliente durante una horn y luego se apagar_i
autom_ticamente.
Cuandose usa la funci6n "Delay",el homo comienzaacocinar m_s
tarde en el d[a. Programela cantidadde tiempo que usteddesea
esperarantesde encenderel homo y el tiempode cocci6n. El homo
comenzar_a calentarsea la temperaturaseleccionaday cocinar_
durante el tiempo programado.Cuandoesetiempoacaba,el homo
mantendr_el alimentocaliente hastapor una horn y luegose
apagar_iautom_ticamente.
Para programar la funci6n "Cook & Hold"
(Cocinar y mantener caliente):
1. Despu6sde programarel horneado,oprima "" More ""
la tecla"NIore Options" (M_isopciones). , ODtJonsr _
2. SeleccioneCOCC/CALI:N. ...........
. Latemperaturaen el indicadoraumentar_en incrementosde
1° hastaqueel homo Ileguea la temperaturaprogramada.
Espereaproximadamente15minutosparaque el homo se
precaliente.
° Cuandoel homo se ha precalentado,se escuchar_una
serialsonoray "PREHEAT"se apagar_en la pantalla.
AI final de la cocci(_n,apagueel homo j,.........................................
oprimiendola tecla "CANCEL" (Anular). Retire (CANCEL "
el alimentodel homo. El homo continuar_i .................. .
/
funcionandohastaque se optima latecla "CANCEL".
Notas:
° Sitranscurren m_sde treintasegundos al oprimir una tecla y
unatecla numc!rica,la pantallavolver_al despliegueanterior.
° Siempreque la temperaturaapareceen la pantalla,el homo
est_calentando.
° Paracambiarla temperaturadel homo durante el procesode
cocci6n,optima la tecla "Bake" y seleccioneunade Ins
temperaturasdesplegadaso use Insteclas numc!ricaspara
programarla temperaturadeseada.
° El homo se apagar_iautom_ticamentedespu6sde 12 hornssi
se deja accidentalmenteencendido. Paraprogramarun modo
sab_itico,yea lasecci0n "Modo sabbtico',en la p%ina 93.
Opciones de horneado
Lasopciones"Cook& Hold" (Cocinary mantenercaliente)y "Delay"
(Diferido) est_ndisponiblescuando se hornea. Cuandouse la
opci6n "Cook& Hold" (modelosselectos),el homo comienzaa
calentarinmediatamentedespu_sde que el control hasido
programado. A continuaci6n,el homo cocinapot un periodo
3. Selecionela cantidad detiempo que vaa hornear usando las
teclas rdpidaso Insteclas num6ricas.
4. Optimala tecla "Enter".
5. "COOKTIME" 0-iempode cocci6n),el conteo regresivodel
tiempo de cocci6n,"PREHEAT",HORNEARy laternperatura
actualse desplegar_nen pantalla.
El homo cocinar_ duranteel tiempo seleccionadoy luego mantendrd
el alimentocaliente durante una horn.
Para programar la funci6n "Delay" (Diferido):
1. Despuc!sde programarel horneado,oprima
la tecla"More Options". Options
\ /
2. Seleccionela funci6n DIF. ............
3. Seleccionela cantidad detiempo que usteddeseadiferir el
comienzode la cocci6n usandolos tiemposdesplegadoso Ins
teclas num6ricas.
4. Seleccionela cantidad detiempo que usteddeseacocinar
usandolos tiemposdesplegadoso Insteclas num6ricas.
5. Elindicador mostrardHORNEAR,latemperatura,el tiempo
diferidoy el conteo regresivodel tiempode cocci6n.
6. Cuandoel tiempo diferido se ha acabado,el homo comenzar_a
calentar."COOKTIME",el conteoregresivodel tiempo de
cocci6n,"PREHEAT",HORNEARy la temperaturaactual del
homo se desplegardnen pantalla.
81
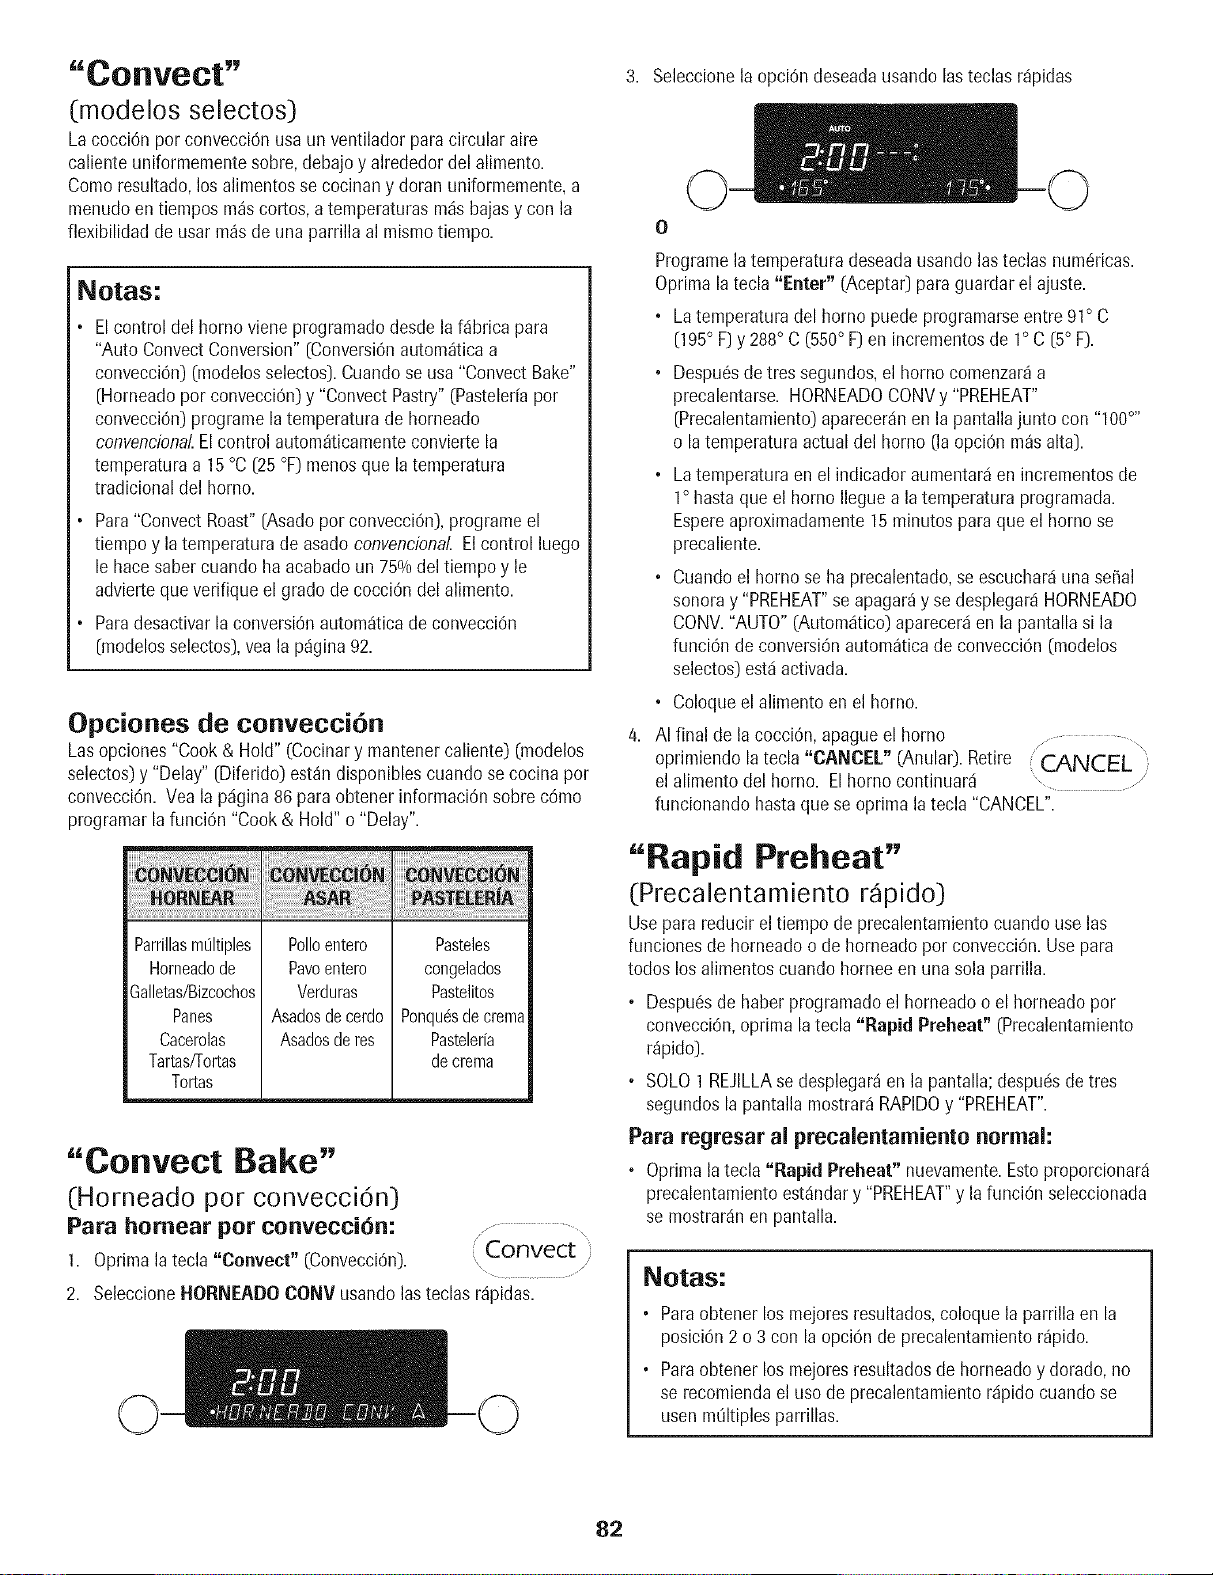
"Cor|vect"
(modelos selectos)
Lacocci0n per convecci0nusa un ventilador paracircularaire
calienteuniformementesobre,debajoy alrededordel alimento.
Comeresultado,los alimentossecocinany doran uniformemente,a
menudoen tiempos m_scortes,a temperaturasmdsbajasy con la
fiexibilidad de usarm_s de una parrillaal mismotiempo.
Notas:
• El control del homo viene programado desde la fdbrica para
"Auto Convect Conversion" [ConversiOn autom_tica a
convecciOn) (modelos selectos). Cuando se usa "Convect Bake"
[Horneado por convecciOn) y "Convect Pastry" (Pasteler[a por
convecciOn) programe la temperatura de horneado
convencional. El control autom_ticamente convierte la
temperatura a 15 °C [25 °F) menos que la temperatura
tradicional del homo.
Para"ConvectRoast"[Asadoper convecci0n),programeel
tiempoy la temperaturade asado convencional.Elcontrol luego
le hacesabercuando haacabadoun 75% del tiempo y le
advierteque verifiqueel grade decocci0n del alimento.
Paradesactivarla conversionautom_ticadeconvecci0n
[modelosselectos),vea la p%ina 92.
Opciones de convecci6n
Lasopciones "Cook& Hold" (Cocinary mantenercaliente)0nodelos
selectos)y "Delay" [Diferido) est_ndisponiblescuandose cocinaper
convecci0n. Vea la pdgina 86paraobtener informaci0nsobre c0mo
programarla funci0n "Cook& Hold" o "Delay".
Parrillasm01tiples
Horneadode
Galletas/Bizcochos
Panes
Cacerolas
Tartasf[ortas
Tortas
Polioentero
Paveentero
Verduras
Asadosde cerdo
Asados de res
Pasteles
congelados
Pastelitos
Ponqu_sde crema
Pasteleria
de crema
"Convect Bake"
(Horneado per convecciOn}
Para hornear per convecci6n: ................ ,
1. Oprimala tecla "Cenvect" (Convecci0n). i,,Convect
2. SeleccioneHORNEADOCONV usandolasteclas r@idas.
3. Seleccionelaopci0n deseadausando lasteclas r_pidas
Programela temperaturadeseadausandolas teclas numOricas.
Optima latecla "Enter" (Aceptar)paraguardar el ajuste.
• Latemperaturadel homo puede programarseentre 91° C
[195° F)y 288° C (550° F) en incrementosde 1° C [5° F).
• DespuOsde tres segundos,el homo comenzar_a
precalentarse.HORNEADOCONVy "PREHEAT"
[Precalentamiento)aparecerdnen la pantallajunto con "100°"
o la temperaturaactualdel homo (la opci0n m_s alta).
, Latemperaturaen el indicador aumentarden incrementosde
1° hastaque el homo Ileguea la temperatura programada.
Espereaproximadamente15minutespara que el homo se
precaliente.
° Cuandoel homo se ha precalentado,se escucharduna sepal
sonoray "PREHEAT"se apagar_y se desplegardHORNEADO
CONV."AUTO"(Automdtico)aparecerden la pantalla si la
funci0n de conversionautom_ticade convecci0n(modelos
selectos)estdactivada.
• Coloqueel alimento en el homo.
AI final de la cocci0n,apague el homo / ............... ,
oprimiendo la tecla "CANCEL" (Anula0. Retire (CANCEL i
el alimentodel homo. El homo continuard ................
funcionandohasta quese oprima la tecla "CANCEL".
"Rapid Preheat"
(Precalentamiento r pido)
Usepara reducir el tiempode precalentamientocuando use las
funcionesde horneadoo de horneadoper convecci0n.Use para
todos los alimentoscuando horneeen una sola parrilla.
° DespuOsde haberprogramaticel horneadoo el horneado per
convecci0n,optima la tecla "Rapid Preheat" (Precalentamiento
r_pido).
• SOLO1REJILLAse desplegar_en la pantalla;despuc!sde tres
segundosla pantalla mostrar_RAPIDOy "PREHEAT".
Para regresar al preealentamiento normal:
° Oprimala tecla "Rapid Preheat" nuevamente.Estoproporcionard
precalentamientoest_ndary "PREHEAT"y la funci0n seleccionada
se mostrardnen pantalla.
Notas:
• Paraobtener los mejoresresultados,coloquela parrilla en la
posici0n2 o 3 con la opci0n de precalentamientor_pido.
• Paraobtener los mejoresresultadosde horneadoy dorado,no
se recomiendael usede precalentamientordpido cuandose
usen m01tiplesparrillas.
82
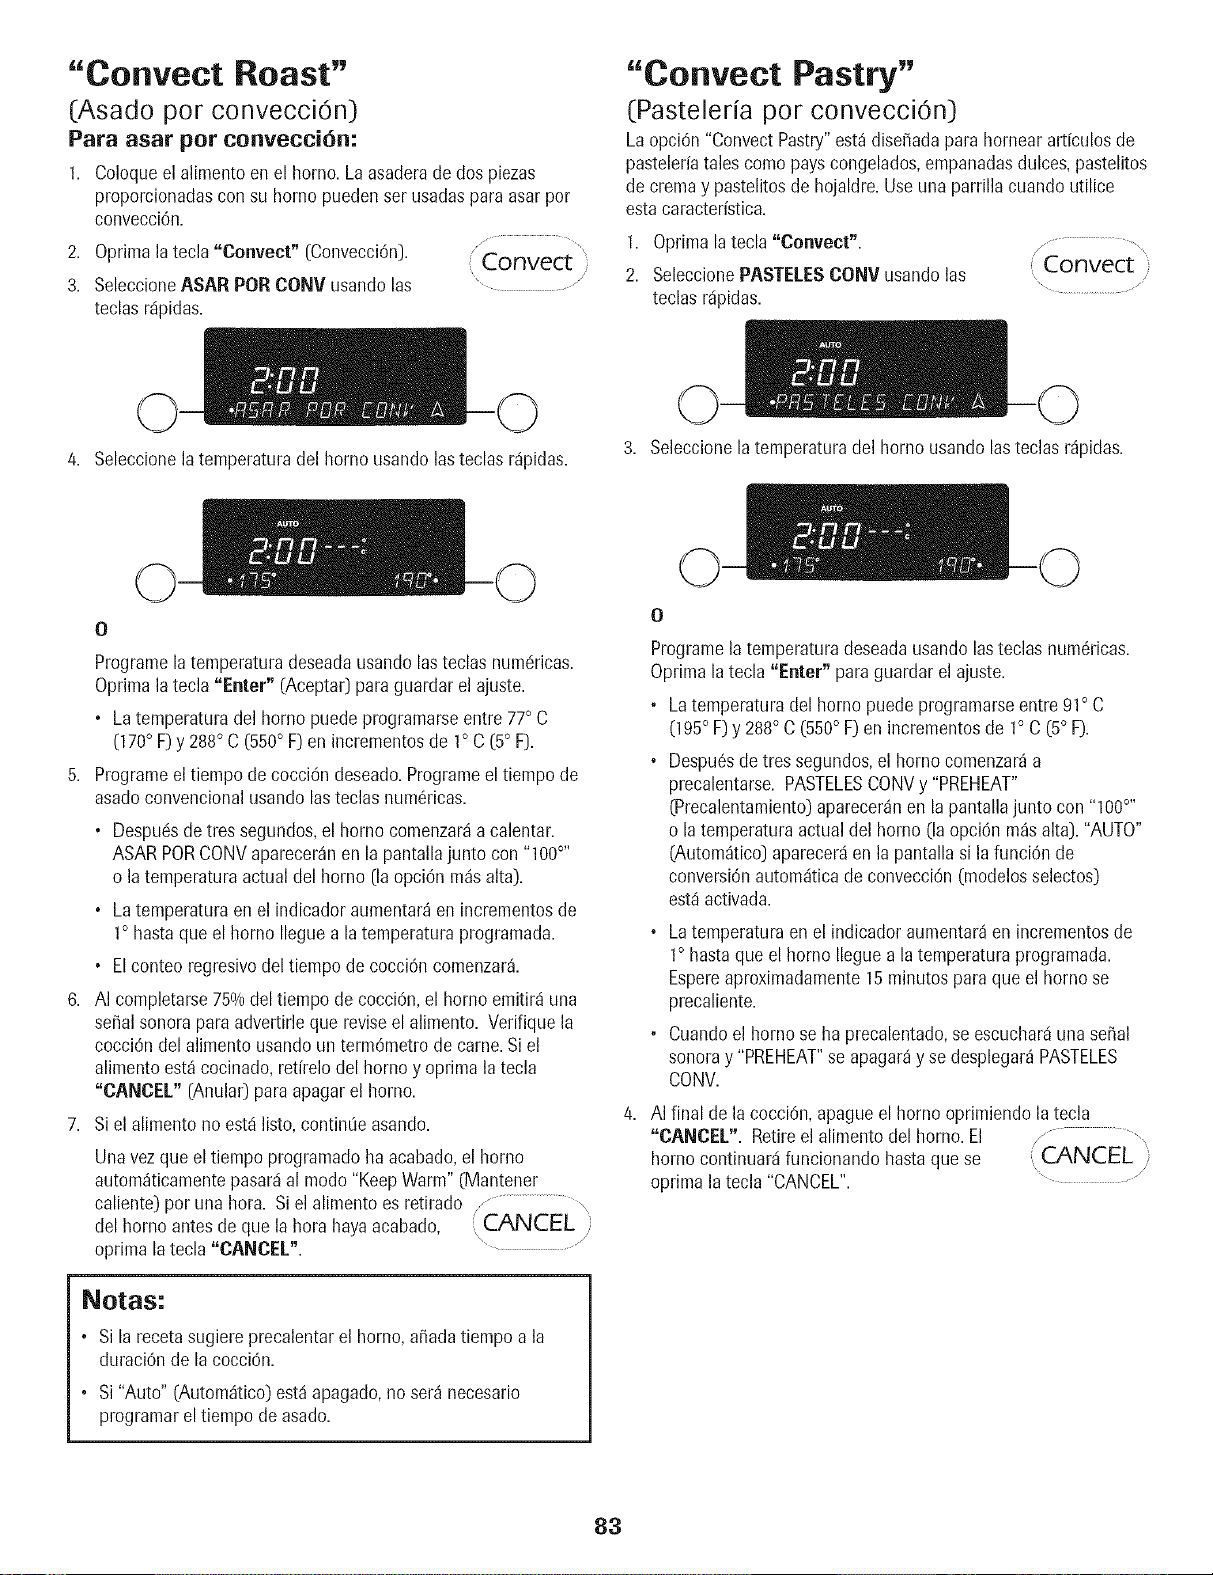
"Convect Roast"
(Asado por convecciOn)
Para asar pot convecci6n:
1. Coloqueel alimento en el homo.La asaderade dos piezas
proporcionadascon su homo puedenser usadasparaasarpor
convecciOn.
/ ........
2. Optima latecla "Conveet" (ConvecciOn). "Convect ')
3. SeleccioneASAR PORCONV usandolas ......................
teclas r_pidas.
"Convect Pastry"
(Pastelefia por convecci0n)
LaopciOn"ConvectPastry"est_ diserada para hornearart[culosde
pasteleriatales como payscongelados,empanadasdulces,pastelitos
decrema y pastelitosde hojaldre.Useunaparrilla cuando utilice
estacaracterfstica.
1. Optima la tecla "Convect".
2. Seleccione PASTELES CONV usando las
teclas r_ipidas.
/_" "%.¸¸
( Convect i
4. Seleccionelatemperaturadel homo usando lasteclas rdpidas.
3. Seleccionela temperaturadel homo usando lasteclas r_pidas.
O
Programela temperaturadeseadausandolas teclas numOricas.
Optima latecla "Enter" (Aceptar)paraguardar el ajuste.
• Latemperaturadel homo puedeprogramarseentre 77° C
(170° F) y 288° C (550° F)en incrementosde 1° C (5° F).
5. Programeel tiempo de cocciOndeseado.Programeel tiempo de
asadoconvencionalusando lasteclas numOricas.
• DespuOsde tres segundos,el homo comenzar_a calentar.
ASARPORCONVaparecer_nen la pantallajunto con "100°"
o la temperaturaactual del homo [la opciOnm_salta).
• Latemperaturaen el indicador aumentar_en incrementosde
1° hastaque el homo Ileguea la temperaturaprogramada.
• Elconteo regresivodel tiempo decocciOncomenzar&
6. AI completarse75o/0del tiempo de cocciOn,el homo emitir_ una
serialsonora paraadvertirleque reviseel alimento. Verifique la
cocciOndel alimento usandoun termOmetrode came. Si el
alimentoest_ cocinado,retfrelodel homo y optima la tecla
"CANCEL" [Anular) paraapagar el homo.
7. Si elalimento no est,1listo,continOeasando.
Una vez queel tiempo programadoha acabado,el homo
autom_ticamentepasar_ial modo "KeepWarm"(Mantener
caliente)por una hora. Si el alimento es retirado .................................
del homo antesde que la hora hayaacabado, CANCEL :
optima latecla "CANCEL". ......... "
Notas:
• Si la recetasugiere precalentarel horno, arada tiempoa la
duraciOnde la cocciOn.
• Si "Auto" (Autom_tico) est_apagado,no ser_ necesario
programarel tiempo de asado.
Programela temperaturadeseadausandolasteclas numOricas.
Optimala tecla "Enter" paraguardar el ajuste.
. Latemperaturadel homo puede programarseentre 91° C
095 ° F) y 288° C (550° F)en incrementosde 1° C (5° F).
• Despu_sde tres segundos,el homo comenzar_a
precalentarse.PASTELESCONVy "PREHEAT"
(Precalentamiento)aparecer_nen la pantallajunto con "100°"
o la temperaturaactual del homo (laopciOnm_salta). "AUTO"
(Autom_tico)aparecer_en la pantallasi la funci0n de
conversionautom_iticade convecci0n(modelosselectos)
est_activada.
• Latemperaturaen el indicador aumentarden incrementosde
1° hastaque el homo Ileguea latemperaturaprogramada.
Espereaproximadamente15minutosparaque el homo se
precaliente.
. Cuandoel homo se ha precalentado,se escuchardunaserial
sonoray "PREHEAT"se apagar_y se desplegar_PASTELES
CONV.
AI final de la cocciOn,apague el homo oprimiendo la tecla
"CANCEL". Retireel alimentodel homo.El .........................
homo continuar_ifuncionandohasta que se (CANCEL ')
optima latecla "CANCEL". ........................................."
83

"Broil" (Asa0
Paraobtener los mejoresresultados,precalienteel homo durante
cinco minutoscon la puerta cerraday useuna bandejadisefiada
paraasar. La puerta del homo debeestar abierta en eltope de asar
[aprox.4" o 5 cm) cuando ase alimentos.
Para asar a la parrilla:
1. Coloquela parrilla del hornoen la posici0napropiada.G/eala
Tablade asar).
/, .................... \
2. Oprima la tecla "Broil". ( Broil
3. Seleccioneel nivelALTO- 288° C [550° F). ......................
O
Seleccioneel nivel BAJO - 232° C (450° F).
• Elhomo tiene unacaracterBticavariablede asara la parrilla Io
que significaque se puedeseleccionaruna temperaturam_s
bajapara asara la parrilla (149° C a 288° C o 300° F a 550° F).
Paraseleccionaruna temperaturam_s baja,oprima lasteclas
numCricascorrespondientes.Oprima la tecla "Enter"
(Acepta0para guardar elajustede temperaturam_sbajo.
4. Precalienteel homo durate cinco minutos.
5. Coloqueel alimento en el homo y cierre la puerta hastael tope
de asar.
/ .................. , \
6. Oprima la tecla "CANCEL" (Anular) cuando (CANCEL :
terminede asar. ......... ,
Notas:
• Yeala Tabladeasarpara obtener informaci0nsobre los
alimentosy tiemposde asado.
• Sipasan m_sde30 segundosentre la activaci0nde latecla
"Broil" y la activaci0nde lasteclas r_ipidaso numc!ricas,el
homo noquedar_ programadoy la pantalla mostrar_el
despliegueanterior.
• Useel ajusteALTOpara asarla mayorfade los alimentos. Use
latemperaturade asado m_sbaja cuandoase alimentosque
requieranmayortiempo de cocci0n. Latemperaturam_s baja
permiteque el alimento quedebiencocido sin que se dore
demasiado.
, Lostiempos de asara la parrilla aumentar_ny el doradoser_i
m_sclaro si el electrodomc!sticoes instaladoen un circuito de
208voltios.
o
°
Elalimento debevoltearsea la mitad deltiempo de asado.
Lostiempos de asara la parrilla puedenser m_s largos
cuandose han seleccionadotemperaturasm_s bajasde asar a
la parrilla.
Tabla de asar
Came de res [asadoa 74° C o 165° F)
6 hamburguesasde 1,3cm (1/2") de grueso
2 filetes,2,5cm (1")de grueso
2 filetesde res"NewYork Strip",2,5cm (1")de grueso
2 filetes"T-Bone", 2,5em (1") degrueso
Carae de ave (asadoa 77° C o 170° F)
4 pechugasdeshuesadas/sinpellejo
4 pechugasde polio con hueso
Came de cerdo [asadoa 71° C o 180° F)
4 chuletasde cerdodeshuesadas,2,5cm (1")de grueso
4 chuletasde cerdocon hueso,2,5cm (1")de grueso
RebanadadejamOn,2,5cm (1")de grueso)
Pescado (asadoa60° C o 140° F)
4 filetesde pezespada,2,5cm [1") de grueso
10 a 12minutos
18 a 22 minutos
18 a 22 minutos
18 a 22minutos
Asado BAJO
12 a 15 minutos
20 a 23 minutos
20 a 28 minutos
25 a 28minutos
12 a 16minutos
8 a 12 minutos
2 filetesde mero,2,5cm (1"3de grueso
Relojanaranjado,2,5cm (1"}de grueso
Camarones(16a 20 camaronespor libra)
2 filetesde salmon,1,3cm (1/2"} de grueso
2 filetesde salmon,2,5cm (1") degrueso
10 a 12 minutos
10 a 12 minutos
8 a 10minutos
8 a 12minutos
8 a 12minutos
4
4
4
4
4
3
4
4
4
4
4
4
4
4
4
*Importante: Parareducir el doradoy el humo excesivodurante el asado,use unaposici0n de parrilla bajay aumente eltiempo de asado.
84
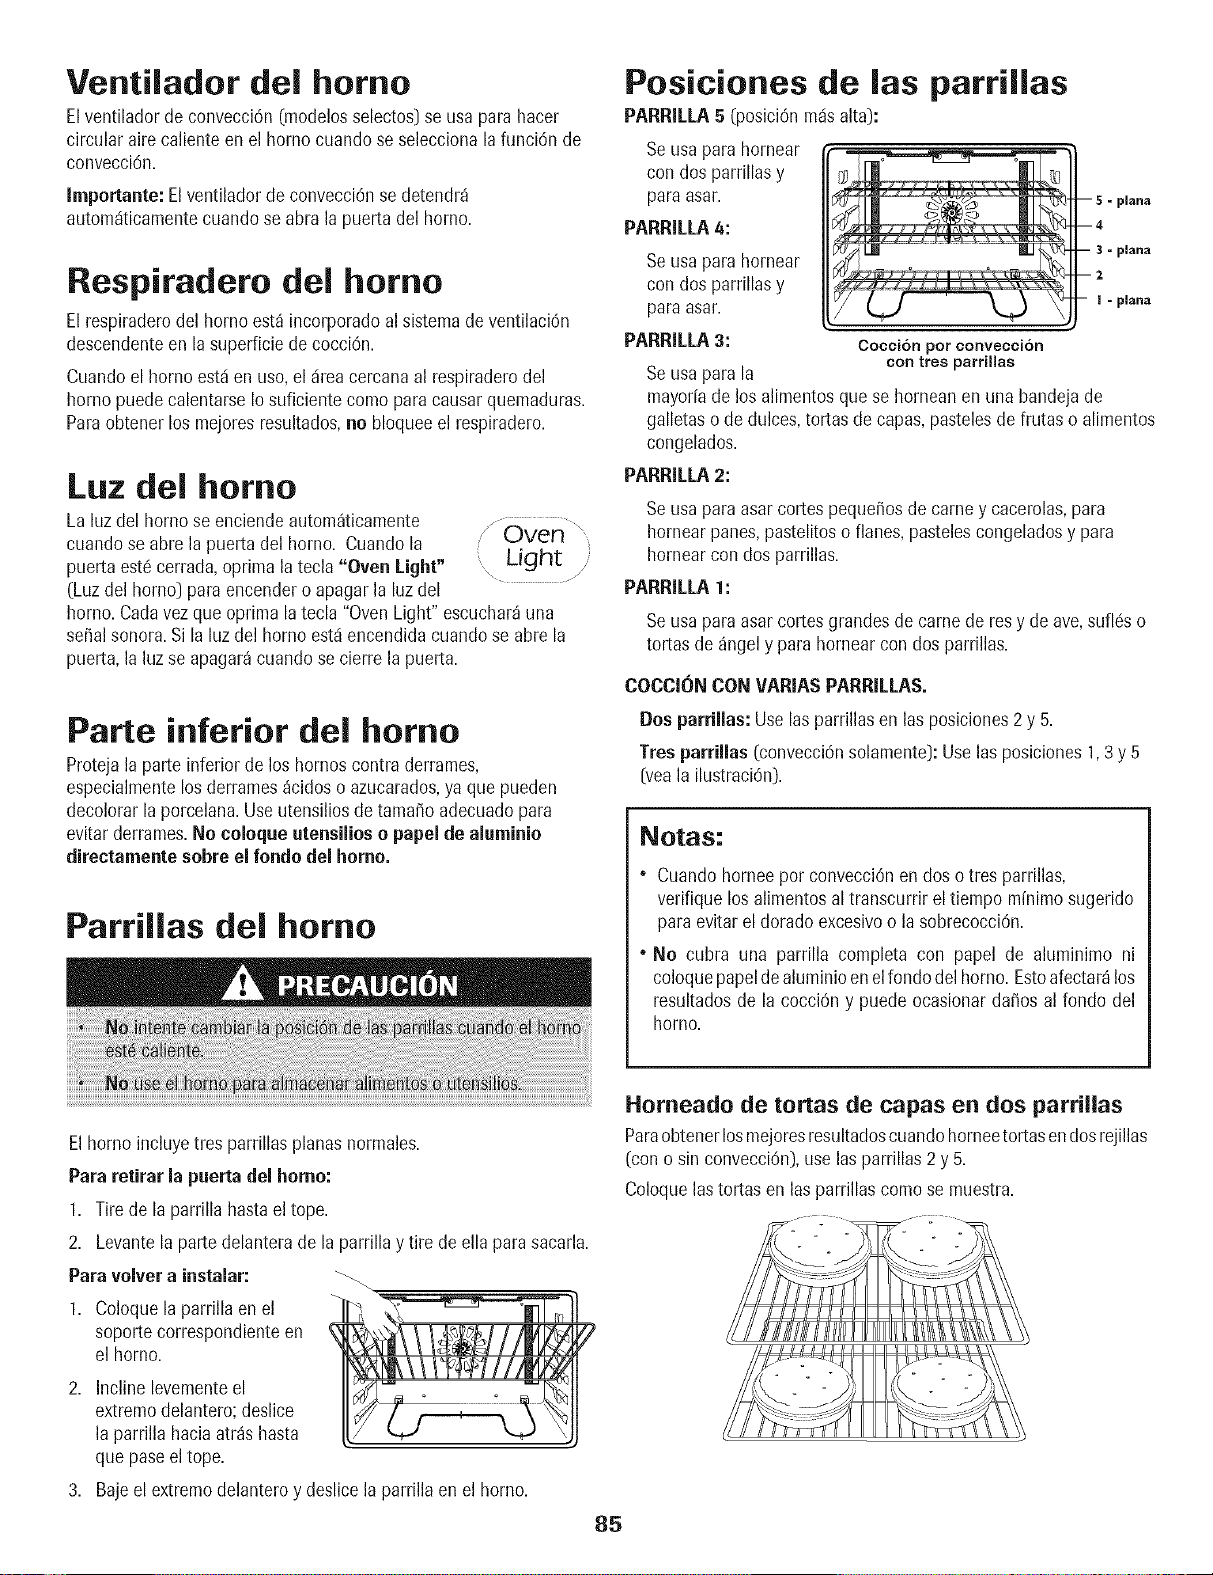
Ventilador del homo
Elventilador de convecci6n(modelosselectos)se usa parahacer
circular airecaliente en el homo cuando se seleccionala funci6n de
convecci6n.
Importante: Elventilador deconvecci6nse detendr_
autom_iticamentecuandose abra la puerta del homo.
Respiradero del homo
Elrespiraderodel horno est_ incorporadoal sistemade ventilaci0n
descendenteen la superficiede cocciOn.
Cuandoel homo est,1en use,el _ireacercanaal respiraderodel
homo puedecalentarseIo suficiente comeparacausar quemaduras.
Paraobtener los mejoresresultados,no bloqueeel respiradero.
Luz del homo
La luz del homo se enciendeautom_ticamente j..............
cuandose abre la puerta del homo. Cuandola Oven "'
puerta est6 cerrada,oprima la tecla "Oven Light" Light
(Luz del homo] para encendero apagarla luzdel
homo. Cadavez que oprima la tecla "OvenLight" escuchar_una
sepalsonora.Si la luz del homo est,1encendidacuandose abrela
puerta,la luz se apagar_cuandose cierre la puerta.
Parte inferior del homo
Protejala parte inferior de los hornoscontra derrames,
especialmentelos derrames_cidoso azucarados,ya que pueden
decolorar la porcelana.Useutensiliosde tamale adecuadopara
evitarderrames.No coloque utensilioso papel de aluminio
directamente sobre eJrondo del homo.
Parrillas del homo
Posiciones de las
PARRILLA5 (posici6n m_isalta):
Seusa parahornear
con dos parrillasy
paraasar.
PARRILLA4:
parrillas
-- 5 = plana
--4
-- 3 = plana
--2
I = plana
Seusa parahornear
con dos parrillasy
paraasar.
PARRILLA3: cocci6n per convecci6n
Seusa parala con tres parriilas
mayor[ade los alimentosque se horneanen una bandejade
galletaso de dulces,tortas de capas,pastelesde frutaso alimentos
congelados.
PARRILLA2:
Seusa paraasarcortes peque_osde came y cacerolas,para
hornearpanes,pastelitoso flanes,pastelescongeladosy para
hornearcon dos parrillas.
PARRILLA1:
Seusa paraasarcortes grandesde came de resy de ave,suflc!so
tortas de angel y para hornear con dos parrillas.
COCCiONCON VARIAS PARRILLAS.
Dos parrillas:Use las parrillasen las posiciones2 y 5.
Tres parrillas(convecci6nsolamente):Use las posiciones1,3 y 5
[yeala ilustraciOn).
Notas:
• Cuando horneeper convecci6nen dos o tres parrillas,
verifique losalimentosal transcurrir eltiempo minimo sugerido
para evitarel dorado excesivoo lasobrecocci6n.
• No cubra una parrilla completa con papel de aluminimo ni
coloquepapelde aluminioen elrondo delhomo. Estoafectardlos
resultadosde la cocci6n y puede ocasionarda_os al rondo del
homo.
El homo incluye tres parrillasplanasnormales.
Para retirar la puerta del borne:
1. Tire de la parrilla hastael tope.
Homeado de tetras de capas en dos parrillas
Paraobtenerlosmejoresresultadoscuandoborneotortasendosrejillas
(cono sin convecciOn),use lasparrillas 2 y 5.
Coloquelastortas en lasparrillas comese muestra.
2. Levantela partedelanterade la parrilla y tire deella parasacarla.
Para velvet a instalar:
1. Coloquela parrilla en el
soportecorrespondienteen
el homo.
Inclinelevementeel
extremedelantero;deslice
la parrillahaciaatria hasta
que pasoel tope.
3. Bajeel extremedelanteroy deslicelaparrilla en el homo.
85
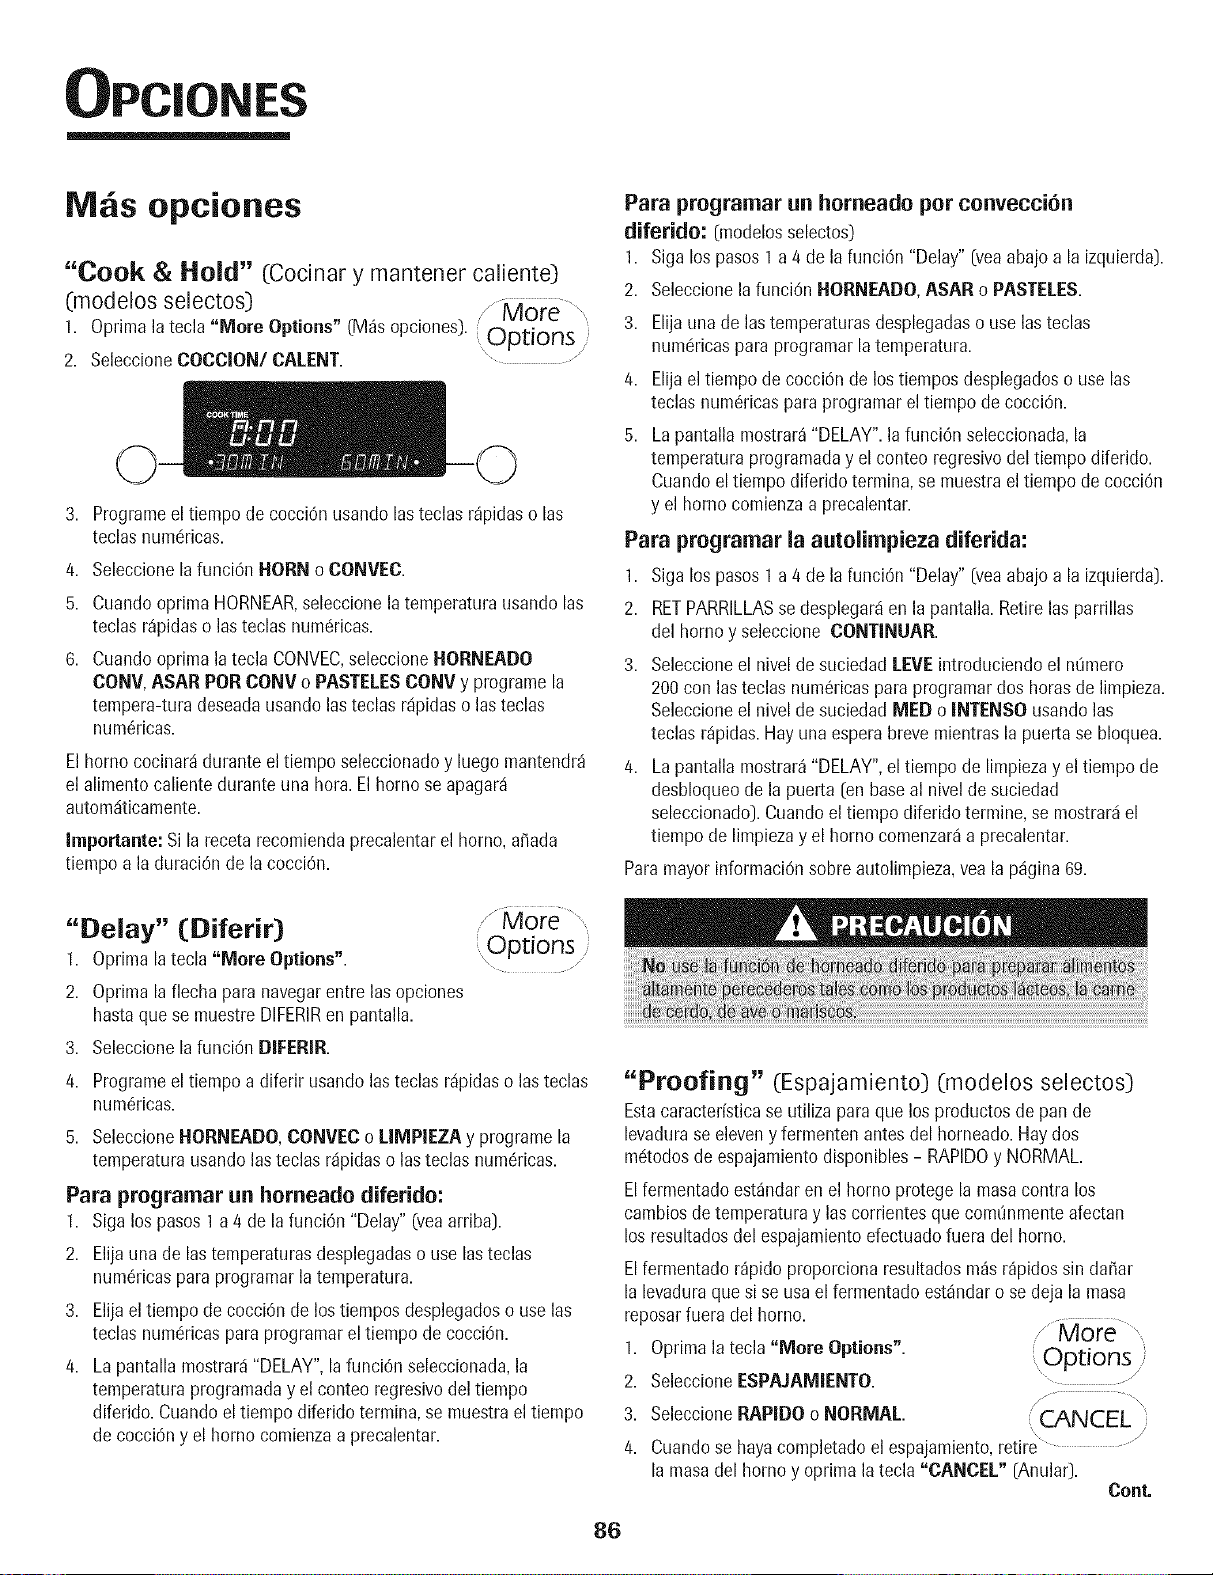
OPC|ONE:
IVies opciones
"Cook & Hold" (Cocinar y mantener caliente)
(modelos selectos)
1. Oprima la tecla "More Options" (M_s opciones). Options
2. SeleccioneCOCCION/CALENT. "...............
3. Programeel tiempo de cocciOnusandolas teclas r@idas o las
teclas numdricas.
4. SeleccionelafunciOnHORN o CONVEC.
5,
6.
Cuandooptima HORNEAR,seleccionela temperaturausandoIns
teclas r@idas o Insteclas numdricas.
Cuandooptima la tecla CONVEC,seleccioneHORNEADO
CONV,ASAR PORCONV o PASTE[,ESCONV y programela
tempera-turadeseadausandoInsteclas rdpidaso las teclas
num6ricas.
Elhomo cocinarddurante eltiempo seleccionadoy luego mantendr_
el alimentocalientedurante una horn.El homo se apagard
automdticamente.
importante:Si la receta recomiendaprecalentarel homo,afiada
tiempo a la duraci6nde la cocciOn.
"Delay" (Diferir)
1. Oprima la tecla "More Options".
2. Oprima la flecha paranavegarentre lasopciones
hastaque se muestreDIFERIRen pantalla.
3. Seleccionelafunci6n DIFERIR.
Options /
\ /
4. Programeel tiempo a diferir usandolas teclas rdpidaso Insteclas
num@icas.
5. SeleccioneHORNEADO, CONVEC o [.IMPIEZAy programe la
temperaturausandolasteclas rdpidaso lasteclas num6ricas.
Para programar an homeado diferido:
1. Sigalos pasos1 a 4 de la funci6n "Delay" (veaarriba).
2. Elijauna de Instemperaturasdesplegadaso use lasteclas
num6ricaspara programarla temperatura.
3. Elijael tiempo de cocciOnde lostiempos desplegadoso use Ins
teclas numdricaspara programarel tiempo de cocciOn.
4. La pantalla mostrard"DELAY",la funciOnseleccionada,la
temperaturaprogramaday elconteo regresivodel tiempo
diferido.Cuandoel tiempo diferido termina,se muestrael tiempo
de cocciOny el homo comienzaa precalentar.
Para programar un horneado pot convecci6n
diferido: 0nodelosselectos)
1. Siga lospasos 1 a4 de lafunciOn"Delay" [yea abajoa la izquierda].
2. Seleccionelafunci6n HORNEADO,ASAR o PASTELLES.
3. Elijauna de Instemperaturasdesplegadaso use Insteclas
numc!ricaspara programarlatemperatura.
4. Elijael tiempo decocciOnde los tiemposdesplegadoso uselas
teclas num6ricaspara programarel tiempo de cocci6n.
5. Lapantalla mostrar_"DELAY".la funci6n seleccionada,la
temperaturaprogramaday el conteoregresivodel tiempo diferido.
Cuandoel tiempo diferidotermina, se muestrael tiempo de cocciOn
y el homo comienzaa precalentar.
Para programar la autolimpieza diferida:
I. Sign lospasosI a4 de la funci6n "Delay" (yeaabajo a la izquierda].
2. RETPARRILLASse desplegarden la pantalla.Retirelas parrillas
del homo y seleccione CONTINUAR.
3. Seleccioneel nivel desuciedad [,EVEintroduciendoel ntimero
200con lasteclas num6ricaspara programardos hornsde limpieza.
Seleccioneel nivelde suciedad MED o INTENSOusandoIns
teclas r@idas.Hay una esperabreve mientrasla puertase bloquea.
4. Lapantalla mostrar_"DELAY",el tiempode limpiezay el tiempo de
desbloqueode la puerta [on baseal nivelde suciedad
seleccionado).Cuandoel tiempo diferido termine,se mostrardel
tiempo de limpiezay el homo comenzarda precalentar.
ParamayorinformaciOnsobreautolimpieza,yea la pdgina 69.
"Proofing" (Espajamiento) (modelos selectos)
Estacaracter[sticase utiliza para que los productosde pan de
levadurase eleveny fermentenantesdel horneado.Haydos
mc!todosdeespajamientodisponibles- RAPIDOy NORMAL.
Elfermentadoest_ndaren el homo protege la masacontra los
cambiosde temperaturay Ins corrientesque comtinmenteafectan
los resultadosdel espajamientoefectuadofuera del homo.
Elfermentador@ido proporcionaresultadosm_sr@idos sin dahar
la levaduraque si se usa el fermentadoest_ndaro se deja la masa
reposarfuera del horno. ,/More ..........
1. Oprimala tecla "More Options". ( C)ntions_,_,
2. SeleccioneESPAJAMIENTO. .............. /
/, ............. ,\
3. SeleccioneRAPIDO o NORMAL. CANCEL
4. Cuandose hayacompletadoel espajamiento,retire .............................../
lamasa del homo y optimala tecla "CANCEL" [Anula0.
Cont.
86
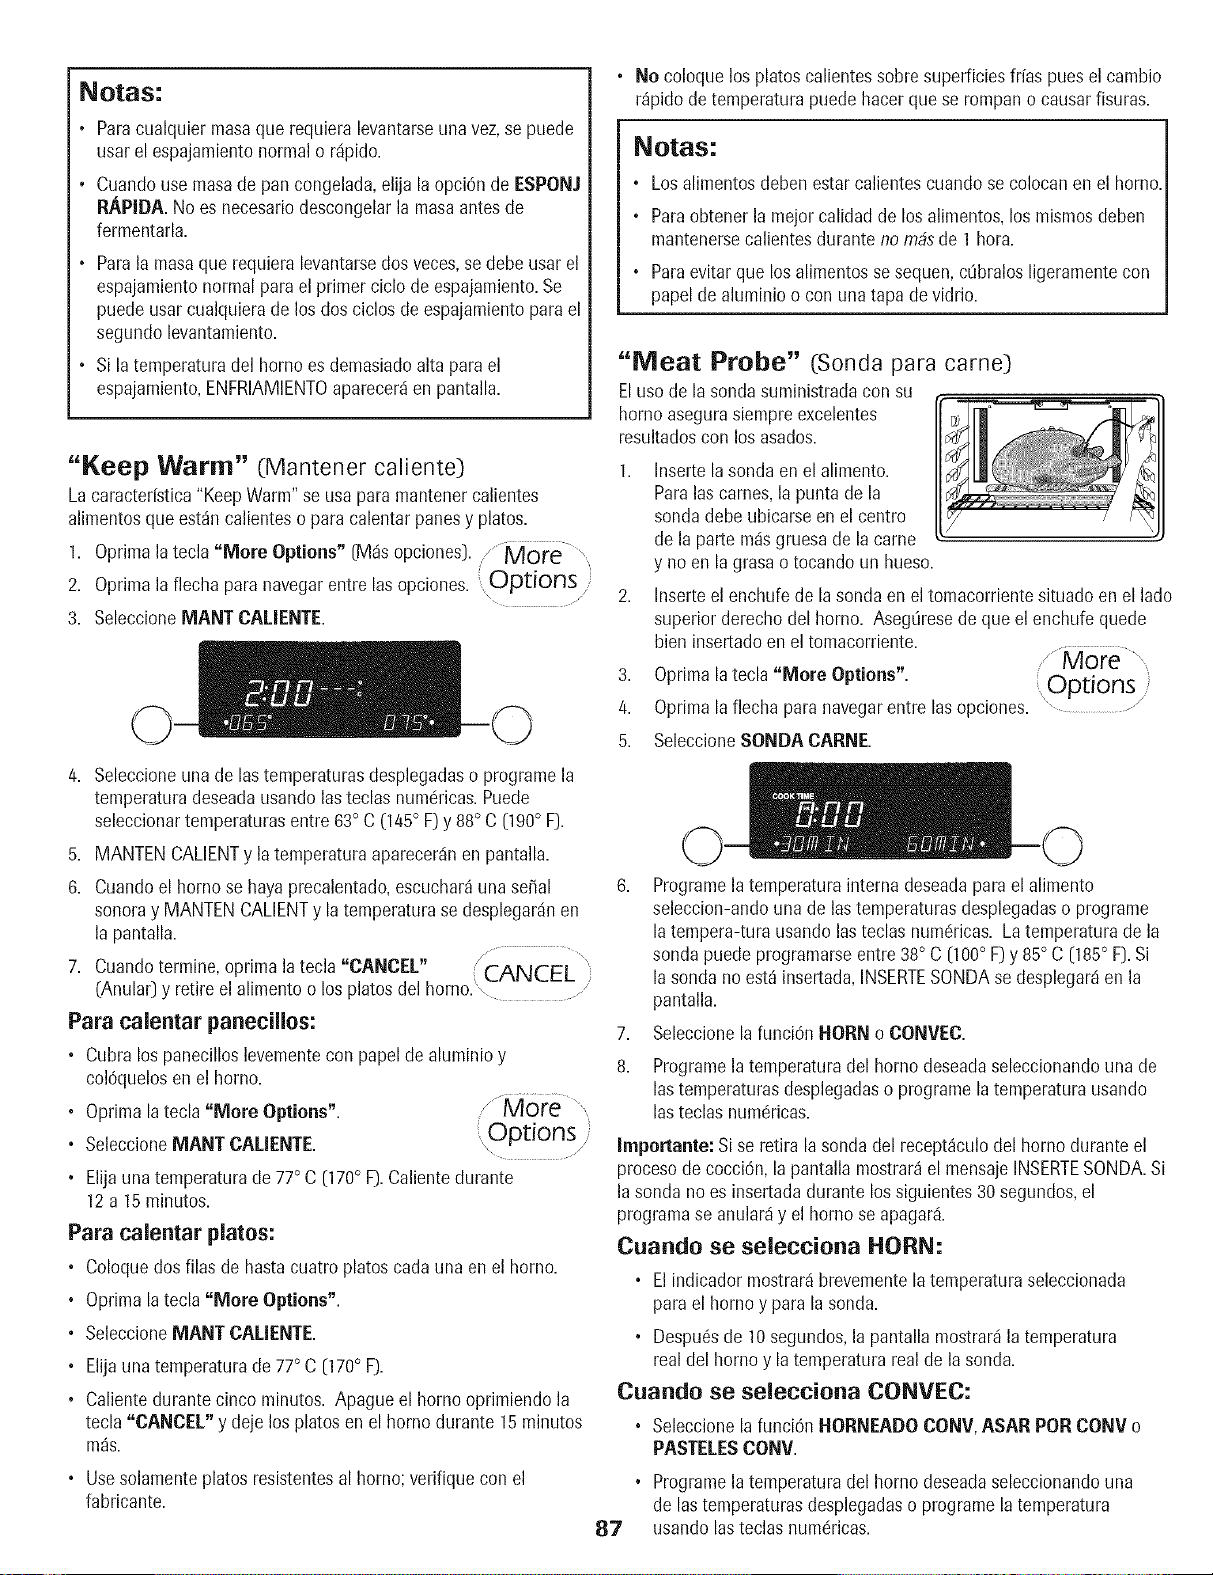
Notas:
• Paracualquier masaque requiera levantarseuna vez,se puede
usar el espajamientonormalo r@ido.
, Cuandouse masade pan congelada,elija la opci6n de ESPONJ
RAPIDA. No es necesariodescongelarla masaantesde
fermentarla.
• Parala masaque requiera levantarsedos veces,se debe usar el
espajamientonormal parael primer ciclo de espajamiento.Se
puedeusar cualquierade los dos ciclos deespajamientoparael
segundo levantamiento.
• Si latemperaturadel homo es demasiadoalta parael
espajamiento,ENFRIAMIENTOaparecer_ien pantalla.
No coloquelos platoscalientessobresuperficiesfrias pues el cambio
r@ido detemperaturapuede hacer quese rompano causarfisuras.
Notas:
• Losalimentosdeben estarcalientescuandose colocanen el horno.
° Paraobtenerla meier calidadde losalimentos,los mismos@ben
mantenersecalientesdurante nombs de 1 hora.
• Paraevitarque losalimentosse sequen,c0bralosligeramentecon
papelde aluminio o con unatapa devidrio.
"Meat Probe" (Sonda para came)
Eluso de la sondasuministradacon su
homo asegurasiempreexcelentes
resultadoscon los asados.
"Keep Warm" (Mantener caliente} 1.
Lacaracter[stica"KeepWarm"se usa paramantener calientes
alimentosque est_ncalienteso para calentarpanesy platos.
1. Oprima la tecla "More Options" (M_s opciones}. /More
2. Oprima la flecha paranavegarentre las opciones. Options
\ " 2.
3. SeleccioneMANTCAUENTE.
4. Seleccioneunade lastemperaturasdesplegadaso programela
temperaturadeseadausandolas teclas numc!ricas.Puede
seleccionartemperaturasentre 63° C (145° F}y 88° C 090° F}.
5. MANTENCALIENTy la temperaturaaparecer_inen pantalla.
6. Cuandoel homo se hayaprecalentado,escuchar_unasepal
sonoray MANTENCALIENTy latemperaturase desplegar_inen
la pantalla.
7. Cuandotermine oprima latecla "CANCEL" / CANCEL
(Anular}y retire el alimento o los platos del homo.' .......... "
Para calentar panecillos:
• Cubralos panecilloslevementecon papel de aluminioy
col6quelosen el homo.
• Oprimala tecla "More Options". _JMore '
, Options
, SeleccioneMANT CALIENTE. ............................
° Elijaunatemperaturade 77° C 070 ° F).Calientedurante
12a 15 minutos.
Para caientar piatos:
• Coloquedos filas de hastacuatro platoscada una en el homo.
• Oprimala tecla "More Options".
, SeleccioneMANT CAIIIENTE.
• Elijauna temperaturade77° C (170° F).
• Calientedurantecinco minutos. Apague el homo oprimiendo la
tecla "CANCEl," y deje los platos en el homo durante 15 minutos
m_s.
, Usesolamenteplatos resistentesal homo; verifique con el
fabricante.
3,
4.
Insertela sondaen el alimento.
Paralas carries,la punta de la
sondadebe ubicarseenel centro
de la parte rodsgruesa de la came
y no en la grasao tocando un hueso.
Inserteel enchufe de lasonda en el tomacorrientesituado en el lado
superiorderechodel homo. Aseg0resede que el enchufequede
bien insertadoen el tomacorriente.
Oprimala tecla "More Options". ODtions_,___
Oprimala flecha para navegarentre las opciones. ".................................
5. SeleccioneSONDACARNE.
6,
7,
8.
87
Programela temperaturainterna deseadaparael alimento
seleccion-andouna de lastemperaturasdesplegadaso programe
la tempera-turausando lasteclas num_ricas. Latemperaturade la
sondapuede programarseentre 38° C [100° F}y 85° C [185° F}.Si
la sonda no est_ insertada,INSERTESONDAse desplegar_ien la
pantalla.
SeleccionelafunciOnHORN o CONVEC.
Programela temperaturadel homo deseadaseleccionandouna de
las temperaturasdesplegadaso programelatemperaturausando
las teclas num6ricas.
Importante: Sise retira lasonda del recept_culodel homo duranteel
procesode cocci6n,la pantalla mostrar_el mensajeINSERTESONDA.Si
la sonda no es insertadadurante lossiguientes30segundos,el
programase anulardy el homo se apagard.
Cuando se selecciona HORN:
, El indicadormostrardbrevementelatemperaturaseleccionada
parael homo y para la sonda.
° Despu@de 10segundos,la pantallamostrardla temperatura
real del homo y la temperaturareal de la sonda.
Cuando se selecciona CONVEC:
• Seleccionelafunci6n HORNEADO CONV, ASAR POR CONV o
PASTELESCONV.
• Programela temperaturadel homo deseadaseleccionandouna
de las temperaturasdesplegadaso programelatemperatura
usando lasteclas numc!ricas.
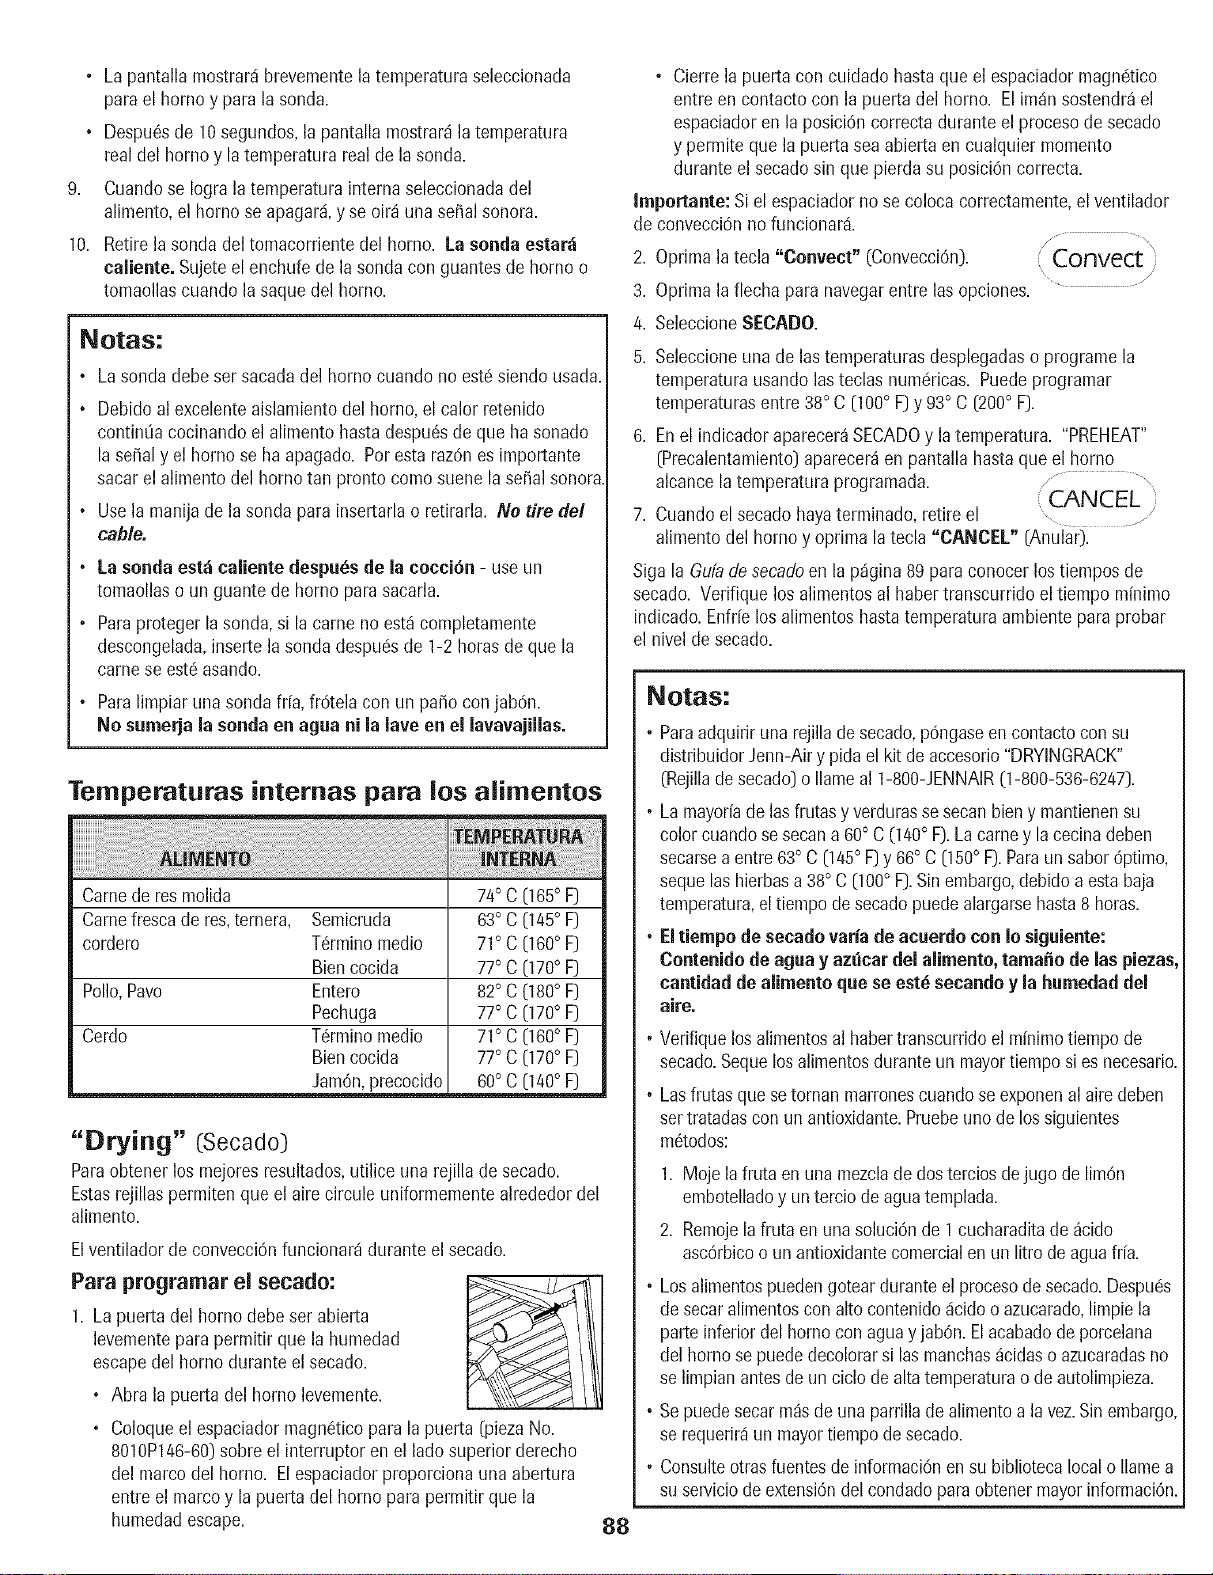
, Lapantallamostrar_ibrevementelatemperaturaseleccionada
paraelhomoyparalasonda.
• Despu6sde10segundos,lapantallamostrar4latemperatura
realdelhomoylatemperaturarealdelasonda.
9. CuandoseIogralatemperaturainternaseleccionadadel
alimento,elhomoseapagar&yseoir4unasepalsonora.
10.Retirelasondadeltomacorrientedelhomo.Lasondaestar_i
caliente.Sujeteelenchufedelasondaconguantesdehomoo
tomaollascuandolasaquedelhomo.
, Cierre la puertacon cuidadohastaque el espaciadormagn6tico
entre en contacto con la puertadel homo. El im_insostendr_el
espaciadoren la posici6ncorrectadurante el procesode secado
y permiteque la puertasea abiertaen cualquier momento
durante el secadosin que pierdasu posici6n correcta.
Importante: Siel espaciadorno se colocacorrectamente,elventilador
de convecci6nno funcionar&
// ..........
2. Oprimala tecla "Cenvect" (Convecci6n). Convect ;
.............. /
3. Oprimala flecha para navegarentre las opciones.
Notas:
• Lasondadebeser sacadadel homo cuando noest6siendo usada.
• Debidoal excelenteaislamientodel homo, el calor retenido
continOacocinandoel alimentohasta despu6sde que hasonado
lasepal y el homo se haapagado. Por esta raz6nes importante
sacarel alimento del homo tan pronto comosuene la sepal sonora.
• Usela manijade la sonda para insertarlao retirarla. Ne tire del
cable.
• La sonda estd caliente despu6s de la coeei6n - use un
tomaollaso un guante de homo parasacarla.
• Paraproteger la sonda,si la came no est_completamente
descongelada,insertela sondadespuc!sde 1-2 horas de que la
came se est6 asando.
• Paralimpiar una sonda if(a,fr6tela con un paso conjab6n.
No sumerja la sonda en agua ni la lave en el lavavajillas.
Temperaturas internas para los alimentos
Camede res molida
Camefrescade res,ternera, Semicruda
cordero T6rminomedic
Biencocida
Polio,Pavo Entero
Pechuga
Cerdo T6rminomedic
Biencocida
JamOn,precocid_
74° C (165° F]
63° C (145° F]
71° C (160° F]
77° C (170° F]
82° C (180° F)
77° C [170° F)
71° C (160° F)
77° C (170° F]
60° C flaO° F)
"Drying" (Secado)
Paraobtenerlos mejoresresultados,utilice unarejilla de secado.
Estasrejillas permiten que el airecircule uniformementealrededor del
alimento.
Elventiladorde convecci6nfuncionar4 duranteel secado.
Para programar el secado:
1. La puerta del homo debeser abierta
levementepara permitir que la humedad
escapedel homo durante el secado.
° Abra la puerta del homo levemente.
° Coloqueel espaciadormagn6ticopara la puerta (piezaNo.
801@146-60)sobreel interruptor enel lado superiorderecho
del marcodel homo. El espaciadorproporcionauna abertura
entre el marco y la puertadel homo para permitir que la
humedadescape.
88
4. SeleccioneSEOADO.
5. Seleccioneunade las temperaturasdesplegadaso programela
temperaturausandolas teclas num6ricas. Puedeprogramar
temperaturasentre 38° C [100° F)y 93° C [200° F).
6. Enel indicadoraparecer_SECADOy latemperatura. "PREHEAT"
(Precalentamiento)aparecer_en pantallahastaqueel homo
alcancela temperaturaprogramada, z..............................,
CANCEL )
7. Cuandoel secadohayaterminado, retireel .............
alimentodel homo y oprima latecla "CANCEL" (Anula0.
Sigala Gufadesecadoen la p_gina 89 paraconocerlos tiempos de
secado. Verifique los alimentosal haber transcurridoel tiempo mfnimo
indicado.Enfr[elos alimentoshastatemperaturaambiente paraprobar
el nivelde secado.
Notas:
Paraadquiriruna rejilla desecado,pongaseen contactoconsu
distribuidorJenn-Airy pidael kit de accesorio"DRYINGRACK"
(Rejillade secado)o Ilameal 1-800-JENNAIR(1-800-536-6247).
Lamayoriade las frutasy verdurasse secanbien y mantienensu
colorcuandose secana 60° C (140° F).Lacamey la cecinadeben
secarsea entre63° C [145° F)y 66° C [150° F).Paraunsabor6ptimo,
sequelashierbasa 38° C (100° F).Sinembargo,debidoa estabaja
temperatura,el tiempode secadopuedealargarsehasta8 horas.
Eltiempe de seeado vada de acuerdo con Io siguiente:
Contenidode agua y az_car del aiimento, tamale de las piezas,
eantidadde aJimento que se est6 seeando y JahumedaddeJ
aire.
° Verifiquelos alimentosal habertranscurridoel minimotiempo de
secado.Sequelosalimentosduranteun mayortiemposi es necesario.
• Lasfrutasque setornan marronescuandoseexponenal airedeben
sertratadascon un antioxidante.Pruebeuno de los siguientes
m6todos:
1. Moje la fruta en unamezclade dosterciosdejugo de limOn
embotelladoy untercio deaguatemplada.
2. Remojela fruta en unasoluci6nde 1cucharaditade _cido
asc6rbicoo un antioxidantecomercialen un litro de aguafr[a.
• Losalimentospuedengotearduranteel procesodesecado.Despuc!s
desecaralimentoscon alto contenido_icidoo azucarado,limpie la
parteinferior delhomo con aguay jab6n. El acabadode porcelana
delhomo se puededecolorarsi lasmanchas_cidaso azucaradasno
selimpian antesde unciclo de alta temperaturaode autolimpieza.
• Sepuedesecarm_sde una parrillade alimentoa lavez.Sinembargo,
serequerir4un mayortiempo desecado.
° Consulteotrasfuentesde informaci6nensu bibliotecalocal o Ilamea
suserviciodeextensi6ndel condadoparaobtenermayorinformaci6n.
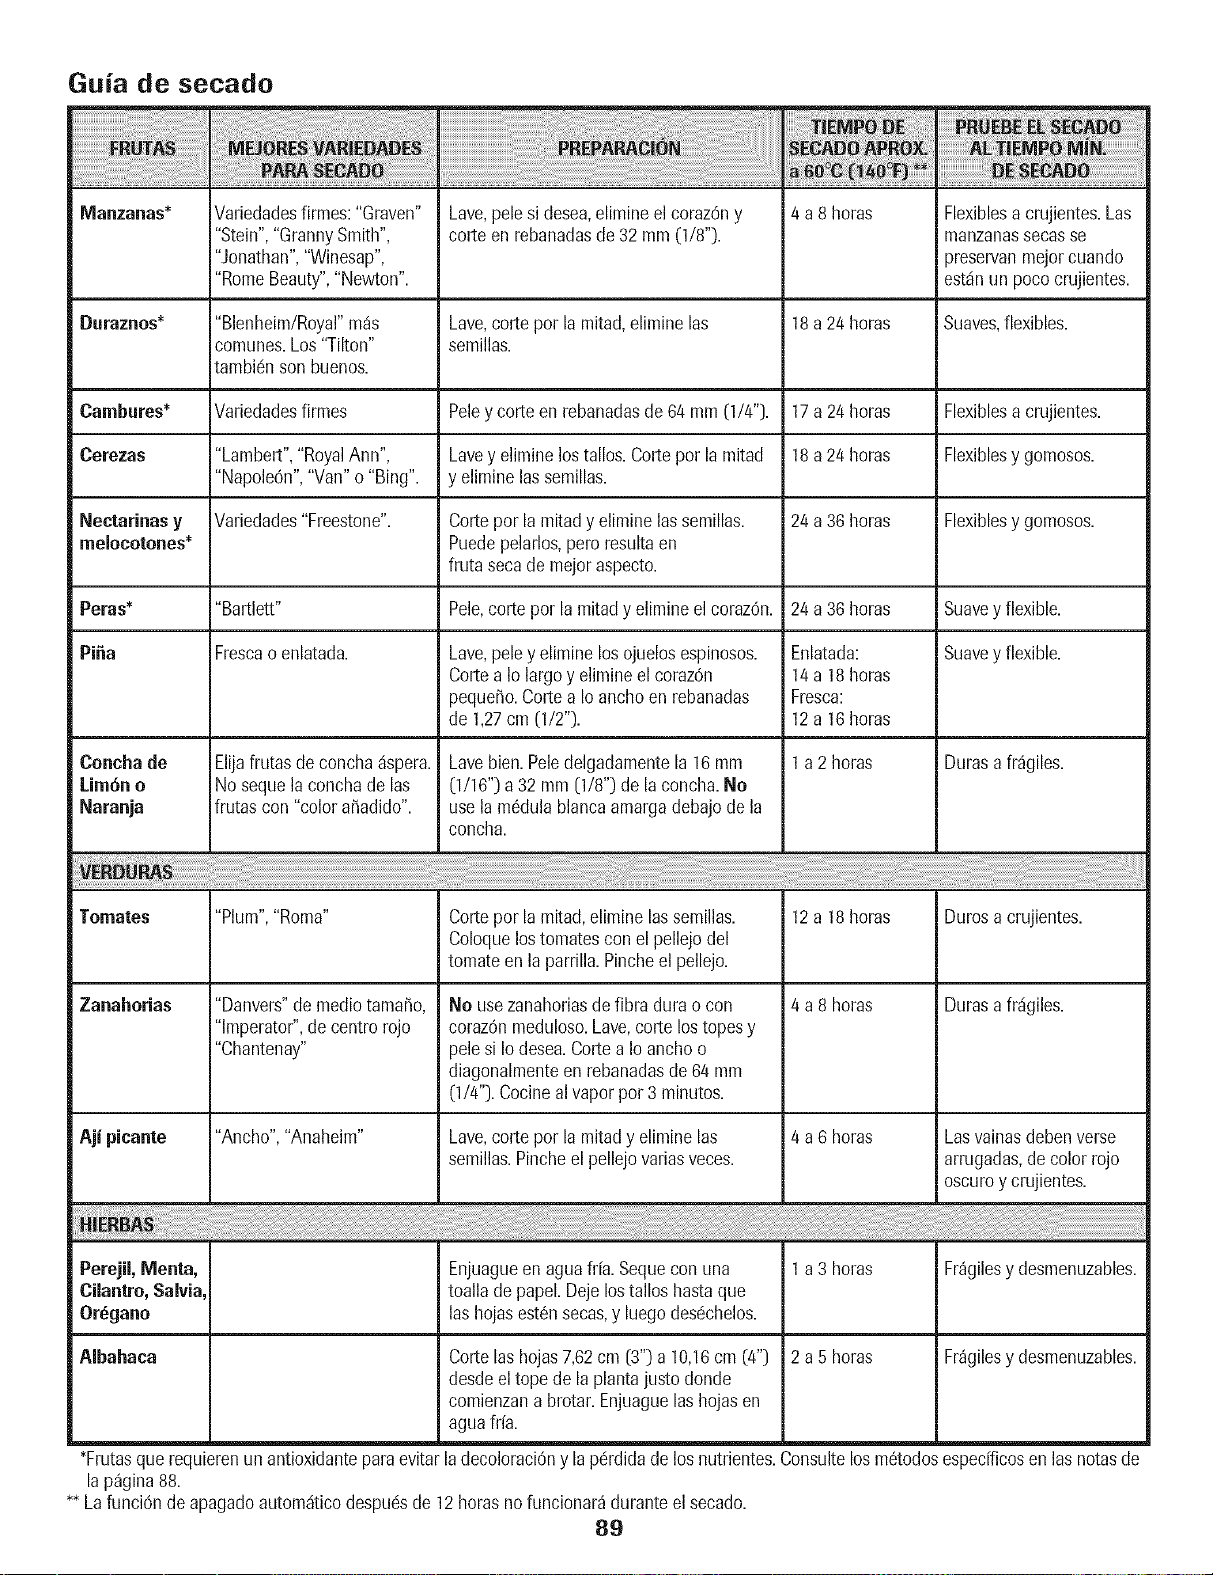
Guia de secado
Manzanas* Variedadesfirmes:"Graven" Lave,pelesi desea,elimineel corazOny 4 a8 horas Flexiblesa crujientes.Las
"Stein","GrannySmith", corteen rebanadasde 32 mm (1/8"). manzanassecasse
"Jonathan","Winesap", preservanmejorcuando
"RomeBeauty","Newton". estdnun poco crujientes.
Duraznos* "Blenheim/Royal"m_s Lave,cortepor la mitad,eliminelas 18a 24horas Suaves,flexibles.
comunes.Los"Tilton" semillas.
tambic!nson buenos.
Cambures* Variedadesfirmes Peley corte en rebanadasde64 mm (1/4"). 17a 24 horas Flexiblesa crujientes.
Cerezas "Lambert","RoyalAnn", Lavey eliminelostallos.Cortepor la mitad 18a 24 horas Flexiblesy gomosos.
"NapoleOn","Van"o "Bing". y eliminelas semillas.
Nectarinasy Variedades"Freestone". Cortepor la mitady eliminelassemillas. 24a 36 horas Flexiblesy gomosos.
melocotones* Puedepelarlos,pero resultaen
frutaseca de mejoraspecto.
Peras* "Bartlett" Pele,corte pot lamitad y elimineel coraz0n. 24 a 36horas Suavey flexible.
Pifia Frescao enlatada. Lave,peley elimine losojuelosespinosos. Enlatada: Suavey flexible.
Cortea Io largo y elimineel coraz0n 14a 18horas
peque_o.Cortea Io anchoen rebanadas Fresca:
de 1,27cm (1/2"). 12a 16horas
1a 2 horas Durasa fr_giles.
Concha de
Lirn6n o
Naranja
Elijafrutas de concha_spera.
No sequela conchade las
frutas con "colora_adido".
Lavebien.Peledelgadamentela 16mm
(1/16") a 32 mm (1/8") de la concha.No
use la m6dulablancaamargadebajodela
concha.
Toinates
Zanahorias
Aji picante
Perejil, Menta,
Cilantre, Salvia,
Oregano
"Plum","Roma"
"Danvers"de mediotama_o,
"Imperator",de centro rojo
"Chantenay"
"Ancho","Anaheim"
Albahaca
Cortepor la mitad,elimine lassemillas.
Coloquelostomatesconel pellejo del
tomateen la parrilla.Pincheel pellejo.
No usezanahoriasdefibra durao con
coraz0nmeduloso.Lave,corte los topesy
pelesi Io desea.Cortea Io anchoo
diagonalmenteen rebanadasde 64 mm
(1/4").Cocinealvapor por3 minutos.
Lave,corte por la mitady eliminelas
semillas.Pincheel pellejovariasveces.
Enjuagueen aguafr[a.Sequecon una
toallade papel.Dejelostallos hastaque
las hojasestOnsecas,y luegodesOchelos.
Cortelashojas7,62cm (3")a 10,16cm (4")
desdeel tope de la plantajusto donde
comienzana brotar.Enjuaguelas hojasen
aguafrfa.
12 a 18 horas
4 a8 horas
4 a6 horas
1a 3 horas
2 a 5 horas
Durosa crujientes.
Durasa frdgiles.
Lasvainasdebenverse
arrugadas,de colorrojo
oscuroy crujientes.
Fr_gilesy desmenuzables.
Fr_gilesy desmenuzables.
*Frutasque requlerenunantioxidanteparaevitarladecoloraciOny lapdrdidadelos nutrientes.ConsultelosmOtodosespedficosenlas notasde
la p_gina88.
** LafunciOnde apagadoautomdticodespudsde 12horasno funcionar_duranteel secado.
89
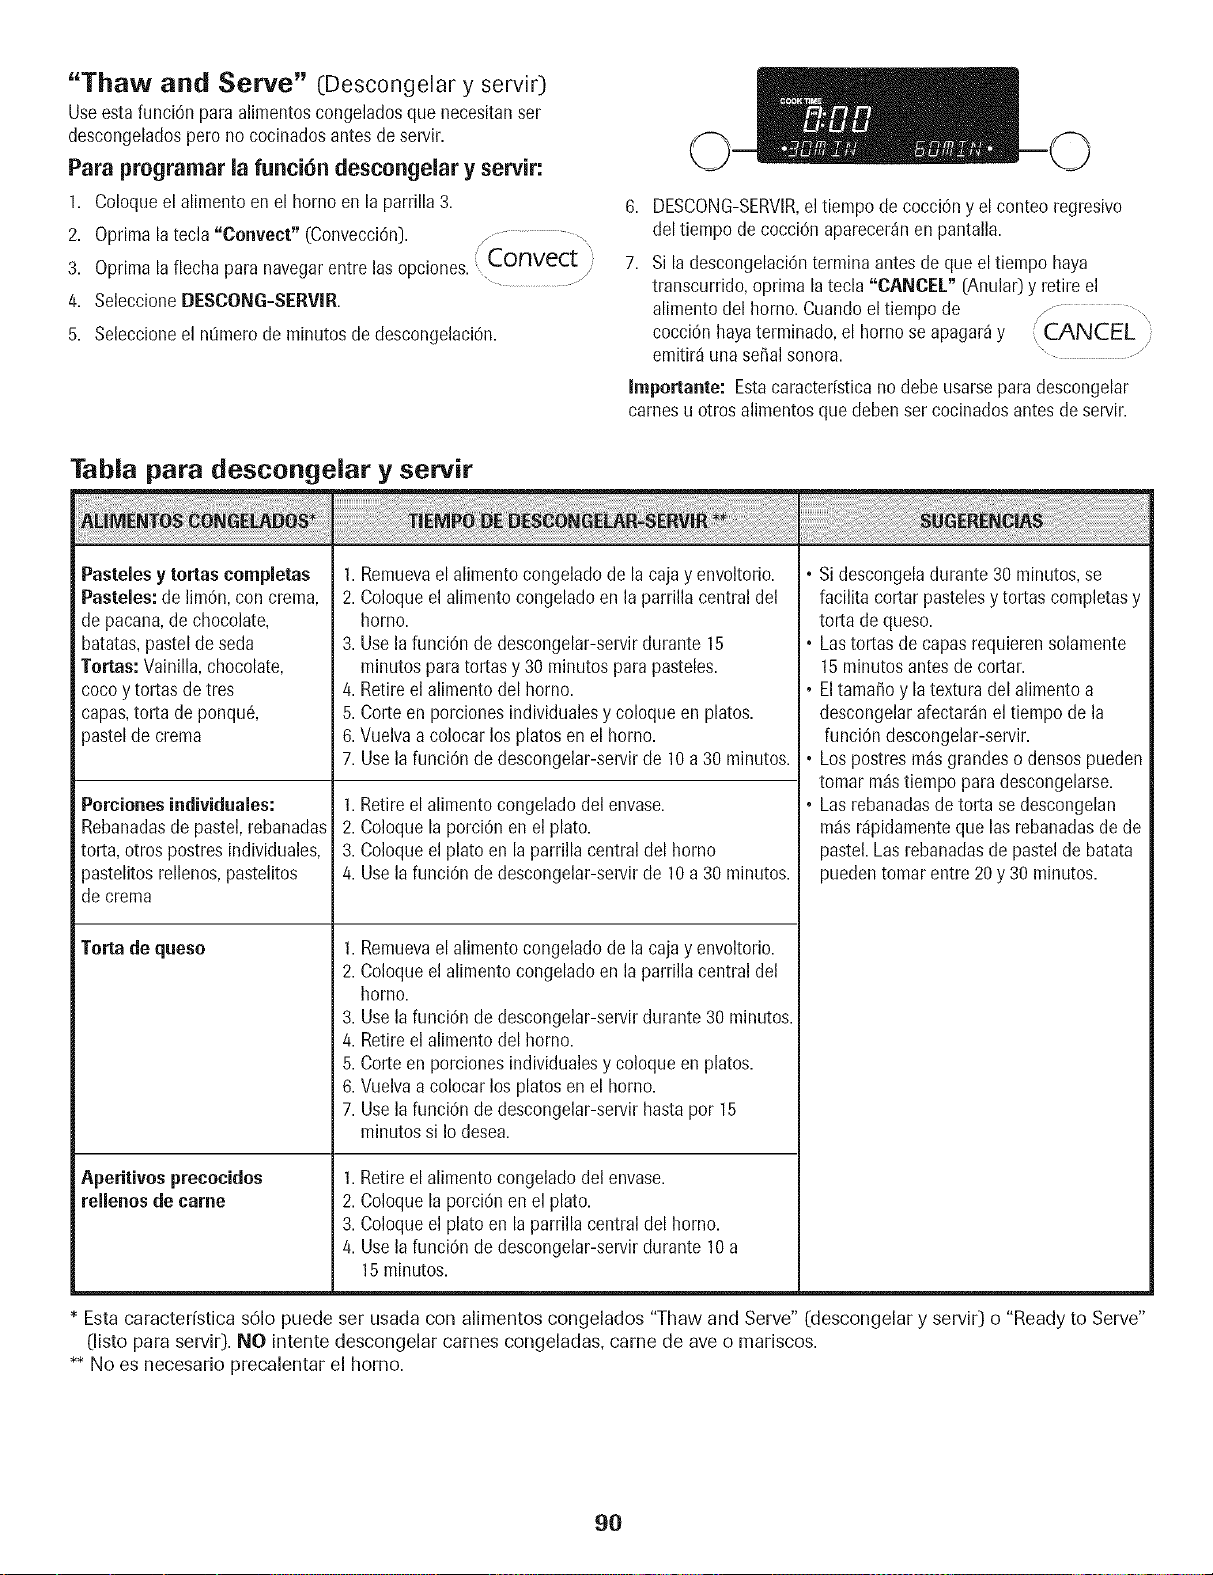
"Thaw and Sere" (Deseongelar y servir)
UseestafunciOnpara alimentoscongeladosque necesitanser
descongeladosperono cocinadosantesdeservir.
Para programar la funci6n descongelar y servir:
1. Coloqueel alimento en el hornoen la parrilla 3.
2. Oprima la tecla "Conveet" (ConvecciOn). ,..........................
3. Oprima la flecha paranavegarentre las opciones.( Convect
/
4. SeleccioneDESCONG=SERVIR.
5. Seleccioneel nL_merode minutosde descongelaciOn.
Tabla para descongelar y servir
6. DESCONG-SERVlR,eltiempo de cocciOny el conteo regresivo
deltiempo de cocciOnaparecer_nen pantalla.
7. Si ladescongelaciOnterminaantes de que el tiempo haya
transcurrido,oprima la tecla "CANCEL" [Anula0 y retire el
alimentodel homo. Cuandoel tiempo de / ............
cocciOnhayaterminado,el homo se apagar_y ( CANCEL
/
emitir_una serialsonora. ..........
Importante: Estacaracter[sticano debeusarsepara descongelar
carriesu otros alimentosquedebenser cocinadosantesde servir.
Pasteles y tortas completas
Pasteles:de limOn,con crema,
de pacana,de chocolate,
batatas,pastel de seda
Tetras: Vainilla,chocolate,
coco y tortas de tres
capas,torta de ponqu_,
pastelde crema
Porcienesindividuales:
Rebanadasde pastel,rebanadas
torta, otros postresindividuales,
pastelitosrellenos,pastelitos
de crema
Toga de queso
Aperitives preeocidos
rellenos de came
1.Remuevael alimento congeladode la cajay envoltorio.
2. Coloqueel alimento congeladoen la parrilla central del
homo.
3. Use lafunciOnde descongelar-servirdurante 15
minutos para tortasy 30 minutospara pasteles.
4. Retire elalimentodel homo.
5. Corte en porcionesindividualesy coloque en platos.
6. Vuelvaa colocar los platos enel homo.
7. Use la funciOndedescongelar-servirde 10a 30 minutos.
1.Retireel alimento congeladodel envase.
2. Coloquela porciOnen el plato.
3. Coloqueel plato en la parrillacentral del homo
4. Use la funciOndedescongelar-servirde 10a 30 minutos.
1.Remuevael alimento congeladode la cajay envoltorio.
2. Coloqueel alimento congeladoen la parrilla central del
homo.
3. Use la funciOndedescongelar-servirdurante 30minutos.
4. Retire elalimentodel homo.
5. Corte en porcionesindividualesy coloque en platos.
6. Vuelvaa colocar los platos enel homo.
7. Use la funciOndedescongelar-servirhasta por 15
minutossi Io desea.
1.Retireel alimento congeladodel envase.
2. Coloquela porciOnenel plato.
3. Coloqueel plato en la parrillacentral del homo.
4. Use la funciOndedescongelar-servirdurante 10a
15minutos.
• Si descongeladurante 30 minutos,se
facilita cortarpastelesy tortas completasy
torta de queso.
• Lastortas de capasrequieren solamente
15minutosantesde cortar.
° Eltamafio y latextura del alimento a
descongelarafectar_nel tiempo de la
funciOndescongelar-servir.
° Lospostresm_s grandeso densos pueden
tomar m_stiempo paradescongelarse.
° Lasrebanadasde torta se descongelan
m_sr_ipidamenteque las rebanadasde de
pastel.Las rebanadasde pastelde batata
puedentomar entre 20 y 30 minutos.
* Esta caracteristica solo puede ser usada con alimentos congelados "Thaw and Serve" (descongelar y servir) o "Ready to Serve"
(listo para servir). NO intente descongelar carnes congeladas, came de ave o mariscos.
** No es necesario precalentar el homo.
9O
FAVO
"Favorites" (Favoritos)
La opci6n "Favorites"guarda hasta 10 desus recetasfavoritas.Los
hornosde convecci6nvienen con cinco recetaspreprogramadas.
Para seleccionar una receta de la lista
de recetas preprogramadas:
1. Oprimala tecla"Favorites". Favorites
, on/off 5.
2. Seleccionela opciOnLISTA RECETAS. "................
6.
3.
Seleccionela recetadeseadaen la pantallau opnma la flecha
paradesplazarsea la receta deseada.
letra "A"; optima latecla <STIJ> unavezpara la letra "S".
Contint_easi hastaque hayaterminadola palabra.
• Despu6sde programarcada letra,esperetres segundoshasta
que aparezcauna linea en el siguienteespaciou optima la tecla
"Enter" antesdepasara la siguienteletra.
• Sepuedenusar hasta14 letras incluyendolosespacios.
Seleccionetecla "Enter" para guardar el nombre.
Seleccioneel tipo de cocciOn,como por ejemploHORNEAR,
HORNEADOCONV,ASARA LA PARR,etc.
Seleccionela temperaturadel homo usando lasteclas r@idas.
O
Unavez que la recetaesseleccionada,el homo comenzar_a
precalentardeacuerdo con el programaseleccionado.
• Puedeoprimir la tecla "More Options" (M_s opciones) para
a_adirlas funcionesCOCC/CALENo DIF.
5. Cuandotermine, optima latecla "CANCEL" (Anula0 y retire el
alimentodel homo.
Para guardar la _ltima receta terminada:
(Hornear,Horneadopor convecci6n,Asado porconvecci6n,Pastelerfa
por convecci0n,Asadoa laparrilla por convecciOn,Secado,Mantener
caliente,Fermentado)
1. Oprimala tecla "Favorites".
/ ....................
2. Seleccionela opciOnGUARDARULTIMA. Favorites
On / Off
3. Introduzcael nombreusando lasteclas. ...........
5,
6.
7.
Para crear llrla nueva receta favorita:
8,
9.
10.
11.
12.
13.
• Porejemplo,para guardar "lasagna",optima la tecla<.JKL>
tresvecespara la letra "L"; oprima la tecla <ABC> una vez
parala letra "A"; optima la tecla <STU> unavezpara la letra 4.
"S".Contin[_easi hastaque hayaterminadola palabra.
Despuc!sde programarcadaletra,esperetressegundos hastaque 5.
aparezcauna linea en el siguienteespaciou optima la tecla "Enter" 6.
[Acepta0 antesde pasara la siguiente letra.
• Sepueden usarhasta 14 letras incluyendolos espacios.
Cuandoel hombrede la receta hayasido programado,los L_ltimos
ajustesse desplegar_ndurante variossegundos.
LISTARECETASse desplegar_en la pantalla paranavegarpor las 1.
opciones. 2.
Oprimala tecla "Favorites" para salir del menL_de recetasfavoritas. 3.
4.
Introduzcael nombreusando lasteclas.
Programela temperaturadeseadausandolas teclas numericas.
A_adala funci0n "Cook/Hold" [cocinar/mantenercaliente)
seleccionandola opci0n SI o sake estafunciOnseleccionandoNO.
Sielige SI,programeel tiempo de cocciOnusandolas teclas r_ipidas
o las teclas numc!ricas.
1. Oprimala tecla "Favorites". / Favorites
2. Oprimala flecha para navegarpot las opciones. "_ On / Off ,
3. SeleccioneCREARNUEVAcon la teclaa la izquierda.
4.
• Potejemplo,paraguardar "lasagna",optima la tecla<JKL> tres
vecespara la letra "L"; optima la tecla<ABC> una vezpara la 91
A_adala funci0n "Delay" (Diferido) seleccionandola opci0n SI o
salteesta funciOnseleccionandoNO.
Sielige Sl,programeel tiempo diferido usandolasteclas r@idaso
las teclas numc!ricas.
La pantallamostrar_las opcionesprogrmadasy luegoregresar_ial
menL_de recetasfavoritas.
Optimala tecla "Favorites"para salir del menL_de recetasfavoritas.
Para editar una receta guardada:
1. Oprimala tecla "Favorites".
2. Optimala flecha para navegarentre las opciones.
3. Seleccionela opci6n EDITARRECETA.
Favorites
', On/Off j/
Elijala recetaque deseaeditar. Esposible quedeba oprimir las
teclas fiechadasparaencontrarla receta.
Sigael men0paracambiar las opciones de la recetasegL_nIo desee.
Lapantalla mostrar_el men0de recetasfavoritasnuevamente.LISTA
RECETASaparecer_en pantalla.
7. Optimala tecla "Favorites" parasalir del men[_de recetasfavoritas.
Para borrar aria receta favorita:
Favorites"
Oprima la tecla "Favorites". ,, On / Off /
............................... /
Optima laflecha para navegarentre lasopciones.
Seleccionelaopci0n BORRARRECETA.
Busquela receta quedesea borrar.Esposibleque deba oprimir las
teclasflechadasparaencontrar la receta.
5. Elcontrol le preguntar_si est,1seguro de que deseaborraresa
receta. SeleccioneSI o NO.
6. Optima latecla "Favorites" parasalir del menOde recetasfavoritas.
Parasalir delmenO de recetasfavoritasen cualquier momento,optima
latecla "Favorites".
LISTE
"Setup" (Ajuste)
1. Optimala tecla "Setup".
/ Setup
On/Offj
2. Usela flecha para desplazarsepor las opcionesde "Setup".
3. Seleccionela opciOndeseadausandolas teclasr_pidas.
NOra=" Parasalir de una pantallasin hacerning_n cambio,optima1
latecla "Setup". La pantallavolver_ a desplegarla hora del dfa. 1
"Clock" (Reloj)
Usela opciOn"Clock"para:
, Programarla hora del dfa.
° Programarel dfade la semana.
° Seleccionar"AM" o "PM" (modode 12horassolamente).
, Seleccionarun formate de 12 o 24 horaspara el reloj.
, Apagar el reloj.
|dioma
Elidioma de laspantallas puedeser programadoen inglOs,francOso
espa_ol. Paracambiarel idioma de ingk!sa otto idioma:
1. Optima latecla "Setup".
2. ElijaIDIOMA.
3. Usela flecha para pasara la pantallasiguientede set necesario.
4. Seleccioneel idiomadeseado.
5. Optima latecla "Setup" parasalir del ment]de configuraciOn.
"Auto Convect" (Convecci6n autom_tica)
Elhomo viene programaticdesde laf_brica para la conversion
autom_ticade convecciOn.
"Auto ConvectConversion"reduceautom_ticamentela temperatura
programadaen 25° F {15° C) paralas funciones"ConvectBake"
{Horneadopor convecciOn)y "ConvectPastry"(Pastelerfapot
convecciOn).
Parala funciOn"ConvectRoast"[Asadopor convecciOn)el control le
advertir_cuando hayatranscurridoel 75o/0del tiempo de asado
programaticpara que verifiqueel gradode cocciOnde los alimentos.
Notas:
Cuandouse "ConvectBake" (Horneadopot convecciOn)y
"ConvectPastry"(Pastelerfapot convecciOn)con la opciOn"Auto
ConvectConversion"[ConversiOnautom_ticade convecciOn)
apagada,reduzcala temperaturaprogramadaen 15° C (25° F).
Sise usala funciOn"ConvectRoasting"(AsadoperconvecciOn]
con laopciOn"Auto ConvectConversion"[ConversiOn
autom_iticade convecciOn)apagada,verifique el alimento
cuando hayatranscurridoel 75o/0del tiempo tradicional.
Para desactivar la conversion autom_tica
de convecciOn:
1. Oprimala tecla "Setup".
2. SeleccionelaopciOnCONVECCAUTOM.
3. SeleccioneDESACTIV.
; Setup
, On/Off/
4,
Para reactivar la conversion autom;itica
de convection:
1. Oprimala tecla "Setup".
2. SeleccionelaopciOnCONVECCAUTOM.
3. SeleccioneACTIV.
Optimala tecla "Setup" para salir delmenO de configuraciOn.
Setup
On/Off
4. Optimala tecla "Setup" para salir delmenO de configuraciOn.
C/F
La escalade temperaturadesplegadapuedeser cambiadade
Fahrenheita Celsius.
Para cambiar la escaia:
1. Oprimala tecla "Setup" [Ajuste).
2. Usela fiecha para pasar a la pantalla siguiente.
3. SeleccioneC/F.
i Setup'
On / Off
, /
4. Seleccionela escalade ternperaturadeseada.
5. Optimala tecla "Setup" parasalir del ment_deconfiguraciOn.
92
"Temp Adjust" (Ajuste de la temperatura)
Lastemperaturasdel homo son cuidadosamenteprobadasen la
f_brica. Esnormal notar una diferenciaentre la temperaturade
horneadoo en el doradoentre un homo nuevoy un homo usado.
A medidaque se usanlos hornos,la temperaturade los mismos
puedecambiar.
Ustedpuede ajustarlatemperaturadel homo si consideraque el
mismono est_ horneandoo dorandocorrectamente. Paradecidir
cuanto debecambiar latemperatura,programela temperaturadel
homo a 15° C [25° F) m_s alta o m_s baja que la temperatura
indicadaen su recetay luego hornee. Los resultadosdel primer
horneadole dardnuna meier ideade cu_nto debeajustarla
temperatura.
Para ajustar la temperatura del homo:
1. Oprimala tecla "Setup" (Ajuste).
2. Optimala flecha para navegarentre las opciones.
3. SeleccioneAJUSTARTEMP.
Setup
.....On/Off/
...................... /
4. Programela temperaturadeseadausandolasteclas numdricas.
5. Seleccione'%/-" paraindicar un aumentoo reducciOnde la
temperatura. El cambio detemperaturase despliegaen la parte
superiorde la ventana.
6. Oprimala tecla "Enter" (Acepta0 o esperetres J Setup
segundosparaaceptar los cambios. On / Off/
'\ ..........
7. Oprima la tecla "Setup" para salir del men&
Latemperaturadel homo no necesitaser reajustadasi hay unafalla
o interrupci6n de la energ[ael6ctrica.
Lastemperaturasde asadoy de autolimpiezanose pueden ajustar.
Mode sab tico
Elhorno est_ programadopara apagarsedespu_sde 12 horassi
ustedIo dejaaccidentalmenteencendido.El modesab_ticotiene
prioridadsobreeste cierreautomdticode 12 horasy puede ser
programadoparaque se active autom_ticamenteo puedeset
programadomanualmentecome se desee.
S01opuede usarla fuciOn"Bake" (Hornea0o "Cook/HoldBake"
(Horneadocon cocinary mantenercaliente) cuandoel homo est_ en
el modesab_tico. Todas las demdsfuncionesson desactivadas.Si
cualquierfunciOnque no sea"Bake"o "Cook/HoldBake"cuando
comienzael mode sab_tico,dichafunci6n serd anulada.
Para activar el mode sab;itico:
1. Oprima latecla "Setup".
2. Oprima la flecha paranavegarentre las opciones.
3. Seleccionelaopci6n SABATIOO.
/z ............ %
Setup
On/Off _
deseausar "Bake"o "Cook/HoldBake" duranteel modo
sabdtico,debeprogramarlasen estemomentoantesde que el
modo sabdticomanualest6activado.
5. SeleccioneACTIV o DESACTIV.
6. Optima lateela "Setup" para salir del mere1de eonfiguraci6n.
Para anular el mode sabbtico:
Oprimay mantengaoprimida la tecla "Setup" durante cinco
segundos.Elmode de horneadopuede set anuladooprimiendola
tecla "CANCEL" [Anula0 durante el modesab_tico.
Notas:
Elhomo no debeestar en use parapoder programarel mode
sabdtico.
Elmodesab_ticono puedeactivarsesi el teclado o la puerta
estdnbloqueados.
Siel homo estdfuncionando cuandoel modesabdtico
comienza,noescuchar_sefialessonoras.
Todoslos avisos,mensajesy sehalessonorasestar_n
desactivadoscuandoel mode sab_ticoest6activado.
Sidesea utilizarla kJzdel homo en mode sab_tico,la misma
debeestar encendidaantesde activarestafunci6n.
Elciclo de autolimpiezay el bloqueoautomdticode las puertas
nofuncionan durante el mode sabdtico.
Latemperaturade horneadopuedeset cambiadaduranteel
modesab_ticoactive.Simplementeoprima latecla "Bake" y
luegointroduzcalatemperaturadeseadausandolasteclas de
programaciOnr_pida.
Sioprime la tecla "CANCEL" se detendr_ el ciclo de
horneado,peroel control permanecerden modesabdtico.
208/240 V
Paramejoresresultadoscuando usa lafunci6n "Bake" [Hornear),el
homo puedeser cambiadode 240V a 208 V si su begat usa 208 V.
Para programar el homo a 208 V: _........................
1. Oprimala tecla "Setup". Setup
On/Off
2. Oprimala flecha para navegarentre las opciones. "................
3. Seleccione 2081240 V.
4. Seleccione208V o 240V usandolas teclas rdpidas.
5. Oprimala tecla "Enter" paraguardar los cambios.
6. Oprimala tecla "Setup" parasalir del men&
4. SeleccioneAUTO o MANUAL.
• "Auto" [Automdtico) le pedird que programe la temperatura de
horneado el viernes alas 2:00 p.m. y permanecer_ en modo
sabdtico por 33 horas. MODO SABAT ACT se despliega en la
pantalla por 90 minutos. Si desea usar "Bake" o "Cook/Hold
Bake" durante el modo sabdtico, debe programarlas en este
momento antes de que el modo sabdtico automdtico estd
activado.
Tones (Bips)
Sepuede ajustarel n_meroy el volumen de las se_alessonoras
emitidasal fin de la cocci6ny al fin de la funciOndel temporizador.
Para ajustar las se_ales sonoras:
1. Oprimala tecla "Setup". , On / Off ,'
2. Oprimala flecha paranavegarentre las opciones. " ...............
• "Manual" coloca al homo en modesab_ticoinstant_neamente
durante 72 horas.SABATICOy MODO SABATACT
aparecerdnen la pantalladurante cinco minutes. Si
93
3. Seleccionelaopci6n SONIDOS.
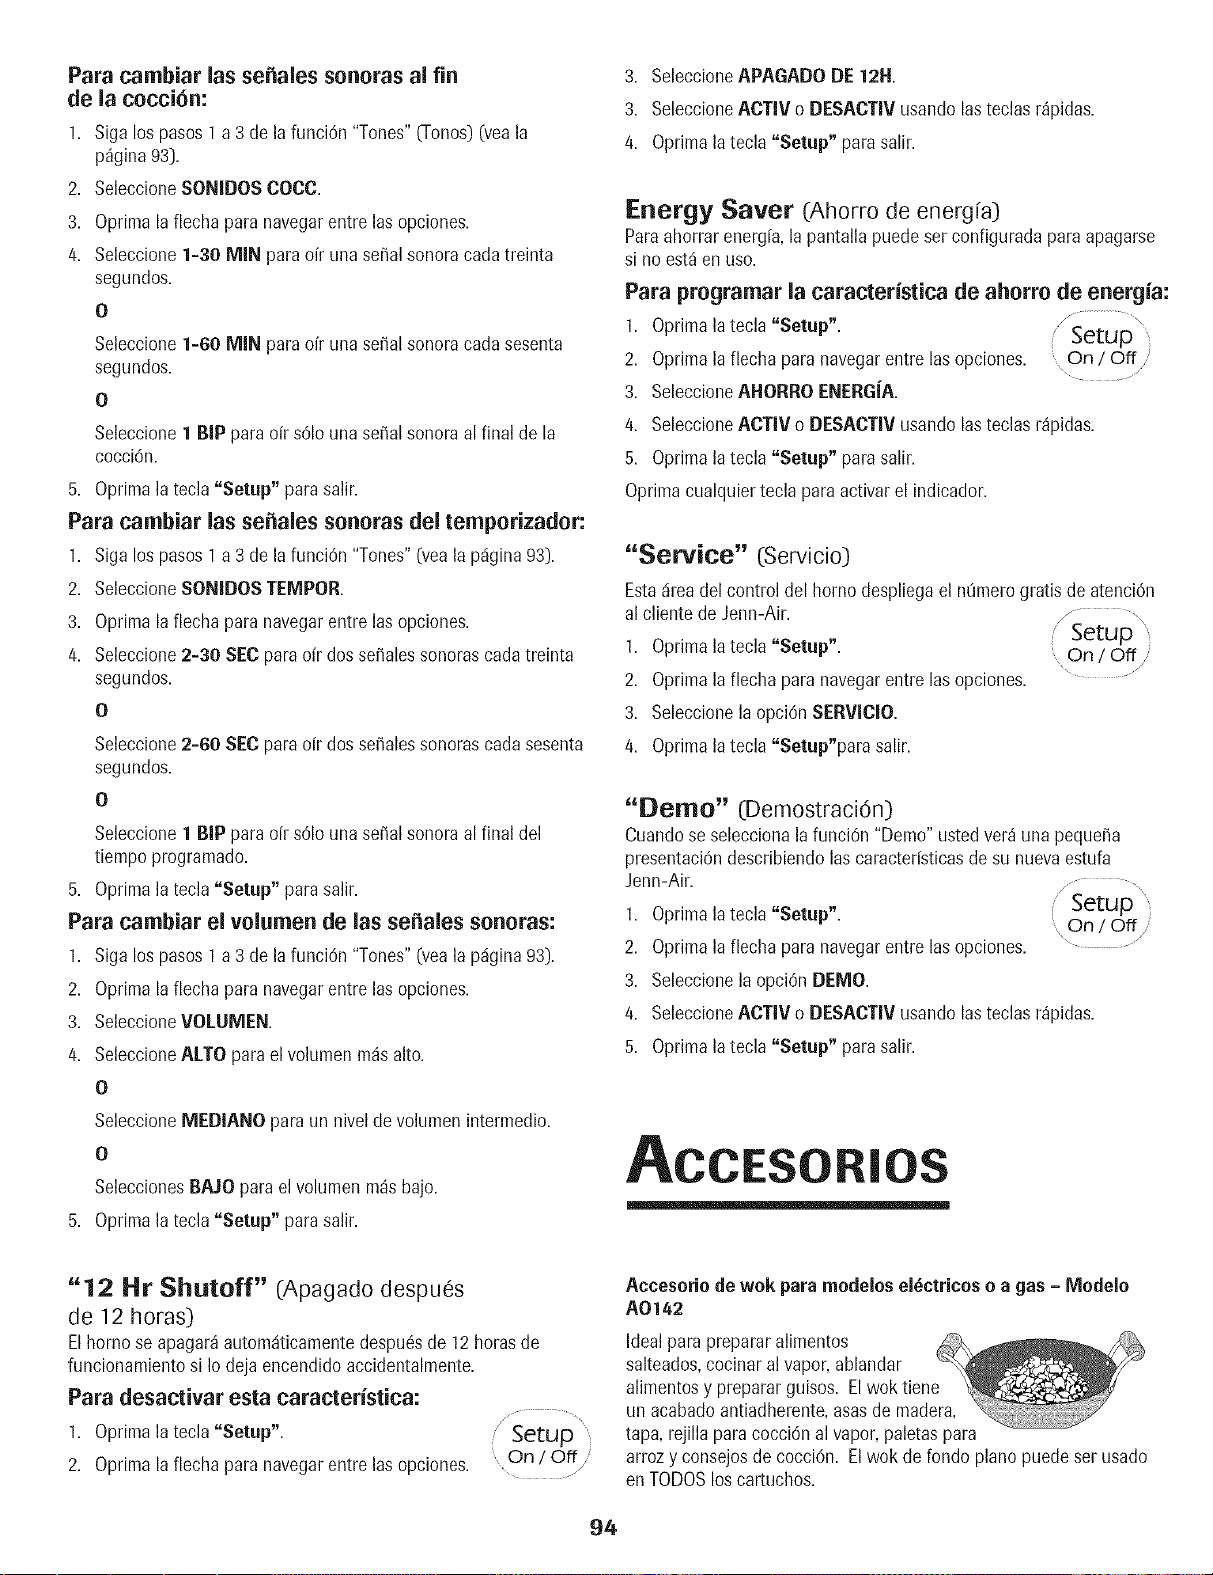
Para cambiar las se_ales sonoras al fin
de la cocciOn:
1. Sigalos pasos1 a 3 de la funci6n "Tones"0-onos)(veala
p%ina 93].
2. SeleccioneSONIDOS COCO.
3. Oprirnala flecha para navegarentre las opciones.
4. Seleccione1=30 MIN paraoir unasehalsonoracada treinta
segundos.
O
Seleccione1=60 MIN paraoir una serialsonoracada sesenta
segundos.
O
Seleccione1 BIP paraoir s01ouna serialsonoraal final de la
cocciOn.
5. Oprirnala tecla "Setup" para salir.
Para cambiar las se_ales sonoras del temporizador:
1. Sigalos pasos1 a 3 de la funciOn"Tones"(yeala p_igina93).
2. SeleccioneSONIDOS TEMPOR.
3. Oprima la flecha paranavegarentre las opciones.
4. Seleccione2-30 SEC paradr dos seralessonoras cadatreinta
segundos.
O
Seleccione2-60 SEC paraoir dos seralessonoras cadasesenta
segundos.
O
Seleccione1 BIP parao[r s01ouna serialsonoraal final del
tiempo programado.
5. Oprima la tecla "Setup" para salir.
Para cambiar el volurnen de las se_ales sonoras:
1. Sigalos pasos1 a 3 de la funciOn"Tones"(veala p_igina93).
2. Oprima la flecha paranavegarentre las opciones.
3. SeleccioneVOLUMEN.
4. SeleccioneALTO para elvolumenm_s alto.
O
SeleccioneMEDIANO paraun nivelde volumen intermedio.
O
SeleccionesBAIO parael volumen m_s bajo.
5. Optima latecla "Setup" parasalir.
3. SeleccioneAPAGADO DE 12H.
3. SeleccioneACTIV o DESACTIVusandolas teclasr_pidas.
4. Optimala tecla "Setup" parasalir.
Energy Saver (Ahorro de energia}
Paraahorrarenerg[a,la pantalla puedeser configurada paraapagarse
si noest_ en uso.
Para programar la caracteristica de ahorro de energia:
/, ...................
1. Oprimala tecla "Setup". Setup ....
2. Optimala flecha para navegarentre las opciones. On / Off '
........ /
3. SeleccioneAHORRO ENERGJA.
4. SeleccioneACTIV o DFSACTIV usandolas teclasr_pidas.
5. Optimala tecla "Setup" parasalir.
Optimacualquiertecla para activar el indicador.
"Service" IZServicio)
Esta_ireadel control del homo despliegael nOmerogratis de atenciOn
al cliente deJenn-Air. / ...............
; Setup "
1. Optimala tecla "Setup". On / Off/
2. Optimala flecha para navegarentre las opciones.
3. Seleccionela opciOnSERVICIO.
4. Optima{atecla "Setup"para salir.
"Bemo" (DemostraciOn)
Cuandose seleccionala funciOn"Demo" ustedver_ una pequera
presentaciOndescribiendo lascaracter[sticasde su nuevaestufa
Jenn-Air.
1. Optimala tecla "Setup".
2. Optimala flecha para navegarentre las opciones.
3. Seleccionela opciOnDEMO.
4. SeleccioneACTIV o BESACTIVusandolas teclasr_pidas.
5. Optimala tecla "Setup" parasalir.
/, .........
Setup
, On/Off
ACCESORI
"12 Hr Shutoff" (Apagado despues
de 1 2 horas]
Elhomo se apagar_ autom4ticamentedespuOsde 12 horasde
funcionamientosi Io deja encendidoaccidentalmente.
Para desactivar esta caracteristica:
..... JS P.......
1. Oprima la tecla Setup . / etu ,
2. Optima laflecha para navegarentre las opciones. On / Off
Accesorio de wok para modelos elOctricoso a gas - Modelo
A0142
Idealpara prepararalimentos
salteados,cocinar alvapor,ablandar
alimentosy preparar guisos. Elwok tiene
un acabadoantiadherente,asas de madera,
tapa, rejillapara cocciOnal vapor,paletaspara
arrozy consejosde cocciOn. Elwok de fondo piano puedeset usado
enTODOSlos cartuchos.
94
f
ARANTiA Y SERViC|
Lo que no cubren estas garantias:
1. Situacionesy dafiosresultantesde cualquierade lassiguienteseventualidades:
a. Instalaci6n,entregao mantenimientoinapropiados.
b. Cualquierreparaci6n,modificaci6n,alteraci6no ajuste no autorizadopor
el fabricanteo por un t6cnico de servicioautorizado.
c. Mal uso,abuso,accidentes,uso irrazonableo hechosfotuitos.
d. Corrienteel6ctrica,voltajeo suministro incorrectos.
e. Programaci6nincorrectade cualquierade los controles.
2. Lasgarant[asquedanhulassi los nQmerosde serieoriginales hansido retirados,
alteradoso no son fdcilmente legibles.
3. Bombillas.
4. Los productoscompradospara usocomercialo industrial.
5. Elcostodel servicioo Ilamadade serviciopara:
a. Corregirerroresde instalaci6n.
b. Instruir al usuariosobre el uso correctodel producto.
c. Transportarel electrodomdsticoal establecimientode servicioy el retorno del
productoal cliente.
6. Losdafios consecuenteso incidentalessufridospor cualquier personacomoresultado
del incumplimientode estagarant[a.
Enalgunosestadosno se permite la exclusi6no limitaci6nde dafios consecuenteso
incidentales,por Iotanto la limitaci6no exclusi6nanterior puedeno aplicarseen su caso.
Si necesita servicio
Primerolea la secci6nde Iocalizaci6ny soluci6nde aver[asen su gala de uso y cuidado
o Ilameal departamentode atenciOnal cliente de MaytagServices,LLC,Jenn-Air al
1-800-JENNAIR(1-800-536-6247)en los EstadosUnidosy Canadd.
Para obtener servicio bajo la garantia
Paraubicaruna compafi[ade servicioautorizadoen su Iocalidad,p6ngaseen contacto
con el distribuidor donde adquiri6su electrodom_sticoo Ilameal departamentode
atenciOnal cliente de Maytag Services,LLC,Jenn-Air.Si no recibeserviciosatisfactorio
bajo la garant[a,por favor Ilameo escribaa:
Maytag Services,LLC
Attn: CAIR_ Center
P.O.Box 2370,Cleveland,TN 37320-2370
En los EstadosUnidosy Canad_ Ilame al I=800-JENNAIR (1 =800=536=6247)
Nora: Cuandose pongaen contacto con el departamentodeatenci6n al
cliente de MaytagServices,LLC,Jenn-Air acercade un problem&por favor
incluya lasiguiente informaci6n:
a. Su hombre,direcci6ny nOmerodeteldono.
b. Los nL_merosde modeloy de seriede su electrodomdstico.
c. Nombrey direcci6n de su distribuidory la fecha de compradel electrodomdstico.
d. Una descripci6nclara del problemaque est_experimentando.
e. Pruebade compra.
Lasgu[as de usoy cuidado, los manualesde servicioy la informaci6nsobrelas
piezaspuedenser solicitadasal departamentode atenci6nalcliente de
MaytagServices,LLC,Jenn-Air.
Form No. A/10/05 Part No. 8113P528 60 ©2005 Maytag Appliances Sales Co. Litho U.S.A.