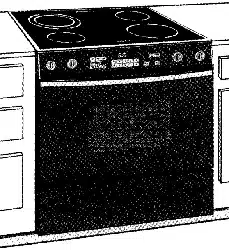
JENN-AIR _ ELECTRIC DOWNDRAFT
SLIDE-IN RANGE
TABLE OF CONTENTS
Important Safety Instructions .....................................1-4
Ducting Information ...........................................................4
Care & Cleaning ..............................................................5-8
Maintenance .....................................................................8-9
Troubleshooting .........................................................10-11
Surface Cooking .........................................................12-16
Oven Cooking ..............................................................17-23
Options ..........................................................................24-28
Favorites ...............................................................................29
Setup ..............................................................................30-32
Cartridges & Accessories ..............................................33
Warranty & Service ...........................................................35
Guide d'utilisation et d'entretien .................................36
Guia de uso y cuidado ....................................................72
I JENN-AIR
Form No. B/12/05 Part No. 8113P527 60 Rev. 1
@2005 Maytag Appliances Sales Co.
Lithe U.S.A.
Read and follow all instructions before using this
appliance to prevent the potential risk of fire, electric
shock, personal injury or damage to the appliance as a
result of improper usage of the appliance. Use appliance
only for its intended purpose as described in this guide.
To ensure proper and safe operation: Appliance
must be properly installed and grounded by a qualified
technician. [}o not attempt to adjust, repair, service,
or replace any part of your appliance unless it is
specifically recommended in this guide. All other
servicing should be referred to a qualified servicer.
Always disconnect power to appliance before servicing.
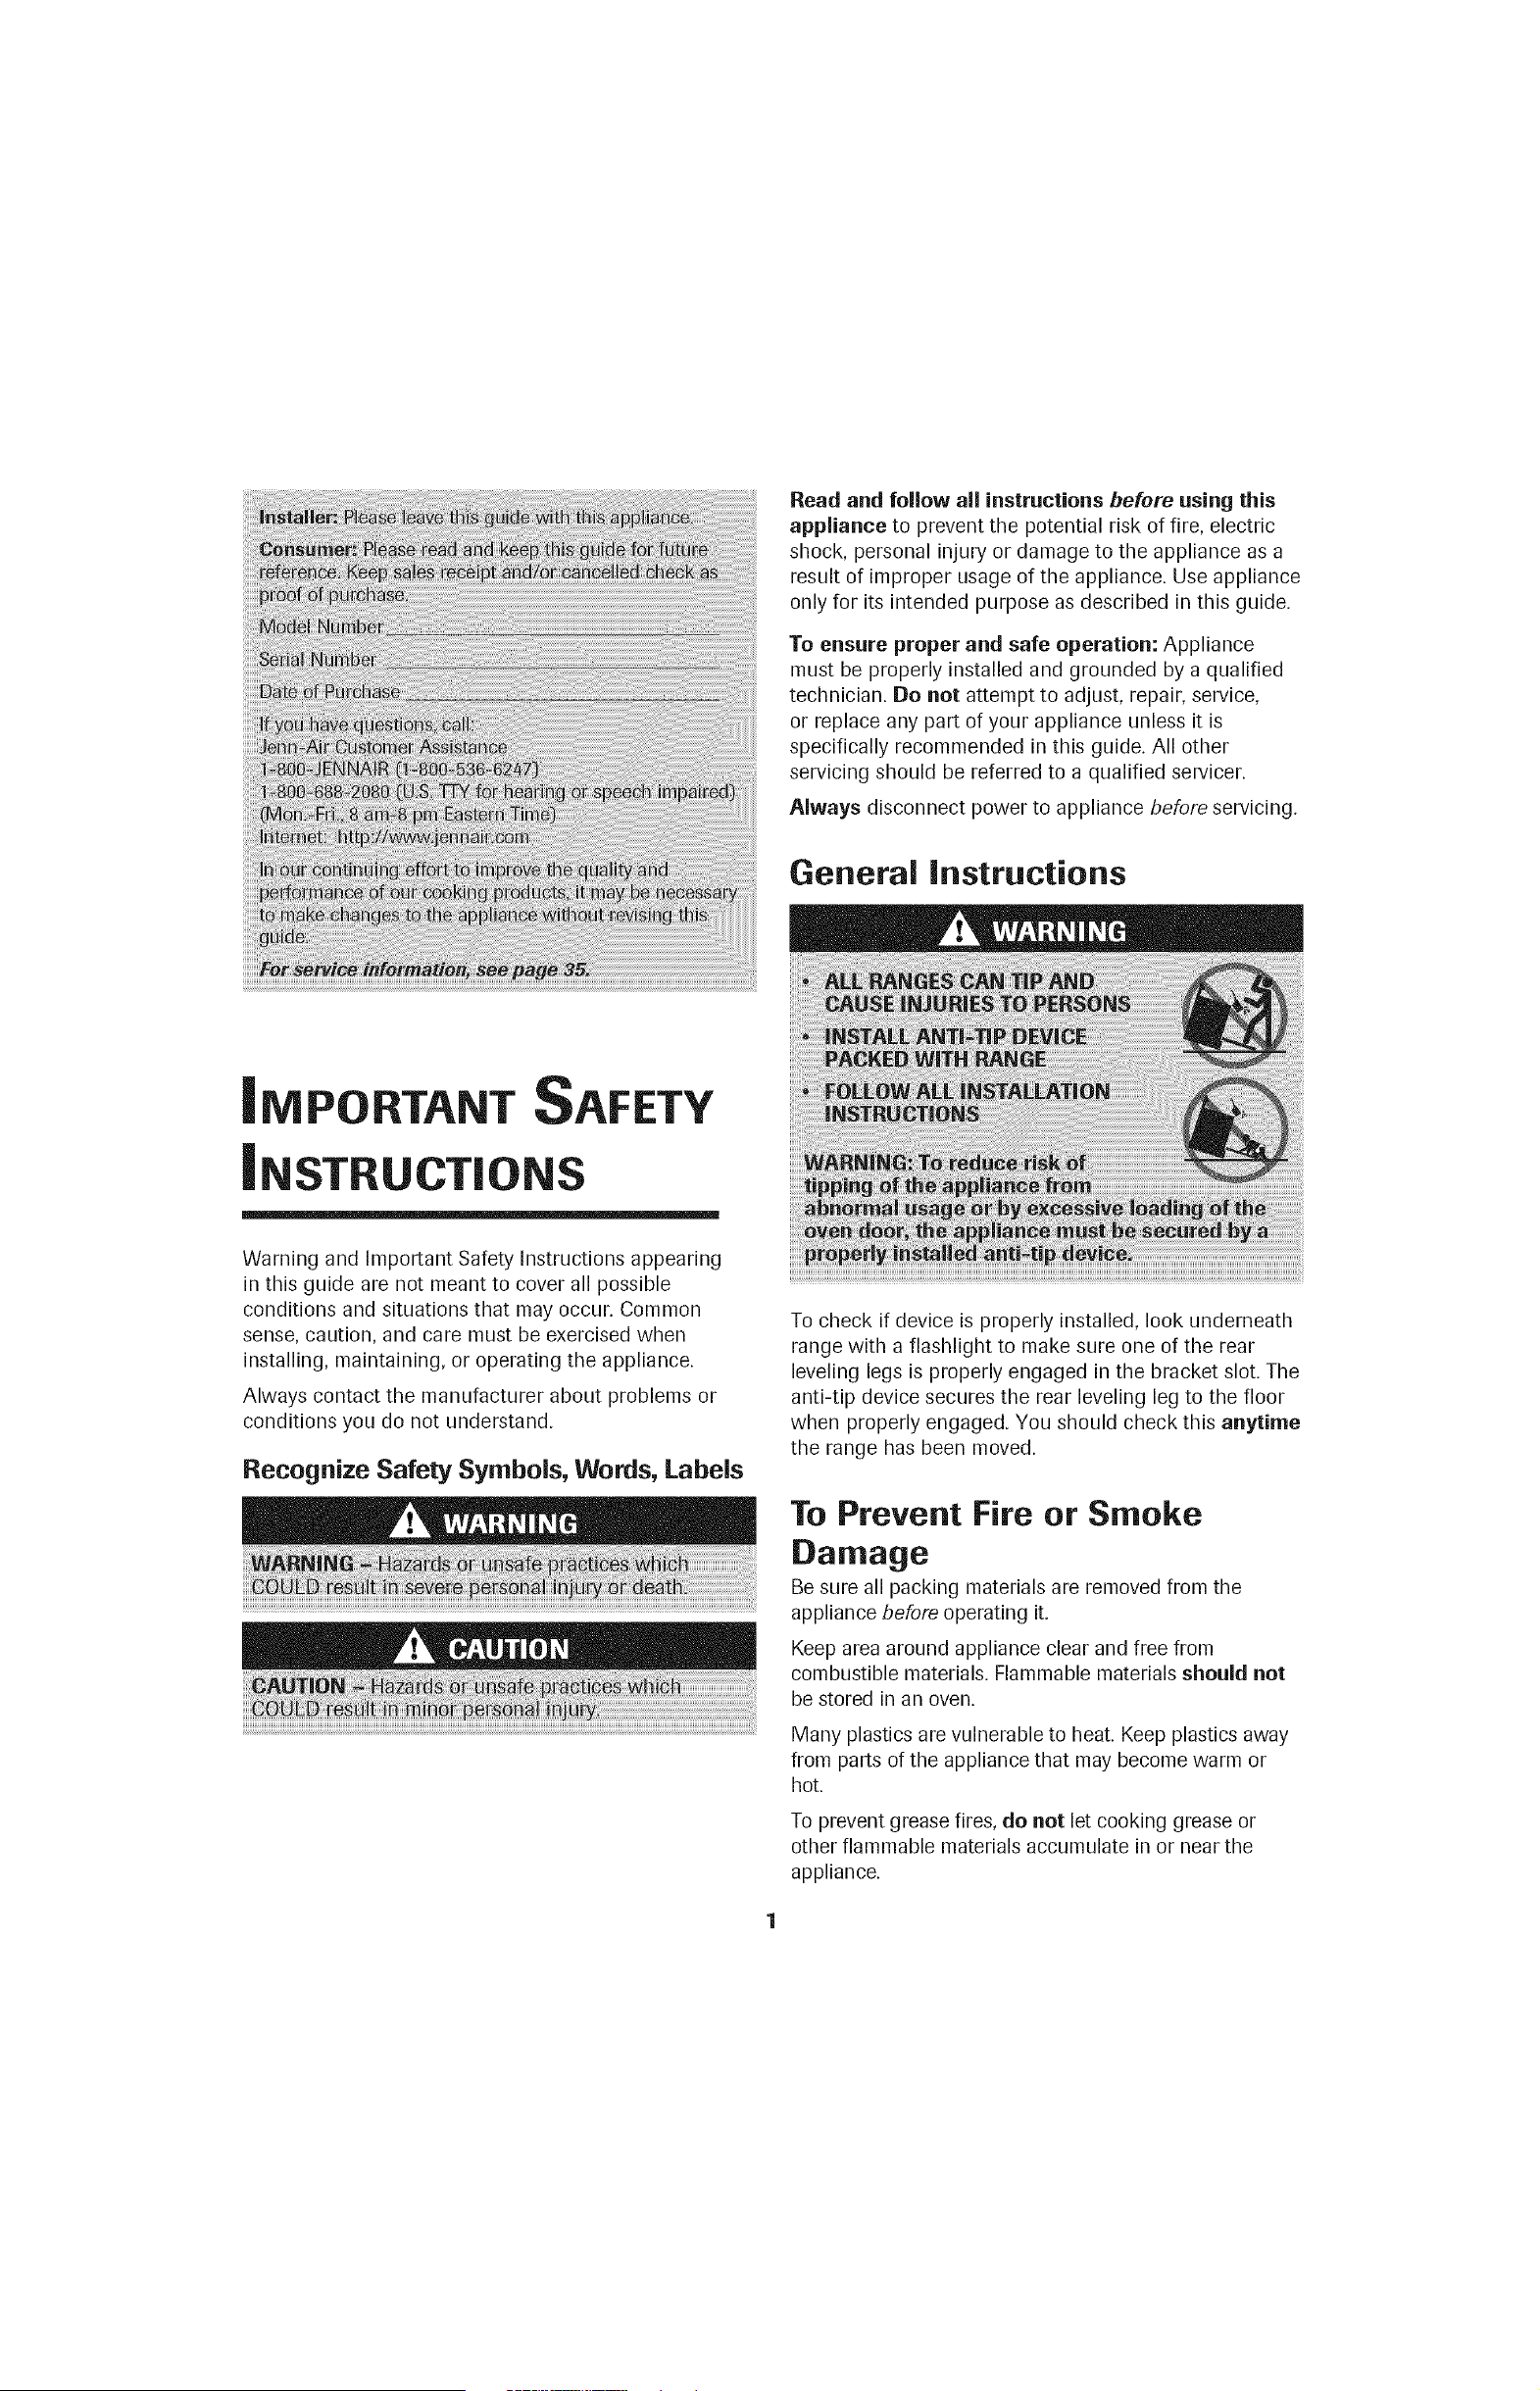
General instructions
NI PORTANT SAFETY
NSTRU
Warning and Important Safety Instructions appearing
in this guide are not meant to cover all possible
conditions and situations that may occur. Common
sense, caution, and care must be exercised when
installing, maintaining, or operating the appliance.
Always contact the manufacturer about problems or
conditions you do not understand.
Recognize Safety Sycbols, Words, Labels
To check if device is properly installed, look underneath
range with a flashlight to make sure one of the rear
leveling legs is properly engaged in the bracket slot. The
anti-tip device secures the rear leveling leg to the floor
when properly engaged. You should check this anytime
the range has been moved.
To Prevent Fire or Smoke
Damage
Be sure all packing materials are removed from the
appliance before operating it.
Keep area around appliance clear and free from
combustible materials. Flammable materials should not
be stored in an oven.
Many plastics are vulnerable to heat. Keep plastics away
from parts of the appliance that may become warm or
hot.
To prevent grease fires, do not let cooking grease or
other flammable materials accumulate in or near the
appliance.
in Case of Fire
Turn off appliance and ventilating hood to avoid
spreading the flame. Extinguish flame, then turn on
hood to remove smoke and odor.
• Cooktop: Smother fire or flame in a pan with a lid or
cookie sheet.
NEVER pick up or move a flaming pan.
• Oven: Smother fire or flame by closing the oven door.
Do not use water on grease fires. Use baking soda, a
dry chemical or foam-type extinguisher to smother fire
or flame.
Child Safety
NEVER leave children alone or unsupervised near the
appliance when it is in use or is still hot. Children
should never be allowed to sit or stand on any part of
the appliance as they could be injured or burned.
Children must be taught that the appliance and utensils
in it can be hot. Let hot utensils cool in a safe place, out
of reach of small children. Children should be taught
that an appliance is not a toy. Children should not be
allowed to play with controls or other parts of the
appliance.
About Your Appliance
To prevent potential hazard to the user and damage to
the appliance, do not use appliance as a space heater
to heat or warm a room. Also, do not use the oven as a
storage area for food or cooking utensils.
Do not obstruct the flow of air by blocking the
oven vent.
DO NOT TOUCH HEATING ELEMENTS OR INTERIOR
SURFACES OF OVEN. Heating elements may be hot
even though they are dark in color. Interior surfaces of
any oven become hot enough to cause burns. During
and after use, do not touch, or let clothing or other
flammable materials contact heating elements or interior
surfaces of oven until they have had sufficient time to
cool. Other surfaces of the appliance may become hot
enough to cause burns - among these surfaces are:
oven vent opening and surface near this opening, oven
door and window of oven door.
Do not touch a hot oven light bulb with a damp cloth as
the bulb could break. Should the bulb break, disconnect
power to the appliance before removing bulb to avoid
electrical shock.
NEVER use aluminum foil to cover an oven rack or oven
bottom. Misuse could result in risk of electric shock, fire,
or damage to the appliance. Use foil only as directed in
this guide.
Cooking Safety
Never heat an unopened food container in the oven.
Pressure build-up may cause container to burst
resulting in serious personal injury or damage to the
appliance.
Use dry, sturdy potholders. Damp potholders may cause
burns from steam. Dish towels or other substitutes
should never be used as potholders because they can
trail across hot elements and ignite or get caught on
appliance parts.
Wear proper apparel. Loose fitting or long hanging-
sleeved apparel should not be worn while cooking.
Clothing may ignite and cause burns if garment comes
in contact with heating elements.
Always place oven racks in the desired positions while
oven is cool. Slide oven rack out to add or remove food,
using dry, sturdy potholders. Always avoid reaching into
the oven to add or remove food. If a rack must be
moved while hot, use a dry potholder. Do not let
potholder contact hot element in oven.
Use racks only in the oven in which they were shipped/
purchased.
Cont.
Use care when opening the oven door. Let hot air or
steam escape before removing or replacing food.
PREPARED FOOD WARNING: Follow food
manufacturer's instructions. If a plastic frozen food
container and/or its cover distorts, warps, or is otherwise
damaged during cooking, immediately discard the food
and its container. The food could be contaminated.
Do not allow aluminum foil or meat probe to contact
heating element.
Always turn off all controls when cooking is completed.
Utensil Safety
Follow the manufacturer's directions when using oven
cooking bags.
This appliance has been tested for safe performance
using conventional cookware. Do not use any devices
or accessories that are not specifically recommended in
this guide. Do not use add-on oven convection systems.
The use of devices or accessories that are not expressly
recommended in this guide can create serious safety
hazards, result in performance problems, and reduce the
life of the components of the appliance.
If pan is smaller than element, a portion of the element
will be exposed to direct contact and could ignite
clothing or potholder.
Only certain types of glass, glass/ceramic, ceramic,
earthenware, or other glazed utensils are suitable for
cooktop or oven service without breaking due to the
sudden change in temperature. Follow utensil
manufacturer's instructions when using glass.
Turn pan handle toward center of cooktop, not out into
the room or over another surface element. This reduces
the risk of burns, ignition of flammable materials, or
spillage if pan is accidently bumped or reached by small
children.
Deep Fat Fryers
Use extreme caution when moving the grease pan or
disposing of hot grease. Allow grease to cool before
attempting to move pan.
Ventilating Hoods
Clean range hood and filters frequently to prevent
grease or other flammable materials from accumulating
on hood or filter and to avoid grease fires.
When flaming foods under the hood, turn the fan on.
Cleaning Safety
Clean cooktop with caution. Turn off all controls and
wait for appliance parts to cool before touching or
cleaning. Use care to avoid steam burns if a wet sponge
or cloth is used to wipe spills on a hot surface. Some
cleaners can produce noxious fumes if applied to a hot
surface.
Clean only parts listed in this guide.
Self=Clean Oven
Do not clean door gasket. The door gasket is essential
for a good seal. Care should be taken not to rub,
damage, or move the gasket.
Do not use oven cleaners or oven liners of any kind in
or around any part of the self-clean oven.
Cooktop
NEVER leave surface units unattended, especially when
using high heat. An unattended boilover could cause
smoking and a greasy spillover can cause a fire.
This appliance is equipped with different size surface
elements. Select pans with flat bottoms large enough to
cover element. Fitting pan size to element will improve
cooking efficiency.
GLASS-CERAMIC SURFACE: NEVER cook on broken
cooktop. If cooktop should break, cleaning solutions and
spillovers may penetrate the broken cooktop and create
a risk of electric shock. Contact a qualified technician
immediately.
3
important Safety Notice
and Warning
The California Safe Drinking Water and Toxic
Enforcement Act of 1986 (Proposition 65) requires the
Governor of California to publish a list of substances
known to the State of California to cause cancer or
reproductive harm, and requires businesses to warn
customers of potential exposures to such substances.
Users of this appliance are hereby warned that when
the oven is engaged in the self-clean cycle, there may
be some low-level exposure to some of the listed
substances, including carbon monoxide. Exposure to
these substances can be minimized by properly venting
the oven to the outdoors by opening the windows and/
or door in the room where the appliance is located
during the self-clean cycle.
iMPORTANT NOTICE REGARDING PET BIRDS:
Never keep pet birds in the kitchen or in rooms where
the fumes from the kitchen could reach. Birds have a
very sensitive respiratory system. Fumes released during
an oven self-cleaning cycle may be harmful or fatal to
birds. Fumes released due to overheated cooking oil, fat,
margarine and overheated non-stick cookware may be
equally harmful.
Save These instructions for Future Reference
UCT|
Jenn-Air's ventilation system is designed to capture both
cooking fumes and smoke from the cooktop surface. If
the system does not, here are some ducting installation
situations to check:
• 6" diameter round or 3 W' x 10" rectangular ducting
should be used for duct lengths 10'-60'.
Important: 5" diameter round ducting may be used if
the duct length is 10' or less.
No more than three 90 ° elbows should be used.
Distance between elbows should be at least 18".
Recommended Jenn-Air wall cap MUSTbe used.
Make sure damper moves freely when ventilation
system is operating.
• There should be a minimum clearance of 6" for
cooktop installed near a side wall.
If there is not an obvious improper installation, there
may be a concealed problem such as a pinched joint,
obstruction in the pipe, etc. Installation is
the responsibility of the installer and
questions should be addressed first by the
installer. The installer should very carefully
check the ducting installation instructions.
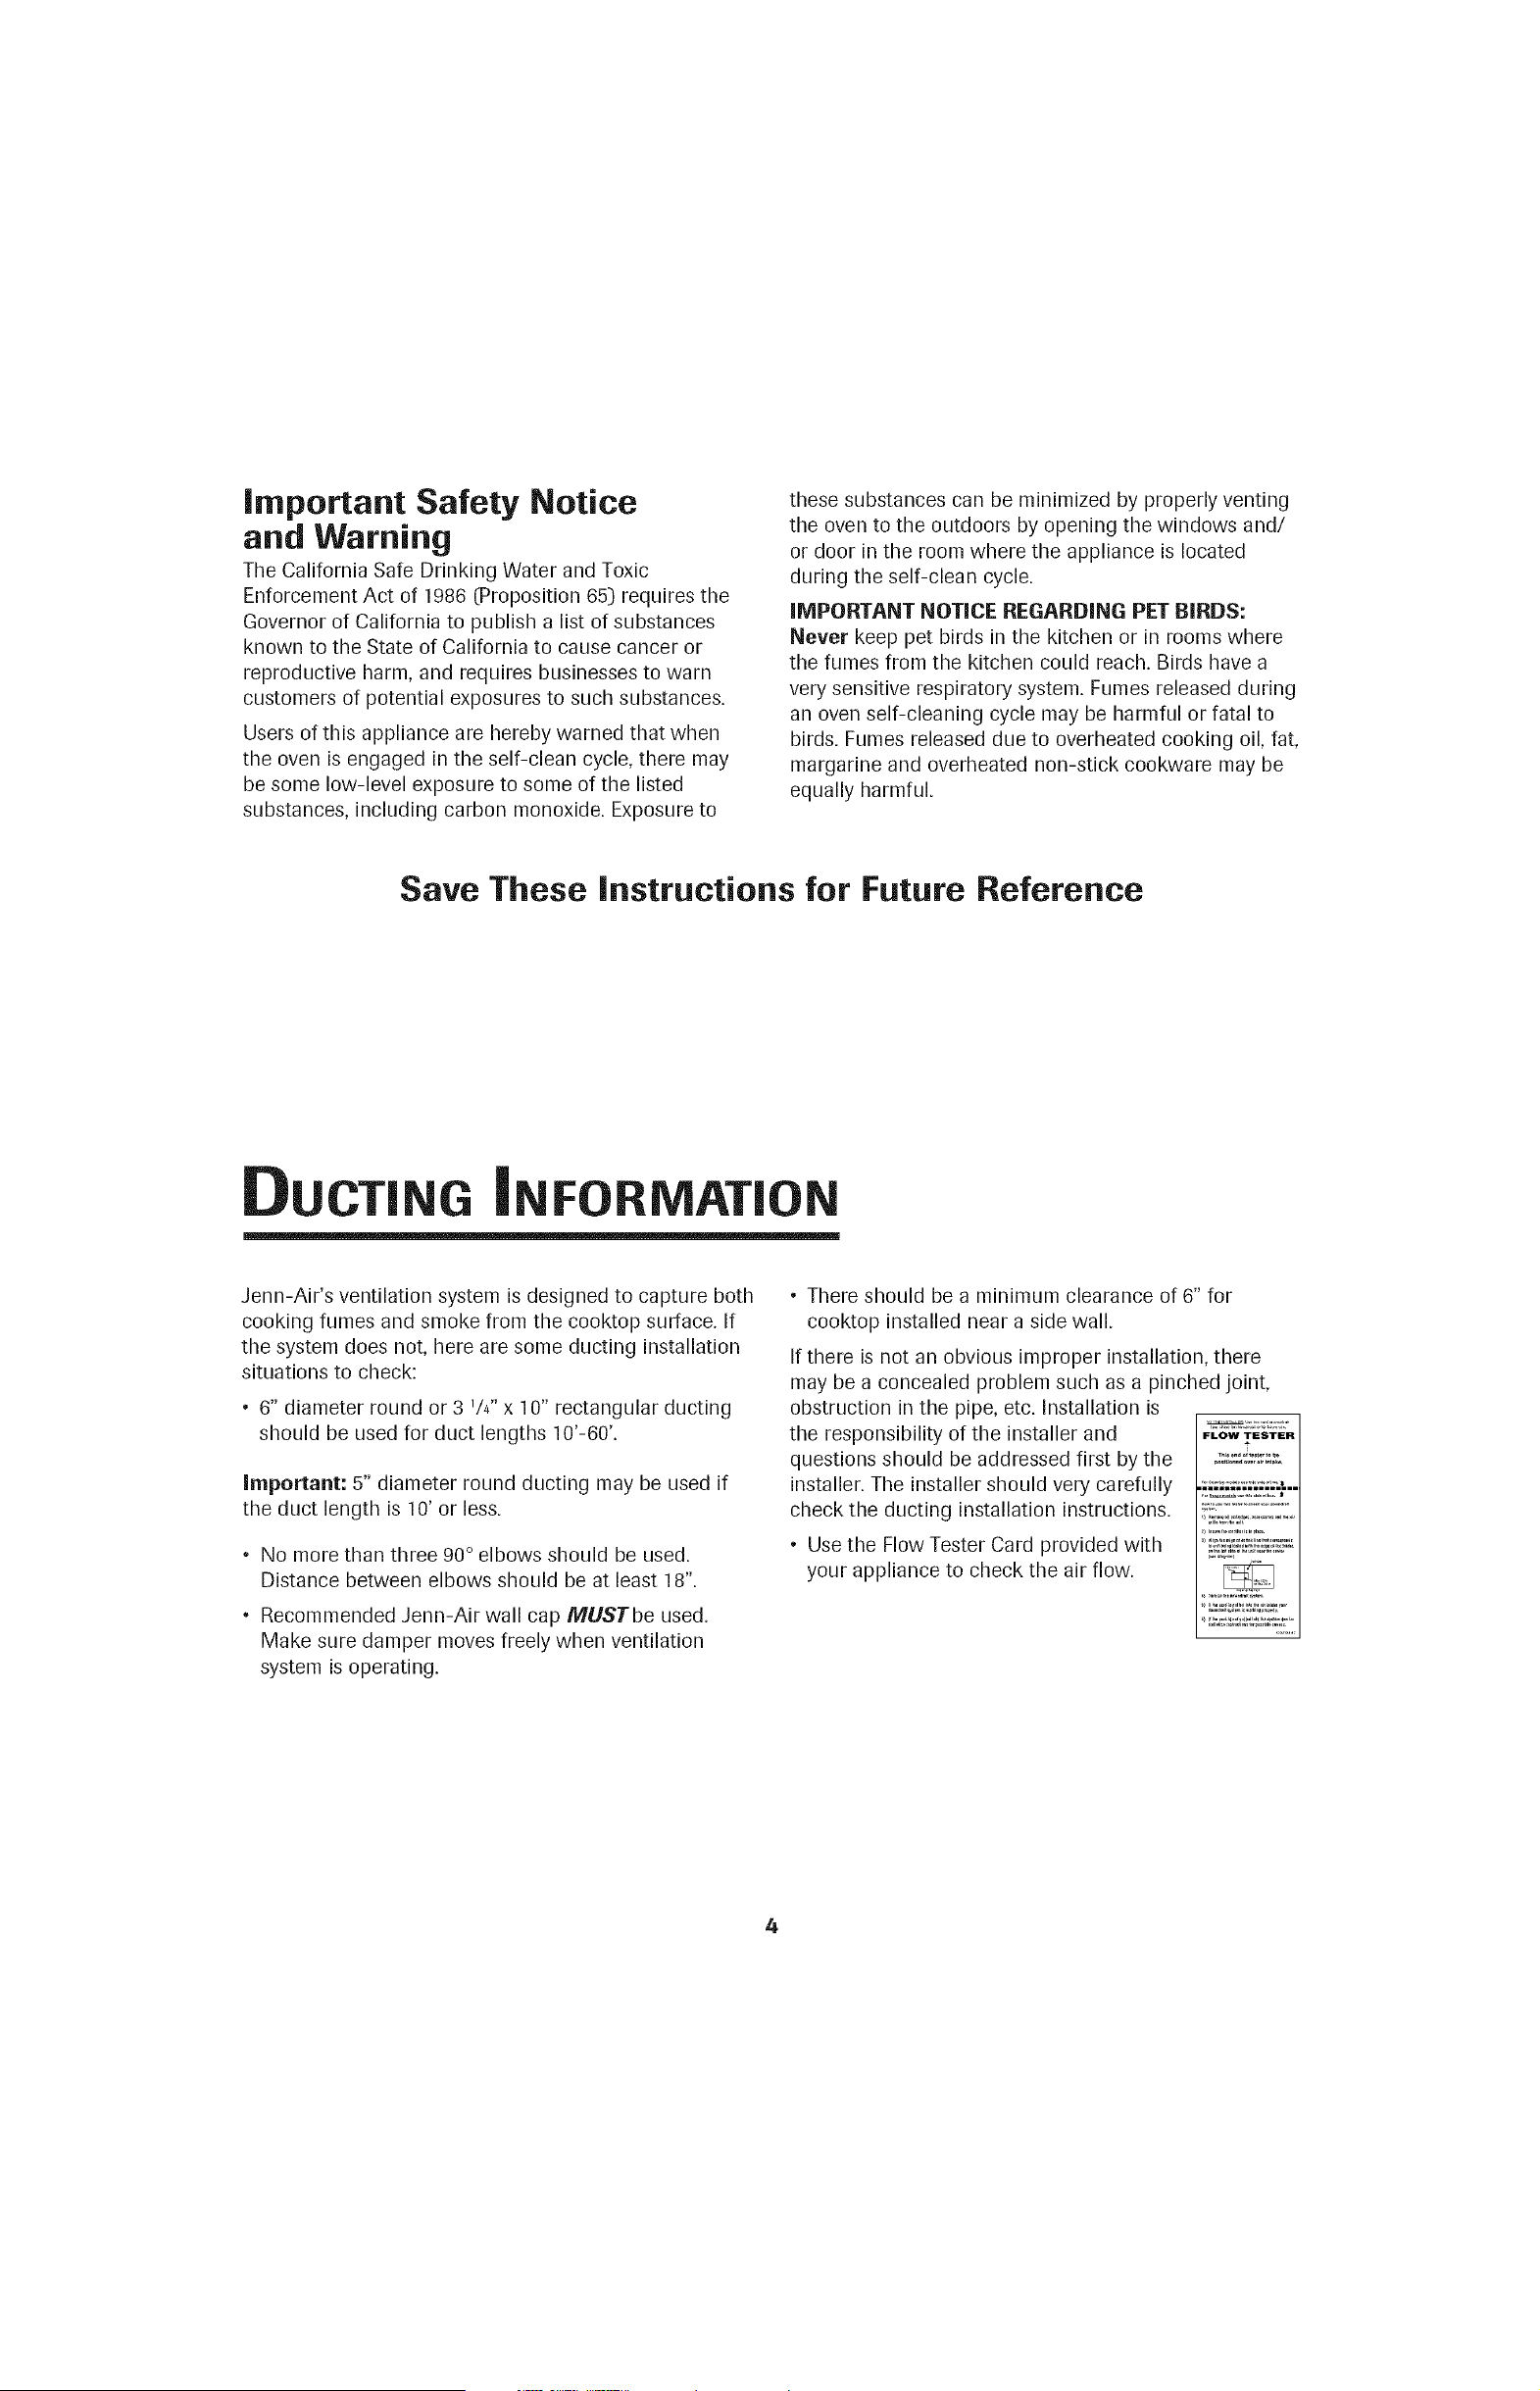
• Use the Flow Tester Card provided with
your appliance to check the air flow.
FLOW TESTER
t
4
CARE CLEANING
Self-Clean Oven
discolor if acidic or sugary spills are not wiped up before a
self-clean cycle.
To set Self=Clean: .................
/Clean"
1. Press Clean pad. ........................./
2. REMOVE RACKSwill be displayed. Remove the racks.
3. Select CONTINUE using the Quickset pad. The Quickset
pads are located on either side of the control panel
display.
4. Set LIGHT soil level by entering 200 using the number
pads for two hours of cleaning time. Select MEDIUM soil
level using the Quickset pads.
The self-clean cycle uses above-normal cooking temperatures
to automatically clean the oven interior.
It is normal for flare-ups, smoking, or flaming to occur during
cleaning if the oven is heavily soiled. It is better to clean
the oven regularly rather than to wait until there is a heavy
build-up of soil in the oven.
During the cleaning process, the kitchen should be well
ventilated to get rid of normal odors associated with cleaning.
Before Self-Cleaning
1. Turn off the oven light before cleaning. The oven light may
burn out during the clean cycle.
2. Remove broiler pan, all pans, and oven racks from the
oven. The oven racks will discolor and may not slide
easily after a self-clean cycle if they are not removed.
Important: Remove the air grille from the cooking surface
before self-cleaning.
3. Clean oven frame, door frame, area outside of gasket, and
around the opening in the door gasket with a nonabrasive
cleaner such as Bon Am/* or detergent and water. The
self-cleaning process does not clean these areas. They
should be cleaned to prevent soil from baking on during
the clean cycle. (The gasket is the seal around the oven
door and window.)
4. To prevent damage, do not clean ----_ _
or rub the gasket around the oven \ -
door. The gasket is designed to
seal in heat during the clean cycle.
5. Wipe up excess grease or
spill-overs from the oven bottom.
This prevents excessive smoking,
flare-ups or flaming during the clean cycle.
6. Wipe up sugary and acidic spillovers such as sweet
potatoes, tomato, or milk-based sauces. Porcelain enamel
is acid-resistant, not acid-proof. The porcelain finish may
OR
Select HEAVY for a heavily soiled oven and four hours of
cleaning time.
5. CLEAN, TIME, LOCKED and the cleaning time countdown
will be displayed while the oven is cleaning. OVEN
COOLING will appear in the display when the cleaning
time has been completed and the oven is still locked.
Important: The door lock will disengage approximately one
hour after the cleaning time is completed. OVEN COOLING
will go off in the display when the oven door has unlocked.
To Delay a Self=Clean Cycle:
1. PressClean pad. JClean
2. REMOVERACKSwill be displayed.
Remove the racks.
3,
4.
Select CONTINUE using the Quickset pad.
Set LIGHT soil level by entering 200 using the number
pads for two hours of cleaning time. Select MEDIUM soil
level using the Quickset pads.
OR
Select HEAVY for a heavily soiled oven and four hours of
cleaning time.
5. The door will lock. CLEAN, TIME, LOCKEDand the
cleaning time countdown will be displayed
6. After door locks, press the More Options pad.
7. Select DELAY using the Quickset pad.
8. Select the number of hours you want to delay the start of the
self-clean cycle.
9. The delay time and cleaning time will be displayed.
Brand names for cleaning products are registered trademarks of the respective manufacturers.
5
After Self=Cleaning
About one hour after the end of the clean cycle, the lock
will disengage and OVEN COOLING will go off in the
display. At this pohlt, the door can be opened.
Some soil may leave a light gray, powdery ash which can be
removed with a damp cloth. If soil remains, it indicates that
the clean cycle was not long enough. The soil will be removed
during the next clean cycle.
If the oven racks were left in the oven and do not slide
smoothly after a clean cycle, wipe racks and embossed rack
supports with a small amount of vegetable oil to restore ease
of movement.
A white discoloration may appear after cleaning if acidic or
sugary foods were not wiped up before the clean cycle. This is
normal and will NOT affect performance.
Notes:
• If the oven door is left open, CLOSE DOOR will appear in
the display until the door is closed.
• If more than 30 seconds elapse between pressing the
Clean pad and pressing a number pad, the program will
automatically return to the previous display.
° The oven door will be damaged if it is forced to open
during cleaning or cooling process.
• The first few times the oven is cleaned, some smoke and
odor may be detected. This is normal and will lessen or
disappear with use. If the oven is heavily soiled, or if the
broiler pan was accidently left in the oven, excessive
smoke and odor may occur.
° As the oven heats and cools, you may hear sounds of
metal parts expanding and contracting. This is normal
and will not damage your appliance.
Cleaning Procedures
* Brand names are registered trademarks of the
respective manufacturers.
** To order call 1-800-JENNAIR (1-800-536-6247).
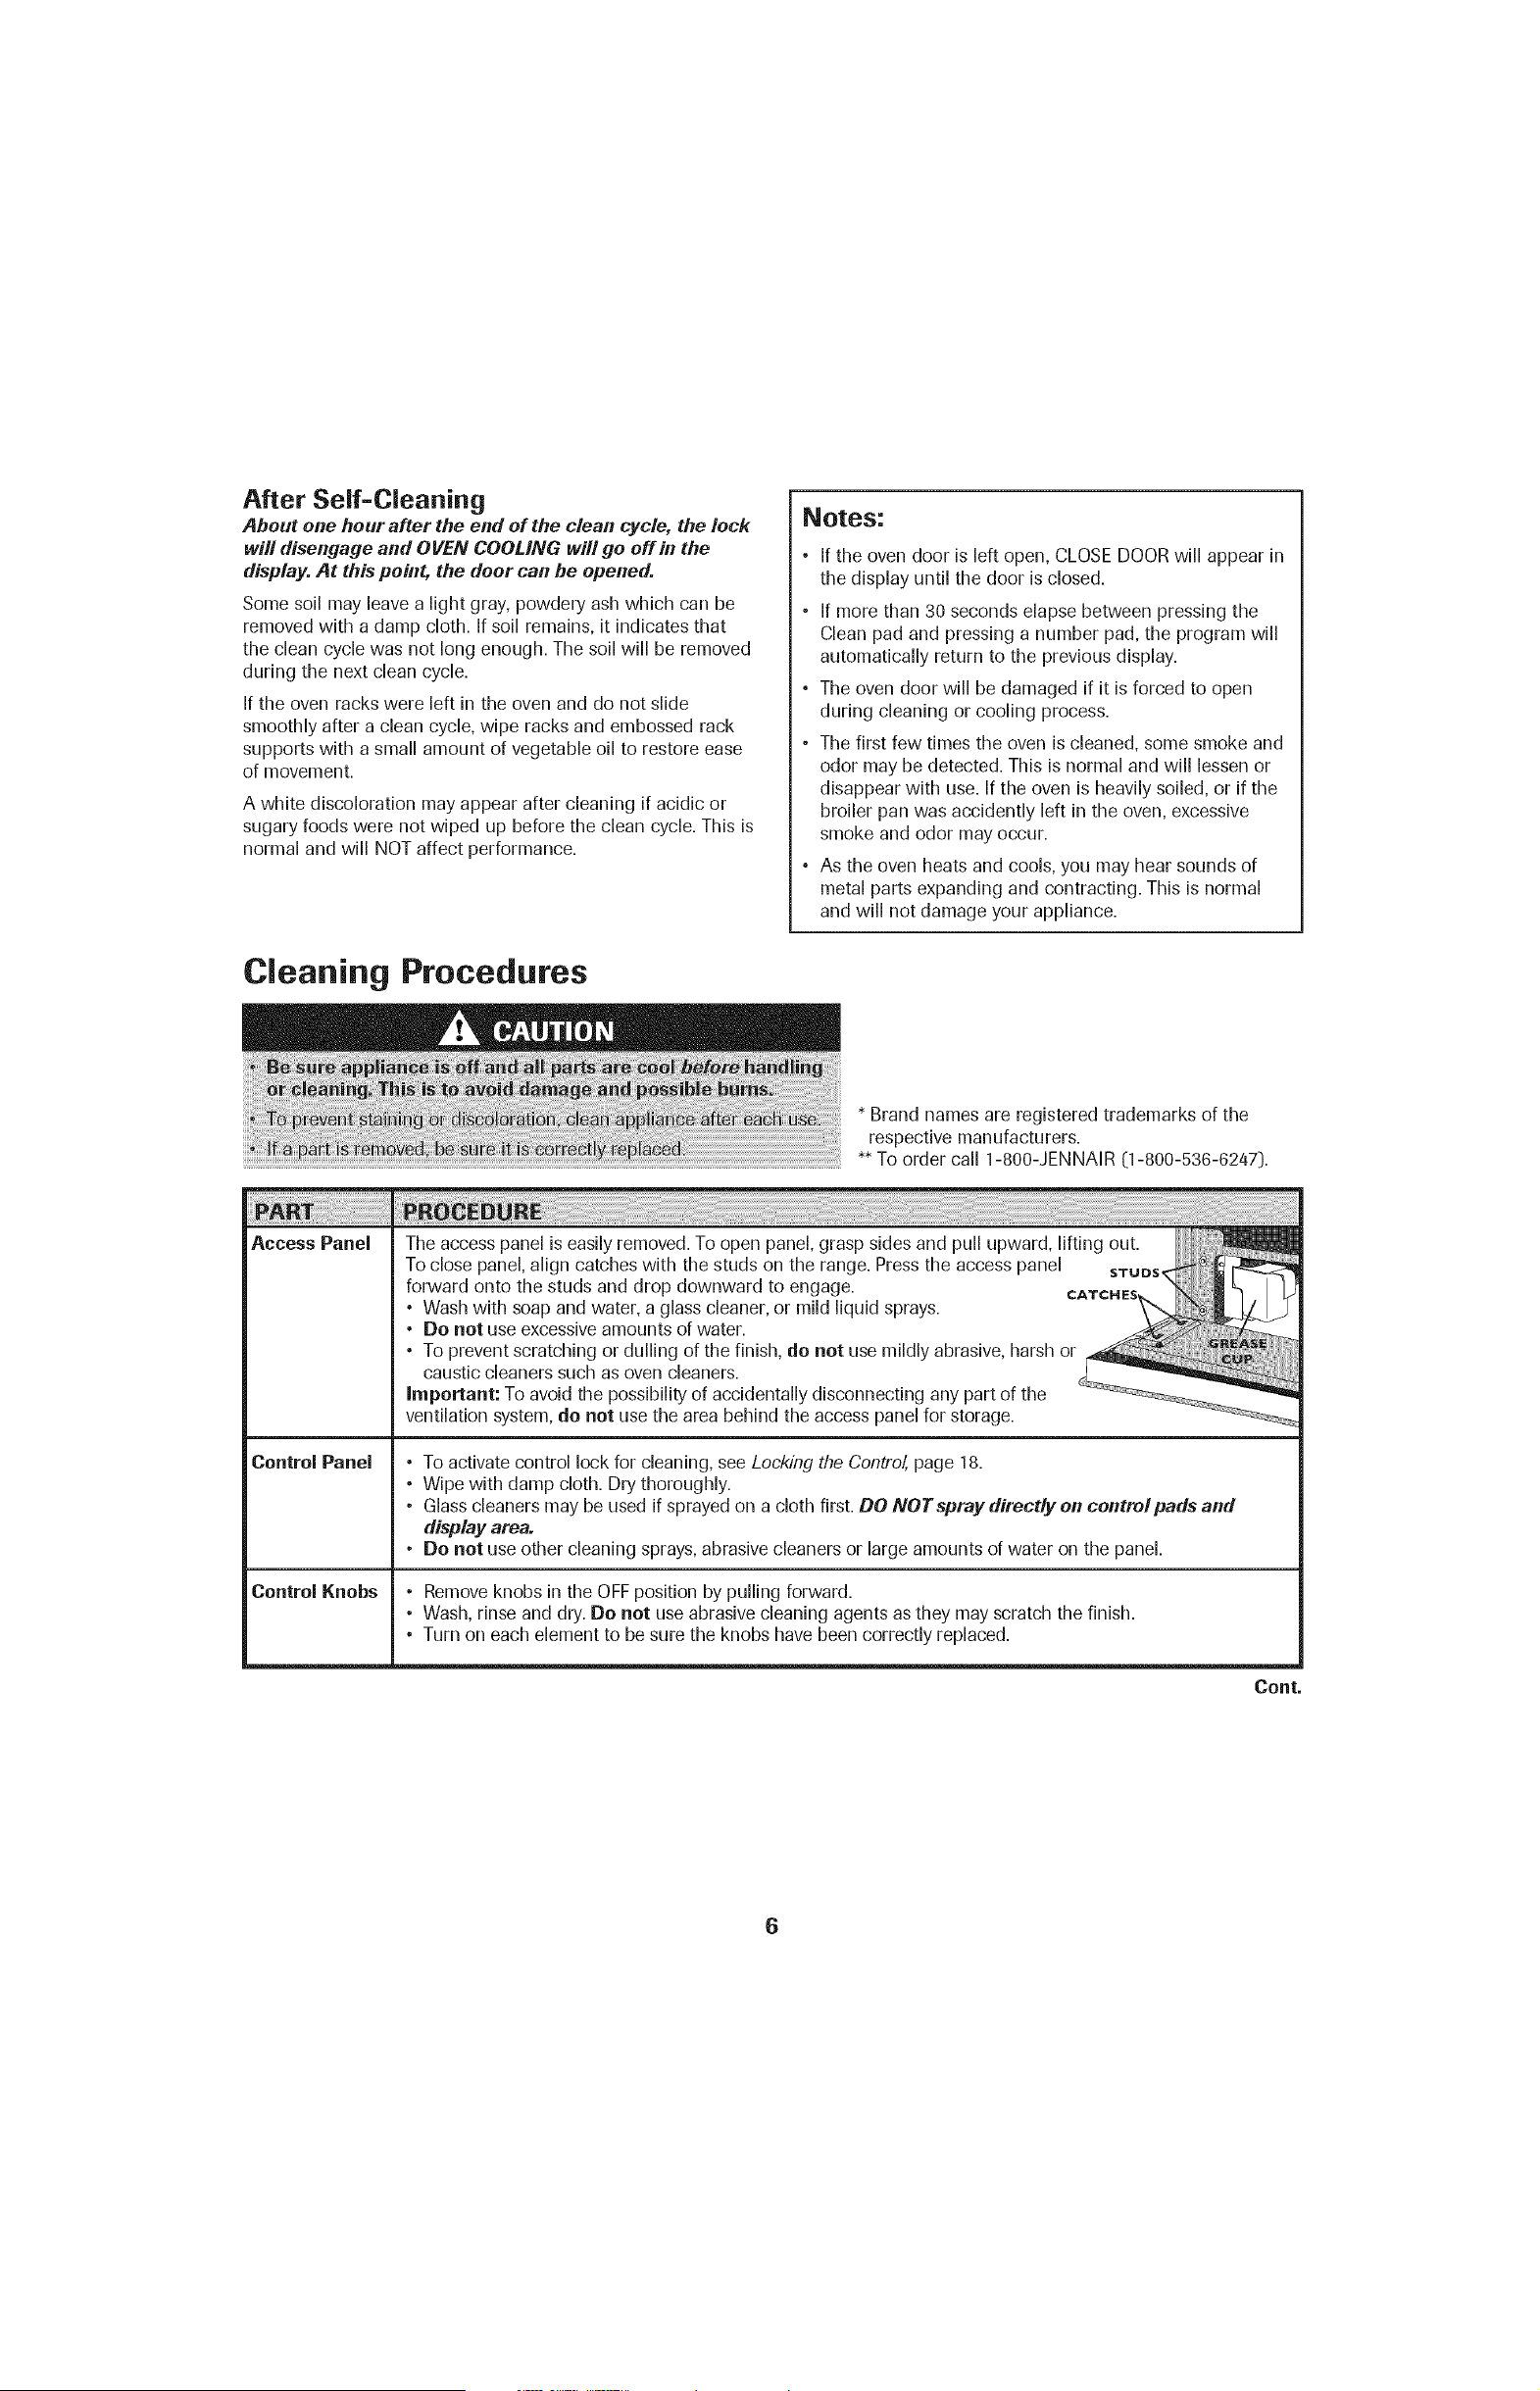
Access Panel
Control Panel
Control Knobs
Theaccess panel is easily removed. To open panel, grasp sides and pull upward, lifting out.
Toclose panel, align catches with the studs on the range. Press the access panel STUDS,
forward onto the studs and drop downward to engage.
° Wash with soap and water, a glass cleaner, or mild liquid sprays.
° Do not use excessive amounts of water.
° To prevent scratching or dulling of the finish, do not use mildly abrasive, harsh or
caustic cleaners such as oven cleaners.
Important: To avoid the possibility of accidentally disconnecting any part of the
ventilation system, do not use the area behind the access panel for storage.
° To activate control lock for cleaning, see Locking the Control, page 18.
° Wipe with damp cloth. Dry thoroughly.
• Glass cleaners may be used if sprayed on a cloth first. DO NOTspray directly on controlpads and
display area.
• Do not use other cleaning sprays, abrasive cleaners or large amounts of water on the panel.
• Remove knobs in the OFF position by pulling forward.
• Wash, rinse and dry. Do not use abrasive cleaning agents as they may scratch the finish.
• Turn on each element to be sure the knobs have been correctly replaced.
Cont.
6
Cooktop - Never use oven cleaners, chlorine h/each, ammonia or glass cleaners with ammonia.
Glass-Ceramic important: Carl an authorized servicer if the g/ass-ceramic top should crack, break or if metal or
aluminum foil should melt on the cool{top.
• Allow the cooktop to cool before cleaning.
• General - Clean cooktop after each use, or when needed, with a damp paper towel and Cooktop Cleaning
Creme_(Part No. 20000001)_*.Then buff with a clean, dry cloth.
lmpertan# Permanentstains will develop if soil is allowed to cook on by repeatedly using the cooktop when soiled.
• Heavy Soils or Metal Marks - Dampen a "scratchless" or "never scratch" scrubber sponge. Apply
Cooktop Cleaning Creme* and scrub to remove as much soil as possible. Apply a thin layer of the creme over
the soil, cover with a damp paper towel and let stand 30 to 45 minutes (2-3 hours for very heavy soil). Keep
moist by covering the paper towel with plastic wrap. Scrub again, then buff with a clean, dry cloth.
Important: Only use a CLEAN, DAMP "scratchless" pad that is safe for non-stick cookware. Thepattern and
glass will be damaged if the pad is not damp, if the pad is soiled, or if another type of pad is used.
° Burned-On or Crusty Soils - Scrub with a "scratchless" or "never scratch" scouring pad and
Cooktop Cleaning Creme*.
Important: Hold a razor blade scraper at 30° angle and scrape any remaining soil. The& clean as described J
above.De net use the razor blade for daily cleaning as it may wear the pattern on the glass.
• Melted Sugar or Plastic - Immediately turn element to LOW and scrape sugar or plastic
from hot surface to a cool area. Then turn element OFF and allow to cool. Clean residue
with razor blade scraper and Cooktop Cleaning Creme*.
Oven Window • Avoid using excessive amounts of water which may seep under or behind glass causing staining.
and Door = • Wash with soap and water. Rinse with clear water and dry. Glass cleaner can be used if sprayed on a
Glass cloth first.
• Do not use abrasive materials such as scouring pads, steel wool or powdered cleaners as they will
scratch glass.
Oven Interior • Follow instructions on pages 5-6 to set a self-clean cycle.
Oven Racks • Clean with soapy water.
• Remove stubborn soil with cleansing powder or soap-filled scouring pad. Rinse and dry.
° Racks will permanently discolor and may not slide smoothly if left in the oven during a self-clean operation.
If this occurs, wipe the rack edge and rack support with a small amount of vegetable oil to restore ease
of movement, then wipe off excess oil.
Stainless Steel • DO NOT USE ANY CLEANING PRODUCT CONTAINING CHLORINE BLEACH.
(select models) ° DO NOT USE ABRASIVE OR ORANGE CLEANERS.
° ALWAYS WIPE WITH THE GRAIN WHEN CLEANING.
° Daily Cleaning/Light Soil -- Wipe with one of the following - soapy water, white vinegar/water solution,
Formula 409 Glass and Surface Cleaner* or a similar glass cleaner - using a sponge or soft cloth. Rinse
and dry. To polish and help prevent fingerprints, follow with Stainless Steel Magic Spray* (Part No.
20000008)_*.
• Moderate/Heavy Soil -- Wipe with one of the following -Bon Ami, Smart Cleanser, or Soft Scrub* -
using a damp sponge or soft cloth. Rinse and dry. Stubborn soils may be removed with a damp multi-
purpose Scotch-Brite* pad; rub evenly with the grain. Rinse and dry. To restore luster and remove streaks,
follow with Stainless Steel Magic Spray*.
° Discoloration -- Using a damp sponge or soft cloth, wipe with Cameo Stainless Steel Cleaner*. Rinse
immediately and dry. To remove streaks and restore luster, follow with Stainless Steel Magic Spray*.
• Brand names for cleaning products are registered trademarks of the respective manufacturers.
•* To order direct, call 1-800-JENNAIR (1-800-536-6247).
7
Grill
Accessories:
Basin and
Basin Pan -
Porcelain
Element
Grates = Cast
aJurninurn
coated with
non=stick
finish
Grease Cup
The basin pan and basin are located under the grill element and/or cartridges. Clean after each use of the grill.
• To remove light soil, clean with soapy water or spray with cleansers such as Fantastik* or Formula 409*. For
easier cleanup: a] spray with a household cleanser; b] cover with paper towels; c] add small amount of hot
water to keep the paper towels moist; d] cover and wait 15 minutes; and e] wipe clean.
• To remove moderate soil, scrub with Bon Ami*, a soft scrub cleanser or plastic scrubber.
° Basin liner pan can be cleaned in the dishwasher.
important: Check the grease drain after each use of the grill. To clean, pour about % cup of very hot tap
water mixed with 1 teaspoon dish detergent down the drain.
• Never immerse in water. Most soil will burn off during use. The terminal block may be wiped with warm,
soapy water. Do not use abrasive cleaners or materials. Dry thoroughly before reinserting in the cooktop.
• Wash cool grates (DO NOT IMMERSE HOT GRILLGRATESIN WATER]with detergent in hot water in the
sink or wash them in the dishwasher. Be sure to remove all food residue before cooking on the grill
grates again.
• Remove stubborn soils with a plastic mesh puff or pad. Use only those cleaning products which state
they are recommended for use when cleaning nonstick surfaces.
• If grates were washed in the dishwasher, season with oil prior to grilling.
° Do not use metal brushes or abrasive scouring pads or other scrubbers intended to clean outdoor charcoal
grills. These will remove the finish as well as scratch the grates. Do not clean in self-cleaning oven or use
oven cleaners on the grates.
• The container is located on the left side behind the bottom access panel, underneath
the range. (See page 6 for opening access panel.] It collects grease and other .......
liquids created while grilling or using some of the accessories. Check each time after
grilling and empty when grease is noticeable. To remove, simply grasp the handle,
and pull from the bracket holding the container.
° The container can be washed in hot, soapy water or in the dishwasher.
* Brand names for cleaning products are registered trademarks of the respective manufacturers.
** To order direct, call 1-800-JENNAIR (1-800-536-6247].
A|NTENANCE
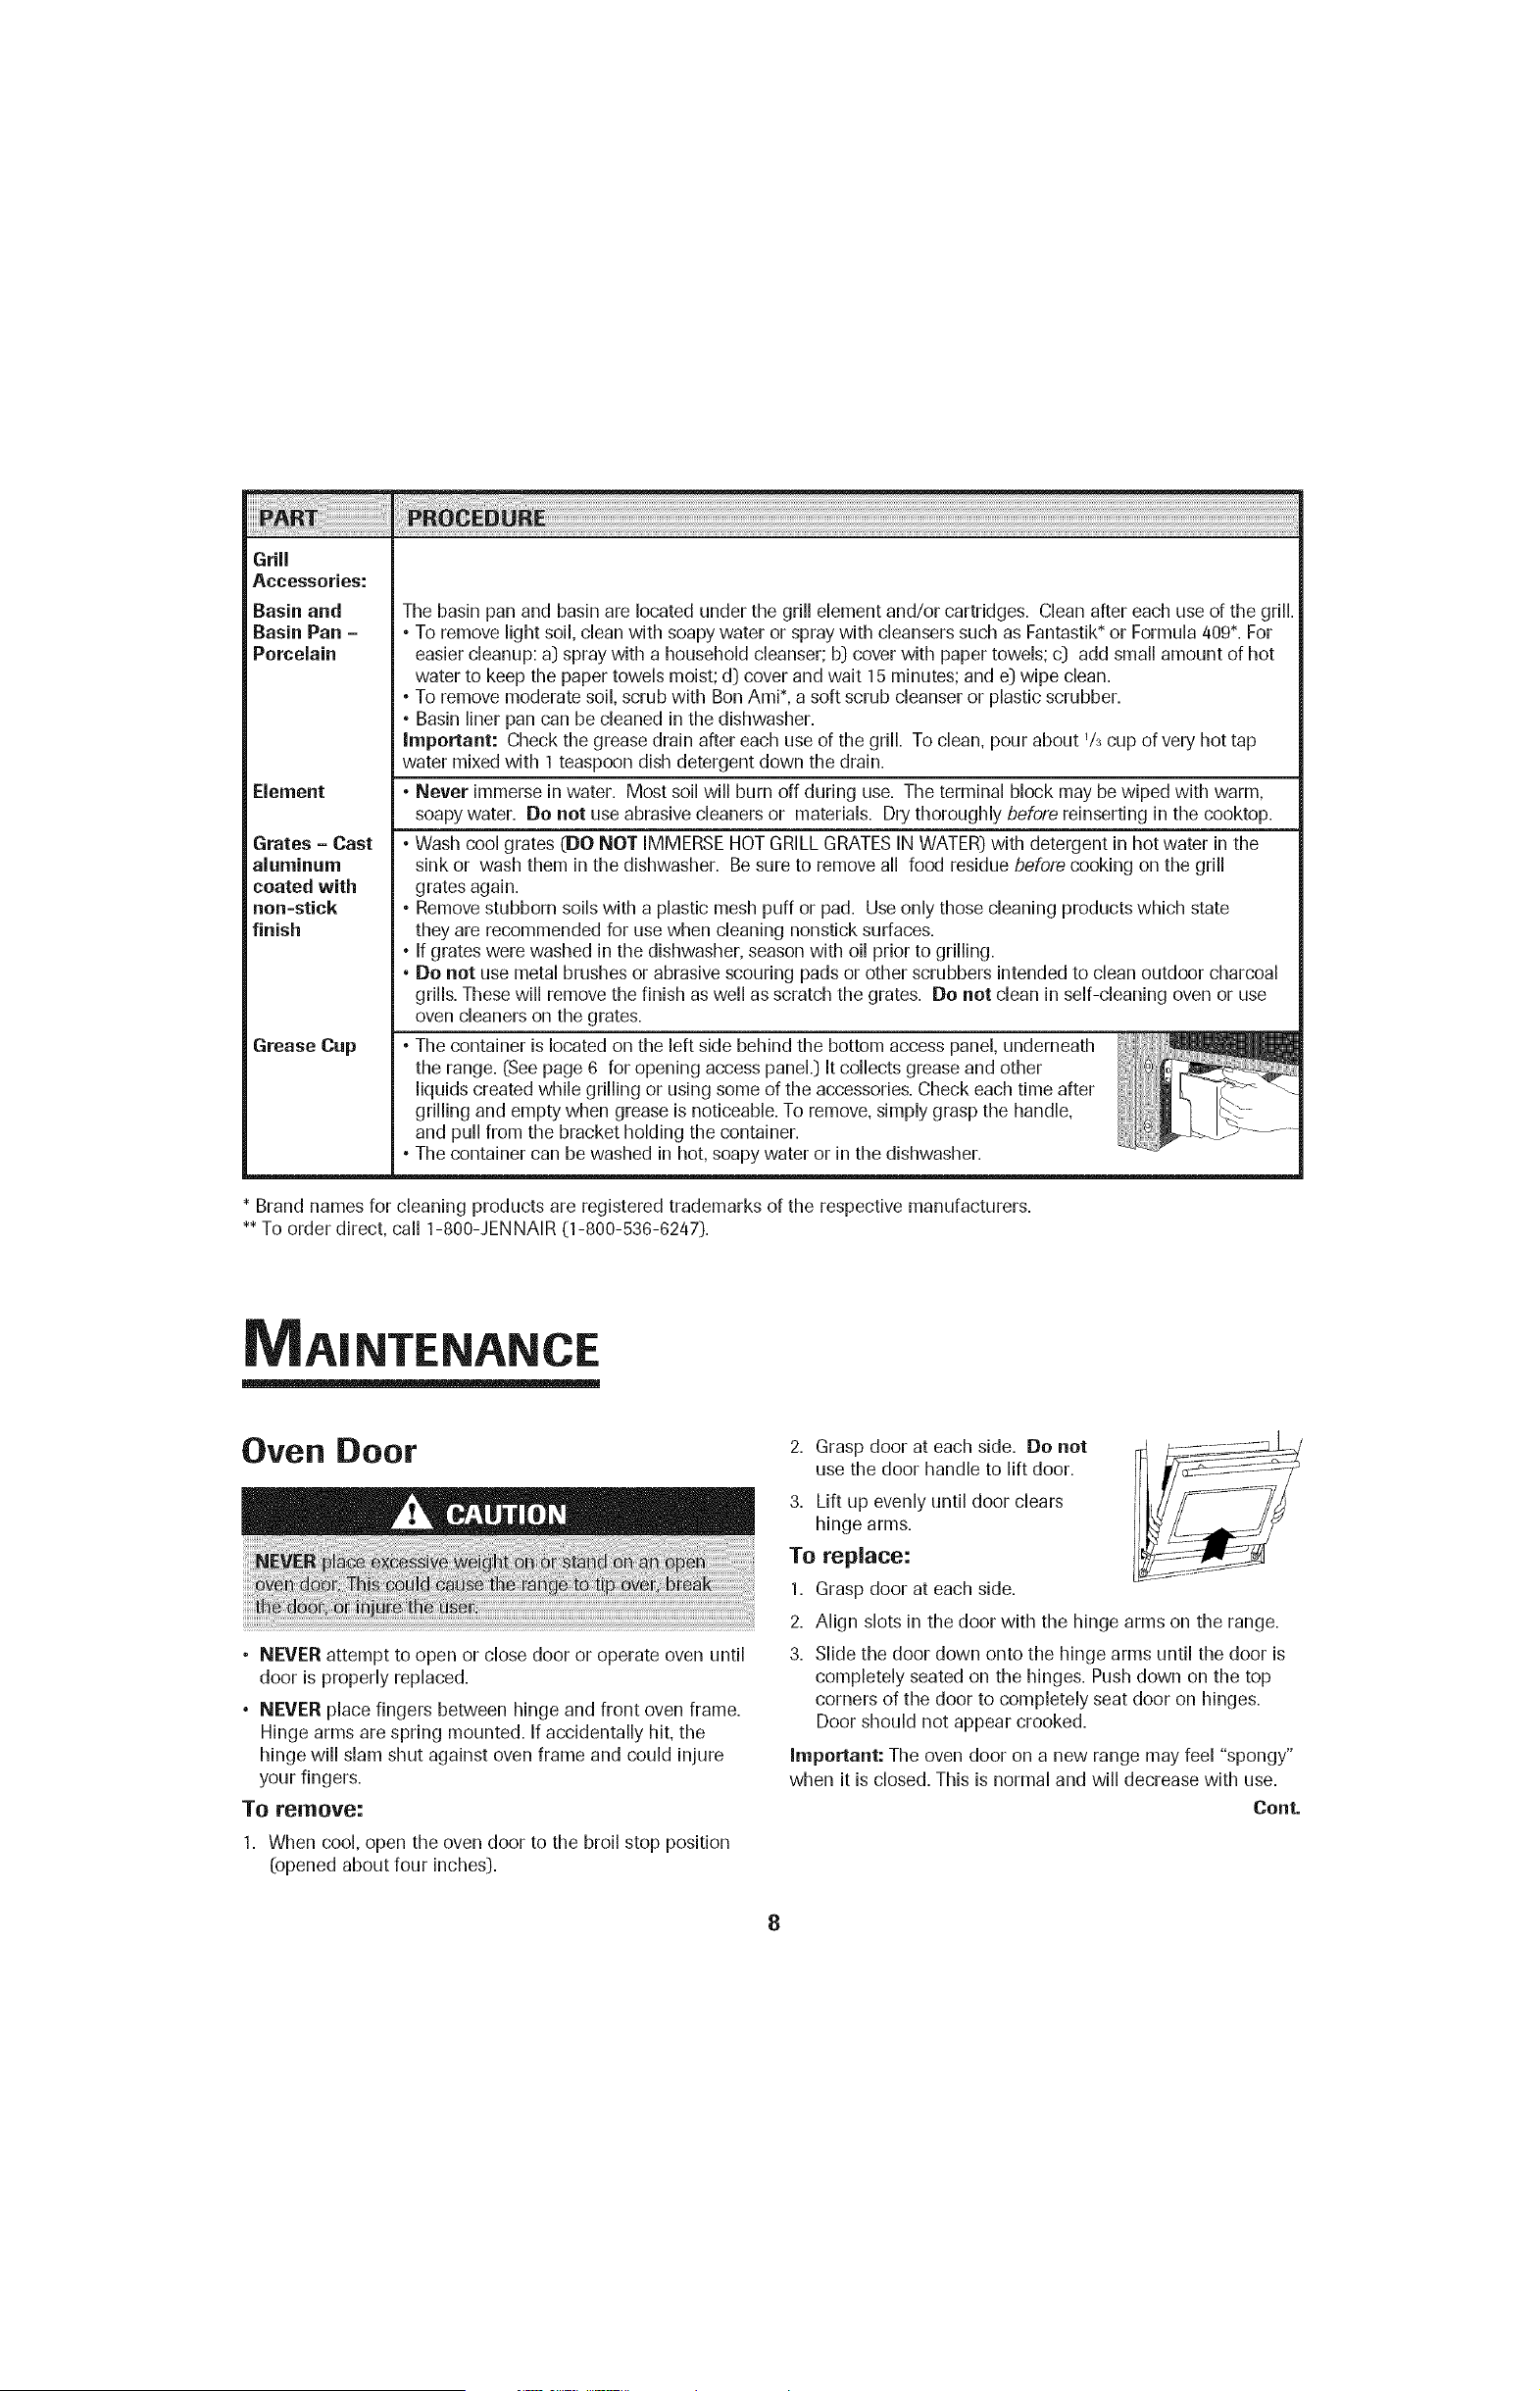
Oven Door
• NEVER attempt to open or close door or operate oven until
door is properly replaced.
° NEVER place fingers between hinge and front oven frame.
Hinge arms are spring mounted. If accidentally hit, the
hinge will slam shut against oven frame and could injure
your fingers.
To remove:
1. When cool, open the oven door to the broil stop position
(opened about four inches].
2. Grasp door at each side. Do not
use the door handle to lift door.
3. Liftup evenly until door clears
hinge arms.
To replace:
1. Grasp door at each side.
2. Align slots in the door with the hinge arms on the range.
3. Slide the door down onto the hinge arms until the door is
completely seated on the hinges. Push down on the top
corners of the door to completely seat door on hinges.
Door should not appear crooked.
Important: The oven door on a new range may feel "spongy"
when it is closed. This is normal and will decrease with use.
Cont.
Oven Window
To protect the oven door window:
1. Do not use abrasive cleaning agents such as steel wool
scouring pads or powdered cleansers as they may scratch
the glass.
2. Do not hit the glass with pots, pans, furniture, toys, or
other objects.
3. Do not close the oven door until the oven racks are in
place.
Scratching, hitting, jarring or stressing the glass may weaken
its structure causing an increased risk of breakage at a later
date.
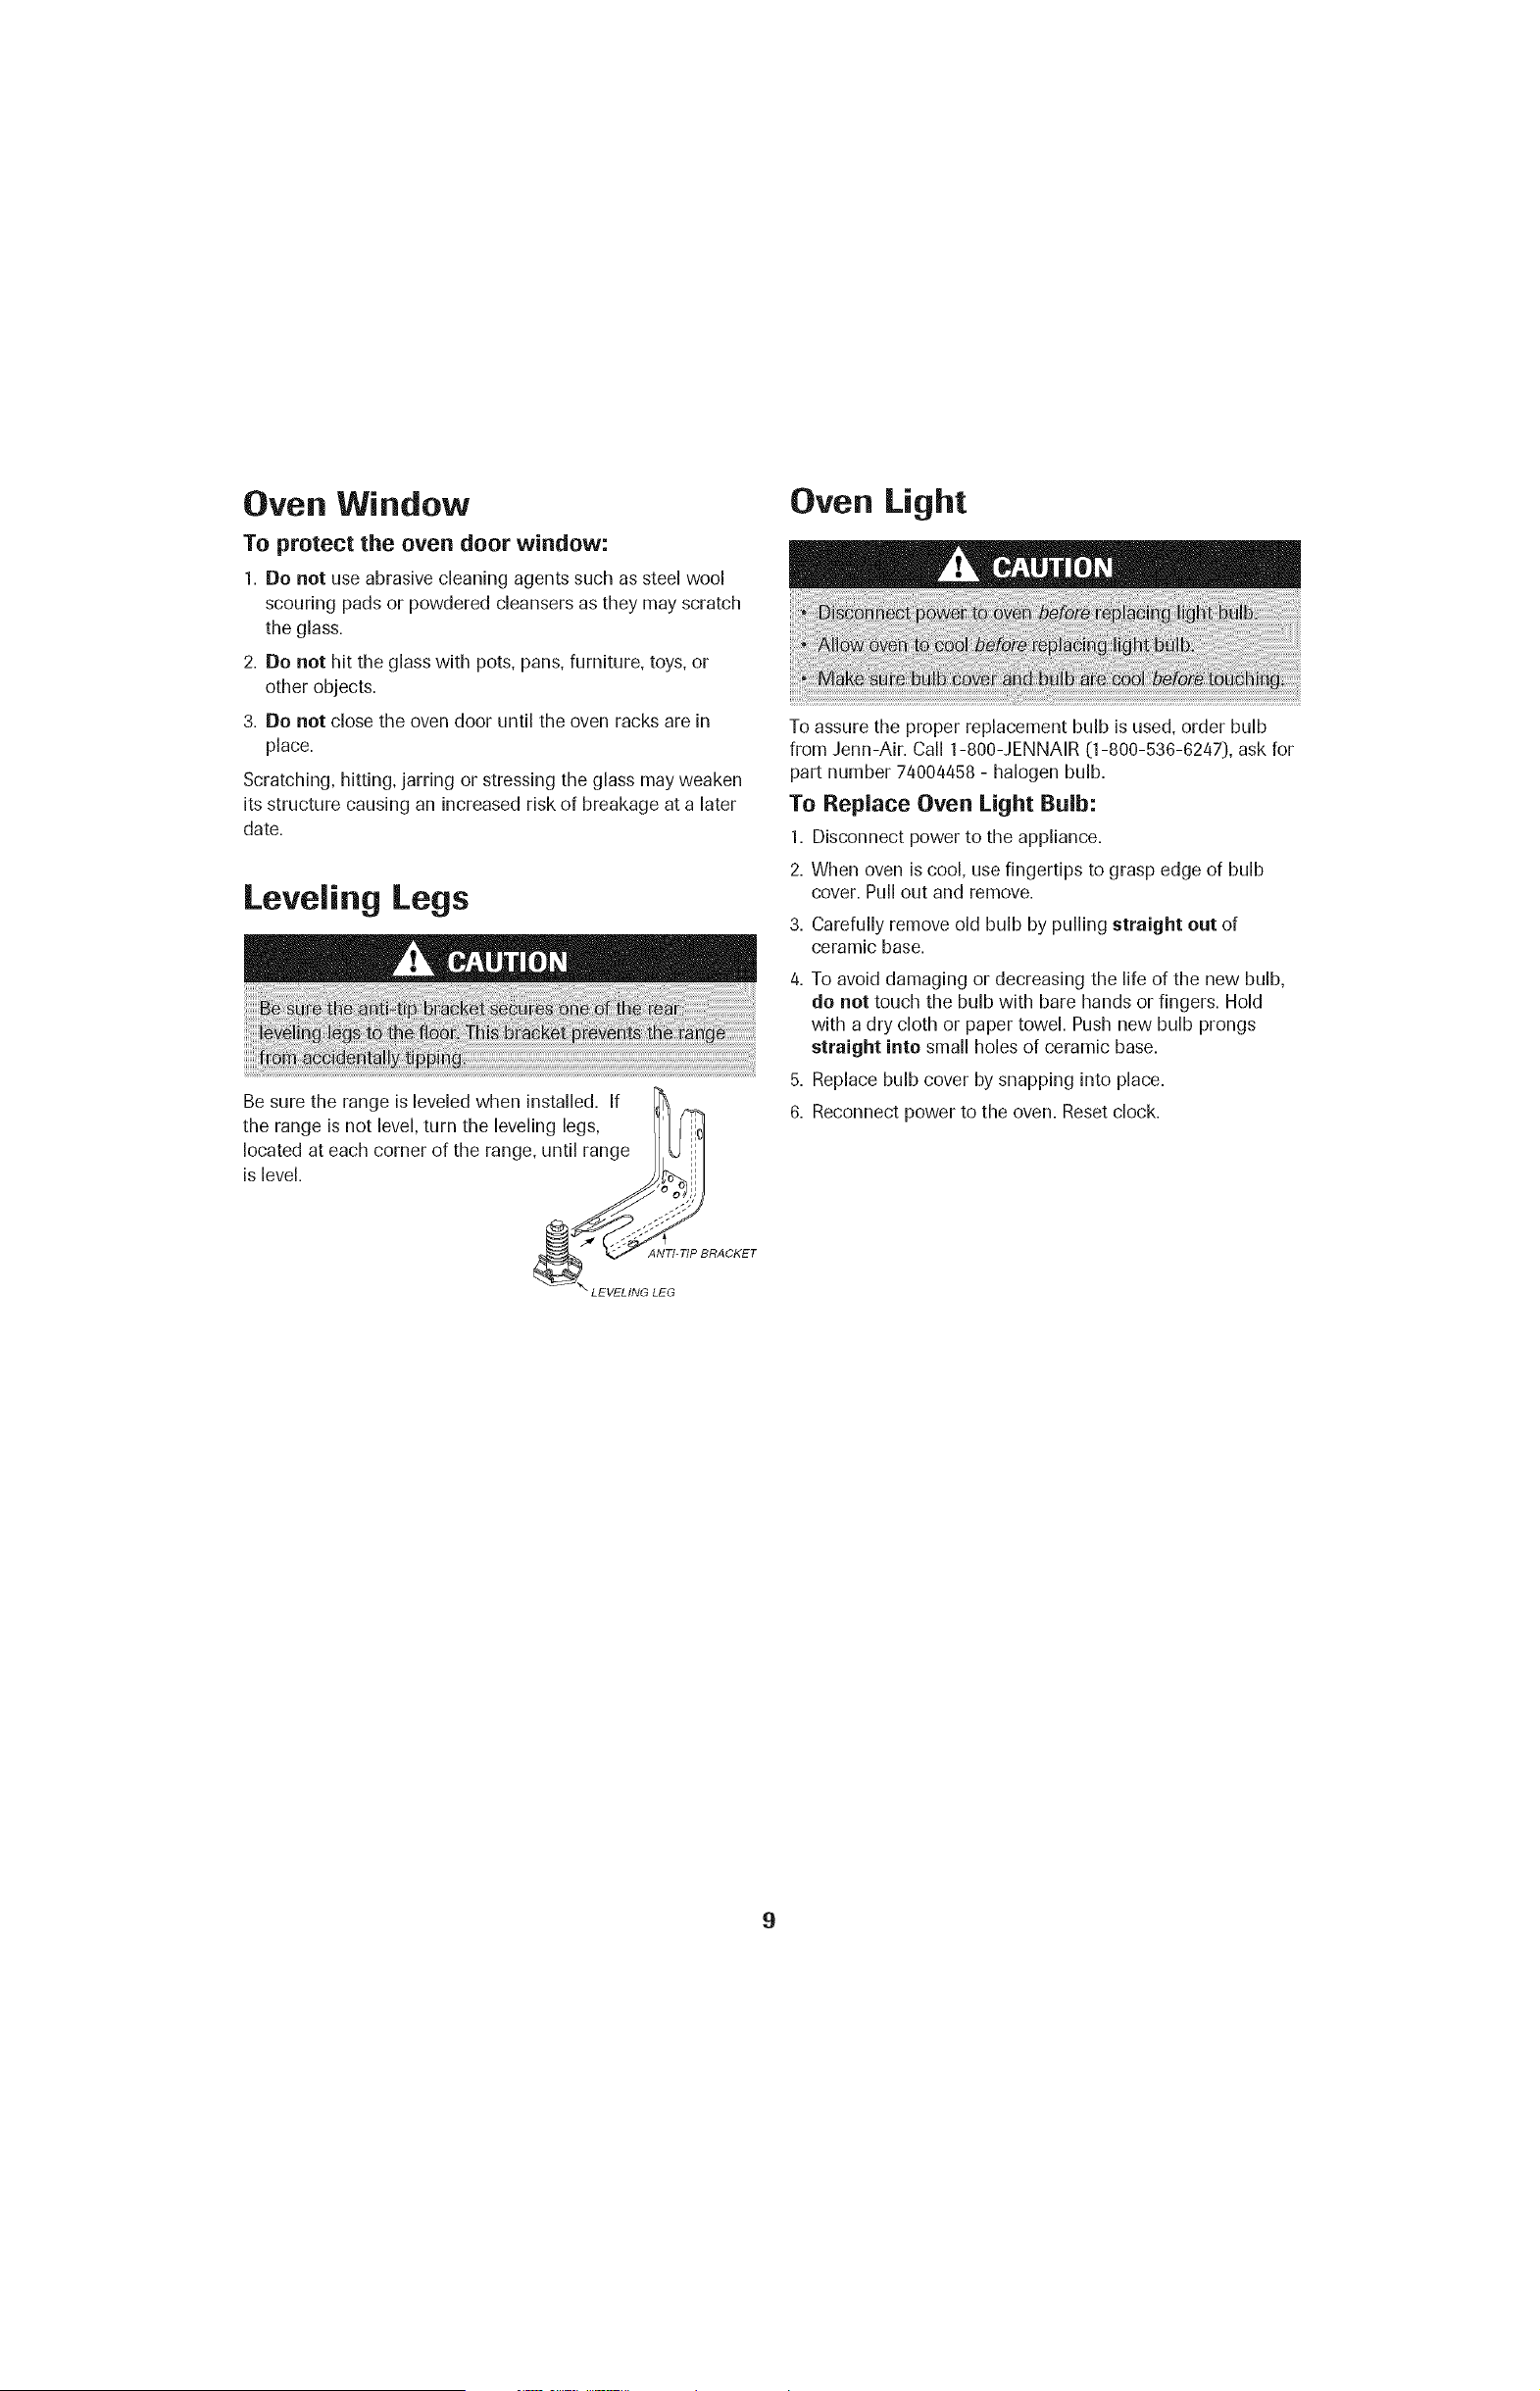
Leveling Legs
Be sure the range is leveled when installed. If
the range is not level, turn the leveling legs,
located at each corner of the range, until range
is level.
ANTI RACKET
\ LEVELING LEG
Oven Light
To assure the proper replacement bulb is used, order bulb
from Jenn-Air. Call 1-800-JENNAIR (1-800-536-82471, ask for
part number 74004458 - halogen bulb.
To Replace Oven Light Bulb:
1. Disconnect power to the appliance.
2. When oven is cool, use fingertips to grasp edge of bulb
cover. Pull out and remove.
3. Carefully remove old bulb by pulling straight out of
ceramic base.
4. To avoid damaging or decreasing the life of the new bulb,
do not touch the bulb with bare hands or fingers. Hold
with a dry cloth or paper towel. Push new bulb prongs
straight into small holes of ceramic base.
5. Replace bulb cover by snapping into place.
6. Reconnect power to the oven. Reset clock.

÷
TRt UBLE NG
÷
For most concerns, try these first. • Check if oven controls have been properly set.
• Check to be sure plug is securely inserted into receptacle.
• Check or re-set circuit breaker. Check or replace fuse.
° Check power supply.
Part or all of appliance does
not work.
Clock, indicator words, and/or
lights operate but oven does
not heat.
Baking results are not as
expected or differ from
previous oven.
Food is not broiling properly or
smokes excessively.
Oven will not self=clean.
Oven did not clean properly.
Oven door will not unlock after
self=clean cycle.
There are no beeps and
no display.
° Check if surface and/or oven controls have been properly set. See pgs. 12 & 19.
• Check if oven door is unlocked after self-clean cycle. See pg. 5.
• Check if oven is set for a delayed cook or clean program. See pgs. 19 & 5.
• Check if Control Lock is activated. See pg. 18.
• Check if control is in Sabbath Mode. See pg. 31.
° Oven may be set for a Cook & Hold or delay function.
° Control Lock may have been set. See pg. 18.
o
o
o
Make sure the oven vent has not been blocked. See pg. 23 for location.
Check to make sure range is level.
Temperatures often vary between a new oven and an old one. As ovens age, the oven
temperature often "drifts" and may become hotter or cooler. See pg. 31 for
instructions on adjusting the oven temperature. Important: It is not recommended
to adjust the temperature if only one or two recipes are in question.
• Check oven rack positions. Food may be too close to element.
• Broil element was not preheated.
• Aluminum foil was incorrectly used. Never line the broiler insert with foil.
• Oven door was closed during broiling. Leave the door open to the first stop position
(about 4 inches).
° Trim excess fat from meat before broiling.
° A soiled broiler pan was used.
° Voltage in house may be low.
• Check to make sure the cycle is not set for a delayed start. See pg. 5.
• Check if door is closed.
• Check if control is in Sabbath Mode. See pg. 31.
° Oven may be over 400° F. Oven temperature must be below 400° F to program a
clean cycle.
• Longer cleaning time may be needed.
• Excessive spillovers, especially sugary and/or acidic foods, were not removed prior
to the self-clean cycle.
° Oven interior is still hot. Allow about one hour for the oven to cool after the
completion of a self-clean cycle, The door can be opened when the LOCK indicator
word is not displayed,
• The control and door may be locked, See pg. 18.
° Oven may be in Sabbath Mode. See pg. 31.
Cont.
÷
10
8113P527-60 11 _ 12/6/05, 8:06 AM
÷
÷
m
!i!i!iiii!ii!!ii !i i !i iiii i!
Smoothtop surface
shows wear=
Moisture coUects on oven
window or steam comes from
oven vent.
There is a strong odor or light
smoke when oven is turned on.
Grill heating element or
cooktop does not get
hot enough.
Ventilation system is not
capturing smoke efficiently.
Fault Codes
Noises may be heard.
SAb flashing and then
displayed continuously.
1.Tiny scratches or abrasions.
• Make sure cooktop and pan bottom are clean. Do not slide glass or metal pans
across top. Make sure pan bottom is not rough. Use the recommended cleaning
agents. See page 7.
2. Metal marks.
• Do not slide metal pans across top. When cool, clean with Cooktop Cleaning Creme.
See page 7.
3. Brown streaks and specks.
° Removespills promptly. Never wipe with a soiled cloth or sponge. Make sure cooktop
and pan bottom are clean.
4. Areas with a metallic sheen.
• Mineral deposits from water and food. Use recommended cleaning agents. See page 7.
5. Pitting or flaking.
• Removesugary boilovers promptly. See page 7.
° This is normal when cooking foods high in moisture.
° Excessivemoisture was used when cleaning the window.
° This is normal for a new range and will disappear after a few uses. Initiating a clean
cycle will "burn off" the odors more quickly.
• Turning on a ventilation fan will help remove the smoke and/or odor.
• Excessivefood soils on the oven bottom. Use a self-clean cycle.
• Surface controls may not be set properly.
• Voltage to house may be low.
° Check on cross ventilation in room or make up air.
• Excessiveamount of smoke is being created; check instructions for grilling, trimming
meats.See pg. 14.
• Outside wall cap may be trapped shut.
• Range may be improperly installed; check ducting information. See pg. 4.
• Air filter may be improperly installed. See pg. 15.
• The oven may detect a fault during programming or during operation. If a fault is
detected, the message FAULT DETECTED- PRESSPOWERTO CLEARor FAULT
DETECTED- PRESSENTERTO TRYAGAIN may appear. Follow directions in the display.
If the fault reappears or does not clear, call an authorized servicer or the toll-free number
in the display.
• If the same operation is attempted before having the wall oven repaired, the message
FEATURENOT AVAILABLE will appear. The feature will remain inoperable until service
isobtained.
• If the oven is heavily soiled, excessive flareups may result in a fault code during cleaning.
Pressthe CANCEL pad and allow the oven to cool completely, wipe out excess soil, then
reset the clean cycle. If the fault code reappears, contact an authorized servicer.
• The oven makes several low-level noises. You may hear the oven relays as they go on
and off. This is normal.
• As the oven heats and cools, you may hear sounds of metal parts expanding and
contracting. This is normal and will not damage your appliance.
° Oven is in Sabbath Mode. To cancel, press and hold the Setup pad for five
seconds.
÷
11
8113P527-60 12 _ 12/6/05, 8:06 AM
÷
URFACECOOKING
Setting the controls for grilling:
Knob A = Exhaust fan only. Knob will not operate the grill
element.
Knob B = Exhaust fan and grill element.
Setting the controls for cartridges:
Knob A - Left front element.
Knob B - Left rear element.
÷
A B
Surface Controls
Use to turn on the surface elements. An infinite choice of
heat settings is available from Low to High. The knobs can
be set on or between any of the settings.
Setting the Controls
1. Place pan on surface element.
2. Push in and turn the knob in either direction to the desired
heat setting.
• The control panel is marked to identify which //
element the knob controls. For example, the _lOFront
graphic at right indicatesright front element.
3. There is an element indicator light on the control panel.
When any surface control knob is turned on, the light will
turn on. The light will turn off when all the surface
elements are turned off.
When a control is turned on, a glow can be seen through
the smoothtop surface. The element will cycle on and off
to maintain the preset heat setting, even on High.
After cooking, turn knob to OFF. Remove pan.
Suggested Neat Settings
Tile size, type of cookware and cooking operation will affect
the heat setting.
High (9): Use to bring
liquid to a boil. Always
reduce setting to a lower
heat when liquids begin to
boil or foods begin to cook,
Low (1): Use to keep foods
warm and melt chocolate
and butter.
Med. Low (3):
Use to
continue
cooking
covered foods
or steam foods.
__
Meal. High (7): Use to
brown meat, heat oil for
deep fat frying or
sauteing. Maintain fast
boil for large amounts
of liquids.
/
Medium (5): Use to
maintain slow boil for
large amounts of liquids
and for most frying
operations.
÷
12
8113P527-60 13 _ 12/6/05, 8:06 AM
÷
Cooktop Cartridge installation
Cooktop cartridges, either conventional coil or radiant
element, can be installed on either side of the range. (See
page 33 for all available cartridges and accessories, and their
model numbers.)
To Install Cartridges:
1. If the grill grates, element, and/or basin pan are in place,
remove before installinga cooktop cartridge. Clean
porcelain basin of any grease accumulation. (See page 8
for cleaning recommendations.)
2. To install any of the optional cooktop cartridges, be sure
controls are turned off and the cartridge is cool. Position
the cartridge terminal plug toward the terminal receptacle.
This receptacle is located at the front of the left side and at
the back of the right side of the range.
Grill installation
The grill accessory consists of two black grill grates, a grill
element and a basin pan. It may be installed on the left side of
the cooktop only.
To Install Grilh
1. Before installing grill components, be certain controls are
off.
2. Place the basin pan into the empty basin.
Position the grill element with the terminal plug toward the
terminal receptacle. This receptacle is located at the front
of the left side of the range. Slide the element toward the
receptacle until the terminal plug is completely engaged
and supports rest on the sides of the basin.
÷
3. Slide the cartridge toward the receptacle until the
cartridge terminal plug is completely engaged.
4. Lower the opposite end of the cartridge into the rangetop
until it is flush with the surface. Your range is now ready
to use.
To Remove Cartridges:
1. Controls must be off and the cartridge should be cool.
2. Lift up the edge of the cartridge until top of cartridge
clears the opening on the range by about 2 inches.
Important: Lifting the cartridge too high while still
engaged in the receptacle could damage the terminal
plug.
3. To disengage terminal, hold cartridge by the sides and pull
away from the terminal receptacle. Lift out when fully
unplugged.
4. Do not stack cartridges where they may fall or be
damaged. Never store other materials on top of the glass-
ceramic cartridges since this could damage or scratch the
surface.
4. Place the grill grates on the top of the cooktop.
To Remove Grilh
1. Be sure controls are off. Remove grill components when
they are cool.
2. To remove grill element, pull away from receptacle until it
is unplugged. Important: Lifting the element more than
2 inches above the cooktop surface while it is engaged in
the receptacle could damage the terminal plug.
÷
Home Canning
Canning should be done on the conventional coil cartridge
only. Canning element accessory, Model A145A, makes it
possible to use large oversized canners with the conventional
coil cartridge.
For additional information, refer to the Use and Care Guide
packaged with your cartridge.
13
8113P527-60 14 _ 12/6/05, 8:06 AM
÷
÷
Using the Grill
• Before the first use, wash your new grill grates in hot
soapy water, rinse and dry. Then "season" the surface by
wiping on a thin coating of cooking oil. Remove excess oil
by wiping with paper towel.
This procedure should be repeated when either:
a)cleaning in the dishwasher since the detergent may
remove seasoning or
b)anytime a sugar-based marinade (for example,
barbecue sauce) is going to be used.
Preheat the grill on High for 5 minutes. Preheating
improvesthe flavor and appearance of meats and quickly
sears the meat to help retain the juices.
Use nonmetallic spatulas or utensils to prevent damaging
the nonstick grill grate finish.
• Excessive amounts of fat should be trimmed from meats.
Only a normal amount is necessary to produce the smoke
needed for that smoked, "outdoor" flavor. Excessive fat can
create cleaning and flare-up problems.
• Allowing excessive amounts of grease or drippings to
constantly flare-up voids the warranty on the grill grates.
Excessive flare-ups indicate that either the grill interior
needs to be cleaned, that excessive amounts of fat are in
the meat or the meat was not properly trimmed.
• Grease drippings will occasionally ignite to produce
harmless puffs of flame for a second or two. This is a
normal part of the cooking process. Important: For
information on the grease cup, see page 8.
• NEVER LEAVE GRILL UNATTENDED DURING
GRILL OPERATION.
• ShouJd excess grease cause sustained flare=ups:
1. Turn on the fan manually.
2. Immediately turn grill controls to OFF.
3. Remove meat from grill.
Notes:
• Do not use aluminum foil insidethe grill /__
° harcoal or wood chips in
° Do not allow grill basin pan to /J__H//
become overloaded with grease. _'
Clean frequently.
• Do not cover grates completely with meat. Leave air
space between each steak, etc. to allow proper
ventilation as well as prevent flare-ups.
Grilling Tips
° Be sure to follow directions for using the grill.
° Suggested cooking times and control settings (see page
15) are approximate due to variations in the foods and
electrical voltage.
• For best results, buy top grade meat. Meat that is at least
3/4inch will grill better than thinner cuts.
° Score fat on edges of steak, but do not cut into meat, to
prevent curling while cooking.
° For the attractive "branded" look on steaks, be sure grill is
preheated. Allow one side of meat to cook to desired
doneness, or until juices appear on the top surface, before
turning. Turn steaks and hamburgers just once.
Manipulating food causes loss of juices.
• When basting meats or applying sauces to foods,
remember that excessive amounts accumulate inside your
grill and do not improve the food flavor.
Apply sauces during the last 15 to 20 minutes of cooking
time unless recipe specifies otherwise. Plus, anytime a
sugar-based marinade (for example barbecue sauce) is
going to be used, the grates should be "seasoned" prior to
preheating. (See Using the Grill section.}
° There are many meat marinades which will help tenderize
less expensive cuts of meat for cooking on the grill.
• Certain foods, such as poultry and non-oily fish, may need
some extra fat. Brush with oil or melted butter occasionally
while grilling.
• Use tongs with long handles or spatulas for turning meats.
Do not use forks as these pierce the meat, allowing juices
to be lost.
Ventilation System
The built-in ventilation system removes cooking vapors, odors
and smoke from foods prepared on your cooktop and grill.
• To operate the ventilation
system manually, push the ..... "_z_'_}_'
}_ME!_ }
Vent Fan pad located on the ..... ;t_z,
electronic control. Push once ..............
for Low, push again for High _€,:I_ o_,,'_,_
and a thirdtime to turn the Y_;I'
fan Off.
The ventilation system will operate automatically when the
grill element is in use.
The fan can be used to remove strong odors from the
kitchen, as when chopping onions near the fan.
Cent.
÷
14
8113P527-60 15 _ 12/6/05, 8:06 AM
÷
÷
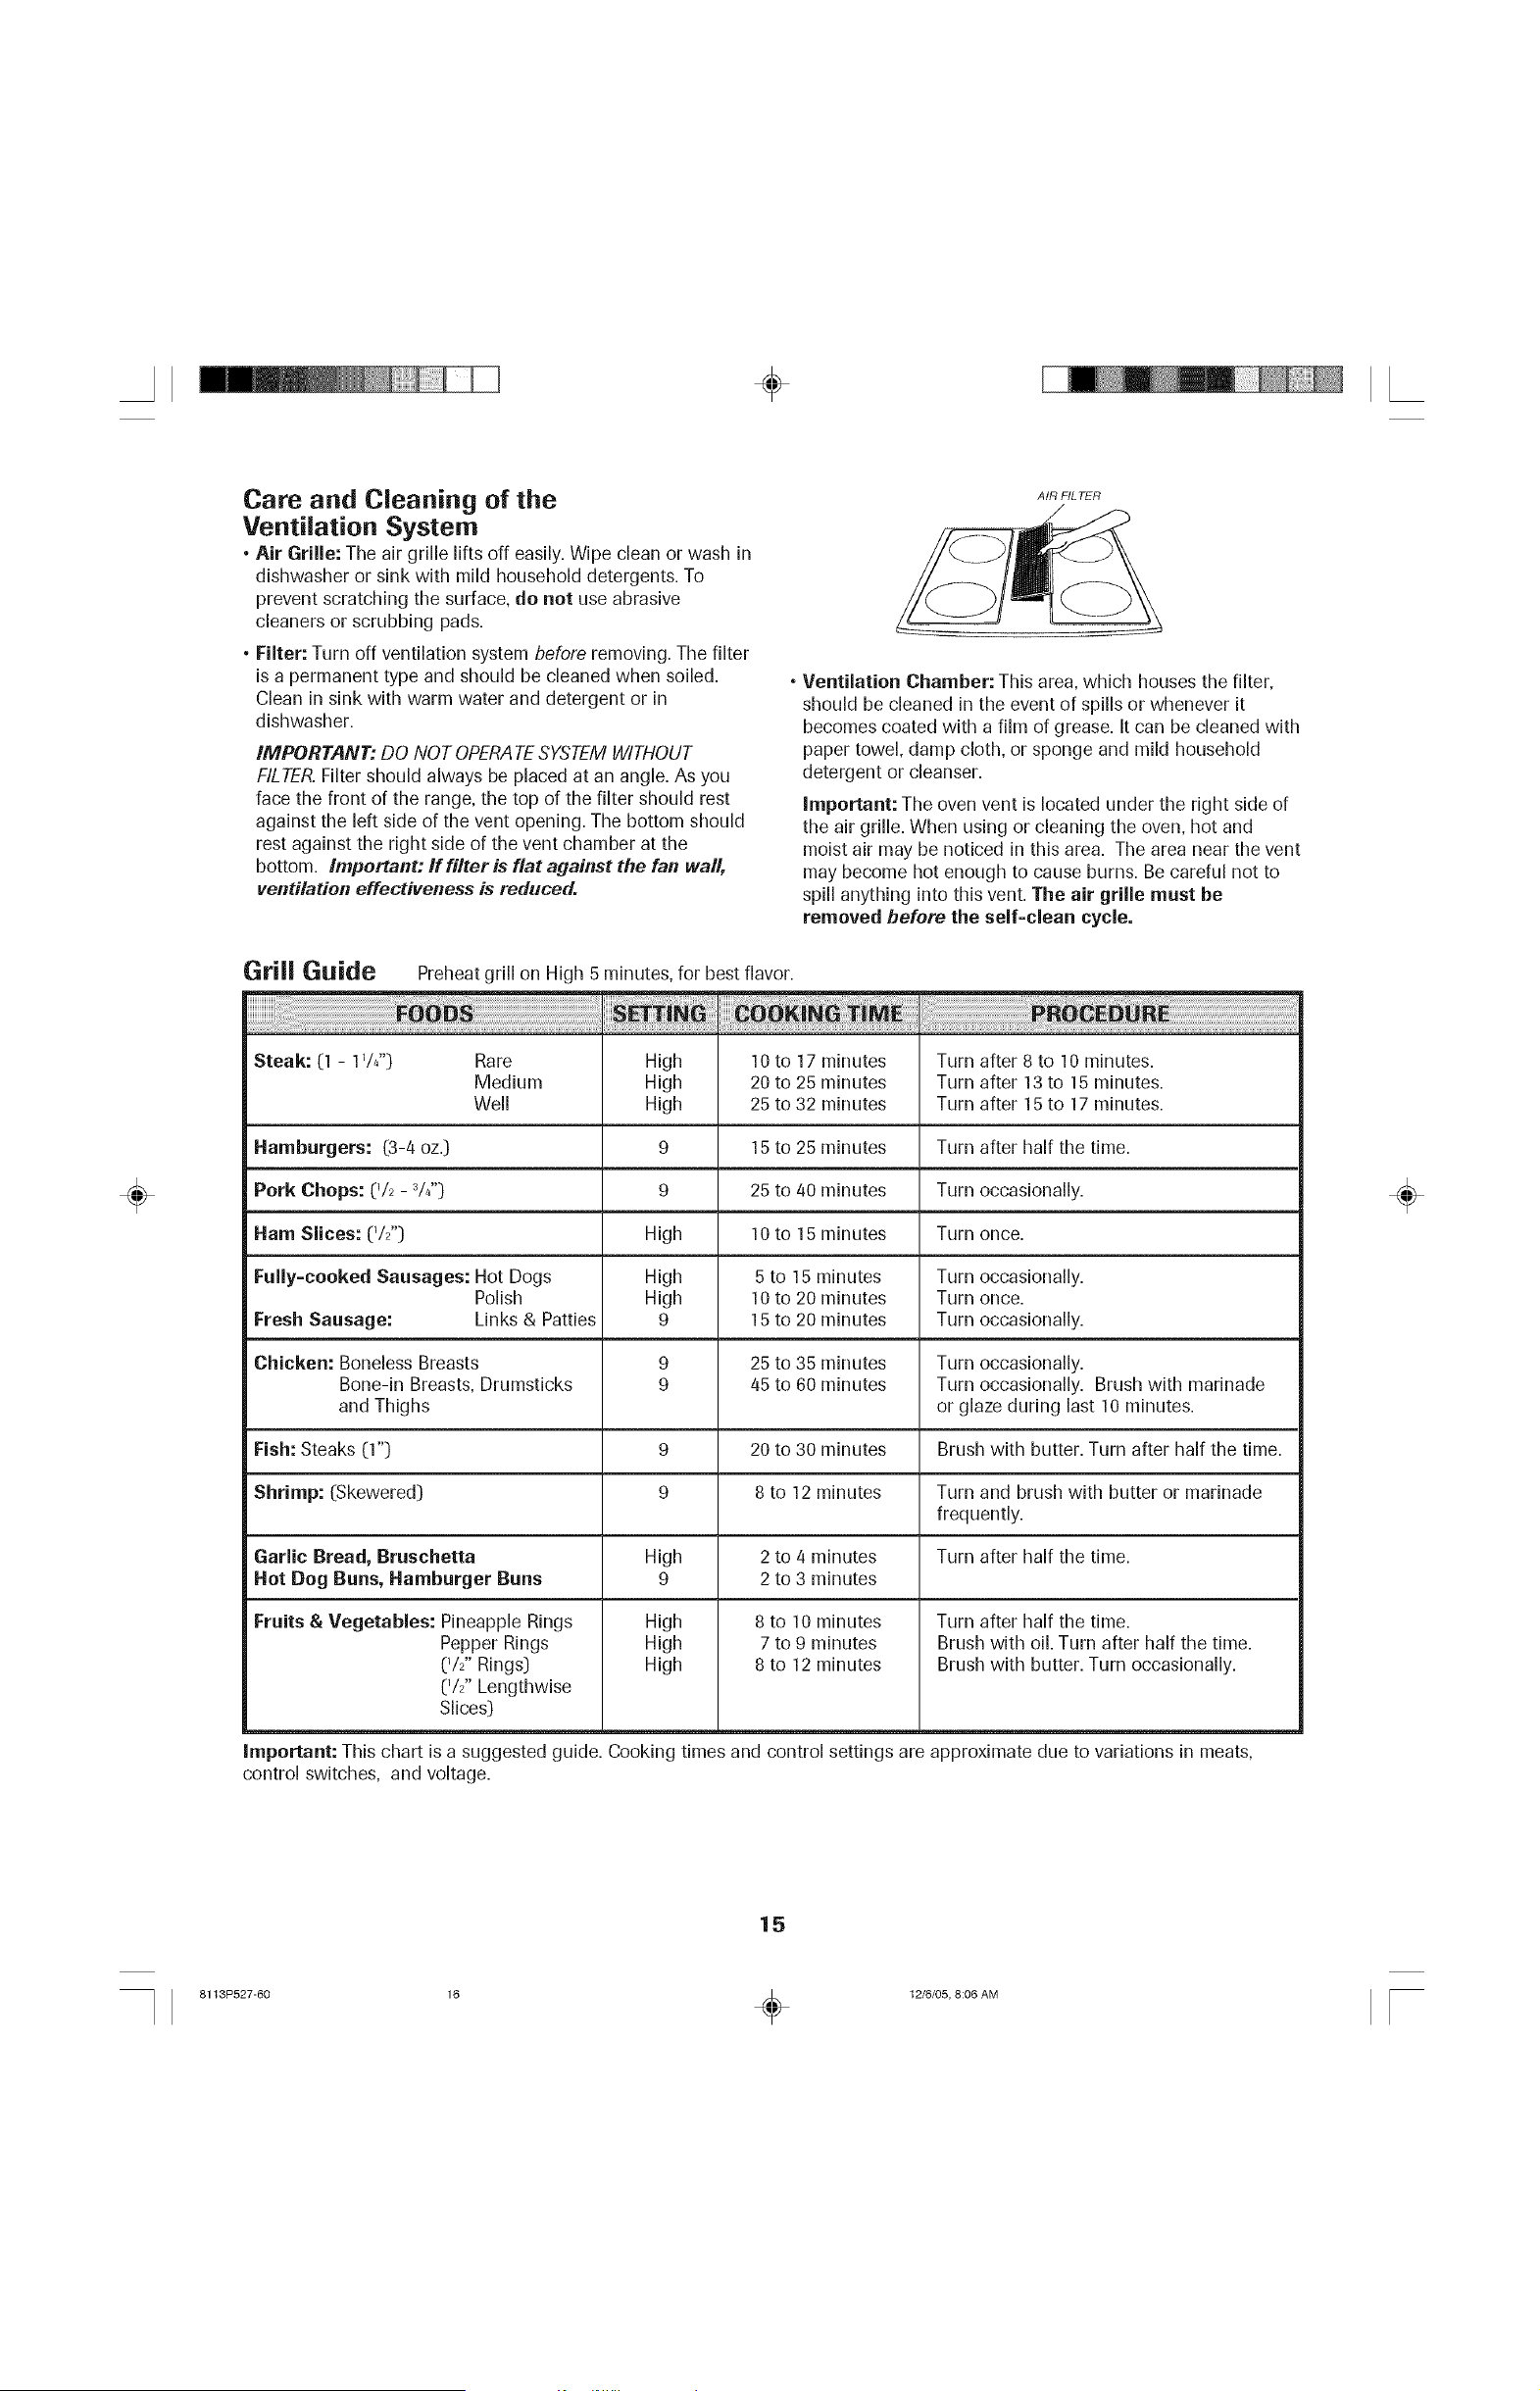
Care and Cleaning of the
Ventilation System
• Air Grille: The air grille lifts off easily. Wipe clean or wash in
dishwasher or sink with mild household detergents. To
prevent scratching the surface, da nat use abrasive
cleaners or scrubbing pads.
° Filter: Turn off ventilation system before removing. The filter
is a permanent type and should be cleaned when soiled.
Clean in sink with warm water and detergent or in
dishwasher.
iMPORTANT: DO NOT OPERATESYSTEMWITHOUT
FILTER.Filter should always be placed at an angle. As you
face the front of the range, the top of the filter should rest
against the left side of the vent opening. The bottom should
rest against the right side of the vent chamber at the
bottom, important: if filter is flat against the fan wall,
ventilation effectiveness is reduced.
AIR FILTER
° Ventilatian Chamber: This area, which houses the filter,
should be cleaned in the event of spills or whenever it
becomes coated with a film of grease. It can be cleaned with
paper towel, damp cloth, or sponge and mild household
detergent or cleanser.
Important: The oven vent is located under the right side of
the air grille. When using or cleaning the oven, hot and
moist air may be noticed in this area. The area near the vent
may become hot enough to cause burns. Be careful not to
spill anything into this vent. The air grille must be
removed before the self=clean cycle.
Grill Guide
Steak: (1 - 1V4")
Preheat grill on High 5 minutes, for best flavor.
Rare
Medium
Well
Hamburgers: (3-4 oz.)
Park Chaps: (V2 - 3/4")
Ham Slices: (W')
Fully=cooked Sausages: Hot Dogs
Polish
Fresh Sausage: Links & Patties
High
High
High
9
9
High
High
High
9
9
9
10 to 17 minutes
20 to 25 minutes
25 to 32 minutes
15 to 25 minutes
25 to 40 minutes
10 to 15 minutes
5 to 15 minutes
10 to 20 minutes
15 to 20 minutes
25 to 35 minutes
45 to 60 minutes
Turn after 8 to 10 minutes.
Turn after 13to 15 minutes.
Turn after 15to 17 minutes.
Turn after half the time.
Turn occasionally.
Turn once.
Turn occasionally.
Turn once.
Turn occasionally.
Chicken: Boneless Breasts Turn occasionally.
Bone-in Breasts, Drumsticks Turn occasionally. Brush with marinade
and Thighs or glaze during last 10 minutes.
Fish: Steaks (1") 9 20 to 30 minutes Brush with butter. Turn after half the time.
Shrimp: (Skewered) 9 8 to 12 minutes Turn and brush with butter or marinade
frequently.
Garlic Bread, Bruschetta High 2 to 4 minutes Turn after half the time.
Hot Dag Buns, Hamburger Buns 9 2 to 3 minutes
Fruits & Vegetables: Pineapple Rings
Pepper Rings
(W' Rings)
(V2" Lengthwise
Slices)
8 to 10 minutes
7 to 9 minutes
8 to 12 minutes
High
High
High
Turn after half the time.
Brush with oil. Turn after half the time.
Brush with butter, Turn occasionally,
Important: This chart is a suggested guide. Cooking times and control settings are approximate due to variations in meats,
control switches, and voltage.
÷
15
8113P527-60 16 _ 12/6/05, 8:06 AM
÷
÷
Tips to Protect the
Smoothtop Cartridge Surface
C_eaning (see page 7 for more information)
• Before first use, clean the cooktop.
• Clean your cooktop daily or after each use. This will keep your
cooktop looking good and can prevent damage.
• If a spillover occurs while cooking, immediately clean the spill
from the cooking area while it is hot to prevent a tough
cleaning chore later. Using extreme care, wipe spill with a
clean, dry towel.
• Do not allow spills to remain on the cooking area or the
cooktop trim for a long period of time.
• Never use abrasive cleansing powders or scouring pads
which will scratch the cooktop.
• Never use chlorine bleach, ammonia or other cleansers not
specifically recommended for use on glass-ceramic.
To Prevent Marks & Scratches
• Do not use glass pans. They may scratch the surface.
• Never place a trivet or wok ring between the surface and pan.
These items can mark or etch the top.
• Do not slide aluminum pans across a hot surface. The pans
may leave marks which need to be removed promptly. (See
Cleaning,page 7.)
• Make sure the surface and the pan bottom are clean before
turning on to prevent scratches.
• To prevent scratching or damage to the glass-ceramic top, do
not leave sugar, salt or fats on the cooking area. Wipe the
cooktop surface with a clean cloth or paper towel before
using.
• Never slide heavy metal pans across the surface since these
may scratch.
To Prevent Stains
• Never use a soiled dish cloth or sponge to clean the cooktop
surface. A film will remain which may cause stains on the
cooking surface after the area is heated.
° Continuously cooking on a soiled surface may/will result in a
permanent stain.
To Prevent Other Damage
° Do not allow plastic, sugar or foods with high sugar content
to melt onto the hot cooktop. Should this happen, clean
immediately. {See Cleaning,page 7.)
• Never let a pan boil dry as this will damage the surface and
pan.
• Never use cooktop as a work surface or cutting board.
• Never cook food directly on the surface.
• Do not use a small pan on a large element. Not only does this
waste energy, but it can also result in spillovers burning onto
the cooking area, which requires extra cleaning.
° Do not use non-fiat specialty items that are oversized or
uneven such as round bottom woks, rippled bottom and/or
oversized canners and griddles.
° Do not use foil or foil-type containers. Foil may melt onto the
glass. If metal melts on the cooktop, do not use. Call an
authorized Jenn-Air Servicer.
Cookware Recommendations
Using the right cookware can prevent many problems, such as
food taking longer to cook or achieving inconsistent results.
Proper pans will reduce cooking times, use less energy, and
cook food more evenly.
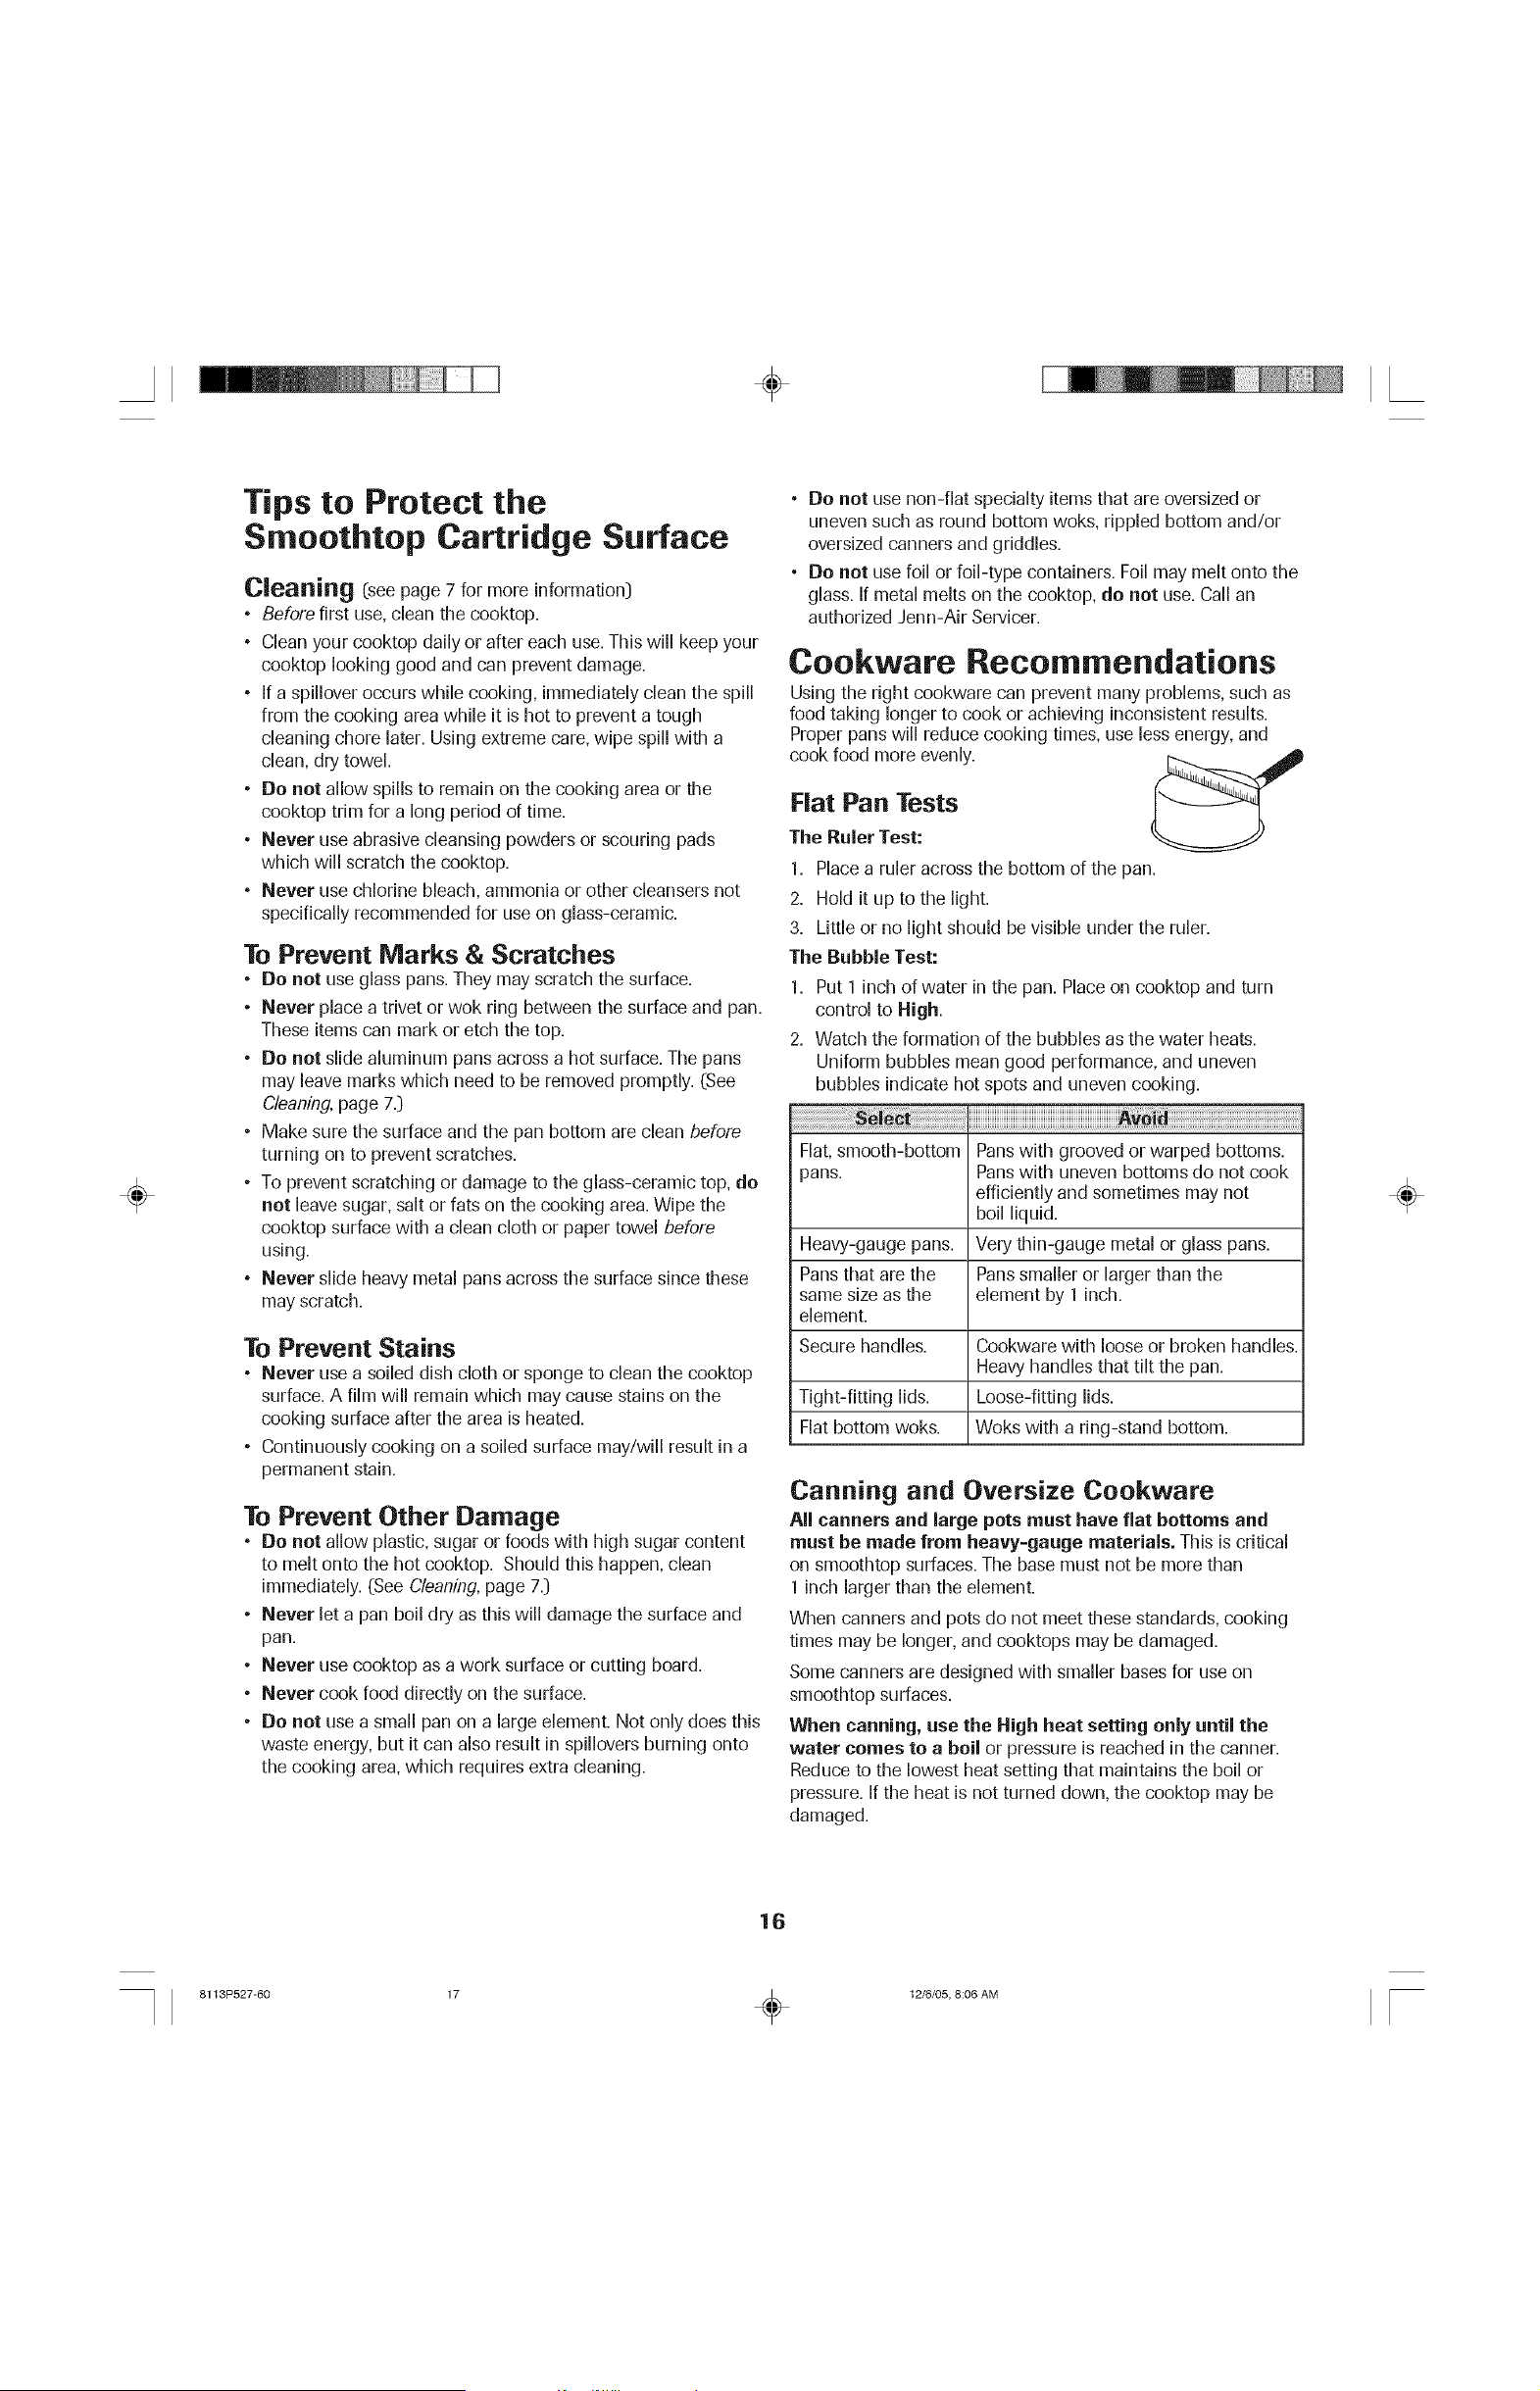
Flat Pan Tests
The Ruler Test:
1. Place a ruler across the bottom of the pan.
2. Hold it up to the light.
3. Little or no light should be visible under the ruler.
The Bubble Test:
1. Put 1 inch of water in the pan. Place on cooktop and turn
control to High.
2. Watch the formation of the bubbles as the water heats.
Uniform bubbles mean good performance, and uneven
bubbles indicate hot spots and uneven cooking.
A,, ia
Flat, smooth-bottom Pans with grooved or warped bottoms.
pans. Pans with uneven bottoms do not cook
efficiently and sometimes may not
boil liquid.
Heavy-gauge pans, Very thin-gauge metal or glass pans,
Pans that are the Pans smaller or larger than the
same size as the element by 1 inch,
element,
Secure handles, Cookware with loose or broken handles,
Heavy handles that tilt the pan.
Tight-fitting lids, Loose-fitting lids,
Flat bottom woks. Woks with a ring-stand bottom,
Canning and Oversize Cookware
All canners and large pats must have flat bottoms and
must be made from heavy=gauge materials. This is critical
on smoothtop surfaces. The base must not be more than
1inch larger than the element.
When canners and pots do not meet these standards, cooking
times may be longer, and cooktops may be damaged.
Some canners are designed with smaller bases for use on
smoothtop surfaces.
When canning, use the High heat setting only until the
water comes to a boil or pressure is reached in the canner.
Reduce to the lowest heat setting that maintains the boil or
pressure. If the heat is not turned down, the cooktop may be
damaged.
÷
16
8113P527-60 17 _ 12/6/05, 8:06 AM
÷
OVENCOOK=NG
÷
Control Panel
AB CD
..............r_ Bake "Favoritesoi1s_tup/ off
nv ct Clean
Rapid
-- Preheat
J KL
TIMER 1
on/off
Vent Oven
Fan Light CANCEL
M N 0
G
TIMER2
On/Off
P
H
!
2 3
ABC DEF
4 5 6
GHI JKL MNO
7 8 9
PORS [UV WXYZ
Back 0 El_ter
1 Space J
_ock
The control panel isdesigned for ease in programming. The display window shows options for each function and moves from step
to step through the programming process. Control panel features vary by model. Oven display above is programmed for a bake
operation.
iiiiiiBiiii!i_
iiiiiiE;ii_ii_iii!
iiiiiiFiliiii!i
iiiiiG!i_;
iiiiiiHii
iiiiiiL
Rapid Preheat
Convect
Bake
Broil
TIMER 1
Display
TIMER 2
Number Pads
Favorites
More Options
Clean
Setup
Vent Fan
Oven Light
CANCEL
Quickset pads
Useto decrease preheating time.
Usefor convection baking and roasting.
Use for baking and roasting.
Usefor broiling and top browning.
Sets timer.
Displays oven functions, options and
window time of day.
Sets timer.
Use to enter time and temperature,
or to enter Favorites names.
Use to access, program or save
baking cycles.
Useto access additional features.
Useto set self-clean cycle.
Use to view or change factory
default settings.
Activates the ventilation fan on
the cooktop.
Useto turn the oven light on or off.
Cancels all operations except Timer,
Clock, Favorites,Setup and Vent Fan.
Use to select options in display
window (next to display window
on both sides).
Quickset Pads
Quickset pads are located on each side of the display window
and are used to select the desired function or option in the
display window. To select the option or function, press the
Quickset pad next to the word.
If you need to back out of a function or option in the display,
press the Back pad. When your programming is complete,
press the Enter pad or wait four seconds and the function will
start automatically.
Up arrows indicate additional screens with additional options.
Pressthe Quickset pads next to the arrows to scroll through
the display.
Important: Four seconds after entering the function,
option, number or letter, the function will automatically be
entered. If more than 30 seconds elapse between steps in
programming, the function will be canceled and the
display will return to the previous display.
Clock
Setting the Clock:
1.
2.
3.
4.
5.
6.
Press the Setup pad.
Select CLOCK using the Quickset pads.
Select TIME.
iJ Setup
.......On/Off
.................. /
Enter the time using the number pads.
Press Enter pad.
Select AM or PM in 12 hour mode. (For 24 hour clock, see
page 18.)
7. To exit the Setup mode, press Setup pad.
17
÷
8113P527-60 18 _ 12/6/05, 8:06 AM
÷
÷
Activating and canceling the clock/day
of week display: ........................
J ....
1. Press Setup pad. " Setup
On/Off/
2. Select CLOCK. "
3. Press the arrow to scroll until DISABLE is displayed.
4. Select DISABLE.
5. Select OFF to turn the clock display off, or select ON to turn
the clock display on.
6. Select OFF to turn the day of the week display off Select
ON to turn the weekday display on.
7. To exit the Setup mode, press Setup pad.
Entering the day of the week: ...........
1. Press Setup pad. -'Setup
, On/Off/
2. Select CLOCK. "..............................
3. Press the arrow to scroll until DAY is displayed.
4. Use Quickset arrow to scroll through the days.
5. To exit the Setup mode, press Setup pad.
TO set the clock for a 12 or 24 hour format:
The clock can be set to display time in either a
hour format.
1. Press the Setup pad.
2. Select CLOCK,
3. Use the arrow to scroll to the next screen,
2 hour or 24
Setup
On/Off /
, z
4. Select 12124 HOUR.
5. Select 12 HR or 24 HR.
6. To exit Setup mode, press Setup pad.
Timers
Setting the Timers (Timer 1 or Timer 2):
1. Press TIMER 1 or TIMER 2 pad...............
J .....
2. Press one of the displayed times using the / TIMER i
Quickset pads, or press the number pads to On........./ Off ./
enter the desired time.
Important: Each press of the displayed time choices adds
additional time. For example, pressing "10 MIN" three
times provides 30 minutes on the timer (0:30}.
3. Press Enter pad.
Changing the amount of time entered once the
Timer starts:
1. Press the TIMER 1 or TIMER 2 pad once.
2. Press the displayed times on the Quickset
pads until the desired time is entered.
OR
@MERi"
....., On / Off/i
3. Press the number pads to enter the new desired time.
4. Press Enter pad.
Canceling the Timer:
Pressthe TIMER 1 or TINIER 2 pad twice.
If both Timers are active:
z..............
/TIMER1
.....,On/Off,
If the desired Timer is already in the foreground, press once
for edit mode and twice to cancel the Timer. If the desired
Timer is not in the foreground, follow the steps below.
1. Press the desired TINIER pad once. The selected Timer will
come to the foreground.
2. Press the TINIER pad a secondtime to access the edit
mode in order to make changes.
3. Pressing the TINIER pad a thirdtime will cancel the Timer.
Changing the Timer beeps:
Tile signal beeps for TIMER 1 and TIMER 2 can be changed.
The options available are two beeps every thirty seconds, two
beeps every sixty seconds or one beep only. The default
setting is one beep.
1. Press the Setup pad.
2,
3,
4.
5.
Select the arrow to scroll until TONES
is displayed.
Select TONES.
6,
/ Setup
On!Off
/
\ .... /
Select TIMERS TONES.
Select the desired timer beep format (2-30 SEC,2-60 SEC
or 1 BEEP:.
Press Setup pad to exit Setup mode.
Locking the Control and Oven Door
The oven control and oven door can be locked to prevent
accidental programming. If an oven function is currently
being used, the control and door cannot be locked.
To lock the control and door:
Press the Back and Enter pads at the same time, holding for
three seconds or until CONTROL LOCKED appears in the
display.
To unlock the control and door:
Press the Back and Enter pads at the same time, holding for
three seconds. UNLOCKING DOOR will appear in the display
when the control and door are unlocking.
Back 0 Enter
÷
18
8113P527-60 19 _ 12/6/05, 8:06 AM
÷
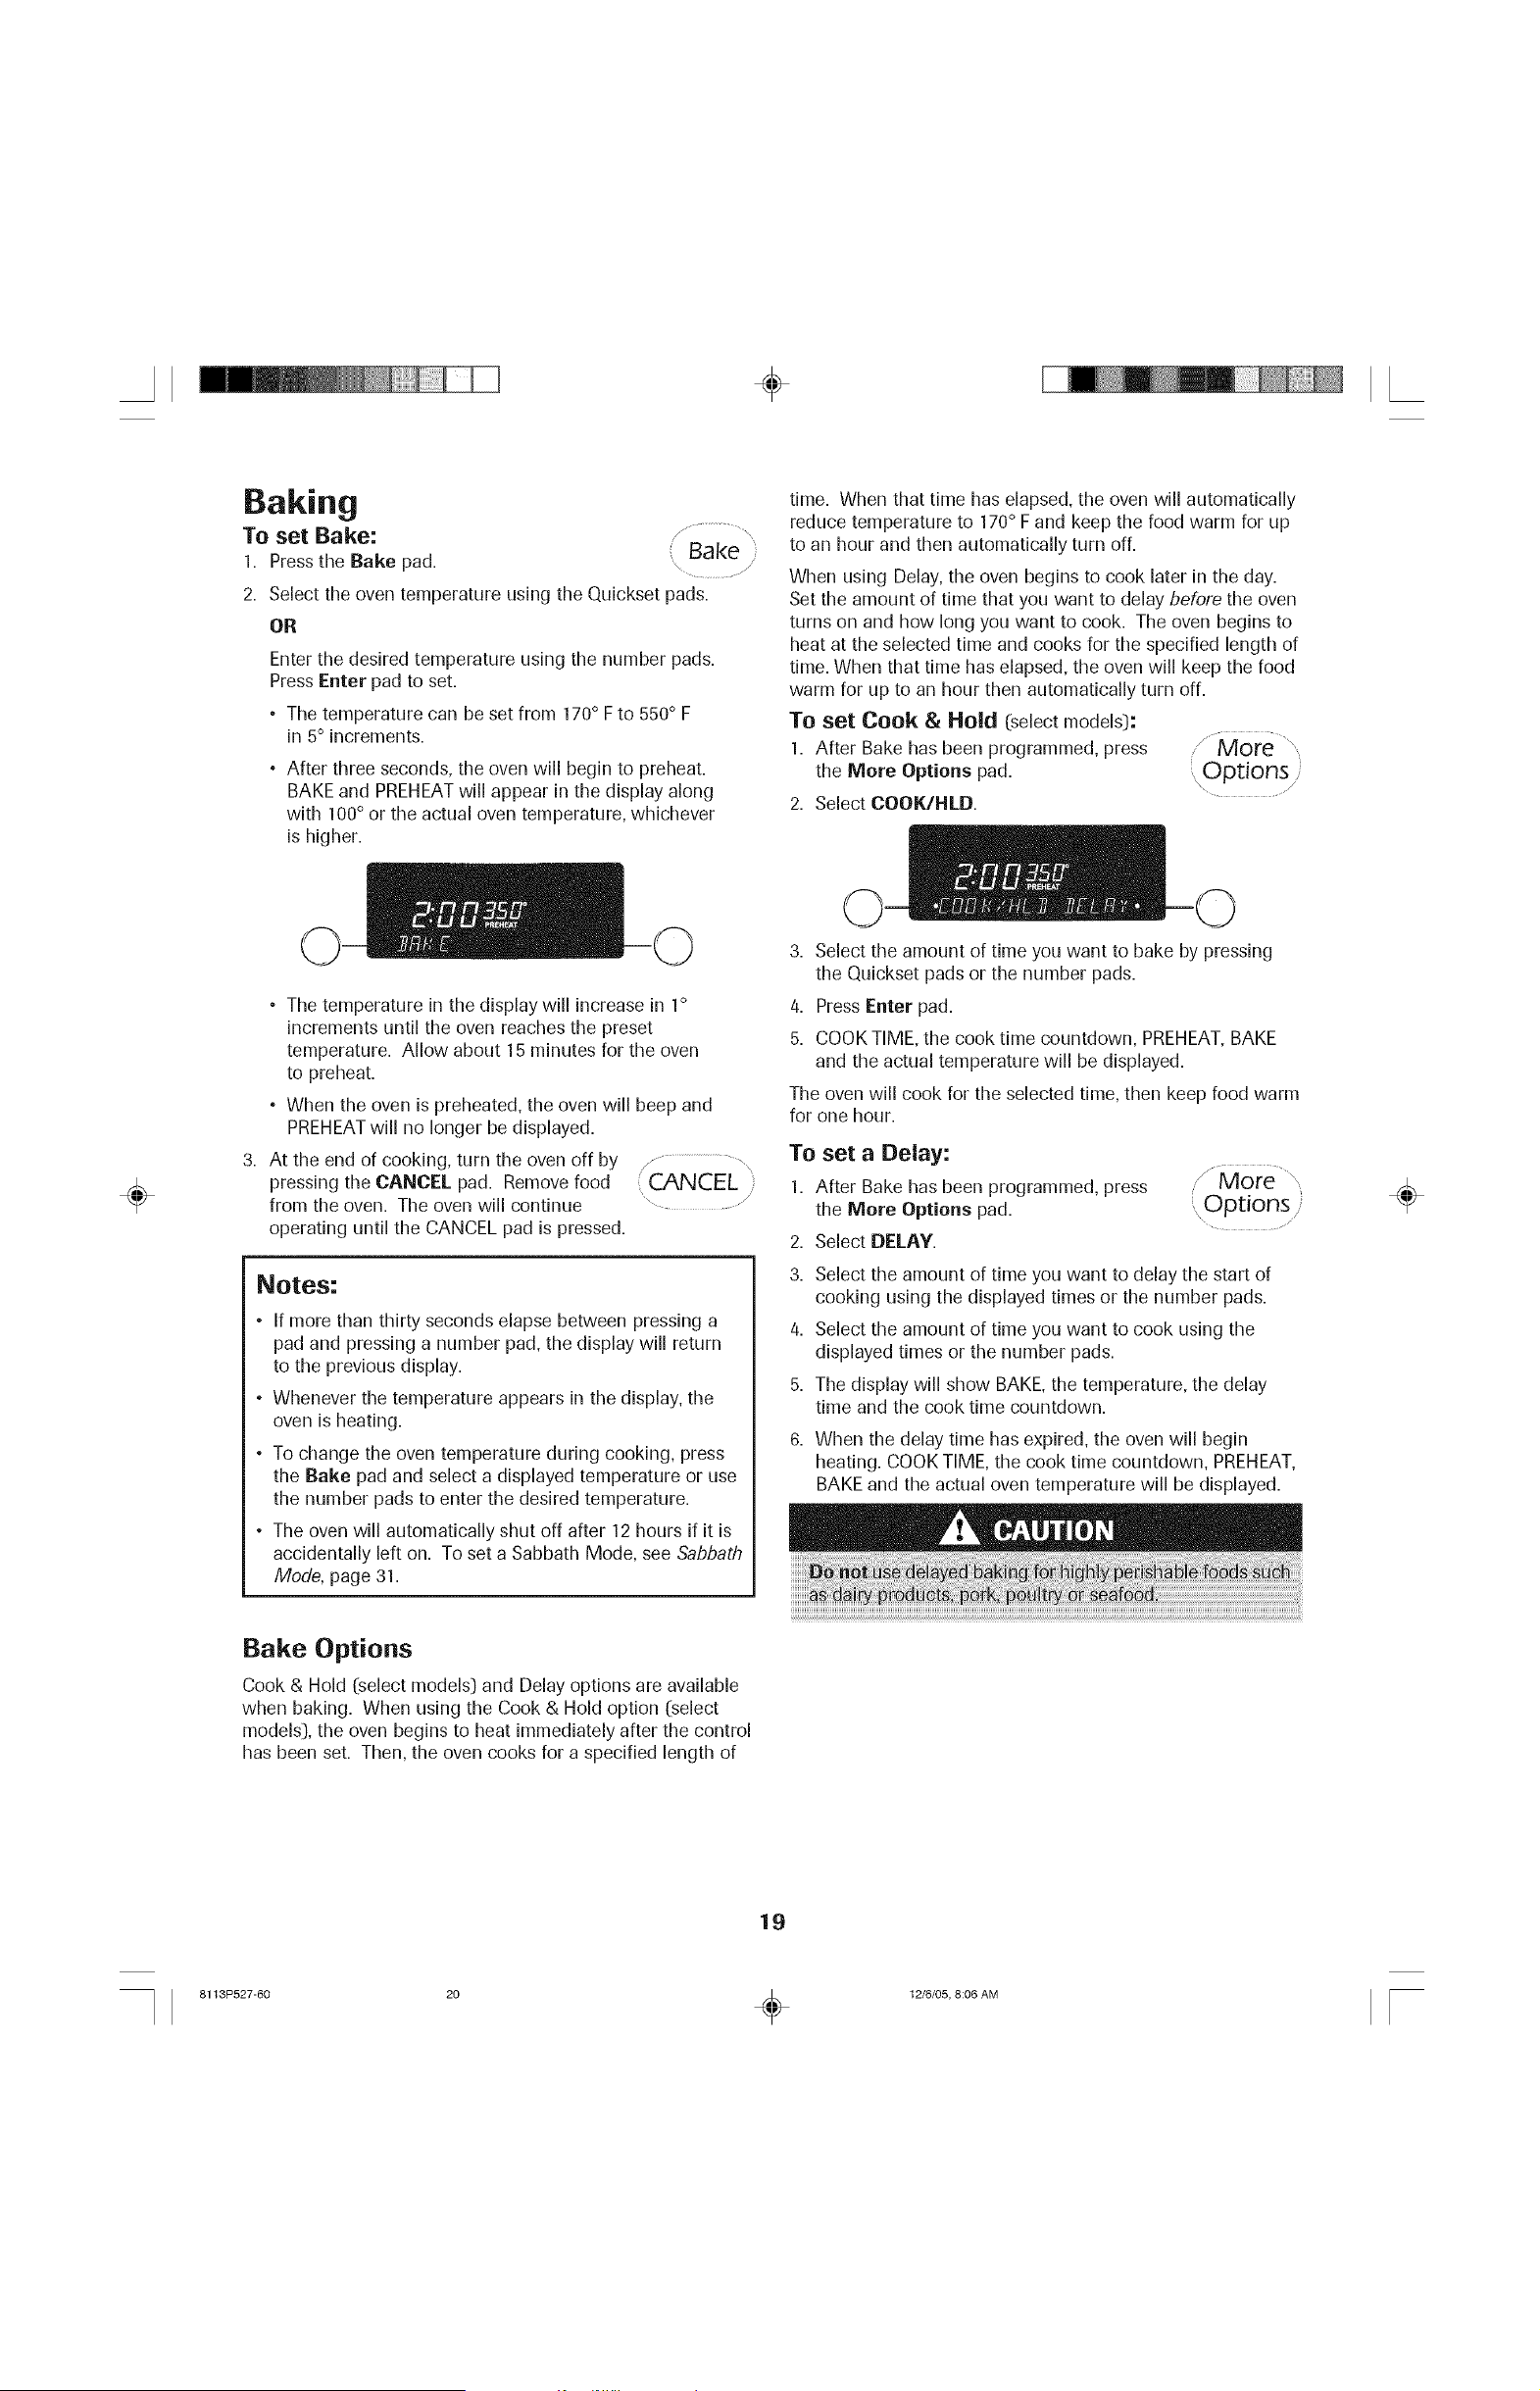
Baking
To set Bake:
1. Pressthe Bake pad.
Bake
2. Select the oven temperature using the Quickset pads.
OR
Enter the desired temperature using the number pads.
Press Enter pad to set.
• The temperature can be set from 170° F to 550° F
in 5° increments.
• After three seconds, the oven will begin to preheat.
BAKE and PREHEATwill appear in the display along
with 100° or the actual oven temperature, whichever
is higher.
time. When that time has elapsed, the oven will automatically
reduce temperature to 170° F and keep the food warm for up
to an hour and then automatically turn off.
When using Delay, the oven begins to cook later in the day.
Set the amount of time that you want to delay before the oven
turns on and how long you want to cook. The oven begins to
heat at the selected time and cooks for the specified length of
time. When that time has elapsed, the oven will keep the food
warm for up to an hour then automatically turn off.
To set Cook & Hold (select models):
1. After Bake has been programmed, press / More ",
the More Options pad. Options
.......... /
2. Select COOK/HLD.
÷
3,
• The temperature in the display will increase in 1°
increments until the oven reaches the preset
temperature. Allow about 15 minutes for the oven
to preheat.
° When the oven is preheated, the oven will beep and
PREHEATwill no longer be displayed.
At the end of cooking, turn the oven off by
pressing the CANCEL pad. Remove food
from the oven. The oven will continue
operating until the CANCEL pad is pressed.
CANCEL
Notes:
• If more than thirty seconds elapse between pressing a
pad and pressing a number pad, the display will return
to the previous display.
° Whenever the temperature appears in the display, the
oven is heating.
° To change the oven temperature during cooking, press
the Bake pad and select a displayed temperature or use
the number pads to enter the desired temperature.
• The oven will automatically shut off after 12 hours if it is
accidentally left on. To set a Sabbath Mode, see Sabbath
Mode, page 31.
Bake Options
Cook & Hold (select models) and Delay options are available
when baking. When using the Cook & Hold option (select
models), the oven begins to heat immediatelyafter the control
has been set. Then, the oven cooks for a specified length of
3. Select the amount of time you want to bake by pressing
the Quickset pads or the number pads.
4. Press Enter pad.
5. COOK TIME, the cook time countdown, PREHEAT,BAKE
and the actual temperature will be displayed.
The oven will cook for the selected time, then keep food warm
for one hour.
To set a Delay:
1. After Bake has been programmed, press
the Mare Options pad.
2. Select BELAY.
3.
4.
5.
6.
/ More,
,,Options
Select the amount of time you want to delay the start of
cooking using the displayed times or the number pads.
Select the amount of time you want to cook using the
displayed times or the number pads.
The display will show BAKE, the temperature, the delay
time and the cook time countdown.
When the delay time has expired, the oven will begin
heating. COOK TIME, the cook time countdown, PREHEAT,
BAKEand the actual oven temperature will be displayed.
÷
19
8113P527-60 20 _ 12/6/05, 8:06 AM
÷
÷
Corlvect (select models)
Convection uses a fan to circulate hot air evenly over, under
and around the food. As a result, foods are evenly cooked
and browned, often in shorter times, at lower temperatures
and with the flexibility of using more than one rack at a time.
Notes:
The oven control comes from the factory set for Auto
Convect Conversion (select models:). When using
Convect Bake and Convect Pastry enter the conventional
baking temperature. The control automatically converts
the temperature to 25° less than the conventional
tern peratu re.
For Convect Roast, enter the conventional roasting
temperature and time. The control then lets you know
when 750/0of the time has elapsed and alerts you to
check the food for doneness.
To turn Auto Convect Conversion (select models:) off,
see page 30.
Convect Options (select models:)
Cook & Hold (select models:) and Delay options are available
when convect cooking. See page 25 for information on how
to program a Cook & Hold (select models:) or Delay option.
Multiple-rack
Baking of
Cookies/Biscuits
Breads
Casseroles
Tarts/Tortes
Cakes
Whole Chicken
Whole Turkey
Vegetables
Pork Roasts
Beef Roasts
FrozenPie
Turnovers
Cream Puffs
Puff Pastry
Corlveot Bake (select models)
To set Convect Bake: ,,J.....................................
i Convect
1. Pressthe Canvect pad. ..................
2. Select CNVT BAKE using the Quickset pads.
3. Select the oven temperature using the Quickset pads
OR
Enter the desired temperature using the number pads.
Press Enter pad to set.
• The temperature can be set from 195° F to 550° F
degrees in 5° increments.
• After three seconds, the oven will begin to preheat.
CNVT BAKE and PREHEATwill appear in the display
along with 100° or the actual oven temperature,
whichever is higher.
° The temperature in the display will increase in 1°
increments until the oven reaches the preset
temperature. Allow about 15 minutes for the oven
to preheat.
• When the oven is preheated, the oven will beep and
PREHEATwill turn off and CNVT BAKE will be displayed.
AUTO will be displayed if Auto Convect Conversion
(select models:) feature is turned on.
° Place food in the oven.
4. At the end of cooking, turn the oven off by
pressing the CANCEL pad. Remove food
from the oven. The oven will continue
operating until the CANCEL pad is pressed.
(CANCEL
Rapid Preheat (selectmodels)
Use to decrease preheating time when using Bake or Convect
Bake. Use for all foods when baking on one rack.
° After Bake or Convect Bake has been programmed, press
the Rapid Preheat pad.
° 1 RACK ONLY will display, after three seconds the display
will show RAPID and PREHEAT.
To return to Standard Preheat:
• Press Rapid Preheat pad again. This will provide standard
preheat. PREHEATand the selected function will be
displayed.
Notes:
° For best results, use rack position 2 or 3 when using the
Rapid Preheat option.
• For optimum baking and browning results, Rapid Preheat
is not recommended when baking on multiple racks.
÷
2O
8113P527-60 21 _ 12/6/05, 8:06 AM

÷
Convect Roast (select models)
To set Convect Roast:
1. Place food in the oven. The two-piece broiler pan provided
with your oven can be used for convection roasting.
2. Pressthe Convect pad. /Convect ).....
3. Select CNVI" ROAST using the
Quickset pads.
Convect Pastry (selectmodels)
Convect Pastry is designed to bake pastry items such as
frozen pies, turnovers, cream puffs and puff pastry. Use one
rack while using this feature. J......... ,
1. Press the Convect pad. ( Convect )
2. Select CNVT PASTRY using the
Quickset pads.
4. Select the oven temperature using the Quickset pads.
3. Select the oven temperature using the Quickset pads.
÷
OR
Enter the desired temperature using the number pads.
Press Enter pad to set.
• The temperature can be set from 170° F to 550° F
degrees in 5° increments.
5. Enter desired cook time. Enter the conventional roasting
time using the number pads.
• After three seconds, the oven will begin to heat. CNVT
ROASTwill appear in the display along with 100° or the
actual oven temperature, whichever is higher.
• The temperature in the display will increase in 1°
increments until the oven reaches the preset
temperature.
° Cook time will begin to count down.
6. At 750/0of the cooking time the oven will beep to let
you know to check food. Check food using a meat
thermometer. If food is done, take food out of oven and
press CANCEL pad to turn oven off.
7. If food is not done, continue roasting.
Once the set time has elapsed the oven will jJ.................
automatically go into Keep Warm mode for (CANCEL i
1 hour. If food is taken from the oven .......... z
before the hour has elapsed, press CANCEL pad.
OR
Enter the desired temperature using the number pads.
Press Enter pad to set.
• The temperature can be set from 195° F to 550° F
degrees in 5° increments.
° After three seconds, the oven will begin to preheat.
CNVT PASTRYand PREHEATwill appear in the display
along with 100° or the actual oven temperature, which
ever is higher. AUTO will display if the Auto Convect
Conversion (select models) feature is turned on.
• The temperature in the display will increase in 1°
increments until the oven reaches the preset
temperature. Allow about 15 minutes for the oven to
preheat.
° When the oven is preheated, the oven will beep and
PREHEATwill turn off and CNVT PASTRYwill be
displayed.
4. At the end of cooking, turn the oven off by
pressing the CANCEL pad. Remove food : CANCEL
from the oven. The oven will continue
operating until the CANCEL pad is pressed.
÷
Notes:
• if the recipe suggests preheating the oven, add time to
cook time.
° If Auto is off, roast time will not be required.
21
8113P527-60 22 _ 12/6/05, 8:06 AM
÷
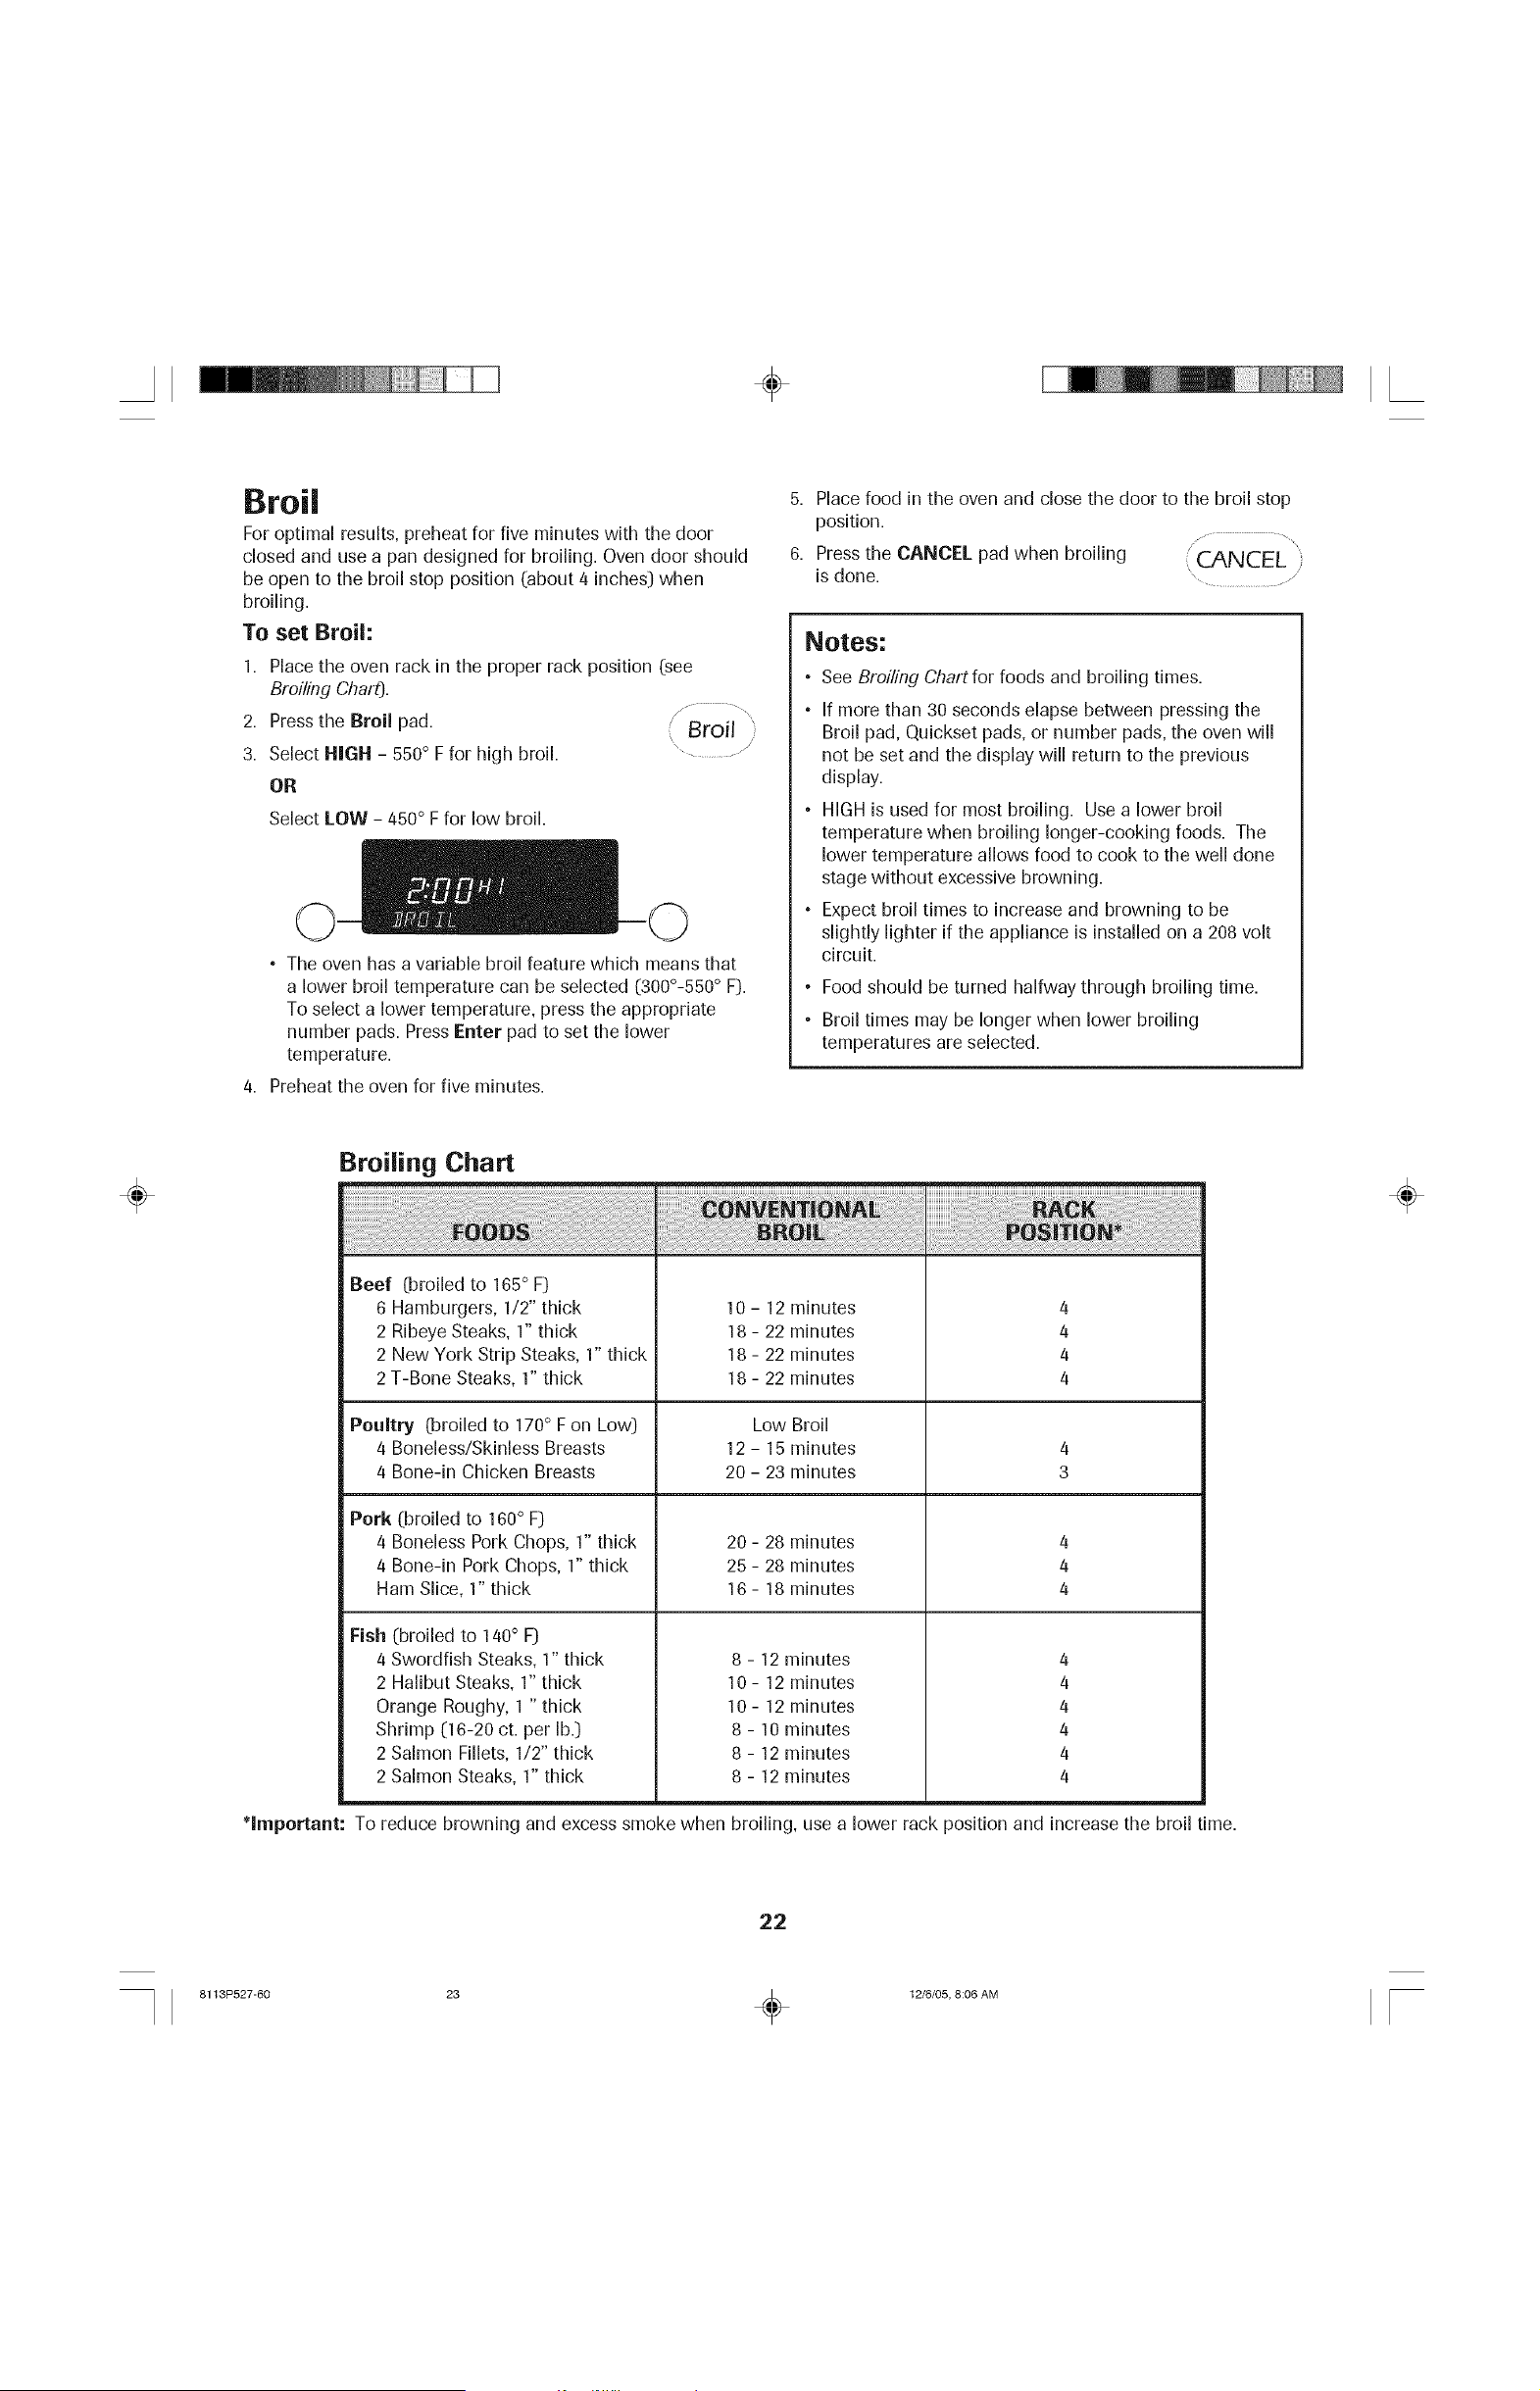
Broil
For optimal results, preheat for five minutes with the door
closed and use a pan designed for broiling. Oven door should
be open to the broil stop position (about 4 inches) when
broiling.
To set Broil:
1. Place the oven rack in the proper rack position (see
Broiling Chart).
j ..............
2. Pressthe Broil pad. Broil
,\
3. Select HIGH - 550° F for high broil. ....................
OR
Select LOW - 450° F for low broil.
• The oven has a variable broil feature which means that
a lower broil temperature can be selected (300°-550° F).
To select a lower temperature, press the appropriate
number pads. Press Enter pad to set the lower
temperature.
Preheat the oven for five minutes.
5. Place food in the oven and close the door to the broil stop
position.
6. Pressthe CANCEL pad when broiling (CANCEL !
is done. ..................................
/
Notes:
• See Broiling Chartfor foods and broiling times.
• If more than 30 seconds elapse between pressing the
Broil pad, Quickset pads, or number pads, the oven will
not be set and the display will return to the previous
display.
• HIGH is used for most broiling. Use a lower broil
temperature when broiling longer-cooking foods. The
lower temperature allows food to cook to the well done
stage without excessive browning.
° Expect broil times to increase and browning to be
slightly lighter if the appliance is installed on a 208 volt
circuit.
• Food should be turned halfway through broiling time.
• Broil times may be longer when lower broiling
temperatures are selected.
÷
Broiling Chart
| I
Beef [broiled to 165 ° F)
6 Hamburgers, 1/2" thick
2 Ribeye Steaks, 1" thick
2 New York Strip Steaks, 1" thick
2 T-Bone Steaks, 1" thick
10- 12 minutes
18 - 22 minutes
18 - 22 minutes
18 - 22 minutes
Poultry [broiled to 170° F on Low) Low
4 Boneless/Skinless Breasts 12 - 15
4 Bone-in Chicken Breasts 20 - 23
Broil
minutes
minutes
Pork (broiled to 160° F)
4 Boneless Pork Chops, 1" thick
4 Bone-in Pork Chops, 1" thick
Ham Slice, 1" thick
20 - 28 minutes
25 - 28 minutes
16 - 18 minutes
Fish (broiled to 140 ° F]
4 Swordfish Steaks, 1" thick 8 - 12 minutes
2 Halibut Steaks, 1" thick 10 - 12 minutes
4
4
4
4
4
3
4
4
4
4
4
Orange Roughy, 1 "thick
Shrimp (16-20 ct. per lb.)
2 Salmon Fillets, 1/2" thick
2 Salmon Steaks, 1" thick
_hnportant: To reduce browning and excess smoke when
10 - 12 minutes 4
8 - 10 minutes 4
8 - 12 minutes 4
8 - 12 minutes 4
broiling, use a lower rack position and increase the broil time.
÷
22
8113P527-60 23 _ 12/6/05, 8:06 AM
÷
÷
Oven Fan
A convection fan (select models) is used to circulate hot air in
the oven when the convection feature is selected.
Important: The convection fan will automatically stop when
the oven door is opened.
Oven Vent
The oven vent is incorporated into the downdraft ventilation
system on the cooking surface.
When the oven is in use, the area near the oven vent may
become hot enough to cause burns. For best baking results,
do not block the vent opening.
Oven Light
The oven light automatically comes on when .......
the door is opened. When the door is closed, /'OVER\ .....
press the Oven Light pad to turn the oven ,, Light ,
light on and off. A beep will sound every time
the Oven Light pad is pressed. If the oven light is on when the
door is opened, the light will go off when the door is closed.
Oven Bottom
Protect oven bottom against spillovers, especially acidic or
sugary spills, as they may discolor the porcelain enamel. Use
the correct pan size to avoid spillovers and boilovers. Do not
place utensils or aluminum foil directly on the oven
bottom.
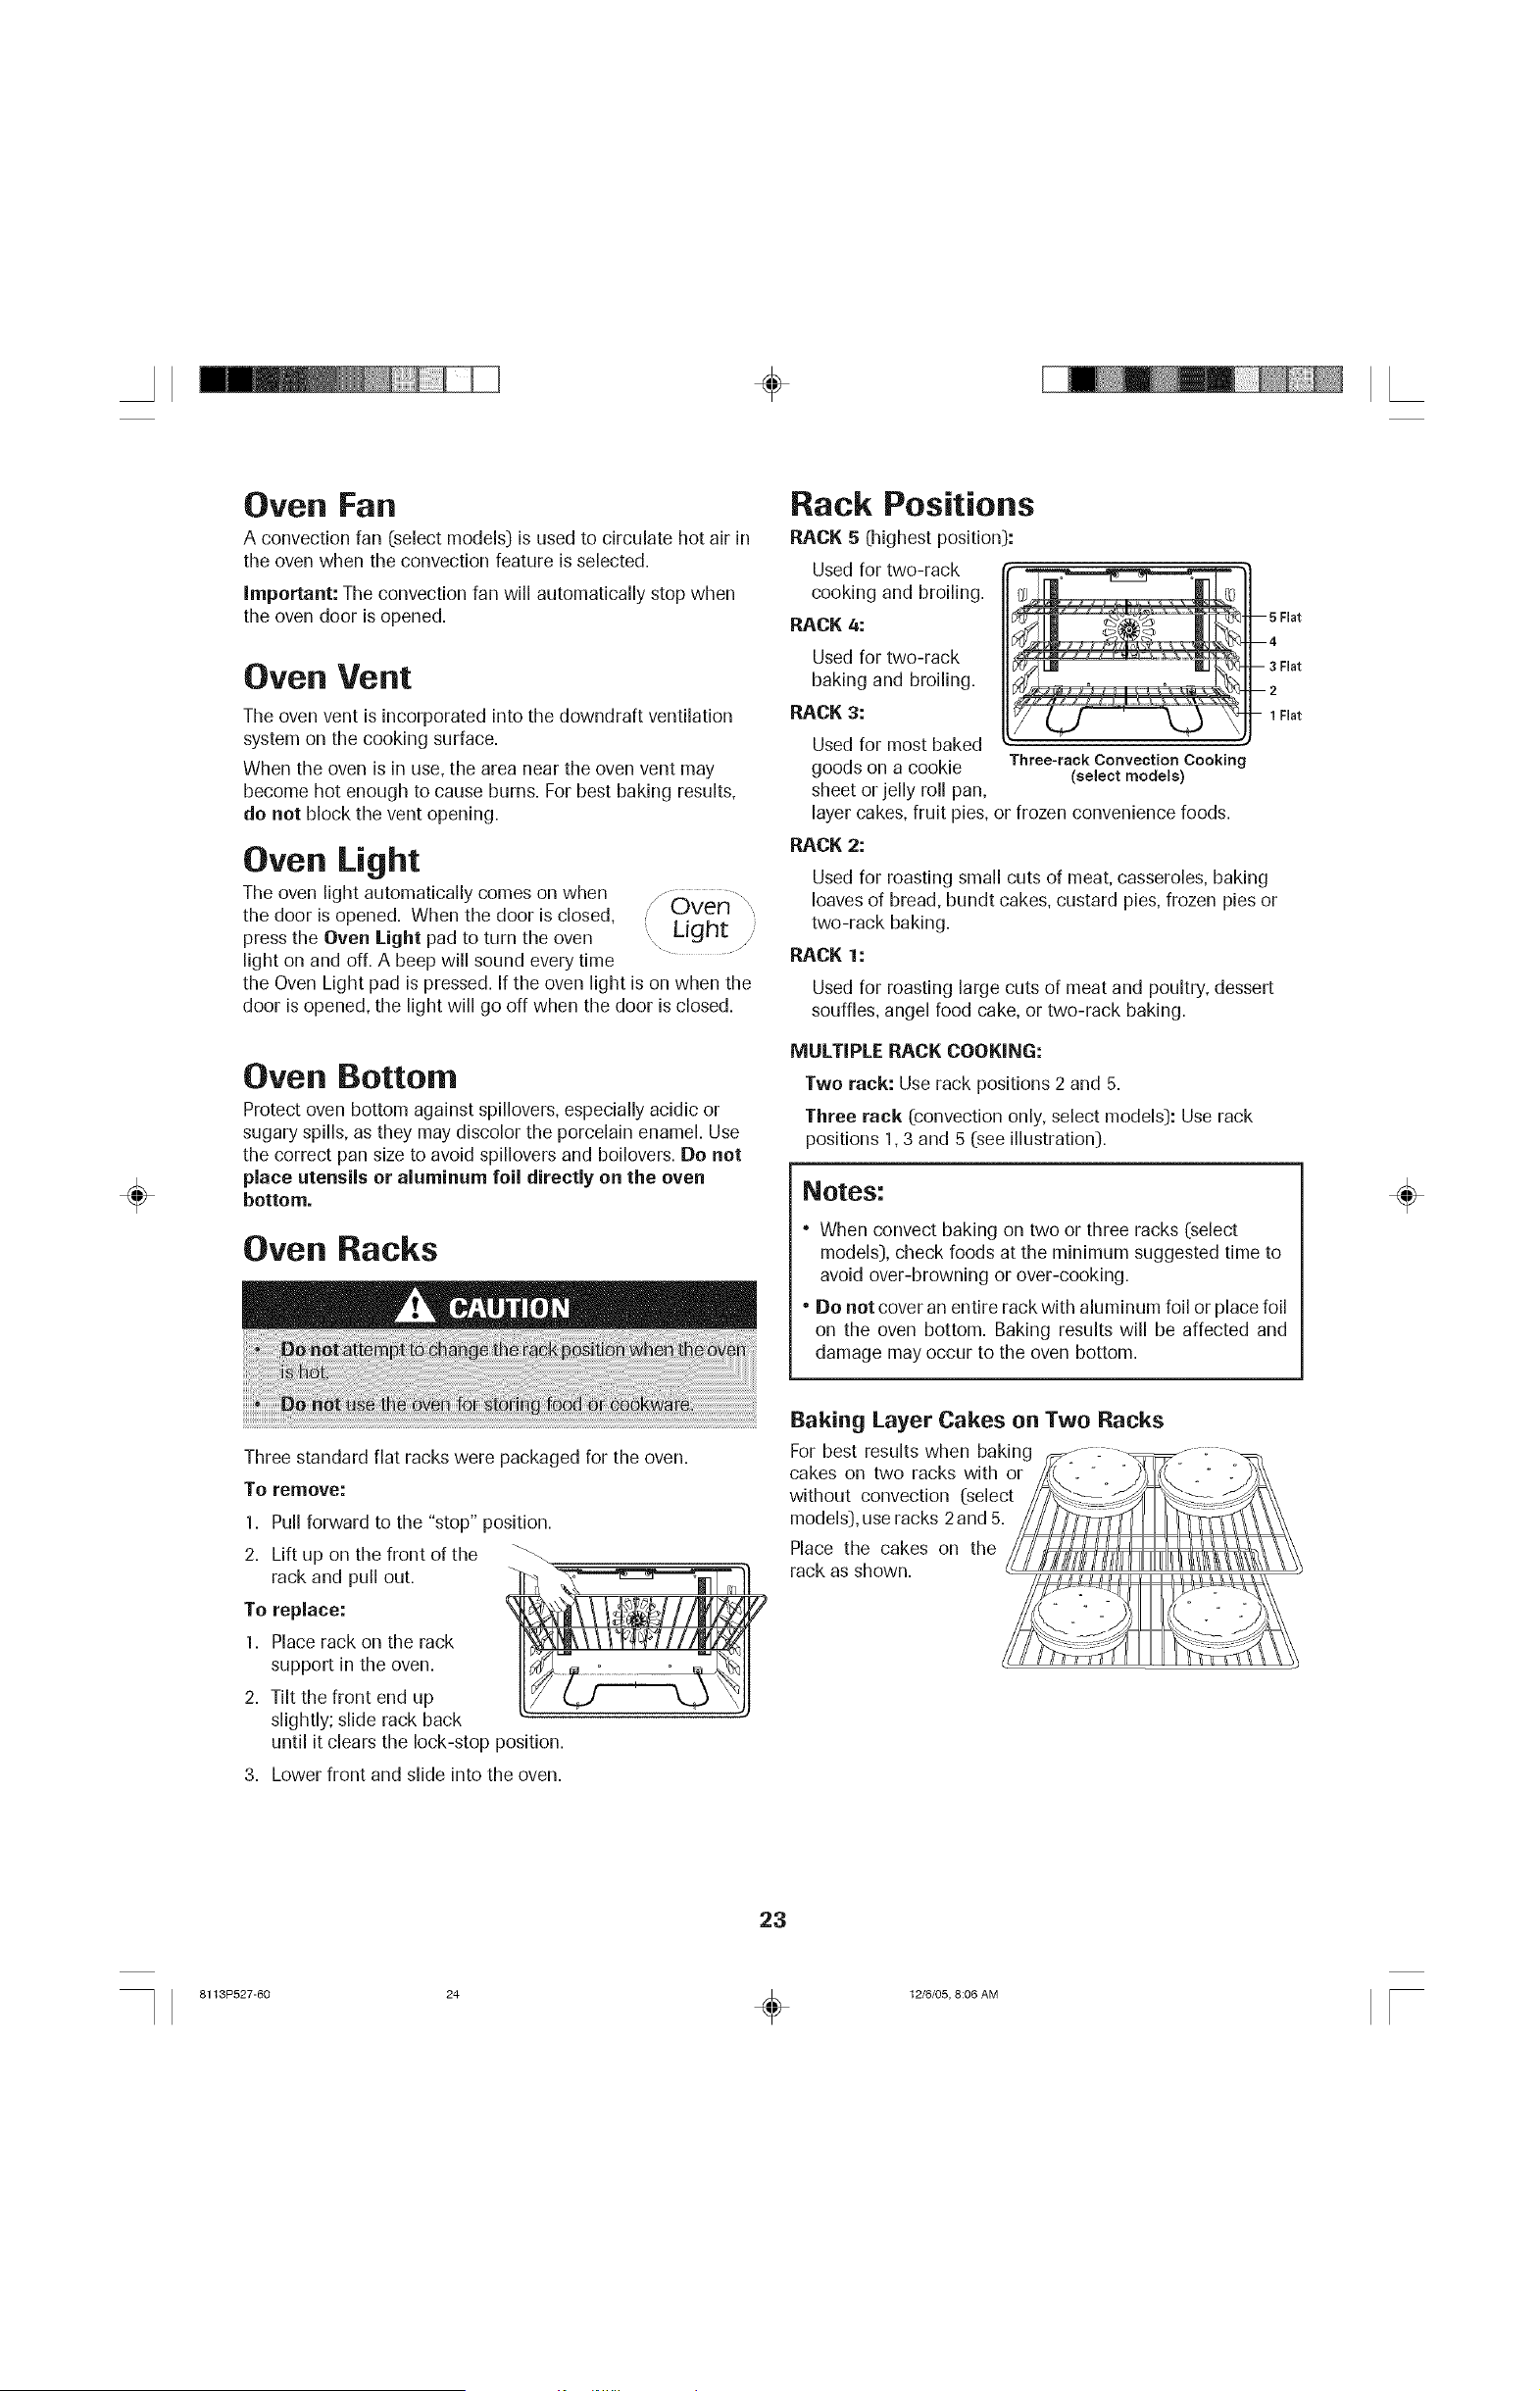
Oven Racks
Rack Positions
RACK 5 (highest position):
Used for two-rack
cooking and broiling.
RACK 4:
Used for two-rack
baking and broiling.
RACK 3:
Used for most baked
goods on a cookie
sheet or jelly roll pan,
Three-rack Convection Cookin(
(select models)
layer cakes, fruit pies, or frozen convenience foods.
RACK 2:
Used for roasting small cuts of meat, casseroles, baking
loaves of bread, bundt cakes, custard pies, frozen pies or
two-rack baking.
RACK 1:
Used for roasting large cuts of meat and poultry, dessert
souffles, angel food cake, or two-rack baking.
MULTIPLE RACK COOKING:
Two rack: Use rack positions 2 and 5.
Three rack (convection only, select models): Use rack
positions 1,3 and 5 (see illustration).
-- 5 Fiat
--4
- 3 Fiat
--2
1 Fiat
Notes:
• When convect baking on two or three racks (select
models), check foods at the minimum suggested time to
avoid over-browning or over-cooking.
• Do not cover an entire rack with aluminum foil or place foil
on the oven bottom. Baking results will be affected and
damage may occur to the oven bottom.
÷
Three standard flat racks were packaged for the oven.
To remove:
Pull forward to the "stop" position.
1,
2. Liftup on the front of the
rack and pull out.
To replace:
1. Place rack on the rack
support in the oven.
2. Tilt the front end up
slightly; slide rack back
until it clears the lock-stop position.
3. Lower front and slide into the oven.
Baking Layer Cakes on Two Racks
For best results when g
cakes on two racks with or
without convection (select
models), use racks 2and 5.
Place the cakes on the
rack as shown.
23
8113P527-60 24 _ 12/6/05, 8:06 AM
÷
OPT|
÷
More Options
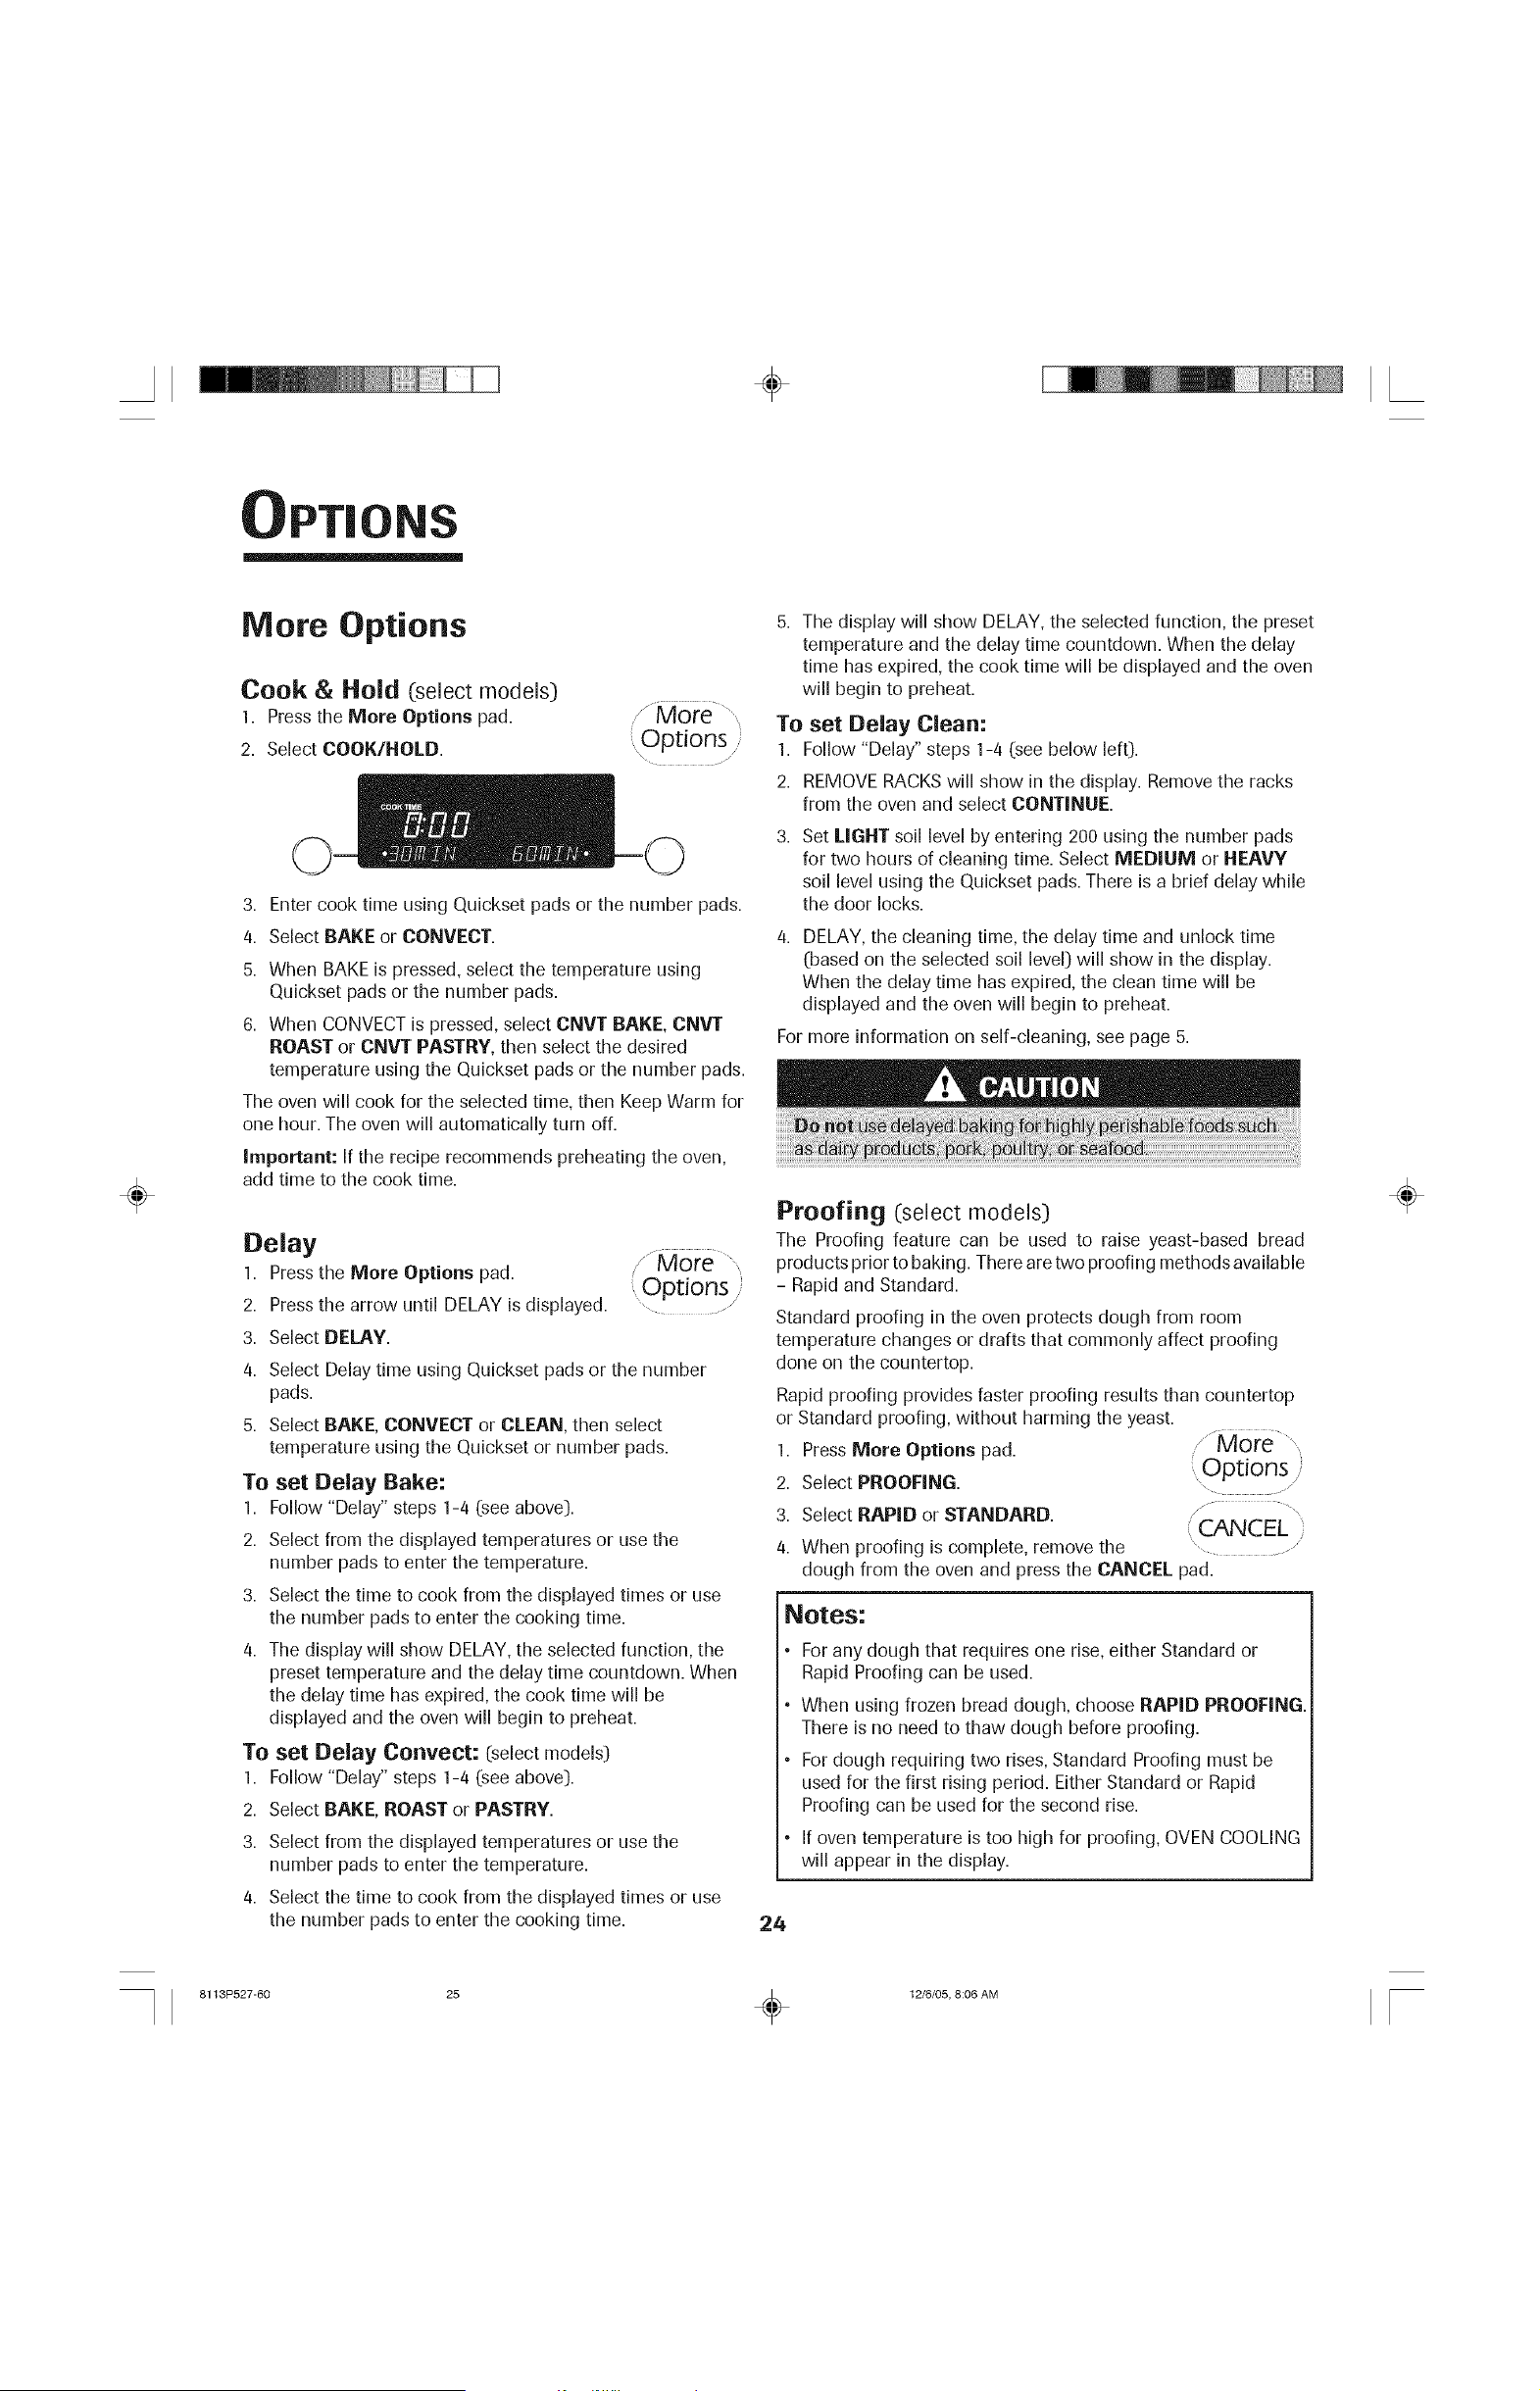
Cook & Hold (select models)
1. Pressthe More Options pad.
2. Select COOK/HOLD.
Options;
3. Enter cook time using Quickset pads or the number pads.
4. Select RAKE or CONVECT.
5. When BAKE is pressed, select the temperature using
Quickset pads or the number pads.
6. When CONVECT is pressed, select CNVT RAKE, CNVT
ROAST or CNVT PASTRY, then select the desired
temperature using the Quickset pads or the number pads.
The oven will cook for the selected time, then Keep Warm for
one hour. The oven will automatically turn off.
Important: If the recipe recommends preheating the oven,
add time to the cook time.
Delay
1. Pressthe More Options pad.
2. Pressthe arrow until DELAY is displayed.
3. Select DELAY.
/J #ore.........
Options
4. Select Delay time using Quickset pads or the number
pads.
5. Select RAKE, CONVECT or CLEAN, then select
temperature using the Quickset or number pads.
To set Delay Bake:
1. Follow "Delay" steps 1-4 (see above).
2. Select from the displayed temperatures or use the
number pads to enter the temperature.
3. Select the time to cook from the displayed times or use
the number pads to enter the cooking time.
4. The display will show DELAY, the selected function, the
preset temperature and the delay time countdown. When
the delay time has expired, the cook time will be
displayed and the oven will begin to preheat.
To set Delay Convect: (select models)
1. Follow "Delay" steps 1-4 (see above).
2. Select RAKE, ROAST or PASTRY.
3. Select from the displayed temperatures or use the
number pads to enter the temperature.
4. Select the time to cook from the displayed times or use
the number pads to enter the cooking time.
5. The display will show DELAY, the selected function, the preset
temperature and the delay time countdown. When the delay
time has expired, the cook time will be displayed and the oven
will begin to preheat.
To set Delay Clean:
1. Follow "Delay" steps 1-4 (see below left).
2. REMOVE RACKS will show in the display. Remove the racks
from the oven and select CONTINUE.
Set LIGHT soil level by entering 200 using the number pads
for two hours of cleaning time. Select MEDIUM or HEAVY
soil level using the Quickset pads. There is a brief delay while
the door locks.
4. DELAY, the cleaning time, the delay time and unlock time
(based on the selected soil level) will show in the display.
When the delay time has expired, the clean time will be
displayed and the oven will begin to preheat.
For more information on self-cleaning, see page 5.
Proofing (select models)
The Proofing feature can be used to raise yeast-based bread
products prior to baking. There are two proofing methods available
- Rapid and Standard.
Standard proofing in the oven protects dough from room
temperature changes or drafts that commonly affect proofing
done on the countertop.
Rapid proofing provides faster proofing results than countertop
or Standard proofing, without harming the yeast.
1. Press More Options pad.
2. Select PROOFING.
3. Select RAPID or STANDARD.
4. When proofing is complete, remove the
dough from the oven and press the CANCEL pad.
.....
Options
CANCEL
Notes:
For any dough that requires one rise, either Standard or
Rapid Proofing can be used.
When using frozen bread dough, choose RAPID PROOFING.
There is no need to thaw dough before proofing.
For dough requiring two rises, Standard Proofing must be
used for the first rising period. Either Standard or Rapid
Proofing can be used for the second rise.
If oven temperature is too high for proofing, OVEN COOLING
will appear in the display.
24
÷
8113P527-60 25 _ 12/6/05, 8:06 AM
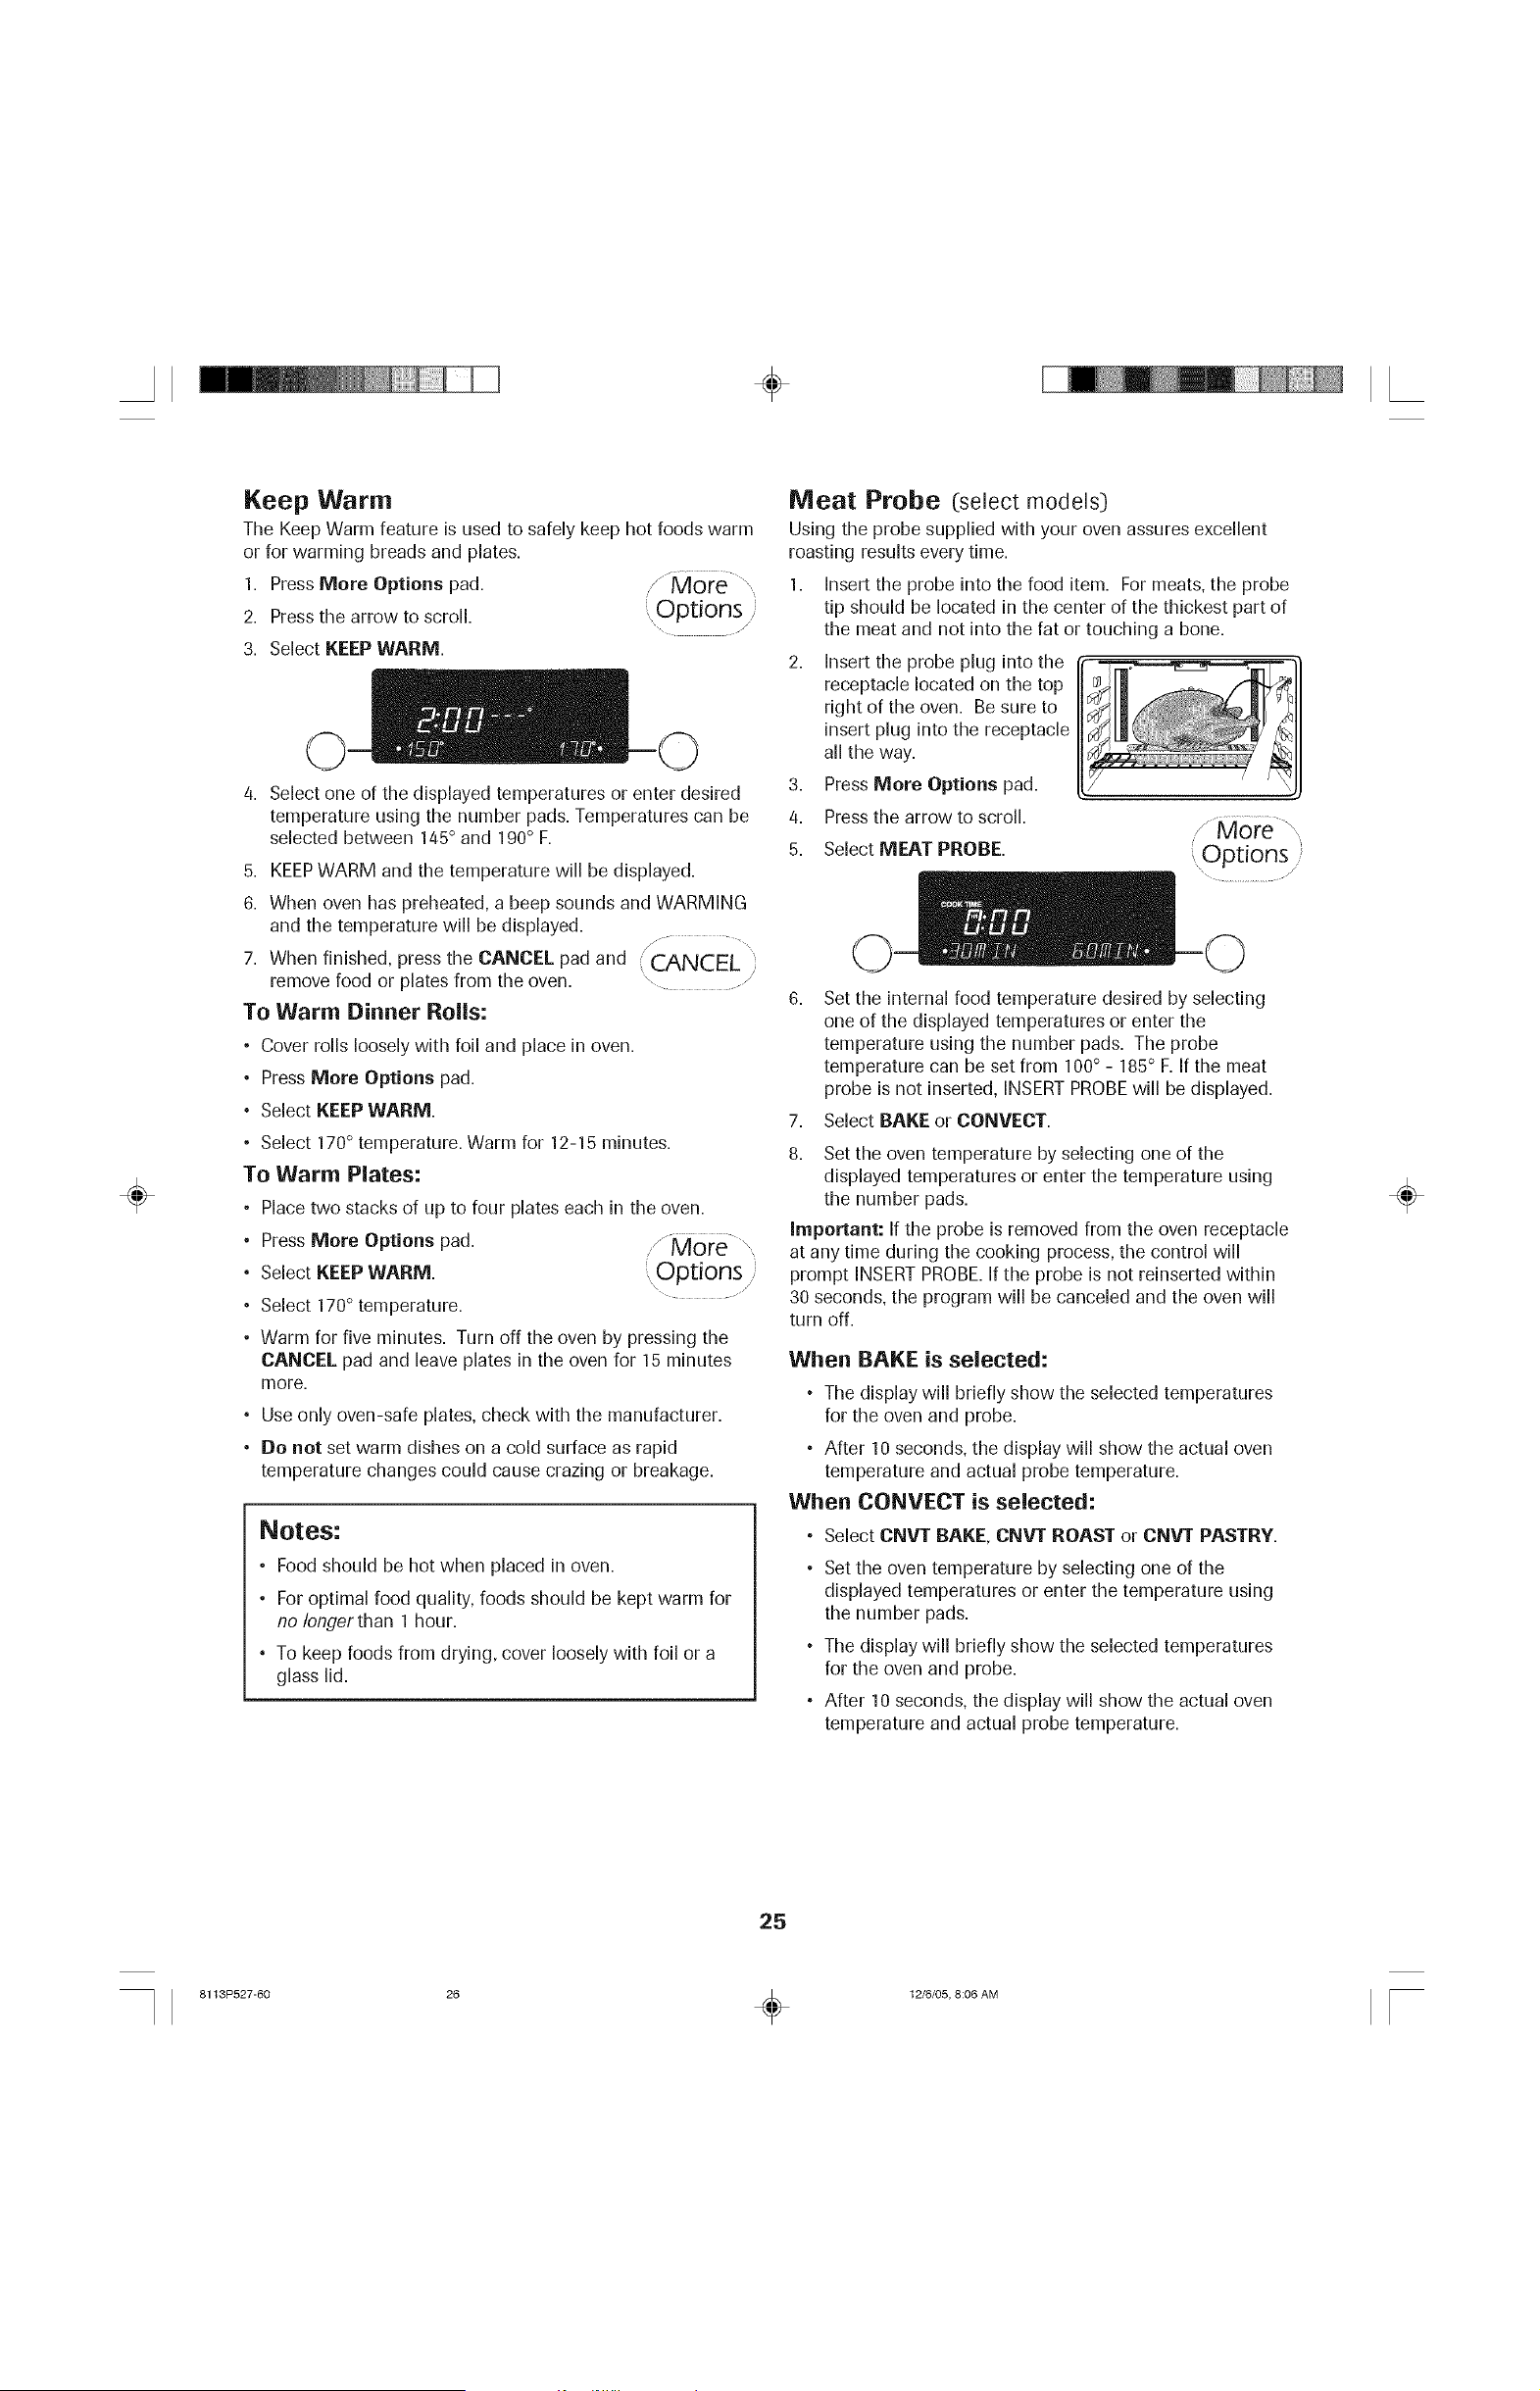
÷
÷
Keep Warm
The Keep Warm feature is used to safely keep hot foods warm
or for warming breads and plates.
1. Press More Options pad. /More .............
2. Press the arrow to scroll, options---
3. Select KEEP WARM.
4. Select one of the displayed temperatures or enter desired 3.
temperature using the number pads. Temperatures can be 4.
selected between 145° and 190° F.
5.
5,
6.
KEEPWARM and the temperature will be displayed.
When oven has preheated, a beep sounds and WARMING
and the temperature will be displayed.
/ ......
i
When finished, press the CANCEL pad and 'i CANCEL
remove food or plates from the oven. ".................
To Warm Dinner Rolls:
• Cover rolls loosely with foil and place in oven.
• Press More Options pad.
• Select KEEP WARM.
• Select 170° temperature. Warm for 12-15 minutes.
To Warm Plates:
o
o
o
o
o
Place two stacks of up to four plates each in the oven.
Press More Options pad.
Select KEEP WARM.
Select 170° temperature.
/ ............ \
More
Options ;
.......... /
Warm for five minutes. Turn off the oven by pressing the
CANCEL pad and leave plates in the oven for 15 minutes
more.
° Use only oven-safe plates, check with the manufacturer.
• De not set warm dishes on a cold surface as rapid
temperature changes could cause crazing or breakage.
Notes:
• Food should be hot when placed in oven.
• For optimal food quality, foods should be kept warm for
no Iongerthan 1 hour.
° To keep foods from drying, cover loosely with foil or a
glass lid.
Meat Probe (select models)
Using the probe supplied with your oven assures excellent
roasting results every time.
1. Insert the probe into the food item. For meats, tile probe
tip should be located in the center of the thickest part of
the meat and not into the fat or touching a bone.
2. Insert the probe plug into the
receptacle located on the top
right of the oven. Be sure to
insert plug into the receptacle
all tile way.
Press More Options pad.
Pressthe arrow to scroll.
Select MEAT PROBE.
0,
7,
8.
Set the internal food temperature desired by selecting
one of the displayed temperatures or enter the
temperature using tile number pads. The probe
temperature can be set from 100° - 185° F. If the meat
probe is not inserted, INSERTPROBEwill be displayed.
Select BAKE or CONVECT.
Set the oven temperature by selecting one of the
displayed temperatures or enter the temperature using
the number pads.
Important: If the probe is removed from the oven receptacle
at any time during the cooking process, the control will
prompt INSERTPROBE.If the probe is not reinserted within
30 seconds, the program will be canceled and the oven will
turn off.
When BAKE is selected:
• The display will briefly show the selected temperatures
for the oven and probe.
• After 10 seconds, the display will show the actual oven
temperature and actual probe temperature.
When CONVECT is selected:
° Select CNVT RAKE, CNVT ROAST or CNVT PASTRY.
• Set the oven temperature by selecting one of the
displayed temperatures or enter the temperature using
the number pads.
• The display will briefly show the selected temperatures
for the oven and probe.
° After 10 seconds, the display will show the actual oven
temperature and actual probe temperature.
÷
25
8113P527-60 26 _ 12/6/05, 8:06 AM
÷
÷
9. When the selected internal temperature of the food has
been reached, the oven will shut off and a beep will sound.
10. Remove the probe from the oven receptacle. The probe
will be hot. Hold probe plug with an oven mitt or
potholder when removing from the oven.
Notes-
• The probe must be removed from the oven when it is not
being used.
• Because of the excellent insulation of the oven, the
retained heat continues to cook the food after the beep
has sounded and the oven has turned off. For this
reason, it is important to remove the food from the oven
as soon as the beep sounds.
° Use the handle of the probe for inserting or removing.
Do not pull on the cable.
° The probe is hot after cooking - use a potholder or
oven mitt to remove.
• To protect the probe, if meat is not completely thawed,
insert probe after 1-2 hours of roasting.
• To clean cooled probe, wipe with a soapy dishcloth.
Do not submerge probe in water or wash in
dishwasher.
Suggested internal Food Temperatures
Ground Beef
FreshBeef, Veal, Lamb Medium Rare
Medium
Well Done
Chicken,Turkey Whole
Breast
Pork Medium
Well Done
165° F
145° F
16O° F
170° F
180° F
170° F
16O° F
170° F
Ham, Precooked 140° F
Drying (select models)
For best results, use a drying rack. A drying rack allows air to
circulate evenly around the food.
The convection fan will operate during the drying procedure.
To set Drying:
1. Tile oven door needs to be opened slightly to allow mois-
ture to escape from the oven during the drying process.
o
o
Open the oven door slightly.
Place the magnetic door spacer
(Part No. 8010P146-60:)over the
plunger switch at the upper right
side of the oven frame. The spacer
provides a gap between the oven
frame and the oven door to allow
moisture to escape.
26
2,
3.
• Gently close the door until the spacer magnet makes
contact with the oven door. The magnet will hold the
spacer in the proper position during the drying process
and allows the door to be opened at any time during
drying without losing proper positioning.
important: If the spacer is not placed correctly, the
convection fan will not operate.
/ ...............
Press Convect pad. " Convect
/
Pressthe arrow to scroll. ..........
4. Select DRYING.
5. Select a displayed temperature or enter a temperature with
the number pads. Temperatures can be set between
100° F and 200° F.
6. DRYING and the temperature will be displayed. PREHEAT
will be displayed until the programmed temperature is
reached.
/, ............................
7. When drying is complete, remove food from ,_,,,,,_LrA_'Ir'=L ,
oven and press CANCEL pad. ,
Follow the Drying Guide on page 27 for drying times.
Check foods at minimum times given. Cool foods to room
temperature before testing for doneness.
Notes:
• To purchase a drying rack, contact your Jenn-Air
dealer for the "DRYINGRACK" Accessory Kit or call
1-800-JENNAIR (1-800-536-62471.
• Most fruits and vegetables dry well and retain their color
when dried at 140° F. Meat and jerky should be dried at
145° - 150° F. For optimal flavor, dry herbs at 100° F,
however, at this lower temperature expect extended
drying times of up to 8 hours.
° The length of drying times vary due to the foJJowing:
Water and sugar content of food, size of food
pieces, amount of food being dried, humidity in the
air.
° Check foods at the minimum drying time. Dry longer if
necessary.
• Fruits that turn brown when exposed to air should be
treated with an antioxidant. Try one of the following
methods:
1. Dip fruit in a mixture of two parts bottled lemon juice
to one part cool water.
2. Soak fruit in a solution of 1 tsp. ascorbic acid or
commercial antioxidant to 1 quart of cold water.
• Foods may drip during the drying process. After drying
high acid or sugary foods, clean the oven bottom with
soap and water. The porcelain oven finish may discolor if
acidic or sugary food soils are not wiped up prior to high
heat or a self-cleaning cycle.
• More than one rack of food may be dried at the same
time. However, additional drying time is needed.
° Refer to other resources at your local library or call your
local County Extension service for additional information.
÷
8113P527-60 27 _ 12/6/05, 8:06 AM
÷
Drying Guide (select models}
÷
Apples*
Apricots*
Bananas*
Cherries
Nectarines
and Peaches*
Pears*
Pineapple
Orange and
Lemon Peel
Firm varieties: Graven
Stein, Granny Smith,
Jonathan, Winesap,
Rome Beauty, Newton.
Blenheim/Royal most
common. Tilton also good.
Firm varieties
Lambert, Royal Ann,
Napoleon, Van or Bing.
Freestone varieties.
Bartlett
Fresh or canned.
Select rough-skinned fruit.
Do not dry the peel of fruit
marked "color added".
Wash, peel if desired, core and slice
into 1/8" slices.
Wash, halve, and remove pits.
Peel and cut into 1/4" slices.
Wash and remove stems. Halve and
remove pits.
Halve and remove pits. Peeling
is optional but results in
better-looking dried fruit.
Peel, halve and core.
Wash, peel and remove thorny eyes.
Slice lengthwise and remove the
small core. Cut crosswise into
1/2" slices.
Wash well. Thinly peel the outer
1/16 to 1/8" of the peel. Do not use
the white bitter pith under the peel.
4-8 hours
18-24 hours
17-24 hours
18-24 hours
24-36 hours
24-36 hours
Canned:
14-18 hours
Fresh:
12-16 hours
1-2 hours
Pliable to crisp. Dried
apples store best when
they are slightly crisp.
Soft, pliable.
Pliable to crisp.
Pliable and leathery.
Pliable and leathery.
Soft and pliable.
Soft and pliable.
Tough to brittle.
Tomatoes
Carrots
Hot Peppers
Plum, Roma
Danvers Half Long,
Imperator, Red Cored
Chantenay
Ancho, Anaheim
Halve, remove seeds. Place tomatoes
skin side up on rack. Prick skins.
I::}onot use carrots with woody fiber
or pithy core. Wash, trim tops and
peel if desired. Slice crosswise or
diagonally into 1/4" slices. Steam
blanch for 3 min.
Wash, halve and seed. Prick
skin several times.
12-18 hours
4-8 hours
4-6 hours
Tough to crisp.
Tough to brittle.
Pods should appear
shriveled, dark red and crisp.
Parsley, Mint,
Cilantro, Sage,
Oregano
Basil
Rinse in cold water. Pat dry with a
paper towel. Leave stems on until
leaves are dry, then discard.
Cut leaves 3 to 4" from top of plant
just as buds appear. Rinse leaves in
cold water.
1-3 hours
2-5 hours
Brittle and crumbly.
Brittle and crumbly.
* Fruits requiring an antioxidant to prevent discoloration and loss of nutrients. Referto the notes on page 26 for specific methods.
** 12 Hour Off will not occur during drying functions.
÷
27
8113P527-60 28 _ 12/6/05, 8:06 AM

÷
Thaw and Serve (:select models)
Use Thaw and Serve to thaw frozen foods that require
thawing, but not cooking, before serving.
To set Thaw=Serve:
1. Place food in the oven on rack 3.
2. Press Convect pad.
3. Press the arrow to scroll.
4. Select THAW-SERVE.
5. Select number of minutes to thaw.
( Convect i'
6. THAW-SERVE,COOK TIME and the cook time countdown
will be displayed.
7. If thawing is complete before time elapses,
press the CANCEL pad and remove food
from the oven. When the time has elapsed,
the oven will turn off and beep.
important: This feature is not meant for thawing meats or
other foods that need to be cooked before serving.
Thaw and Serve Chart
=
CANCEL ii
\ /
÷
Whole Pies & Cakes
Pies: Lemon meringue,
cream, pecan,chocolate,
sweet potato, Frenchsilk
Cakes: Vanilla, chocolate,
coconut, and three-layer
cakes, pound cake,
Boston cream pie
Individual Servings:
Slices of pie, slices of cake,
other individual desserts,
eclairs, cream puffs
Cheesecake
Pre-Ceoked, Nleat=Filled
Appetizers
1.Removefrozen food from outer carton and wrapping.
2. Place frozen food on rack in middle of oven.
3.Thaw-Serve 15 minutes for cakes and 30 minutes
for pies.
4. Removefrom oven.
5. Slice into individual-size servings and place on plates.
6. Return plates to oven.
7.Thaw-Serve for 10to 30 minutes.
1. Removefrozen food from container.
2. Place on plate.
3. Place plate on rack in middle of oven.
4.Thaw-Serve for 10to 30 minutes.
1.Removefrozen food from outer carton and wrapping.
2. Place frozen food on rack in middle of oven.
3.Thaw-Serve for 30 minutes.
4. Removefrom oven.
5. Slice into individual-size servings and place on plates.
6. Return plates to oven.
7.Thaw-Serve for up to 15 minutes if desired.
1. Removefrozen food from container.
2. Place on plate.
3. Place plate on rack in middle of oven.
4.Thaw-Serve for 10to 15 minutes.
Thawing for 30 minutes makes it easier
to slice whole pies, cakes and
cheesecake.
• Layer cakes will require only 15minutes
before slicing.
• Size and texture of food being thawed
will affect Thaw-Serve time.
• Larger or denser desserts may take
longer to thaw.
• Cakeslices will thaw quicker than pies.
Sweet potato pie slices may require 20
to 30 minutes.
* Only "Thaw and Serve" or "Ready to Serve" frozen foods can be used with this feature. DO NOT attempt to thaw frozen meats,
poultry or seafood.
** It is not necessary to preheat the oven.
÷
28
8113P527-60 29 _ 12/6/05, 8:06 AM
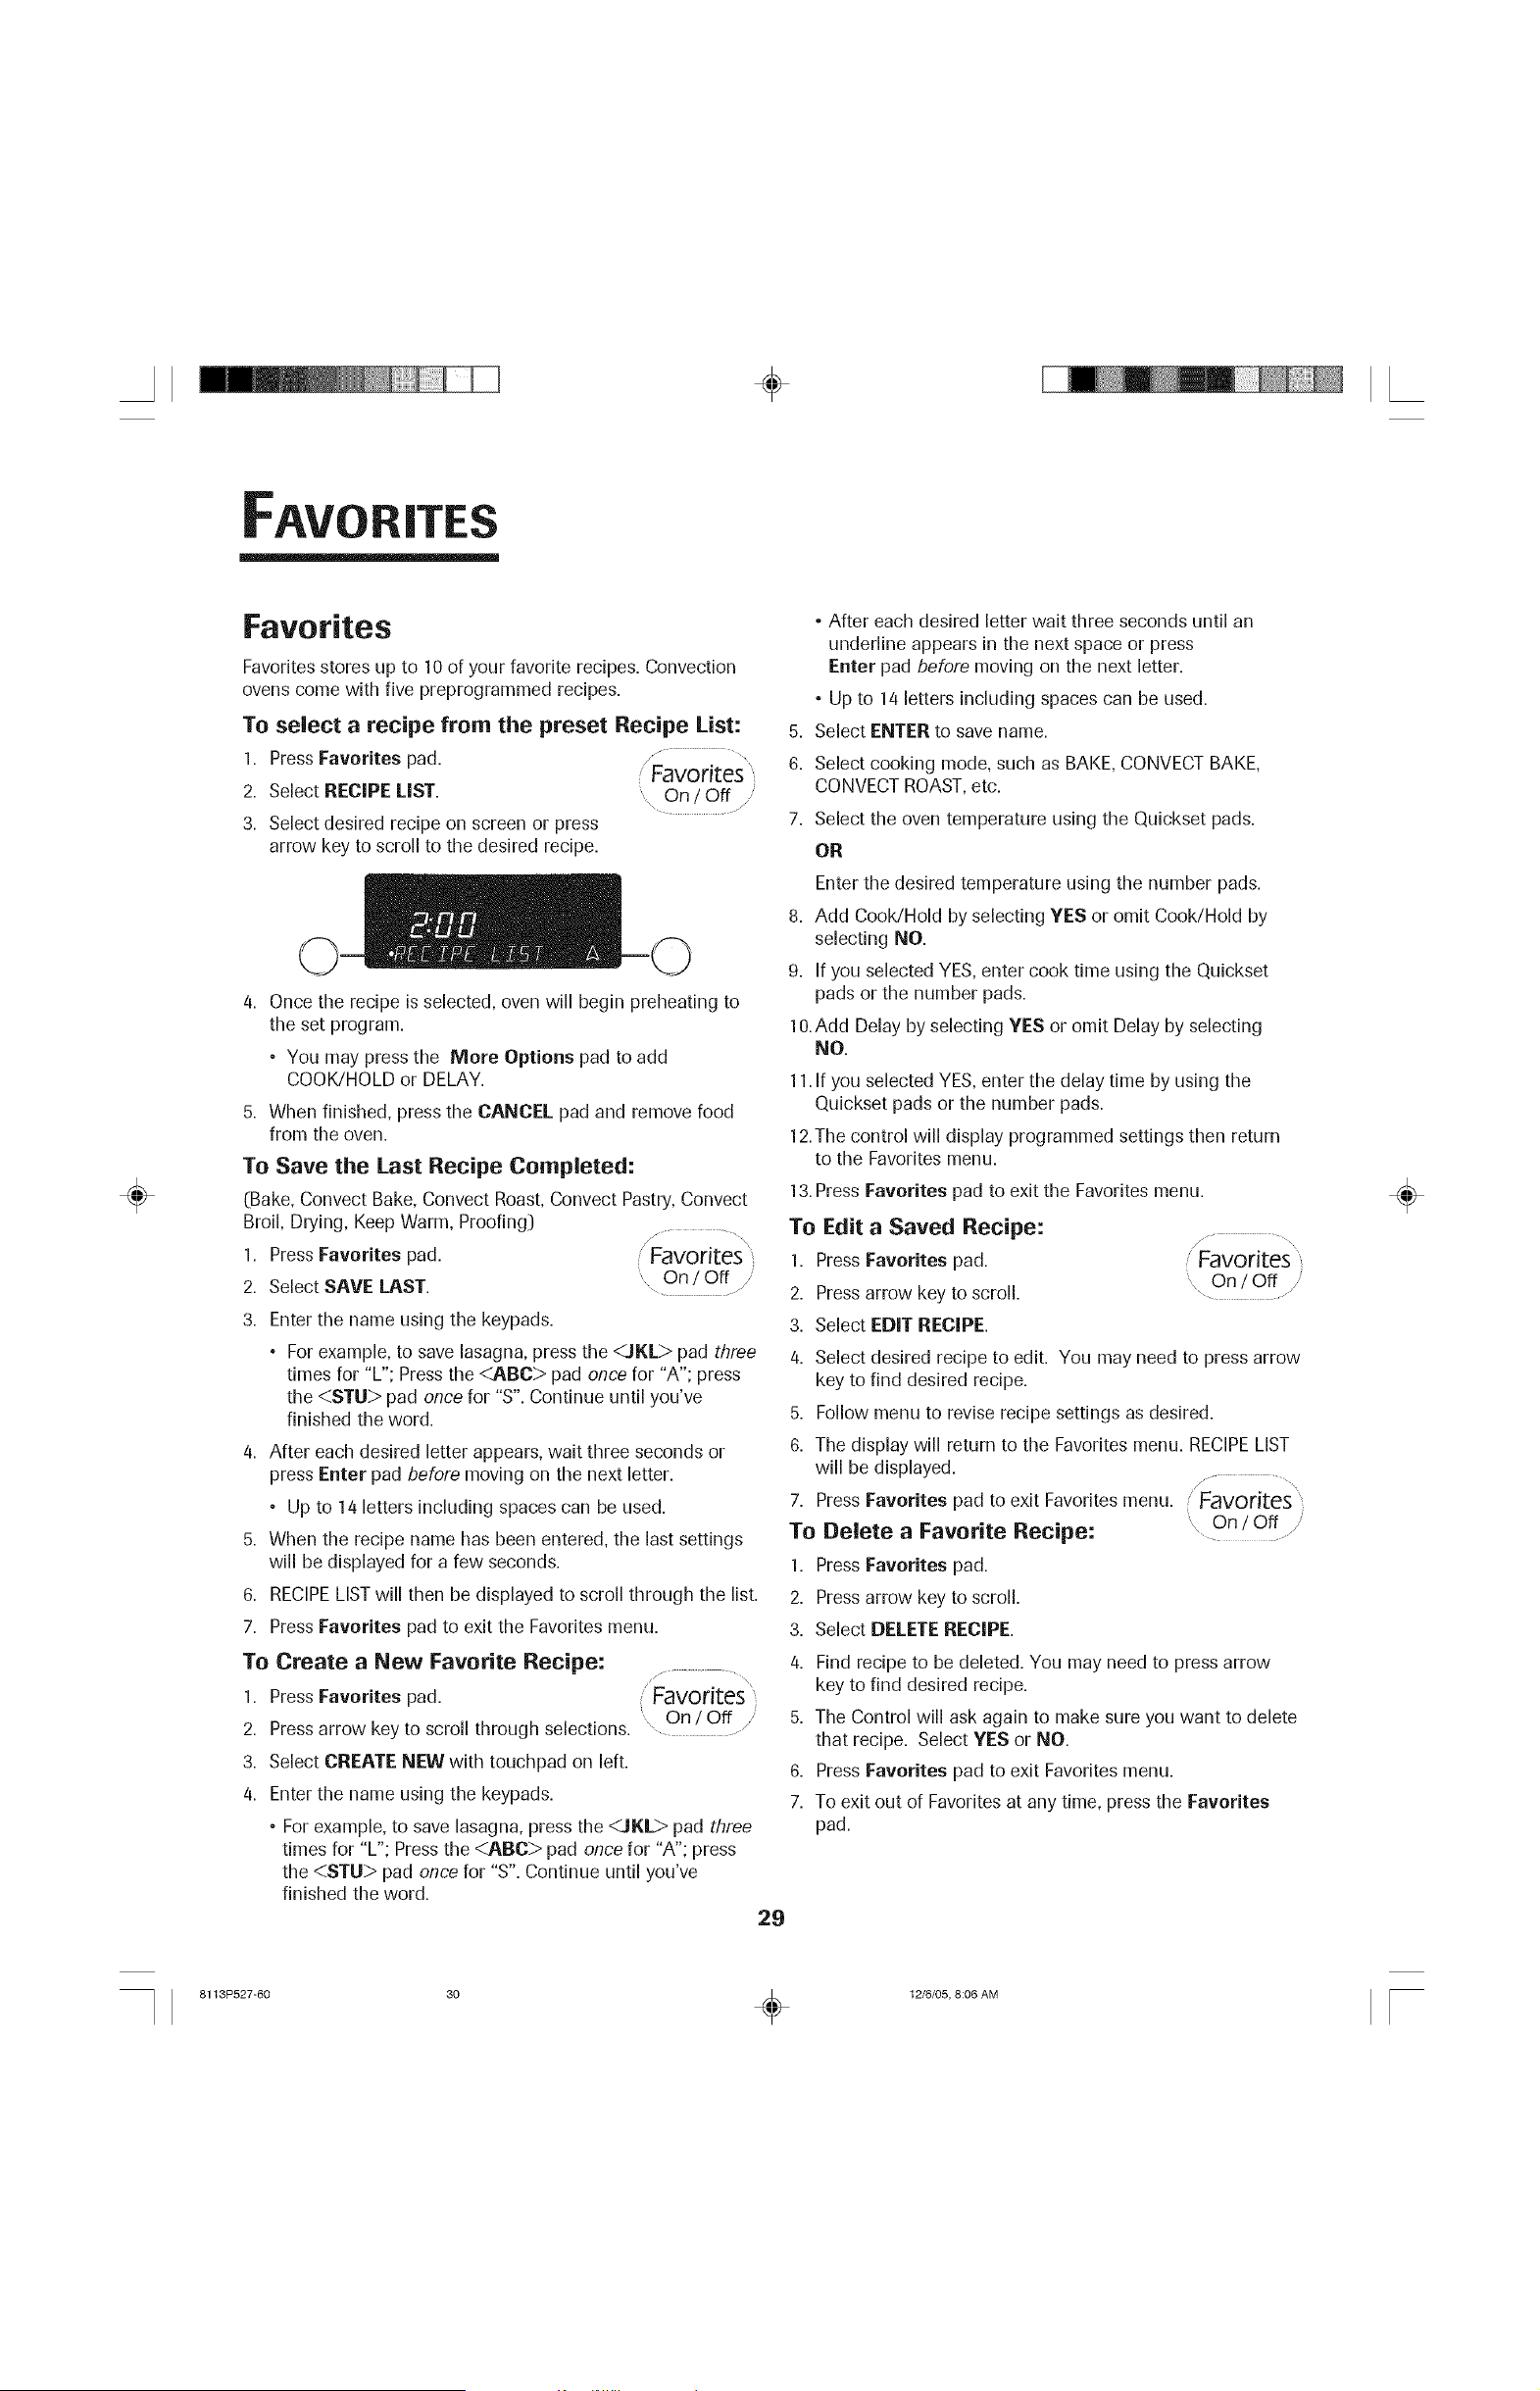
÷
FAVORITES
÷
Favorites
Favorites stores up to 10 of your favorite recipes. Convection
ovens come with five preprogrammed recipes.
To select a recipe from the preset Recipe List:
1. Press Favorites pad. J..........................................
f Favorites
2. Select RECIPE LIST. On / Off
3. Select desired recipe on screen or press
arrow key to scroll to the desired recipe.
4. Once the recipe is selected, oven will begin preheating to
the set program.
• You may press the More Options pad to add
COOK/HOLD or DELAY.
5. When finished, press the CANCEL pad and remove food
from the oven.
To Save the Last Recipe Completed:
_Bake,Convect Bake, Convect Roast, Convect Pastry, Convect
Broil, Drying, Keep Warm, Proofing]
1. Press Favorites pad. :" Favorites
2. Select SAVE LAST. On / Off
3. Enter the name using the keypads.
° For example, to save lasagna, press the <Ji(L> pad three
times for "L"; Press the <ARC> pad once for "A"; press
the <STU> pad once for "S'. Continue until you've
finished the word.
4. After each desired letter appears, wait three seconds or
press Enter pad before moving on the next letter.
• Up to 14 letters including spaces can be used.
5. When the recipe name has been entered, the last settings
will be displayed for a few seconds.
6. RECIPELISTwill then be displayed to scroll through the list.
7. Press Favorites pad to exit the Favorites menu.
To Create a New Favorite Recipe:
F ..............
1. Press Favorites pad. Favorites
2. Pressarrow key to scroll through selections. On / Off )
3. Select CREATE NEW with touchpad on left.
4. Enter the name using the keypads.
• For example, to save lasagna, press the <.IKL> pad three
times for "L'; Press the <ARC> pad once for "A"; press
the <STU> pad once for "S". Continue until you've
finished the word.
29
• After each desired letter wait three seconds until an
underline appears in the next space or press
Enter pad before moving on the next letter.
° Up to 14 letters including spaces can be used.
5. Select ENTER to save name.
6. Select cooking mode, such as BAKE, CONVECT BAKE,
CONVECTROAST,etc.
7. Select the oven temperature using the Quickset pads.
OR
Enter the desired temperature using the number pads.
8. Add Cook/Hold by selecting YES or omit Cook/Hold by
selecting NO.
9. If you selected YES, enter cook time using the Quickset
pads or the number pads.
10.Add Delay by selecting YES or omit Delay by selecting
NO.
11.If you selected YES, enter the delay time by using the
Quickset pads or the number pads.
12.The control will display programmed settings then return
to the Favorites menu.
13.Press Favorites pad to exit the Favorites menu.
To Edit a Saved Recipe:
/, ....................
Favorites
, On/Off
],
2.
3.
4.
Press Favorites pad.
Pressarrow key to scroll.
Select EDIT RECIPE.
5,
6.
7,
To
1.
2.
3.
4.
Select desired recipe to edit. You may need to press arrow
key to find desired recipe.
Follow menu to revise recipe settings as desired.
The display will return to the Favorites menu. RECIPELIST
will be displayed.
jr ................................
Press Favorites pad to exit Favorites menu. Favorites
, On / Offj
Delete a Favorite Recipe:
Press Favorites pad.
Pressarrow key to scroll.
Select DELETE RECIPE.
Find recipe to be deleted. You may need to press arrow
key to find desired recipe.
5. The Control will ask again to make sure you want to delete
that recipe. Select YES or NO.
6. Press Favorites pad to exit Favorites menu.
7. To exit out of Favorites at any time, press the Favorites
pad.
÷
8113P527-60 30 _ 12/6/05, 8:06 AM
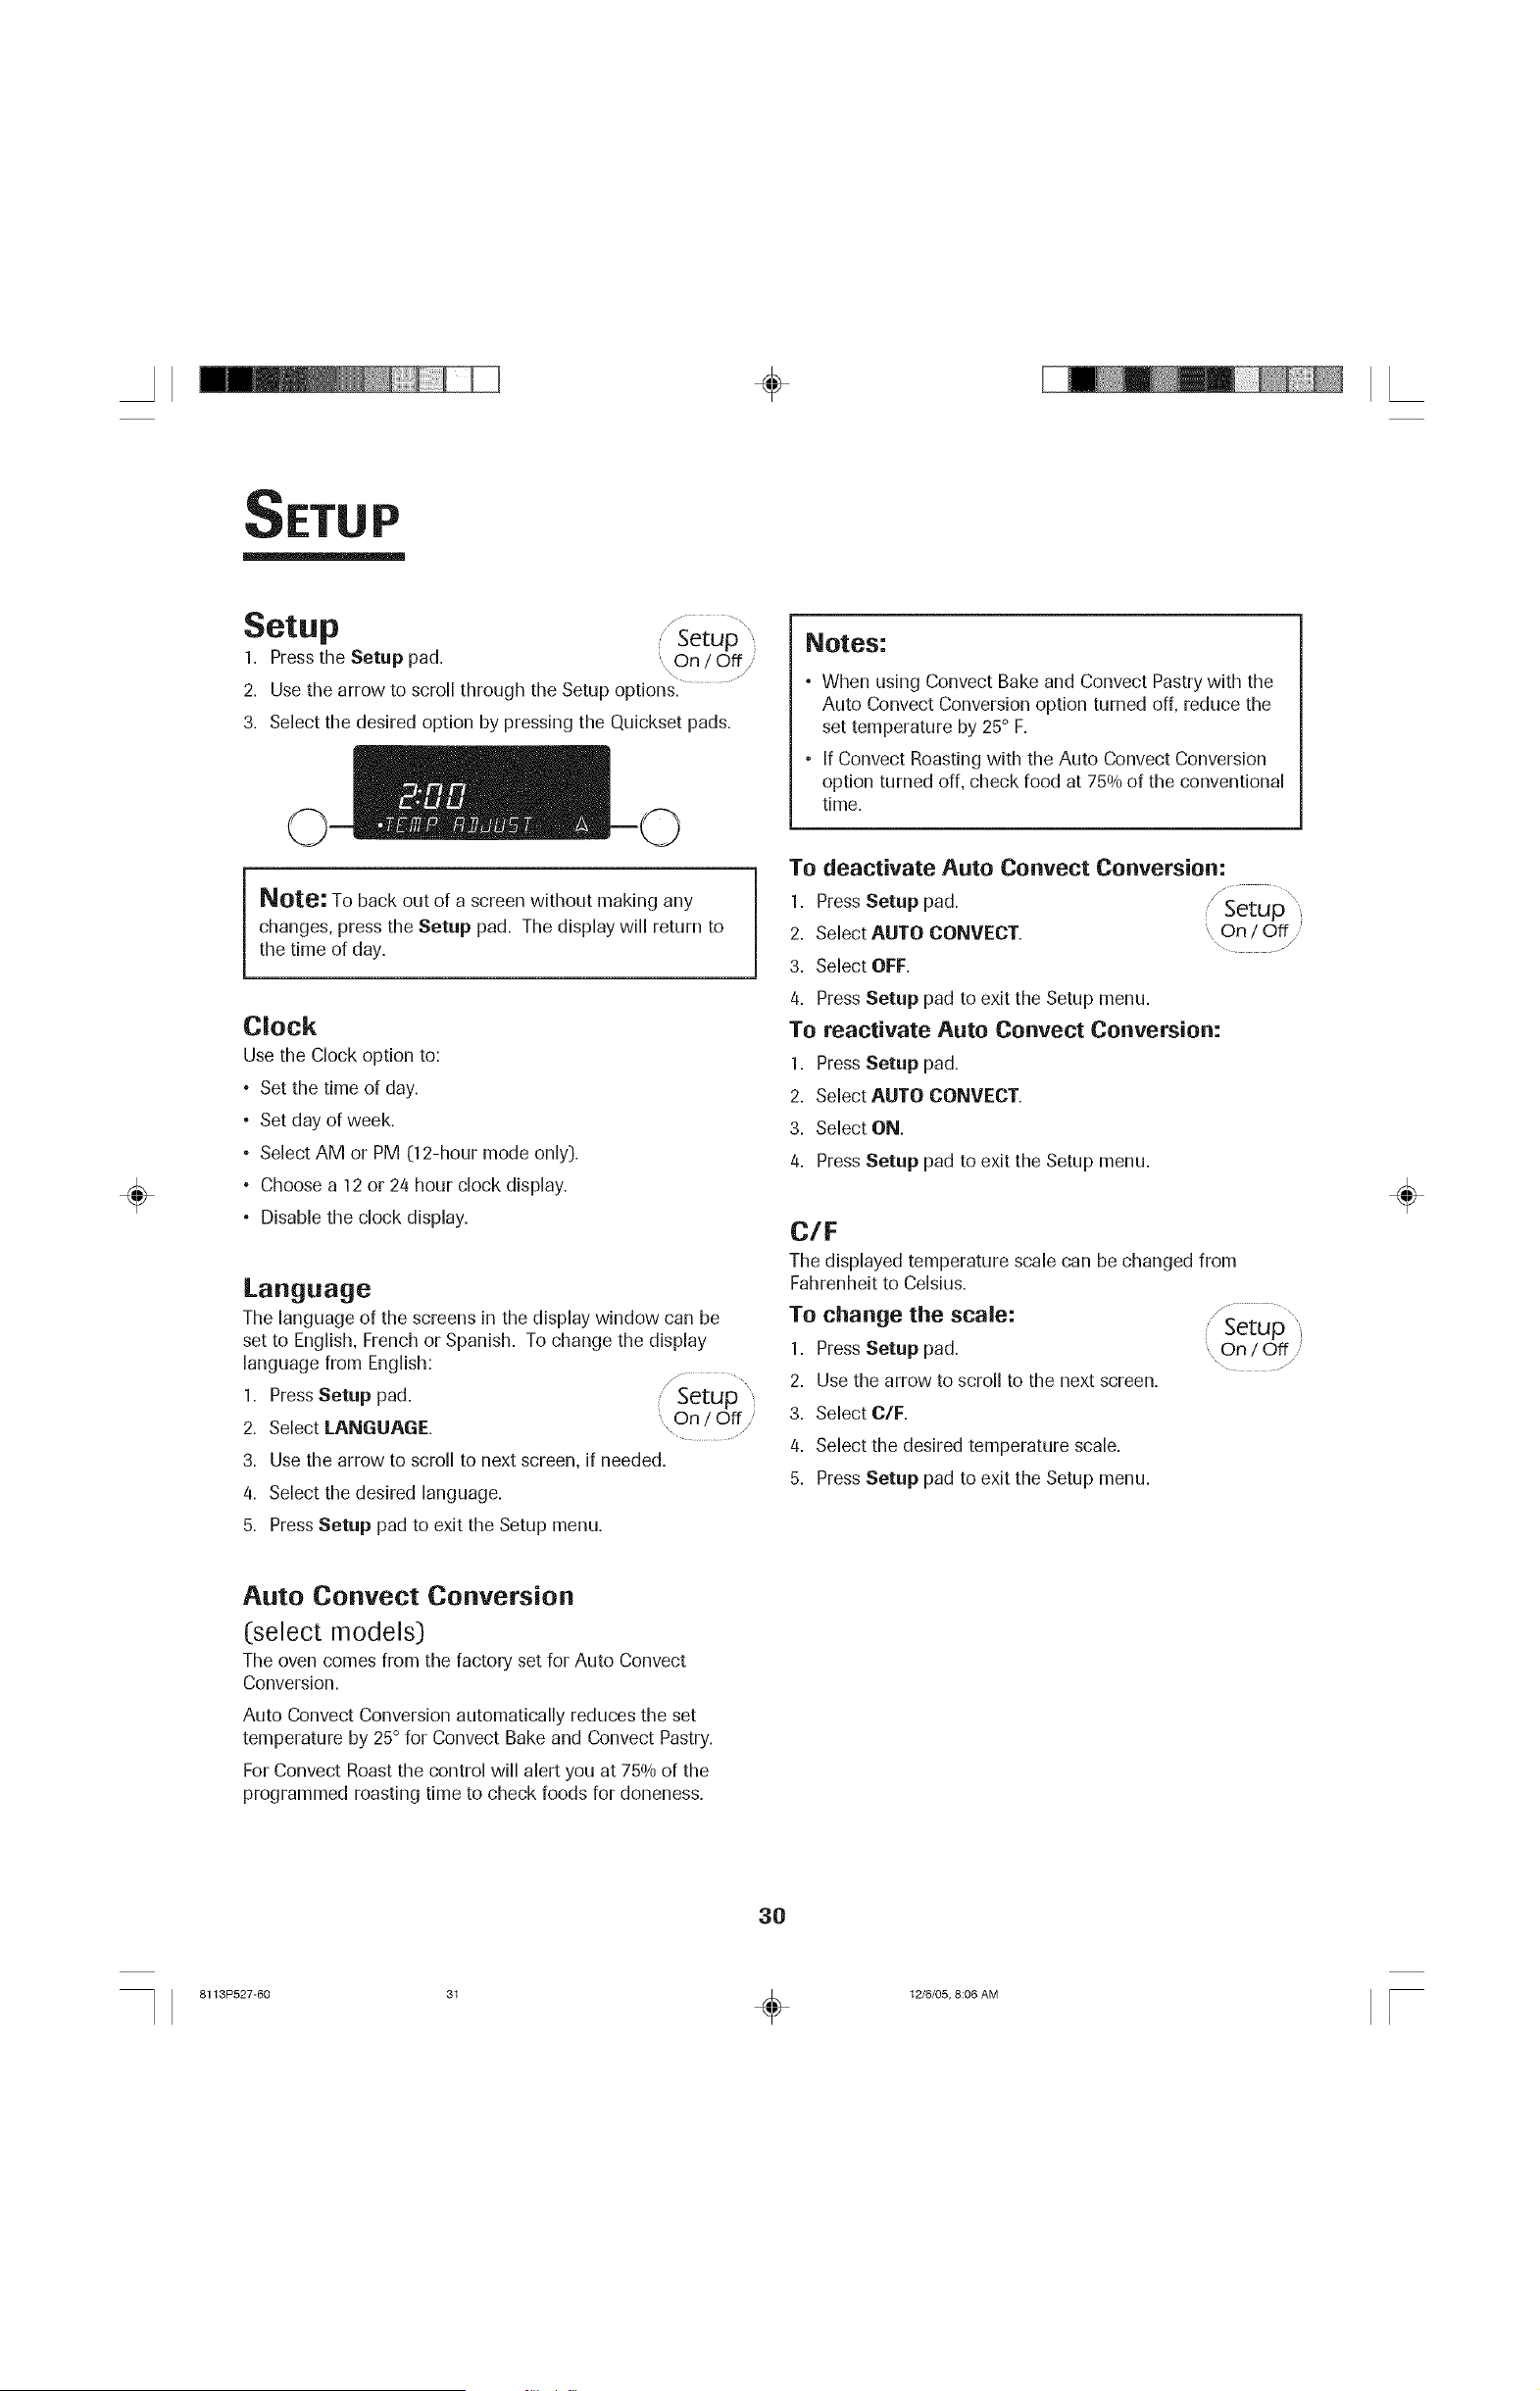
÷
Setup setup
1. Press the Setup pad. On / Offj
..................... /
2. Use the arrow to scroll through the Setup options.
3. Select the desired option by pressing the Quickset pads.
Notes:
• When using Convect Bake and Convect Pastry with the
Auto Convect Conversion option turned off, reduce the
set temperature by 25° F.
• If Convect Roasting with the Auto Convect Conversion
option turned off, check food at 750/0of the conventional
time.
÷
Note; To back out of a screen without making any
changes, press the Setup pad. The display will return to
the time of day.
Clock
Use the Clock option to:
• Set the time of day.
• Set day of week.
• Select AM or PM (12-hour mode only).
• Choose a 12 or 24 hour clock display.
• Disable the clock display.
Language
Tile language of the screens in the display window can be
set to English, French or Spanish. To change the display
language from English:
1. PressSetup pad. ' Setup
2. Select LANGUAGE. , On ! Off ji
3. Use the arrow to scroll to next screen, if needed.
4. Select the desired language.
5. Press Setup pad to exit the Setup menu.
To deactivate Auto Convect Conversion:
1. Press Setup pad. Setup
2. Select AUTO CONVECT. On / Off/
3. Select OFF.
4. Press Setup pad to exit the Setup menu.
To reactivate Auto Convect Conversion:
1. Press Setup pad.
2. Select AUTO CONVEOT.
3. Select ON.
4. Press Setup pad to exit the Setup menu.
C/F
Tile displayed temperature scale can be changed from
Fahrenheit to Celsius.
To change the scale:
1. Press Setup pad.
2. Use the arrow to scroll to the next screen.
On/Off/
3. Select C/F.
4. Select the desired temperature scale.
5. Press Setup pad to exit the Setup menu.
÷
Auto Convect Conversion
(select models)
The oven comes from the factory set for Auto Convect
Conversion.
Auto Convect Conversion automatically reduces the set
temperature by 25° for Convect Bake and Convect Pastry.
For Convect Roast the control will alert you at 750/0of the
programmed roasting time to check foods for doneness.
3O
8113P527-60 31 _ 12/6/05, 8:06 AM
÷
÷
Sabbath Mode
Tile oven is set to shut off after 12 hours if you accidentally
leave it on. The Sabbath Mode overrides the 12-hour shut-off
and can either be set to come on automatically or can be set
manually as desired.
Only Bake or Cook/Hold Bake will operate when the oven is in
Sabbath Mode. All other functions are invalid. Ifa function other
than Bake or Cook/Hold Bake is in operation when Sabbath
Mode starts, the function will be canceled.
To activate Sabbath Mode:
1. PressSetup pad.
2. Pressthe arrow to scroll.
3. Select SABBATH.
/ .................... ,
/ Setup
On / Off,
........... /
4. Select AUTO or MANUAL.
• AUTO will automatically prompt you to enter a Bake
temperature on Friday at 2 pm and stay in Sabbath
mode for 33 hours. SABBATH ENABLE appears in the
display for 90 minutes. If Bake or Cook/Hold Bake are
desired during Sabbath Mode, they must be
programmed during this time before AUTO Sabbath
Mode is active.
• MANUAL sets the oven to Sabbath Mode for 72 hours.
SABBATH and SABBATH ENABLE appear in the display
for five minutes. If Bake or Cook/Hold Bake are desired
during Sabbath Mode, they must be programmed during
this time before the MANUAL Sabbath Mode is active.
5. Select ON or OFF.
6. PressSetup pad to exit the Setup menu.
Notes:
• The oven must be idle to program Sabbath Mode.
• Sabbath Mode cannot be turned on if the keypads are
locked out or when the door is locked.
• If the oven is baking when Auto Sabbath Mode starts,
there will be no audible beeps.
• All prompts, messages and beeps are deactivated when
the Sabbath Mode is active.
• If the oven light is desired while in Sabbath Mode, it
must be turned on before the Sabbath Mode is set.
• The self-clean cycle and automatic door lock do not
operate during the Sabbath Mode.
• The Bake temperature can be changed during an Active
Sabbath Mode. Simply press the Bake pad and then
enter the desired temperature using the Quickset pads.
• Pressing the CANCEL pad will cancel a Bake cycle,
however the control will stay in the Sabbath Mode.
To cancel Sabbath Mode:
Press and hold the Setup pad for five seconds.
The Bake mode may be cancelled by pressing
the CANCEL pad during Sabbath.
/Setup
, On/Off/
\ .......... /
Temp Adjust
Oven temperatures are carefully tested at the factory. It is
normal to notice some baking time or browning differences
between a new oven and an old one. As ovens get older, the
oven temperature can shift.
You may adjust the oven temperature if you think the oven is
not baking or browning correctly. To decide how much to
change the temperature, set the oven temperature 25° F
higher or lower than the temperature in your recipes, then
bake. The resultsof the first bake should give you an idea of
how much to adjust the temperature.
To adjust the oven temperature:
1. Press Setup pad.
2. Pressthe arrow to scroll.
3. Select TEMP ADJUST.
/ Setup
On/Off/
4. Enter the desired temperature change using the number
pads.
5. Select "+/J' to indicate an increase or decrease in
temperature. The temperature change is displayed at the
top of the window.
6. Press Enter pad or wait three seconds to accept the
change.
7. Press Setup pad to exit the menu.
The oven temperature does not need to be readjusted if there
is a power failure or interruption.
Broiling and cleaning temperatures cannot be adjusted.
208/240V
For improved results when using Bake, the oven can be set
from 240V to 208V if your household is on 208V.
To set the oven to 208V: _.......... ....
Setup
1. Press Setup pad.
On / Off
2. Pressthe arrow to scroll. ..............
3. Select 208/240V.
4. Select 208V or 240V using the Quickset pads.
5. Press Enter pad to accept the change.
6. Press Setup pad to exit the menu.
÷
31
8113P527-60 32 _ 12/6/05, 8:06 AM
÷
÷
Tones (beeps:)
The number of beeps heard at the end of cooking and at the
end of timer operation and their volume can be adjusted.
To adjust the beeps: ........
S
1. Press Setup pad. / Setup
2. Use the arrow to scroll. On / Offj
3. Select TONES.
To change the beeps at the end of cooking:
1. Follow "Tones" steps 1-3 (see above:).
2. Select COOK TONE.
3. Use the arrow to scroll.
4. Select 1=30 IVlIN to hear one beep every thirty seconds.
OR
Select 1 =60 IVlIN to hear one beep every sixty seconds.
OR
Select 1 BEEP to hear one beep only at the end of cooking.
5. Press the Setup pad to exit.
To change the timer beeps:
],
2.
3.
4.
5. Press the Setup pad to exit.
To change the volume of the beeps:
1. Follow "Tones" steps 1-3 (see above:).
2. Press the arrow to scroll.
3. Select VOLUME.
4. Select HiGH for the highest volume.
OR
Select MEDIUM for medium volume.
OR
Select LOW for the lowest volume.
5. Press the Setup pad to exit.
Follow "Tones" steps 1-3 (see above:).
Select TIMERS TONES.
Use the arrow to scroll.
Select 2=30 SEC to hear two beeps every thirty seconds.
OR
Select 2=60 SEC to hear two beeps every sixty seconds.
OR
Select 1 BEEP to hear one beep only at the end of the
set time.
/ ................
/ Setup,
On!Off/
\ ........... /
12 l-! R Shutoff
The oven will automatically turn off at the end of 12 hours if
you accidentally leave it on.
TO turn off this feature:
1. Press Setup pad.
2. Use the arrow to scroll.
3. Select 12HR SHUTOFF.
// ................
/ Setup
....OntOffi
\ /
3. Select ON or OFF using the Quickset pads.
4. Press the Setup pad to exit.
Energy Saver
To save energy, the display can be set to go dark if it is not
being used.
To set the Energy Saver feature:
1. Press Setup pad.
2. Use the arrow to scroll.
3. Select ENERGY SAVER.
// .\
/ Setup ',
, On / Off
\ /
4. Select ON or OFF using the Quickset pads.
5. Press the Setup pad to exit.
Pressany pad to "wake up" the display.
Service
This area of the oven control displays the Jenn-Air Customer
Service toll-free phone number,
// ..............
1. Press Setup pad. Setup
2. Use the arrow to scroll, On / Off
........... /
3. Select SERVICE.
4. Press the Setup pad to exit.
DeBIO
When Demo is selected, you will see a short presentation
highlighting the features of your new Jenn-Air range.
// .........
1. Press Setup pad. Setup
2. Use the arrow to scroll. On / Off
....................... /
3. Select BEMO.
4. Select ON or OFF using the Quickset pads.
5. Press the Setup pad to exit.
÷
32
8113P527-60 33 _ 12/6/05, 8:06 AM
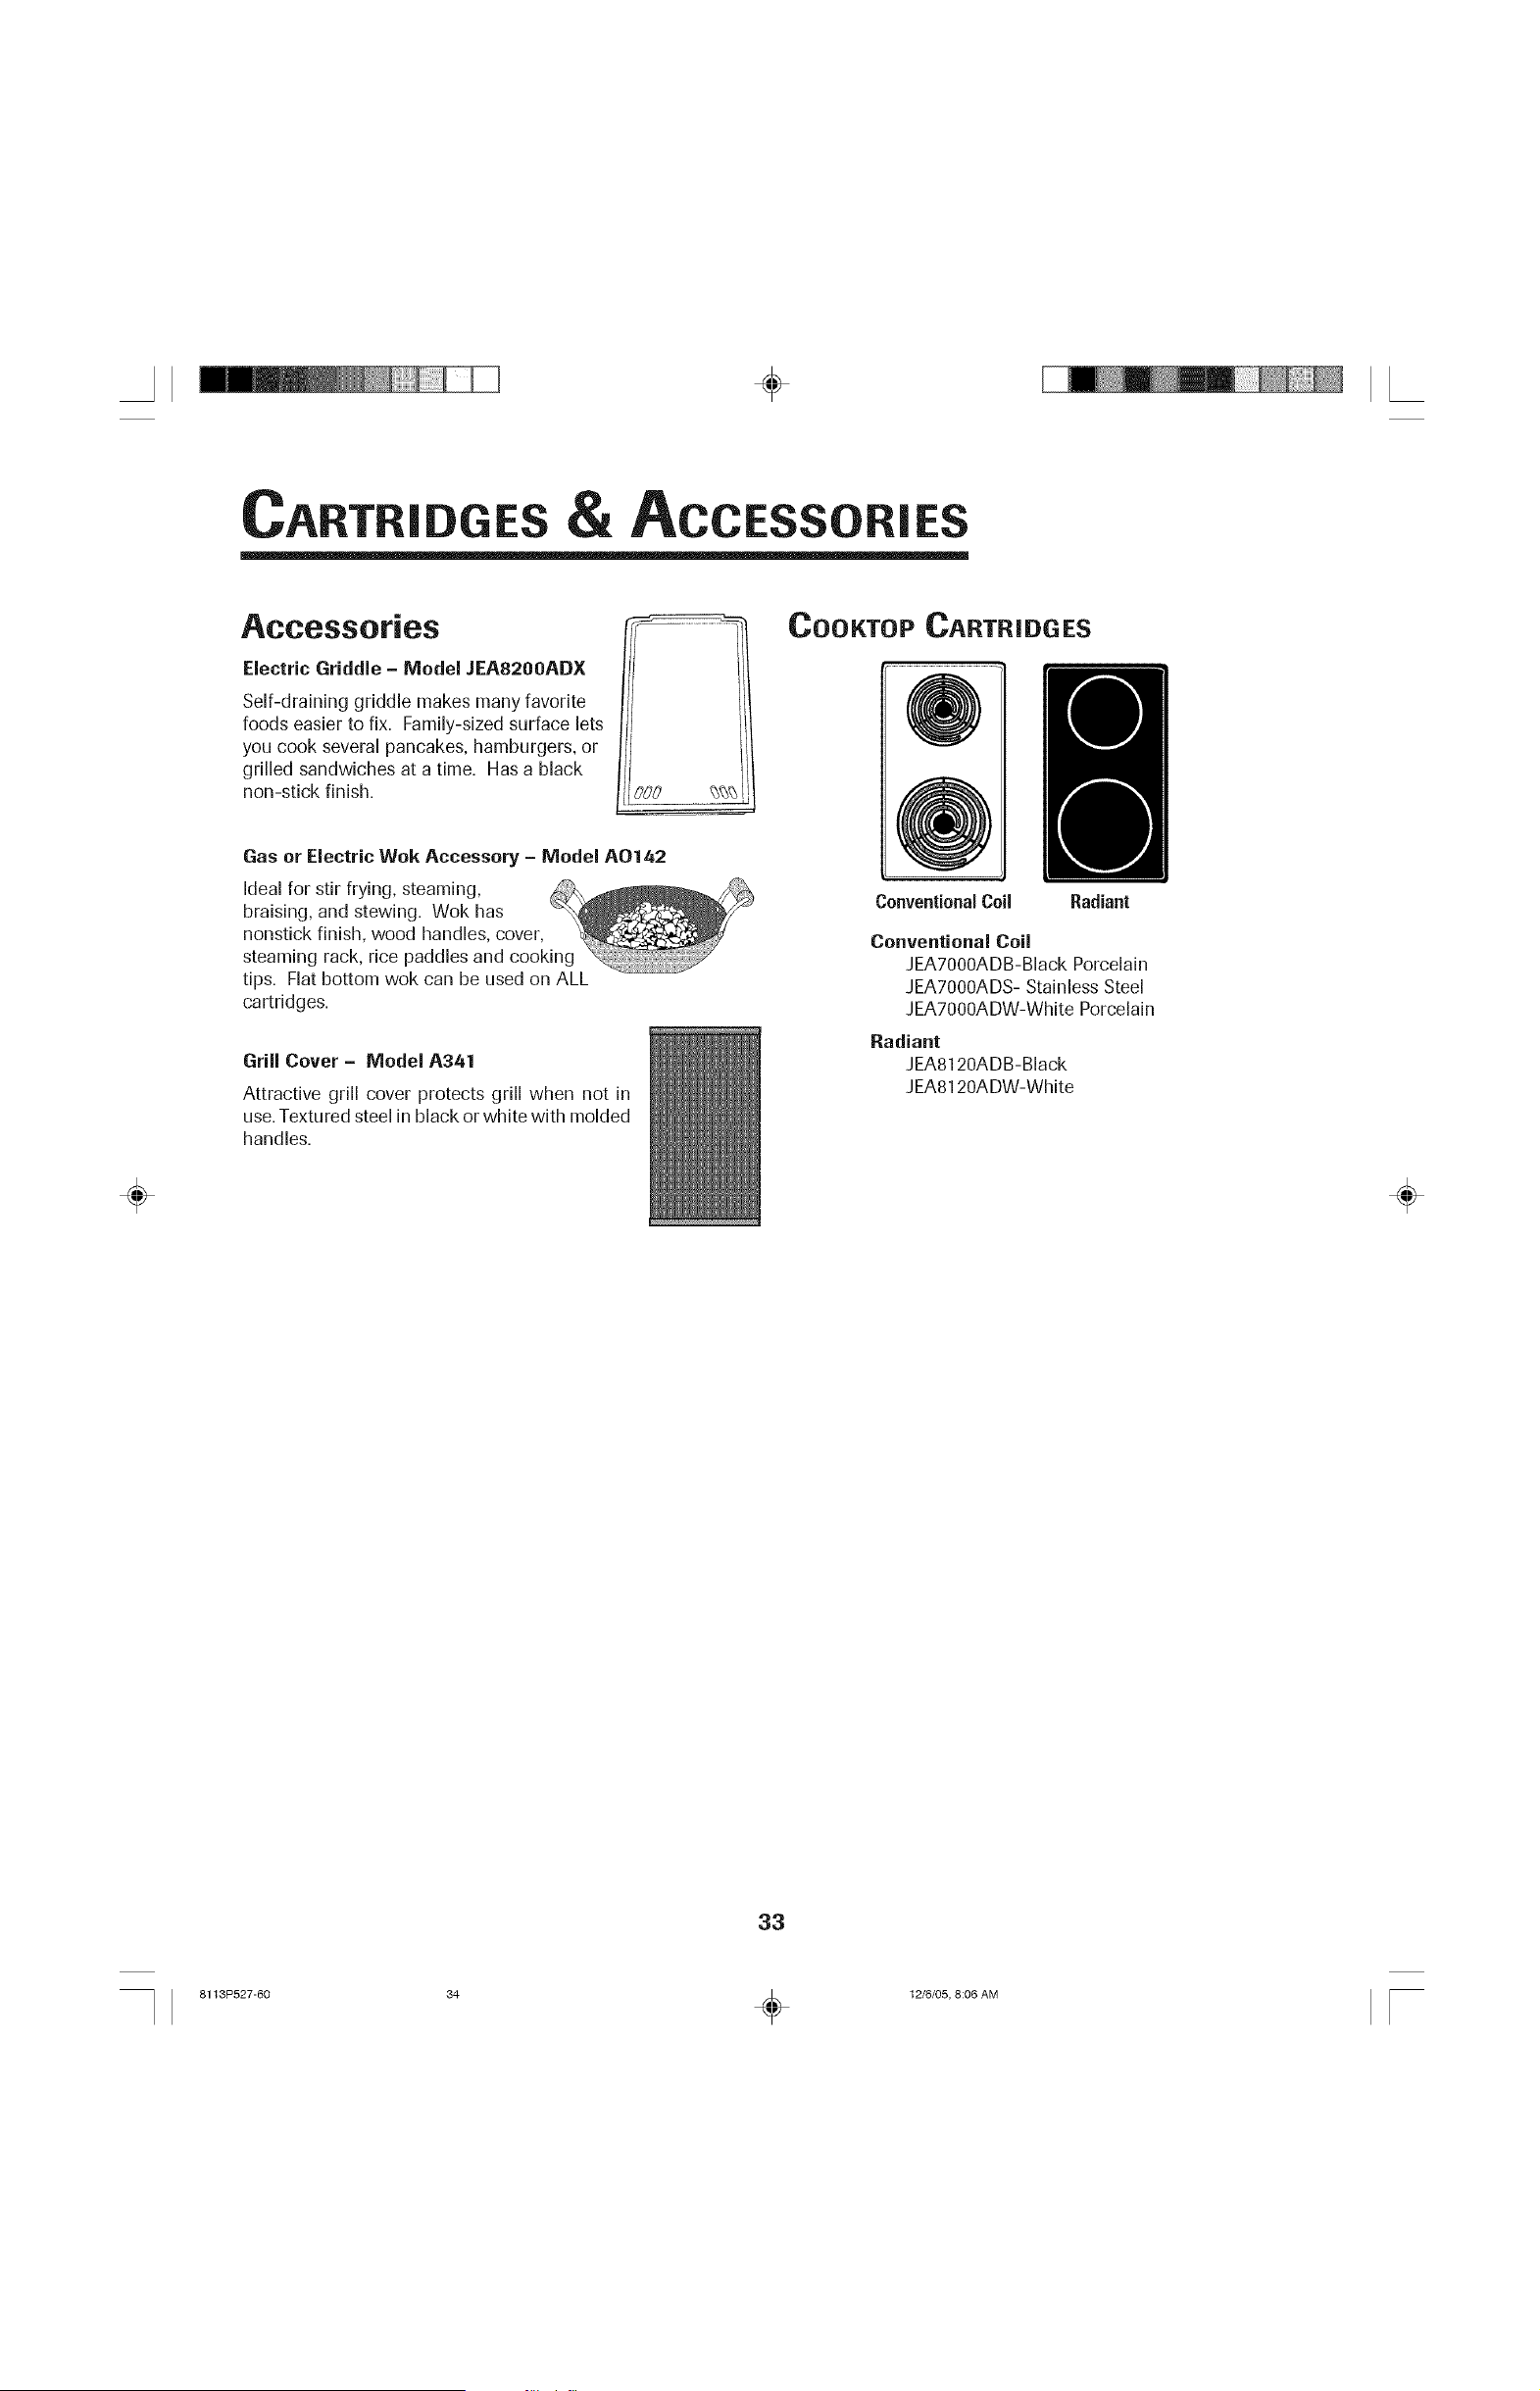
÷
CARTRiD RiE
÷
Accessories
Electric Griddle - NIodel JEA8200ADX
Self-draining griddle makes many favorite
foods easier to fix. Family-sized surface lets
you cook several pancakes, hamburgers, or
grilled sandwiches at a time. Has a black
non-stick finish.
Gas or Electric Wok Accessory - IVIodel AO142
Ideal for stir frying, steaming,
braising, and stewing. Wok has
nonstick finish, wood handles, cover,
steaming rack, rice paddles and cooking
tips. Flat bottom wok can be used on ALL
cartridges.
Grill Cover - IVlodel A341
Attractive grill cover protects grill when not in
use.Textured steel in black or white with molded
handles.
COOKTOP CARTRIDGES
Conventional Ceil Radiant
Conventional Coil
JEA7000ADB-BIack Porcelain
JEA7000ADS- Stainless Steel
JEA7000ADW-White Porcelain
Radiant
JEA8120ADB-Black
JEA8120ADW-White
÷
33
8113P527-60 34 _ 12/6/05, 8:06 AM

÷
÷ ÷
34
8113P527-60 35 _ 12/6/05, 8:06 AM
÷
÷
WARRANTY SERVICE
What is Not Covered By These Warranties:
1. Conditions and damages resulting from any of the following:
a. Improper installation, delivery, or maintenance.
b. Any repair, modification, alteration, or adjustment not authorized by the
manufacturer or an authorized servicer.
c. Misuse, abuse, accidents, unreasonable use,or acts of God.
d. Incorrect electric current, voltage, or supply.
e. Improper setting of any control.
2. Warranties are void if the original serial numbers have been removed,altered, or
cannot be readily determined.
3. Light bulbs.
4. Products purchased for commercial or industrial use.
5. The cost of service or service call to:
a. Correct installation errors.
b. Instruct the user on the proper use of the product.
c. Transport the appliance to the servicer and back.
6. Consequential or incidental damages sustained by any person as a result of any
breach of these warranties.
Some states do not allow the exclusion or limitation of consequential or incidental
damages, so the above exclusion may not apply.
If You Need Service
First see the Troubleshooting section in your Use and Care Guide or call Maytag
Services, LLC, Jenn-Air Customer Assistance at 1-800-JENNAIR (1-800-536-62471
U.S.A.and Canada.
To Obtain Warranty Service
To locate an authorized service company in your area, contact the dealer from
whom your appliance was purchased or call Maytag Services, LLC, Jenn-Air
Customer Assistance. Should you not receive satisfactory warranty service,
call or write:
Maytag Services, LLC
Attn: CAIRRCenter
P.O. Box 2370, Cleveland, TN 37320-2370
U.S. and Canada 1-800-JENNAIR (1-800-536-6247)
U.S. customers using TTY for deaf, hearing impaired or speech
impaired, call 1=800-688-2080.
Note: When contacting Maytag Services, LLC,Jenn-Air Customer
Assistance about a service problem, please include the following:
a. Your name, address and telephone number.
b. Model number and serial number of your appliance.
c. Name and address of your dealer and date appliance was purchased.
d. A clear description of the problem you are having.
e. Proof of purchase.
÷
Use and Care guides, service manuals and parts information are available from Maytag Services, LLC, Jenn-Air Customer Assistance.
35
8113P527-60 36 _ 12/6/05, 8:06 AM
CUISINI#__RE ENCASTRABLE CLECTRIQUE ,& i::VACUATION
DESCENDANTE JENN-AIR _
TABLE DES MATIERES
Instructions de securite importantes ..................37-40
Informations sur les conduits .......................................40
Entretien et nettoyage ..............................................41-44
Entretien ........................................................................44-45
D@annage ...................................................................46-47
Cuisson sur la surface .............................................48-52
Cuisson au four ..........................................................53-59
Options ..........................................................................60-64
Reglage favori .............................................................65-66
R6glage ..........................................................................67-68
Modules et accessoires ..................................................69
Garantie et service ...........................................................71
Guia de uso y cuidado ....................................................72
JENN-AIR
8113P527-60 37 _ 12/6/05, 8:06 AM

÷
que pourrait causer une utilisation incorrecte de rappareil.
Utilisez rappareil uniquement pour los fonctions prevues,
decrites darts ce guide.
Pour assurer une utilisation appropri_e et en route
s_curit_ :Seul un technicien qualifie devrait installer
rappareil et le mettre _ la terre. Ne tentez pas de rdgler,
reparer ou remphcer un composant de rappareil, _ moins
que cela ne soit specifiquement recommande darts ce guide.
Toute autre reparation doit etre effectuee par un technicien
qualifi&
Debranchez toujours rappareil avant d'en faire rentretien.
instructions g n rales
÷
DE
÷
Les instructionsde securite importanteset les avertissements
paraissant darts ce guide ne sont pas destines _ couvrir toutes
los situations et conditions eventuelles qui peuvent se
presenter. II faut faire preuve de bon sens, de prudence et de
soin Iors de rinstallation, de rentretien ou du fonctionnement
de rappareil.
Communiquez toujours avec le fabricant si vous ne
comprenez pas un probleme ou une situation.
Reconnaissez los briquettes,
paragraphes et symboles sur la s6curit_
iisez routes les instructions avant d'utiliser cot appareil ;
observez toutes les instructions pour eliminer les risques
d'incendie, choc electrique, dommages materiels et corporels
Utilisez une lampe torche pour determiner si la bride
antibasculement est convenablement installee sous la
cuisiniere. L'un des pieds de mise _ niveau arriere dolt etre
convenablement engage dans la fente de la bride. Lorsque la
cuisiniere est convenablement calee, la bride antibasculement
immobilise le pied arriere contre le sol. Assurez-vous que la
cuisiniere est bien ancree au sol apres chaque deplacement.
Pour viter un incendie ou des
dommages causes par la
fum e
Assurez-vous que tousles materiaux de conditionnement sont
retires de rappareil avantde le mettre en marche.
Gardez les materiaux combustibles bien eloignes de rappareil.
Ne rangez pas de materiaux inflammables dans un four.
De nombreux articles en plastique peuvent etre deteriores par la
chaleur. Gardez les plastiques eloignes des pieces de rappareil
pouvant devenir chaudes.
Pour empecher un feu de graisse, _vitez toute accumulation de
graisse ou autre matiere inflammable _ rinterieur ou pros de
rappareil.
37
8113P527-60 38 _ 12/6/05, 8:06 AM
÷
÷
En cas d'incendie
Debranchez rapparei[ et la hotte de ventilation, pour minimiser
la propagation des flammes. Eteignez les flammes, puis mettez
la hotte en marche pour evacuer la fumee et les odeurs.
• Table de cuisson : Utilisez un couvercle ou une plaque
biscuits pour etouffer les fiammes d'un feu qui se declare
darts un ustensile de cuisine.
NE saisissez ou d_placez JAMAiS un ustensiie de cuisine
enfiamme.
• Four : Fermez [a porte du four pour etouffer [es fiammes.
Ne jetez pas d'eau sur un feu de graisse. Utilisez du
bicarbonate de sodium, un extincteur _ mousse ou un produit
chimique sec pour eteindre les fiammes.
S6curit des enfants
NE laissez JAMAIS des enfants seuis ou sans supervision
[orsque rapparei[ est en service ou encore chaud. Ne laissez
jamais un enfant s'asseoir ou se tenir sur une partie
quelconque de rapparei[. II pourrait se biesser ou se brQier.
II est importantd'enseigner aux enfants que [a cuisiniere et [es
ustensiies places dessus ou _ rinterieur peuvent etre chauds.
Laissez refroidir [es ustensiies en un lieu sOr, hors d'atteinte
des enfants. Les enfants doivent comprendre que rappareil
n'est pas un jouet, lis ne do[vent pas jouer avec [es boutons
ou toute autre piece de rapparei[.
Familiarisation avec ['apparel[
Pour eviter d'endommager I'appareil ou de mettre en danger
rutilisateur, r|'utilisez pas cet appareil comme appareil de
chauffage pour chauffer ou rechauffer une piece. N'utilisez
pas non plus [e four pour ranger des aliments ou des
ustensiles de cuisine.
N'entravez [}as [a circulation d'air en obstruant
['event du four.
NE TOUCHEZ JAMAIS LES ELEMENTSDE CUISSON NI LES
PAROISINTERIEURESDU FOUR. Les elements chauffants
peuvent etre brOlants, meme s'ils ne sont plus rouges. Les
surfaces interieures du four peuvent atteindre une temperature
suffisamment elevee pour infliger des brOlures. Pendant et apres
usage, ne toucbez pas leselements de cuisson ni les parois
interieuresdu four. Evitez leur contact avec les vetements ou
autres materiaux inflammables,jusqu'_ ce qu'ils aient
suffisamment refroidi. D'autres surfaces peuvent egalement
atteindre une temperature suffisamment elevee pour brOler :
rouverture de revent et les surfaces avoisinantes, ainsi que la
porte et le hublot du four.
Ne toucbez pas rampoule chaude du four avec un linge
humide car elle pourrait se casser. Si rampoule se casse,
debranchez rappareil avant de retirer rampoule afin d'eviter un
choc electrique.
N'utilisez JAMAIS de feuille d'aluminium pour recouvrir la sole
ou une grille du four. Ceci pourrait endommager I'appareil ou
causer un risque de choc eiectrique ou d'incendie. Utiiisez le
papier d'aiuminium uniquement seion les instructionsdonnees
darts ce guide.
Cuisson et s6curit6
NE faites JAMAiS chauffer un recipient non ouvert darts le
four. L'accumulation de press[on darts le recipient pourrait [e
faire eclater, provoquant ainsi de graves biessures corporeiies et
des dommages materiels.
Utilisez des maniques robustes et seches. Des maniques
humides peuvent provoquer la formation de vapeur brOiante.
N'utilisez jamais un torchon _ vaisselle ou autre article textile
[a place de maniques. Ces articles pourraient trainer sur un
brOleur et s'enfiammer, ou encore, s'accrocher _ une piece de
rappareil.
Portez des vetements appropries. Evitez de porter des vetements
amples ou _ [ongues manches pendant rutilisation de rapparei[.
Ils peuvent prendre feu et provoquer des brOlures s'ils entrent en
contact avec un element chauffant.
Piacez toujours les grilles _ [a position appropriee darts [e four
Iorsqu'il est froid. Faites couiisser la grille vers I'exterieur avant
d'ajouter ou d'enlever un plat _ raide de maniques robustes et
seches. Evitezd'introduire la main darts le four pour deposer ou
retirer un plat. S'il est necessaire de deplacer une grille
Iorsqu'elle est chaude, utilisez une manique seche. Ne touebez
pas un element chaud avec une manique.
Utilisez les grilles darts leur four d'origine seulement.
Ouvrez toujours tres prudemment la porte du four. Laissez rair
chaud ou la vapeur s'echapper avant de retirer ou deposer un
plat.
AVERTISSEMENT - METS PRI_PAR¢S :Suivez les instructions
du fabdcant. Si le contenant ou le couvercle en phstique d'un
mets surgele se ddorme ou est endommage durant la cuisson,
Suite
38
÷
8113P527-60 39 _ 12/6/05, 8:06 AM
÷
÷
jetez imme,diatement le re,cipient et son contenu. Les aliments
pourraient e,trecontamine,s.
Ne laissez pas le papier d'aluminium ou la sonde 8 viande
entrer en contact avec les e,le,mentschauffants.
Eteignez toujours toutes les commandes une fois la cuisson
termine,e.
Ustensiles et s curit
Suivez [es instructions du fabricant [ors de ['emploi d'un sachet
pour cuisson au four.
La se,curite,de fonctionnement de cet appareil a e,te,teste,e
I'aide d'ustensiles de cuisine conventionnels. N'utiiisez pas
un ustensile ou accessoire qui n'est pas spe,cifiquement
recommande, dans ce guide. N'utiiisez pas de syste,me de
convection additionnel. L'utilisation d'un dispositif ou
accessoire qui n'est pas expresse,ment recommande, dans ce
guide peut entrafner de graves dangers, entraver le rendement
de I'appareilet re,duire la Ionge,vite,de ses composants.
Si un ustensile est plus petit que I'e,ie,mentutilise,,une partie
de I'e,le,mentchauffant est expose,eet peut provoquer
I'infiammationd'un ve,tement ou des maniques.
Seuls certains mate,riaux en verre, vitroce,ramique, ce,ramique,
gre,s,ou certains ustensiles vitrifie,s/e,maille,speuvent e,tre
utilise,ssur la table de cuisson ou dans le four, sans risque de
se casser sous I'effet du choc thermique. Observez les
instructions du fabricant Iorsde I'utilisationd'un ustensile en
verre.
Orientez la poigne,e de chaque ustensile vers le centre de la
table de cuisson, et non vers I'exte,rieurou vers un autre
e,le,ment.Vous re,duirez ainsi le risque de brOlure,
d'infiammation des matie,rescombustibles ou de renversement
cause,par un jeune enfant qui pourrait saisir ou renverser
accidentellement un ustensile dont le manche est oriente,vers
I'exte,rieur.
surface de cuisson endommage,e et entrainer un risque de
choc e,lectrique. Communiquez imme,diatement avec un
technicien qualifie,.
Friteuses
Exercez une prudence extra,me lots du de,placement du
re,cipient de graisse ou Iorsde I'e,liminationde graisse chaude.
Laissez la graisse refroidir avant de de,placer I'ustensile.
Hottes d'e×traction
Nettoyez fre,quemment les filtres et la hotte de la cuisinie,re,
pour empe,cher la graisse ou d'autres produits inflammables
de s'accumuler sur le filtre ou la hotte et provoquer des feux
de graisse.
Sivous flambez des aliments sous la hotte, mettez le
ventilateur en marche.
Nettoyage et s curit6
Nettoyez la table de cuisson avec pre,caution. Arre,tez toutes
les commandes et attendez le refroidissement de tousles
composants avant de les toucher ou d'entreprendre le
nettoyage. Travaillez prudemment afin d'e,viter les brOlures par
la vapeur si vous utilisez un chiffon ou une e,ponge humide
pour nettoyer les renversements sur une surface chaude.
Certains produits de nettoyage peuvent ge,ne,rerdes vapeurs
nocives Iorsqu'ilssont applique,s sur une surface chaude.
Nettoyez uniquement les pie,ces mentionne,es darts ce guide.
Four autonettoyant
÷
Table de cuisson
NE laissez JANIAIS un e,ie,mentde surface aiiume,sans
surveillance, particulie,rement _ un re,glage e,ieve,.Le
de,bordement du contenu de I'ustensilepourrait ge,ne,rerune
fume,eabondante et la graisse qu'il contient pourrait
s'enfiammer.
Cet appareil comporte des e,le,mentschauffants de diffe,rentes
tailles. Utilisez toujours un ustensile _ fond plat, de taille
suffisante pour qu'il puisse recouvrir comple,tement I'e,le,ment.
Pour optimiser I'efficacite,, choisissez un ustensile de me,me
taille que I'e,le,ment.
SURFACE DE CUISSON EN VITROCCRANIlOUE : N'utiiisez
JAIVIAIS une surface de cuisson endommage,e. Les solutions
de nettoyage et les de,bordements pourraient pe,ne,trerdans la
Ne nettayez pas le joint de porte. Le joint est essentiel
I'e,tanche,ite,de I'appareil.Veillez _ ne pas frotter,
endommager ou de,placer le joint.
N'utilisez pas de protection pour couvrir la sole ou de
nettoyant pour four _ I'inte,rieur du four autonettoyant ou pre,s
de ses composants.
39
8113P527-60 40 _ 12/6/05, 8:06 AM
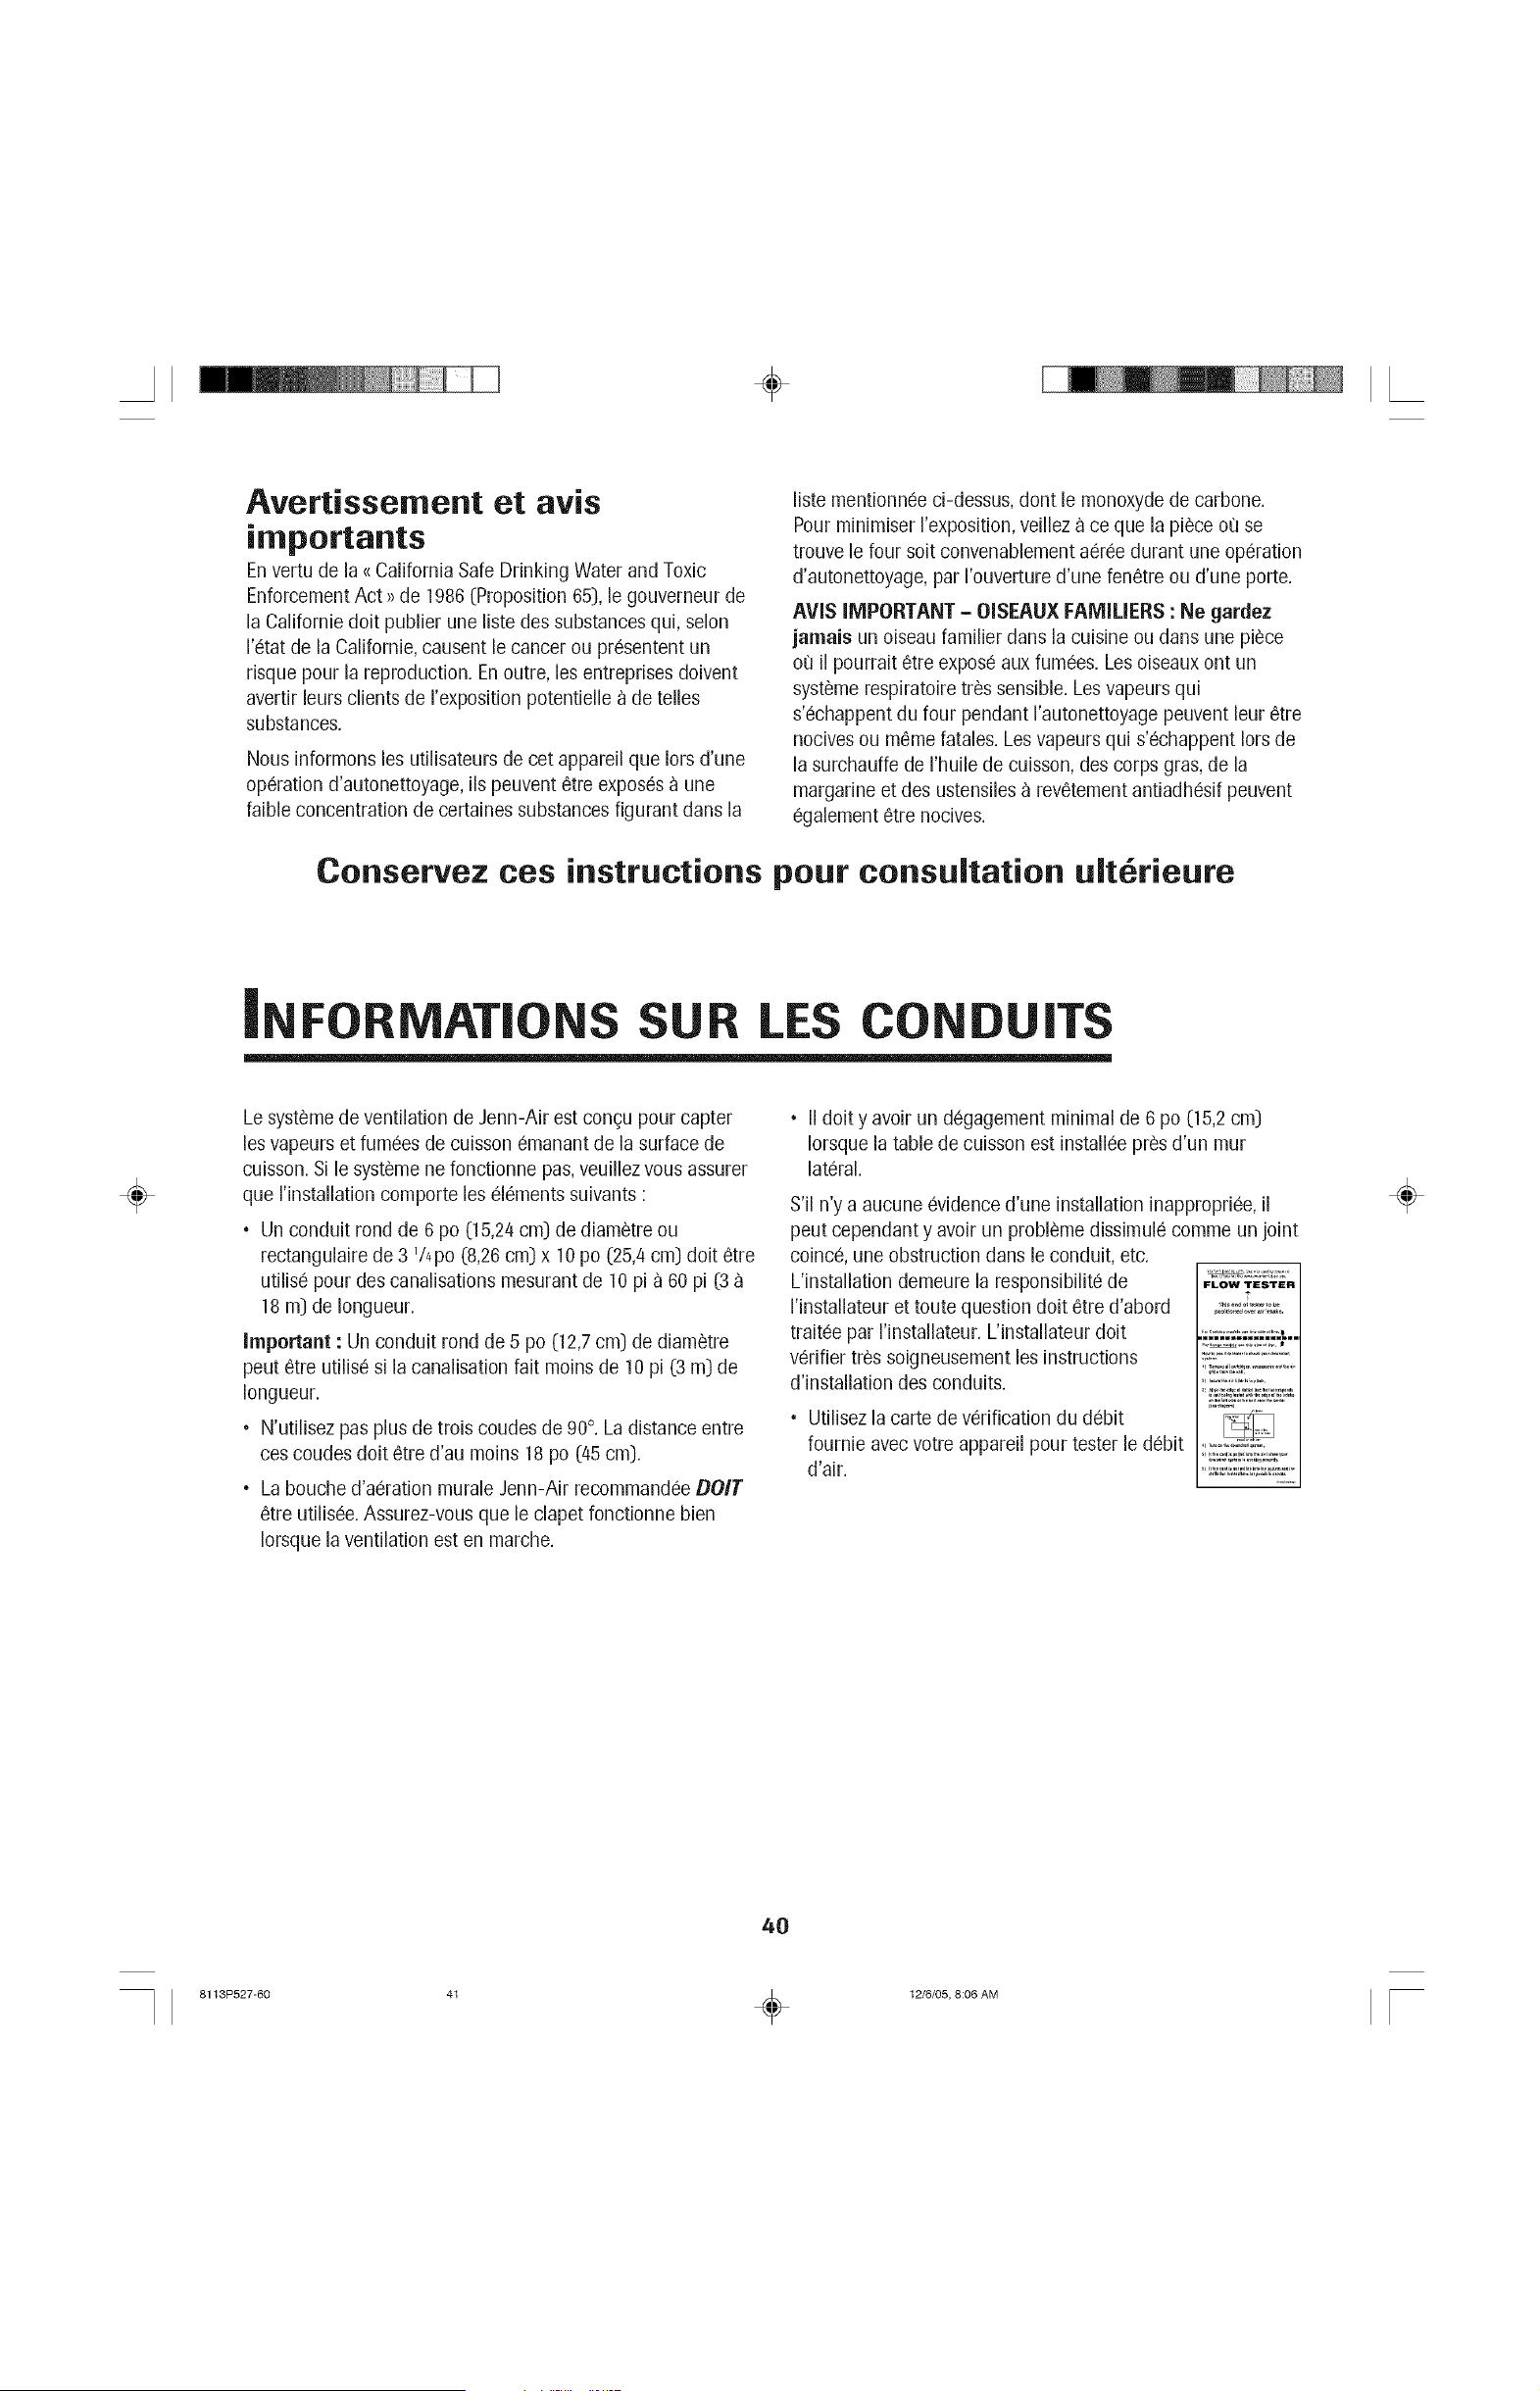
÷
Avertissement et avis
irnportants
Envertu de la <<California Safe Drinking Water and Toxic
Enforcement Act >>de 1986 (Proposition 65), le gouverneur de
la Californie doit punier une liste des substances qui, selon
I'etat de la Californie, causent le cancer ou presentent un
risque pour la reproduction. En outre, les entreprises doivent
avertir leurs clients de rexposition potentielle _ de tefles
substances.
Nous informons les utilisateurs de cet appareil que Iors d'une
operation d'autonettoyage, ils peuvent etre exposes _ une
DiNe concentration de certaines substances figurant dans [a
liste mentionnee ci-dessus, dont le monoxyde de carbone.
Pour minimiser I'exposition, veillez _ ce que la piece ou se
trouve le four soit convenablement aeree durant une operation
d'autonettoyage, par I'ouverture d'une fenetre ou d'une porte.
AVIS IMPORTANT - OISEAU× FAMILIERS : Ne gardez
jamais un oiseau familier dans la cuisine ou dans une piece
ou il pourrait ¢tre expose aux fumees. Les oiseaux ont un
systeme respiratoire tres sensible. Les vapeurs qui
s'echappent du four pendant I'autonettoyage peuvent leur etre
nocives ou meme fatales. Les vapeurs qui s'echappent Iors de
la surchauffe de I'huile de cuisson, des corps gras, de la
margarine et des ustensiles _ revetement antiadhesif peuvent
egalement ¢tre nocives.
Conservez ces instructions pour consultation ult rieure
!
÷
Le systSme de ventilation de Jenn-Air est con(_u pour capter
les vapeurs et fumees de cuisson emanant de la surface de
cuisson. Si le systSme ne fonctionne pas,veuillez vous assurer
que I'installation comporte les elements suivants :
• Un conduit rond de 6 po (15,24 cm) de diametre ou
rectangulaire de 3 1/4po (8,26 cm) x 10 po (25,4 cm) doit ¢tre
utilise pour des canalisations mesurant de 10 pi _ 60 pi (3
18 m) de Iongueur.
Important : Un conduit rond de 5 po (12,7 cm) de diam_tre
peut ¢tre utilise si la canalisation fait moins de 10 pi (3 m) de
Iongueur.
• N'utilisez pas plus de trois coudes de 90°. La distance entre
ces coudes doit ¢tre d'au moins 18 po (45 cm).
• La bouche d'aeration murale Jenn-Air recommandee DOlT
etre utilisee. Assurez-vous que le clapet fonctionne bien
Iorsque la ventilation est en marche.
• II doit y avoir un degagement minimal de 6 po (15,2 cm)
Iorsque la table de cuisson est installee pres d'un mur
lateral.
S'il n'y a aucune evidence d'une installation inappropriee, il
peut cependant y avoir un probleme dissimule comme un joint
coinc& une obstruction dans le conduit, etc.
L'installation demeure la responsibilite de ,i:o_:_:,
?
I'installateur et toute question doit etre d'abord ..................
traitee par I'installateur. L'installateur doit
verifier tres soigneusement les instructions
d'installation des conduits.
• Utilisez la carte de verification du debit
fournie avec votre appareil pour tester le debit
d'air.
,uuusm_mmmm=l
÷
40
8113P527-60 41 _ 12/6/05, 8:06 AM
÷
÷
TaMede N'oti/isezjamais de nettoyantpoor foor, d'agent de blanchimentch/or_, d'ammoniaqoeou de nettoyant pour verre
cuisson- conteoant de/'ammoniaqoe, important: Prenezcontactavec on r_parateoragr_ si la surface en vitroc_ramiqoe
Vitroc_ramique se fissore, se ca._e ou si de I'alominiomou do m_tal fond sot/a surface.
* Laissezlatable de cuissonrefroidir avantde lanettoyer.
, G_a_ralit_s - Nettoyezla tablede cuissonapr_schaqueemploiou aubesoin,_ I'aided'un papieressuie-touthumideet
de la cr_mede nettoyagepourtable de cuisson*(pieceno20000001)*_.Puis,polissezavecun lingosecet propre.
important: Desmarquespermanentesapparaftrontsi vouslaissezla salet_rest_esurla surfacedecuissoncuirede
fa_onr_p_t_e.
, Salet_ irnportante ou marquesde rn_tal - Humidifiezunec!ponge_ rGcurer<{ne rayantpas>>.Appliquez
de la cr_mede nettoyagepourtable de cuisson*et frottezpour retirerautant desalet6 quepossible.Appliquezune
mincecouchede cr_me,recouvrezavecdu papieressuie-touthumideet laissezreposerpendant30 a 45 minutes [2
3 heurespour unesouilluretenace).Gardezhumideen recouvrantressuie-toutd'une pelliculeplastique. Frottez
nouveau,puis polissezavecun lingopropreet sec.
important: N'utilisezqu'untampon_r_curer_ne rayantpas,_,PROPREet HUMIDE,sansdangerpourlosustensilesde cuisine
rev#tementantiadh#sifLeverreet le motif semntendommag#sdle tamponn'estpas humide,s'il estsouill#ou si unautre
typede tamponestutilis#.
° Salet_s cuites ou dess_chees - Frottezavecun tampon_ rGcurer{{ nerayantpas >>et une cr_mede nettoyagepour
table de cuisson*.
important: Utilisezungrattoir _lamede rasoir_ unanglede 30° et grattezpour enlevertoutesalet#restante.Puis,
nettoyezcomme il est d_critci-dessus.Alevousservezpasdela lamederasoirtous lesjourspour nepas userle
motif du verre.
, Plastiqueou sucre fondu - R_glezimmc!diatementI'c!lc!mentsur LOW [Bas)et grattezlesucre et le
plastiquede la surfacechaudepour los61oignerversunezoneplusfroide.I_fEIGNEZensuiteI'_!l_ment
et laissez-lerefroidir.Nettoyezle r_!siduavecun grattoir_ lamede rasoiret une cr_mede nettoyage
pourtable de cuisson*.
Hubiot • Evitezd'utilisertrop d'eau,car elle risqueraitdes'infiltrersousou derriereleverre,causantainsi destachessur le hublot.
et porte - • Lavez_ I'eauet ausavon.Rincez_ I'eauclaireet s_chez. Un nettoyantpourverrepeut_tre utilis_ si vousle pulv_!risez
Verre d'abordsur un chiffon.
° N'utilisez pasde produits abrasifscommelostamponsa r_!curer,la lained'acierou les nettoyantsen poudrequi
peuventrayerleverre.
Int_rieurdu four ° Suivezles instructionspr_!sent_esauxpages41-42 pour rautonettoyagedu four.
Grillesdufour . Nettoyeza reausavonneuse.
° Eliminezlossalet_!stenacesavecune poudrede nettoyageou un tampon) r_curersavonneux.Rincezet s_!chez.
. Losgrillesse d_colorentet glissentdifficilementsi ellessontlaiss_esdartsle four pendantle cycled'autonettoyage.
Sicolase produit,enduisezle borddesgrilleset leurssupportsavec un peu d'huilev_!g_talepourleurpermettrede glisser
nouveau,puisessuyezrexc_s.
Acier inoxydable ° N'UTILISEZPASDE PBODUITSDE NETTOYAGECONTENANTUN AGENTDE BLANCHIMENTCHLORE.
[certainsmod_les_ • N'UTILISEZPASDE NETTOYANTSABRASIFSOUA BASED'ORANGE.
° ESSUYEZTOUJOUBSDANS LESENSDU GRAINPENDANTLENETTOYAGE.
, Nettoyagejournalier/saiet_ I_g_re -- Nettoyeza I'aideun lingodouxou d'une _!pongeet un des produitssuivants: eau
savonneuse,m_langevinaigreblanc/eau,nettoyantpour verreet surfaceFormula409*ou un produitsemblablepourverre.
Rincezets_chez.Pourpoliretaidera pr_!venirlestracesde doigts,appliquezStainlessSteelMagicSpray*[piecen° 20000008]**.
. Salet_ rnod_r_e/irnportante--Nettoyez _ I'aided'un lingodoux ou d'une _ponge humideet I'un desproduitssuivants:
BonAmi, SmartCleanserouSoft Scrub*. Rincezet s_!chez.Lostaches rebellespeuvent_tre enlev_!esen frottant dans le
sonsdugrainavecuntampontout usageScotch-Brite*humide.Rincezets_chez.Pourretirerlosmarqueset redonnerdulustre,
terminezle nettoyageavecleproduit pour acierinoxydableMagic Spray*.
. D_coloration -- Avecun chiffondouxou une_!pongehumide,appliquezlenettoyantpour acier inoxydableCameo*.Rincez
imm_!diatementets_chez.Pourretirerlos marqueset redonnordu lustre,terminezle nettoyageavecle vaporisateurpouracier
inoxydableMagicSpray*.
Losnomsde marquedes produitsde nettoyagesont des marquesd_!pos_esdes diff_rents fabricants.
** Pourcommanderdirectement,composezle 1-800-JENNAIR(1-800-536-6247).
÷
43
8113P527-60 44 _ 12/6/05, 8:06 AM
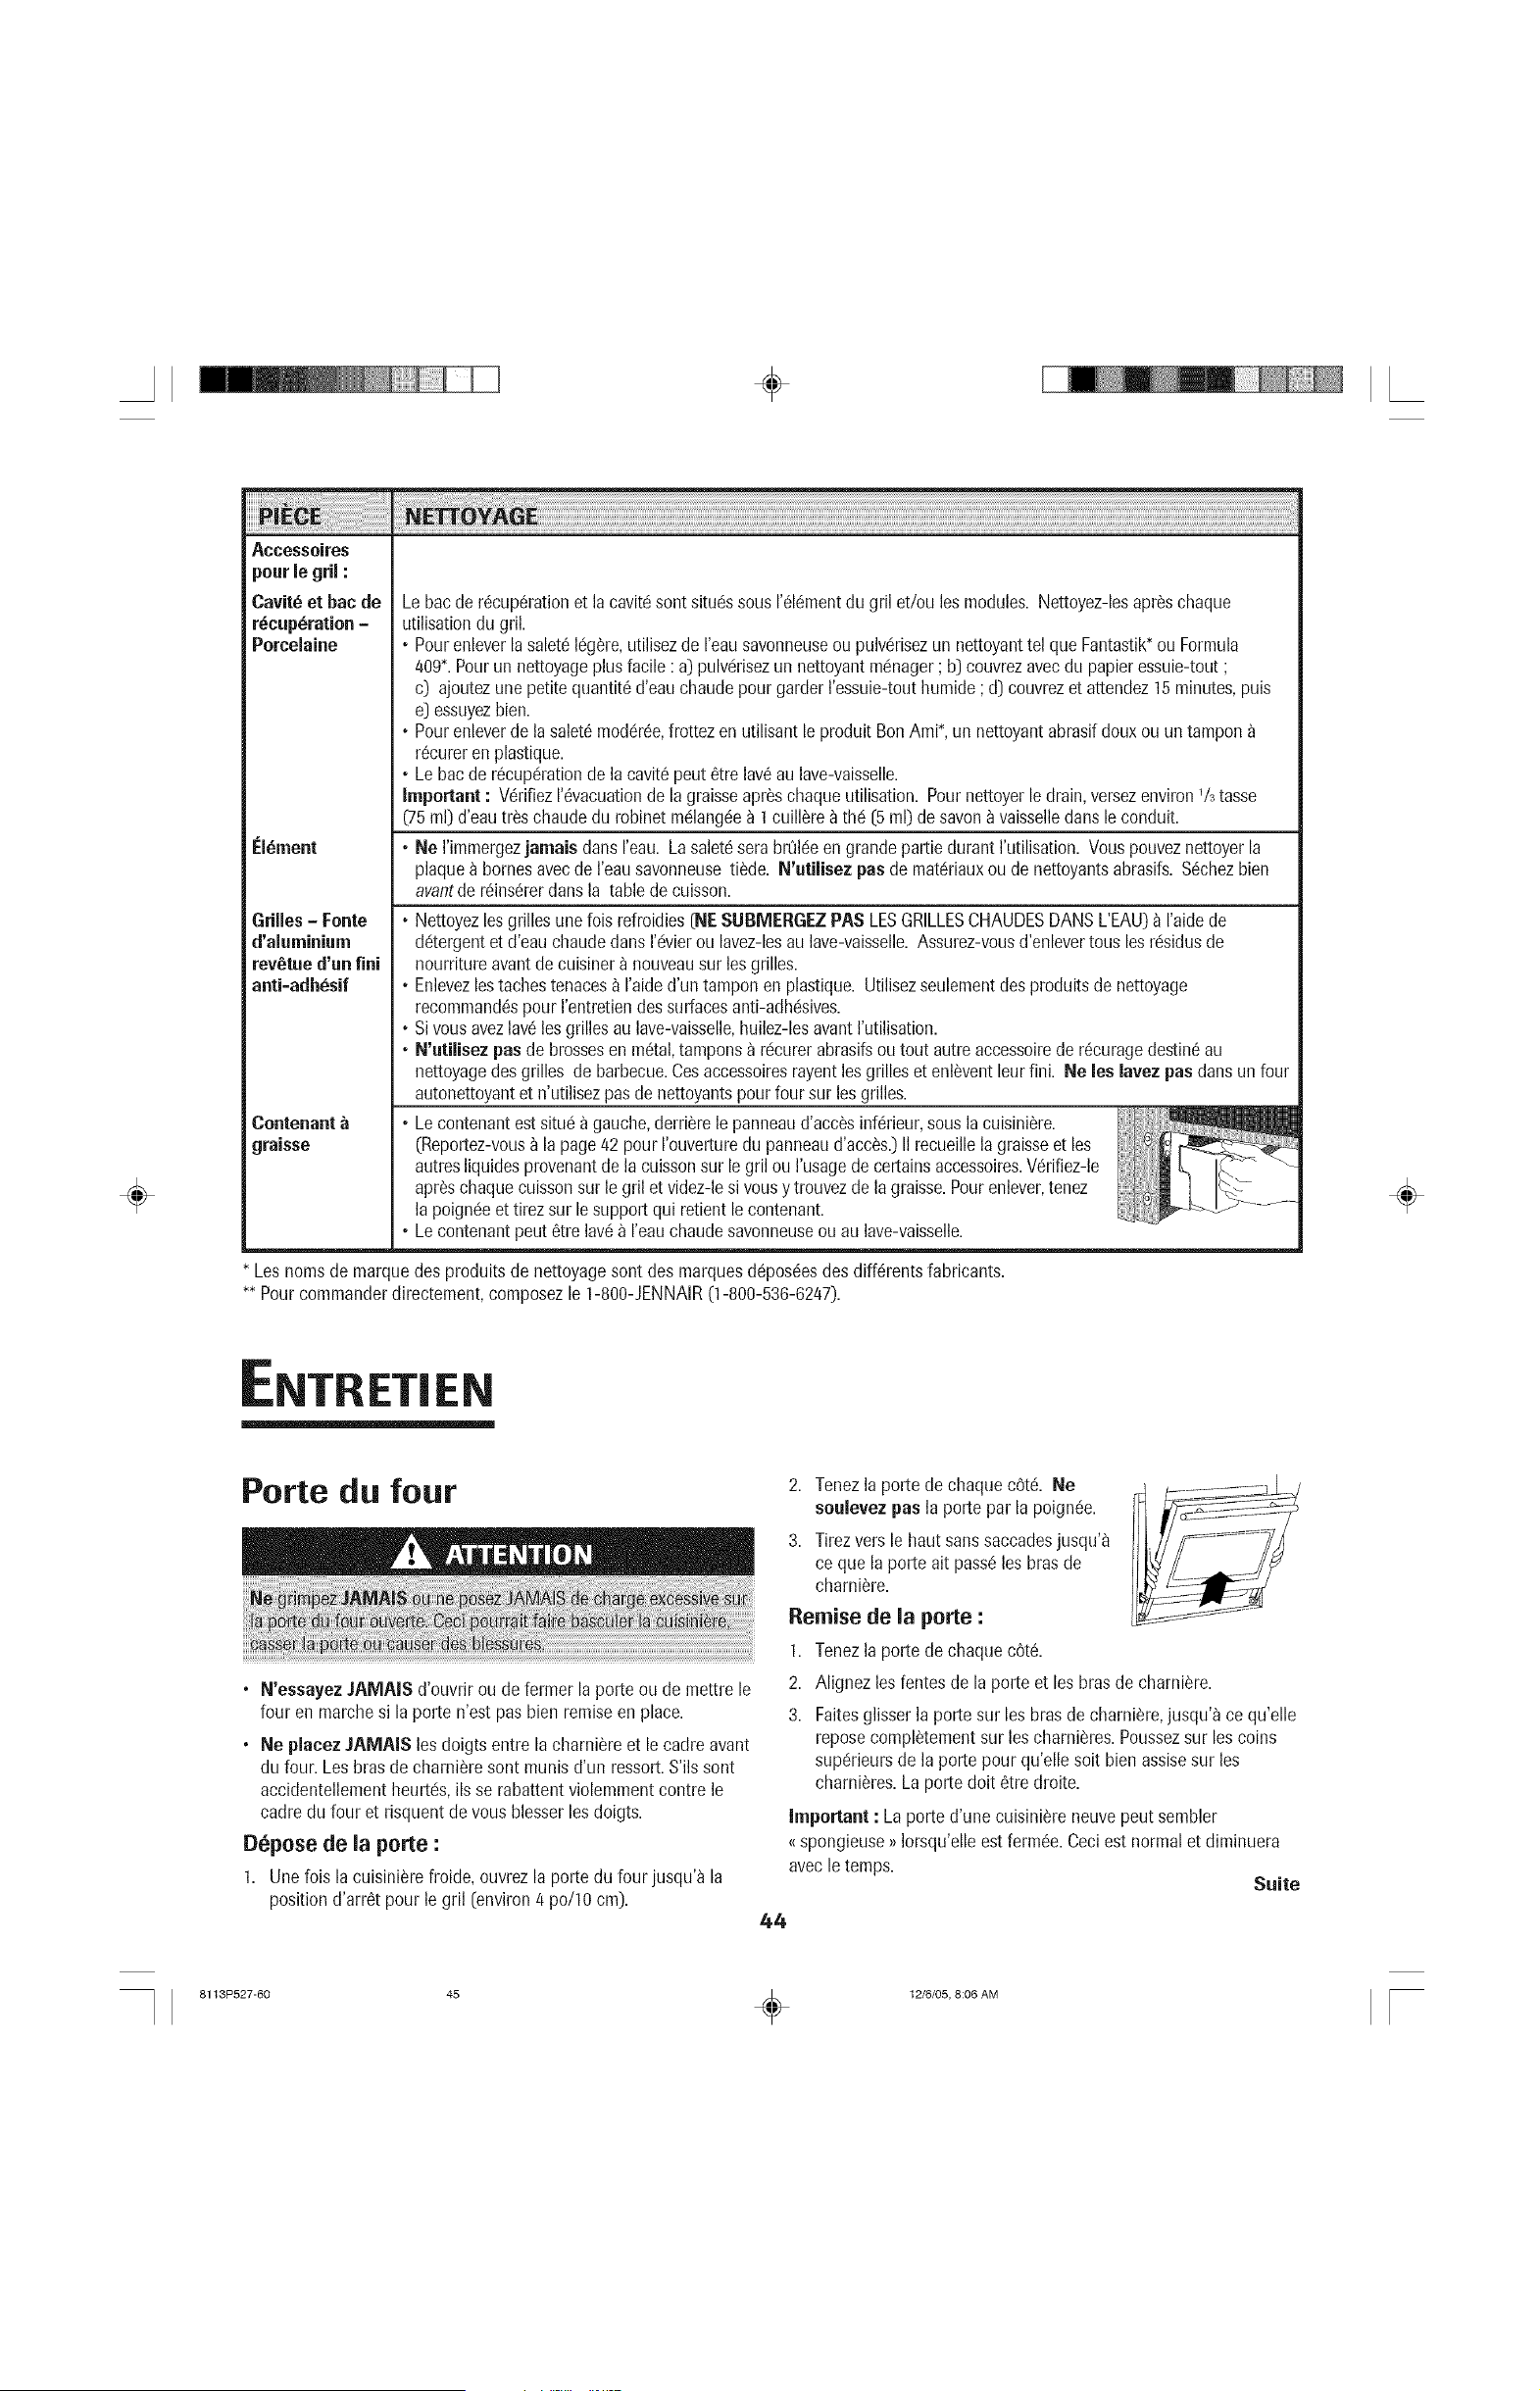
÷
÷
Accessoires
pourle gril :
Cavit6et bac de
r6cup_ration-
Porcelaine
Element
Grilles- Fonte
d'aluminium
rev_tued'un fini
anti=adh_sif
Contenant
graisse
Le bacde r6cup6rationet la cavit6sontsituc!ssous1'61_mentdu gril et/ou les modules. Nettoyez-lesap@schaque
utilisationdu gril.
• Pourenleverla salet616g_re,utilisezde reau savonneuseoupulv6risezun nettoyanttel que Fantastik*ou Formula
409*.Pourun nettoyageplus facile: a) pulv6risezun nettoyantm6nager; b) couvrezavecdu papieressuie-tout;
c) ajoutezune petitequantit6d'eau chaudepour garderI'essuie-touthumide; d) couvrezet attendez15 minutes,puis
e) essuyezbien.
• Pourenleverde lasalet6modc!@e,frottez enutilisant le produit BonAmi*, un nettoyantabrasifdouxou untampon
@cureren plastique.
• Lebac de r6cupc!rationde la cavit6peut6tre lav_au lave-vaisselle.
Important : V6rifiez1'6vacuationde la graisseap@schaqueutilisation. Pournettoyerle drain,versezenviron% tasse
(75ml) d'eau t@schaudedu robinetmc!lang6ea I cuill_re_thc!(5 ml) de savon_ vaisselledunsle conduit.
• Ne I'immergezjamais dunsI'eau. Lasalet6serabr@6eengrandepartiedurant I'utilisation.Vouspouveznettoyerla
plaquea bornesavecde I'eausavonneusetilde. N'utilisez pus demat_riauxou denettoyantsabrasifs.S6chezbien
avantde@ins6rerduns la tablede cuisson.
• Nettoyezlesgrillesune fois refroidies(N[ SUBMERGEZPAS LESGRILLESCHAUDESDANSL'EAU)_ raidede
dc!tergentet d'eauchaudeduns rc!vierou lavez-lesau lave-vaisselle.Assurez-vousd'enlevertousles rc!sidusde
nourritureavantdecuisiner a nouveausur les grilles.
• Enlevezlestachestenaces_ I'aided'untampon en plastique. Utilisezseulementdesproduitsde nettoyage
recommand6spour I'entretiendessurfacesanti-adhc!sives.
• Sivous avezlav6lesgrilles aulave-vaisselle,huilez-lesavantI'utilisation.
• N'utilisezpusde brossesen m6tal,tamponsa r_!curerabrasifsou tout autreaccessoirede @curagedestin_au
nettoyagedes grilles de barbecue.Cesaccessoiresrayentles grilleset enl_ventleur fini. Ne les lavez pus dunsun four
autonettoyantet n'utilisezpus denettoyantspourfour sur lesgrilles.
• Lecontenantest situ6 a gauche,derrierele panneaud'acc_sinf_rieur,sousla cuisini_re.
(Reportez-vous_ la page42 pour I'ouverturedu panneaud'acc_s.)II recueillela graisseet les
autresliquidesprovenantdela cuissonsur legril ou I'usagede certainsaccessoires.V6rifiez-le
ap@schaquecuissonsur legril et videz-lesi vous y trouvezde la graisse.Pourenlever,tenez
lapoign6eet tirezsur le supportqui retientlecontenant.
• Lecontenantpeut _tre lav__ I'eauchaudesavonneuseou au lave-vaisselle.
Lesnomsde marquedes produitsde nettoyagesont des marquesd@os6esdes diff6rentslubricants.
** Pourcommanderdirectement,composezle 1-800-JENNAIR(1-800-536-6247).
÷
NTRET|EN
Porte du four
• N'essayezJAMAIS d'ouvrir ou defermer la porte ou de mettre le
four en marchesi la porte n'est pas bien remiseen place.
• Ne plaeez JAMAIS les doigts entre la charni_reet lecadre avant
du four. Lesbras decharni_resont munis d'un ressort.S'ilssont
accidentellementheurt_!s,ils se rabattentviolemmentcontre le
cadredu four et risquentdevous blesserles doigts.
D6pose de la porte :
1. Une fois la cuisini6refroide, ouvrezla porte du four jusqu'a la
positiond'ar@tpour le gril (environ/4po/10 cm).
2. Tenezla porte de chaque cot& Ne
soulevez pusla porte par la poign_e.
3. Tirezversle haut sanssaccadesjusqu'_
ce que la porte ait pass_les brasde
charni_re.
Remise de la porte :
1. Tenezla porte dechaque c6t6.
2. Alignezles fentes de la porte et les bras de charniSre.
3. Faitesglisserla porte sur les brasde charni_re,jusqu%ce qu'elle
reposecompl_tementsur les charni_res.Poussezsur lescoins
sup_!rieursde la porte pour qu'elle soit bienassisesur les
charniSres.La portedoit _tre droite.
important : Laporte d'une cuisini_reneuvepeut sembler
{{spongieuse>>Iorsqu'elleest fermSe.Ceciest normalet diminuera
avecle temps.
Suite
44
8113P527-60 45 _ 12/6/05, 8:06 AM
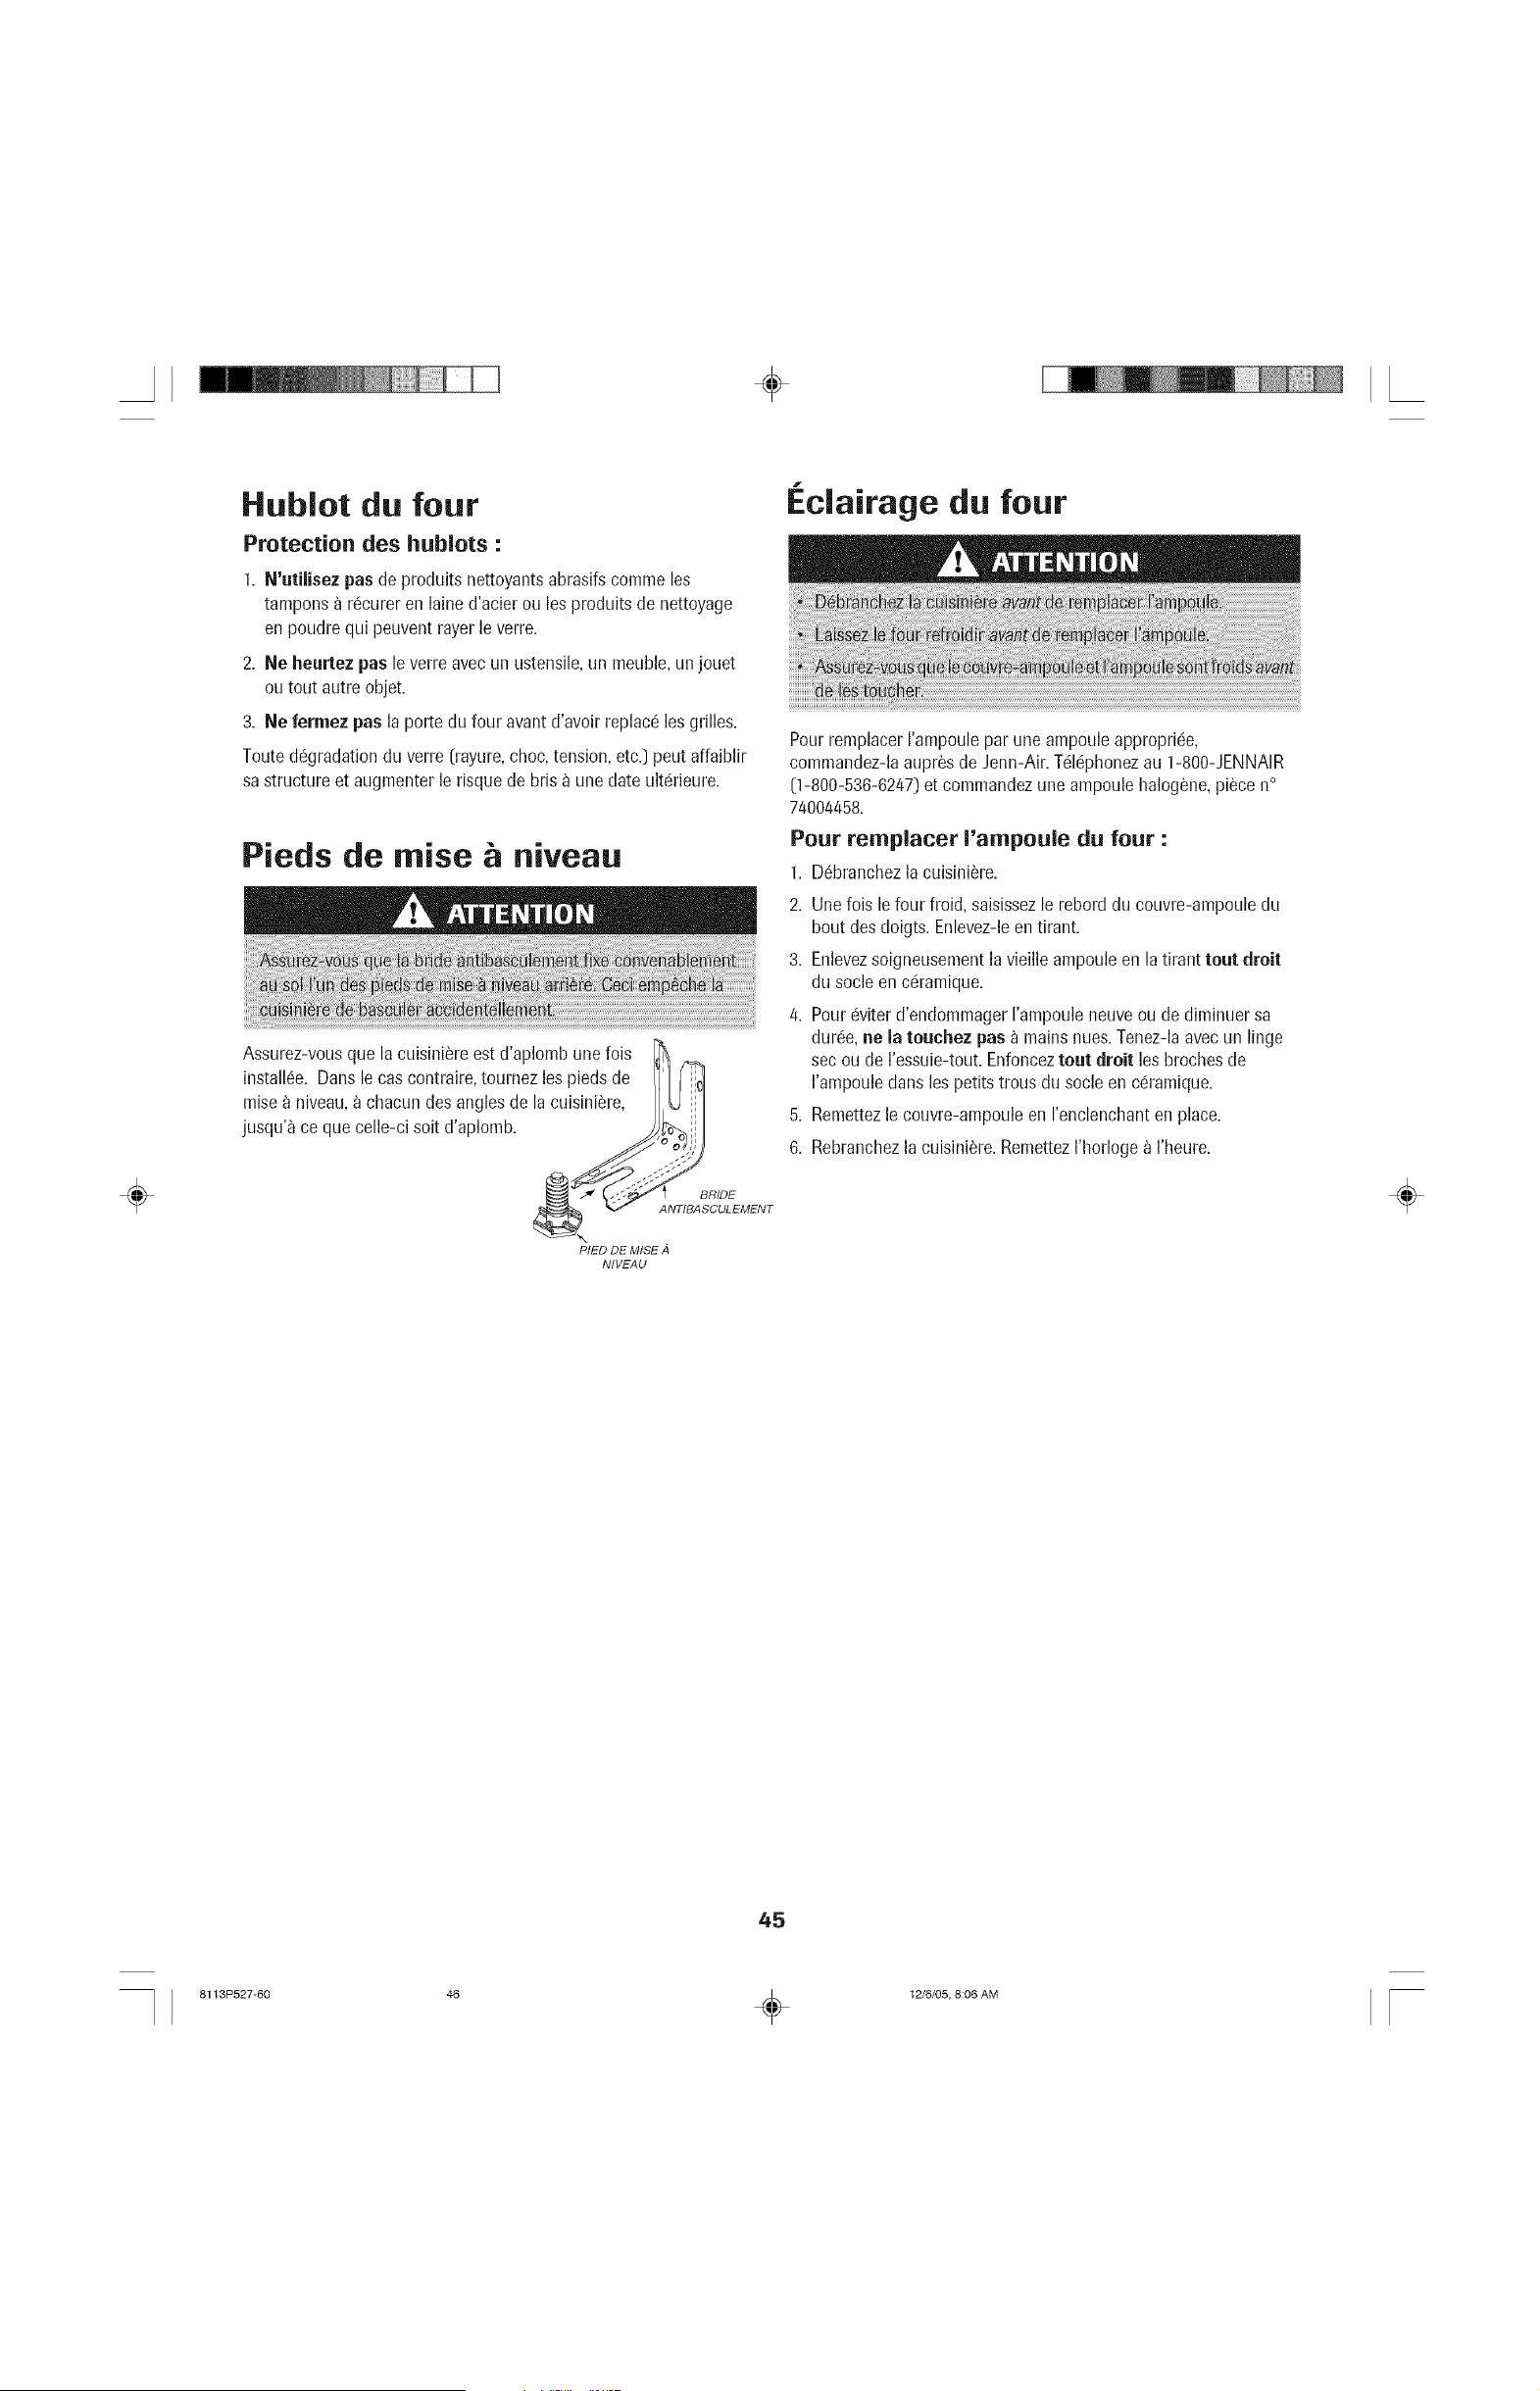
÷
÷
Hublot du four
Protection des hublots :
1. N'utilisez pas de produits nettoyantsabrasifscomme les
tamponsa rc!cureren lained'acierou losproduits de nettoyage
en poudre qui peuventrayerle verre.
2. Ne heurtez pas le verreavecun ustensile,un meuble,unjouet
ou tout autre objet.
3. Ne fermez pas la porte du four avantd'avoir replacc!lesgrilles.
Toutede!gradationdu verre (rayure,choc,tension,etc.) pout affaiblir
sastructure et augmenter le risquede bris_ unedate ult6rieure.
Plods de raise & niveau
Assurez-vousque la cuisini_reest d'aplombune lois
install6e. Danslecas contralto,tournez lospieds de
misea niveau,a chacun desangles de la cuisiniSre,
jusqu'_ ceque celle-ci soit d'aplomb.
&_ BRIDE
ANTIBASCULEMENT
PIED DE MISE
NIVEAU
i clairage du four
PourremplacerI'ampoulepar une ampouleappropri6e,
commandez-laaupr_sde Jenn-Air.Tc!16phonezau 1-800-JENNAIR
[1-800-536-6247)et commandezune ampoulehalog_ne,piScen°
74004458.
Pour remplacer I'ampoule du four :
1. D6branchezla cuisini_re.
2. Unelois lefour froid, saisissezle rebord du couvre-ampouledu
bout desdoigts. Enlevez-leen tirant.
3. Enlevezsoigneusementlavieille ampouleen la tirant tout droit
du socle en cc!ramique.
4. Pourc!viterd'endommagerI'ampouleneuveou de diminuer sa
dur_e,ne la touchez pas a mainshues.Tenez-laavecun lingo
secou de I'essuie-tout.Enfonceztout droit los brochesde
I'ampouledans los petitstrous du socle en cc!ramique.
5. Remettezle couvre-ampouleen I'enclenchanten place.
6. Rebranchezla cuisini_re.RemettezI'horloge_ I'heure.
÷
45
8113P527-60 46 _ 12/6/05, 8:06 AM
÷
f
EPANNAGE
÷
Pourla plupartdes problbmes • Vc!rifiezque lescommandesdu four sont correctementrc!gl6es.
observes, essayez d'abord ce qui suit. , V6rifiezsi la fiche est bienbranch6esur la prise.
Inspectez/r_armezledisjoncteur. Inspectez/remplacezle fusible.
, Vc!rifiezlasource d'alimentation_lectrique.
Une partie ou la totaiit_ de la • Vc!rifiezsi lasurfaceet/ou lescommandosdu four sont bien rc!gl6es.Voyezlespages48 et 55.
cuisini_rene fonctionne pas. • V6rifiezsi la porte du four estd6verrouill6eapr_s un autonettoyage.Voyezla page 42.
• Vc!rifiezsile fourest rc!gl6pourunecuissondiffc!rc!eoupour unautonettoyage.Voyezlospages
55et 41.
• Vc!rifiezsile verrouillagedescommandosestactive.Voyezla page54.
° Vc!rifiezsi la commandoesten modesabbat.Voyezla page 67.
L'horioge,I'afficheur et/ou Lefour peut 6tre programm_pour une fonction diff6r6eou de cuissonet maintien.
les lampes fonctionnent, mais le four Leverrouillagedescommandesestpeut-6tre activ6.Voyezla page54.
ne chauffe pas.
Losr_sultats de la cuisson D6terminezsi I'_ventdu four est obstru_. Voyezlapage 59pour son emplacement.
differentde ceux du • Assurez-vousque lacuisini_re est d'aplomb.
four precedent. Losrc!glagesdetempc!raturevarientsouvententre unfour neuf et le four qu'il remplace.Avec
I'_gedesfours,latemp6ratureestsouventd6cal6eetdevientpluschaudeouplusfroide.Voyez
la page 67pour obtenir los instructionssur le rc!glagede latemp(!raturedu four.
Important : II n'est pus recommand6de r6gler latempc!raturesi un problSmese manifesto
avecune ou deux recettesseulement.
Lesaliments ne griflent pus • Vc!rifiezla positiondes grilles. L'alimentest peut-6tretrop pros de I'c!lc!ment.
correctementou produisent L'61c!mentdu gril n'a pus 6tc!pr6chauffc!.
trop de fum_e. Lepapierd'aluminiuma €!t6realutilis6.Ne garnissez jamais la grillede laI_chefriteavecdu
papierd'aluminium.
Laporte du four 6tait ferm6edurant la cuissonau gril. Laissezlaporte ouvertejusqu'_ la
premiSrebut6e [environ4 pc/10 cm).
EnlevezI'exc_sde graissesur la piece deviande avantla cuissonau gril.
Une I_chefritesalea 6t_ utilis_e.
Latension _!lectriquede la maisonest peut-_tre basse.
L'autonettoyagene se fair pas. D_terminezsi I'appareila _!t_programm_!pour un autonettoyagediff_!r_!.Voyezla page/41.
, V_!rifiezque la porte estferrule.
• V_!rifiezsi la commandoesten modesabbat.Voyezla page 67.
Lefour est pout_tre _ une temperaturesup_rieurea400° F (204° C).Latemperaturedu four
dolt _tre inf_!rieure_ 400° F (204° C) pour pouvoirprogrammerun cycled'autonettoyage.
Le four nese nettoie pas Un tempsde nettoyageplus long pout _tre n(!cessaire.
correctement. • Avant I'op_rationd'autonettoyage,vousn'avezpus_!limin_les accumulationsexcessivesde
r_!sidus,particuli_rementlos r_sidusd'alimentsacidesou sucres.
La portedu four nese d_verrouille L'int(_rieurdu fourestencorechaud. Laissezlefour refroidir pendantenvironuneheureapr_s
pas apr_sle cycle d'autonettoyage, un cycled'autonettoyage.II estpossibled'ouvrir la porte Iorsquele messageLOCK
[Verrouillage)n'est plus affich(!.
Lacommandoet la porte sont peut-_tre verrouill_!es.Voyezla page54.
II n'y a pas de hips et Lefour pout _tre en modesabbat.Voyezla page 67.
I'afficheur ne fonctionne pas.
Suite
46
÷
8113P527-60 47 _ 12/6/05, 8:06 AM
÷
÷
m
La surfaceen vitroc6ramique
r6v_le des signesd'usure.
De rhumidit6 se d6posesur le
hublotou de la vapeurs'6chappe
de r6vent.
Odeurforte ou fum6e 16g_re
la raiseen marche dufour.
L'_16mentchauffantdu grilou
la table de cuissonne produisent
pas suffisammentde chaieur.
Le syst_mede ventilationne
capte pas la fum6e efficacement.
Codesd anomalie
Des bruits se font entsndre.
SAbclignotepuis,
s'affichecontinuellement.
1. Finesrayuresou abrasions.
, Assurez-vousquelasurfacede cuissonet lefond des ustensilessont propres.Ne faites pas
glisserd'ustensilesen verreou en m6talsur la surface.Assurez-vousque le fond desustensiles
n'estpas rugueux.Utilisezlesproduits de nettoyagerecommand_s.Voyezla page43.
2. Marquesde m6tal.
, Ne faites pusglisserd'ustensilesm_talliquessur la surface. Apr_sle refroidissement,nettoyezla
surfaceavecde la cr_mede nettoyagepour table de cuisson.Voyezla page43.
3. Petitesmarqueset tracesmarron.
, Enlevezrapidementles produitsrenvers_s.N'essuyezjamais la surfaceavec une6pongeou un
lingesales.Assurez-vousque lasurfacede cuissonet le fond des ustensilessont propres.
4. Zonesa reflet m6tallique.
, D_p0tsminc!rauxenprovenancede I'eauet de la nourriture.Utilisezlesagentsde nettoyage
recommand6s.Voyezla page43.
5. Ecaillageet piq0resde corrosion.
° Enlevezrapidementles produitssucresqui ont d_!bord_.Voyezla page43.
• Ceciest normalavecdesalimentsa teneur_!lev_!een humiditY.
, Lenettoyagedu hublot a produittrop d'humidit_!.
, Ceciest normalpourunecuisini_reneuveet disparaitapr6squelquesutilisations. Un
autonettoyage_!limineralesodeursplus rapidement.
, Lamise enmarched'un ventilateurd'extractionaide _ enleverfum_eet odeur.
• Salet_importantesur lasole. Ex_cutezuneop6rationd'autonettoyage.
• Lescommandesdes _k!mentsde surfacenesont pas r_gl_escorrectement.
• La tensionqui alimente lamaisonpeut _trefaible.
• V_rifiezla ventilationcrois_edeI'air de lapieceou rair de renouvellement.
• Productionexcessivede fum_e.Lisezles instructionsconcernantla cuissonau gril et la coupe
desviandes.Voyezlapage50.
Leclapet de la bouched'a_rationmuraleest peut_tre coinc_!.
, Latable de cuissonpeut _treincorrectementinstall_e.V_!rifiezles informationssur lesconduits.
Voyezla page40.
, Lefiltre _ air peut _tre mal installS.Voyezla page51.
° Lefour peut d_!celeruneanomalieIors dela programmationou du fonctionnement.Encas
d'anomalie,le messageDEFAUTDETECTE- APPUYEZENTERPOURREESSAYERpeuvent
apparaitre.Suivrelesindicationsde I'affichage.Siranomalier_apparaitou ne s'effacepas,appeler
un r_!parateuragr_! ou composerlenum_!rosansfraisde rafficheur.
, Sila m_meoperationest essay_!eavantque lefour nesoit r6par_,lemessageCARACTERISTIO,UE
NONDISPONIBLE- APPUYEZAIDE paraitra.Lacaract_ristiqueseradartsrincapacit6de
fonctionnertant que lar_parationn'aura pas_t_ effectu_e.
° Sile four esttr_s sale,lesflamm_chespeuventproduireun coded'anomalieau coursdu cycle
d'autonettoyage.AppuyersurCANCEL[Annule0 et laisserlefour refroidircompletement,essuyer
lasalet6en exc_spuis reprogrammerI'autonettoyage.Sile coded'anomalier_!apparait,prendre
contactavecun r_!parateuragr6_!.
• Lefour peut faire diff,!rentsbruits I_!gers.Vouspouvezentendreles relaisfonctionneret s'arr_ter.
Ceciest normal.
, Lachaleurdansle four,puis le refroidissement,peuventproduiredes bruitsde contractionou de
dilatationdu mStal.Ceciest normalet n'endommagepasI'appareil.
Lefour est enmodesabbat.Pourannuler,appuyezsur latouche Setup (R_glage)pendantcinq
secondes.
÷
47
8113P527-60 48 _ 12/6/05, 8:06 AM

÷
CU N R LA RFACE
÷
Commandes de la table
de cuisson
Utilisezces boutonspour commander
I'allumagedes61c!mentsde surface.
Chaquebouton poss_deun
nombreinfini de r6glagesentre
Low (Bas)et High (Elevc!).Vous
pouvezrc!glerun bouton
n'importe quellepositionsitu6e
entre cesdeux extr6mes. A B
]©
R glage des commandes
1. PlacezI'ustensilesur I'c!l_ment.
2. Enfoncezet faitestourner le bouton jusqu'_ la positiond_sirc!e
(rotationdansun sensou dartsI'autre).
• Des marquessur le tableaude commandeidentifient 1'616merit
command_parchaque bouton. Parexemple,le L
graphique_ droite indique I'c!16mentavantdroit. IOFront
3. Voustrouverezun t6moin lumineuxde
fonctionnementde I'c!l_mentsur letableau de commande.
Lorsque I'undes boutons de commanded'un c!16mentde surface
est en marche,le t6moins'ilhmine. Letc!moins'6teint Iorsque
tousles _lc!mentsnefonctionnentpas.
Lorsqu'unecommandeest raiseen marche,vous pouvezvoir un
rougeoiement_ traversla surfaceen vitroc6ramique.L'616ment
fonctionnera parintermittencepour maintenir le rc!glagede
chaleur pr6c!tabli,m6meat] niveauHigh.
4. Apr_s la cuisson,tournez le bouton _ la positionOFF (Arr6t).
RetirezI'ustensile.
R_glage des commandes pour le grille :
BoutonA - Ventilateurd'extractionseulement.Lebouton ne
commandepas I'_lementde gril.
Bouton B - Ventilateurd'extractionet 616mentdegril.
R_glage des commandespour les modules :
BoutonA - I_l_mentavantgauche.
Bouton B - I_l_mentarri_regauche.
48
Suggestions de r6glage
Vousdevezchoisir le rc!glageen fonction de la taille et du type
d'ustensile_ utiliser,ainsi que lacuisson a effectuer.
I
High (9) : Utilisezce r_glagepour [
I'c!bullitiond'un liquide.R(gduisezensuite
la puissancede chauffageapr_sle [
d6but de I'cgbullitionou de lacuisson I
des aliments.
ivied.High
(Mioyen/_levd)
(7) : Utilisez ce
r6glagepour
rissolerles
viandes,
chauffer I'huile
[grandefriture
ou aliments
saut6s)et
maintenir
I'c!bullition
rapided'une
grandequantitc!
de liquide.
Low (1) : Utilisezce
r_glagepour maintenir
la temp6raturedes
alimentset pour faire
fondre du chocolat ou
du beurre.
ivied.Low
(Mioyen/bas) (3)
: Utilisezpour la
cuisson_ la
vapeurou la
cuissoncontinue
d'un mets dansun
r6cipientcouvert.
Miedium (Mioyen) (5) :
Pourle maintiende
I'cgbullitionlente de
liquidesou pour laplupart
desfritures.
÷
8113P527-60 49 _ 12/6/05, 8:06 AM
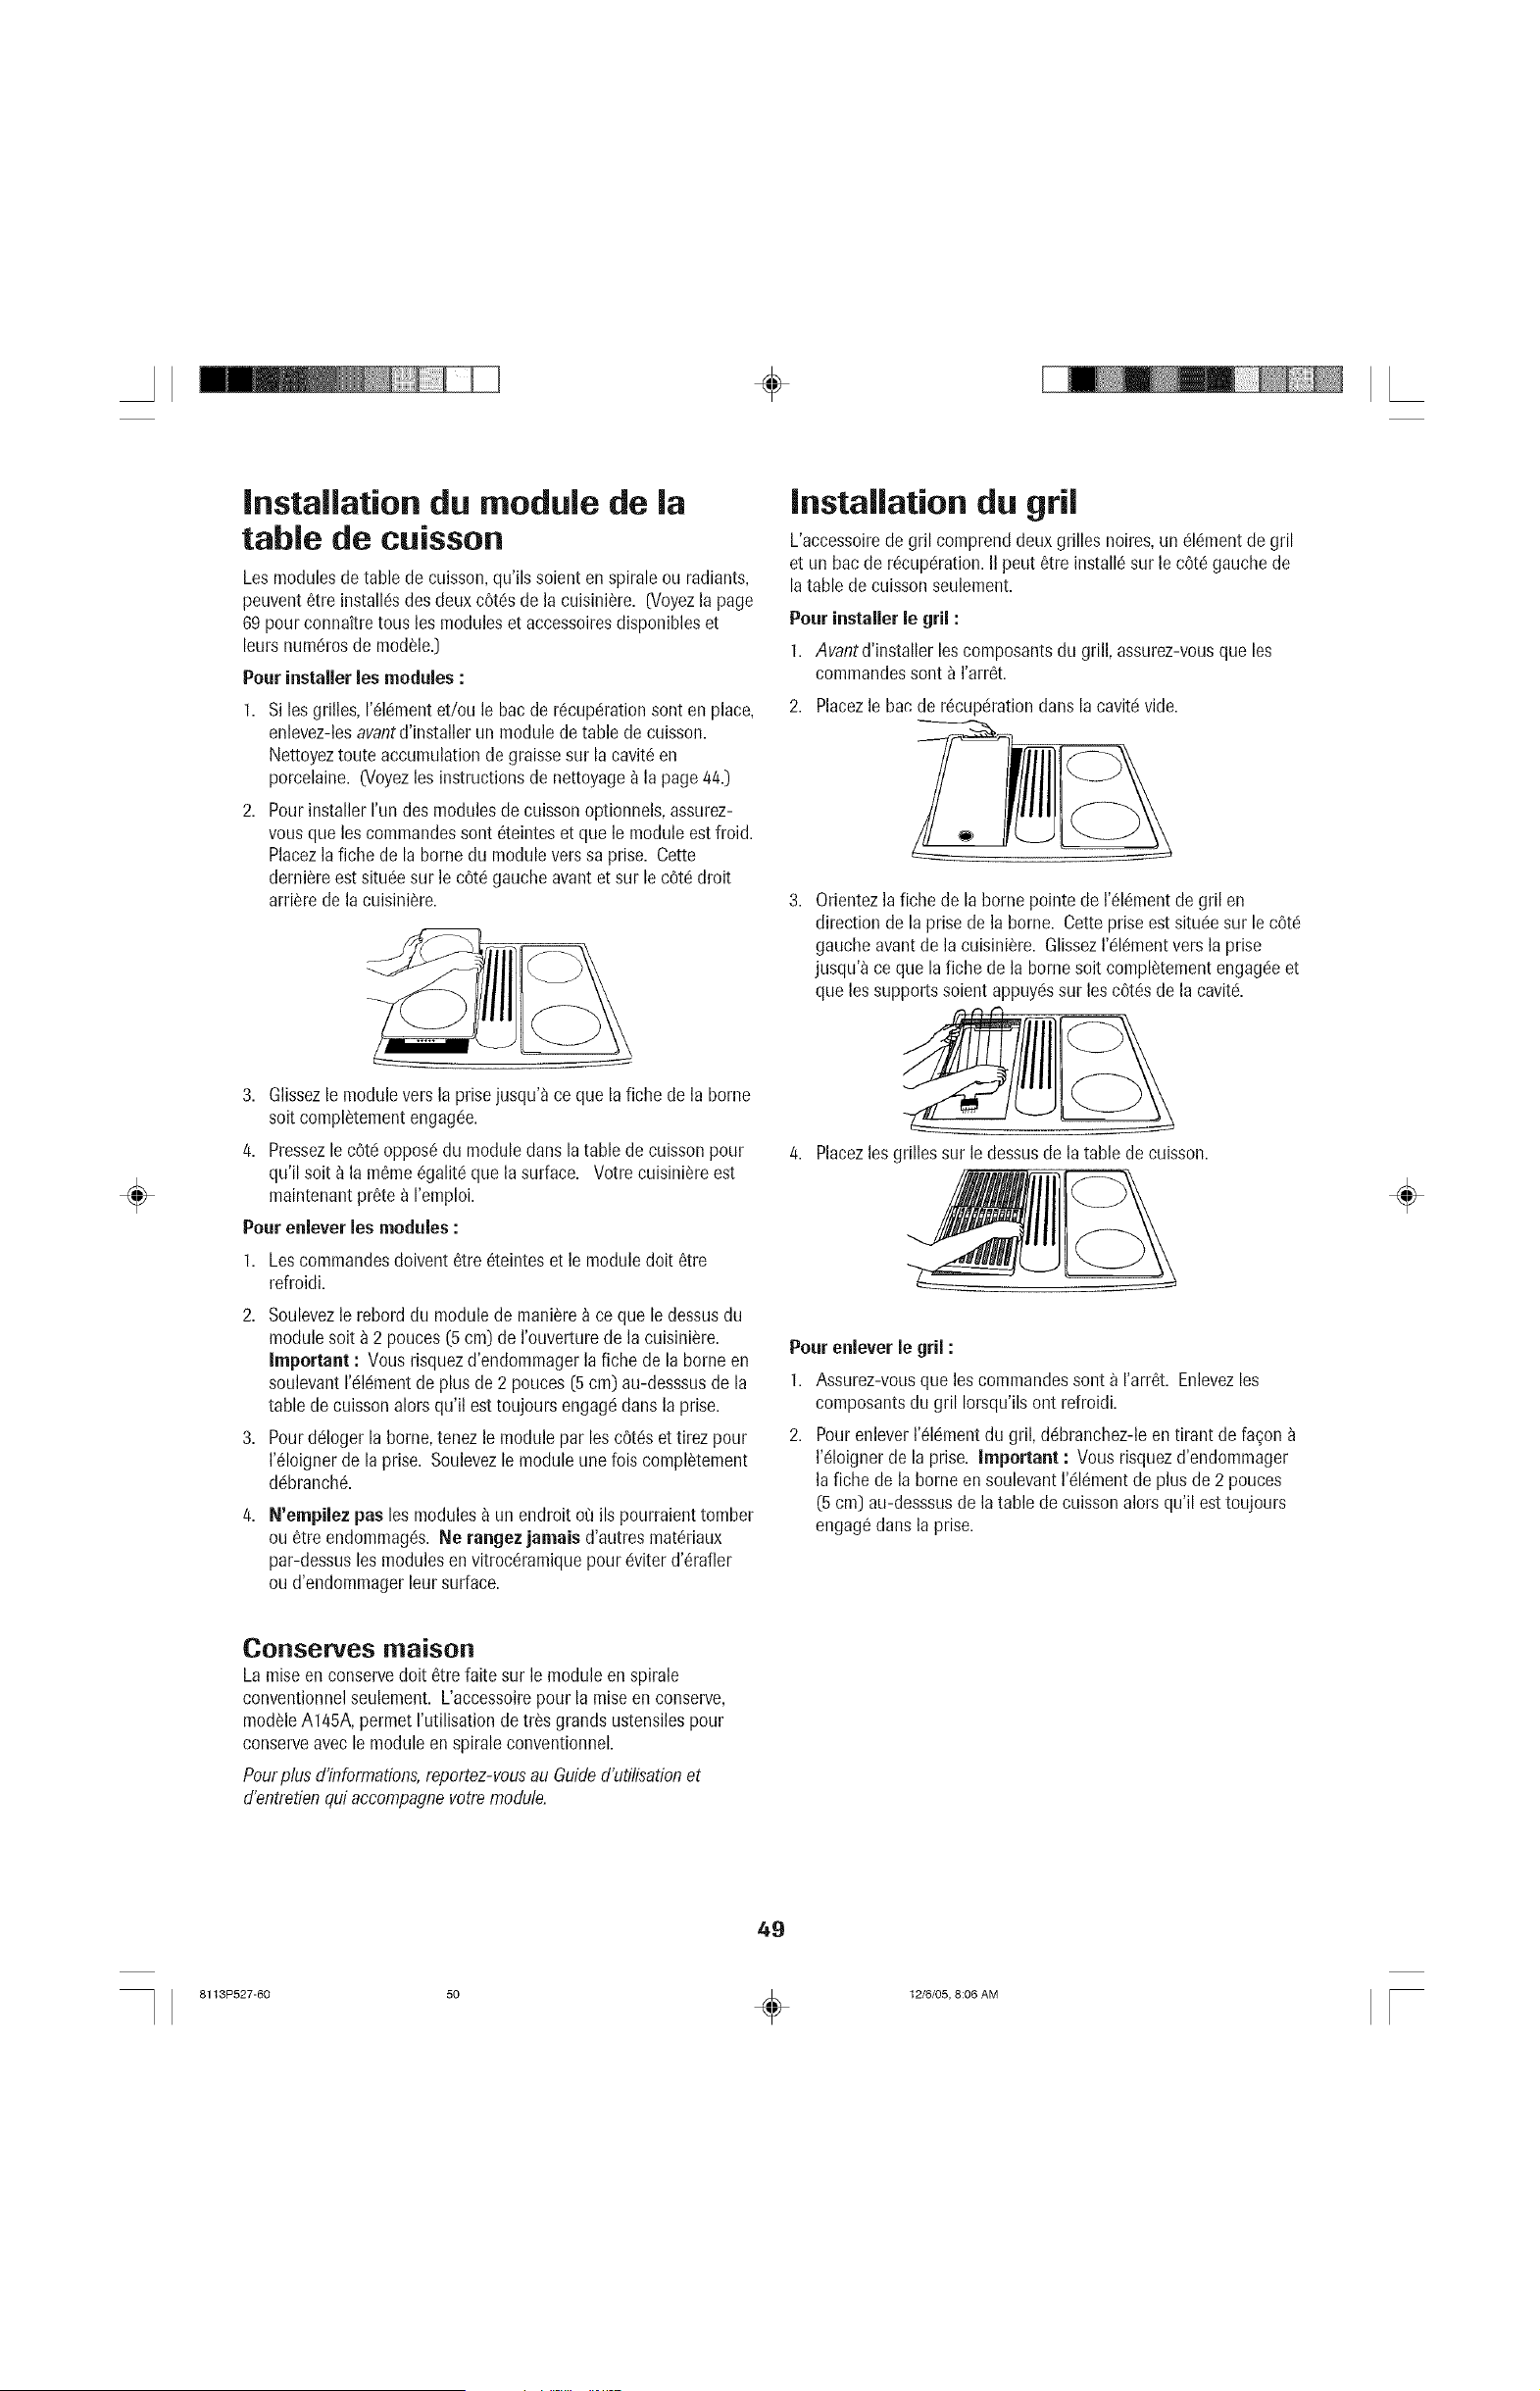
÷
Installation du module de la
table de cuisson
Lesmodulesde table de cuisson,qu'ils soienten spirale ou radiants,
peuvent6tre install6sdes deux cOt_sde la cuisini_re. Noyez la page
69pour connaitretous los modules et accessoiresdisponibleset
leurs numdrosde module.]
Pour installer les modules:
1. Si losgrilles,1'61dmentet/ou le bac de r6cupdrationsont en place,
enlevez-lesavantd'installer un modulede table de cuisson.
Nettoyeztoute accumulationde graissesur la cavit6en
porcelaine. G/oyezlos instructionsde nettoyage_ la page 44.)
2. Pour installerI'un des modulesde cuissonoptionnels,assurez-
vousque loscommandossont _teinteset que le moduleest froid.
Placezlafiche de la borne du modulevers sa prise. Cette
derni_reest situ6esur le c6t6 gaucheavant et sur le c6tc!droit
arriSrede la cuisini_re.
Installation du gril
L'accessoirede gril comprenddeux grilles noires,un 616mentde gril
et un bacde r6cupdration.IIpout 6tre install6sur le c6t6 gauche de
latable de cuisson seulement.
Pour installer le gril :
1. Avantd'installer lescomposantsdu grill, assurez-vousque les
commandossont a I'arr6t.
2. Placezle bande r6cupdrationdans la cavitd vide.
3. Orientezla fiche de la bornepointe de 1'616mentde gril en
direction de laprise de la borne. Cetteprise est situ6esur le c6t6
gaucheavantde la cuisini_re. GlissezI'dl_mentversla prise
jusqu'a ce que lafiche de la bornesoit compl_tementengag6e et
que les supportssoientappuydssur los cOt6sde la cavit6.
÷
3. Glissezle modulevers la prisejusqu'a ceque la fiche de la borne
soit complbtementengagc!e.
4. Pressezle c6t6oppos6 du moduleclansla table de cuissonpour
qu'il soit _ la m6me6galit6que la surface. Votre cuisinibre est
maintenantprate _ I'emploi.
Pour enlever losmodules :
1. Lescommandesdoivent 6tre _teinteset le moduledolt 6tre
refroidi.
2. Soulevezle reborddu modulede mani_re_ ce que le dessusdu
modulesoit _ 2 pouces(5 cm) de I'ouverturede la cuisini_re.
Important : Vous risquezd'endommagerla fiche de la borneen
soulevantI'c!lc!mentde plus de 2 pouces(5 cm) au-desssusde la
table de cuissonalors qu'il esttoujours engag_clansla prise.
3. Pourdc!logerla borne,tenezle modulepar les c6tc!set tirez pour
I'_loignerde la prise. Soulevezle moduleune fois complStement
dc!branch6.
4,
N'empilez pas les modules_ un endroit ou ils pourraienttomber
ou 6tre endommag6s. Ne rangez jamais d'autres mat6riaux
par-dessuslosmodulesen vitroc6ramiquepour @iter d'_rafler
ou d'endommagerleursurface.
4. Placezlosgrilles sur ledessusde la table de cuisson.
Pour enlever le gril :
1. Assurez-vousque los commandessent a I'arr6t. Enlevezles
composantsdu gril Iorsqu'ilsont refroidi.
2. Pourenlever1'61_!mentdu gril, d_branchez-leen tirant de facon
I'_loignerde la prise. Important : Vous risquezd'endommager
la fiche de la borneen soulevantI'_l_mentde plus de 2 pouces
(5cm] au-desssusde la table de cuissonalors qu'il esttoujours
engag_dartsla prise.
÷
CORSeFVeS N_aisoR
Lamiseen conservedolt _tre faite sur le module enspirale
conventionnelseulement. L'accessoirepour la raiseen conserve,
moduleA145A,permet I'utilisationdetr_s grands ustensilespour
conserveavecle moduleen spiraleconventionnel.
Pourplus d'informations,reportez-vousau Guided'utilisationet
d'entretienqui accompagnevotremodule.
49
8113P527-60 50 _ 12/6/05, 8:06 AM
÷
÷
Utilisation du gril
Avantle premieremploi,lavezvos nouvellesgrilles _ I'aided'eau
savonneusechaude, rincezet s6chez. Ensuite,huilezleur surface
en applicant une mincecouched'huile de cuisson. RetirezI'excSs
d'huile _ I'aided'un papieressuie-tout.
R_p_tezcette procedure si :
a)vous lavezlesgrilles au lave-vaisselle,puisquele d6tergent
pourrait enlever I'huile,ou
b)vousutilisez une marinadea basede sucre (parexemple,
de la saucebarbecue).
Pr6chauffezle gril a Nigh (Elevc!)pendant 5 minutes. Le
pr6chauffageamc!liorela savouret I'apparencedesviandes et
saisit rapidementla viande pouraider a retenirsos jus.
Utilisezdesspatulesouustensilesnon m4talliquespour 4viter
d'endommagerle fini anti-adh4sifde la grille.
L'excesde gras des viandesdoit _treretranch4. Unequantit6
normaleestn6cessairepour produirela fum6erequisequi donne
lasavourfum6e de la cuissonen {{plein-air >>.Un ex@sde gras
pout engendrerdes probl_mesde nettoyageet deflammes.
L'utilisationde quantit4sexcessivesde graissepour engendrer
constammentdes flammesannulelagarantiedesgrilles.
Un ex@sde flammesindiqueque le gril int6rieurdolt 6tre
nettoyc!,que la quantit6de graissepr6sentesur la viandeesttrop
grandeou que la viande n'a pas _t6 correctementpr@arc!e.
Losjus de cuissons'enflamment_ I'occasionet produisentdes
petites flamb6essans dangerqui durent uneseconde ou deux.
Cecifait pattiedu d@oulementnormalde lacuisson.Important :
Pourdes renseignementsconcernantle contenant_ graisse,
voyezla page4/4.
NE LAISSEZJAMAIS LEGRIL SANSSURVEILLANCE
LORSQU'ILFONCTiGNNE.
Si la graisseengendre des fiammes continuelles:
1. Allumezleventilateur manuellement.
2. Placezimm_diatementles commandesdu gril a la position
OFF(Arr6t).
3. Retirezla viande du gril.
• N'utilisez pas de papierd'aluminium a /J,_//
,',,t r,eurdo,azonedugr,,
° N'utilisez pas de charbon de boisou de /_H_//'
copeauxdeboisclans,azonedugr,I
°Ne laissezpas la graisses'accumuler __
dans bac de r6cup6rationdu gril. - ...........
Nettoyezfr_quemment.
• Ne couvrez pas toute la surfacedes grilles avecla viande.
Laissezde I'espaceentre chaquemorceaude viande (bifteck,
etc.) pour permettreune ac!rationappropric!eet pour pr@enir
I'apparition deflammes.
Conseils de cuisson sur le gril
• Assurez-vousde suivrelos instructionsd'utilisation du gril.
5O
Lesdurc!esde cuissonet les rcgglagessugg6r6s(voyezla page 51)
sontapproximatifset varient solon les alimentsou la tension
61ectrique.
Pourobtenir los meilleurs rcgsultats,utilisezde la viandede
premierequalit6. Los coupesde viandequi font au moins3/4
pouce (2 cm) d'@aisseur cuisent mieuxsur le gril que los coupes
plus minces.
Retranchezle gras prc!sentsur los rebordsdu bifteck, mais ne
coupezpasdarts la viande,pour @iter que celle-ci nese recourbe
durant la cuisson.
Pourcrcgerlos marquesappc!tissantessur les biftecks, assurez-
vousde prc!chaufferle gril. Grillezun c6t6de la viandea la
cuissond6sir_eoujusqu'_ ceque losjus apparaissent_ la surface,
puis retournez. Retournezlos bifteckset los hambourgeoisun
seulefois. Lamanipulation desalimentsaugmentela porte de
leursjus.
Lorsquevousbadigeonnezlosviandes ou ajoutezdes saucessur
los aliments,retenezque I'exc6dentne fait que s'accumuler
I'int6rieur devotre gril sansam61iorerla savourdes roots.
Ajoutezlossaucesdurant los 15 a 20derni_resminutesde cuisson
ou solon la recette.Aussi,chaquelois quevousd_!sirezutiliserune
marinadea basede sucre (par exemple,la saucebarbecue),los
grilles doivent8tre huil_!esavant le pr_chauffage. [Voyezlasection
Utilisationdugril.)
II existeplusieursmarinadesqui aident _ attendrir los coupesde
viandeplus _conomiquesavantqu'elles ne soientcuites sur le gril.
Certainsaliments,commela volailleet le poissonmaigre, peuvent
n_cessiterun peu degras. Badigeonnez-lesd'huile ou de beurre
fondu a quelquesreprisesdurant la cuissonsur le gril.
Pourretourner la viande,utilisezdes pinces muniesde Iongues
poign_esou unespatule. N'utilisez #as de fourchettescar olios
percentla viandeet causentla porte desjus.
Syst me de ventilation
Lesyst_mede ventilation incorpor_!retire lesvapeursde cuisine,les
odeurset lafum_e _!manantde la nourriture pr@ar_!esur la table de
cuissonet legril.
Ba_e _vur_tes
• Pour mettreen marchele _%;
Setul,
B,o_ _,or
syst_medeventilation
manuellement,appuyezsur la .............
Mo_e
touche Vent Fan [Ventilateur) ,_;_;I........
situ_esur letableau de
commando_lectronique. Appuyezsur la touche unelois pour le
r_gglageLow (Bas],une secondelois pour Itigh et unetroisi6me
foispour arr_ter le ventilateurOff.
° Lesyst_mede ventilationfonctionne auternatJquement Iorsque
I'_l_!mentde gril est utilis_!.
• Le ventilateurpeut _tre utilis_pour _liminer los odeursfortes
provenantde la cuisine,commeIorsquevouscoupezdesoignons.
Entretien et nettoyage du
syst me de ventilation
• Grille d'a_ration : Lagrille d'a@ations'enl_vefacilement.Essuyez-
laou lavez-laau lave-vaisselleou darts I'@ieravec un d_tergent
domestiquedoux.Pour nepas rayer la surface,n'utilisez pas de
nettoyantsabrasifsni de tamponsa r_!curer.
Suite
÷
8113P527-60 51 _ 12/6/05, 8:06 AM
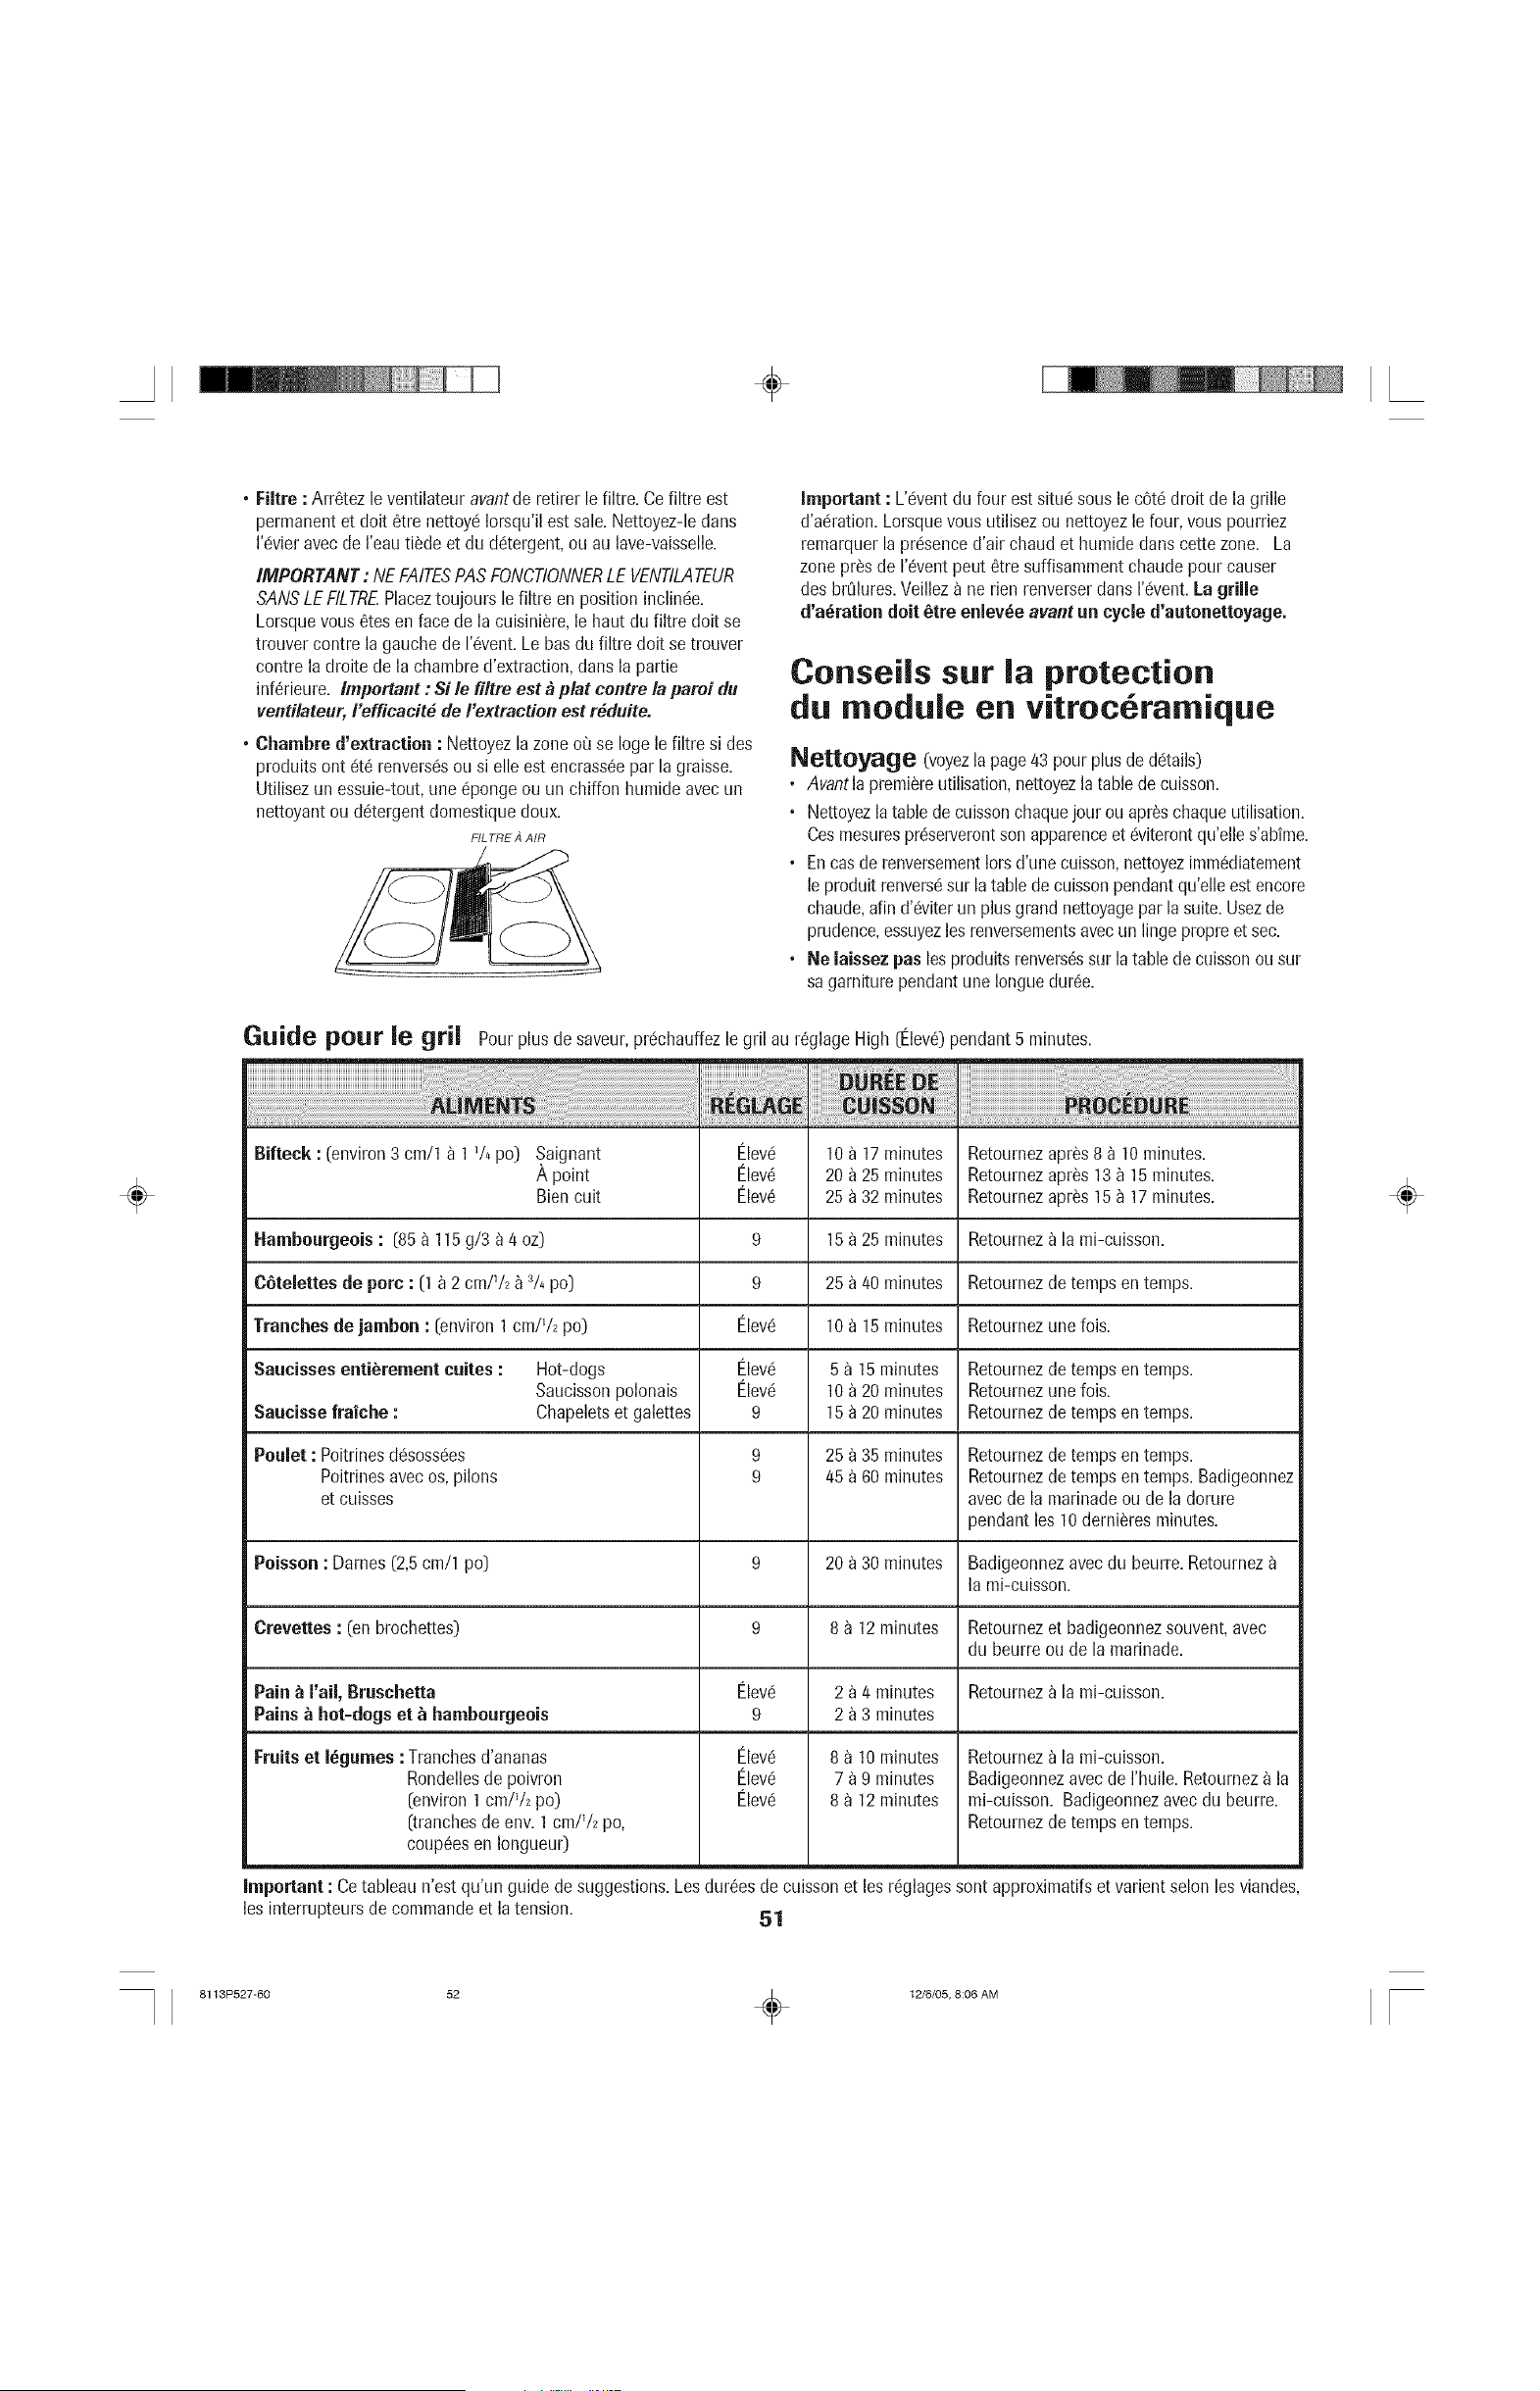
÷
÷
• Filtre :Arr6tez leventilateuravantde retirer le filtre. Ce filtre est
permanentet dolt 6tre nettoyc!Iorsqu'il estsale. Nettoyez-leduns
I'@ieravecde I'eautilde et du dc!tergent,ou au lave-vaisselle.
IMPORTANT: AlEFAITESPASFONCflONNERLE VENTIMTEUR
SANSLEFILTREPlaceztoujours le filtre en positioninclin6e.
Lorsquevous 6tesen facede la cuisini_re,le haut du filtre dolt se
trouvercontre la gauchede I'@ent.Le busdu filtre dolt se trouver
contre la droite de la chambred'extraction,dunsla pattie
inf6rieure. Important : $i le filtre est _ plat centre la paroi du
ventilateur, I'efficacit_ de/'extraction estr_duite.
• Chambre d'extraction : Nettoyezla zoneou se Ioge le filtre si des
produitsont 6t6 renvers6sou si elle est encrass_epar la graisse.
Utilisezun essuie-tout,une@onge ou un chiffon humideavec un
nettoyantou d6tergent domestiquedoux.
FIL TRE A AIR
Important : L'6ventdu four estsitu6 sousle c6t6droit de la grille
d'a6ration. Lorsquevousutilisezou nettoyezlefour, vous pourriez
remarquer lapr6senced'air chaud et humide duns cettezone. La
zone prosde 1'6ventpeut 6tre suffisammentchaudepour causer
des brQlures.Veilleza ne rien renverserduns I'@ent.La grille
d'a6ration dolt 6ire enlev6e avant un cycle d'autonettoyage.
Conseiis sur la protection
du module en vitroc6ramique
Nettoyage (voyezla page43pour plusde d6tails)
, Avantla premiereutilisation,nettoyezla tablede cuisson.
• Nettoyezla table de cuissonchaquejour ou apr_schaqueutilisation.
Cosmesurespr6serverontson apparenceet c!viterontqu'elles'abime.
, Encasde renversementIorsd'une cuisson,nettoyezimm6diatement
le produitrenvers6sur la table decuissonpendantqu'elleest encore
chaude,afin d'c!viterun plus grand nettoyageparla suite.Usezde
prudence,essuyezlos renversementsavecun lingo propreet sec.
• Ne laissez pas lesproduits renvers6ssur la tablede cuissonou sur
sagarniturependantune Ionguedur6e.
Guide pour le gril
Pourplus de saveur,prc!chauffezle gril au r6glageHigh (Elev6)pendant 5 minutes.
Bifteck : (environ 3 cm/1 _ 1% po) Saignant
A point
Bien cult
Elev6
Elev6
I_lev6
Retournez apr_s 8 _ 10 minutes.
Retournez apr6s 13 _ 15 minutes.
Retournez apr_s 15 _ 17 minutes.
Hambourgeois : [85 _ 115 g/3 a 4 oz) 9 Retournez a la mi-cuisson.
C6telettes de pore : [1 _ 2 cm/V2 _ 3/4po) 9 Retournez de temps en temps.
"[ranches de jambon : (environ 1 cm/V2 po) Elevc! Retournez une fois.
Saucisses enti_rement cuites : Hot-dogs Elev6 Retournez de temps en temps.
Saucisson polonais Elev6 Retournez une lois.
Saucisse [raiche : Chapelets et galettes 9 Retournez de temps en temps.
Poulet : Poitrines d6soss6es 9 Retournez de temps en temps.
Poitrines avec os, pilons 9 Retournez de temps en temps. Badigeonnez
et cuisses avec de la marinade ou de la dorure
pendant los 10 derni_res minutes.
Poisson : Dames (2,5 cm/1 po) 9 20 a 30 minutes Badigeonnez avec du beurre. Retournez
la mi-cuisson.
Crevettes : (on brochettes) 9 8 a 12 minutes Retournez et badigeonnez souvent, avec
du beurre ou de la marinade.
Pain _ I'ail, Bruschetta Elev6 2 a 4 minutes Retournez a la mi-cuisson.
Pains _ hot-dogs et _ hambourgeois 9 2 a 3 minutes
Elev6
Elev6
Elev6
10 a 17 minutes
20 a 25 minutes
25 _ 32 minutes
15 a 25 minutes
25 a 40 minutes
10 a 15 minutes
5 a 15 minutes
10 a 20 minutes
15 a 20 minutes
25 a 35 minutes
45 a 60 minutes
8 a 10 minutes
7 a 9 minutes
8 a 12 minutes
Fruitset 16gurnes:Tranchesd'ananas
Rondellesde poivron
(environ1cm/V2po)
(tranchesde env. 1cm/V2po,
couples en IongueuO
Retourneza la mi-cuisson.
Badigeonnezavec de I'huile. Retournez_ la
mi-cuisson. Badigeonnezavec du beurre.
Retournezde temps entemps.
Important : Cetableau n'est qu'un guide desuggestions.Losdur_esde cuissonet los r6glagessont approximatifset varientsolon losviandes,
los interrupteursde commandeet latension.
51
÷
8113P527-60 52 _ 12/6/05, 8:06 AM
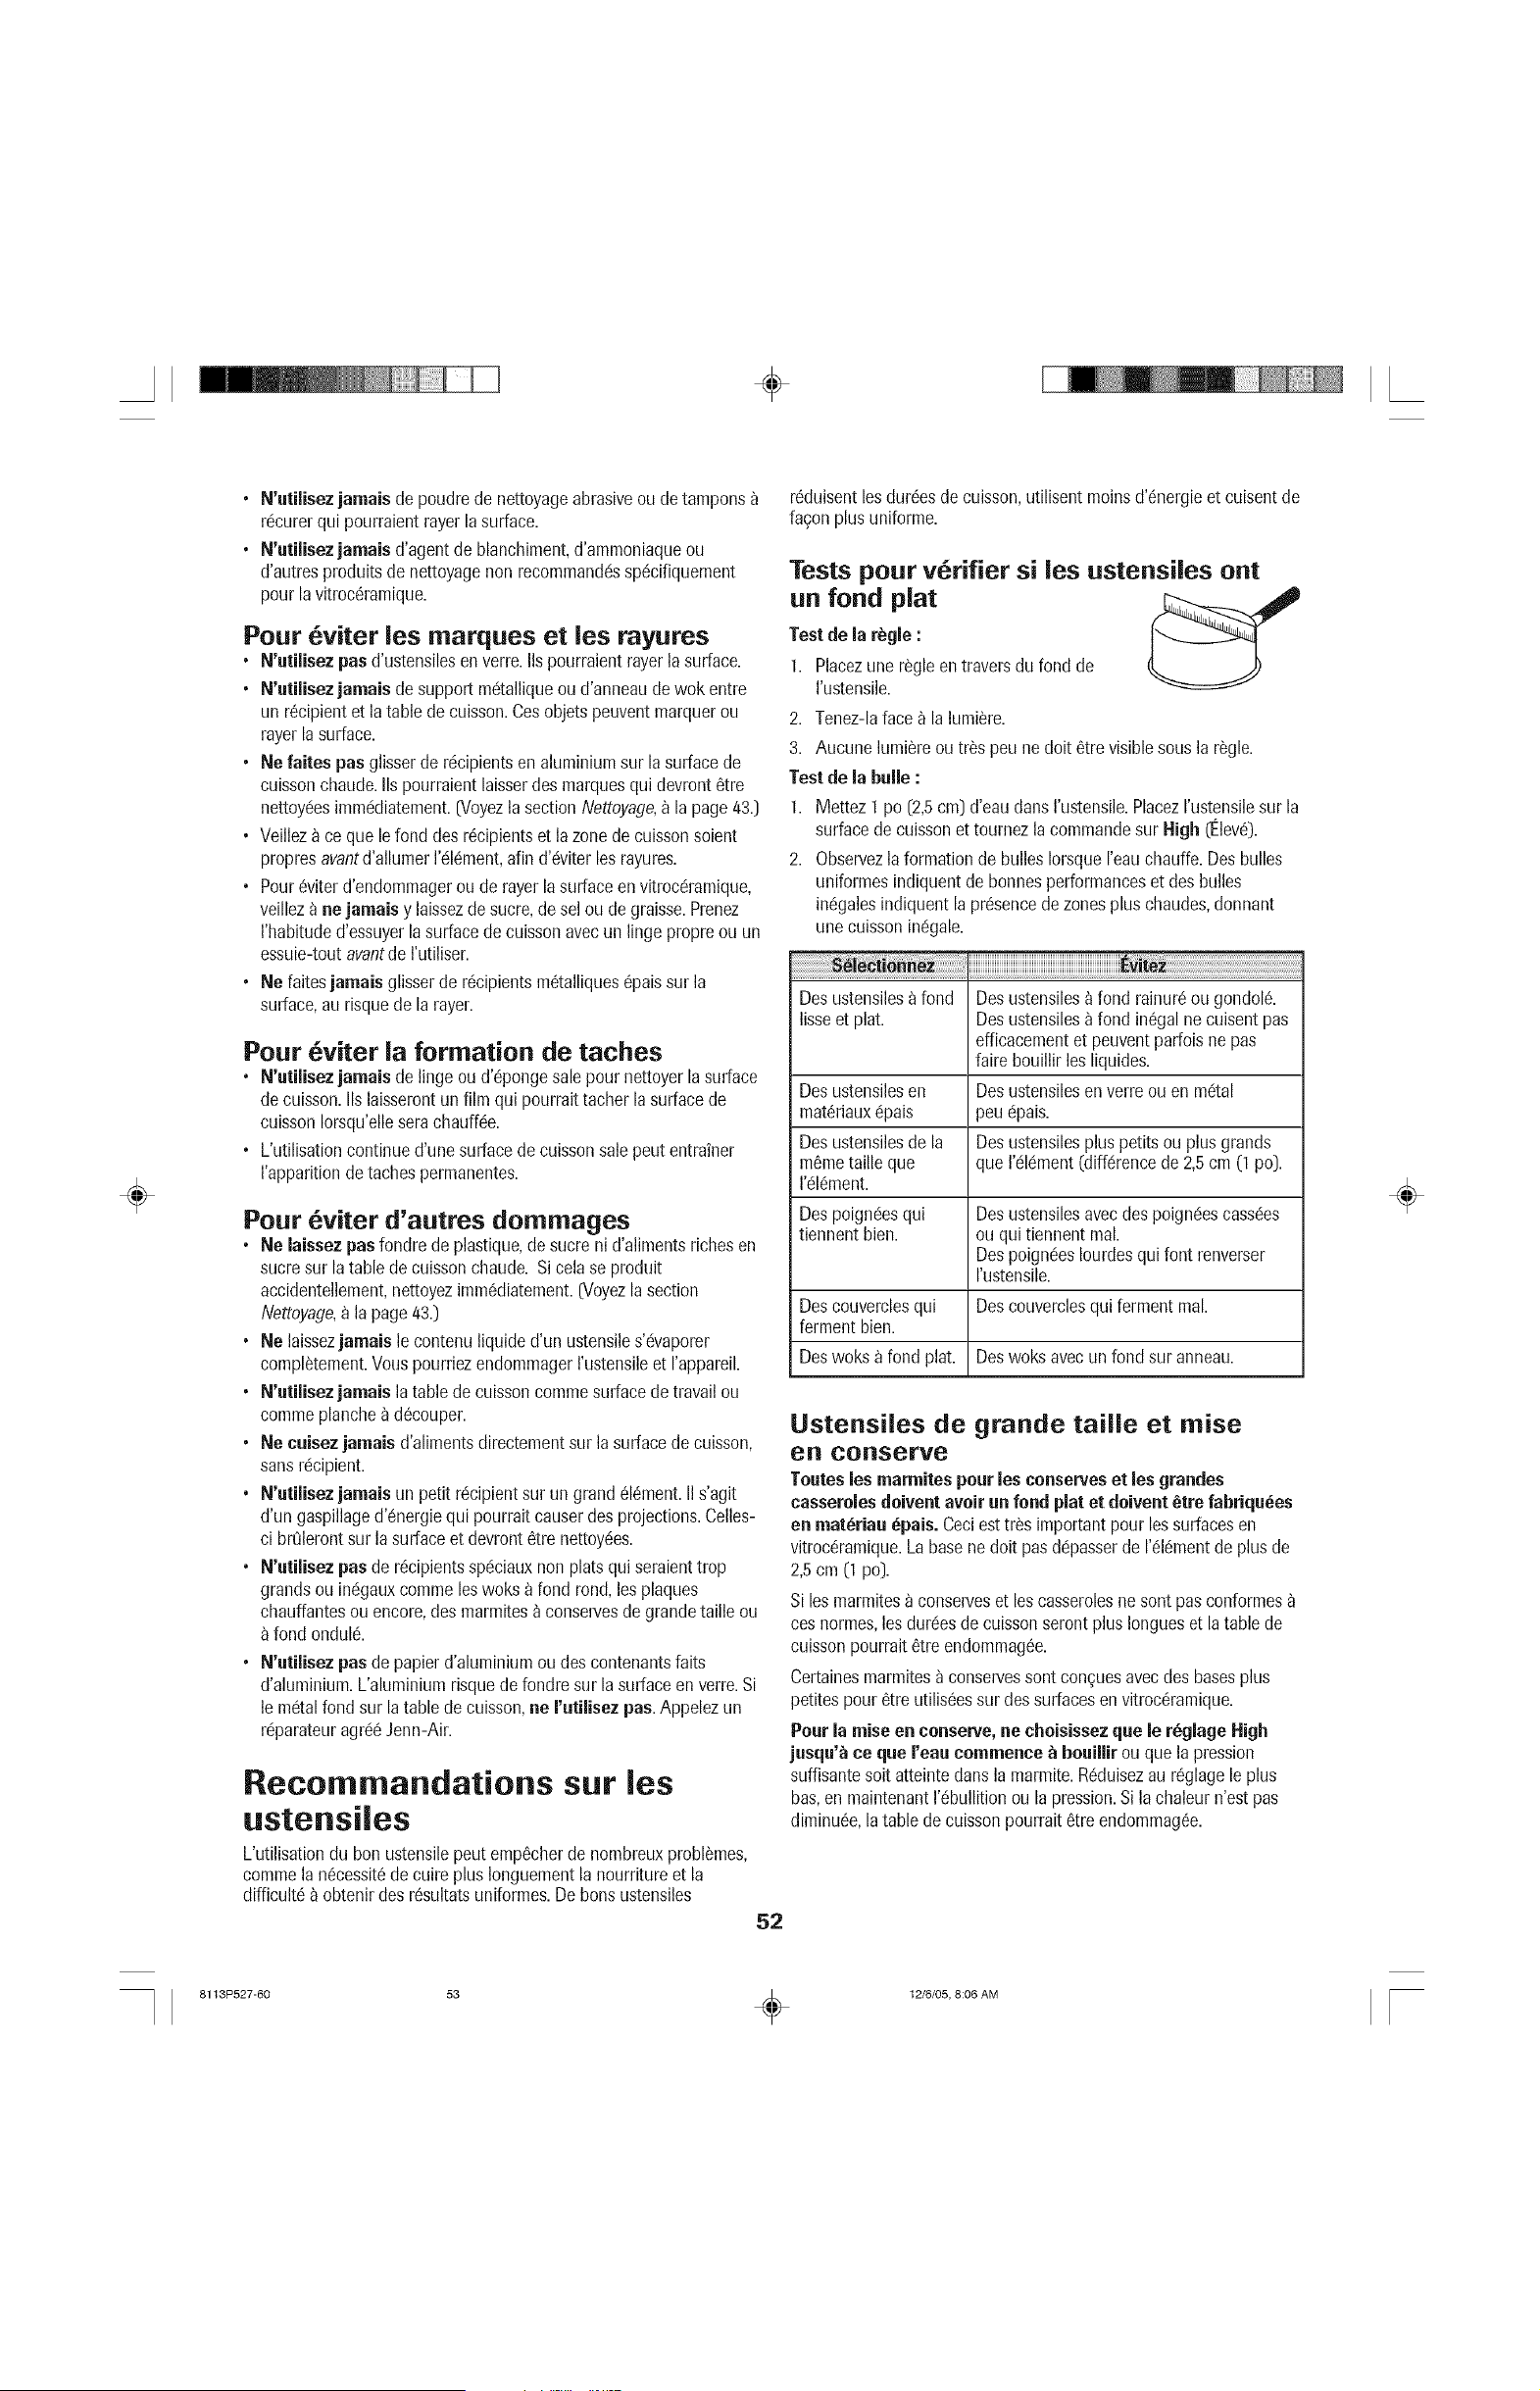
÷
÷
• N'utilisez jamaisde poudrede nettoyageabrasiveou de tampons
rc!curerquipourraientrayerla surface.
• N'atilisez jamais d'agentde blanchiment,d'ammoniaqueou
d'autresproduitsde nettoyagenon recommandc!ssp6cifiquement
pourla vitroc6ramique.
Pour viter los marques et los rayures
• N'utilisezpasd'ustensilesenverre.IIspourraientrayerla surface.
• N'utilisez jamais de supportmc!talliqueou d'anneaude wok entre
un r6cipientet la table decuisson.Cosobjets peuventmarquerou
rayerlasurface.
• Ne faites pas glisserde r6cipientsenaluminiumsur la surfacede
cuissonchaude.IIspourraientlaisserdes marquesqui devront6tre
nettoyc!esimmc!diatement.[VoyezlasectionNettoyage,_ la page/43.)
• Veillez_ ce qua le fond des r6cipientset la zonede cuissonsoient
propresavantd'allumer1'616taunt,afin d'c!viterlos rayures.
• Pour6viterd'endommagerou de rayerla surfaceenvitroc_ramique,
veilleza ne jamais y laissezde sucre,de sol ou de graisse.Prenez
I'habituded'essuyerlasurfacede cuissonavecun lingopropreou un
essuie-toutavantderutiliser.
• Ne faitesjamais glisserde r6cipientsm6talliques@ais sur la
surface,au risquedela rayer.
Pour 6viter la formation de taches
• N'atilisezjamais de lingoou d'@ongesale pour nettoyerlasurface
decuisson.IIslaisserontun film qui pourraittacherla surfacede
cuissonIorsqu'elleserachauffc!e.
• L'utilisationcontinued'une surfacedecuissonsale peutentrainer
I'apparitiondetachespermanentes.
Pour 6viter d'autres dommages
• Ne laissezpusfondre de plastique,desucre ni d'alimentsrichesen
sucresur latable de cuissonchaude. Sicolase produit
accidentellement,nettoyezimm6diatement.[Voyezla section
Nettoyage,a lapage/43.)
• Ne laissezjamais le contenuliquided'un ustensiles'c!vaporer
compl_tement.Vouspourriezendommagerrustensileet I'appareil.
• N'utilisez jamais latable de cuissoncommasurfacedetravail ou
commaplanche_ d6couper.
• Ne cuisez jamais d'alimentsdirectementsur la surfacede cuisson,
sansrc!cipient.
• N'utilisezjamais unpetit rc!cipientsurun grand616mont.II s'agit
d'un gaspillaged'_nergiequi pourrait causerdesprojections.Celles-
ci brQlerontsur la surfaceet devront6tre nettoy6es.
• N'utilisezpusde r6cipientssp_ciauxnon platsqui seraienttrop
grandsou inc!gauxcommaloswoks a fond rond,losplaques
chauffantesou encore,desmarmites_ conservesde grandetaille ou
fond ondul&
• N'utilisezpusde papierd'aluminiumou descontenantsfaits
d'aluminium.L'aluminiumrisquedefondresur la surfaceenverre.Si
le m_talfond sur la table de cuisson,ne rutilisez pus.Appelezun
rc!parateuragrc!6Jenn-Air.
Recommandations sat les
ustensiles
L'utilisationdu bonustensilepeut emp6cherde nombreuxproblSmes,
commelan6cessit6de cuire plus Ionguementlanourritureet la
difficult6_ obtenirdes r6sultatsuniformes.De bonsustensiles
r6duisentlosdur6esdecuisson,utilisent moinsd'6nergieet cuisentde
fagon plusuniforme.
Tests pour v6rifier si los ustensiles oat
un fond plat
Test de la regle :
1. Placezune r_gleentraversdu fond de
I'ustensile.
2. Tenez-la face _ la lumi_re.
3. Aucunelumi_reou tr_speune dolt 6trevisiblesousla r_gle.
Test de la bulle :
1. Mettez 1 po [2,5cm] d'eauclansI'ustensile.PlacezI'ustensilesur la
surfacedecuissonet tournezla commandesur High (Elev_).
2. Observezlaformationde bullesIorsqueI'eauchauffe.Desbulles
uniformesindiquentdebonnesperformanceset des bulles
in6galesindiquent lapr6sencedezonesplus chaudes,donnant
unecuissoninc!gale.
__ m
____________________________________________________________________________________________________________________________________________________________________________________________________________________________________________________________________________________________________________________________________________
Desustensilesa fond Desustensiles_ fond rainur_ou gondola.
lisseet plat. Desustensiles_ fond in_gal necuisentpus
efficacementet peuventparfoisne pus
faire bouillir lesliquides.
Desustensilesen Desustensilesen verre ouen m_!tal
mat_riaux_!pais peu_!pais.
Desustensilesde la Desustensilesplus petitsou plus grands
m_metaille que queI'_!l_!ment(diff_!rencede 2,5cm (1 po].
I'_!l_ment.
Despoign(gesqui Desustensilesavecdes poign_!escass_!es
tiennentbien. ou quitiennentreal.
Despoign_esIourdesqui font renverser
I'ustensile.
Descouverclesqui Descouverclesqui fermentreal.
fermentbien.
Deswoks a fond plat. Deswoks avecun fond sur anneau.
Ustensiles de grande taille et raise
en conserve
Touteslosmarmites pour les conserves et les grandes
casserolesdoivent avoir un fond plat et doivent_tre fahriqu_es
en mat_riau _pais. Ceciesttr_s importantpourlossurfacesen
vitroc_ramique.Labasenedolt pus d_!passerde I'_l_mentdeplus de
2,5cm (1 po].
Si losmarmitesa conserveset loscasserolesne sontpasconformes
cosnormes,losdur_!esde cuissonserontplus Iongueset latable de
cuissonpourrait6tre endommag_e.
Certainesmarmitesa conservessont conguesavecdes basesplus
petitespour 8treutilis_essur dessurfacesen vitroc_ramique.
Pour la raise en conserve, ne choisissez que le r_giage High
jusqu'_ ceque reau commence_ bouillir ou quela pression
suffisantesoit atteintedunsla marmite.R(_duisezaur_glagele plus
bus,enmaintenant1'6bullitionou la pression.Si la chaleur n'estpas
diminu_e,latable de cuissonpourrait_tre endommag6e.
52
÷
8113P527-60 53 _ 12/6/05, 8:06 AM
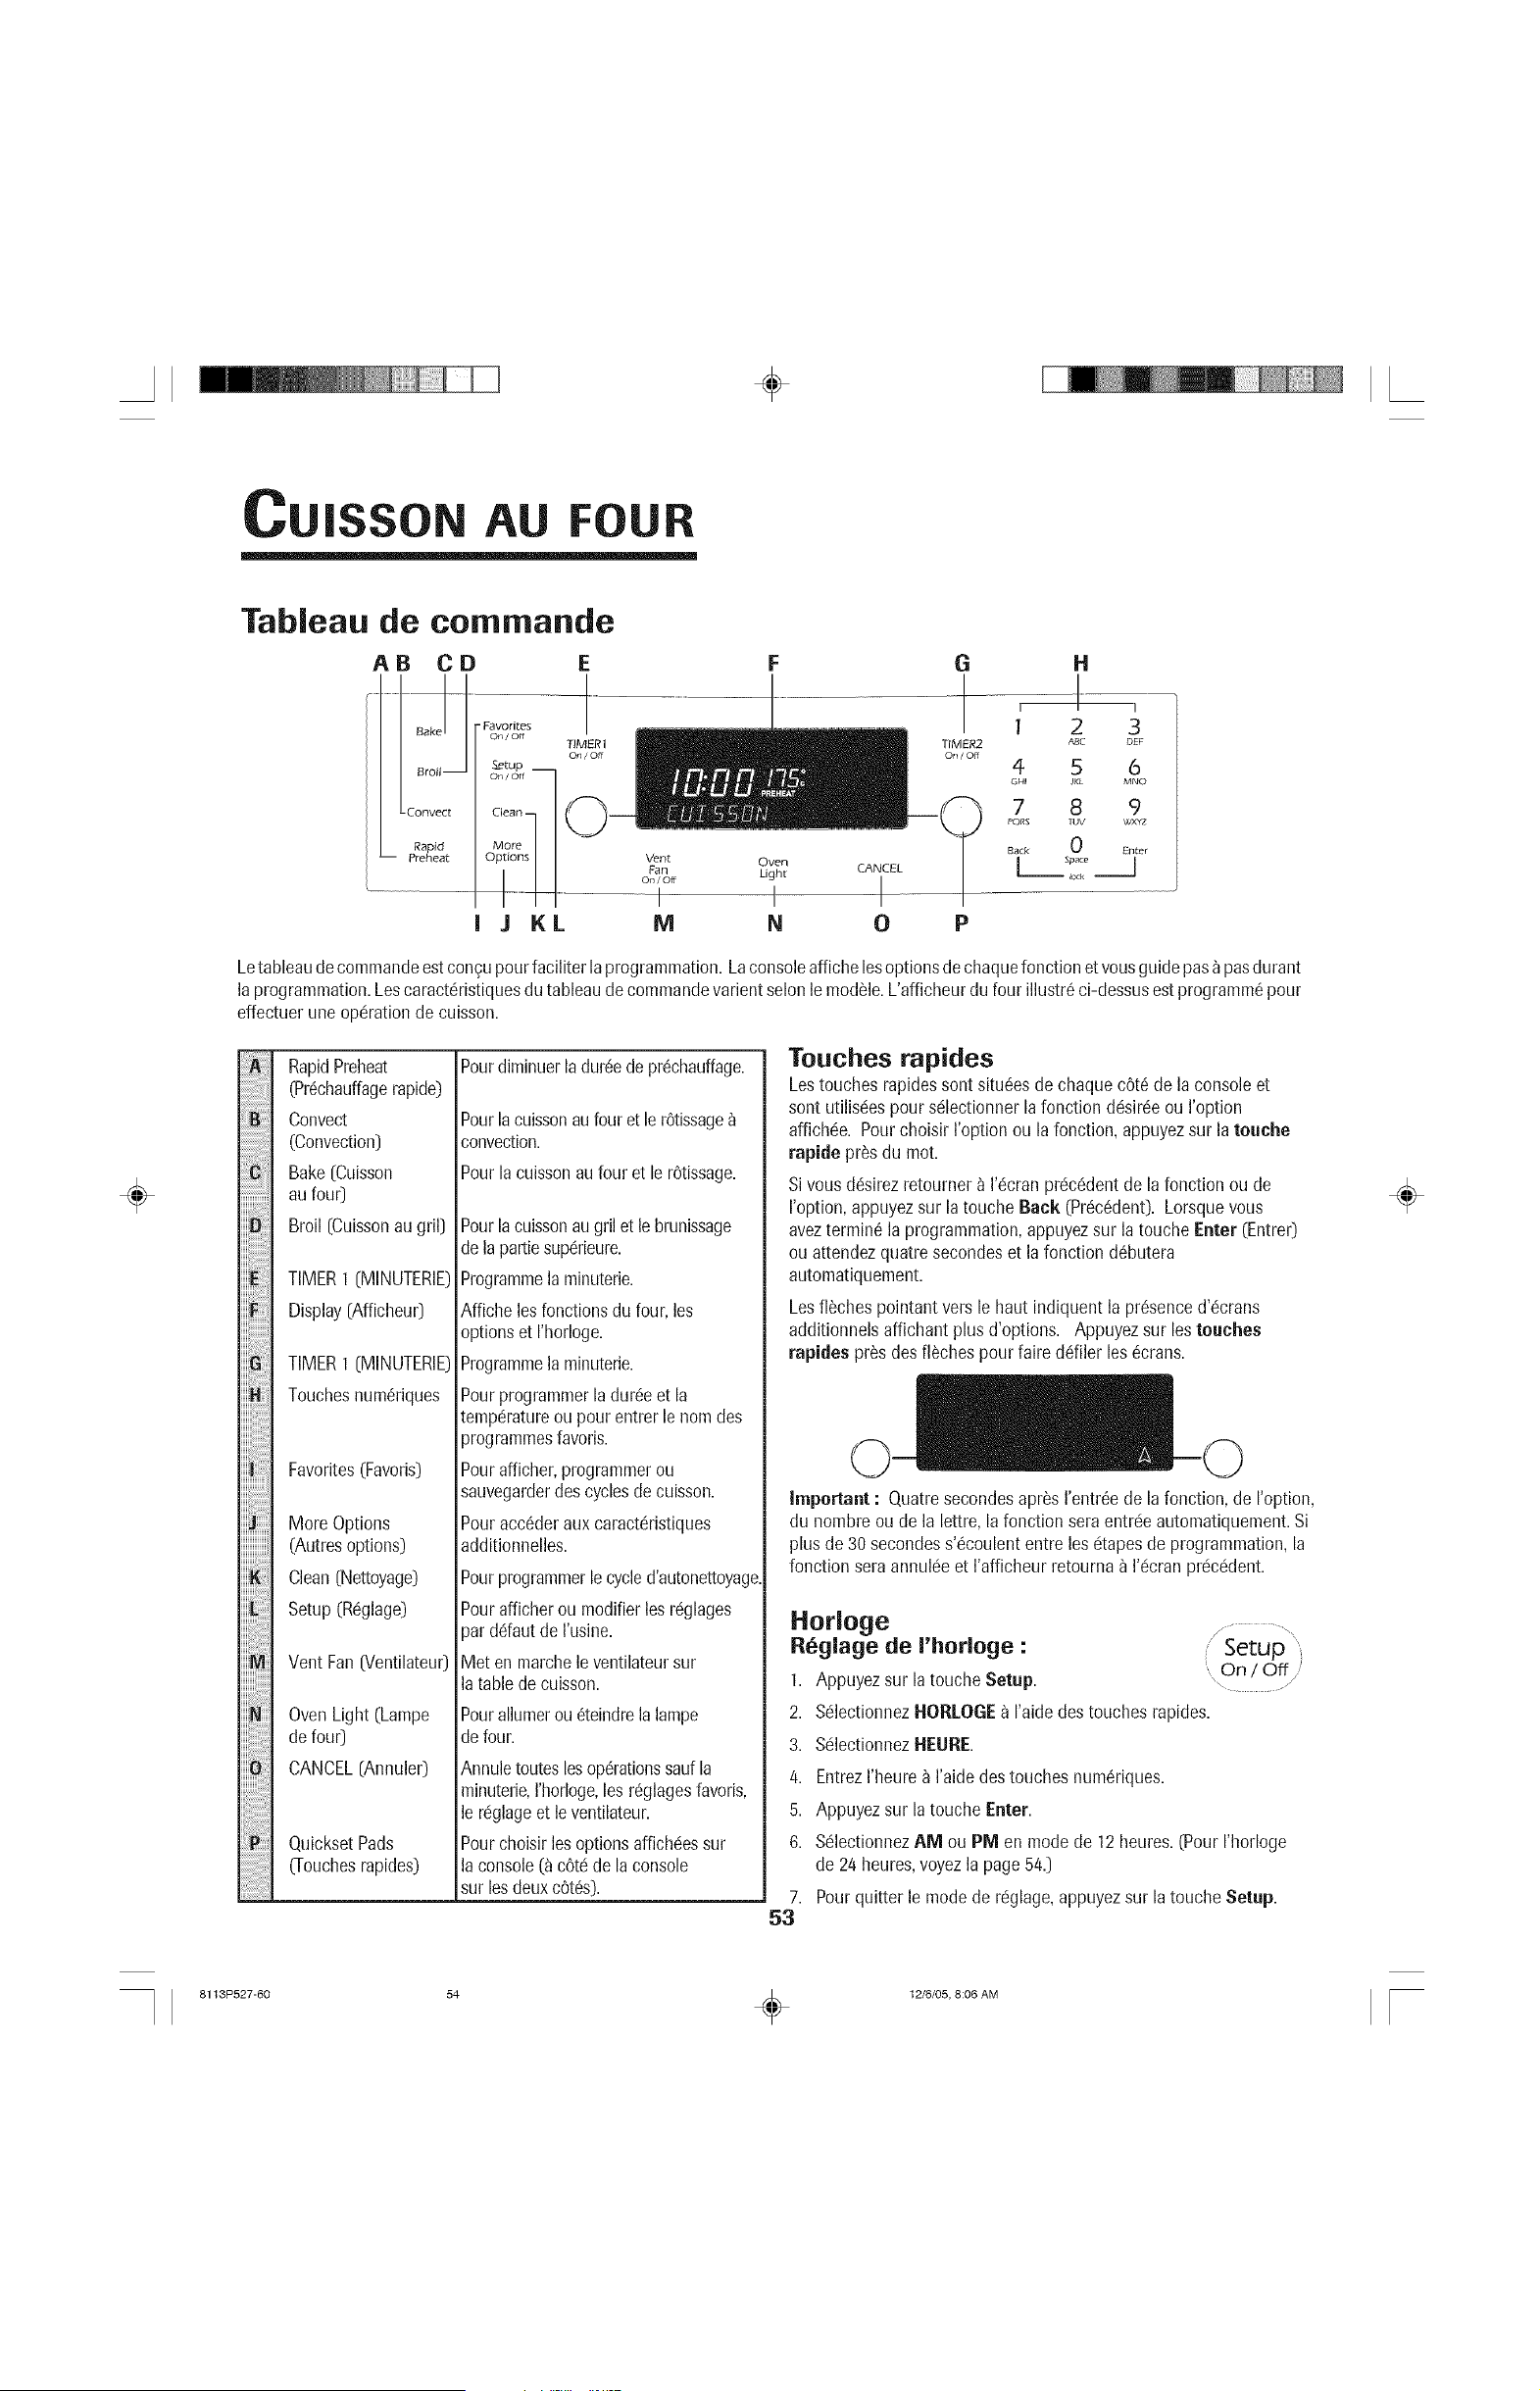
÷
CU|SSON AU FOUR
÷
Tableau de commande
AB CD
..............t ro,I, oCq c, n
J KL
TIMER 1
On/Off
G
TIMER2
on / of_
P
H
!
2 3
ABC DEF
4 5 6
GHI JKL MNO
7 8 9
P©RS IUV WXYZ
Back O Enter
1 Space J
Letableaudecommandeestcongupour faciliter laprogrammation.Laconsoleaffiche lesoptionsde chaquefonctionet vousguidepas_pasdurant
laprogrammation.Lescaract6ristiquesdu tableaudecommandevarientselonlemodule.L'afficheurdufour illustr_ ci-dessusestprogramm6pour
effectuerune opdration de cuisson.
!!iiBi!:i!:i!:i!:i!i;
iii!Fiiiiiii
iiiiKi!i:
iiiiK!;!!iiiii
iiiiLi!i!!
RapidPreheat
(Pr6chauffagerapide)
Convect
(Convection)
Bake (Cuisson
au fou0
Broil (Cuissonau gril]
TIMER1 (MINUTERIE
Display(Afficheur]
TIMERI (MINUTERIE
Touchesnum6riques
Favorites(Favoris]
More Options
(Autresoptions)
Clean(Nettoyage)
Setup (Mglage)
Vent Fan [Ventilateur
OvenLight (Lampe
defour)
CANCEL(Annuler]
QuicksetPads
(Touchesrapides]
Pourdiminuerladurdedepr6chauffage.
Pourlacuissonaufouret ler6tissage
convection.
Pourla cuissonaufour et le rOtissage.
Pourlacuissonaugrilet lebrunissage
dela pattiesup6rieure.
Programmela minuterie.
Affiche lesfonctionsdu four, les
optionset I'horloge.
Programmela minuterie.
Pourprogrammerladur6e et la
temp6ratureou pourentrer le norades
programmesfavoris.
Pourafficher,programmerou
sauvegarderdescyclesdecuisson.
Pouracc6deraux caractc!ristiques
additionnelles.
Pourprogrammerlecycled'autonettoyage.
Pourafficherou modifierles rc!glages
)at ddaut de I'usine.
dieten marcheleventilateursur
latable de cuisson.
Pourallumerou_teindrelalampe
defour.
Annuletouteslesoperationssaul la
minuterie,rhorloge,les r6glagesfavoris,
le rc!glageet le ventilateur.
Pourchoisirles optionsaffichc!essur
la console(a c6t(!de laconsole
sur lesdeuxcOt6s].
Touches rapides
Lestouches rapidessont situ6esde chaquecOt6de laconsole et
sont utilisc!espour s(!lectionnerlafonction d(!sir6eou I'option
affichc!e.Pour choisir I'optionou la fonction, appuyezsur la teuehe
rapide pros du mot.
Sivous dc!sirezretourner_ I'c!cranprc!cc!dentde la fonction ou de
I'option,appuyezsur la touche Back (Pr6c6dent].Lorsquevous
aveztermin_ la programmation,appuyezsur la toucheEnter (Entrer)
ou attendezquatre secondeset la fonction d_butera
automatiquement.
Lesfl_chespointantvers le haut indiquent la pr6senced'c!crans
additionnelsaffichant plus d'options. Appuyezsur lesteuches
rapides pros desfl_chespour faire de:filerles _crans.
important : Quatresecondesapr_s I'entr_ede la fonction,de I'option,
du nombreou de la lettre,la fonction seraentrc!eautomatiquement.Si
plus de30 secondess'6coulententre les c!tapesde programmation,la
fonction seraannuk!eet I'afficheurretourna _ I'c!cranprc!cc!dent.
Horloge
R_glage de I'horloge :
1. Appuyezsur la touche Setup.
2. Sc!lectionnezHORLOGEa I'aidedestouches rapides.
3. Sc!lectionnezHEURE.
4. EntrezI'heure_ I'aidedes touches numSriques.
5. Appuyezsur la touche Enter.
6. S_lectionnezAM ou PM en mode de 12 heures.(PourI'horloge
de 24 heures,voyezla page5/4.)
7. Pourquitter le mode de r_!glage,appuyezsur la toucheSetup.
53
/ Setup
On / Off/
÷
8113P527-60 54 _ 12/6/05, 8:06 AM
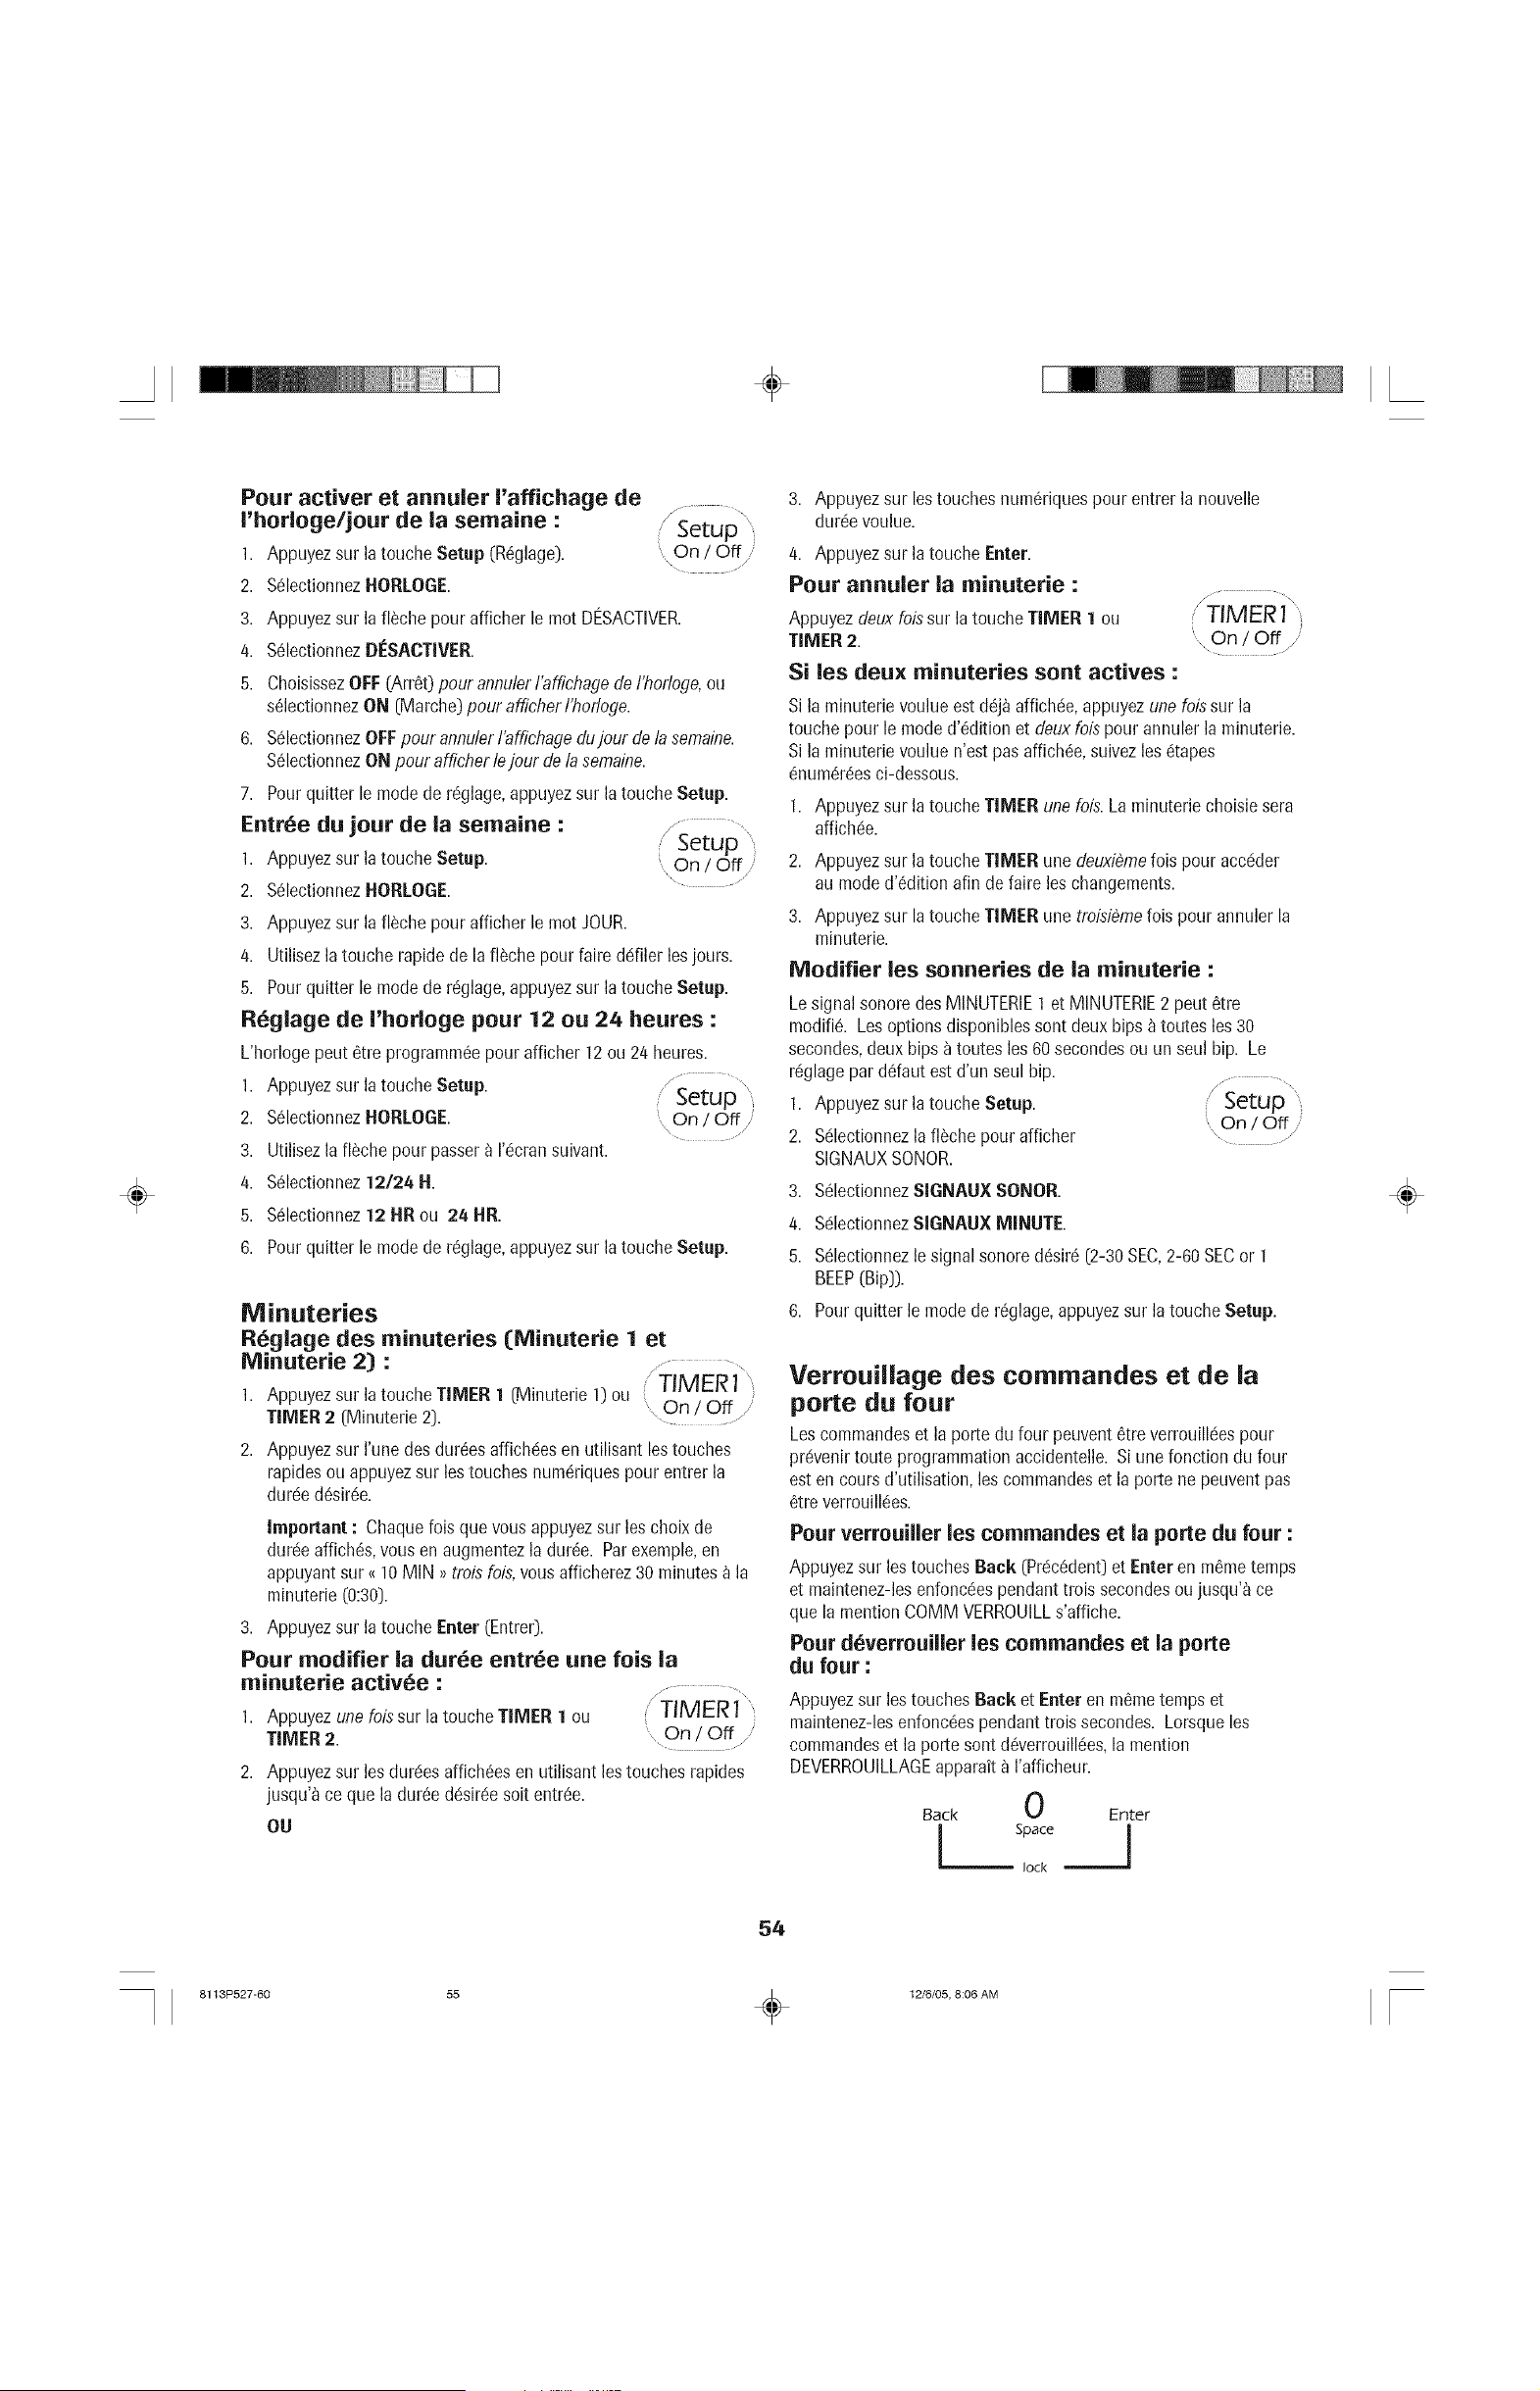
÷
÷
Pour activer et annulet l'affichage de
I'horloge/jour de la semaine :
1. Appuyezsur la touche Setup (R6glage).
2. S61ectionnez HORLOGE.
" Setup
.....On/Off /
, ,z
3. Appuyezsur lafl_che pourafficher le mot DESACTIVER.
4. S61ectionnezDESACTIVER.
5. ChoisissezOFF(Arr6t)pour annulerI'affichagede I'horloge,ou
s61ectionnezON [Marche) pour afficherI'horloge.
6. S61ectionnezOFFpour annulerI'affichagedujour de lasemaine.
S61ectionnezON pour afficherlejour dela semaine.
Pourquitter le modede r6glage,appuyezsur la touche Setup.
7,
Entree du jour de la semaine :
1. Appuyezsur la touche Setup.
2. S61ectionnezHORLOGE.
....On/Off /
........ /
3. Appuyezsur laflSche pourafficher le motJOUR.
4. Utilisezla touche rapide de la fl_chepour faire ddiler les jours.
5. Pourquitter le modede r6glage,appuyezsur la touche Setup.
R6glage de I'horloge pour 12 ou 24 heures :
L'horlogepeut 6tre programm6epour afficher 12ou 2/4heures.
/ .......
1. Appuyezsur la touche Setup. " Setup
2. S61ectionnezHORLOGE. On / Off
\ ............. /
3. Utilisezla flSchepour passera N!cransuivant.
4. S61ectionnez 12124 H.
5. S61ectionnez 12 HR ou 24 HR.
6. Pourquitter le modede r6glage,appuyezsur la touche Setup.
Nlinuteries
Reglage des minuteries (Minuterie 1 et
Minuterie 2) : ,.................
" TIMER 1
1. Appuyezsur la toucheTIMER 1 [Minuterie 1) ou , On / Off j
TIMER2 [Minuterie 2]. ............
Appuyezsur I'unedes dur6esaffichdesen utilisant les touches
rapidesou appuyezsur los touches num6riquespour entrer la
dur6ed6sir6e.
important : Chaquefois que vousappuyezsur los choix de
duroc affich6s,vousen augmentezla dur6e. Parexemple,en
appuyantsur _10 MIN _trois fois,vousafficherez30 minutes_ la
minuterie (0:30].
3. Appuyezsur latouche Enter (Entre0.
Pour modifier la duroc entree une lois la
minuterie activee : _.............
1. Appuyezune foissur la toucheTIMER 1 ou TIMER 1
TIMER2.
2. Appuyezsur losdurc!esaffich@esen utilisant lostouches rapides
jusqu'_ ceque la dur@ed4sirc!esoit entr@e.
OU
3. Appuyez sur los touchesnum6riquespour entrer la nouvelle
dur6evoulue.
4. Appuyez sur la touche Enter.
Pour armuler la minuterie :
Appuyezdeuxfois sur la touche TIMER 1 ou
TIMER 2.
Si los deux minuteries sont actives :
/TiMERi"
On / Off /
Si la minuterievouhe est d6j_ affichc!e,appuyezune loissur la
touche pour le moded'6dition et deuxfois pour annulerla minuterie.
Si la minuterievouhe n'estpus affich6e,suivezlos c!tapes
6num6r6esci-dessous.
1. Appuyezsur la toucheTIMER unefois. Laminuteriechoisiesera
affichc!e.
2. Appuyez sur la touche TIMER une deuxiemefois pour accc!der
au moded'6dition afin de faire loschangements.
3. Appuyez sur la touche TIMER une troisiemelois pour annulerla
minuterie.
Modifier los sonneries de la minuterie :
Lesignalsonore desMINUTERIE1et MINUTERIE2 peut 6tre
modifi& Les optionsdisponiblessont deux bips fi toutes les 30
secondes,deux bips a toutes les 60 secondesou un seul bip. Le
r6glagepar ddaut est d'un seu]bip. ,................................,
1. Appuyezsur la toucheSetup. Setup '
On/Off
2. Sc!lectionnezla fl_che pour afficher ...........
SlGNAUXSONOR.
3. S61ectionnez SIGNAUX SONOR.
/4. Sc!lectionnezSIGNAUX MINUTE.
5. S61ectionnezle signalsonore d_sir6 [2-30SEC,2-60 SECor 1
BEEP(Bip]).
6. Pourquitter le modede r6glage,appuyezsur la toucheSetup.
Verrouillage des commandos et de la
porte du four
Lescommandeset la porte du four peuvent6treverrouillc!espour
pr@enirtoute programmationaccidentelle. Si une fonction du four
esten coursd'utilisation, les commandeset la porte ne peuventpas
6treverrouill6es.
Pour verrouiller los commandos et la porte du four :
Appuyezsur les touchesBack (Prc!c6dent]et Enter en m6metemps
et maintenez-lesenfonc6espendanttrois secondesou jusqu'_ ce
que la mentionCOMM VERROUILLs'affiche.
Pour d6verrouiller los commandos et la porte
du four :
Appuyezsur les touchesBack et Enter en m6metemps et
maintenez-lesenfonc_espendant troissecondes. Lorsqueles
commandeset la porte sont d6verrouill6es,la mention
DEVERROUILLAGEapparait_ I'afficheur.
Back 0 Enter
1 1
lock
÷
54
8113P527-60 55 _ 12/6/05, 8:06 AM
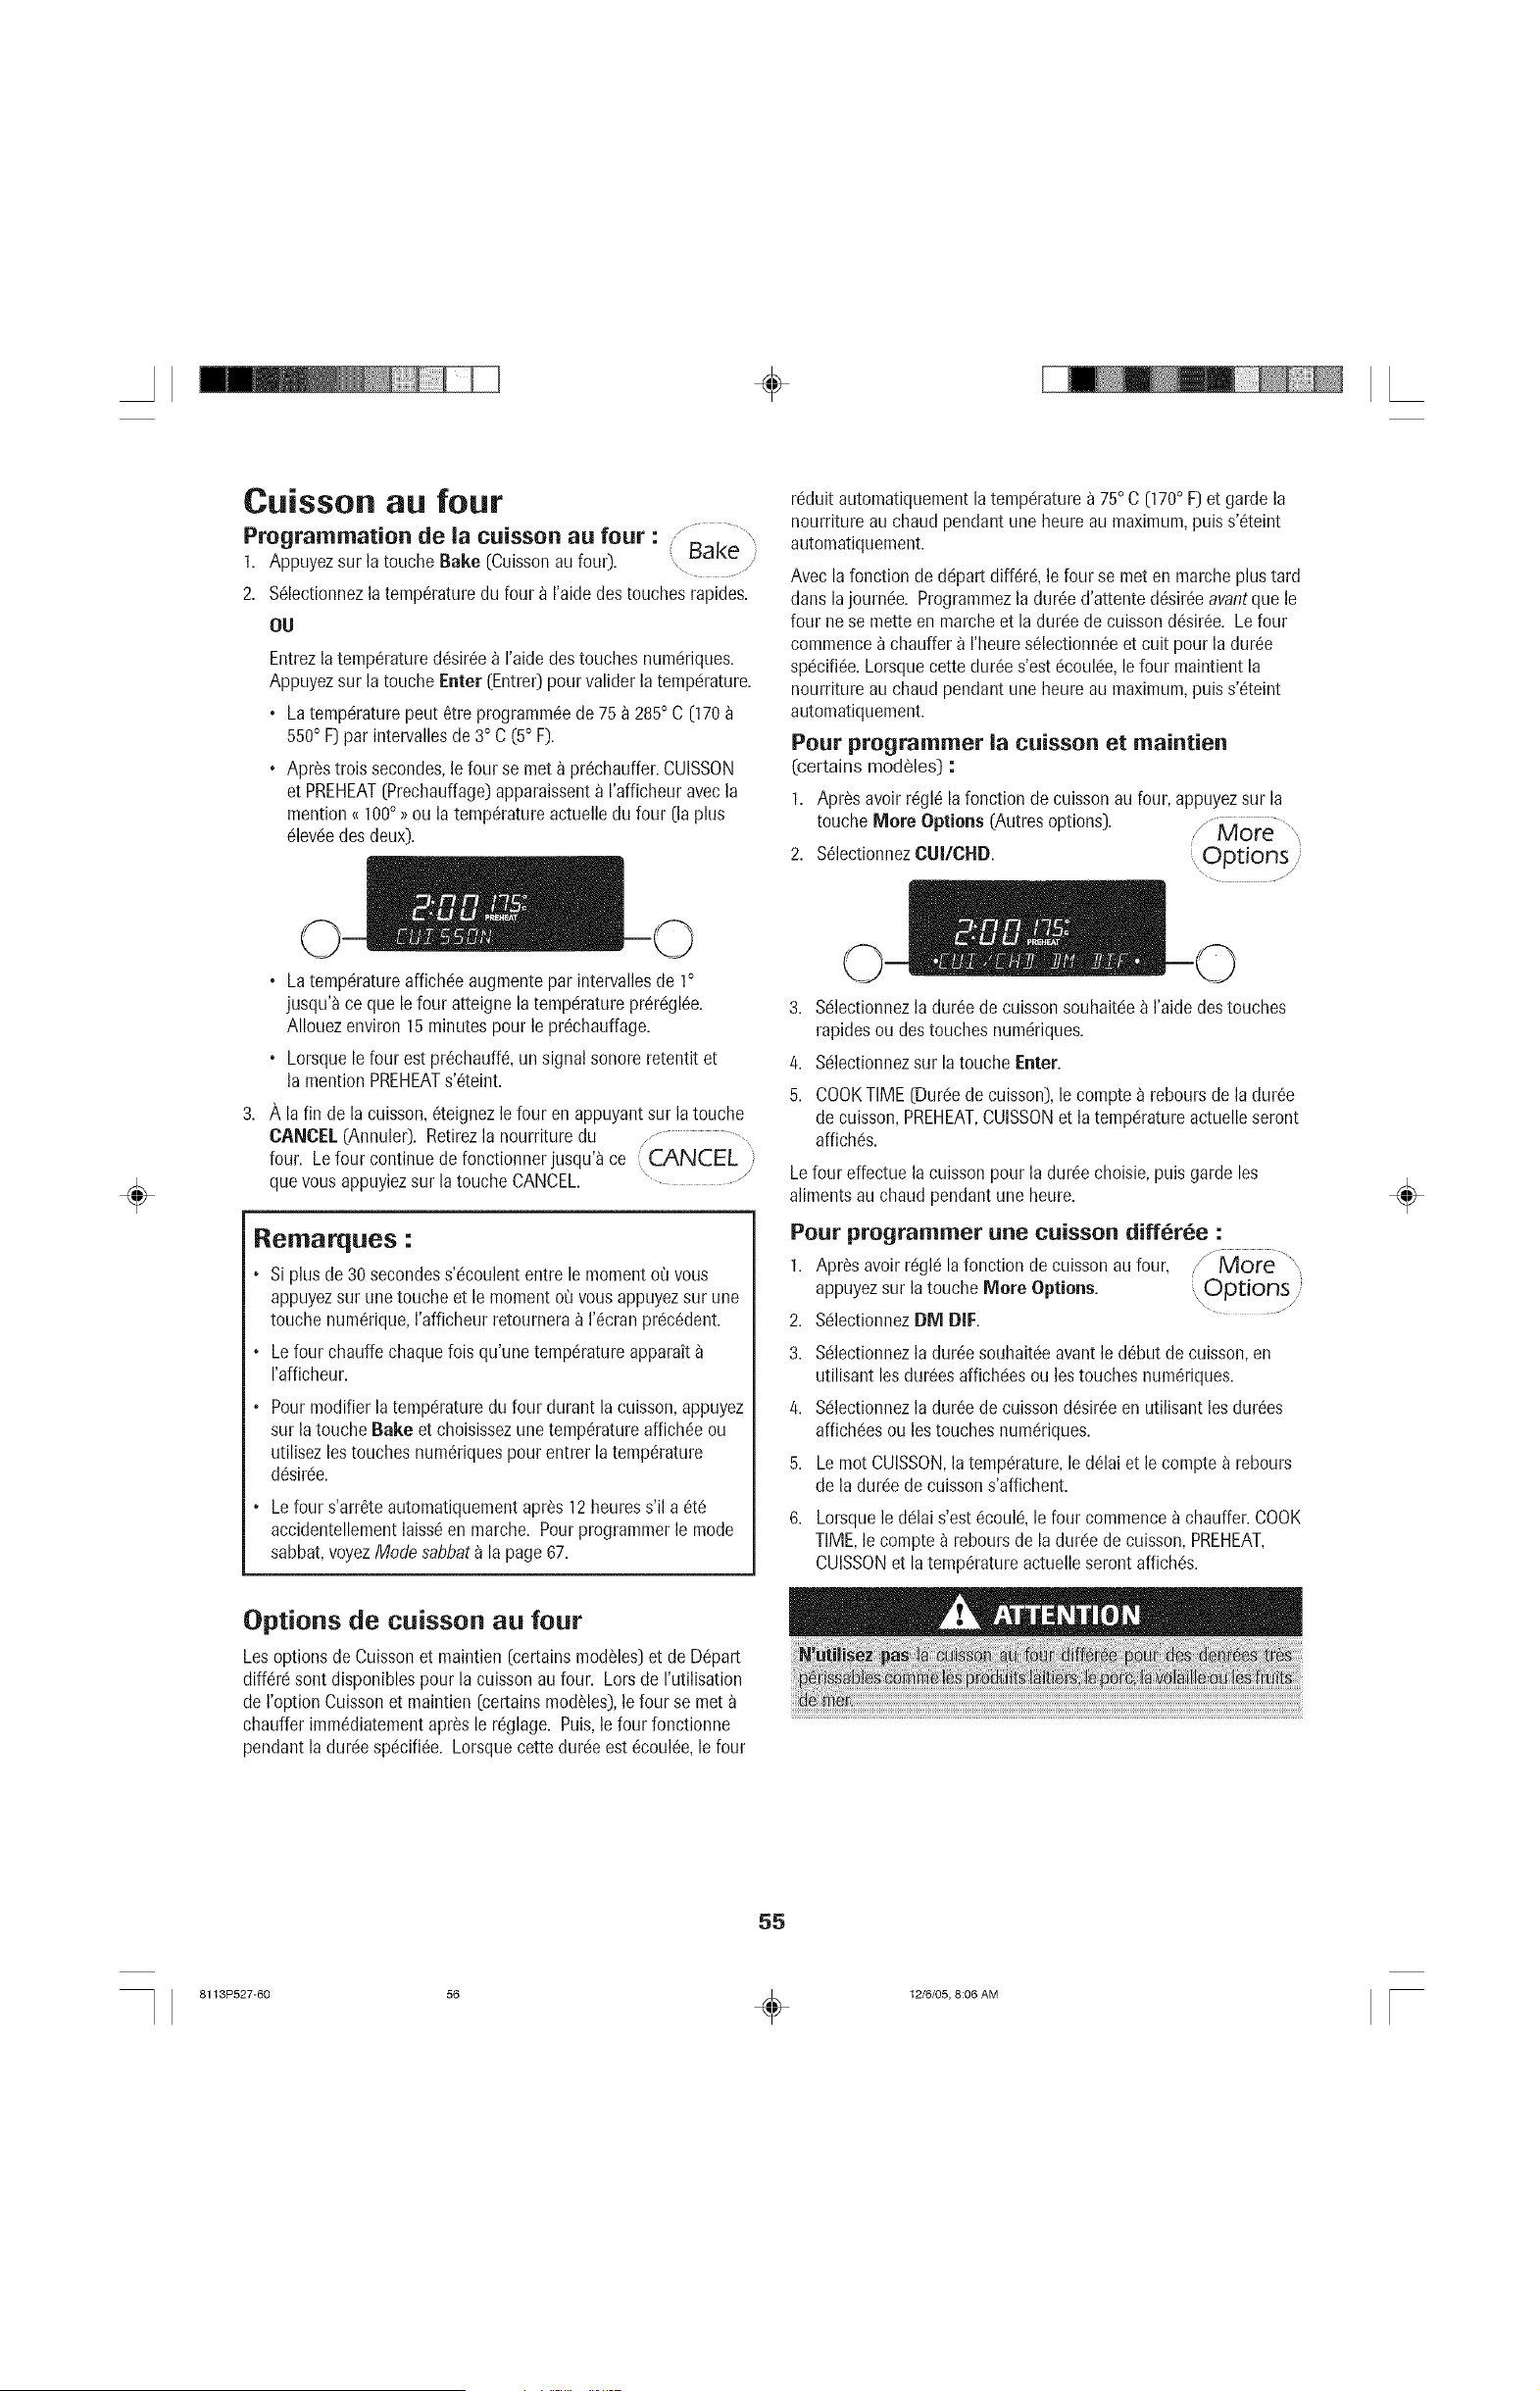
÷
Cuisson au four
Programmation de la cuisson au four :
1. Appuyezsur la touche Bake (Cuissonau four). Bake i
2. Sdlectionnezlatemp6raturedu four _ I'aidedestouches rapides.
OU
Entrezla temp6ratured6sir6e_ I'aidedestouches numdriques.
Appuyezsur latouche Enter (Entrer)pourvalider la tempdrature.
• La tempdraturepout _tre programm6ede75 _ 285° C (170
550° F]par intervallesde 3° C (5° F).
Apr_s troissecondes,le four se met a pr6chauffer.CUISSON
et PREHEAT(Prechauffage)apparaissenta I'afficheuravec la
mention_ 100° ))ou la temp6ratureactuelledu four (la plus
c!levdedesdeux).
rc!duitautomatiquementla tempdraturea 75° C (170° F] et garde la
nourritureau chaud pendant une heureau maximum,puis s'_teint
automatiquement.
Avec la fonction de ddpart diff6r& lefour se met en marche plustard
dans lajournc!e. Programmezla dur6ed'attente d6sir6eavantque le
four nese mottoen marcheet la durdede cuissond6sir6e. Le four
commence_ chauffer a I'heures61ectionn6eet cult pour la dur6e
spdcifi6e.Lorsquecette dur6es'estc!coulde,lefour maintient la
nourritureau chaud pendant une heureau maximum,puis s'6teint
automatiquement.
Pour programmer la cuissou et maiutieu
_certains modules] :
1. Apr_savoir r6gl_ lafonction de cuissonau four, appuyezsur la
toucheMore Options (Autres options). /" More .........
2. S61ectionnezCUI/CHD ....... Options,,
÷
3,
• La tempdratureaffichc!eaugmentepar intervallesde 1°
jusqu'a ce que le four atteigne latempdraturepr6rdgl6e.
AIIouezenviron 15 minutes pour le pr_chauffage.
• Lorsque le four est pr_chauff&un signal sonore retentit et
la mention PREHEATs'6teint.
A la fin de la cuisson,6teignezle four en appuyantsur latouche
CANCEL(Annuler). Retirezla nourriture du j ................
four. Le four continue defonctionner jusqu'a ce ( CANCEL
que vous appuyiezsur latouche CANCEL. .......... z
Remarqi.leS :
• Si plusde 30 secondess'c!coulententre le momentoOvous
appuyezsur unetouche et le momentoOvous appuyezsur une
touche num6rique,I'afficheur retournera_ 1'6cranprdc6dent.
• Le four chauffe chaquefois qu'une temp6ratureapparait
I'afficheur.
Pourmodifier latempdraturedu four durant la cuisson,appuyez
sur la touche Bake et choisissezunetemp6ratureaffich6e ou
utilisez lostouches num6riquespourentrer la temp6rature
d_sirde.
• Le four s'arr6te automatiquementapr_s 12heuress'il a _t8
accidentellementlaiss_en marche. Pourprogrammerle mode
sabbat,voyezMode sabbata la page67.
3. S_!lectionnezla dur_e de cuissonsouhaitde_ I'aide destouches
rapidesou des touches numdriques.
4. S_!lectionnezsur la touche Enter.
5. COOKTIME(Dur_!ede cuisson),le compte _ reboursde la dur_e
de cuisson,PREHEAT,CUISSONet latempdratureactuelleseront
affich_!s.
Lefour effectue la cuissonpour la dur_echoisie,puis garde les
alimentsauchaud pendantune heure.
2,
3.
4.
5.
6.
Pour programmer uue cuissou diff_r_e :
1. Apr_s avoirr_gl_ lafonction de cuissonau four,
appuyezsur la touche More Options. ,Options:
S_!lectionnezDM DIF.
Sdlectionnez la dur6e souhaitde avant le d6but de cuisson, en
utilisant les dur_es affichdes ou les touches numdriques.
Sdlectionnez la dur_e de cuisson d_sirde en utilisant les dur_es
affichdes ou les touches numdriques.
Le mot CUISSON, la tempdrature, le d_lai et le compte a rebours
de la durde de cuisson s'affichent.
Lorsquele ddlais'est _could,le four commencea chauffer.COOK
TIME,le comptea reboursde ladurde decuisson,PREHEAT,
CUISSONet latempdratureactuelle serontaffichds.
÷
Options de cuisson au four
Lesoptionsde Cuissonet maintien[certains modules]et de D_part
diffdrdsont disponiblespour la cuissonau four. Lorsde I'utilisation
de I'option Cuissonet maintien[certainsmodules),le four se met
chauffer imm_diatementapr_s le rdglage. Puis,le four fonctionne
pendant ladurde spdcifi_e. Lorsquecette durdeestdcoul_e,le four
55
8113P527-60 56 _ 12/6/05, 8:06 AM
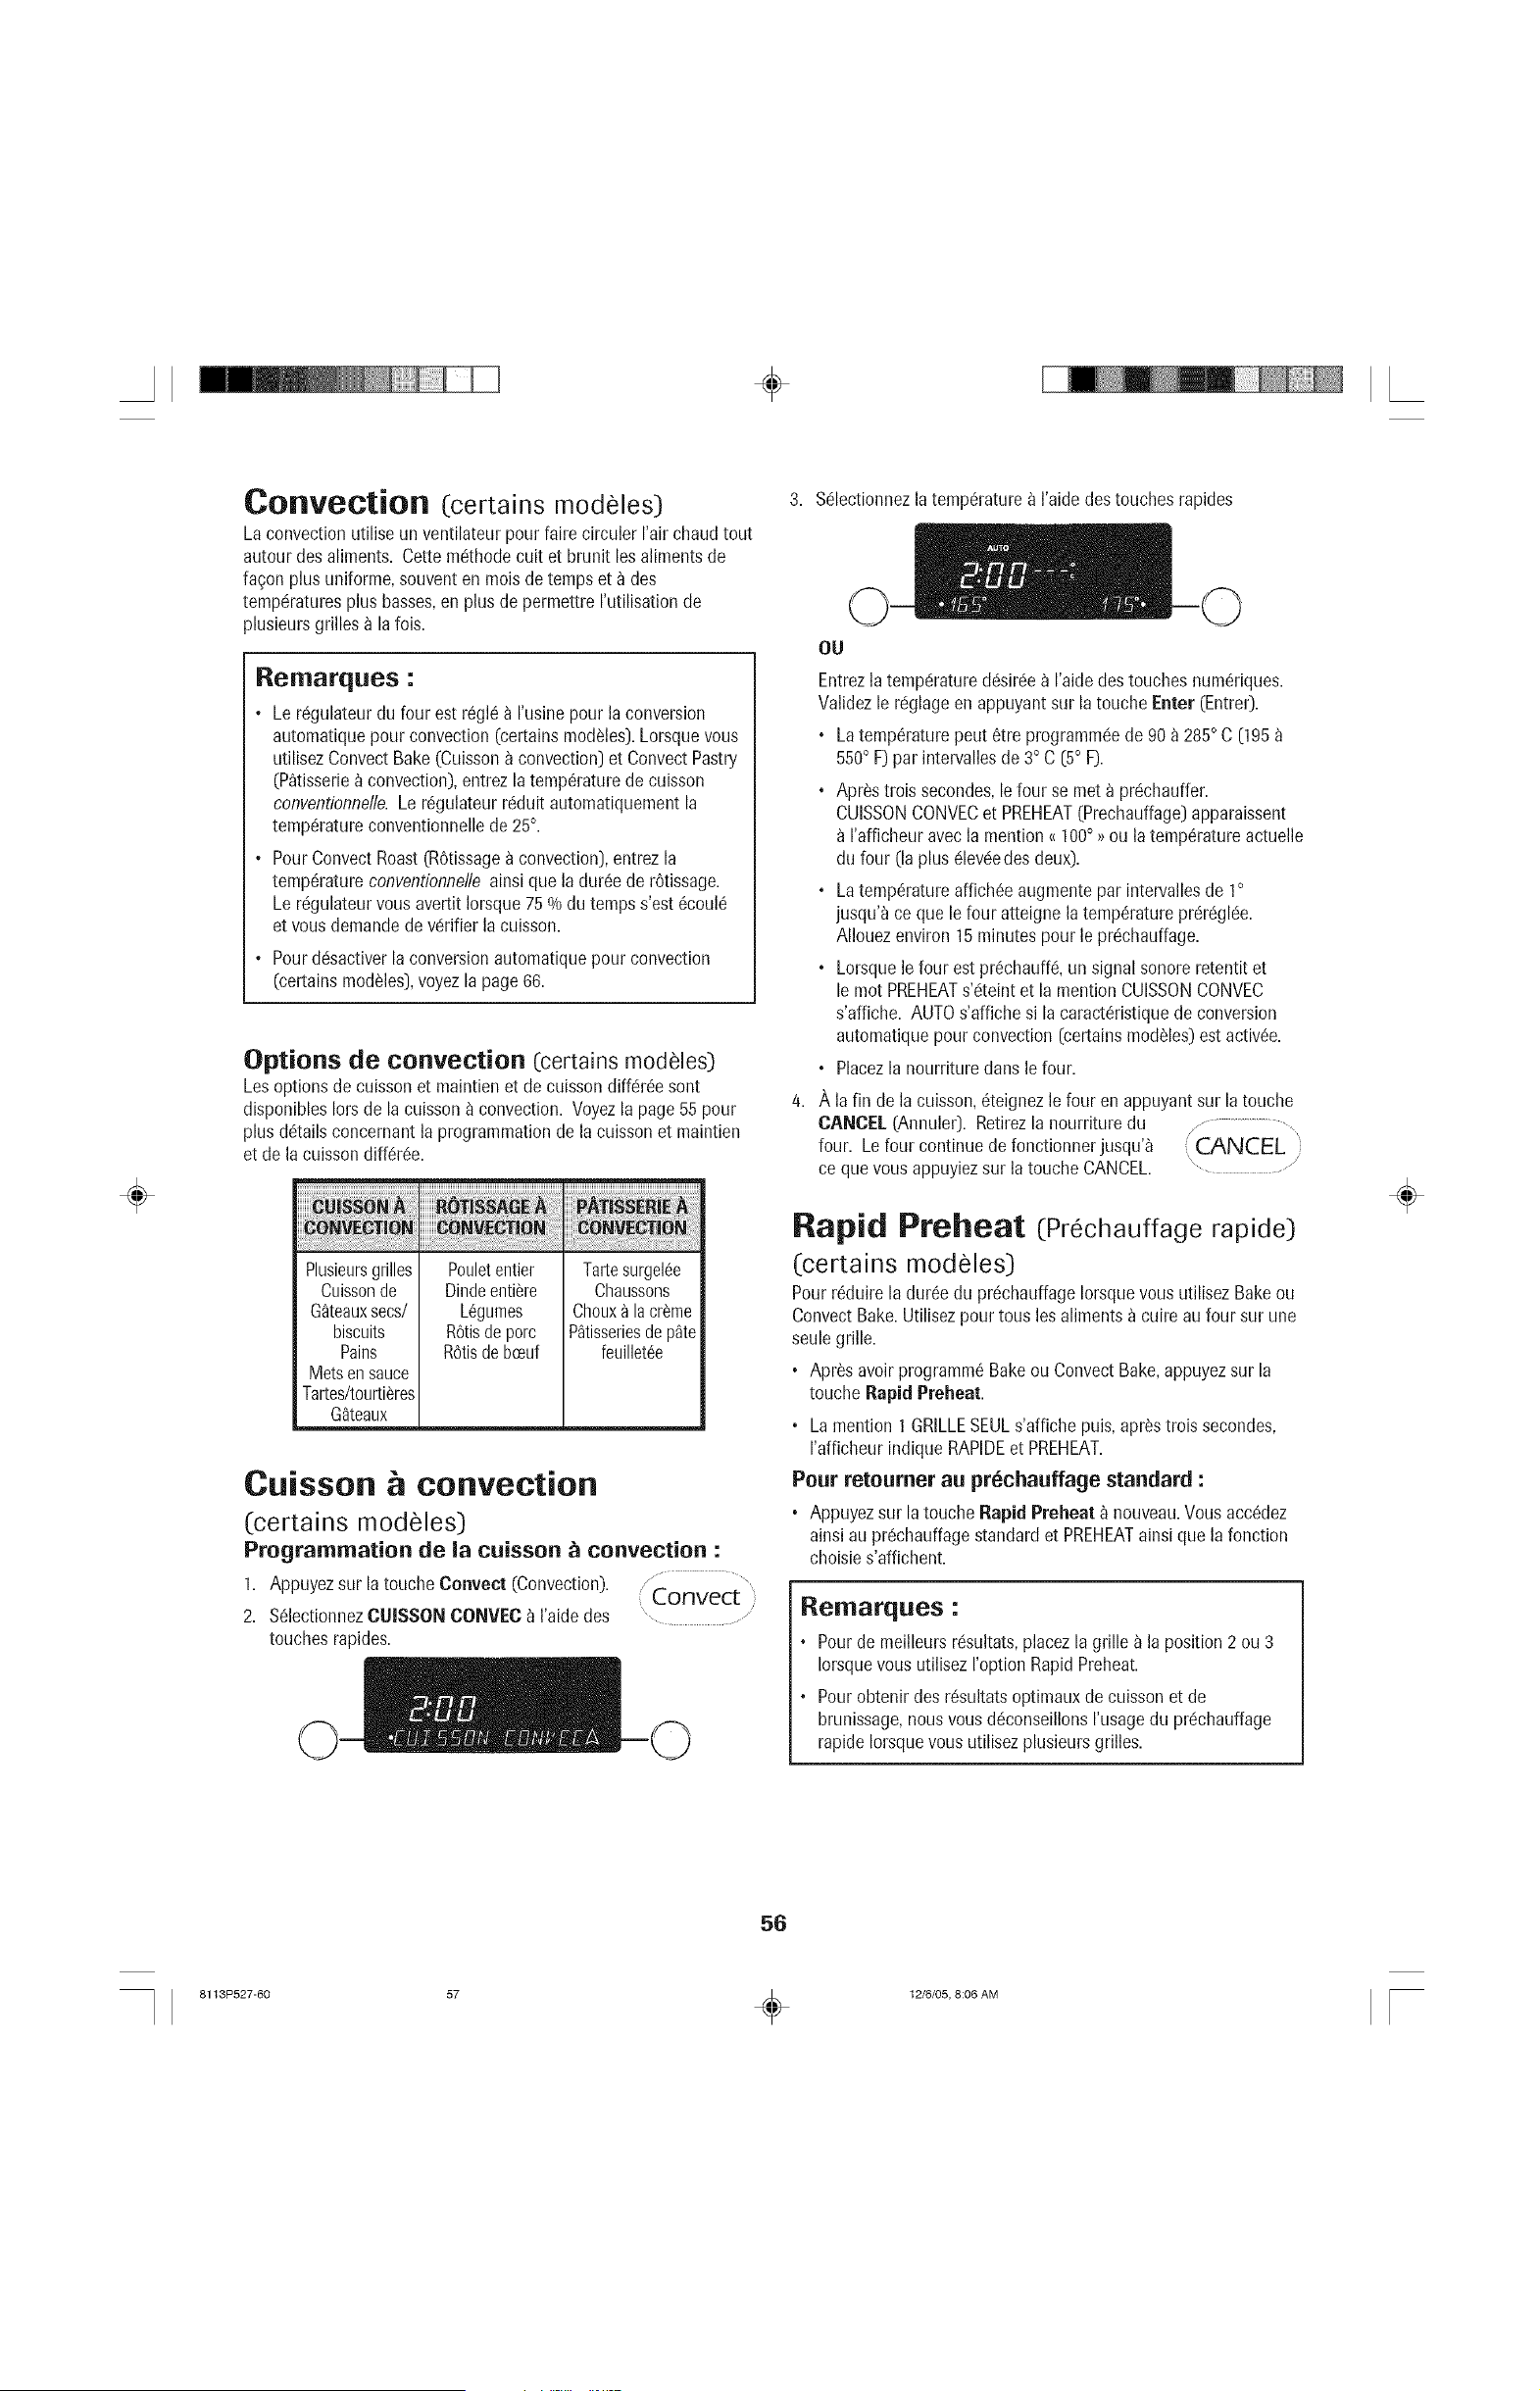
÷
÷
Convection (certains modeles)
Laconvection utiliseun ventilateur pourfaire circuler I'airchaud tout
autour des aliments. Cette mCthodecult et brunit los alimentsde
fagon plus uniforme,souventen mois detemps et _ des
tempCraturesplus basses,en plus depermettre I'utilisationde
plusieursgrilles _ la fois.
Reilrlarques :
• Le rCgulateurdu four estrCgl6) I'usinepour la conversion
automatiquepour convection(certains modeles].Lorsquevous
utilisezConvectBake(Cuisson) convection)et ConvectPastry
(P_tisserie_ convection),entrez latempCraturede cuisson
conventionnelle.Le rCgulateurrCduitautomatiquementla
tempCratureconventionnellede 25°.
• PourConvectRoast(RCtissageaconvection),entrez la
tempCratureconventionnelleainsi que la durCede rCtissage.
Le rc!gulateurvousavertit Iorsque750/odu tempss'est 6coul6
et vous demandede vc!rifierla cuisson.
• Pour dCsactiverla conversionautomatiquepourconvection
(certains modCles],voyezla page66.
Options de convection (certains modeles)
Lesoptions de cuissonet maintienet de cuissondiff_rCesent
disponiblesIorsde la cuissona convection. Voyezla page55pour
plus dCtailsconcernantla programmationde lacuissonet maintien
et de la cuissondiffCrCe.
Plusieursgrilles
Cuissonde
G_teauxsecs/
biscuits
Pains
Metsensauce
Tartes/tourtiCres
G_teaux
Pouletentier
Dindeentiere
LCgumes
ROtisdeporc
RCtisdebceuf
Tartesurgel(!e
Chaussons
Choux_la crCme
P_tisseriesde p_te
feuilletCe
Caisson & convection
(certains modeles)
Programrnation de la caisson _ convection :
1. Appuyezsur la touche Cenvect (Convection). J......................................
Convect
2. SClectionnezCUISSON CONVEC) [aide des ................
touches rapides.
3. Sc!lectionnezlatempCrature_ I'aidedes touchesrapides
OU
Entrezlatempc!raturedCsirc!ea I'aidedes touchesnumCriques.
Validezle rc!glageen appuyantsur latouche Eater (Entrer).
• La tempCraturepeut 6tre programmCede 90 a 285° C [195
550° F)par intervallesde 3° C (5° F).
• Apr_s trois secondes,lefour se met a prc!chauffer.
CUISSONCONVECet PREHEAT(Prechauffage]apparaissent
I'afficheuravec[a mention{{100° >>ou latempCratureactuelle
du four (Inplus c!levc!edes deux).
• La tempCratureaffichCeaugmentepar intervallesde 1°
jusqu'a ce que le four atteigne latempCratureprCrc!glc!e.
AIIouezenviron 15minutespour le prc!chauffage.
• Lorsque[efour est prCchauffc!,un signal sonoreretentit et
le mot PREHEATs'_teintet la mentionCUISSONCONVEC
s'affiche. AUTOs'affiche si la caractCristiquede conversion
automatiquepour convection(certainsmod_les)est activ_e.
• Placezla nourriture dans lefour.
A la fin de la cuisson,6teignezle four en appuyant sur la touche
CANCEL(Annule0. Retirezla nourriture du , .............................,
four. Lefour continuede fonctionnerjusqu'_ CANCEL
ceque vousappuyiezsur la touche CANCEL.
Rapid Preheat (Prechauffagerapide)
(certains modeles)
PourrCduirela durCedu prCchauffageIorsquevousutilisez Bakeou
ConvectBake.Utilisezpour tous los alimentsa cuire au four sur une
seulegrille.
• Apr_s avoirprogramm_ Bakeou ConvectBake,appuyezsur la
touche Rapid Preheat.
• La mention 1 GRILLESEULs'affiche puis,apr_s trois secondes,
I'afficheur indique RAPIDEet PREHEAT.
Pour retourner au pr_chauffage standard :
• Appuyezsur la touche Rapid Preheat _ nouveau.Vous acc_dez
ainsi au pr_chauffagestandard et PREHEATainsi que lafonction
choisies'affichent.
Re|lr|arq_es :
• Pour de meilleurs r_!sultats,placezla grille _ la position 2 ou 3
Iorsquevousutilisez I'option RapidPreheat.
. Pourobtenir des r_sultatsoptimauxde cuissonet de
brunissage,nousvousd_conseillonsI'usagedu pr_!chauffage
rapide Iorsquevous utilisezplusieursgrilles.
÷
56
8113P527-60 57 _ 12/6/05, 8:06 AM
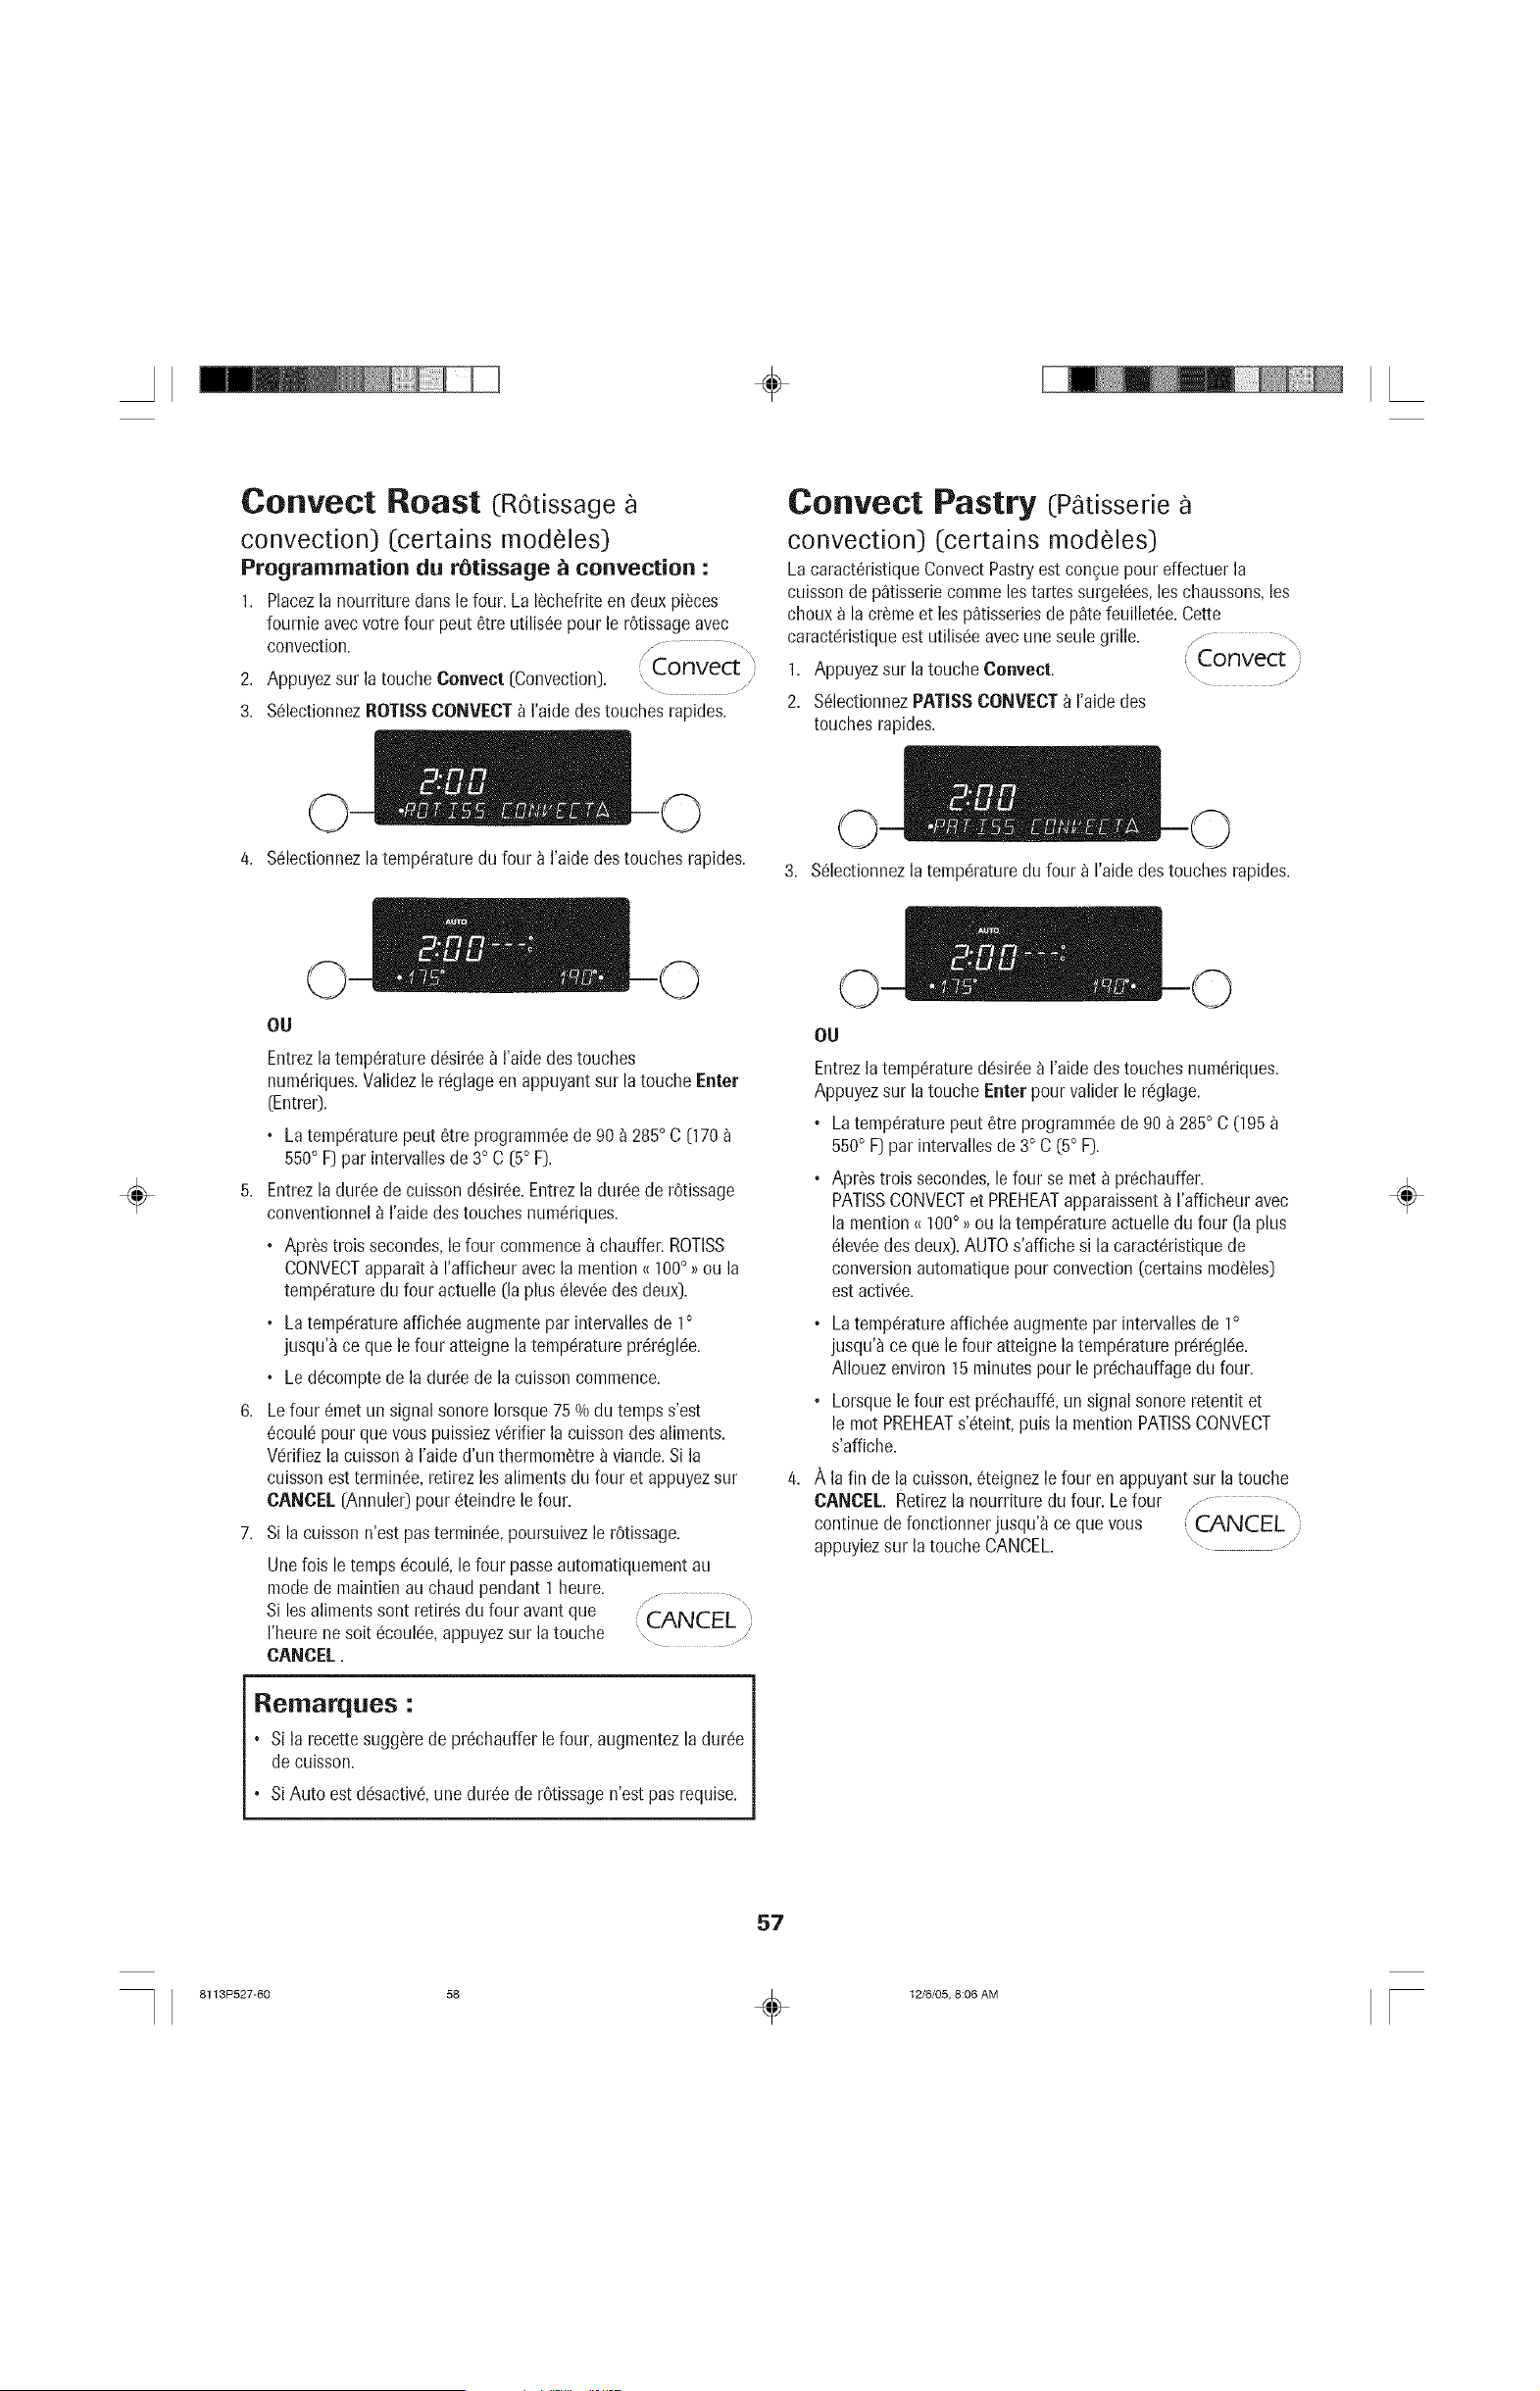
÷
Conveot Roast (ROtissage
convection) (certains modeles)
Programrnation du rStissage _ convection :
1. Placezla nourrituredans le four. La I_chefriteendeux pi_ces
fournie avecvotre four peut 6tre utilisCepour le rCtissageavec
convection. _............... .,
2. Appuyezsur latouche Convect (Convection). (.Convect i
3. SClectionnezROTISSCONVECT) [aide destouches rapides.
Oonveot Pastry (P tisserie
convection) (certains modeles)
LacaractCristiqueConvectPastryest concuepour effectuerla
cuissonde p_tisseriecomme lestartes surgek!es,los chaussons,los
chouxa la cr_me et los p_tisseriesde p_tefeuilletCe.Cette
caractCristiqueest utilisc!eavec une seulegrille. / ..............
: Convect '
1. Appuyezsur la touche Convect.
2. SClectionnezPATISS CONVECTa I'aidedes
touches rapides.
4. SClectionnezla tempCraturedu four _ I'aidedestouches rapides.
3. SClectionnezla tempCraturedu four a I'aidedes touches rapides.
÷
OU
Entrezla tempCraturedCsirCe_ I'aide destouches
num_riques.Validezle rCglageen appuyantsur latouche Eater
(Entre0.
• La temp(!raturepout 6tre programmCede 90_ 285° C [170
550° F]par intervallesde 3° C [5° F).
5. Entrezla durc!ede cuissondc!sirCe.Entrezladurc!ede rCtissage
conventionnel_ I'aidedestouches numCriques.
• Apr_strois secondes,le four commence_ chauffer.ROTISS
CONVECTapparait_ I'afficheur avecla mention{{100° >>ou la
tempCraturedu four actuelle (laplus 6leveedes deux].
• La temperatureaffich(!eaugmentepar intervallesde 1°
jusqu'_ ceque lefour atteigne la tempc!ratureprCrCglCe.
• Le dCcomptede la durCede la cuisson commence.
6. Le four 6met un signalsonore Iorsque75 % du tempss'est
_coul6 pourque vouspuissiezvc!rifierla cuissondesaliments.
Vc!rifiezlacuisson_ I'aide d'un thermom_tre aviande.Si la
cuissonestterminCe,retirez los alimentsdu four et appuyezsur
CANCEL (Annule0 pour 6teindrele four.
7. Si la cuisson n'est pasterminCe,poursuivezle r0tissage.
Une fois le temps c!coulC,le four passeautomatiquementau
mode de maintien auchaud pendant 1 heure.
Siles alimentssont retirCsdu four avantque
I'heure nesoit c!couk!e,appuyezsur latouche _CANCEL
CANCEL.
Remarques :
• si la recettesugg_rede prCchaufferlefour,augmentezla durc!e
de cuisson.
° SiAuto est dc!sactivc!,une durCede rCtissagen'est pas requise.
OU
Entrezla temp_!ratured_!sir_ea I'aidedestouches numCriques.
Appuyezsur latouche Eater pour validerle r_!glage.
• Latemperaturepeut _tre programm_ede 90 a 285° C (195
550° F]par intervallesde 3° C (5° F).
• AprCstrois secondes,lefour se met _ pr_!chauffer.
PATISSCONVECTet PREHEATapparaissenta I'afficheuravec
la mention{{ 100° _ou latemperatureactuelle du four (la plus
_levCedesdeux).AUTOs'affichesi la caract_ristiquede
conversionautomatiquepour convection (certainsmodules]
est activ_!e.
• Latemperatureaffich_e augmentepar intervallesde ] °
jusqu'a ceque le four atteigne latemperaturepr_r_gk!e.
AIIouezenviron 15minutespour le pr_!chauffagedu four.
° Lorsquele four estpr_chauff_, unsignal sonore retentit et
le mot PREHEATs'_!teint,puis la mention PATISSCONVECT
s'affiche.
A la fin de la cuisson,6teignezlefour en appuyantsur la touche
CANCEL. Retirezla nourrituredu four. Lefour
continue de fonctionnerjusqu'_ ce quevous ( CANCEL,
i
appuyiezsur la touche CANCEL. ............
÷
57
8113P527-60 58 _ 12/6/05, 8:06 AM
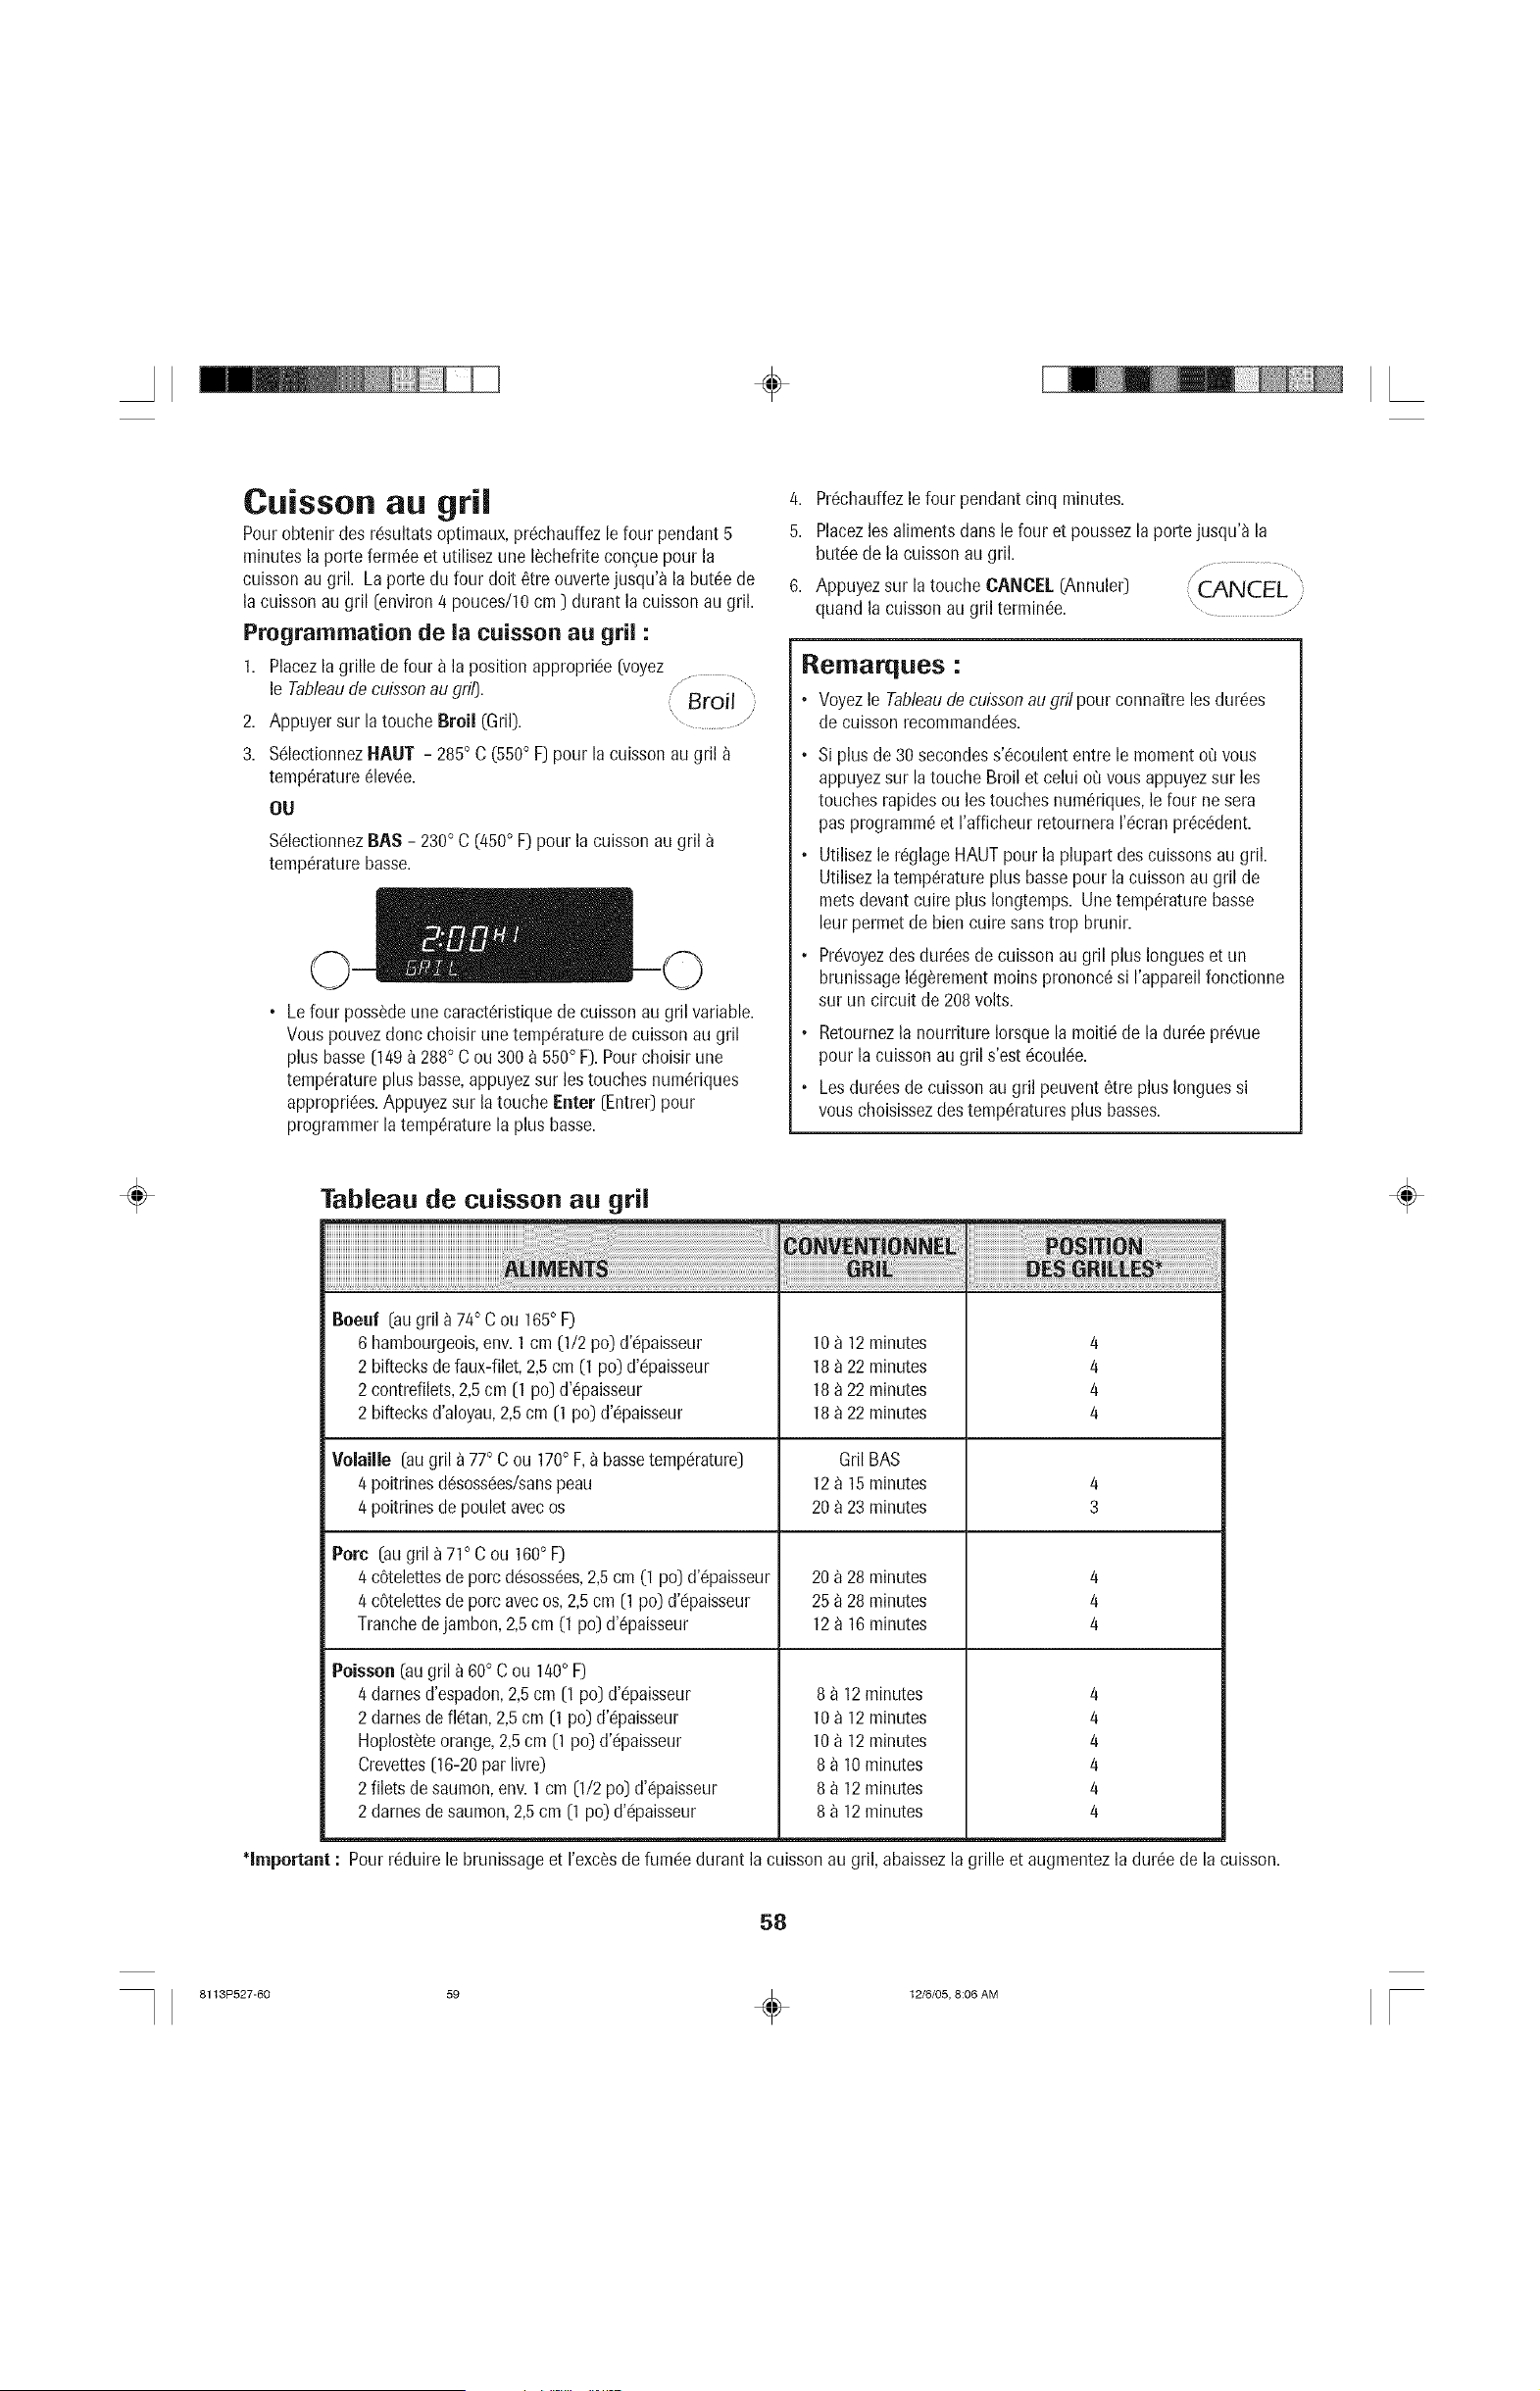
÷
Cuisson au gril
Pourobtenir des r6sultatsoptimaux,pr_chauffezlefour pendant5
minutesla porte ferm6e et utilisezune I_chefriteconcuepour la
cuissonau gril. Laporte du four dolt 6tre ouvertejusqu'a la but6e de
la cuissonaugril (environ4 pouces/10cm ) durant la cuissonau gril.
Programmation de la cuisson au gril :
1. Placezla grille de four _ la positionappropri& (voyez
le Tableaude cuissonau gril).
Broil
2. Appuyersur la touche Broil (Gril). ....................
3. S61ectionnezHAUT - 285° C (550° F]pour la cuissonau gril
temp6rature_lev6e.
OU
S61ectionnezBAS - 230° C (450° F) pour lacuisson augril
temp6raturebasse.
• Le four poss_deune caract6ristiquede cuissonau gril variable.
Vouspouvezdonc choisirune temp6raturede cuissonau gril
plus basse[1498 288° Cou 300_ 550° F).Pourchoisir une
temp6ratureplus basse,appuyezsur les touchesnum6riques
appropri&s. Appuyezsur la touche Enter (Entre0pour
programmerla temp6raturela plus basse.
/4. Pr6chauffezle four pendantcinq minutes.
5. Placezlesaliments dansle four et poussezlaporte jusqu'a la
but& de la cuissonau gril.
/,, ................
6. Appuyezsur la touche CANOE[.(Annule0 CANCEL
quand la cuissonau gril terrain&.
Remarques :
• Voyezle Tableaudecuissonaugril pour connaitre les dur6es
decuisson recommand&s.
• Si plus de 30secondess'6coulententre le moment o0 vous
appuyezsur latouche Broil et celui o0 vousappuyezsur les
touches rapidesou les touchesnum_riques,le four nesera
pas programm6et rafficheur retourneraI'c!cranpr6cc!dent.
• Utilisezle r6glageHAUTpour la plupart des cuissonsau gril.
Utilisezla temp6ratureplus bassepour la cuissonau gril de
metsdevantcuire plus Iongtemps. Unetemcrature basse
leur permetde biencuire sans trop brunir.
. Prc!voyezdes dur6esde cuissonau gril plus Iongueset un
brunissagek!g_rementmoinsprononc6si rappareil fonctionne
sur un circuit de 208volts.
• Retournezla nourriture Iorsquela moitk! de la dur& prc!vue
pour la cuisson augril s'estc!couk!e.
• Lesdur6esde cuissonau gril peuvent6tre plus Ionguessi
vous choisissezdestemp6raturesplus basses.
÷
Tableau de cuisson au gril
Boeuf (au gril _ 74° C ou 165° F)
6 hambourgeois,env. 1cm (1/2 po) d'@aisseur
2 biftecksde faux-filet,2,5cm (1po) d'%aisseur
2 contrefilets,2,5cm (1 po] d'@aisseur
2 biftecksd'aloyau,2,5cm (1 po) d'%aisseur
VolaJlle [au gril a 77° Cou 170° F, _ basse temcrature]
4 poitrines d6soss&s/sans peau
4 poitrines de poulet avec os
Porc (au gril a 71° C ou 160° F)
4 cOtelettesde porc dc!soss6es,2,5cm (1 po] d'@aisseur
4 cOtelettesde porc avecos,2,5cm (1po)d'%aisseur
Tranchedejambon,2,5cm (1 po] d'@aisseur
Poisson(augril a 60° C ou 140° F)
4 dames d'espadon,2,5cm [1 po] d'%aisseur
2 dames defl_tan,2,5cm (1 po)d'c!paisseur
Hoplost_teorange,2,5cm (1 po) d'%aisseur
Crevettes(16-20parlivre)
2 filets de saumon,env.1 cm (1/2 po] d'%aisseur
2 dames desaumon,2,5cm (1po) d'%aisseur
10 a 12 minutes
18 a 22 minutes
18 a 22 minutes
18 a 22 minutes
Gril BAS
12 a 15 minutes
20 a 23 minutes
20 _ 28 minutes
25 _ 28 minutes
12 a 16minutes
4
4
4
4
4
3
4
4
4
8 _ 12minutes
10 a 12 minutes
10 _ 12 minutes
8 _ 10minutes
8 _ 12minutes
8 _ 12minutes
4
4
4
4
4
4
*important : Pourr6duire le brunissageet I'exc_sde fum& durant la cuissonau gril, abaissezla grille et augmentezla dur6ede lacuisson.
÷
58
8113P527-60 59 _ 12/6/05, 8:06 AM
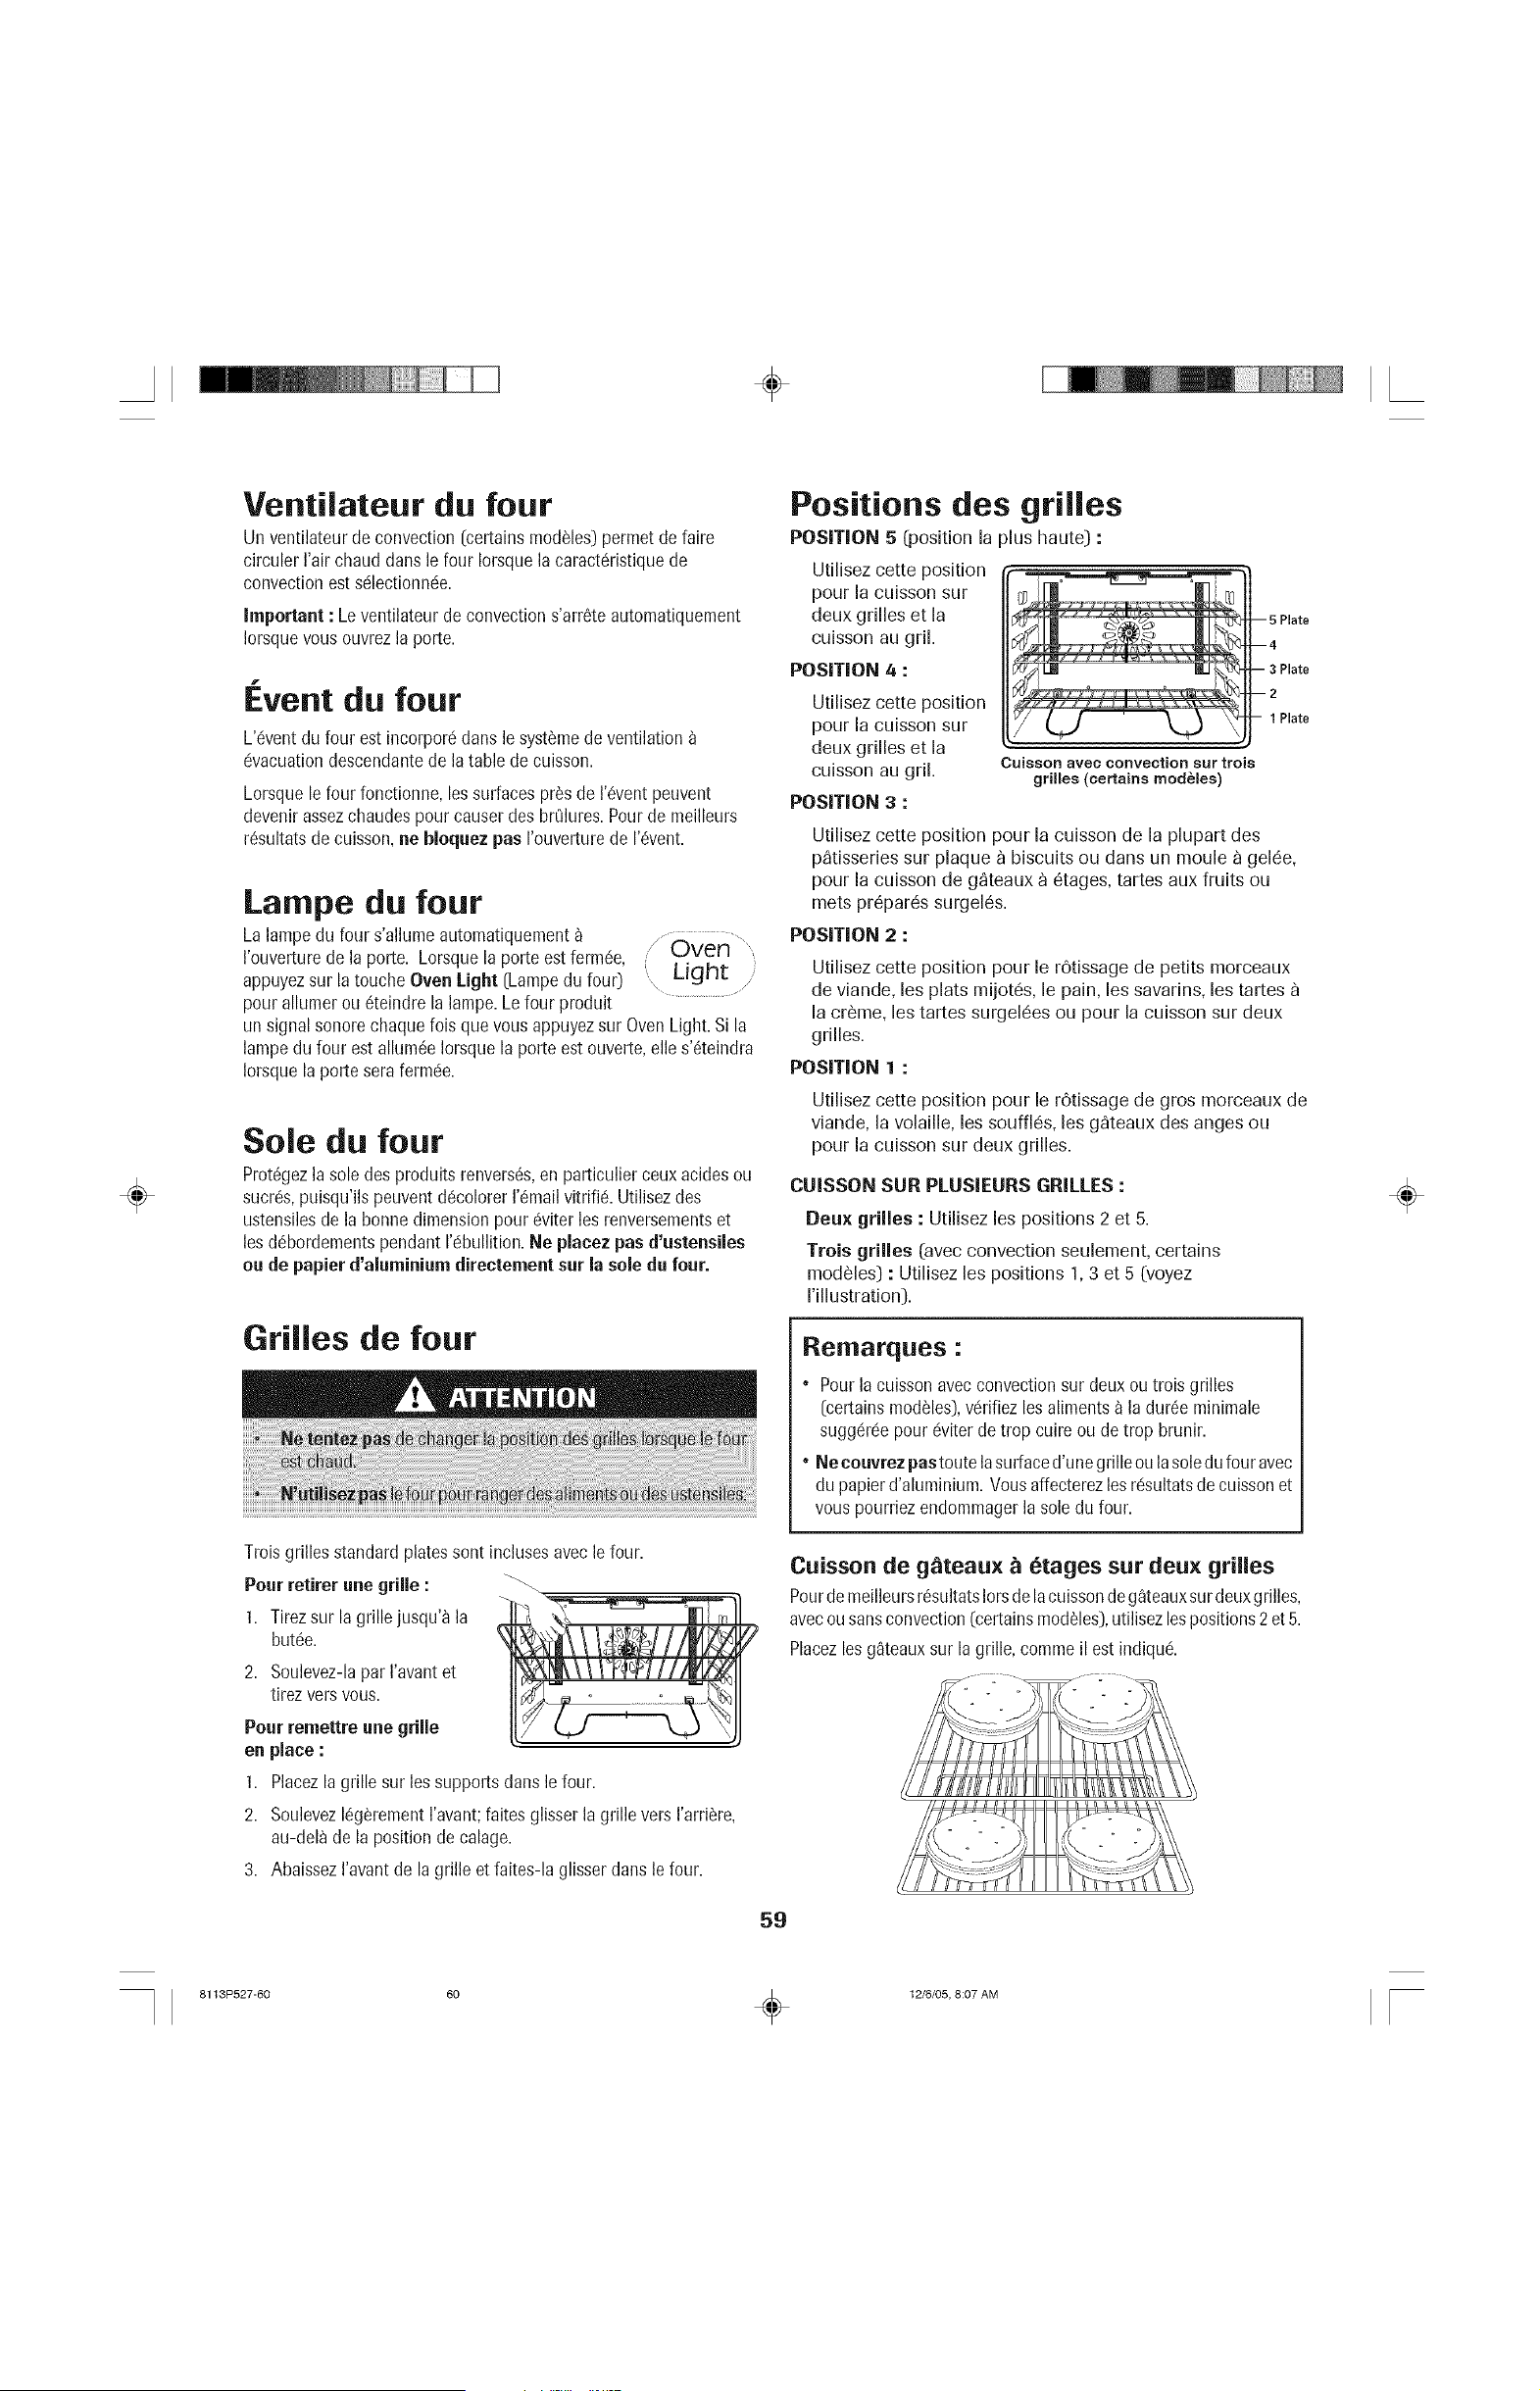
÷
÷
Ventilateur du four
Un ventilateurde convection(certainsmod_les)permetde Dire
circuler I'air chauddartsle four Iorsquela caract6ristiquede
convectionest s(!lectionnc!e.
Important : Leventilateurde convections'arr6teautomatiquement
Iorsquevousouvrez la porte.
f
Event du four
L'6vent dufour est incorporc!dans le syst_medeventilation
c!vacuationdescendantede la table de cuisson.
Lorsquele four fonctionne,les surfacespros de I'_ventpeuvent
devenirassezchaudespour causerdes brQlures.Pourde meilleurs
r_sultatsde cuisson,ne bloquez pas I'ouverturede r6vent.
Lampe du four
Lalampe du four s'allume automatiquement_ z Over3
I'ouverturede la porte. Lorsque la porteest ferm6e, f .....'
appuyezsur latouche Oven Light (Lampedu four) ' Light
pour allumerou 6teindre la lampe.Lefour produit
un signalsonore chaquefois quevous appuyezsur Oven Light.Si la
lampedu four estallum6e Iorsquela porte est ouverte,elles'_teindra
Iorsquela porte serafermc!e.
Sole du four
Prot6gezla sole desproduits renvers6s,en particulierceux acidesou
sucres,puisqu'ilspeuventd6colorer1'6mailvitrifi6. Utilisezdes
ustensilesde la bonne dimensionpour c!viterles renversementset
les d6bordementspendantrc!bullition.Ne placez pas d'ustensiles
ou de papier d'aluminium directement surla sole du four,
Grilles de four
Troisgrilles standard platessont inclusesavec le four.
Pour retirer une grille :
1. Tirezsur la grillejusqu'_ la
but6e.
2. Soulevez-lapar I'avantet
tirezvers vous.
Pour remettre une grille
en place :
1. Placezla grille sur les supportsdans le four.
2. Soulevez16g_rementI'avant;faites glisserla grille versI'arri_re,
au-deD de la positionde calage.
3. AbaissezI'avantde la grille et faites-la glisser dansle four.
Positions des grilles
POSITION 5 (position la plus haute) :
Utilisez cette position
pour la cuisson sur
deux grilles et la
cuisson au gril.
POSITION 4 :
Utilisez cette position
pour la cuisson sur
deux grilles et la
cuisson au gril.
POSITION 3 :
i
Cuisson avec convection sur trois
grilles terrains modules)
-- 5 Plate
--4
L3 Plate
1 Plate
Utilisez cette position pour la culsson de la plupart des
p_tisseries sur plaque b biscuits ou dans un moule _ gel6e,
pour la cuisson de g_teaux b 6tages, tartes aux fruits ou
mets pr6par6s surgel6s.
POSITION 2 :
Utilisez cette position pour le rOtissage de petits morceaux
de viande, les plats mijot6s, le pain, les savarins, les tartes
la cr_me, les tartes surgel6es ou pour la cuisson sur deux
grilles.
POSITION 1 :
Utilisez cette position pour le rOtissage de gros morceaux de
viande, la volaille, les souffl6s, los g_teaux des anges ou
pour la cuisson sur deux grilles.
CUISSON SUR PLUSIEURS GRILLES :
Deu× grilles : Utilisez les positions 2 et 5.
Trois grilles [avec convection seulement, certains
modules) : Utilisez les positions 1, 3 et 5 [voyez
rillustration).
Remarques :
• Pourla cuissonavecconvectionsur deuxou trois grilles
[certainsmodules),vdrifiez losaliments_ ladur6e minimale
sugg6rdepour _viterdetrop cuire ou de trop brunir.
• Ne couvrezpastoute lasurfaced'unegrilleoula soledufour avec
du papierd'aluminium. Vousaffecterezlosrdsultatsde cuissonet
vouspourriezendommagerla soledu four.
Cuisson de g_teau× _ etages sur deux grilles
Pourdemeilleursr6sultatslorsde lacuissondeg_teauxsurdeuxgrilles,
avecousansconvection(certainsmeddles),utilisezlespositions2 et5.
Placezlos g_teauxsur lagrille, comme il est indiquc!.
59
÷
8113P527-60 60 _ 12/6/05, 8:07 AM
÷
OPT|
÷
Autres options
Cuisson et maintien (certains modules)
1. Appuyezsur la touche More Options [Autres .....
options). Options /
2. S61ectionnezCUISS/CNAUD. "
3. Entrezla dur6ede cuisson_ I'aidedes touches rapidesou des
touches num6riques.
4. S61ectionnezCUBS ou CONVECT.
5. Apr_s avoirappuydsur CUISS,s61ectionnezla temp6rature_ I'aide
des touches rapidesou des touches num6riques.
6. Apr_s avoirappuydsur CONVECT,sdlectionnezCUISSON
CONVEC,ROTISSCONVECTou PATISSCONVECT,puis
sdlectionnezlatempdraturea I'aidedes touchesrapidesou des
touches num6riques.
Lefour effectue la cuissonpour la dur6echoisie,puis garde les
alimentsau chaud pendantune heure.Lefour s'arr6tera
automatiquement.
Important : Si la recette recommandede pr6chaufferle four,
augmentezla dur6ede cuisson.
D marrage differ /More",,
Options
1. Appuyezsur la touche More Options. .......... "
2. Appuyezsur la flSchepour afficher DEMARRDIFFERE.
3. SdlectionnezDEMARR DIFFERE.
4. Entrezla dur_ede ddlaisouhait6savant le ddbut de I'opdration
I'aide destouches rapidesou destouches numdriques.
5. SdlectionnezCUISSON,CONVECTou NETTOYAGE,puis
s61ectionnezlatempdraturea I'aidedes touchesrapidesou des
touches num6riques.
Programmation de la cuisson diff_r_e :
1. Suivezles6tapesI a 4 du _ d_marragediffc!rc!_>[voirci-dessus).
2. Sdlectionnezlatemp6ratureparmi cellesaffich6esou utilisez les
touches num6riquespour entrer la temp6raturedevotre choix.
3. Sdlectionnezladur6ede cuissonddsirdeen utilisant les durdes
affichc!esou lestouches num6riques.
4. La mentionDELAY(Diff6r6)apparait _ I'afficheur,lafonction
choisie,la temp6ratureprdddinie et leddcomptede la dur6edu
d61ai.Lorsqueledc!compteest terminal,la durdede cuisson
s'affiche et lefour commencea pr_chauffer.
Programmation de la cuisson _ convection differ6e :
[certainsmodules)
1. Suivezles 6tapes 1a/4 du {{dc!marragediff_rc!>>[voir a gauche).
2. S61ectionnezCUBS CONVECT,ROTISSCONVECT ou PATISS
CONVECT.
3. S61ectionnezla temp6ratureparmi cellesaffich6esou utilisez les
touches num6riquespourentrer la temp6raturede votre choix.
/4. S61ectionnezla dur6e de cuisson d6sir6een utilisant lesdurdes
affich6esou lestouches num_riques.
5. Lamention DELAYapparait a I'afficheur,lafonction choisie,la
tempdratureprdddinie et le ddcomptede la dur_edu d_!lai.Lorsque
led_!compteest terrain& la dur_e de cuissons'affiche et lefour
commence_ pr6chauffer.
Programmation de l'autonettoyage diff_r_ :
1. Suivezles _tapes I a/4 du _<d_!marragediff_!r_!_[voir a gauche).
2. ENLEVERGRILLEapparaita I'afficheur.Retirezles grilles du four et
sdlectionnezCONTINUER.
3. Choisissezle niveaude salet(_LEGERen entrant 200a I'aidedes
touches num_riquesafin de programmerdeux heuresde nettoyage.
Choisissezle niveaude salet_MOYEN ou INTENSEa I'aidedes
touches rapides.Attendez quelquesinstantspendantque la porte se
verrouille.
/4. DELAYapparait_ I'afficheur,ainsique la durde du nettoyage,le ddlai
et le ddverrouillage(selon le niveaudesalet_ choisi).Lorsquele
d_compteest termin& la durdedu nettoyages'afficheet lefour
commence_ prdchauffer.
Pourplus de ddtailsconcernantI'autonettoyage,voyezla page/41.
Fermentation (certains modules)
La caractSristiquede fermentation est utilisde pour faire lever des
produitsde boulangerie_ basede levureavantde les cuire. IIy a deux
m_thodesde fermentationdisponible : rapideet standard.
Lafermentation standardeffectu_eduns lefour protege la p_te des
changementsdetemperatureou descourants d'air qui affectent
courammentles r_sultatsd'une fermentationfaite sur le comptoir.
La mSthodede fermentationrapide permetd'obtenir une
fermentationplus rapidesans faire de tort a la levure.
1. Appuyezsur la touche More Options.
2. S_!lectionnezFERMENTATION.
3. S_!lectionnezRAPIDEou NORMALE.
/4. Lorsquela fermentationest termin_e,retirezla
p_te du four et appuyezsur la touche
CANCEL(Annule0.
" More
,Options
\ /
x ..............
CANCEL
\ ............ /
Suite
6O
÷
8113P527-60 61 _ 12/6/05, 8:07 AM
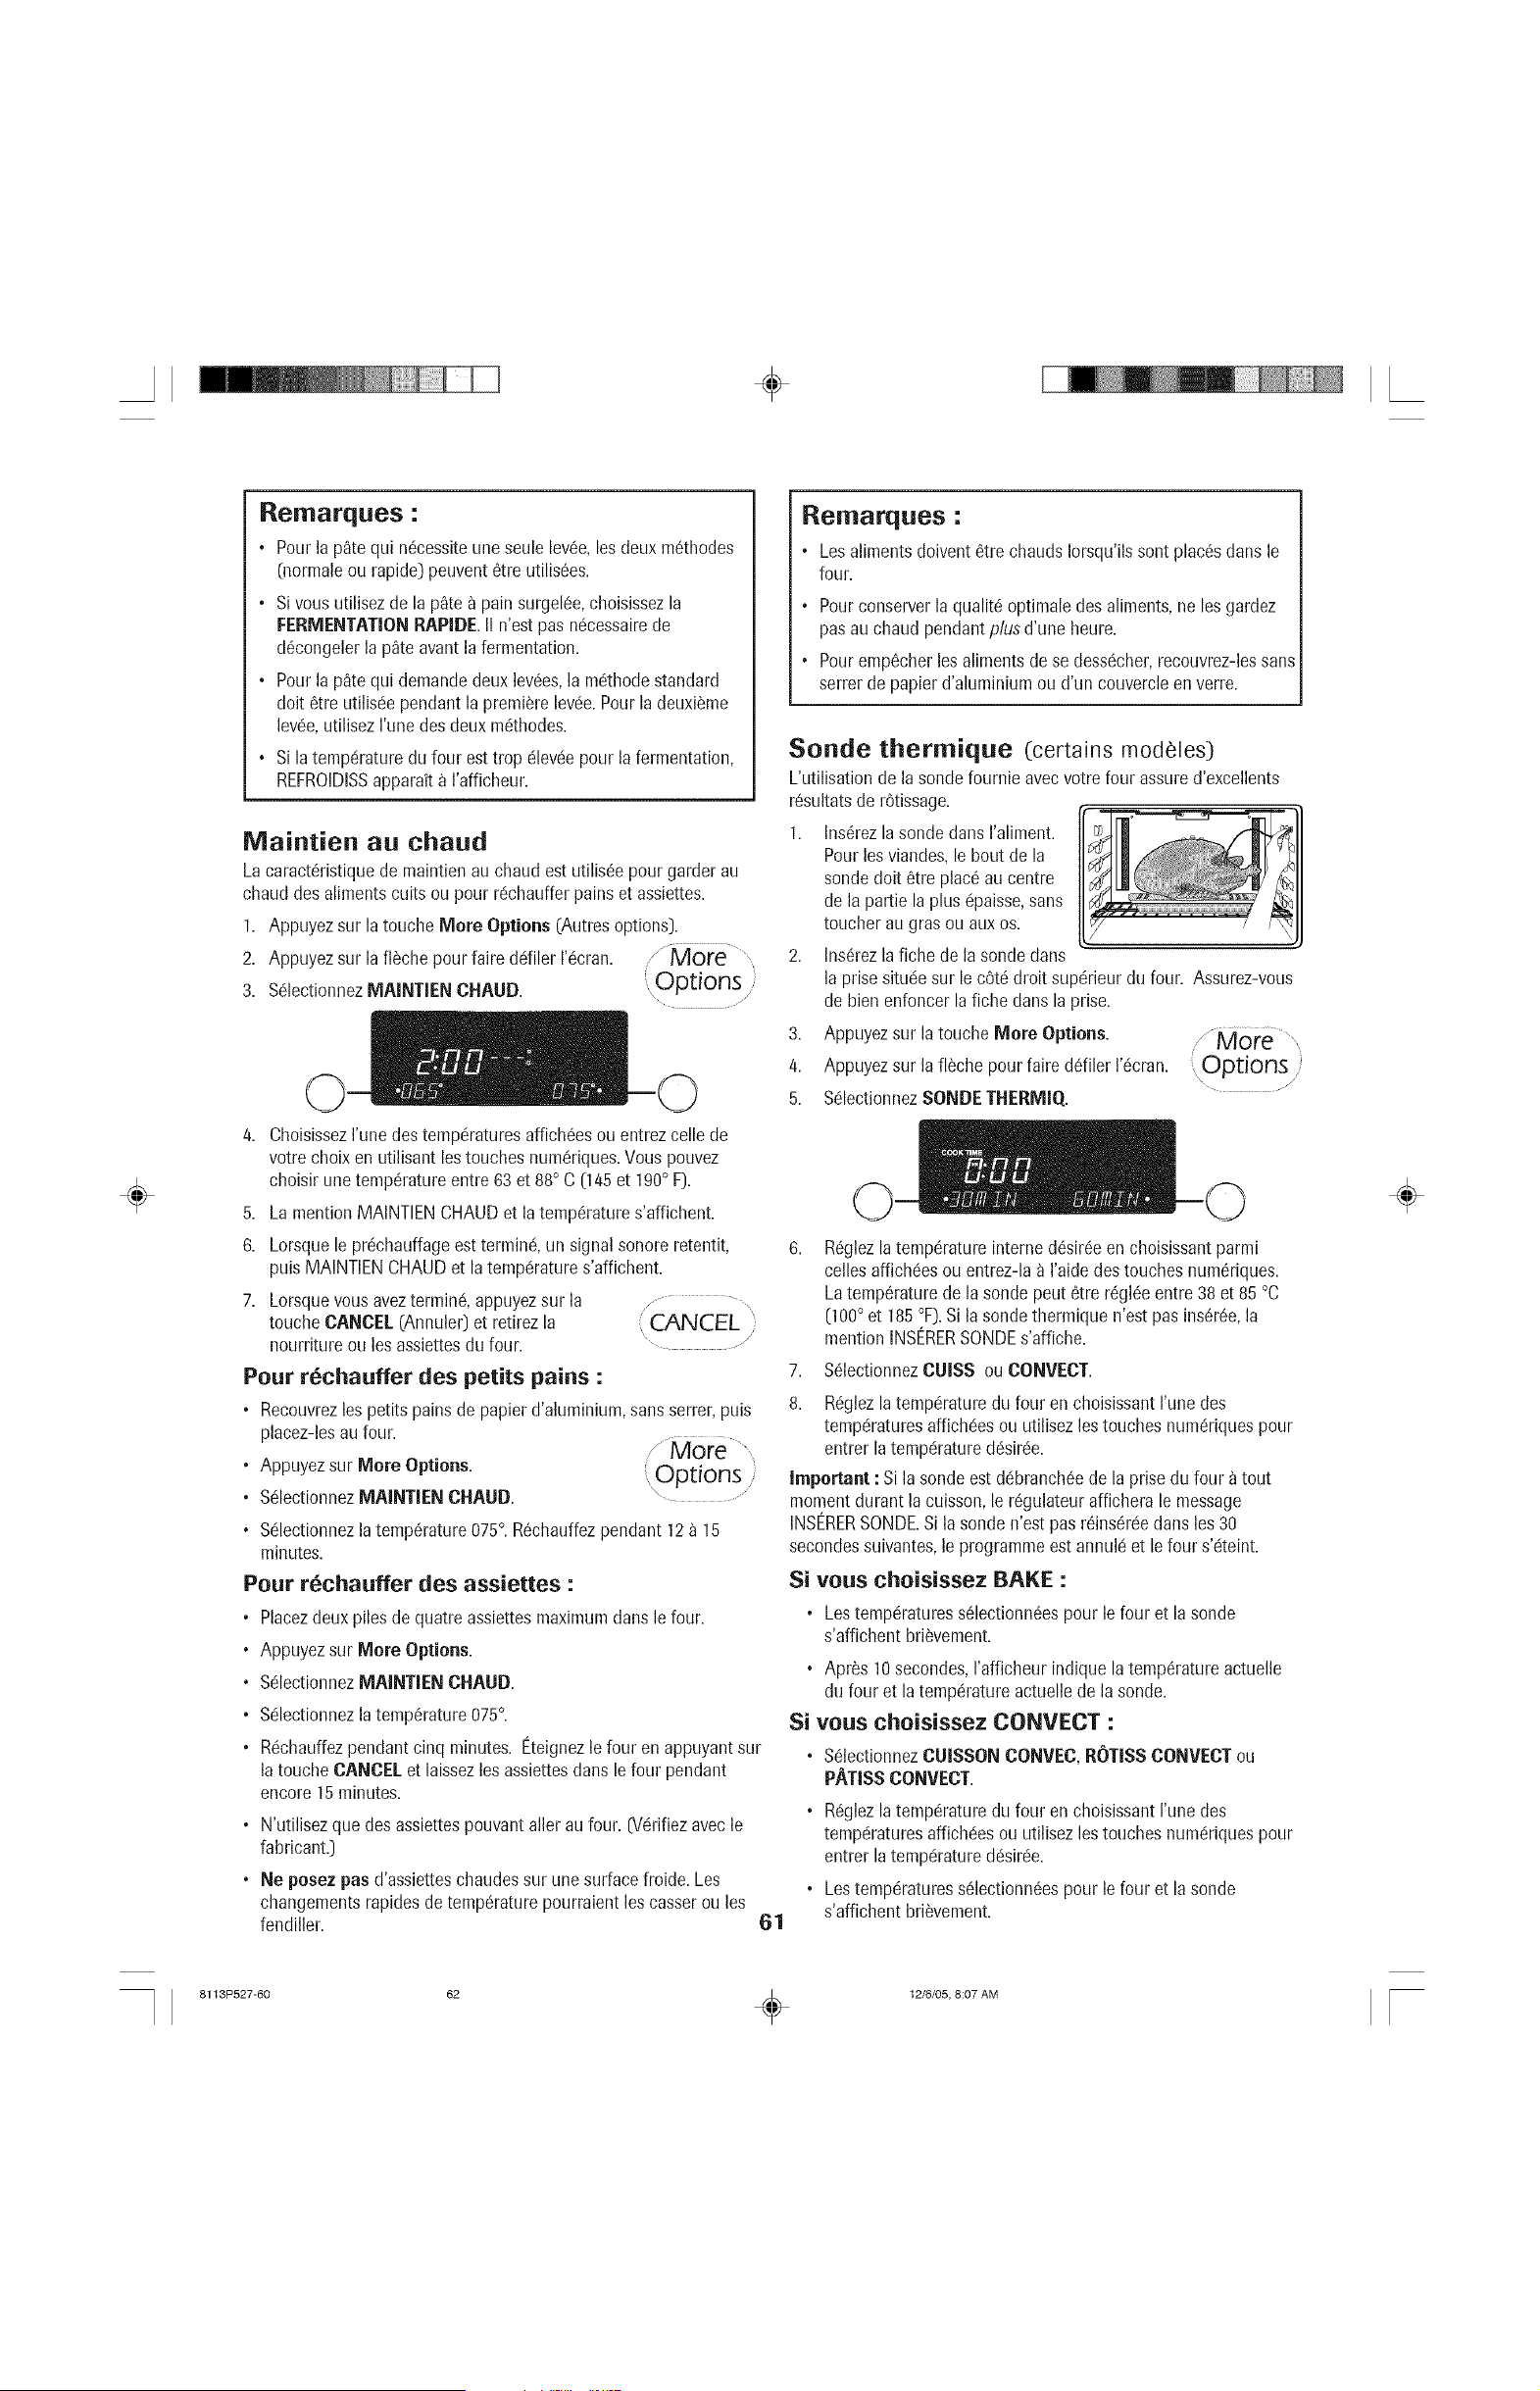
÷
÷
Remarques :
• Pour la p_te qui n6cessiteuneseule lev6e,los deuxrn6thodes
(norrnaleou rapide) peuvent6tre utilis6es.
. Sivous utilisez de la p_te_ pain surgel6e,choisissezla
FERMENTATIONRAPIDE.II n'est pus nc!cessairede
d6congelerla p_teavant lafermentation.
• Pour la p_te qui dernandedeux lev_es,la rn_thodestandard
doit 6tre utilisc!ependant laprerniSrelevc!e.Pourla deuxi_rne
lev6e,utilisezI'une desdeux rn6thodes.
° Si latemp@aturedu four esttrop c!levc!epour la fermentation,
REFROIDISSapparaita I'afficheur.
IVlaintien au chaud
Lacaract@istiquede rnaintienau chaud est utilis_epour garder au
chaud desalimentscults ou pour rc!chaufferpainset assiettes.
1. Appuyezsur la touche More Options (Autres options).
2. Appuyezsur la fl_che pour faire ti!!filer I'c!cran. ."" More
3. Sc!lectionnezMAINTIEN CHAUD. Options
4. ChoisissezI'une destemperaturesaffich6esou entrezcello de
votrechoix en utilisant lostouches numc!riques.Vous pouvez
choisir une ternp6ratureentre 63et 88° C [145et 190° F).
5. La mentionMAINTIENCHAUDet la temp6ratures'affichent.
6. Lorsque le prc!chauffageestterrninc!,un signal sonore retentit,
puis MAINTIENCHAUDet laternp@atures'affichent.
7. Lorsquevous avezterrnin(!,appuyezsur la
toucheCANCEL (Annuler) et retirezla CANCEL
nourriture ou los assiettesdu four. ...........
Pour r_chauffer des petits pains :
• Recouvrezles petits pains de papierd'alurniniurn,sansserrer, puis
placez-lesau four.
• Appuyezsur More Options. ,ODtiOnS
° Sc!lectionnezMAINTIEN CHAUD. .............
° Sc!lectionnezlatemp@ature075°. R_chauffezpendant 12a 15
minutes.
Pour r_chauffer des assiettes :
° Placezdeux piles dequatre assiettesmaximumdunsle four.
° Appuyezsur More Options.
° S(!lectionnezMAINTIEN CHAUD.
• Sc!lectionnezla temp6rature075°.
• R(_chauffezpendant cinq minutes. Eteignezle four en appuyantsur
latouche CANCELet laissezlos assiettesduns le four pendant
encore 15minutes.
° N'utilisezque des assiettespouvantaller au four. [W!rifiezavecle
fabricant.)
• Ne posez pas d'assietteschaudes sur une surfacefroide. Los
changementsrapidesde ternp@aturepourraientlos cusserou los
fendiller.
61
Remarques :
• Los alimentsdoivent 6tre chaudsIorsqu'ilssont plac6sduns le
four.
° Pourconserverla qualit6 optimaledes aliments,ne losgardez
pus auchaud pendantplus d'une heure.
• Pour ernp6cherlos alimentsde se dess(_cher,recouvrez-lessans
serrerde papierd'aluminium ou d'un couvercleenverre.
Sonde thermique (certains modeles)
L'utilisationde la sonde fournie avecvotre four assure d'excellents
r6sultatsde r6tissage.
1. Ins6rezlasonde duns I'alirnent.
Pourlos viandes,lebout de la
sonde doit 6tre plac6au centre
de la partie la plus @aisse,sans
toucher au gras ou aux os.
2. Ins@ezlafiche de la sondeduns
laprise situ6e sur lecOtc!droit sup@ieurdu four. Assurez-vous
de bien enfoncerla fiche duns la prise.
3. Appuyezsur latouche More Options. _"MOre
4. Appuyezsur lafl_che pour faire driller 1'6cran. OPtions
x _
5. Sc!lectionnezSONDETHERMIO..
6,
R6glezla temp6ratureinterne d6sir6een choisissantparmi
cellosaffichc!esou entrez-la a I'aidedestouches nurn_riques.
Latemp@aturede la sonde pout 6tre r6gl_eentre 38 et 85 °C
(100° et 185°F).Si lasondetherrnique n'est pus ins6r6e,la
mentionINSERERSONDEs'affiche.
7. S6lectionnezCUiSS ou CONVECT.
8. R6glezla temp@aturedu four en choisissantI'unedes
temp@aturesaffichc!esou utilisezlostouches nurn_!riquespour
entrer laternp@atured_sir_!e.
Important : Sila sonde estd_branch_ede la prise du four atout
rnornentdurant la cuisson, ler_gulateuraffichera le message
INSERERSONDE.Si la sonden'est pus r_ins_r_!eduns los 30
secondessuivantes,le programmeest annul_!et lefour s'_!teint.
Si vous choisissez BAKE :
. Lostemp@aturess_lectionn_espour le four et lasonde
s'affichent bri_vement.
• Apr_s 10secondes,I'afficheurindique la temperatureactuelle
du four et la ternp_!ratureactuellede la sonde.
Si vous choisissez CONVECT :
• S61ectionnezCLIISSONCONVEC,ROTISSCONVECTou
PATISSCONVECT.
• R_glezla temperaturedu four en choisissantI'unedes
temp@aturesaffich_!esou utilisezlostouches nurn_!riquespour
entrer laternp@atured_!sir_!e.
. Lostemp@aturess_lectionn_espour le four et lasonde
s'affichent bri_vernent.
÷
8113P527-60 62 _ 12/6/05, 8:07 AM
÷
÷
• Apr_s 10secondes,I'afficheurindique la tempc!ratureactuelle
du four et la temp6ratureactuellede lasonde.
9. LorsqueI'alimentatteint la temp6ratureinternechoisie, le four
s'_teint et un signal sonoreretentit.
10. Dc!branchezlasonde de la prisedu four. La sonde sera
chaude. Utilisez un gant de cuisineou une maniquepour retirer
lafiche de la sonde du four.
Reilrlarques :
. La sondedolt 6tre retiree du four Iorsqu'ellen'estpasutilis6e.
• Puisquele four esttr_s bien isol6,la chaleurqu'il contient
poursuit la cuissonde la nourriture m6mesile signalsonore a
retenti et le four s'estdteint. Pourcette raison, il est importantde
retirer losalimentsdu four aussit6t que lesignal sonore retentit.
• Utilisez la poign6ede la sonde pour I'ins6rerou la retirer. Ne
tirez pas sur /e c_flle.
. La sonde est chaude apr_s la cuisson.Utilisez unemanique
ou un gant decuisine pour la retirer.
• Si laviande n'est pas compl_tementd6congel6e,ins_rezla
sonde apr_sI a 2 heuresde rOtissage,afin de la prot6ger.
, Pournettoyerla sonde unelois refroidie, essuyez-laa I'aided'un
linge _ vaissellesavonneux.N'immersez pas la sonde darts
reau et ne la lavez pas au lave=vaisselle.
Temperatures internes sugg6r es
Bc_ufhach_ 74° C (165° F)
Bceuf,veau,agneau(frais) Saignant 63° C (145° F)
A point 71° C (160° F)
Biencult 77° C (170° F)
Poulet,dinde Entier 82° C (180° F)
Poitrine 77° C (170° F)
Porc A point 71° C (160° F)
Biencult 77° C (170° F)
Jambon,pr6cuit 60° C (140° F)
Deshydration (certains modeles)
Pourde meilleursrc!sultats,utilisez unegrille de deshydration qui
permeta I'airde circuler uniformc!mentautour de la nourriture.
Leventilateurde convectionfonctionne pendant ladeshydration.
Program[nation de la dessiccation :
1. Laporte du four doit 6tre 16g_rementouvertepour hisser
c!chapperI'humidit6pendant la deshydration.
• OuvrezIc!g_rementla porte du four.
• PlacezI'entreb_illeurmagnc!tique(Pieceno
8010P146-60)par-dessuslecommutateur
situc!en haut a droite sur lecadre du four.
L'entreb_illeurcr_e un espaceentre le cadre du four et la porte
du four afin de permettrea I'humidit6de s'_chapper.
° Fermezdoucementla porte jusqu'_ ceque I'entreb_illeur
magn6tiquesoit en contact avecla porte du four. L'aimant
garderaI'entreb_illeuren positiondurant la dessiccationet
permettraI'ouverturede la porte a tout momentdurant
I'opc!ration,sansque ce dernier ne change de position.
important : Si I'entreb_illeurn'est pas correctementpositionnc!,le
ventilateur deconvection nefonctionnera pas.
/ ........
2.Appuyezsur la toucheConvect (Convection). ( Convect i,
3. Appuyezsur la flSchepour faire driller I'_cran. '................. "
/4.Sc!lectionnezDESHYDRATION.
5. Sc!lectionnezunetemp6ratureparmi celles affich_esou entrez celle
devotre choixen utilisant lostouches num_riques. Vous pouvez
choisirune temp6ratureentre 38 et 93° C (100 et 200° F).
6. Lamention DESHYDRATIONet latempc!ratures'affichent.
PREHEAT(PrechauffageJs'affiche jusqu'_ ceque latemp6rature
programmc!esoit atteinte.
7. Lorsquela dessiccationestterminc!e,retirez los
alimentsdu four et appuyezsur la touche CANCEL
CANCEL(Annulet). ......................................"
Suivezle Guidede deshydrationde la page 63 pour connaitreles
durdesde dessiccation.V_rifiezlosalimentsaux dur_es minimales
indiqu_es.Refroidissezlesaliments_ latempdratureambianteavant
dev_rifier s'ils sont bienddshydratSs.
Remarques :
• Pouracheterunegrille de deshydration,appelezun d_taillant
Jenn-Air afin d'obtenir la _{DRYINGRACK>>(Grillede
dessiccation),en accessoireou composezle 1-800-JENNAIR.
, La majorit8 desfruits et I_gumess_chentbienet conserventleur
couleur unelois s_ch_s_ 60° C (140° F).Lesviandesfraicheset
s_ch_!esdoivent8tre d_shydratSesentre 63 _ 65° C [145et
150° F).Pourobtenir des r_sultatsoptimaux,dess_!chezlos
herbesaromatiquesa 38° C (100° F).Cependant,a cette
temp_!ratureinf_rieure,pr_voyezdes dur_!esde s_!chagepouvant
allerjusqu'a 8 heures.
. La dur6e de deshydrationvarie solon les crit_res suivants :
Le contenu en eau et en sucre de raliment, la taille des
morceaux,la quantit6 d'aliments _ d6shydrater et
I'humidit6 dans I'air.
• V_rifiezlos alimentsau temps des_chageminimum.S_!chez-les
plus Iongtempsau besoin.
, Losfruits qui brunissent une fois exposesa I'airdoivent_tre
trait_!savecun antioxydant.EssayezI'une des m_thodes
suivantes:
1. Trempezle fruit dansun m_langede deux partsde jus de
citron embouteill_!pour unepart d'eau fraiche.
2. Faitestremper le fruit dartsune solution d'acideascorbique
ou d'antioxydantcommercial(1 cuill_re _th_!pour 1pinto
(1 L)d'eau froide).
, Losaliments peuvents'6goutterIorsdu processusde
deshydration.Apr_s la deshydrationd'aliments_ contenu61ev_
en sucre ou en acide,la sole du four dolt _tre nettoy_ea I'eau
et au savon.Lefini de porcelainepeut se d6colorersi los
projectionsde sucreou d'acide nesont pasessuy_esavantque
le four ne soit chauff_ a chaleur_!lev_!eou avant un cycle
d'autonettoyage.
, II est possibled'utiliser plus d'une grille a lafois. Cependant,
vousdevrezaugmenterla dur6ede deshydration.
, Consultezd'autres sources(commela biblioth_quede la r6gion)
pour obtenir des informationssuppl_!mentaires.
62
÷
8113P527-60 63 _ 12/6/05, 8:07 AM
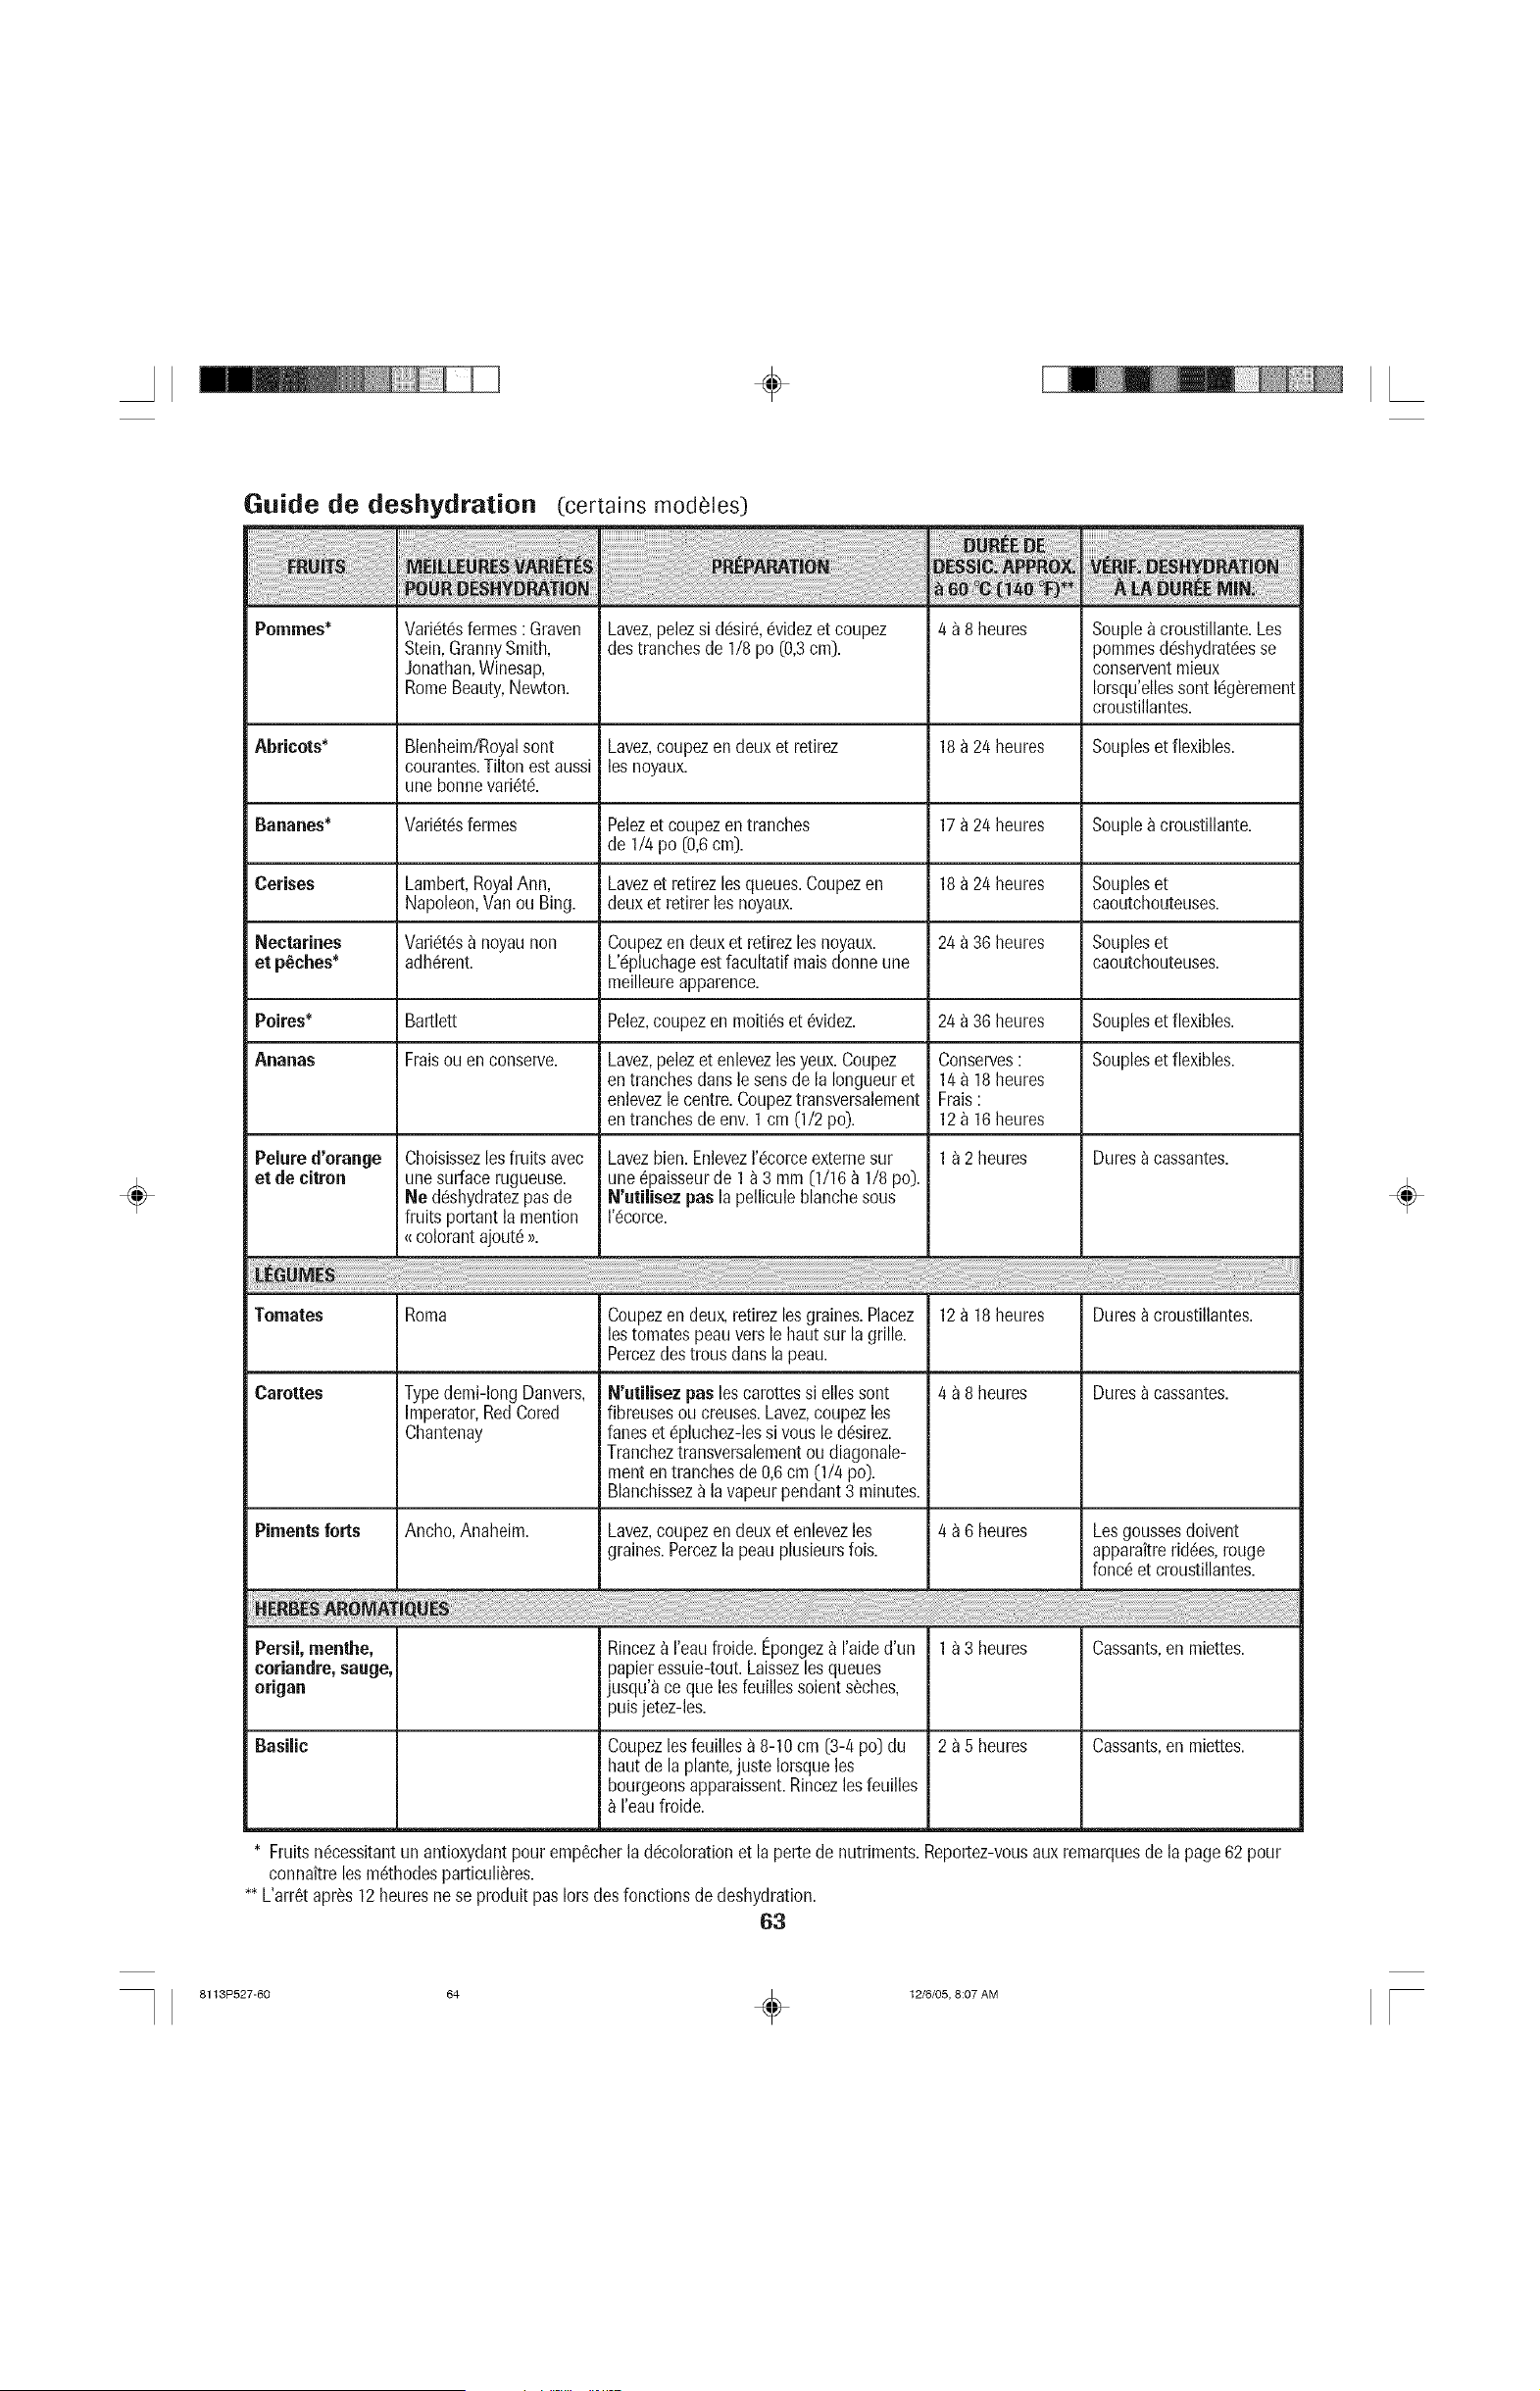
÷
Guide de deshydration (certains modeles)
÷
Polnnles*
Abricots*
Bananes*
Cerises
Nectarines
et p_ches*
Pokes*
Ananas
Pelured'orange
et de citron
Vari_tesfermes: Graven
Stein,GrannySmith,
Jonathan,Winesap,
RomeBeauty,Newton.
Blenheim/Royal sont
courantes. Tilton est aussi
une bonne vari6t&
Varidt6s fermes
Lambert,RoyalAnn,
Napoleon,Vanou Bing.
Varidtds_ noyaunon
adh6rent.
Bartlett
Fraisou enconserve.
Choisissezles fruits avec
une surfacerugueuse.
Ne d(!shydratezpasde
fruits portantla mention
<_colorantajout6_.
Lavez,pelezsi d6sir&dvidezet coupez
destranchesde 1/8po (0,3cm).
Lavez,coupezendeuxet retirez
les noyaux.
Pelezet coupezentranches
de 1/4 po [0,6cm).
Lavezet retirezlesqueues.Coupezen
deuxet retirerles noyaux.
Coupezendeux et retirezles noyaux.
L'6pluchageestfacultatif maisdonne une
meilleureapparence.
Pelez,coupez en moiti6s et 6videz.
Lavez,pelezet enlevezlesyeux.Coupez
entranchesdans lesensde la Iongueuret
enlevezle centre.Coupeztransversalement
entranchesde env.I cm (1/2 po).
Lavezbien.Enlevezr6corceextemesur
une6paisseurde 1a 3 mm (1/16) 1/8 po).
N'utJlisez pas lapelliculeblanchesous
I'c!corce.
4 a 8 heures
18 a 24 heures
17 a 24 heures
18 a 24 heures
24 a 36 heures
24 a 36 heures
Co[lserves :
14_ 18heures
Frais:
12_ 16heures
I a 2 heures
Souple_ croustillante.Les
potatoesdc!shydrat_esse
conserventmieux
Iorsqu'ellessont Ic!g_rement
croustillantes.
Soupleset flexibles.
Souple_ croustillante.
Soupleset
caoutchouteuses.
Soupleset
caoutchouteuses.
Soupleset flexibles.
Soupleset flexibles.
Dures a cassantes.
_!i_i!_i_Ei_i_i_i_!_!_!_!_!_!_!_!_!_!_!_!_!_!_!_!!_i_I __________
Tomates Roma Coupezen deux,retirezlesgraines.Placez 12 a 18 heures Duresacroustillantes.
lestomatespeauvers lehaut sur la grille.
Percezdes trousdansla peau.
Carottes Typedemi-longDanvers, N'utilisez pas lescarottessi ellessont 4 a 8 heures Duresa cassantes.
Imperator,RedCored fibreusesou creuses.Lavez,coupezles
Chantenay faneset c!pluchez-lessi vous le d6sirez.
Trancheztransversalementou diagonale-
menten tranchesde0,6cm (1/4 po).
Blanchisseza la vapeurpendant3 minutes.
Pimentsforts Ancho,Anaheim. Lavez,coupezendeuxet enlevezles 4 a 6 heures Lesgoussesdoivent
graines.Percezla peauplusieurslois. apparaitrerid6es,rouge
fonc6et croustillantes.
Persil,menthe, Rincez_ I'eaufroide.Epongez_ I'aided'un I a 3 heures Cassants,en miettes.
coriandre,sauge, papieressuie-tout.Laissezlesqueues
origan jusqu'ace queles feuillessoients_ches,
puisjetez-les.
Basilic Coupezlesfeuillesa 8-10cm [3-4 po) du 2 a 5 heures Cassants,en miettes.
haut dela plante,juste Iorsqueles
bourgeonsapparaissent.Rincezlesfeuilles
I'eaufroide.
* Fruitsn6cessitantun antioxydantpour emp6cherladc!colorationet la pertede nutriments.Reportez-vousauxremarquesde lapage 62pour
connaitreles m6thodesparticuli_res.
** L'arr6tapr_s 12heuresnese produit pasIorsdes fonctionsde deshydration.
63
÷
8113P527-60 64 _ 12/6/05, 8:07 AM
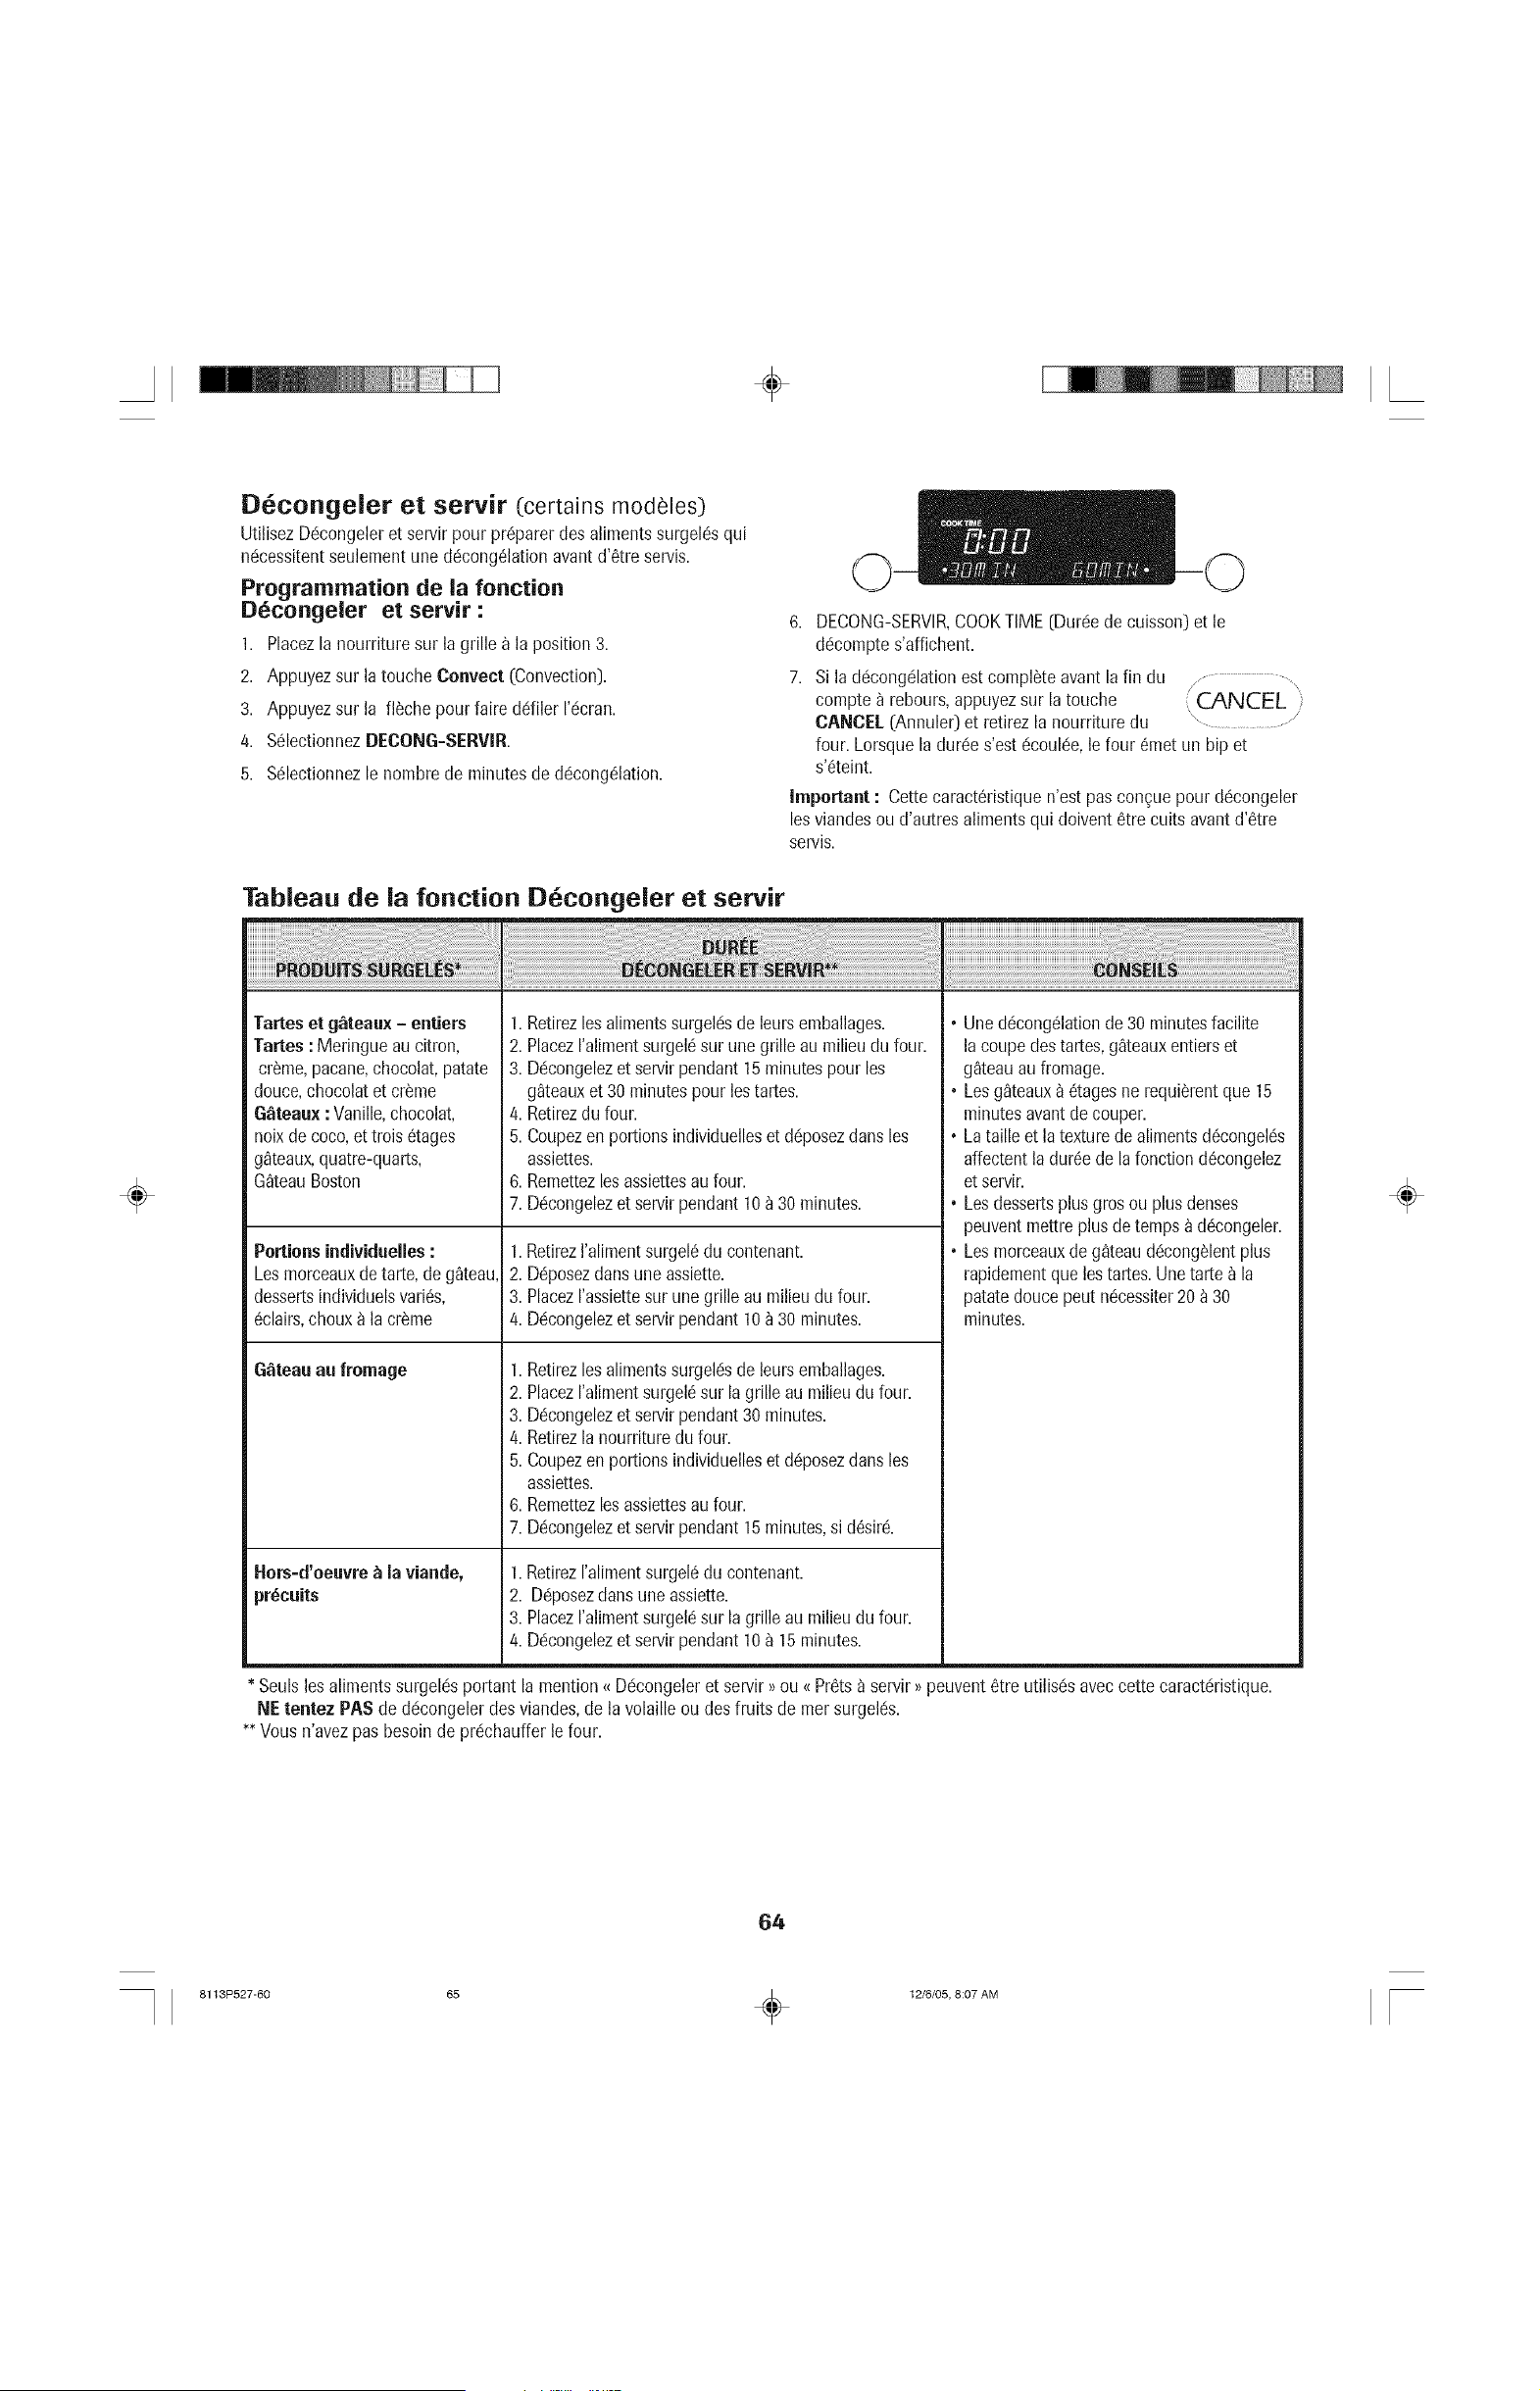
÷
÷
D congeler et servir (certains modeles)
UtilisezDc!congeleret servirpour pr@arer des alimentssurgel6squi
nc!cessitentseulementune d6cong61ationavantd'6treservis.
Prograrnmation de la fonction
D_congeler et servir :
1. Placezla nourrituresur la grille _ la position 3.
2. Appuyezsur latouche Oonveet (Convection].
3. Appuyezsur la fl_che pour faire driller rc!cran.
4. S@ctionnez DECONG-SERVIR.
5. S@ctionnez le hombrede minutesde dc!cong61ation.
6. DECONG-SERVIR,COOKTIME [Durde de cuisson)et le
d6comptes'affichent.
7. Si ladc!cong@tionest completeavantla fin du , ......................
compte a rebours,appuyezsur la touche CANCEL
CANCEL(Annule0 et retirezla nourrituredu \...................................
four. Lorsquela dur@ s'estc!coul@,le four _metun hip et
s'_teint.
important : Cette caract6ristiquen'est pus con£uepour d6congeler
lesviandesou d'autresalimentsqui doivent8tre cults avant d'6tre
servis.
Tableau de la reaction D congeler et servir
Tarteset g_teaux - entiers 1. Retirezlesalimentssurgel6sdeleursemballages. •
Tartes: Meringueaucitron, 2. PlacezI'alimentsurgel6sur unegrille au milieudu four.
cr_me,pacane,chocolat,patate 3. D@ongelezet servirpendant 15minutespour les
deuce,chocolatet cr_me g_teauxet 30minutespour los tartes. •
G_teaux :Vanille,chocolat, /4.Retirezdu four.
noixdecoco,et trois @ges 5. Coupezen portionsindividuelleset d@osezdunsles •
g_teaux,quatre-quarts, assiettes.
G_teauBoston 6. Remettezlosassiettesau four.
7. D@ongelezet servirpendant 10_ 30minutes. •
Portionsindividuelles: 1. Retirez[aliment surgel_du contenant. •
Lesmorceauxdetare, de g_teau 2. D@osezdunsune assiette.
dessertsindividuelsvari6s, 3. Placezrassiettesur une grilleau milieudu four.
_clairs,chouxa lacr_me /4.D@ongelezet servirpendant 10_ 30 minutes.
G_teau au fromage 1. Retirezlesalimentssurgelc!sde leursemballages.
2. PlacezI'alimentsurgel_sur lagrille au milieudu four.
3. Dc!congelezet servirpendant30minutes.
/4.Retirezlanourrituredu four.
5. Coupezen portionsindividuelleset d@osezdunslos
assiettes.
6. Remettezlesassiettesau four.
7. D@ongelezet servirpendant 15minutes,si d6sirc!.
Hers=d'oeuvre_ Javiande, 1. Retirez[aliment surgel6du contenant.
pr_cuits 2. D@osezdunsune assiette.
3. PlacezI'alimentsurgelc!sur lagrilleau milieudu four.
/4.D@ongelezet servirpendant 10_ 15minutes.
• Soulsles alimentssurgek!sportant la mention_ D@ongeleret servir _>ou _Pr6tsa servir_>peuvent6tre utilisc!saveccette caractc!ristique.
BE tentez PAS de dc!congelerdes viandes,de la volailleou des fruits de mer surgelc!s.
•* Vous n'avezpus besoinde prc!chaufferle four.
Une d6cong_lation de 30 minutes facilite
la coupe des tartes, g_teaux entiers et
g_teau au fromage.
Les g_teaux _ 6tages ne requi_rent que 15
minutes avant de couper.
La taille et la texture de aliments d_congel6s
affectent la dur6e de la fonction d6congelez
et servir.
Les desserts plus gros ou plus denses
peuvent mettre plus de temps _ d_!congeler.
Los morceaux de g_teau d_!cong@nt plus
rapidement que [es tartes. Une tarte _ la
patate deuce pout n@essiter 20 _ 30
minutes.
÷
64
8113P527-60 65 _ 12/6/05, 8:07 AM
÷
LAGE FAVOR|
÷
R6glage favori
Lafonction R6glagefavori garde en m6moirejusqu'_ 10 de vos
recettesprc!fc!r6es.Lesfours _ convectionsont livr6savec 5 recettes
pr@rogramm6es.
Pour s_lectionuer uue recette de la liste
pr_6tablie : j ..........................,
1. Appuyezsur la touche Favorites[R6glagefavori). Favorites '
' On/Off
2. S61ectionnezUSTE RECETTES.
3. Choisissezla recetted6sir6eou appuyezsur
la fl_che pour faire dc!filerI'_cran.
4. Unelois la recettes61ectionnc!e,le four commencele pr_chauffage
solon le programmec!tabli.
, Vous pouvezappuyersur la toucheMore Options(Autres
options) pour ajouter une fonction de CUI/CHDou DEM DIF.
5. Lorsquevousaveztermin6,appuyezsur la touche CANCEL
[Annuler) et retirezla nourriture du four.
Pour sauvegarder la derui&re recette compl_t_e :
[Cuissonau four, Cuisson_ convection,R6tissagea convection,
P_tisserie_ convection,Gril _ convection,D6shydratation,Maintien au
chaud,Fermentation) .....................
/ ....
1. Appuyezsur la touche Favorites. Favorites
2. S61ectionnezGARDERDERNIER. On / Off ,
3. Entrezle nom_ I'aidedestouches.
, Parexemple,pour sauvegarderune lasagne,appuyezsur la
touche<,IKL> troislois pour la lettre _{L 77;appuyezsur la touche
<ABC> une foispour la lettre_{A 77;appuyezsur la touche
<STU> unefois pour la lettre {{S>7.Continuezjusqu'_ ce que
vousayez compl6tc!le mot.
/4. Chaquelois que la lettre recherchc!eapparait,attendeztrois
secondespourque le prochain espacesoit soulign6 ou appuyez
sur la touche Enter [Entre0avantde passer_ la prochaine lettre.
, Vous pouvezutiliserun maximumde 1/4lettres incluantlos
espaces.
5. Lorsquele norade larecette est entr6,los derniers r6glages
s'affichent pendantquelquessecondes.
6. Lamention LISTERECETTESapparait pour faire ddiler 1'6cran.
7. Appuyezsur la touche Favoritespour quitter le menu des rc!glages
favoris.
Pour creer une nouvelle recette favorite :
/ ........
1. Appuyezsur la touche Favorites. Favorites
2. Appuyezsur la fl_che pour faire dc!filerles choix. On / Off /
3. Sc!lectionnezCREERNOUVEAU_ I'aidede la touche _ gauche.
/4. Entrezle nora _ I'aidedes touches.
5,
6.
, Parexemple,poursauvegarderune lasagne,appuyezsur la
touche_JKL> troisfois pour la lettre {{L 77;appuyezsur latouche
<ABC> une lois pour la lettre _{A 77;appuyezsur la touche
<STU> unelois pour la lettre {{S >7.Continuezjusqu'_ ceque vous
ayezcompl6t6 le mot.
• Chaquefois que la lettre recherch6eapparait,attendeztrois
secondespour que le prochainespacesoit soulignc!ou appuyez
sur latouche Eater avantde passera la prochainelettre.
• Vouspouvezutiliser un maximumde 1/4lettresincluant les
espaces.
S(!lectionnezENTERpour sauvegarderle nom.
Sc!lectionnezle modede cuisson,par exemple: CUISSON,CUISSON
CONVEC,ROTISSCONVECT,etc.
S(!lectionnezla tempc!raturedu four a I'aidedestouches rapides.
OU
Entrezla tempc!raturedcgsirc!ea I'aidedestouches num_riques.
8. Ajoutez la fonction de Cuissonet maintienen choisissantOUI ou
cuisinezsansCuissonet maintien enchoisissantNON.
9. Sivous s61ectionnezYES,entrez ladur_!ede cuisson _ I'aidedes
touchesrapidesou destouches num_!riques.
10.Ajoutezla fonction de D@art diff_r_ en choisissantOUI ou cuisinez
sansD_gpartdiff_r_ enchoisissantNON.
11.Sivous s_lectionnezOUI,entrezla dur_edu d_lai a I'aidedes
touchesrapidesou destouches num_griques.
12. Ler_ggulateuraffiche los r_!glagesprogramme!s,puis retourneau
menu des r_!glagesfavoris.
13.Appuyezsur latouche Favorites pour quitter
le menu des r_glagesfavoris.
Pour modifier uue recette sauvegard_e :
/ ..............
1. Appuyezsur la touche Favorites. Favorites
2. Appuyezsur la fi_che pour faire driller I'_!cran. On / Off
............................... /
3. S(glectionnezMODIF REOETTE.
/4. Choisissez la recette a modifer. Au besoin, utilisez les fl_ches pour
rep_!rer la recette d_!sir_!e.
5. Modifer les r_!glages de la recette en suivant le menu.
6. L'afficheur retourne au menu des r_!glages favoris. La mention
LISTE RECETfES s'affiche.
7. Appuyezsur la touche Favoritespour quitter le menu des r_!glages
favoris.
÷
65
8113P527-60 66 _ 12/6/05, 8:07 AM
÷
Pour supprimer une recette favorite :
1. Appuyezsur la touche Favorites (R6glagefavori). ............
/
2. Appuyezsur la flSchepour faire driller I'c!cran. / Favorites
3. Sc!lectionnezEFFACRECETTE. On / Off
4. Trouvezla recette_ supprimer.Au besoin,utilisez losfl_ches
pour repc!rerla recetted_sir6e.
5. Lerc!gulateurvousdemandera_ nouveausi vous d6sirez
supprimercette recette. S61ectionnezOUI ou NON.
6. Appuyezsur la touche [:averites pour quitter le menu des
recettesfavorites.
Entout temps,vous pouvezquitter le menudes rc!glagesfavoris en
appuyantsur latouche Favorites.
f
EGLAGE
÷
Reglage /Setup
1. Appuyezsur latouche Setup (R6glage). On / Off
...................... /
2. UtilisezlaflSchepour faire driller los optionsde I'_crande r_glage.
3. ChoisissezI'option d_sirc!een appuyantsur les touchesrapides.
RelTiarque : Pour quitter 1'6cransansfaire de changements,
pppuyez sur a touche Setup. Lheure du jour apparaita afficheur.J
Horioge
UtilisezI'option Clock(Horloge)pour :
• R6glerI'heure.
• R6glerle jour de lasemaine.
• S61ectionnerAM ou PM (modede 12heuresseulement).
• Choisir I'affichage_ 12ou 24 heures.
• D6sactiverI'affichagede I'horloge.
Langue
Lesc!cransde la consolepeuvent6tre affich6s en anglais,fran_aisou
espagnol. Pour choisirune autre langueque I'anglais
1. Appuyezsur la touche Setup. / .......................,
/ Setup
2. Sc!lectionnezLANGUES. On / Off
3. Au besoin,utilisezla fl_chepour passer_ 1'6cransuivant.
4. Choisissezla languedc!sir6e.
5. Appuyezsur la touche Setup pourquitter le menude rc!glage.
Conversion automatique pour
convection (certains mod_les)
Lefour est r6g16a I'usine pourla conversionautomatiquepour
convection.
Laconversionautomatiquepour convectionr_duit automatiquement
latemp6rature rc!gk!ede 25° pour loscaract6ristiquesde Cuisson
convectionet de P_tisserie_ convection.
66
Pourle ROtissage_ convection,le r_gulateurvousavertit Iorsque
75% du tempsde rOtissages'est6coul_et vous demandedevc!rifier
la cuisson.
Relnarques :
• Lorsquevousutilisez la Cuisson_ convectionet la P_tisserie
convectionalorsque I'option de Conversionautomatique pour
convectionest d6sactiv6e,rc!duisezla tempc!raturede cuisson
de 14° C (25° F].
• Si vous utilisezle ROtissage_ convectionalors que la
Conversionautomatiquepourconvection estdc!sactiv#e,vc!rifiez
lacuissondes aliments Iorsque75 % du tempsde cuisson
conventionnels'est _coul&
Pour desactiver la conversion automatique
pour convection :
/ ................
1. Appuyezsur latouche Setup. " _-3etup
....On/Off
2. S6lectionnezCONVECTAUTO. " .........
3. S6lectionnezARRET.
/4. Appuyezsur la touche Setup pour quitter le menude rc!glage.
Pour reactiver la conversion automatique pour
convection :
1. Appuyezsur latouche Setup.
2. S61ectionnezCONVECTAUTO.
3. ChoisissezMARCHE.
/, ...............
i Setup
On/Off /
.......... /
/4. Appuyezsur la touche Setup pour quitter le menude rc!glage.
C/F
L'egchelledetempc!raturepeut 6tre indiquc!een Fahrenheitou en
Celsius.
Pour modifier YecheUe de temperature :
1. Appuyezsur latouche Setup.
2. Utilisezla fl_che pour passer_ I'_!cransuivant.
3. S_lectionnezC/F.
/4. ChoisissezI'_chellede temperatured_sir_e.
!f ..................... . ....
/ Setup ',
On/Off,
\ /
5. Appuyezsur la touche Setup pour quitter le menude r_!glage.
÷
8113P527-60 67 _ 12/6/05, 8:07 AM
÷
÷
Mode sabbat
Lefour est programmdpours'_teindre apr_s 12heuress'il est
accidentellementlaiss6en marche.Le modesabbatannule I'arr6t
automatiqueapr_s 12 heureset pout 6tre r6glc!pour s'activer
automatiquementou manuellement,au choix.
Le modesabbatpermetle fonctionnementde lacuissonau four et de
la cuisson et maintien seulement. Toutes los autres fonctions sont
d6sactiv6es.Siune fonction autreque la cuissonaufour ou la cuisson
et maintienestutilis_equandle modesabbatcommence,cettefonction
seraannulde.
Pour activer le mode sabbat :
1. Appuyezsur [atouche Setup [R6glage).
2. Appuyezsur la flSchepour faire ddiler I'_cran.
3. SelectionnezSABBAT.
z........
/ Setup
on/off
...... /
4. S61ectionnezAUTO ou MANUEL.
• Lafonction AUTOvous demandeautomatiquementd'entrer
unetemp6raturede cuissonpourvendredi a 14het demeure
en mode sabbat pendant33 heures.La mentionMODESABBA
ACTapparait_ I'afficheur pendant90 minutes.Sivous
ddsirezutiliser la fonction de cuissonau four ou decuisson et
maintien,durant le modesabbat,vous devezlos programmer
durant cette p6riode,avantquele mode sabbat
automatiquene soit activ&
• Lafonction MANUAL r_gle lefour pour le mode sabbat de72
heures.LosmentionsMODESABBAACTapparaissent
I'afficheurpendant cinq minutes. Si vous d6sirez utiliser
la fonction de cuisson au four ou de cuisson et maintien
durant le mode sabbat, celle-ci doit 6tre programm6e
durant cette p6riode, avantque le mode sabbat
MANUEL ne soit activ6.
5. S61ectionnez NIARCHE ou ARRET.
6. Appuyez sur la touche Setup pour quitter le menu de
r6glage.
Rerlrlarques :
° Lefour doit 6tre inactif pour programmerle modesabbat.
° Lemodesabbatne peut pas6tre mis en marchesiles touches
ou la porte sont verrouill6es.
• Si lacuisson au four est en coursIorsquele mode sabbatse
meten marche,il n'y aura pusde signalsonore.
° Tousles messageset les bips sont ddsactiv_sIorsquele mode
sabbatest en marche.
° Sivous voulezque la lampedu four soit allum6e pendantle
modesabbat,allumez-laavantde rc!glerle mode.
• L'autonettoyageet leverrouillageautomatiquedes portes ne
fonctionnentpus pendant le modesabbat.
• Latempdraturede cuissonpout 6tre changdependantque le
modesabbatest actif.Appuyezsimplement sur la touche
Bake (Cuissonau fou0 et entrezensuite latemp6rature
ddsirde_ I'aidedes touchesrapides.
° Appuyezsur latouche CANCEL (Annulet) pour annuler la
cuissonau four. Le rdgulateurdemeureraen modesabbat.
Pour annulet le mode sabbat :
/, ........
Appuyezsur latouche Setup et maintenez-laenfoncde Setup '
pendantcinq secondes.Vouspouvezannulet le mode ,, On / Off,
de cuissonen appuyantsur latouche CANCEL ..................
durant le mode sabbat.
Ajustement de ia temperature
La prc!cisiondes r6glagesdetempdraturea _tc!soigneusement
vc!rifi6e_ I'usine. II est normalde remarquerquelquesdiff6rences
dans la dur6e de cuissonentre un four neuf et un four plus ancien.
Latempdraturedes fours pout c!ventuellementseddcaler.
Vouspouvezajusterla temp6raturedu four si vous pensezqu'il ne
cult pas ou ne dorepus correctement. Pour ddciderde I'ajustement
apporter,rc!glezle four a unetempdraturede 14 °C(25 °F)plus
61evdeou plus basseque latemp6ratureindiquc!edans la recette,
puis faites cuire la pr@aration. Losrdsultatsdu premieressaide
cuissondoiventdonner une idle du nombrede degr6spar lequel la
tempdraturedoit 6tre ajust6e.
Pour ajuster la temperature du four :
1. Appuyezsur latouche Setup.
2. Appuyezsur la fl_chepour faire ddfiler I'_cran.
3. SdlectionnezREGLERTEMP.
//
/ Setup
On / Off/
4. Entrez la modification de tempdrature ddsirde a I'aide des
touches numdriques.
5. Sdlectionnez _ +/= _ pour indiquer une augmentation ou une
r_duction de tempdrature. La modification de tempdrature est
affich_e en haut de I'dcran.
6. Appuyezsur la touche Enter (Entrer)ou attendezpendanttrois
secondespourvalider le changement.
7. Appuyezsur la touche Setup pour quitter le menu.
II n'est pas ndcessairede r_ajusterlatempdraturedu four en cas de
panneou d'interruption de courant.
Lestempdraturesde cuissonau gril et de nettoyagene peuventpus
6tre ajustdes.
208/240 V
Pouram_!liorerles r_sultatsIorsquevous utilisezla cuissonau four,
le four pout _tre rdgld pour fonctionner a 240V ou 208V, solonle
circuit devotre maison.
Pour regler le four _ 208 V :
1. Appuyezsur latouche Setup.
2. Appuyezsur la fl_chepour faire ddfiler I'_cran.
3. S_lectionnez208/240V.
/ Setup
On/Off/
\ /
4. Sdlectionnez208V ou24eV a I'aidedestouches rapides.
5. Appuyezsur la touche Enter pour valider lechangement.
6. Appuyezsur la touche Setup pour quitter le menu.
÷
67
8113P527-60 68 _ 12/6/05, 8:07 AM
÷
÷
Signaux sonores (bips)
Vous pouvezajusterle volumeet le nombre de bips entendus_ la fin
de la cuissonet du d6comptede la minuterie.
Pour ajuster los bips :
1. Appuyezsur la touche Setup (R6glage).
2. Appuyezsur la fDche pour Dire driller I'c!cran. \On............/ Off,
3. SelectionnezSIGNAUX SONOR.
Pour modifier los hips euteudus _ la fin
de la cuisson :
1. Suivezlos 6tapes I _ 3 de lasection <_Signauxsonores>>ci-dessus.
2. S61ectionnezSIGNAUX CUISS.
3. Appuyezsur la fDche pour Dire driller I'c!cran.
4. S61ectionnez1=30 MIN pour entendreun hip _ toutes los 30
secondes.
OU
Sc!lectionnez1=60 MIN pour entendreun hip _ toutes les 60
secondes.
OU
S_lectionnez1 BIP pour entendreun soul bip a la fin de la
cuisson.
5. Appuyezsur la touche Setup pourquitter le menu.
Pour modifier los sonueries de la minuterie :
1. Suivezlos 6tapes I _ 3 de lasection <_Signauxsonores>>ci-dessus.
2. SelectionnezSIGNAUX MINUTE.
3. Appuyezsur la fDche pour Dire driller I'c!cran.
4. S61ectionnez2=30 MIN pour entendredeux hips _toutes les 30
secondes.
OU
S61ectionnez2=60 MIN pour entendredeux hips _ toutes los 60
secondes.
OU
Sc!lectionnez1 BEEP(Bip) pour entendre un soul bip a la fin de
la dur6e r6gl6e. / ...............,
/ Setup
5. Appuyezsur la touche Setup pour quitter le menu.
,On/Off/
Pour modifier le volume des hips : .................
1. Suivezlos 6tapes I _ 3 de lasection <_Signauxsonores>>ci-dessus.
2. Appuyezsur la fDche pour Dire driller I'c!cran.
3. S_lectionnezVOLUME.
4. Sc!lectionnezHAUT pour le volumele plus _lev_.
OU
Sc!lectionnezMOYEN pour un volumemoyen.
OU
Sc!lectionnezBAS pour le volumele plus bus.
5. Appuyezsur la touche Setup pourquitter le menu.
Arret automatique 12 heures
Lefour s'arr6teautomatiquementapr_s 12heuress'il est
accidentellementlaiss6en marche.
Pour desactiver cette caracteristique : .............................
1. Appuyezsur la touche Setup. Setup '
On / Off /
2. Appuyezsur la fi_che pour faire driller I'c!cran. _ .......... ,,
3. S(!lectionnezARRETAUT 12 H.
3. Sc!lectionnezMARCHE ou ARRET_ I'aide destouches rapides.
/4. Appuyezsur la touche Setup pour quitter le menu.
_:conomie d'energie
Pour6conomiser1'6nergie,I'afficheurpout 6tre r_gk!pour s'6teindre
Iorsqu'il n'est pusen fonction.
Pour regler ia caracteristique
d'economie d'euergie :
1. Appuyezsur la touche Setup.
2. Appuyezsur la fl_che pour faire driller I'c!cran.
3. S(!lectionnezECONOM ENERGIE.
//" ",,%
JSetup
On/Off/
,/
/4. Sc!lectionnezMARCHEou ARRET _ I'aidedes touchesrapides.
5. Appuyezsur la touche Setup pour quitter le menu.
Appuyer sur n'importe quelletouche pour rc!activerI'afficheur.
Service & la clientele
Cettezonedu r_gulateurdefour affiche le numc!rosansfrais du
service_ la clientSleJenn-Air.
/ ........ \
1. Appuyezsur la touche Setup. ( Setup,
, On/Off
2. Appuyezsur la fl_che pour Dire driller I'_!cran. "..................
3. S_!lectionnezENTRETIEN.
4. Appuyezsur la touche Setup pour quitter le menu.
Demonstration
Si vous s_!lectionnezla d_!monstration,vous verrezune courte
pr_!sentationdes caract_ristiquesprincipalesde votre nouvelle
cuisini_reJenn-Air.
/, ............
1. Appuyezsur la touche Setup. ' Setup,
2. Appuyezsur la fi_che pour faire driller rdcran. , On / Off/
3. SdlectionnezDENIO.
/4. S_!lectionnezMARCHE ou ARRET _ I'aidedes touchesrapides.
5. Appuyezsur la touche Setup pour quitter le menu.
÷
68
8113P527-60 69 _ 12/6/05, 8:07 AM
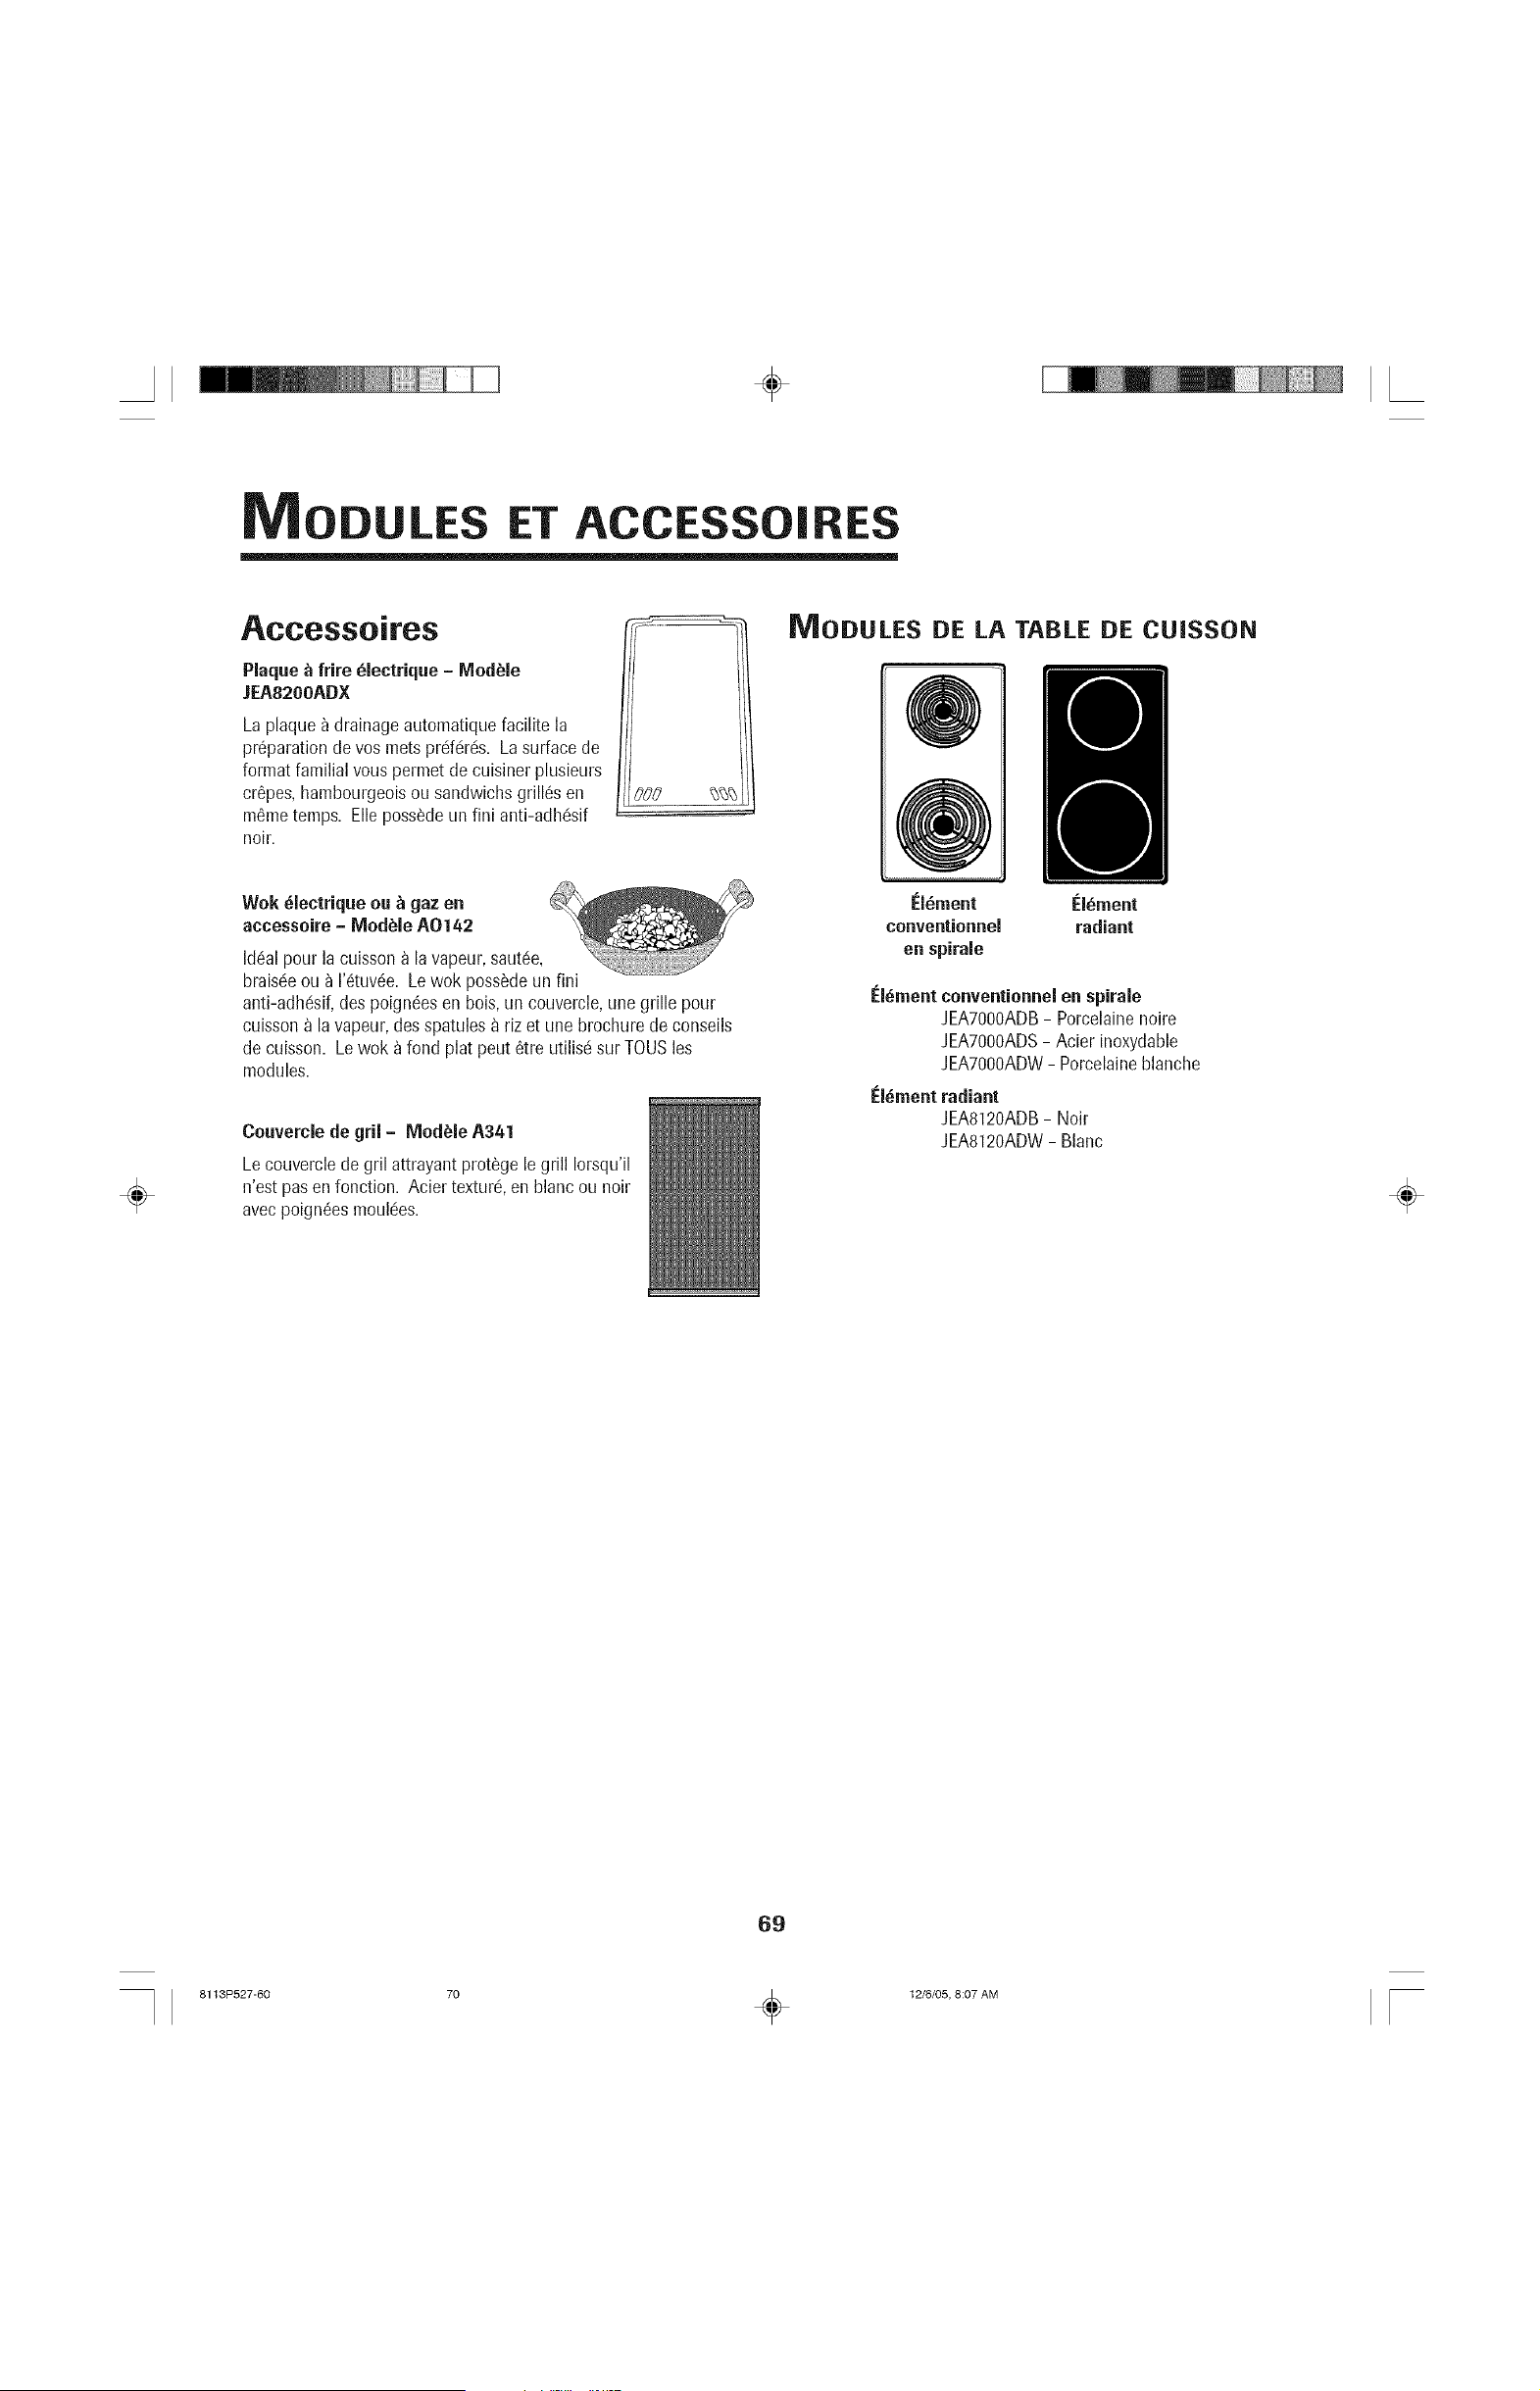
÷
U ET
Accessoires
Plaque _ frire blectrique - IVlodble
JEA8200ADX
Laplaquea drainageautomatiquefacilite la
pr@arationde vos mets prd_r_s. Lasurfacede
format familial vous permetde cuisinerplusieurs
cr@es,hambourgeoisou sandwichs grill6s en
m6metemps. Elle poss_deun fini anti-adhc!sif
noir.
888 %%_
MODULES DE LA TABLE DE CU|SSON
÷
Wok _lectrique ou _ gaz en
accessoire - IVIodbleAO142
Id6alpour la cuissona la vapeur,saut6e,
braisc!eou a 1'6tuv6e.Lewok poss&deun fini
anti-adh_sif,des poign_esen bois,un couvercle,unegrille pour
cuissona lavapeur,desspatules_ riz et une brochurede conseils
decuisson. Lewok afond plat peut 6tre utilisc!sur TOUSles
modules.
Couvercle de gril- IVlodbleA341
Lecouverclede gril attrayantprotege le grill Iorsqu'il
n'est pasen fonction. Acier texturc!,en blanc ou noir
avecpoign6esmoulc!es.
Elbrnent Eibrnent
conventionnel radiant
en spirale
l'i_ment conventionnelen spirale
JEA7000ADB- Porcelainenoire
JEA7000ADS- Acier inoxydable
JEA7000ADW- Porcelaineblanche
Elementradiant
JEA8120ADB- Noir
JEA8120ADW- Blanc
÷
69
8113P527-60 70 _ 12/6/05, 8:07 AM

÷
EMARQU
÷ ÷
7O
8113P527-60 71 _ 12/6/05, 8:07 AM
÷
÷
GARANT|E ET ERV| :E
Ne sont pas couverts par ces garanties :
1. Lesdornrnagesou d_rangernentsdus _ce qui suit :
a. Installation,livraisonou entretieneffectu6s incorrecternent.
b. Touter(_paration,modification,alt(!rationet tout r_glagenon autoris6spar
lefabricant ou par un prestatairedeserviceapr_s-venteagrc!6.
c. Mauvaisemploi,emploi abusif,accidents,usage non raisonnable,ou catastrophe
naturelle.
d. Alirnentationc!lectrique(tension,intensit(!) incorrecte.
e. R(_glageinappropri6de toute comrnande.
2. Lesgarantiesne peuvent_tre honor6essi les nurn_rosde sc!ried'origine ont 6tc!
enlev_s,modifi6sou ne sont pasfacilernentlisibles.
3. Lesampoules.
4. Lesproduitsachet6sa desfins commercialesou industrielles.
5. Lesfraisde dc!pannageou de visitepour :
a. Correctiond'erreursd'installation.
b. Initiationde I'utilisateur _ remploi de I'appareil.
c. Assurerle transport de I'appareiljusqu'a I'entreprisedeserviceapr_s-venteet
son retour.
6. Dommagesindirectsou accessoiressubis partoute personne_ la suited'une
quelconqueviolationdes garanties.
Certainsc!tatsou provincesnepermettent pas I'exclusionou la limitation de responsabilitc!
en ce qui concerneles domrnagesdirectsou indirects.L'exclusionci-dessuspeut en
cons6quencene pas s'appliqueravotre cas.
Si vous avez besoin d'aide
Consultezd'abord lasection sur le d_pannagedu manueld'utilisation et d'entretien ou
appelezle service_ la clientele de Maytag, LLC,soci6tc!_ responsabilit6limit6e,Servicea la
clientSledeJenn-Air au 1-800-JENNAIR(1-800-536-6247)aux Etats-Uniset au Canada.
÷
Pour obtenir un service en vertu de la garantie
PourIocaliserune agenceagrc!6ede serviceapr_s-ventedansvotre r_gion,prenez
contact avec led_taillant ot_vous avezachet(_I'appareil;ou appelezMaytagServices,
LLC,soci6t6_ responsabilit6limit6e,Servicea la clientele deJenn-Air. Si le service
obtenu envertu de la garantie nevous satisfait pas,veuillezt61_phonerou 6crire_ :
MaytagServices,LLC,soci6t_!_ responsabilit_lirnit_e
rattention du CAIR_ Center
P.O.Box2370,Cleveland,TN37320-2370ETATS-UNIS
Etats=Uniset Canada : I=See=JENNAIR(1=800=536=6247}
RerBarqlle : Lorsde tout contact aupr_sde MaytagServices,LLC,soci_!t_
responsabilit_!limit_e,service_ laclientSlede Jenn-Air concernantun probl_me,
veuillezfournir I'information suivante•
a.Vos nora,adresseet num_ro det_!l(_phone;
b. Lesnum_!rosde moduleet de s_riede votreappareil ;
c. Le hornet radressedu d_taillantet la date d'achat de I'appareil;
d. Unedescriptionclaire du problSmeobserv_;
e. Une )reuved'achat.
Lesguides d'utilisation,les manuelsde serviceet les renselgnementssur lespi_cessont disponiblesaupr_sde MaytagServices,LLC,
ci_!t_a responsabilit_lirnit_e,Service_ la clientele de Jenn-Air.
21
8113P527-60 72 _ 12/6/05, 8:07 AM
ESTUFAELI2CTRICA DESLIZANTE
DE CORRIENTE DESCENDENTE JENN-AIR
TABLA DE CONTENIDO
Instrucciones importantes sobre seguridad .... 73-76
Informaci0n sobre los conductos ...............................76
Cuidado y limpieza ....................................................77-80
Mantenimiento ...........................................................80-81
Localizaci0n y soluci0n de averias ......................82-83
Cocci0n en la cubierta .............................................84-88
Cocci0n en el homo .................................................89-95
Opciones .....................................................................96-100
Favoritos ...................................................................101-102
Aj uste ........................................................................102-10/4
Cartuchos y accesorios ...............................................105
Garantia y servicio ....................................01tima pdgina
JENN-AIE
8113P527-60 73 _ 12/6/05, 8:07 AM
÷
electrodomestico como resultado de su uso inapropiado.
Utilice este electrodomestico solamente para el prop6sito para
el cual ha sido destinado segt_nse describe en esta gu{a.
Para asegurar el funcionamiento correcto y seguro del
electrodorn_stico: El electrodom_stico debe ser instalado
debidamente y puesto a tierra por un tecnico calificado. No
instente ajustar, reparar, realizar servicio o reemplazar
cualquier pieza de su electrodomestico a menos que se
recomiende espedficamente en esta gu{a.Todas las demos
reparaciones deben set hechas pot un tScnico calificado.
Siernpre desenchufe el electrodomestico antes de realizar
reparaciones.
lnstrucciones generales
÷
NSTRUCCi
iM
RIDAD
E
Las advertencias e instruccionesimportantessobre seguridad
que aparecen en esta gu{a no est_n destinadas a cubrir todas
las posibles circunstancias y situaciones que puedan ocurrir.
Se debe ejercer sentido comt_n, precauci6n y cuidado cuando
se instale, se realice mantenimiento o se haga funcionar el
electrodomestico.
Siempre p6ngase en contacto con el fabricante si surgen
problemas o condiciones que no entienda.
Reconozca los simboios, advertencias y
etiquetas de seguridad
Lea y siga todas las instrucciones antes de usar este
electrodorn_stico para evitar el riesgo potencial de incendio,
choque electrico, lesiones personales o da_o al
73
Paraverificar si el dispositivo est_ debidamente instalado, mire
debajo de la estufa con una linterna para asegurarse de que
uno de los tornillos niveladores traseros est8 debidamente
enganchado en la ranura del soporte. Eldispositivo antivuelco
asegura el tornillo nivelador trasero al piso cuando est_
debidamente enganchado. Verifique este dispositivo carla vez
que la estufa sea movida.
Para evitar da os a causa de
un incendio o humo
Asegt_resede que se hayan retirado todos losmateriales de
empaque del electrodomestico antes de su uso.
Mantenga el _rea que rodea el electrodomestico libre de
materiales combustibles. Los materiales combustibles no
[leben ser almacenados en el interiorde un homo.
Muchos pl_sticos son afectados por el calor. Mantenga los
pl_sticos alejados de las piezas del electrodomestico que se
puedan entibiar o calentar.
Paraevitar incendios de grasa, no deje que se acumule grasa
de cocinar ni otros materiales infiamables en la estufa o cerca
de ella.
÷
8113P527-60 74 _ 12/6/05, 8:07 AM

÷
÷
En caso de incendio
Apague el electrodomCstico y la campana de ventilaciCn para
evitar esparcir las llamas. Apague las llamas y luego encienda
la campana para expulsar el humo y el olor.
• En la cubierta: Apague el fuego o la llama en una sartCn
con una tapa o una bandeja de hornear.
NUNCA levante o mueva una sartCn en llamas.
• En el homo: Apague el fuego o la llama del homo cerrando
la puerta del horno.
No use agua en los incendios de grasa. Use bicarbonato de
sodio, un producto qufmico seco o un extinguidor de espuma
para apagar un incendio o llama.
Seguridad para los ni os
NUNCA deje a los ni_os solos o sin supervisiCn cerca del
electrodomCstico cuando est6 en uso o est6 caliente. Nunca
permita que los ni_os se sienten o se paten en ninguna parte
del electrodomCstico pues se pueden lesionar o quemar.
Se le debe ense_ar a los ni_os que el electrodomCstico y los
utensilios que est_n en 61pueden estar calientes. Deje enfriar
los utensilios calientes en un lugar seguro, fuera del alcance
de los ni_os peque_os. Se le debe ense_ar a los ni_os que un
electrodomCstico no es un juguete. No se debe permitir que
los ni_os jueguen con los controles u otras piezas del
electrodomCstico.
InformaciCn sobre su
electrodom stico
Para evitar exporter al usuario a un potencial riesgo y para
evitar da_os al electrodomCstico, no use este
electrodomCstico como calefactor de _rea o para calentar una
habitaciCn. Tampoco utilice el homo como _rea de
almacenamiento para alimentos o utensilios de cocina.
No obstruya el flujo del aire bloqueando el respiradero del
horno.
NO TOQUE LOS ELEMENTOSCALENTADORESO LAS
SUPERFICIESINTERIORESDEL HORNO. Los elementos
calentadores pueden estar calientes a0n cuando se vean de
color oscuro. Las superficies interioresde cualquier homo se
calientan Io suficiente como para causar quemaduras. Durante
y despuCs del uso, no toque ni deje que la ropa u otros
materiales inflamablesentrenen contacto con los elementos
calentadores o con las 5reas del interiordel homo hasta que
se hayan enfriado completamente. Otras superficies del
electrodomCstico pueden calentarse Io suficiente como para
causar quemaduras - entre estas se encuentran las siguientes:
la abertura del respiradero del homo y la superficie cercana a
esta abertura, la puerta del homo y la ventana de la puerta del
horno.
No toque una bombilla de homo caliente con un paso
h0medo ya que se puede romper. Si la bombilla se rompe,
desconecte el suministro elCctrico al electrodomCstico antes
de retirar la bombilla para evitar un choque elCctrico.
NUNCA use papel de aluminio para cubrir una parrilla o la
parte inferiordel horno. El mal uso puede crear riesgos de
choque elCctrico, incendioo da_os al electrodomCstico. Use el
papel de aluminio solamente como se indica en esta gufa.
InformaciCn de seguridad
sobre la cocciCn
Nunca caliente un envase de alimento cerrado en el horno. La
acumulaciCn de presiCn puede hacer que el envase explote y
causar lesiones personales graves o da_os al
electrodomCstico.
Use tomaolhs secos y gruesos. Los tomaollas h_medos
pueden causar quemaduras por vapor. Nunca use pa_os para
secar platos u otros artfculos similares como tomaollas ya que
pueden arrastrarse sobre la superficie caliente de los
elementos y se pueden encender o enredar en las piezas del
electrodomCstico.
Use ropa adecuada. No se debe usar ropa holgada o con
mangas muy largas durante la cocciCn. La ropa podrfa
encenderse y causar quemaduras si la tela entra en contacto
con los elementos calentadores.
Siempre coloque las parrillas del homo en las posiciones
deseadas cuando el homo est6 frfo. Deslice la parrilla hacia
afuera para colocar o retirar alimentos usando tomaollas secos
y gruesos. Siempre evite introducir sus manos en el homo
para colocar o retirar alimentos. Si se debe mover una parrilla
mientras est_ caliente, use un tomaollas seco. No deje que el
tomaollas entre en contacto con el elemento caliente en el
horno.
S61ouse las parrillas en el horno con el cual se adquirieron o
enviaron.
Tenga cuidado cuando abra la puerta del horno. Permita que
el aire o vapor caliente escape antes de retirar o colocar el
alimento.
74 Cont.
÷
8113P527-60 75 _ 12/6/05, 8:07 AM
÷
÷
ADVERTENCIA SOBRE ALIMENTGS PREPARADOS: Siga
las instruccionesdel fabricante. Si un envase de pl_stico con
alimento congelado y/o su tapa se deforman, se comban o se
da_an de alguna manera durante la cocci6n, elimine el
alimento y el envase. El alimento puede estar contaminado.
No permita que el papel de aluminio o la sonda de came
entren en contacto con el elemento calentador.
Siempre apague todos los controles cuando haya terminado
de cocinar.
Informaci6n de seguridad
sobre los utensilios
Siga las instrucciones del fabricante cuando utilice bolsas para
homear.
El rendimiento y funcionamiento seguro de este
electrodom6stico se hart comprobado usando utensilios de
cocina convencionales. No use ningQn dispositivo o accesorio
que no haya sido espedficamente recomendado en esta gu{a.
No use sistemas de convecci6n incorporados para hornos. El
uso de dispositivos o accesorios que no est6n expresamente
recomendados en esta gu{a puede crear peligros graves de
seguridad, afectar el rendimiento y reducir la vida t_tilde los
componentes de este electrodom6stico.
Si el utensilio es m_s peque_o que el elemento, una porci6n
del elemento quedar_ expuesta y puede encender la ropa o un
tomaollas.
Solamente ciertos tipos de utensilios de vidrio, vidrio/cer_mico,
cer_mica, gres u otros utensilios vidriados son convenientes
para cocinar en la cubierta o en el homo sin que se quiebren
debido al cambio repentino de temperatura. Siga las
instrucciones del fabricante del utensilio cuando use vidrio.
Gire las manijas de los utensilios hacia el centro de la cubierta,
no hacia la habitaci6n o sobre otto elemento superior. Esto
reduce el riesgo de quemaduras, de encendido de materiales
infiamables o de derrames si el sart6n es tocado
accidentalmente o alcanzado por ni_os peque_os.
SUPERFICIE DE VIDRIO CERAIVllCO: NUNCA cocine sobre
una cubierta rot& Si la cubierta de la estufa se rompe, los
agentes de limpieza y los derrames pueden penetrar la
cubierta rota y crear un riesgo de choque el6ctrico. P6ngase
en contacto con un t6cnico calificado inmediatamente.
Ollas freidoras
Sea extremadamente cuidadoso cuando mueva la olla con
aceite o descarte la grasa caliente. Deje que la grasa se enfr{e
antes de intentar mover la olla.
Campanas de ventilaci6n
Limpie la campana de ventilaci6n de la estufa y losfiltros con
frecuencia para evitar que se acumule grasa u otros
materiales infiamables en la campana o en el filtro y tambi6n
para evitar incendios de grasa.
Cuando fiamee alimentos debajo de la campana, encienda el
ventilador.
Informaci6n de seguridad
sobre la iimpieza
Limpie la cubierta con cuidado. Apague todos los controles y
espere hasta que las piezas del electrodom6stico se enfr{en
antes de tocarlas o limpiarlas. Tenga cuidado si utiliza un paso
o esponja mojada para limpiar derrames en una superficie
caliente para evitar quemaduras por vapor. Algunos
limpiadores pueden producir vapores nocivos si se aplican a
una superficie caliente.
Limpie Qnicamente las piezas que se indican en esta gu{a.
Homo autolimpiante
÷
Cubierta
NUNCA deje los elementos superiores sin supervisi6n,
especialmente cuando est6 usando los ajustes de calor altos.
Un derrame que no reciba la debida atenci6n puede causar
humo y un derrame de grasa puede causar un incendio.
Este electrodom6stico tiene diferentes tama_os de elementos
superiores. Seleccione utensilios que tengan bases planas Io
suficientemente grandes para cubrir el elemento. La relaci6n
adecuada entre el utensilio y el elemento mejorar_ la
eficiencia al cocinar.
No limpie la junta de la puerta. La junta de la puerta es
esencial para obtener un sellado herm6tico. Tenga cuidado de
no frotar, da_ar o mover la junta.
No use limpiadores o forros para hornos de ningt_n tipo dentro
o cerca de ninguna pieza del homo autolimpiante.
75
8113P527-60 76 _ 12/6/05, 8:07 AM
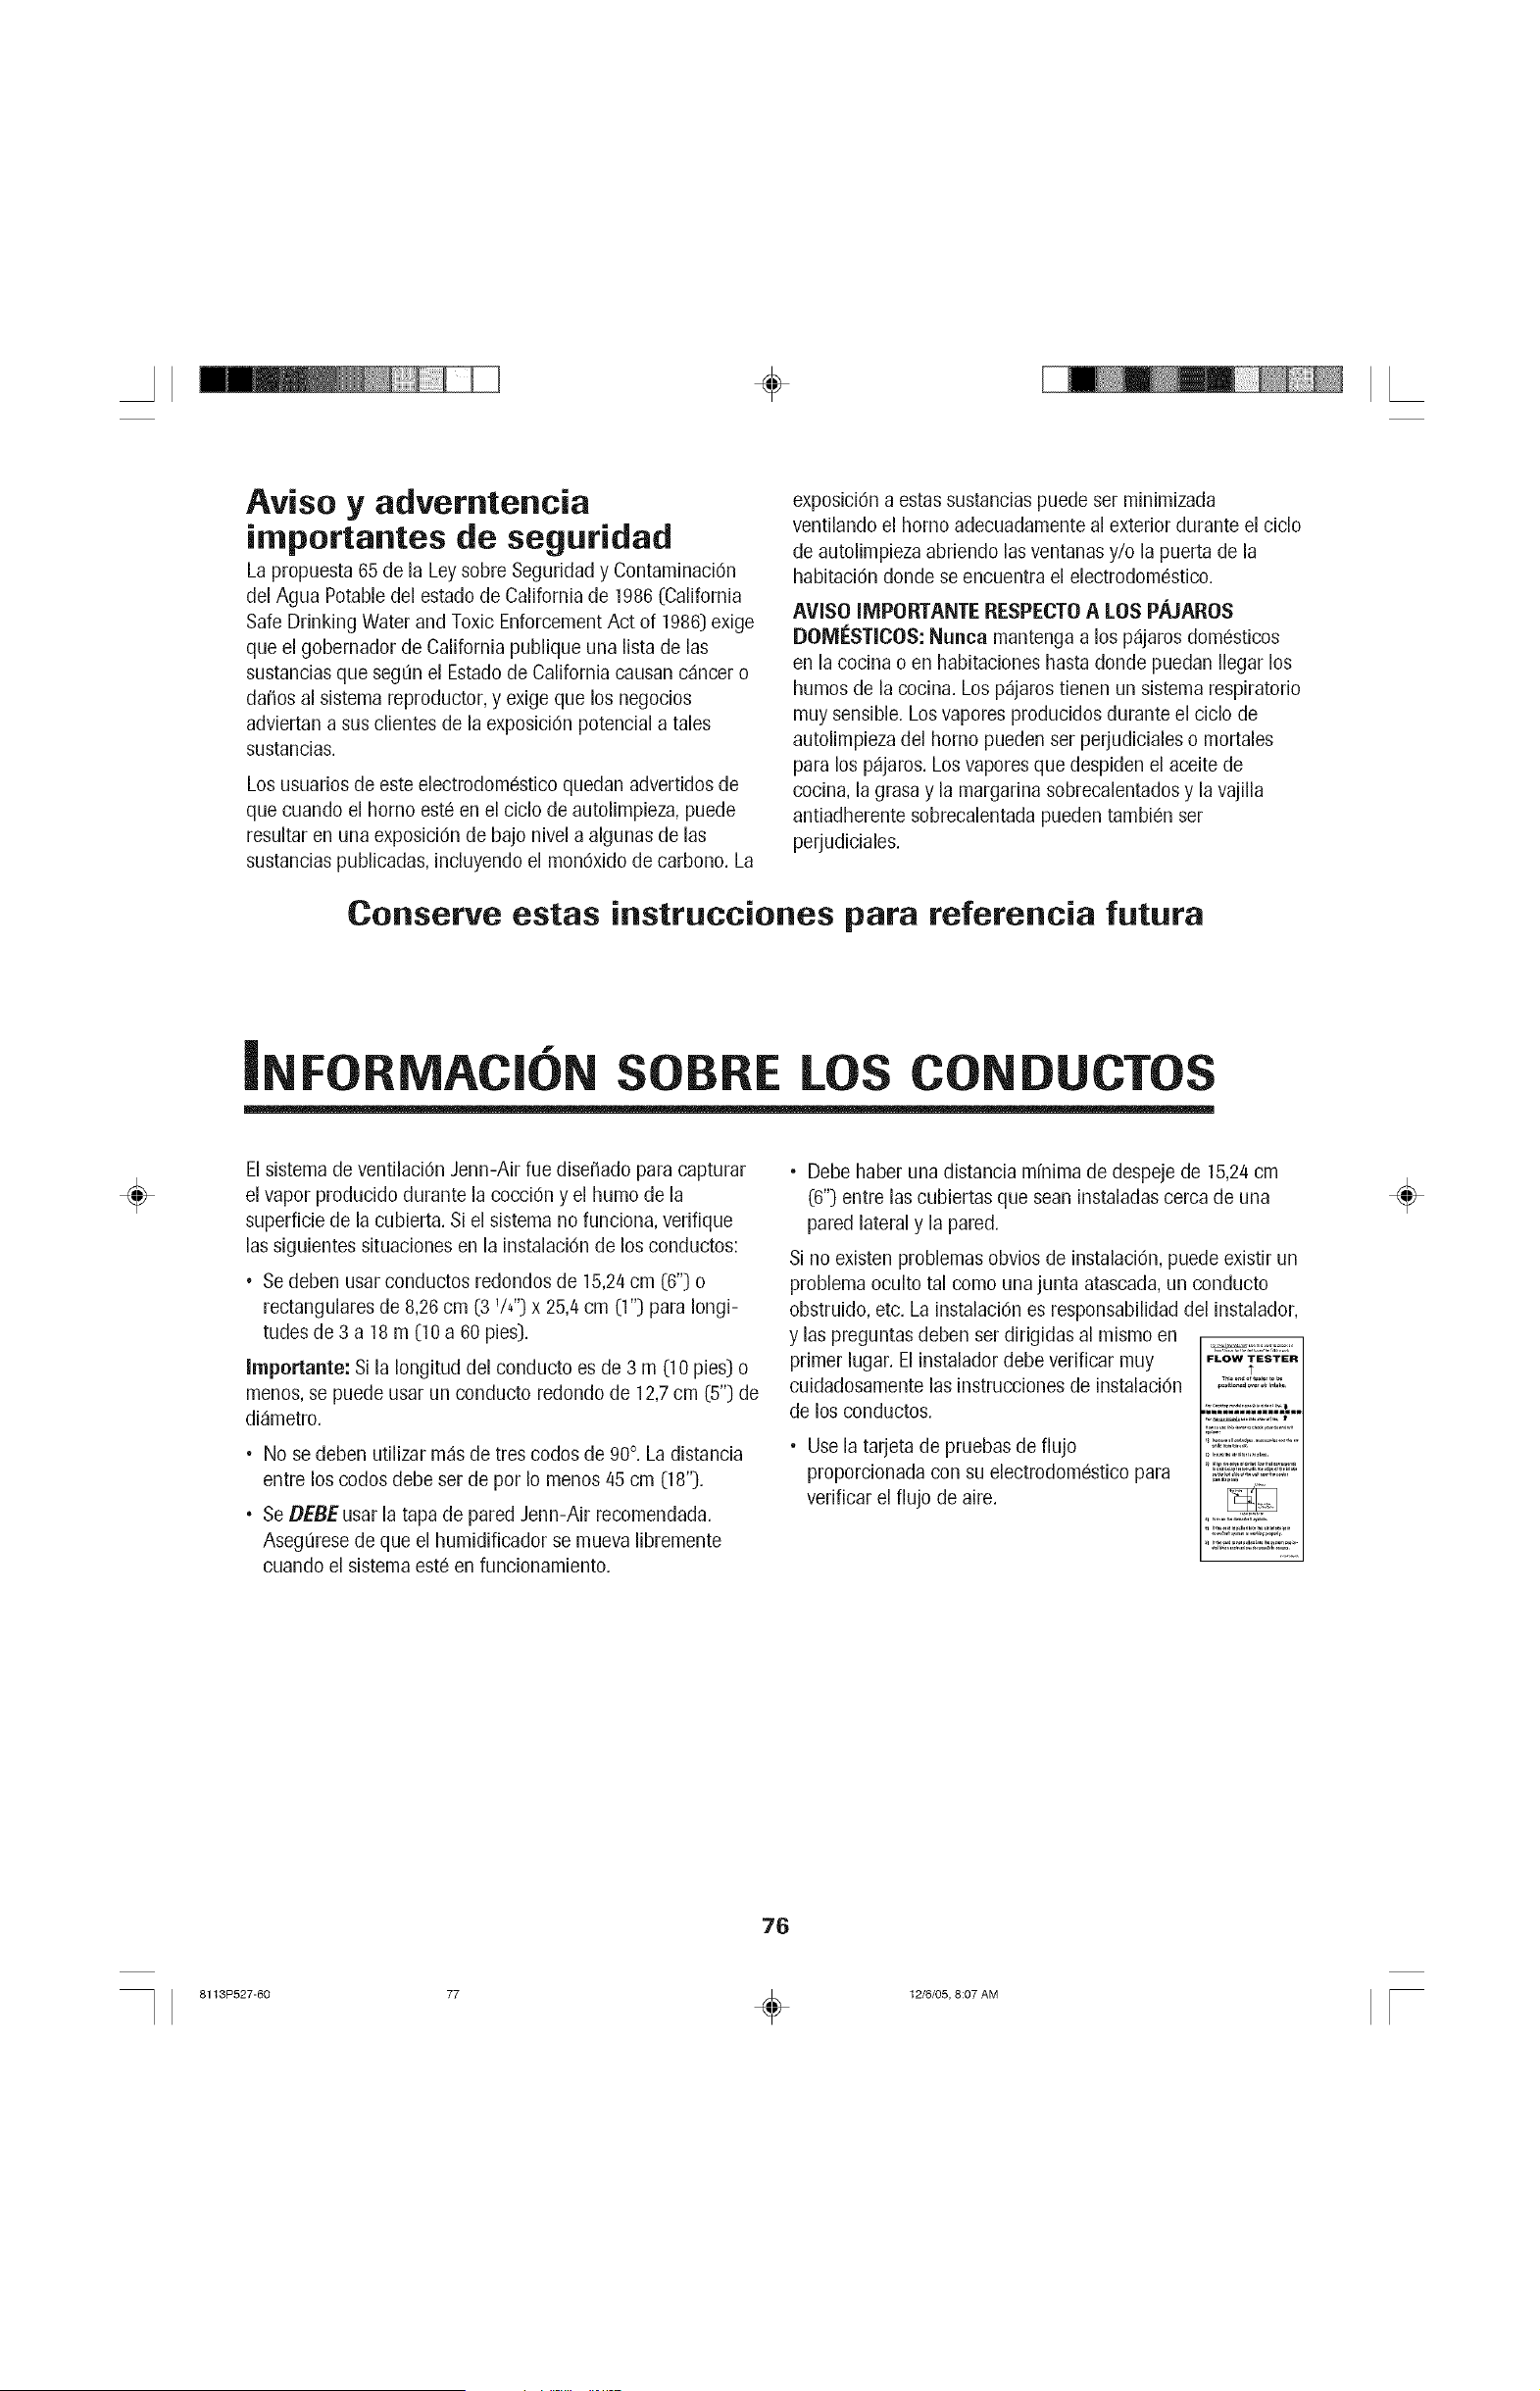
÷
Aviso y adverntencia
irnportantes de seguridad
La propuesta 65 de la Ley sobre Seguridad y Contaminaci6n
del Agua Potable del estado de California de 1986 (California
Safe Drinking Water and Toxic Enforcement Act of 1986) exige
que el gobernador de California publique una lista de las
sustancias que seg_n el Estado de California causan c_ncer o
da_os al sistema reproductor, y exige que los negocios
adviertan a sus clientes de la exposici6n potencial a tales
sustancias.
Los usuarios de este electrodomestico quedan advertidos de
que cuando el homo est8 en el ciclo de autolimpieza, puede
resultar en una exposici6n de bajo nivel a algunas de las
sustancias publicadas, incluyendoel mon6xido de carbono. La
exposici6n a estas sustancias puede set minimizada
ventilando el homo adecuadamente al exterior durante el ciclo
de autolimpieza abriendo las ventanas y/o la puerta de la
habitaci6n donde se encuentra el electrodomestico.
AVlSO {MPORTANTE RESPECTO A LOS PAJAROS
DOMESTICOS: Nunca mantenga a losp_jaros dom_sticos
en la cocina o en habitaciones hasta donde puedan Ilegar los
humos de la cocina. Los p_jaros tienen un sistema respiratorio
muy sensible. Los vapores producidos durante el ciclo de
autolimpieza del homo pueden ser perjudiciales o mortales
para los p_jaros. Los vapores que despiden el aceite de
cocina, la grasa y la margarina sobrecalentados y la vajilla
antiadherente sobrecalentada pueden tambien set
perjudiciales.
Conserve estas instrucciones para referencia futura
!
÷
Elsistema de ventilaci6n Jenn-Air rue dise_ado para capturar
el vapor producido durante la cocci6n y el humo de la
superficie de la cubierta. Si el sistema no funciona, verifique
las siguientes situaciones en la instalaci6nde los conductos:
• Se deben usar conductos redondos de 15,24cm (6") o
rectanguhres de 8,26 cm (3 V4") x 25,4 cm (I"D para longi-
tudes de 3 a 18 m (10 a 60 pies).
Irnportante: Si la Iongitud del conducto es de 3 m (10 pies) o
menos, se puede usar un conducto redondo de 12,7cm (5") de
di_metro.
• No se deben utHizar m_s de tres codos de 90°. La distancia
entre los codos debe ser de por Io menos/45 cm (18"_.
• Se DEBE usar la tapa de pared Jenn-Air recomendada.
Aseg_rese de que el humidificador se mueva libremente
cuando el sistema est6 en funcionamiento.
• Debe haber una distancia m{nima de despeje de 15,24 cm
(6"_entre las cubiertas que sean instaladascerca de una
pared lateral y la pared.
Si no existen problemas obvios de instalaci6n, puede existir un
problema oculto tal como una junta atascada, un conducto
obstruido, etc. La instalaci6n es responsabilidad del instalador,
y las preguntas deben ser dirigidas al mismo en
primer lugar. El instaladordebe verificar muy
cuidadosamente las instruccionesde instalaci6n
de los conductos.
• Use la tarjeta de pruebas de flujo
proporcionada con su electrodomestico para
verificar el fiujo de aire.
FLOW TESTER
t
÷
76
8113P527-60 77 _ 12/6/05, 8:07 AM
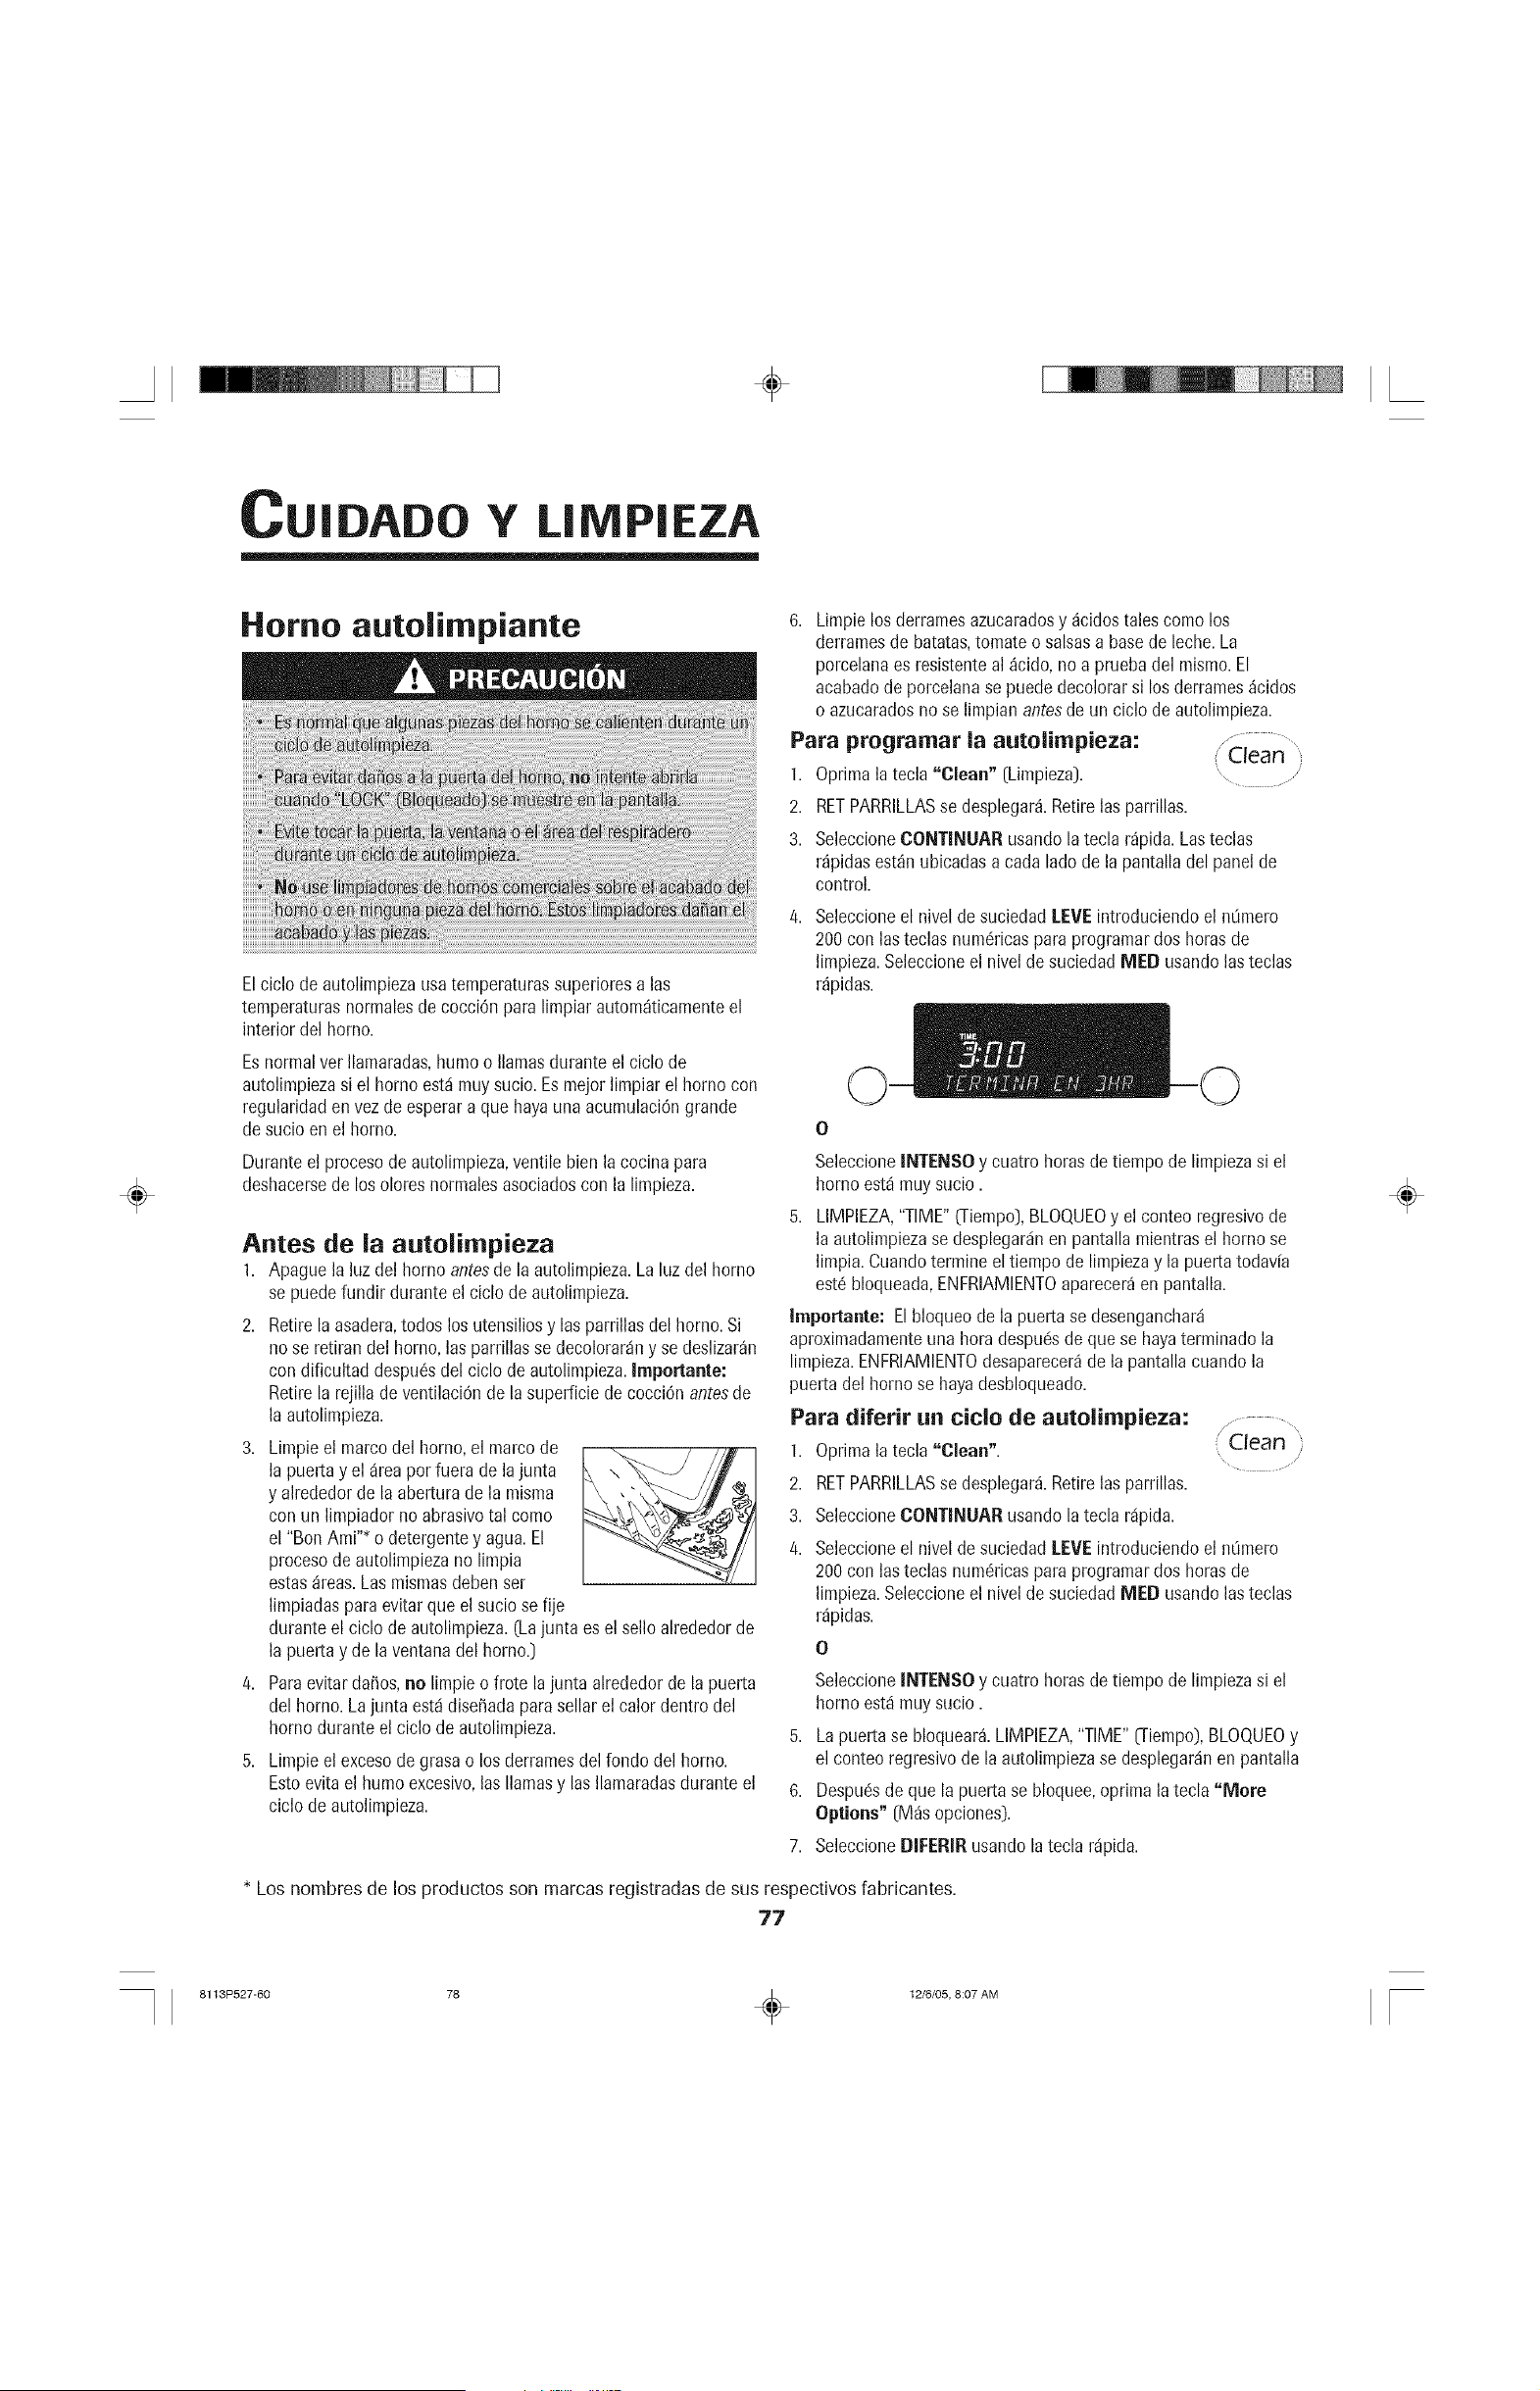
÷
U|DAD Y L|MP|EZA
÷
Homo autolimpiante
6. Limpielos derramesazucaradosy acidostalescomo los
derramesde batatas,tomate o salsasa basede leche.La
porcelanaes resistenteal acido, noa pruebadel mismo.El
acabadode porcelanase puededecolorarsi los derramesacidos
o azucaradosno se limpian antesde un ciclo deautolimpieza.
/ ...........
Para programar la autolirnpieza: '"Clean
1. Oprimala tecla "Clean" [Limpieza].
2. RETPARRILLASse desplegar&Retirelas parrillas.
3. SeleccioneCONTINUARusandola tecla rapida.Lasteclas
rapidasestanubicadas acada lado de la pantalladel panelde
control.
Elciclo de autolimpiezausatemperaturassuperioresa las
temperaturasnormalesde cocci6n para limpiar automaticamenteel
interior del homo.
Seleccioneel nivelde suciedadLEVEintroduciendoel n0mero
200con las teclas num6ricaspara programardos horasde
limpieza.Seleccioneel nivelde suciedadMED usandolas teclas
rapidas.
Esnormalver Ilamaradas,humoo llamasdurante el ciclo de
autolimpiezasi el homo esta muysucio.Es mejorlimpiar el homo con
regularidadenvez de esperara que hayaunaacumulaci6ngrande
de sucio enel homo. O
Duranteel procesode autolimpieza,ventile bien lacocina para
deshacersede los oloresnormalesasociadoscon la limpieza.
Antes de la autolimpieza
1. Apague la luz del homo antesde la autolimpieza.Laluz del horno
se puedefundir duranteel ciclo de autolimpieza.
2. Retirela asadera,todos los utensiliosy lasparrillas del homo. Si
no se retiran del homo,las parrillasse decolorarany se deslizaran
con dificultad despu_sdel ciclo de autolimpieza.Importante:
Retirela rejillade ventilaci6nde la superficie de cocci6nantesde
la autolimpieza.
3. Limpie el marco del homo,el marcode _ //
la puerta y el areapor fuera de lajunta ,,,
y alrededorde la aberturade la misma ,"
con un limpiadorno abrasivotal como
el "Bon Ami"* o detergentey agua.El
procesode autolimpiezano limpia
estasareas.Lasmismasdebenset
limpiadaspara evitar que elsucio se fije
durante el ciclo deautolimpieza.(Lajunta es el sello alrededorde
la puerta y de la ventanadel homo.]
4. Paraevitardafios, no limpie ofrote lajunta alrededorde lapuerta
del homo. Lajunta esta disefiadapara sellar el calor dentro del
homo duranteel ciclo de autolimpieza.
5. Limpie el excesode grasao losderramesdel fondo del homo.
Estoevitael humoexcesivo,las llamasy las Ilamaradasdurante el
ciclo de autolimpieza.
SeleccioneINTENSOy cuatro horasdetiempo de limpiezasi el
homo est4muy sucio.
5. LIMPIEZA,"TIME"(]-iempo],BLOO,UEOy el conteo regresivode
la autolimpiezase desplegaranen pantalla mientrasel homo se
limpia.Cuandotermine el tiempo de limpiezay la puerta todav[a
est6bloqueada,ENFRIAMIENTOapareceraen pantalla.
Importante: El bloqueode la puerta sedesenganchar4
aproximadamenteuna hora despudsde quese hayaterminadola
limpieza.ENFRIAMIENTOdesaparecerade la pantallacuando la
puertadel homo se hayadesbloqueado.
Para diferir un ciclo de autolirnpieza:
1. Oprimala tecla "Clean". Clean
......... /
2. RETPARRILLASse desplegar&Retirelas parrillas.
3. SeleccioneCONTINUARusandola tecla rapida.
4. Seleccioneel nivelde suciedadLEVEintroduciendoel n0mero
200con las teclas num6ricaspara programardos horasde
limpieza.Seleccioneel nivelde suciedadMED usandolas teclas
rapidas.
O
SeleccioneINTENSOy cuatro horasdetiempo de limpiezasi el
homo estamuy sucio.
5. Lapuertase bloquear& LIMPIEZA,"TIME"(Tiempo),BLOQUEOy
el conteo regresivode la autolimpiezase desplegardnen pantalla
6. Despudsde que la puerta se bloquee,oprima la tecla "More
Options" [Mas opciones).
7. SeleccioneDIFERIR usandolatecla rapida.
* Los nombres de los productos son marcas registradas de sus respectivos fabricantes.
77
÷
8113P527-60 78 _ 12/6/05, 8:07 AM

÷
8. Seleccionela cantidadde horasque deseadiferir el inicio delciclo
de autolimpieza.
9. El tiempodiferidoy el tiempode limpiezaaparecer_nen la pantalla.
Despu6s de la autolimpieza
Apreximadamente una hera despu_s de/fin de/eicle de
limpieza, el blequee se desenganchat_ y ENFRIAMIENTO
desaparecet_ de la pantal/a. En este memento se pedF_
abrir Is puerta.
AIgunas manchas pueden dejar una ligera ceniza gris que
puede ser removida con un paso ht3medo. Si la suciedad
permanece despu6s de limpiar las cenizas, el ciclo de
autolimpieza no fue Io suficientemente largo. La suciedad
ser_ removida durante el siguiente ciclo de autolimpieza.
Si se dejaron las parrillas en el homo y las mismas no se
deslizan con facilidad despu6s de un ciclo de autolimpieza,
limpie las parrillas y los soportes con una peque_a cantidad
de aceite vegetal para facilitar su movimiento.
Puede aparecer una decoloraciOn blanca despu6s de la
autolimpieza si no se limpiaron los derrames _cidos o
Procedimientos de lirnpieza
azucarados antes de iniciar el ciclo de autolimpieza. Esto es
normal y NO afectar_ el rendimiento.
Notas:
* Si se deja la puerta abierta,CIERREPUERTAse desplegar_en
lapantalla hastaque se cierre la puerta
° Si pasanm_sde30 segundosentre la activaci6nde la tecla
"Clean" [Limpieza)y la activaci6nde unatecla num_rica,el
programaregresardautom_ticamenteal despliegueanterior.
. La puerta del homo se da_ard si intentaabrirla a la fuerza
durante la limpiezao enfriamiento.
. Lasprimerasvecesque seuse laautolimpieza,es normal ver
humoy sentir un olor. Estoes normaly se reducir_ o
desaparecerdcon el uso. Siel homo est_muy sucioo si la
asaderase dej6 accidentalmenteenel homo,pueden salir
humoy olor excesivos.
° A medidaque el homo se calientay se enfria,es posible
escucharel sonido de laspiezasde metal a medidaquese
expandeny contraen.Estoes normaly no da_ardel
electrodomdstico.
÷
* Los nombresde los productosson marcasregistradasde
susrespectivosfabricantes.
** Parahacer un pedidoflame al 1-800-JENNAIR
(1-800-536-6247).
Panel de acceso
÷
Panel de control
Perillasde
control
Elpanelde accesose puede retirarf_icilmente.Paraabrir elpanel,sostengaloscostadosy tire haciaarriba
parasacarlo.Paracerrarel panel,alineelos ganchoscon lostachonesde la estufa.Oprimael "r_:_,4s_
panelde accesohaciaadelantesobrelostachonesy empujehaciaabajopara engancharlo.GANCaOS_"',, h _r
° Limpiecon aguayjabOn,limpiavidrioso rociadorI[quidosuave.
No use cantdadesexcesvasde agua
Paraewtaropacaro rayarel acabado,no use hmpladores_speros,levementeabraslvos
o c_usticostales eomoloslimpiadoresde hornos.
Irnportante: Paraevitar laposibilidadde desconectaraccidentalmentecualquierpiezadel sist
ventilaci6n,no use el _readetr_sdel panelde accesoparaalmacenamiento.
• Paraactivarel bloqueodecontrolespara lalimpieza,vea lasecciOnBloqueodelcontrolen la p_gina90.
• Limpiecon un paso mojado.Sequebien.
• Se puedenusar limpiadoresde vidriosi se rocfaen un paso primero.NO recied limpiador directamente seflre d
#tea de/as tec/asde controly de la pantalla.
• No use otrosrociadoresde limpieza,limpiadoresabrasivoso grandescantidadesdeagua en el panelde control.
• Retirelas perillastirando de eliashaciaafueracuandoest6nenla posici6n"OFF"(apagado).
• Limpie,enjuaguey seque.No useagentesde limpiezaabrasivosya quelos mismospuedenrayarel acabado.
• Enciendacada elementoparaasegurarsede quelas perillasfueron reinstaladascorrectamente.
Cont.
78
8113P527-60 79 _ 12/6/05, 8:07 AM
÷
÷
Cubierta-
Ventanillay
puerta del
homo = Vidrio
interiorde[
homo
Nunca uselimpiadoresde homo,blanqueadorcon cloro,amoniacoo limpiavidriosconamoniaco.
Vidrio cer_rnicoImportante:Uame a un t_cnicode servicioautorizadosi la cubiertade vidrio cer_micose agrieta,
quiebra osi se derritemetal e papel de aluminio sobre la superficie.
• Esperea que la cubiertase enfffe antesde limpiarla.
• General- Limpiela cubiertadespuc!sde carlauso o cuandosea necesariousandouna toalla depapel hOmeday la crema
de limpiezaparacubiertas"CooktopCleaningCreme""(PiezaNo.20000001)**.Luego,lustrecon un paso secoy limpio.
Impertante: Aparecer#nmanchaspermanentessi seperrniteque sesequensobrela superfMeusandolacubierta
repetidamentecuandoest_manchada.
° Manchas fuertes o marcasrnet;ilicas- Humedezcaunaesponjade restregar"antirayas".Apliquela cremade limpieza
paracubiertas"CooktopCleaningCreme"*y restriegueparaquitartanta suciedadcomoseaposible.Apiique unacapa
delgadade la cremasobre lamancha,cubracon una toalla depapel hOmeday dejereposardurante30 a 45minutos [2 a
3 horasparasuciedadmuyfuerte).Mantengala humedadcubriendola toallade papel con envolturade pl_stico.
Restrieguenuevamentey luegolustrecon un paso !impioy seco.
Impertante: UsesolamenteunaesponjaLIMPIAYHUMEDAqueno rayeque seasegurapara utensiliosconrevestimiento
antiadherente.EIpatr6ny el vidriosedafiar_nsi la esponjanoest_hEJmeda,si la esponjaest_suciao dse usacualquierotro
tipo deesponja.
° Nlanchasquernadas o secas - Restrieguecon una esponjade restregar"antirayas"y con cremade limpiezapara
cubiertas"CooktopCleaningCreme"*.
Impertante:Sujeteun raspadorconuna hojade afeitaraun findulode30°y raspecualquiersuciedadquequede.Luego
limpiecomosedescribi6anteriormente.No usela hojade afeitarparalimpiezadiariaya quedesgastarfielpatr6n del vidrio>/
• Azticar o pl_sticoderretido- Cambieinmediatamentela temperaturadelelementoalajuste"LOW" (Bajo) _ z
y raspeelaz_caro el pl_sticodela superficiecalientea unasuperficiefr[a. LuegoAPAGUEel elementoy /_
esperea que se enfrie.Limpieel residuocon un raspadorcon hoja de afeitary con la cremade limpieza
paracubiertas"CooktopCleaningCreme"*.
• Eviteusarcantidadesexcesivasdeagua,ya que puedeescurrirsedebajoo detr_sdelvidrio y mancharlo.
• Lavecon aguay jab6n.Enjuaguecon agua limpiay seque.Sepuedenusarlimpiadoresde vidrio si se roc[aen un
paso primero.
• No usematerialesabrasivostalescomoesponjasde restregar,lanadeaceroo limpiadoresen polvoya que los mismos
rayar_inel vidrio.
• Sigalas instruccionesen lasp_ginas77 y 78 paraprogramarun ciclo deautolimpieza.
Parriiiasdel • Lavecon aguajabonosa.
homo ° Limpielas manchasdificilescon un limpiadoren polvoo con unaesponjade restregarjabonosa.Enjuaguey seque.
• Lasparrillasse decolorar_inpermanentementey puedeque nose deslicenbien si se dejanen el homo duranteun ciclo
de autolimpieza.Si estosucede,limpieel hordede laparrillay el soportecon una peque_acantidadde aceitevegetal
pararestaurarla facilidadde movimiento.Limpieel excesode aceite.
Acero Inoxidabie ° NO USENINGLINPRODUCTODE LIMPIEZA QUECONTENGABLANQUEADORA BASEDE CLORO.
O_lodelosselectos_ • NO USELIMPIADORESABRASIVOS 0 DE NARANJA.
° SIEMPRELIMPIE/=ASSUPERFICIESDEACEROA FAVORDEL GRANO.
, Limpiezadiarialsuciedad leve - Limpiecon unode lossiguientes- aguaconjab6n,una soluci6nde aguay vinagre
blanco,limpiadorparasuperficiesy vidrio "Formula409"*o un limpiadorpara vidriosimilar- usandounaesponjaoun
paffosuave.Enjuaguey seque.Parapuliry evitarmarcasde losdedos,useel producto"StainlessSteelMagic Spray"*
(PiezaNo20000008_**.
• Suciedadmederada/manchasrebeldes - Limpiecon uric de lossiguientes- "BonAmi","SmartCleanser"o "Soft
Scrub"*- usandounaesponjaht_medao un paffosuave.Enjuaguey seque.Lasmanchasdificilespuedenser quitadas
con unaesponja"Scotch-Brite"*multiusoh_medafrotandoa favor delgrano.Enjuaguey seque.Pararestaurarel lustrey
sacarlas marcas,vetas,aplique"StainlessSteelMagicSpray"*.
• Decoloraci6n-- Usandouna esponjamojadao un paffo suave,limpiecon el limpiadorparaacero inoxidable"Cameo
StainlessSteelCleaner"*.Enjuagueinmediatamentey seque.Parasacar lasvetasy restaurarel lustre,utilice"Stainless
SteelMagic Spray"*.
Loshombresde los productosson marcasregistradasde sus respectivosfabricantes.
•* Parahacerpedidos directamente,Ilameal 1-800-JENNAIR[1-800-536-6247).
÷
79
8113P527-60 80 _ 12/6/05, 8:07 AM
÷
÷
Accesorios
de Ja parriJJa:
Basey bandeja
de la base -
Porcelana
Bernento
Parrillas-
Aluminio
acabado
antiadherente
Taza para grasa
La basey su bandejaestdnubicadasdebajodel elementode la parrillay/o de los cartuchos. LimpiedespuOsdecadauso
de la parrilla.
• Pararemoversucio leve,limpiecon aguajabonosao rode con limpiadorescomo Fantastik*o Formula409*.Paralimpiar
m_sf_cilmentela porcelana:a) rode con un limpiador;b)cubra contoallasde papel;c) a_adauna peque_acantidadde
aguacaliente paramantenerlastoallas depapel h0medas;d) cubray espere15 minutos;y e) limpie con un paso.
• Pararemoversucio moderado,restrieguecon "BonAmr'*,un limpiadorde restregarsuaveo con un restregadorde
pl_stico.
• Labandejadeforro de la basepuedeser limpiadaen el lavavajillas.
Iraportante: Verifiqueel drenajede grasadespuOsde cadauso dela parrilla. Paralimpiar,viertaaproximadamenteV3
detaza deagua de Ilavemuy calientemezcladacon 1cucharaditade detergentede lavavajillasen el drenaje.
• Nunca sumerjaen agua. La mayoriade las manchasse quemar_ncon el uso. Eltablerodeterminalespuedeser
limpiadocon aguajabonosatibia. No use limpiadoresni materialesabrasivos.Sequebien antesdevolvera introduciren
lacubierta.
• Lave las parrillas if[as (NO SUMERJA PARRILLAS CALIENTESEN AGUA) con detergente en agua caliente en el
fregadero o en el lavavajillas. Aseg0rese de remover todos los residuos de alimentos antes de cocinar en las parrillas
recubiertas con de nuevo.
• Remueva las manchas dificiles con una esponja o malla. SOlo use los productos de limpieza que indiquen que
son recomendados para limpiar superficies antiadherentes
• Si las parrillas fueron lavadas en el lavavajillas, aplique aceite antes de cocinar.
• No use cepillos de metal o esponjas de restregar abrasivas u otros elementos de restregar para parrillas de carbon para
exteriores. Estos accesorios remueven el acabado y rayan las parrillas. No limpie las parrillas dentro del homo
autolimpiante o use limpiadores para hornos sobre las mismas.
• El envase estd ubicado en el lado izquierdo detr_s del panel de acceso inferior debajo de la
estufa. (Vea la p_gina 78 para obtener instrucciones para abrir el panel de acceso.) Esta taza
recolecta la grasa y otros Ifquidos generados durante la cocci0n o al usar algunos de los
accesorios. Verifique la taza cada vez que termine de cocinar a la parrilla y vacfela cuando
pueda vet la grasa. Para retirar la taza, simplemente sostenga la manija y tire del soporte
mientras sostiene el envase.
• El envase puede ser lavado en agua jabonosa caliente o en el lavavajillas.
* Los hombresde los productosson marcasregistradasde sus respectivosfabricantes.
** Para hacerpedidosdirectamente,Ilameal 1-800-JENNAIR[1-800-536-6247).
÷
ANTEN|M|E
Puerta del homo
• NUNCA intenteabrir o cerrar lapuerta o hacerfuncionarel homo
hastaque se hayareinstaladocorrectamentela puerta.
• NUNCA coloque losdedosentre la bisagray la partedelanteradel
marcodel homo.Losbrazosde las bisagrasestdninstaladosa
resorte.Sise golpeaaccidentalmente,la bisagrase cerrar_contra
el marco del homoy podrialesionarsus dedos.
Para retirar:
1. Cuandoel homo est_if[o, abrala puertahastala posiciOnde asar
(aproximadamente4" o 10 cm).
2. Sostengala puertaa cada lado. No use
la manijade la puertaparalevantarla.
3. Levantela puertade manerauniforme
hastaque la mismasalgade los brazos
de lasbisagras.
Para velvet a instalar:
1. Sostengala puertaa cada lado.
2. Alineelas ranurasde la puertacon los brazosde las bisagrasde
la estufa.
3,
Deslicela puertahaciaabajosobre los brazosde las bisagras
hastaque la puertaest6completamenteasentadasobrelas
bisagras.Empujelasesquinassuperioresde la puerta haciaabajo
paraterminar deasentar lapuerta sobrelas bisagras.Lapuerta
nose debe ver torcida.
Importante: La puerta del homo de una estufanuevapuedesentirse
"esponjosa"cuandose cierra.Estoes normaly se reducirdcon el uso.
80 Cont.
8113P527-60 81 _ 12/6/05, 8:07 AM
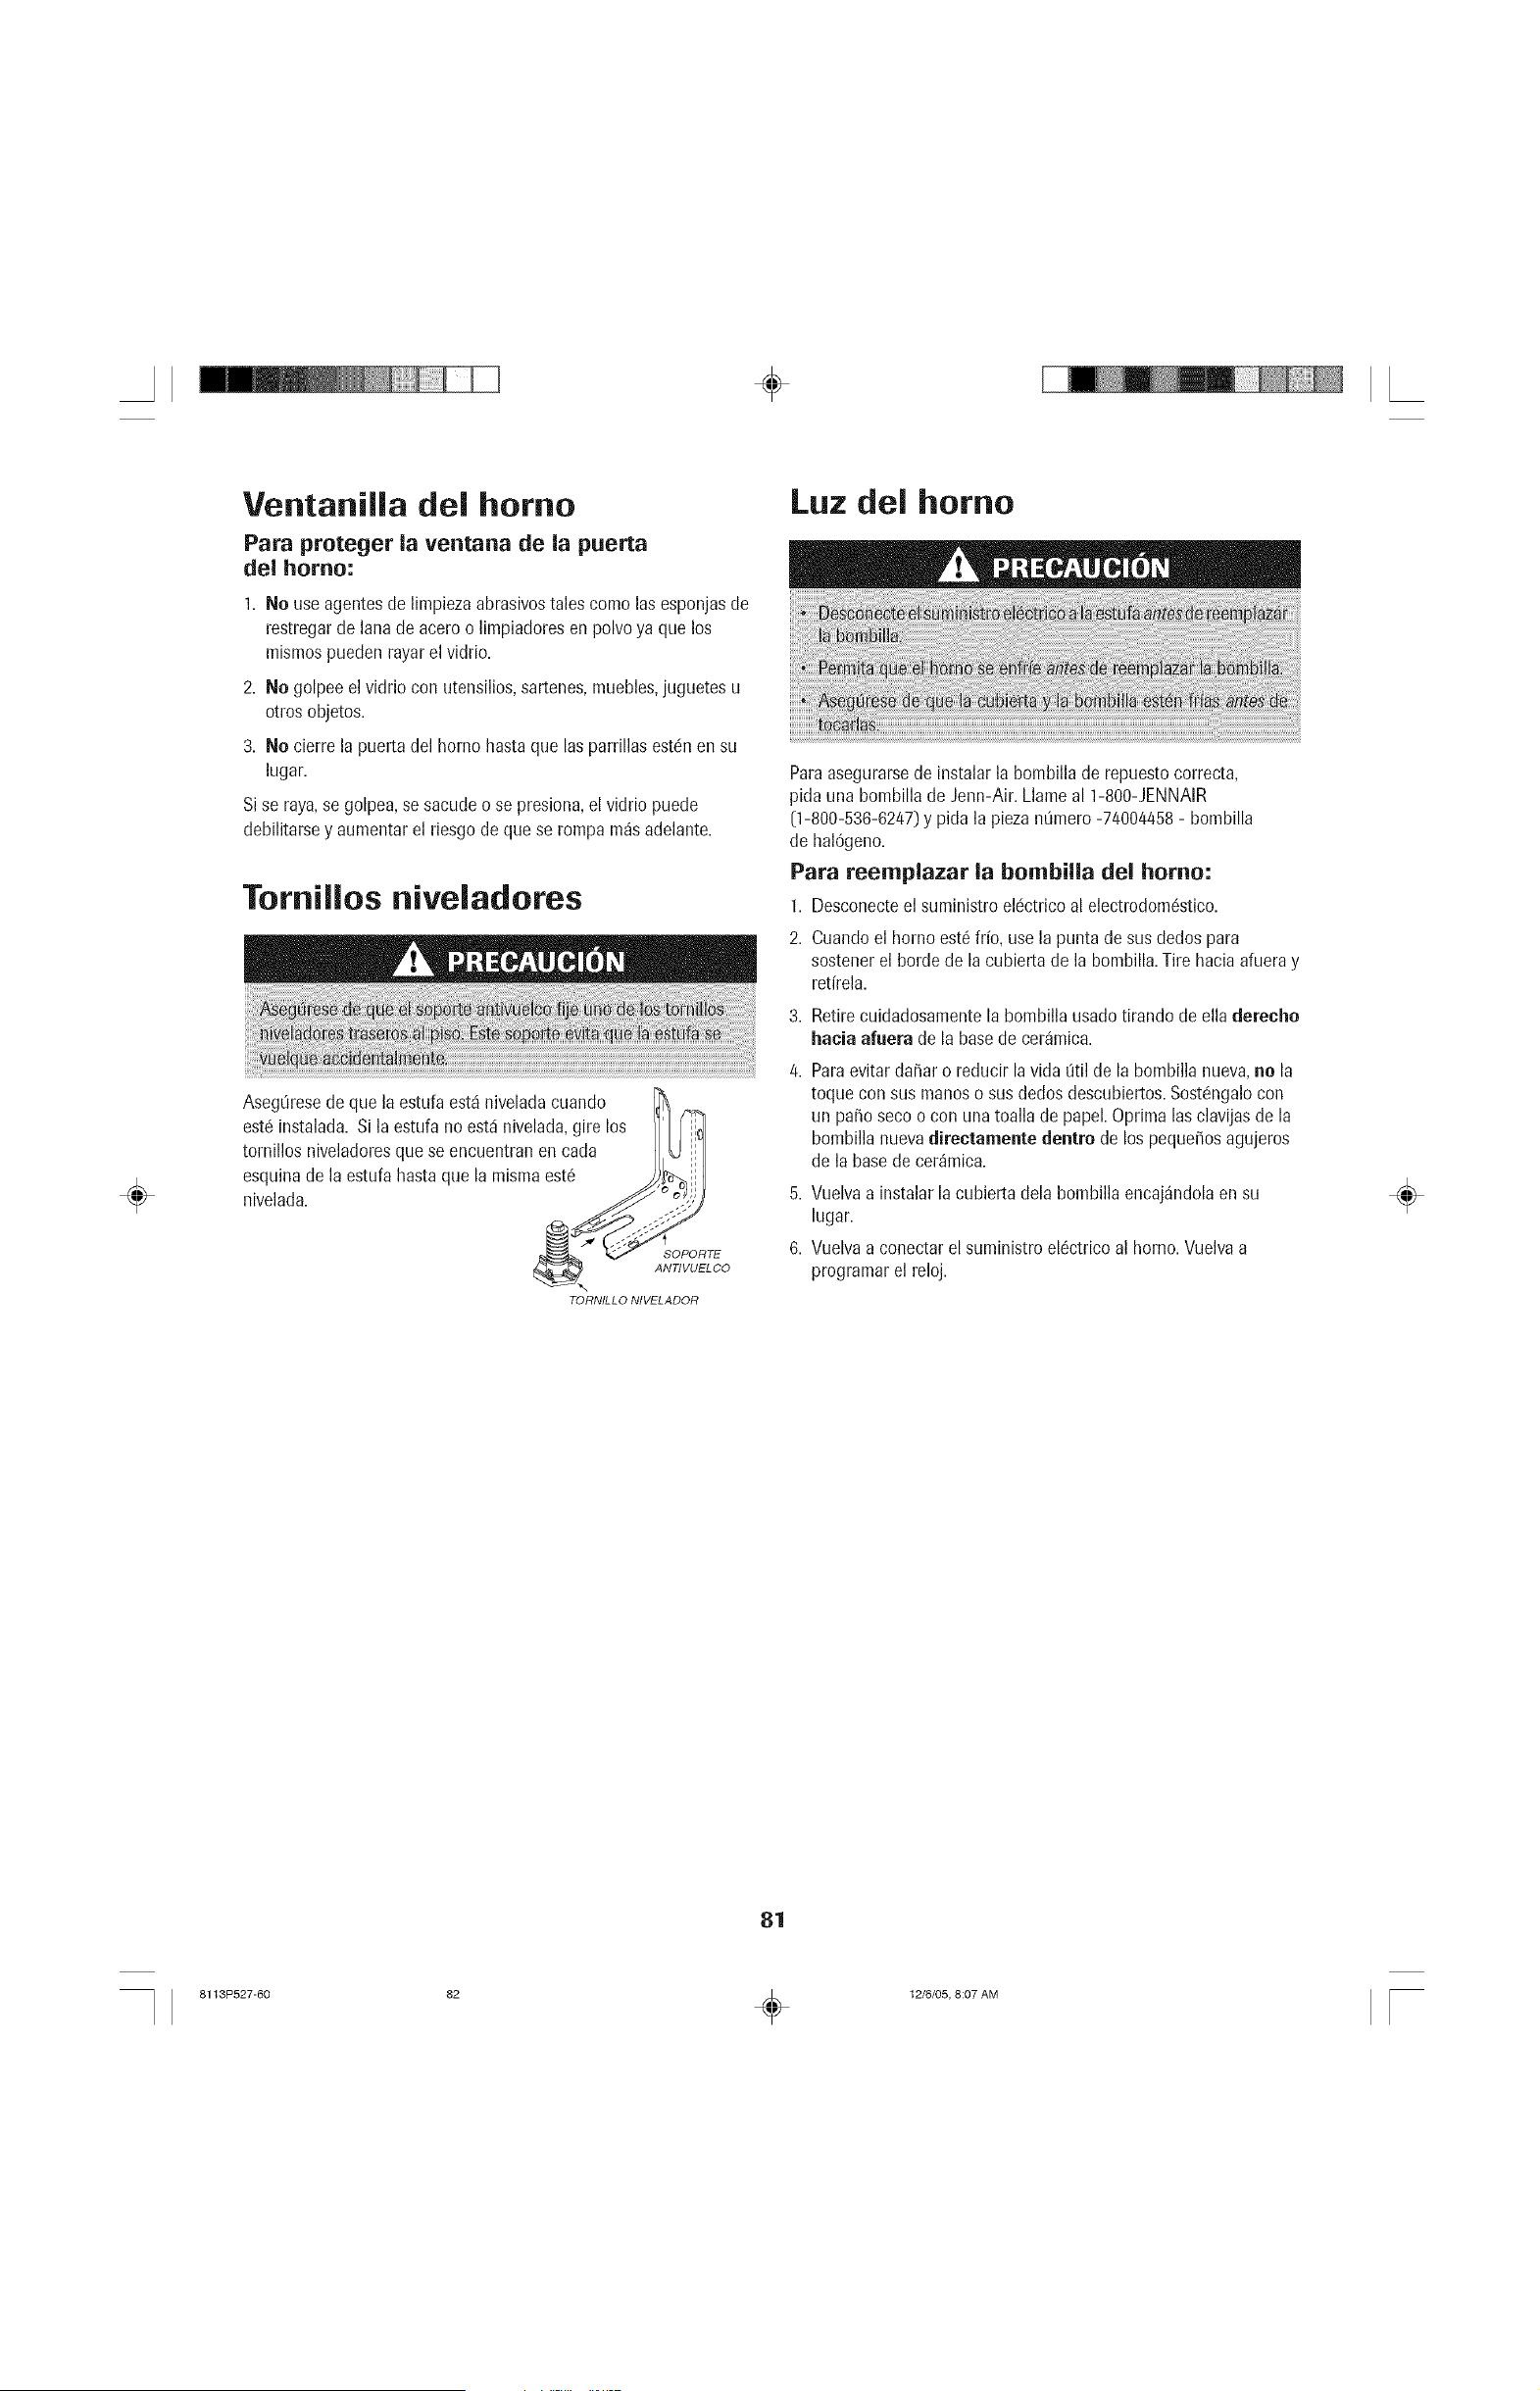
÷
÷
Ventanilla del homo
Para proteger la ventana de la puerta
del homo:
1. Ne useagentesde limpiezaabrasivostalescomo las esponjasde
restregarde lana deacero o limpiadoresen polvoya que los
mismospueden rayarel vidrio.
2. Ne golpeeel vidrio con utensilios,sartenes,muebles,juguetes u
otrosobjetos.
3. No cierrela puerta del homo hastaque lasparrillasest6nen su
lugar.
Sise raya,se golpea,se sacudeo se presiona,el vidrio puede
debilitarsey aumentarel riesgode quese rompa m_s adelante.
Tornillos niveladores
AsegOresede que laestufa est,1niveladacuando
est6instalada. Si la estufano est,1nivelada,gire los _[ d
tornillos niveladoresque se encuentranen cada I_
esquinade la estufahastaque la mismaest6 JJ,,_
nivelada. __.
__O PO R TE
_\ ANTIVUEL CO
TORNILLO NIVELADOR
Luz del homo
Paraasegurarsede instalar la bombilla de repuestocorrecta,
pidauna bombilla deJenn-Air. Llameal 1-800-JENNAIR
(1-800-536-6247)y pida la piezanOmero-74004458- bombilla
de hal6geno.
Para reempiazar la bornbilla de[ homo:
1. Desconecteel suministro elc!ctricoal electrodom6stico.
2. Cuandoel homo est6 fifo, use la punta de susdedos para
sostenerel bordede la eubiertade la bombilla.Tire hacia afueray
retfrela.
3. Retirecuidadosamentela bombilla usadotirando de elladerecho
hacia afuera de la basede cer_mica.
Paraevitarda_ar o reducir la vida Qtilde la bombillanueva,ne la
toque con sus manoso susdedos descubiertos.Sost6ngalocon
un paso seco o con unatoalla de papel.Oprima lasclavijasde la
bombilla nuevadirectamentedentro de los peque_osagujeros
de la basede cer_mica.
5. Vuelvaa instalarlacubierta dela bombilla encaj4ndolaen su
lugar.
6. Vuelvaaconectar el suministroel6ctrico al homo. Vuelvaa
programarel reloj.
÷
81
8113P527-60 82 _ 12/6/05, 8:07 AM
÷
LOCAL|
Y LU DE
÷
Para la rnayoriade las situaciones,
siga las sigaientes soluciones.
Una parte o la totalidad del
eJeetrodom6sticono fanciona.
Elreloj, las palabrasindicadorasy/o
JasJucesfuncionanpero eJhomo
nocalienta.
Losresultadosdel horneadono
son los esperados o difieren de
losobtenidos en an homo asado.
Eialimento no hierve
adecuadamente o genera
dernasiadohumo.
Elhomo no se aatolimpia.
Eihomo no se limpi6
adecuadamente.
La puerta del homo no se
desbioqueadespaOsdel cieio de
autoiimpieza.
Nose escuchan se_ales sonorasy
JapantalJaest_ apagada.
• Verifiquesi los controlesdel homo fueron programadoscorrectamente.
• Verifiqueque el enchufe est6bien conectadoenel tomacorriente.
• Verifiqueo restablezcael disyuntor. Verifiqueo reemplaceel fusible.
• Verifiqueel suministroelc!ctrico.
• Verifique si los controles superiores y/o los del homo fueron programados correctamente.
Vealas p_ginas84 y 91.
• Verifiquesi la puertadelhomo sedesbloque8despu_sdelciclo de autolimpieza.Vealap_gina 78.
• Verifiquesi el homorue programadoparaun ciclo decocciOno deautolimpiezadiferido.Vealas
p_ginas91y 77.
• Verifiquesi el bloqueode los controlesest_activado.Vea la p_gina 90.
• Verifiqueque el homo no est6en modosab_itico.Veala p_gina 103.
• El homo puedeestarprogramadoparaunafunci0n de Cocinary Mantener Calientediferida.
. El bloqueode los controles puedeestaractivado.Vea la p_gina 90.
• Asegtiresede que el respiraderodel homo no hayasido bloqueado. Vea su ubicaciOnen la
p_igina95.
• Aseg_resede que la estufaest6 nivelada.
. Frecuentemente,lastemperaturasvar[anentre unhomo nuevoy uno usado.A medidaque seusan
los hornos,latemperaturatiendea cambiary puedehacersem_scalienteo m_sfr[o. Vealap_igina
103paraobtener instruccionespara ajustarla temperaturadel homo. Importante: No
se recomiendaajustarla temperaturasi el problemaIo presentans01ouna o dos recetas.
. Verifique lasposicionesde lasparrillas del homo. Elalimento puedeestar demasiadocerca
del elemento.
. No seprecalent0el elementode asar.
° El papelde aluminio se us0 de maneraincorrecta.Nunea cubra el insertode la asaderacon
papelde aluminio.
• La puertadel homo estuvocerradadurante el asado. Deje la puertaabierta hastael primertope
(aproximadamente10cm o 4")
• Recorteel excesode grasade la came antesde asarla.
• Seus0 una asaderasucia.
• Elvoltajede la casa puedeser bajo.
• AsegLiresede que no hayaprogramadoun ciclo de autolimpiezadiferido. Veala p_gina 77.
• Verifiqueque la puerta est6 cerrada.
° Verifiqueque el homo noest_en modosab_itico.Vea la p_gina 103.
• Elhomo puedeestarsobre los 204° C (400° F).Latemperaturadebe ser menorde 204° C (400° F]
para poder programarun ciclo de autolimpieza.
• Esposible que se requieraun ciclo de autolimpiezam_s largo.
. Los derramesexcesivos,en especiallos derramesazucaradosy/o _cidos,no se limpiaron antes
del ciclo de autolimpieza.
• El interior del homo todav[aest_caliente. Espereaproximadamenteuna horaparaque el homo
se enfr[edespuc!sde queel ciclo de autolimpiezahayafinalizado.Lapuerta puede abrirse una
vezque la luz indicadoraBLOQUEOno est6en la pantalla.
• Elcontrol y laspuertas puedenestar bloqueados.Veala p_gina90.
• El homo puedeestaren modosab_tico.Veala p_igina103.
82 Cont.
÷
8113P527-60 83 _ 12/6/05, 8:07 AM
÷
÷
Cubiertalisa
muestradesgaste.
La humedadse acumula en
la ventanadel homo o salevapor
del respiraderodel homo.
Se percibe unfuerte olor o humo
leve cuandose enciende el homo.
Eielemento ealentadorde la
parrillao la cubierta nose
calientanIo suficiente.
Elsistemade ventilaei6nno
eapturael humo de mar=era
eficiente.
C6digosde fallas
Se escuchanruidos.
"SAb" destellay luego
se despliegacontinuamente.
1. Rayaduraso abrasionespeque_as.
• Aseg0resedeque lacubiertay el rondodel utensilioest6nlirnpios.No desliceutensiliosde vidrio
ni de metalsobre lacubierta. Aseg0resede queel fondodel utensilionoest6dspero.Uselos
agentesdelimpiezarecomendados.Veala p_gina79.
2. Marcasde metal.
, No desliceutensiliosde metalsobrela cubierta. Cuandoest6fr[a,limpie con unacremade
limpiezaparacubiertas.Veala pdgina79.
3. Vetasy rnanchasmarrones.
, Limpie losderramesinrnediatamente.Nunca lirnpiela cubiertacon unaesponjao pasosucio.
AsegOresedeque lacubiertay el fondo del utensilioestdnlimpios.
4. Areascon un brillo met_ilico.
, Dep6sitosmineralesdel aguay delalimento.Uselosagentesde limpiezarecomendados.Veala
p_gina79.
5. Picaduraso escamas.
° Limpie losderramesazucaradosinmediatamente.Vea lap_gina 79.
° Estoes normalcuandose cocinanalimentoscon alto contenidodehumedad.
° Seus6 humedadexcesivacuandose limpi6 laventana.
• Estoes normalen unaestufanuevay desaparecer_despu6sde variosusos. Un ciclo de
autolimpiezanuevo"quemar_"los oloresm_sr_pidamente.
• Sienciendeunventiladorayudar_a eliminarel humoy/u olor.
• Haysuciedadde alimentosexcesivaen la parteinferiordel homo. Useun ciclo deautolimpieza.
• Puedeque loscontrolessuperioresno est6nbien ajustados.
• Elvoltajede la casapuedeser bajo.
• Verifiqueelairecruzadoen la habitaciOno lacompensaci6nde aire.
• Apareceunacantidadexcesivade humo;verifiquelas instruccionesparaasara la parrillay para
cortarlascarnes.Veala pdgina86.
• Latapa de la paredexteriorpuede estaratascada.
• Esposibleque la cubierta hayasido realinstalada.Verifiquela informaci6nsobrelos conductos.
Veala pdgina76.
• Elfiltro de aire puedeestarreal instalado.Vealap_gina 87.
° El homo puede detectar una falla durante la programaci6n o durante el funcionamiento. Si se
detecta una falla, puede aparecer el mensaje FALLA DETECTADA- PILSEENTERY TRATE DE
NUEVO. Siga las instrucciones en la pantalla. Si la falla vuelve a aparecer o no desaparece, Ilame
a un tdcnico de servicio autorizado o al nLimero gratis que aparece en la pantalla.
• Si se intenta usar la misma funciOn antes de que el homo mural sea reparado, se desplegar_ el
mensaje CARACTER[STICANO DISPONIBLE PULSEAYUDA. La caracteristica permanecer_
inactiva hasta que sea reparada.
° Si el homo estd demasiado sucio, pueden ocurrir demasiadas Ilamaradas Io cual resultar_ en un
cOdigo de error durante la limpieza. Oprima la tecla "CANCEL" [Cancelar) y deje que el homo se
enfr[e completamente, limpie el exceso de suciedad y luego wJelva a programar el ciclo de limpieza.
Si el cOdigo de error reaparece, Ilame a un t6cnico autorizado.
• El homo hacevariosruidosde bajonivel.Esposibleque puedaescucharlos rel_sdelhomo cuando
se enciendeny se apagan.Estoes normal.
• A medidaque el homose calientay se enfrfa,es posibleescucharel sonidode laspiezasde metal a
medidaquese expandeny contraen.Estoes normaly no da_ardel electrodom6stico.
° Elhomoestden modosabdtico.Paraanularestafunci6n,oprimay mantengaoprimidalatecla
"Setup" (Ajuste)durantecinco segundos.
÷
83
8113P527-60 84 _ 12/6/05, 8:07 AM
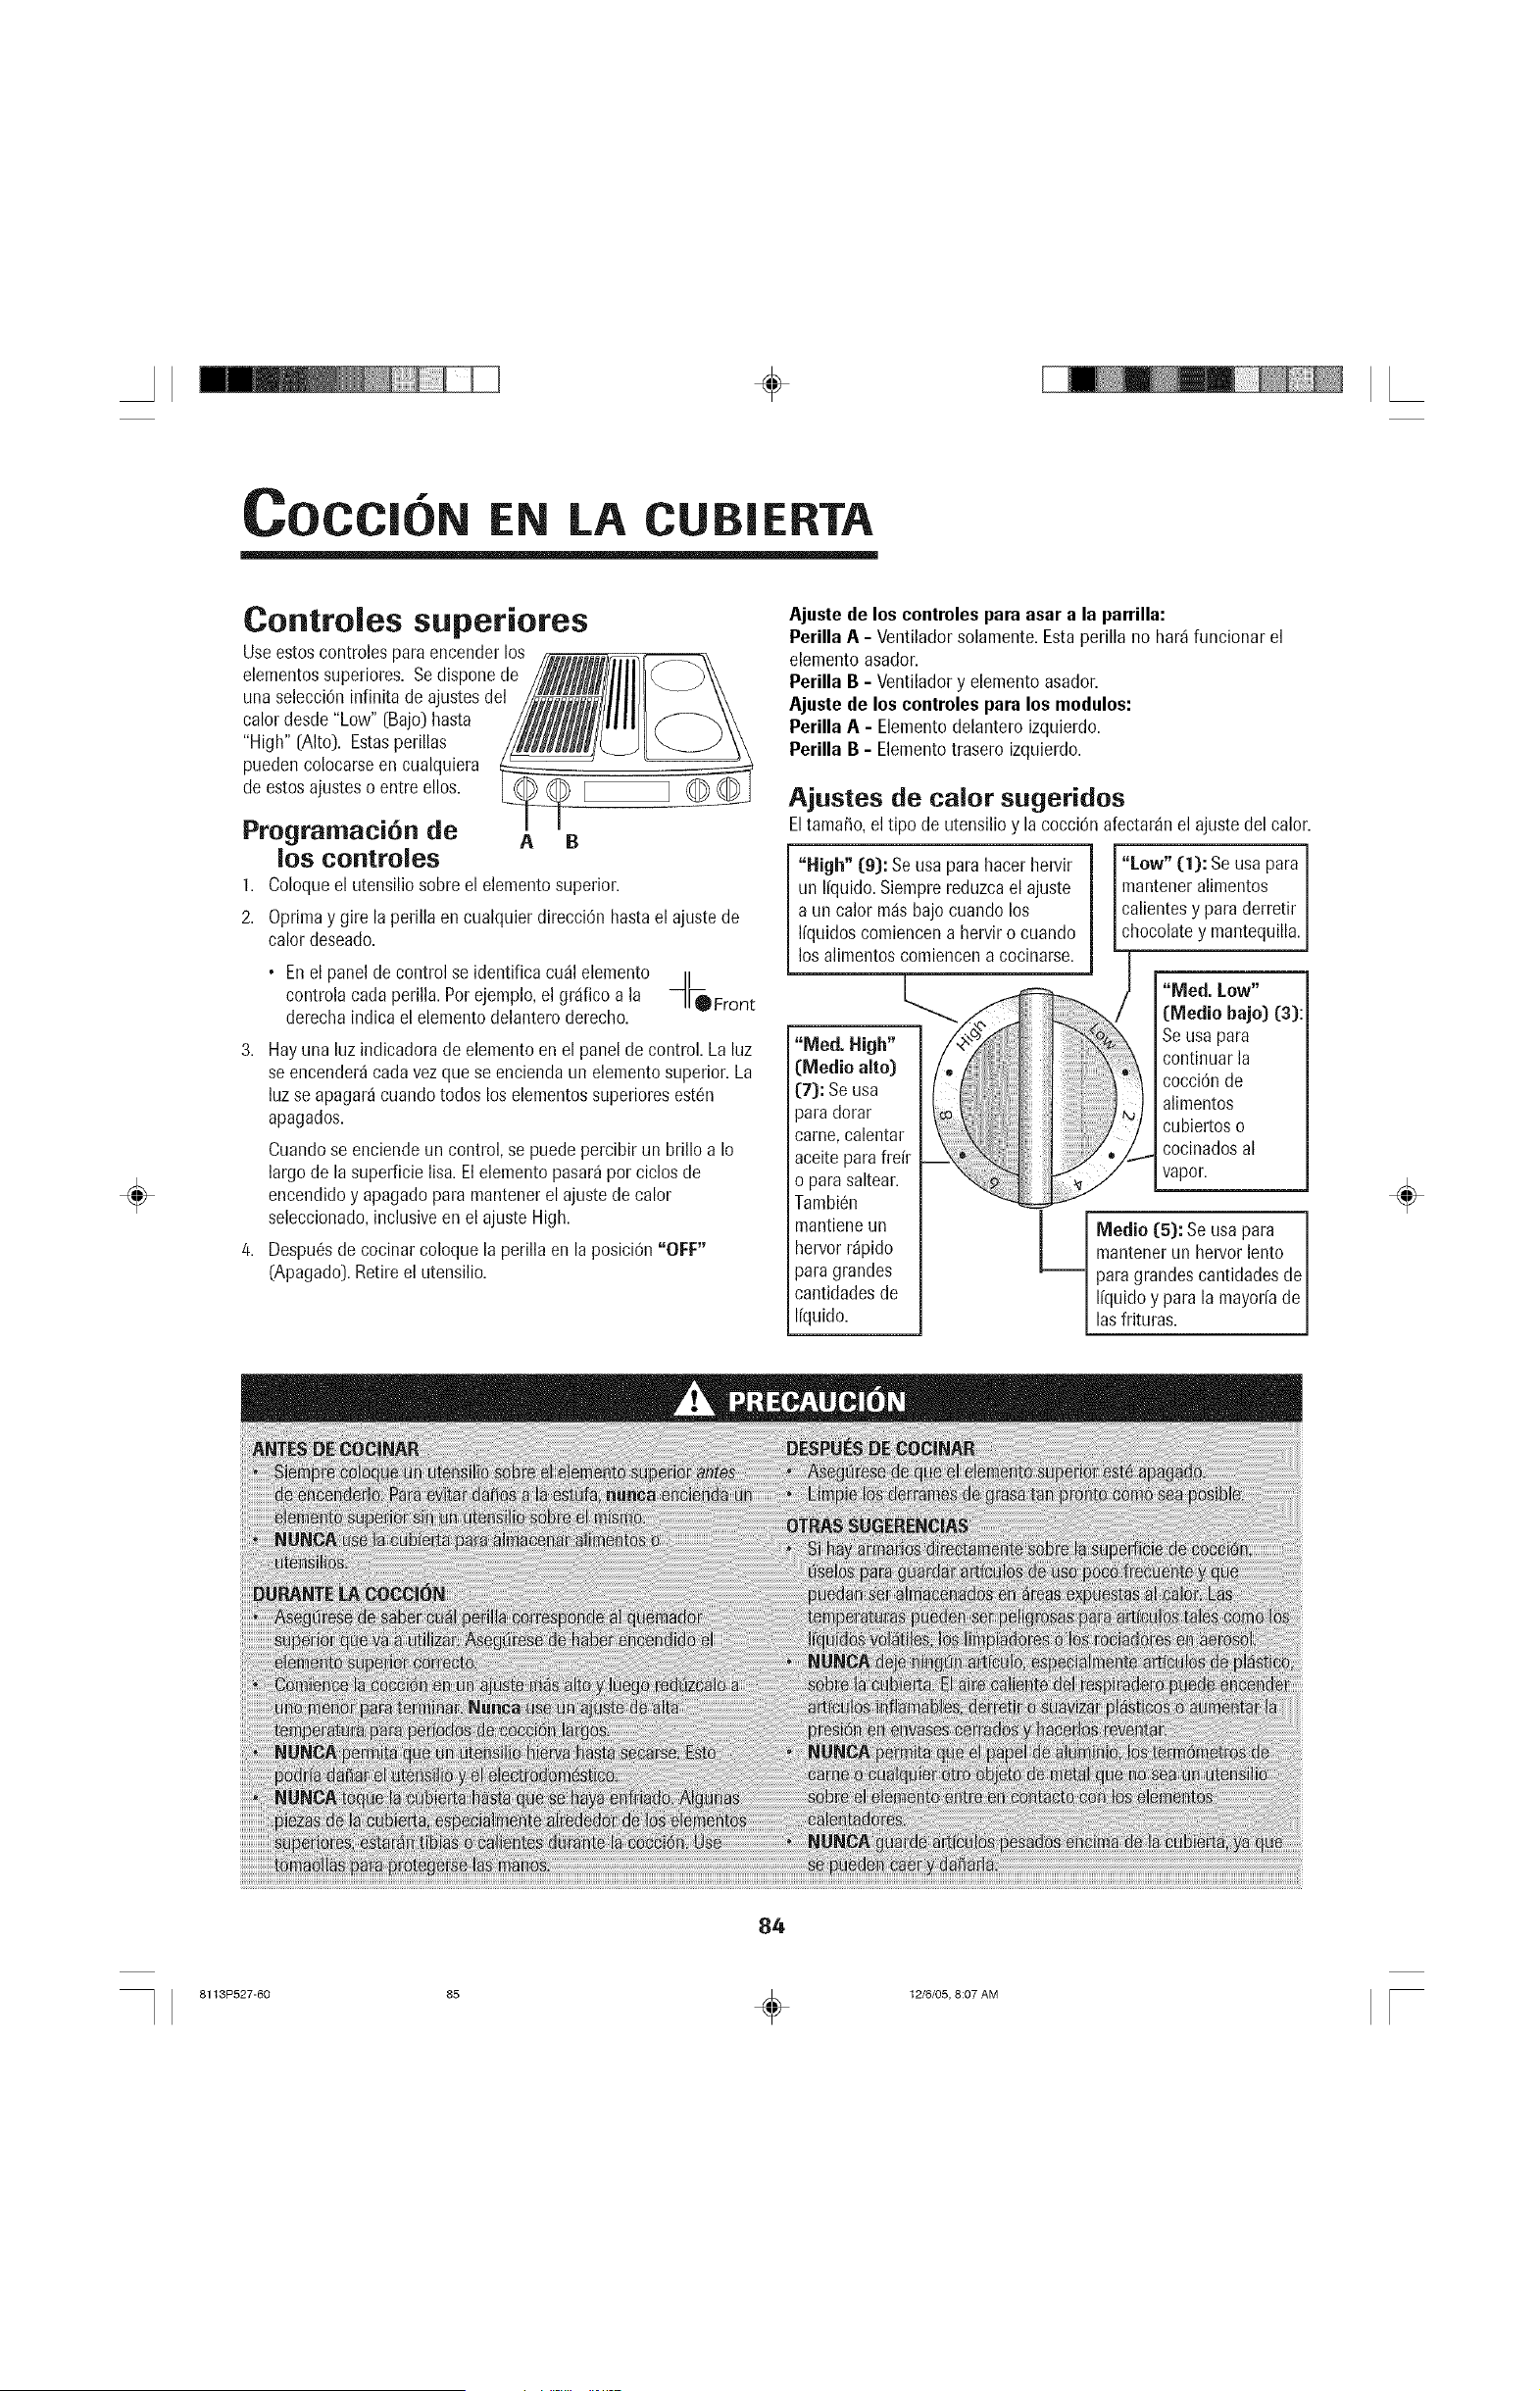
÷
EN LA B| ERTA
÷
Controles superiores
Useestoscontrolespara encenderlos
elementossuperiores. Se disponede
unaselecci6ninfinita de ajustesdel
calor desde"Low" (Bajo)hasta
"High" [Alto). Estasperillas
puedencolocarseen cualquiera
deestos ajusteso entreellos.
Programaci6n de
los controles
1.
A B
Coloqueel utensiliosobre el elernentosuperior.
Oprimay gire la perillaen cualquier direcci6n hastael ajustede
calor deseado.
• En el panelde control se identifica cu_l elemento //
controlacada perilla.Pot ejemplo,el gr_ificoa la -1_ Front
derechaindica el elernentodelanteroderecho.
3. Hayuna luz indicadoradeelemento enel panelde control. La luz
se encender_cadavezque se enciendaun elementosuperior.La
luz seapagar_cuandotodos los elementossuperioresest6n
apagados.
Cuandose enciendeun control, se puedepercibir un brilloa Io
largode la supefficie lisa.El elementopasar_por ciclos de
encendidoy apagadopara rnantenerel ajuste de calor
seleccionado,inclusiveen el ajusteHigh.
/4. Despu6sde cocinarcoloque la perillaen la posici6n"OFF"
[Apagado).Retireel utensilio.
Ajuste de los controles pare asar a la parrilla:
PerillaA - Ventiladorsolamente.Estaperilla no har_ funcionar el
elementoasador.
Perilla B - Ventiladory elementoasador.
Ajuste de los controles para los modules:
Perilla A - Elementodelantero izquierdo.
Perilla B - Elementotrasero izquierdo.
Ajustes de calor sugeridos
Eltamafio,el tipo de utensilio y lacocci6n afectar_nel ajustedel calor.
"High" (9): Se usa parahacer hen/it
un I[quido.Siemprereduzcael ajuste
a un calor m_sbajo cuando los
Ifquidoscomiencena hen/iro cuando
los alimentoscomiencena cocinarse.
Tambi6n
mantieneun
hen/orr_pido
para grandes
cantidadesde
I[quido.
"Low" (1): Se usa para
manteneralirnentos
calientesy para derretir
chocolatey mantequilla.
"iVied. Low"
(Mealie bajo) (3):
Seusa para
continuarla
cocciOnde
alimentos
cubiertoso
cocinadosal
vapor.
Mealie (5): Se usapara
mantenerun hen/orlento
-- para grandescantidadesde
I[quidoy para la mayor[ade
las frituras.
÷
84
8113P527-60 85 _ 12/6/05, 8:07 AM
÷
Instalaci6n de los cartuchos de
la cubierta
Loscartuchosde la cubierta,ya seande elementostubulares
convencionaleso radiantes,pueden set instaladosen cualquier lado
de la estufa. (Veala p_gina 105para obtenerinformaci6nsobre
todos loscartuchosy accesoriosdisponiblesy sus n0merosde
modelo.)
Para instalarlos cartuchos:
1. Si las rejillasde laparrilla, el elementoy/o la bandejade la base
est_nen su lugar,remu6valasantesde instalar un cartuchode
cubierta. Limpie cualquieracumulaci6nde grasade la basede
porcelana. (Vea lap_gina 80para las recomendacionesde
limpieza.)
2. Parainstalarcualquierade los cartuchosopcionalesde la
cubierta, aseg0resede que loscontrolesest6napagadosy que el
acrtucho est6fifo. Coloqueel enchufede terminalesdel
cartucho hacia el recept_culode terminales. Esterecept_culo
est_ ubicadoen la parte delanteradel lado izquierdoyen la parte
traseradel lado derechode laestufa.
Instalaci6n de la parrilla:
Elaccesoriode la parrillaconsistede dos parrillas negras,un
elementode asara la parrilla y la bandejade la base.Esteaccesorio
sOlopuedeser instaladoen el ladoizquierdode la cubierta.
Para instalar la parrilla:
1. Antesde instalarlas piezasde la parrilla,aseg0resedeque los
controlesest6napagados.
2. Coloquela bandejade la baseen la basevac[a.
Coloqueelelemento de asara la parrillacon el enchufede
terminalesorientado haciael recept_culo. Esterecept_culoest_
ubicadoen la parte delanteradel lado izquierdode laestufa.
Desliceel elementohacia el receptdculohastaque el enchufe
delterminal estdcompletamenteconectadoy el soporte
descanseen los ladosde la base.
÷
3. Desliceel cartucho haciael recept_iculohastaque el enchufede
terminalesdel cartucho estc!completamenteconectado.
4. Bajeel extremoopuestodel cartucho haciael interior de la
cubierta de la estufahastaque quedeal ras de lasuperficie. Su
estufa est,1lista parausar.
Para remover loscartuchos:
1. Loscontrolesdeben estarapagadosy el cartucho debe estarfr[o.
2. Levanteel borde del cartucho hastaque la parte superiorest6
aproximadamente5 cm (2") por encimade la aberturade la
estufa. Importante: Si levantael elemento m_isde 5 cm (2")
sobre la superficiede la cubiertacuando est,1conectadoen el
recept_culo,se podria dafiar el enchufede terminales.
3. Paradesconectarel terminal,sostengael cartucho pot sus
costadosy ret[relodel recept_culode terminales. Lev_intelouna
vezest6 completamentedesconectado.
4. No apile loscartuchosdondepuedan caerseo da_arse. Nunca
almaceneotros materialessobre los cartuchosde vidrio cer_imico
ya que podr[a da_ar o rayar la superficie.
Enlatado en el hogar
ElenlatadosOlodebe ser realizadoen el cartucho tubular
convencional. El accesoriode enlatadoparael elemento(modelo
A145A)haceposible usarollas grandespara conservascon el
cartuchotubular convencional.
Parainforrnaci6nadicional,consultelagufade usoy cuidadoincMda
con su oartuoho.
4. Coloquelasparrillas en lasuperficie de la cubierta.
Para retirar la parrilla:
1. Aseg0resede que los controlesest6napagados. Retirelos
componentesde la parrilla unavezest6nfrios.
2. Pararetirar el elemento deasara la parrilla,retfrelodel
recept_culohastaque se desenchufe. Importante: Si levantael
elementom_sde 5 cm (2") sobre lasuperficiede lacubierta
cuandoest_conectadoen el recept_iculo,se podr[adafiar el
enchufede terminales.
Use de la parrilla
Antesdel primer uso,lavelas parrillas nuevasen aguajabonosa
caliente,enjuaguey seque. Luego aplique unacapa delgadade
aceitede cocinaa la superficie. Remuevael excesode aceite
con unatoalla de papel.
Repita este procedimiento cuando:
a)limpie lasparrillasen el lavavajillasya que el detergentepuede
removerla capa de aceite;o
b)cada vezque vayaa usar un adoboa base deaz0car [por
ejemplo,salsaBBQ).
÷
85
8113P527-60 86 _ 12/6/05, 8:07 AM
÷
÷
Precalientela parrilla en el ajuste"High" (Alto) durante5
minutos. El precalentamientomejorael sabory aparienciade la
camey la abrasardpidamentepararetener losjugos.
Useesp#tulasno met#licaso utensiliospara evitardafiarel
acabadoantiadherentede la parrilla.
Corte/ascantidadesexcesivasde grasade la came.$61ose
necesitauna cantidadnormalde grasa para producir la cantidad
de humo necesariapara darleel sabor "ahumado"deparrilla a la
came. Lagrasa excesivapuede causarproblemasde limpiezay
de Ilamaradas.
Sipermite quelas cantidadesexcesivasde grasaojugo formen
Ilamaradasconstantemente,la garantfadelas parrillasquedar#
anulada.
Las Ilamaradasexcesivasindicanque el interior de la parrilla
debeser limpiado,que la came tiene cantidadesexcesivasde
grasao que lacame no fue preparadacorrectamente.
Ocasionalmentelosgoteosde grasase enciendenpara producir
Ilamaradasinofensivascortas durante unoo dos segundos. Esta
es una parte normaldel procesodecocciOn.[raportante: Para
obtener informaciOnsobre la tazade grasa,yea la p_gina80.
NUNCA DEJELA PARRILLADESATENDIDADURANTEEL
USO.
Si el excesode grasa causa llamaradas constantes:
1. Enciendaelventilador manuahnente.
2. APAGUE inmediatamente los controles.
3. Retirela camede la parrilla.
Notas:
• No use papel de aluminio en el interior
_rea de asado a la parrilla.
• No use carb6no trozos de maderaenel
_reade asadoa la parrilla.
e
No permitaque la bandeja de la basede _--c_c_c-_c_-
la parrilla se sobrecarguedegrasa. Limpie con frecuencia.
No cubra la totalidad de las parrillas con came. Deje espacio
entre cadacorte paraproporcionarventilaciOnadecuaday
evitarIlamaradas.
Sugerencias para asar a la parrilla
• Aseg_resede seguir las instruccionesde uso de la parrilla.
Lostiempos y ajustesde cocciOnsugeridos (yealap_gina 87_son
aproximadosdebidoa las variacionesde los alimentosy del
voltajeeldctrico.
Paraobtener los mejoresresultados,comprecame de primera.
La came de por Io menos1,9cm (s/4")se asardmejor que los
cortes m_sdelgados.
• Corte la grasade los hordesde lacame perono en la came
misma paraevitar quese arrugue durante la cocciOn.
Paraobtener camea la parrilla con aspecto"marcado",asegt_rese
de precalentarla parrilla. Esperehastaqueun lado de la came
se aseal nivelde cocci6n deseadoo hasta que losjugos surjan
en la superficiesuperiorantes de voltearla. Voltee la camey las
hamburguesasuna solavez. LamanipulaciOnde losalimentos
causala pdrdidade losjugos intemos.
86
• Cuandosazonecarneso aplique salsaa los alimentos,recuerdeque
lascantidadesexcesivasse acumulanen el interior de la parrillay
no mejoranel sabor del alimento.
Aplique las salsasdurante los Oltimos15 a 20 minutosde cocciOna
menosque la recetaindique Io contrario.Adem_s,cada vezque use
unamarinadaa basede azOcar_or ejemplo,salsa BBQ),aplique
unacapa de aceitede cocinaalas parrillas antesdeprecalentar.
(Veala secci6n Usode laparrilla.]
• Existenmuchassalsasparacame que ayudana suavizarloscortes
de came menoscostososcuando son asadosa la parrilla.
° Ciertosalimentos,tales comola came de ave y el pescadono
grasoso,pueden necesitargrasaadicional. Sazonecon aceite o
mantequilladerretidaocasionalmenteduranteel asadoa la parrilla.
° Usepinzascon manijaslargaso esp_tulasparavoltear lacame. No
usetenedoresya que perforanla came y se pierdenlos jugos.
Sistema de ventilaci6n
Elsistemade ventilaci6nintegradoremuevelos vaporesde la cocci6n,
los oloresy el humo producidopor los alimentospreparadosen la
cubiertayen la parrilla.
° Parausar el sistemade .... _o,,.o,
HM_=RI
o,. o,
ventilaci6n manualmente,optima .... _,:t"_,
latecla "Vent Fan" [Ventilador) ...............
ubicadaen el control electr6nico.........
Op[_ons en[
Oprimala tecla unavezparael ......_.,
ajustede velocidad"Low" (Bajo),
unasegundavez parael ajuste "Nigh" y una terceravezpara
apagar el ventilador.
° Elsistemade ventilaci6n funcionardautom_ticamente cuando el
elementode asara laparrilla estc!en uso.
• El ventiladorpuedeser usadopara removeroloresfuertes de la
cocinatales como los producidosal picar cebollascercadel
ventilador.
Cuidado y limpieza dei sistema
de ventilaci6n
• Rejilla de aire: Larejilla deaire se levantaf_cilmente.Limpiecon un
paso o laveen el lavavajillaso enel fregadero con detergentedel
hogarsuave.Paraevitarrayar lasuperficie,no use limpiadores
abrasivoso esponjasde restregar.
• Filtro:Apagueel sistemade ventilaci6nantesde retirarel filtro. El
filtro es de tipo permanentey debeser limpiadocuando est6sucio.
Limpieen el fregaderocon aguatibia y detergenteo en el lavavajillas.
IMPORTANTE: NO USEELSISTEMASINEL FILTRO.El filtro siempre
debeset instaladoen _ngulo.Si observala parte delanterade la
estufa,la partesuperior del filtro debe estarapoyadasobreel lado
izquierdode laabertura deventilaci6n.La parte inferior debeestar
apoyadasobreel lado derechode la c_marade ventilaciOnensu
parteinferior. /mpertante: Si el filtro est_ instaladoparalelo y
contm la pared de/ventilador, se reducir_ la efectividad de la
venti/aciSn.
• Cdmara de ventilaci6n: Estadrea,la cual aloja al filtro, debe ser
limpiadaen casodederrameso cada vezque quede recubiertade
grasa.Puedeser limpiadacon una toalla de papel,un paso ht3medo
o una esponjay un detergenteo limpiador suavedel hogar.
Cont.
÷
8113P527-60 87 _ 12/6/05, 8:07 AM
÷
FILTRO DE AIRE
Importante: El respiraderodel homo est,1ubicado debajo del lado
derecho de la rejillade aire.Cuandouse o limpie el homo, podr_i
sentir aire calientey htimedo en esta_irea.Elarea cercanaal
respiraderopuedecalentarseIo suficientecomo paracausar
quemaduras.Tongacuidado de no derramarnadadentro de este
respiradero.La rejilla de aire debe ser removidaantes del
ciclo de autolimpieza.
Consejos para proteger la
superficie del cartucho de la
cubierta lisa
Limpieza (yeala p_gina79 para mayorinformaci6n)
. Antes deusar, limpiela cubierta.
. Limpiela cubiertadiariamenteo despuc!sde carlauso.Estoayudar_
a mantenerel aspectode lacubiertay a prevenirdafios.
. Siocurreun derramecuandoest6cocinando,I[mpielo
inmediatamentedelarea decocciOncuandotodav[aest_caliente
paraevitartenorque limpiarlocon mayordificultadm_sadelante.
Conextremocuidado,limpieel derramecon unatoalla seca.
Guia de asado a la parrilla Precalientela parrillaen el ajuste"High" (Alto) durante5 minutosparaobtener el mejorsabor.
÷
Filete de res: [2,5 a 3,2 cm o Semicrudo Alto 10 a 17 minutos Voltee despu6s de 8 a 10 minutos.
1 a 1W'): Intermedio Alto 20 a 25 minutos Voltee despuc!s de 13a 15 minutos.
Bien cocido Alto 25 a 32 minutos Voltee despuc!s de 15a 17 minutos.
Hamburguesas: [85 a 114 g o 3 a 4 oz.) 9 15 a 25 minutos Voltee despuc!s de la mitad del tiempo.
Chuletas de cerdo: [1,3 a 1,9cm o _/2a 3/4") 9 25 a 40 minutos Voltee ocasionalmente.
Rebanadas de jam6n: [1,3 cm o Vd') Alto 10 a 15 minutos Voltee una vez.
Salchichas completamente cocidas:
Perros calientes Alto 5 a 15 minutos Voltee ocasionalmente.
Polaca Alto 10 a 20 minutos Voltee una vez.
Embutido fresco: Salchichas y porciones 9 15 a 20 minutos Voltee ocasionalmente.
Polio: Pechugas deshuesadas 9 25 a 35 minutos Voltee ocasionalmente.
Pechugas con hueso, patas de polio 9 45 a 60 minutos Voltee ocasionalmente. Unto con salsa
y cuadril o sazone durante los tiltimos 10 minutos.
Pescado: Filetes [2,5 cm o 1") 9 20 a 30 minutos Unto con mantequilla. Voltee despu6s de la
mitad del tiempo.
Camarones: [brochetas) 9 8 a 12 minutos Voltee y unte con mantequilla o salsa
con frecuencia.
Pan de ajo, Bruschetta Alto 2 a 4 minutos Voltee despuds de la mitad del tiempo.
Pan de porto caiiente, pan de hamburguesa 9 2 a 3 minutos
Frutas y verduras: Aros de pifia
Aros de pimentOn
(arosde 1,3cm 0 V2")
(rebanadasde 1,3cm 0
V2"de largo)
Alto
Alto
Alto
8 a 10 minutos
7 a 9 minutos
8 a 12 minutos
Importante"Estatablaes una gufa desugerencias.Lostiemposdecocci6ny losajustesde los
variacionesde las carnes,los controlesy el voltaje.
Volteedespu6sde la mitaddeltiempo.
Untecon aceite.Volteedespuc!sde la mitad
deltiempo.
Untocon mantequilla.Volteeocasionalmente.
controlessonaproximadosdebidoalas
÷
87
8113P527-60 88 _ 12/6/05, 8:07 AM
÷
÷
• No permitaque losderramespermanezcanen el areade cocci6no
enla moldurade lacubiertaduranteun per[odelargode tiempo.
• Nunca usepelveslimpiadoresabrasiveso esponjasde restregar
puespuedenrayarla cubierta.
• Nunca useblanqueadorcon cloro,amen[aceu otroslimpiadores
queno estc!nespedficamenterecomendadosparause envidrio
cer_mico.
Para evitar marcas y rayaduras
• No useutensiliosdevidrio. Puedenrayarlasuperficie.
• Nunca useun soporteo un anillodewok entre lasuperficiey el
utensilio.Estosart[culospueden marcaro rayarla cubierta.
• No desliceutensiliosde aluminioa Io largo de la cubiertacaliente.
Losutensiliospuedendejar marcasque debenser removidas
inmediatamente.(Vealasecci6ndeLimpiezaen lap_gina79.)
• AsegOresede quela superficiey laparteinferior del utensilioest6n
limpiosantesdeencenderla estufaparaevitar rayaduras.
• Paraevitarrayaduraso da_oa la cubiertade vidriocer_mico,no
dejeazQcar,sal ni grasaenel areade cocci6n.Limpielasuperficie
dela cubiertacon un pa_o limpioo con una toallade papelantes
deusarla.
• Nunca desliceutensiliosde metal _esadosa Io largode la cubierta
puespuederayarse.
Para evitar manchas
• Nunca useun pa_oo unaesponjasucia paralimpiarla superficie
dela cubierta.Quedar_una pelfculaque puedecausarmanchasen
lasuperficiede cocci6ndespuc!sde queel _irease caliente.
• Si cocinacontinuamentesobreunacubiertasucia puedemanchar
lacubierta de manerapermanente.
PaPa evitar otros da os
° No permitaquese derritapl_istico,az_caroalimentoscon un alto
contenidodeazOcaren lacubierta caliente. Siesto Ilegaaocurrir,
limpieel derrameinmediatamente.(Veala secci6nde Lirnpiezaen
lap_gina 79.)
• Nunca deje queun utensiliohiervahastaquedarseco puesesto
puededa_arla cubiertay el utensilio.
• Nunca usela cubiertacomeuna superficiede trabajoni come
tabla de cortar.
• Nunca cocineel alimentodirectamenteen la superficie.
• No useun utensiliopeque_oen un elementogrande.No solamente
desperdiciaenergfasine quetambic!npuede resultaren derrames
quese quemenen el_ireade cocci6nIocual requierelimpieza
adicional.
• No useutensiliosno planesque seanmuygrandeso disparejos,
talescome woksde rondoredondo,derondoonduladoy/o rejillasy
eliasgrandesparahervirconservas.
• No usepapelde aluminioo envasesde aluminio.Elaluminiose
puedederretiren elvidrio.Si el metalse derritesobrela cubierta,
no la use.Llamea unt6cnico deservicioautorizadoJenn-Air.
Recomendaciones sobre
los utensilios
Sise usanlos utensilioscorrectosse puedenevitar touchesproblernas,
tal comela prolongaci6ndel tiempode cocci6nde los alimentoso la
obtenci6nde resultadosno consistentes.Losutensilioscorrectos
88
reducenel tiempode cocciOn,usan menosenergiael6ctricay cocinan
losalimentosde maneram_s uniforme.
Pmeba de las elias planas
La Pruebade la regla.
1. Coloqueuna reglaa Io largo delfondo
de la ella.
2. Col6quelaa la luz.
3. Sedebever pocao ningunaluz debajode la regla.
La Pruebade la burbuja.
11 Coloque1 pulgada[2,54cm) de aguaen la ella.Coloquela ella
sobrela cubiertay enciendael elementoenel ajustede
temperatura"High" [Alto).
2. Observela formaciOnde burbujasa medidaqueel aguase
calienta.LaformaciOnde burbujasuniforme indicaun buen
rendimiento,mientrasque la formaci6nirregular deburbujas
indica puntosde mayorcalory cocci6ndispareja.
Utensiliospianosy Utensilioscon rondosacanaladoso
de fondo liso. arqueados.Losutensilioscon rondos
irregularesno cocinaneficientementey
algunasvecesno hiervenliquido.
Utensiliosdematerial Utensiliosde metaldelgadoo devidrio.
grueso.
Utensiliosquesean Utensilios2,5cm (1")m_speque_oso m_s
del mismotamale grandesque el elemento.
que el elemento.
Fijelasmanijas. Utensilioscon manijassueltaso rotas.
Manijaspesadasque inclinanel utensilio.
Tapashermdticas. Tapassueltas.
Wokscon rondoplane. Wokscon un rondoapoyadoen un anillo.
Utensilios para preparar consewas y
de tamales grandes
Todaslas elias para prepararconservasy las elias grandes
debentoner rondos pianosy deben set hechosde materiales
gruesos. Estoes muyimportanteparalascubiertaslisas.Labaseno
debeset mds de2,54cm (1pulgada)rodsgrandeque elelemento.
Cuandolaselias paraprepararconservasy laseliasde tamales
grandesno cumplencon estosrequisites,lacocci6npuedetomar rods
tiempoy se puede da_arla cubiertade la estufa.
Algunaselias paraprepararconservastienen basespeque_aspara
usarlasen lascubiertaslisas.
Cuandoest_ preparando conservas,use el ajuste de calor alto
solamente hastaque el agua comience a herviro hasta que la
ella alcance la presi_nadecuada. Reduzcael caloral ajuste m_s
bajoque mantengael hervoro la presi6n.Si nose reduceel calor,se
puededa_arla cubierta.
÷
8113P527-60 89 _ 12/6/05, 8:07 AM
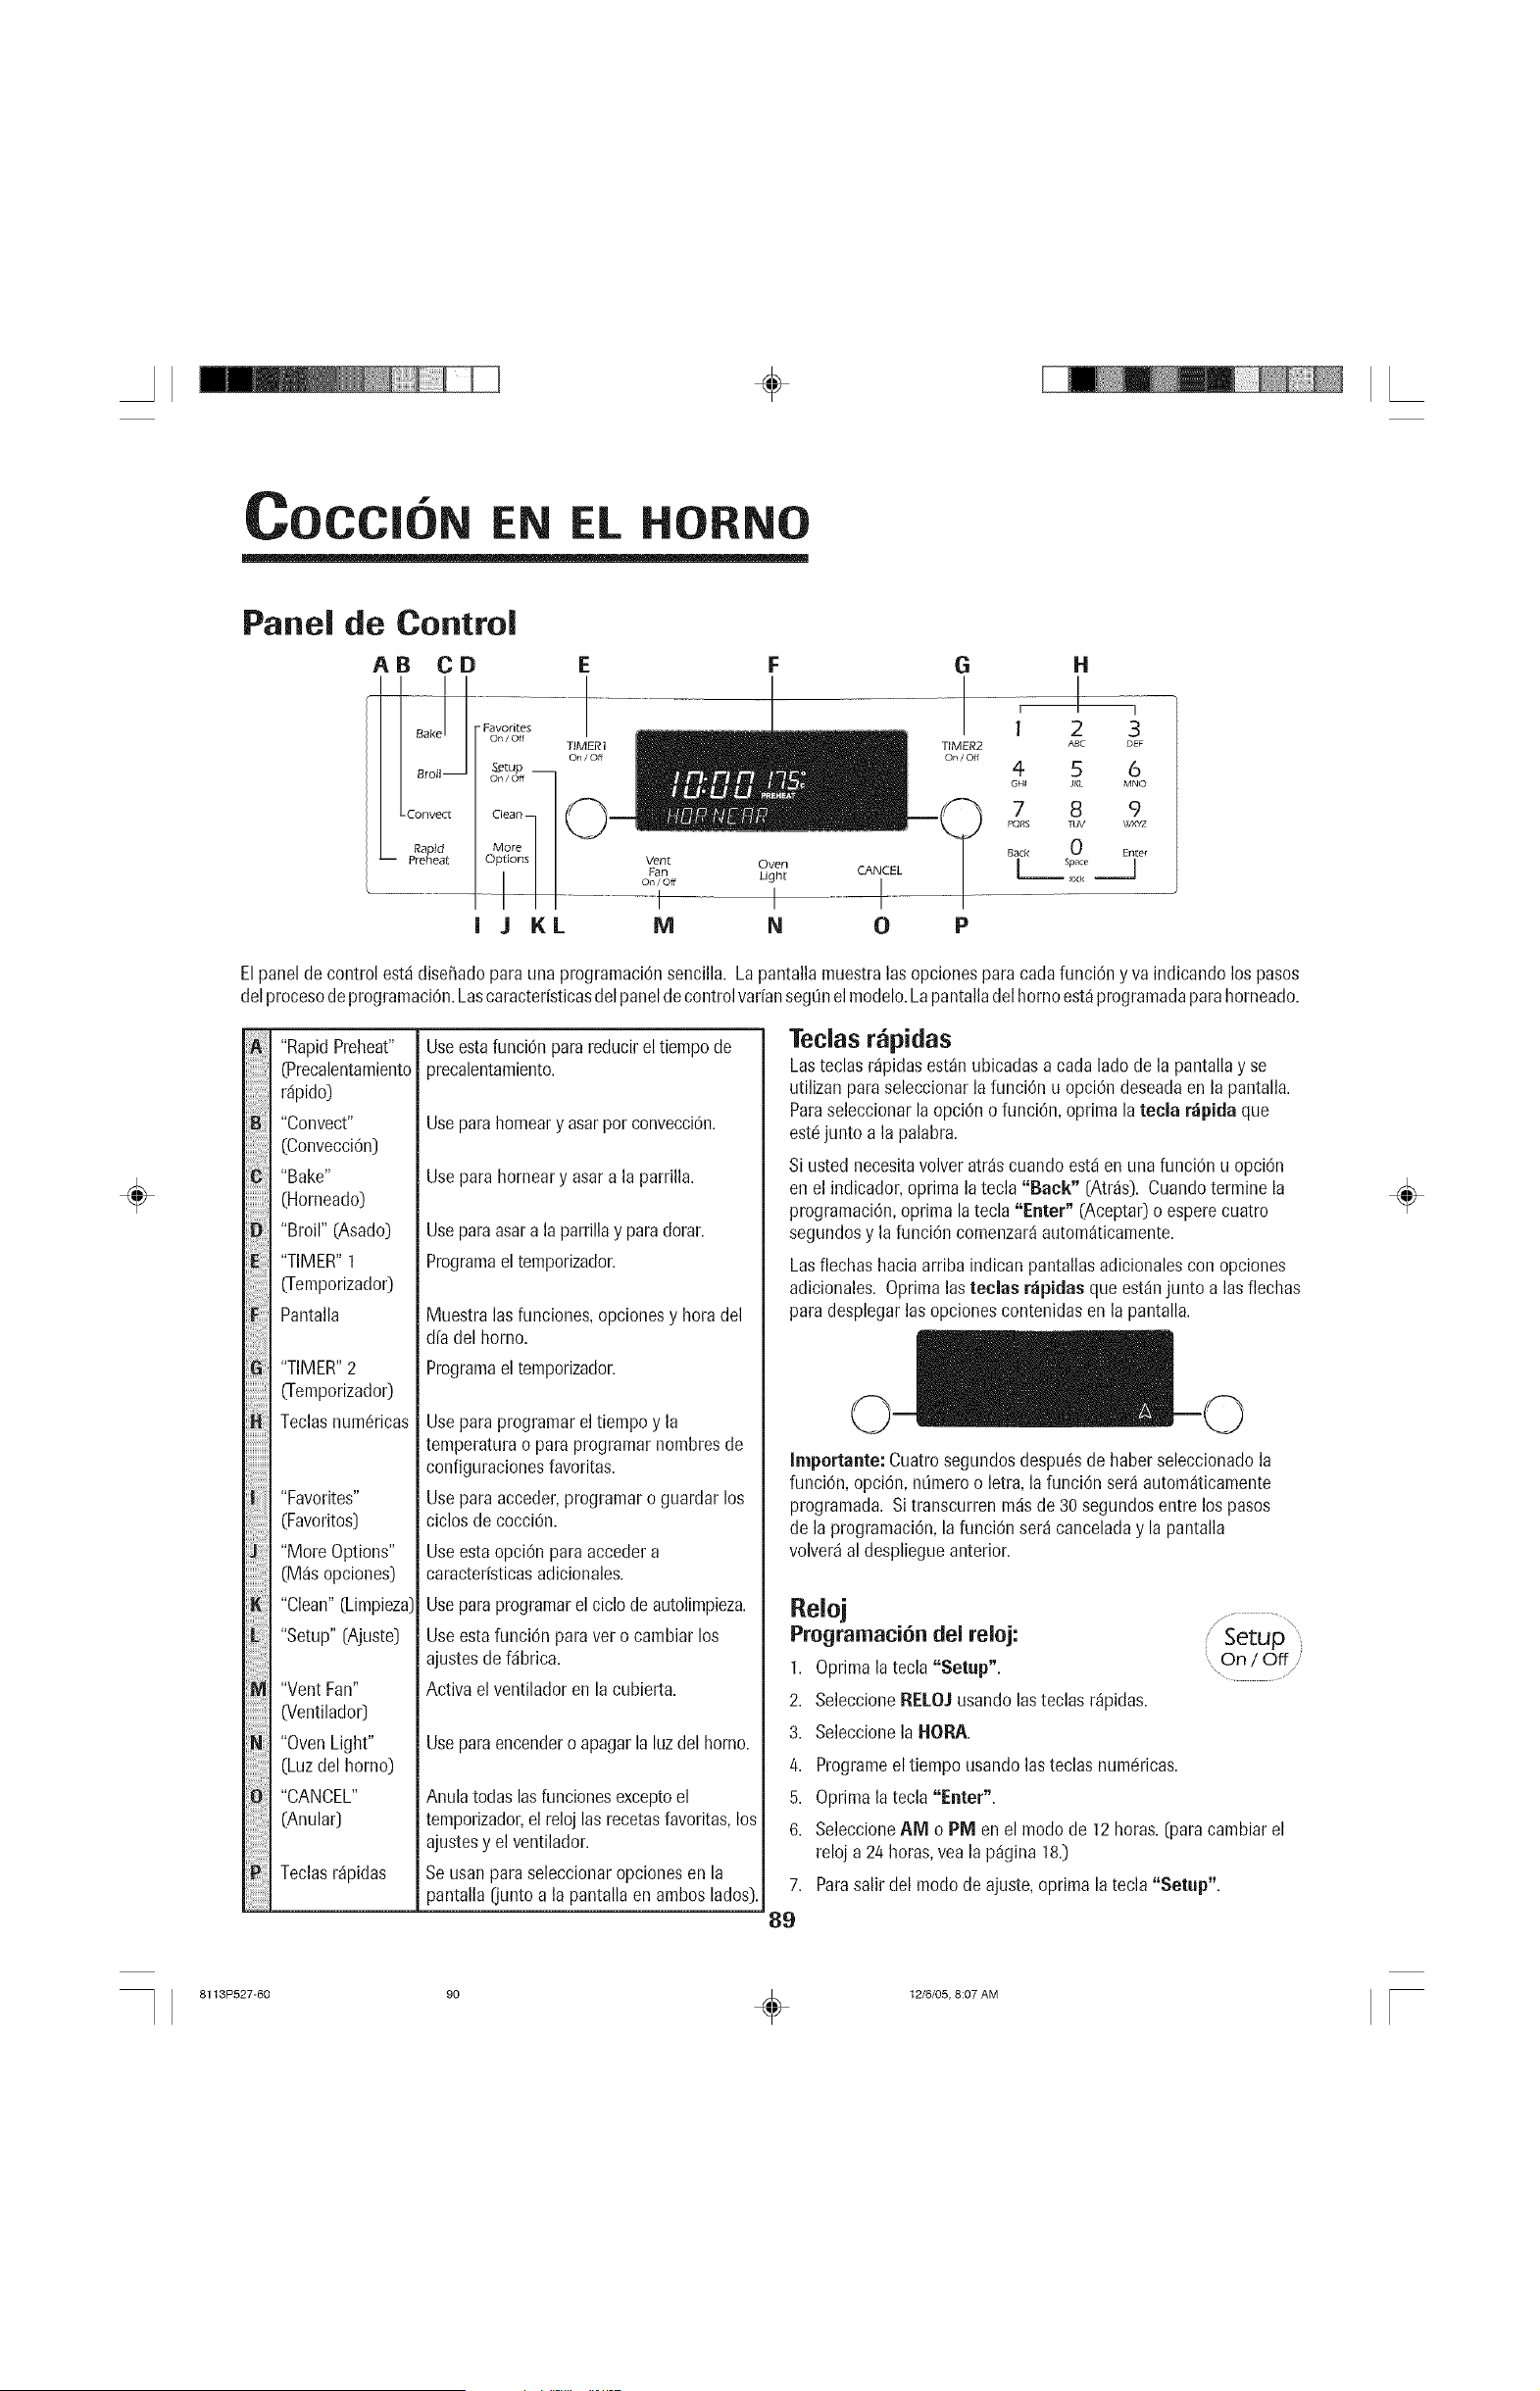
÷
f
EN EL HORNO
÷
Panel de Control
AB CD
C!!_ "Favorites
Oil / Off
_tup
On/Off
Clean
Rapid More
-- Preheat iis_ l
J KL
TIMER 1
on / Off
Vent Oven
Fan Light CANCEL
i t
M N 0
G H
TIMER2
On/Off
P
I
1 2 3
ABC DEF
4 5 6
GHI JKL MNO
7 8 9
PORg TUV _/XYZ
Back 0 Enter
[ Space I
_oc_
Elpanel de control est,1disefiadoparauna programaciOnsencilla. La pantallamuestralas opcionesparacadafunciOny va indicando los pasos
delprocesodeprogramaciOn.Lascaracteristicasdelpaneldecontrolvar[anseg0nel modelo.Lapantalladel homoest_programadaparahorneado.
;iBii_!iii
iDili!
iiF
L
M_
"RapidPreheat"
(Precalentamiento
r@ido]
"Convect"
(Convecci6n]
"Bake"
(Horneado)
"Broil" (Asado)
"TIMER"1
(Temporizador)
Pantalla
"TIMER"2
(Temporizador]
Teclasnum6ricas
"Favorites"
(Favorites]
"More Options"
(M_sopciones)
"Clean"(Limpieza]
"Setup" [Ajuste]
"Vent Fan"
(Ventilado0
"Oven Light"
(Luzdel homo)
"CANCEL"
(Anular]
Teclasr@idas
UseestafunciOnparareducirel tiempode
3recalentamiento.
Useparahorneary asarper convecci6n.
Usepara horneary asara la parrilla.
Useparaasara la parrillay paradorar.
Programael temporizador.
Muestralas funciones,opcionesy heradel
d[a del homo.
Programael temporizador.
Usepara programareltiempoy la
temperaturao paraprogramarhombresde
configuracionesfavoritas.
Usepara acceder,programaro guardarlos
ciclos de cocciOn.
Useestaopci6n para accedera
caracter[sticasadicionales.
Useparaprogramarel ciclode autolimpieza.
UseestafunciOnpara vet o cambiarlos
ajustesde f4brica.
Activa elventilador en la cubierta.
Useparaencendero apagarla luzdel homo.
Anulatodas lasfuncionesexceptoel
temporizador,el reloj las recetasfavoritas,los
ajustesy el ventilador.
Seusan para seleccionaropciones en la
pantalla(junto a la pantalla enambos lades).
Teclas r pidas
Lasteclas r@idas est_n ubicadasa cada lade de la pantallay se
utilizanpara seleccionarlafunci6n u opciOndeseadaen la pantalla.
Paraseleccionarla opci6n o funci6n, optima latecla r_ipida que
estc!junto a la palabra.
Si usted necesitavolveratr_scuando est4 en una funciOnu opci6n
en el indicador,optima latecla "Back" (Atr_s). Cuandoterminela
programaci6n,oprima latecla "Eater" (Acepta0o esperecuatro
segundosy la funci6n comenzar4autom_ticamente.
Lasflechas haciaarriba indican pantallasadicionalescon opciones
adicionales. Optimalas teclas r_ipidas que est4njunto alas flechas
paradesplegarlasopciones contenidasen la pantalla.
Impertante: Cuatrosegundosdespu_sde haberseleccionadola
funciOn,opciOn,n0mero o letra, la funci6n ser_autom_ticamente
programada.Si transcurrenm4sde 30 segundosentre los pasos
de la programaci6n,lafunciOnser_ canceladay la pantalla
volver4al despliegueanterior.
Reloj
Programaci6n del reloj:
1. Oprimala tecla "Setup".
2. SeleccioneREIIOJ usando lasteclas r@idas.
3. Seleccionela HOI_.
4. Programeel tiempo usandolasteclas num@icas.
5. Optima la tecla "Enter".
6. SeleccioneAM o PM en el mode de 12horas.[para cambiar el
reloj a 24horas,yea la p_gina 18.)
7. Parasalir del mode de ajuste,optima latecla "Setup".
89
// ......................
/ Setup
On/Off
÷
8113P527-60 90 _ 12/6/05, 8:07 AM
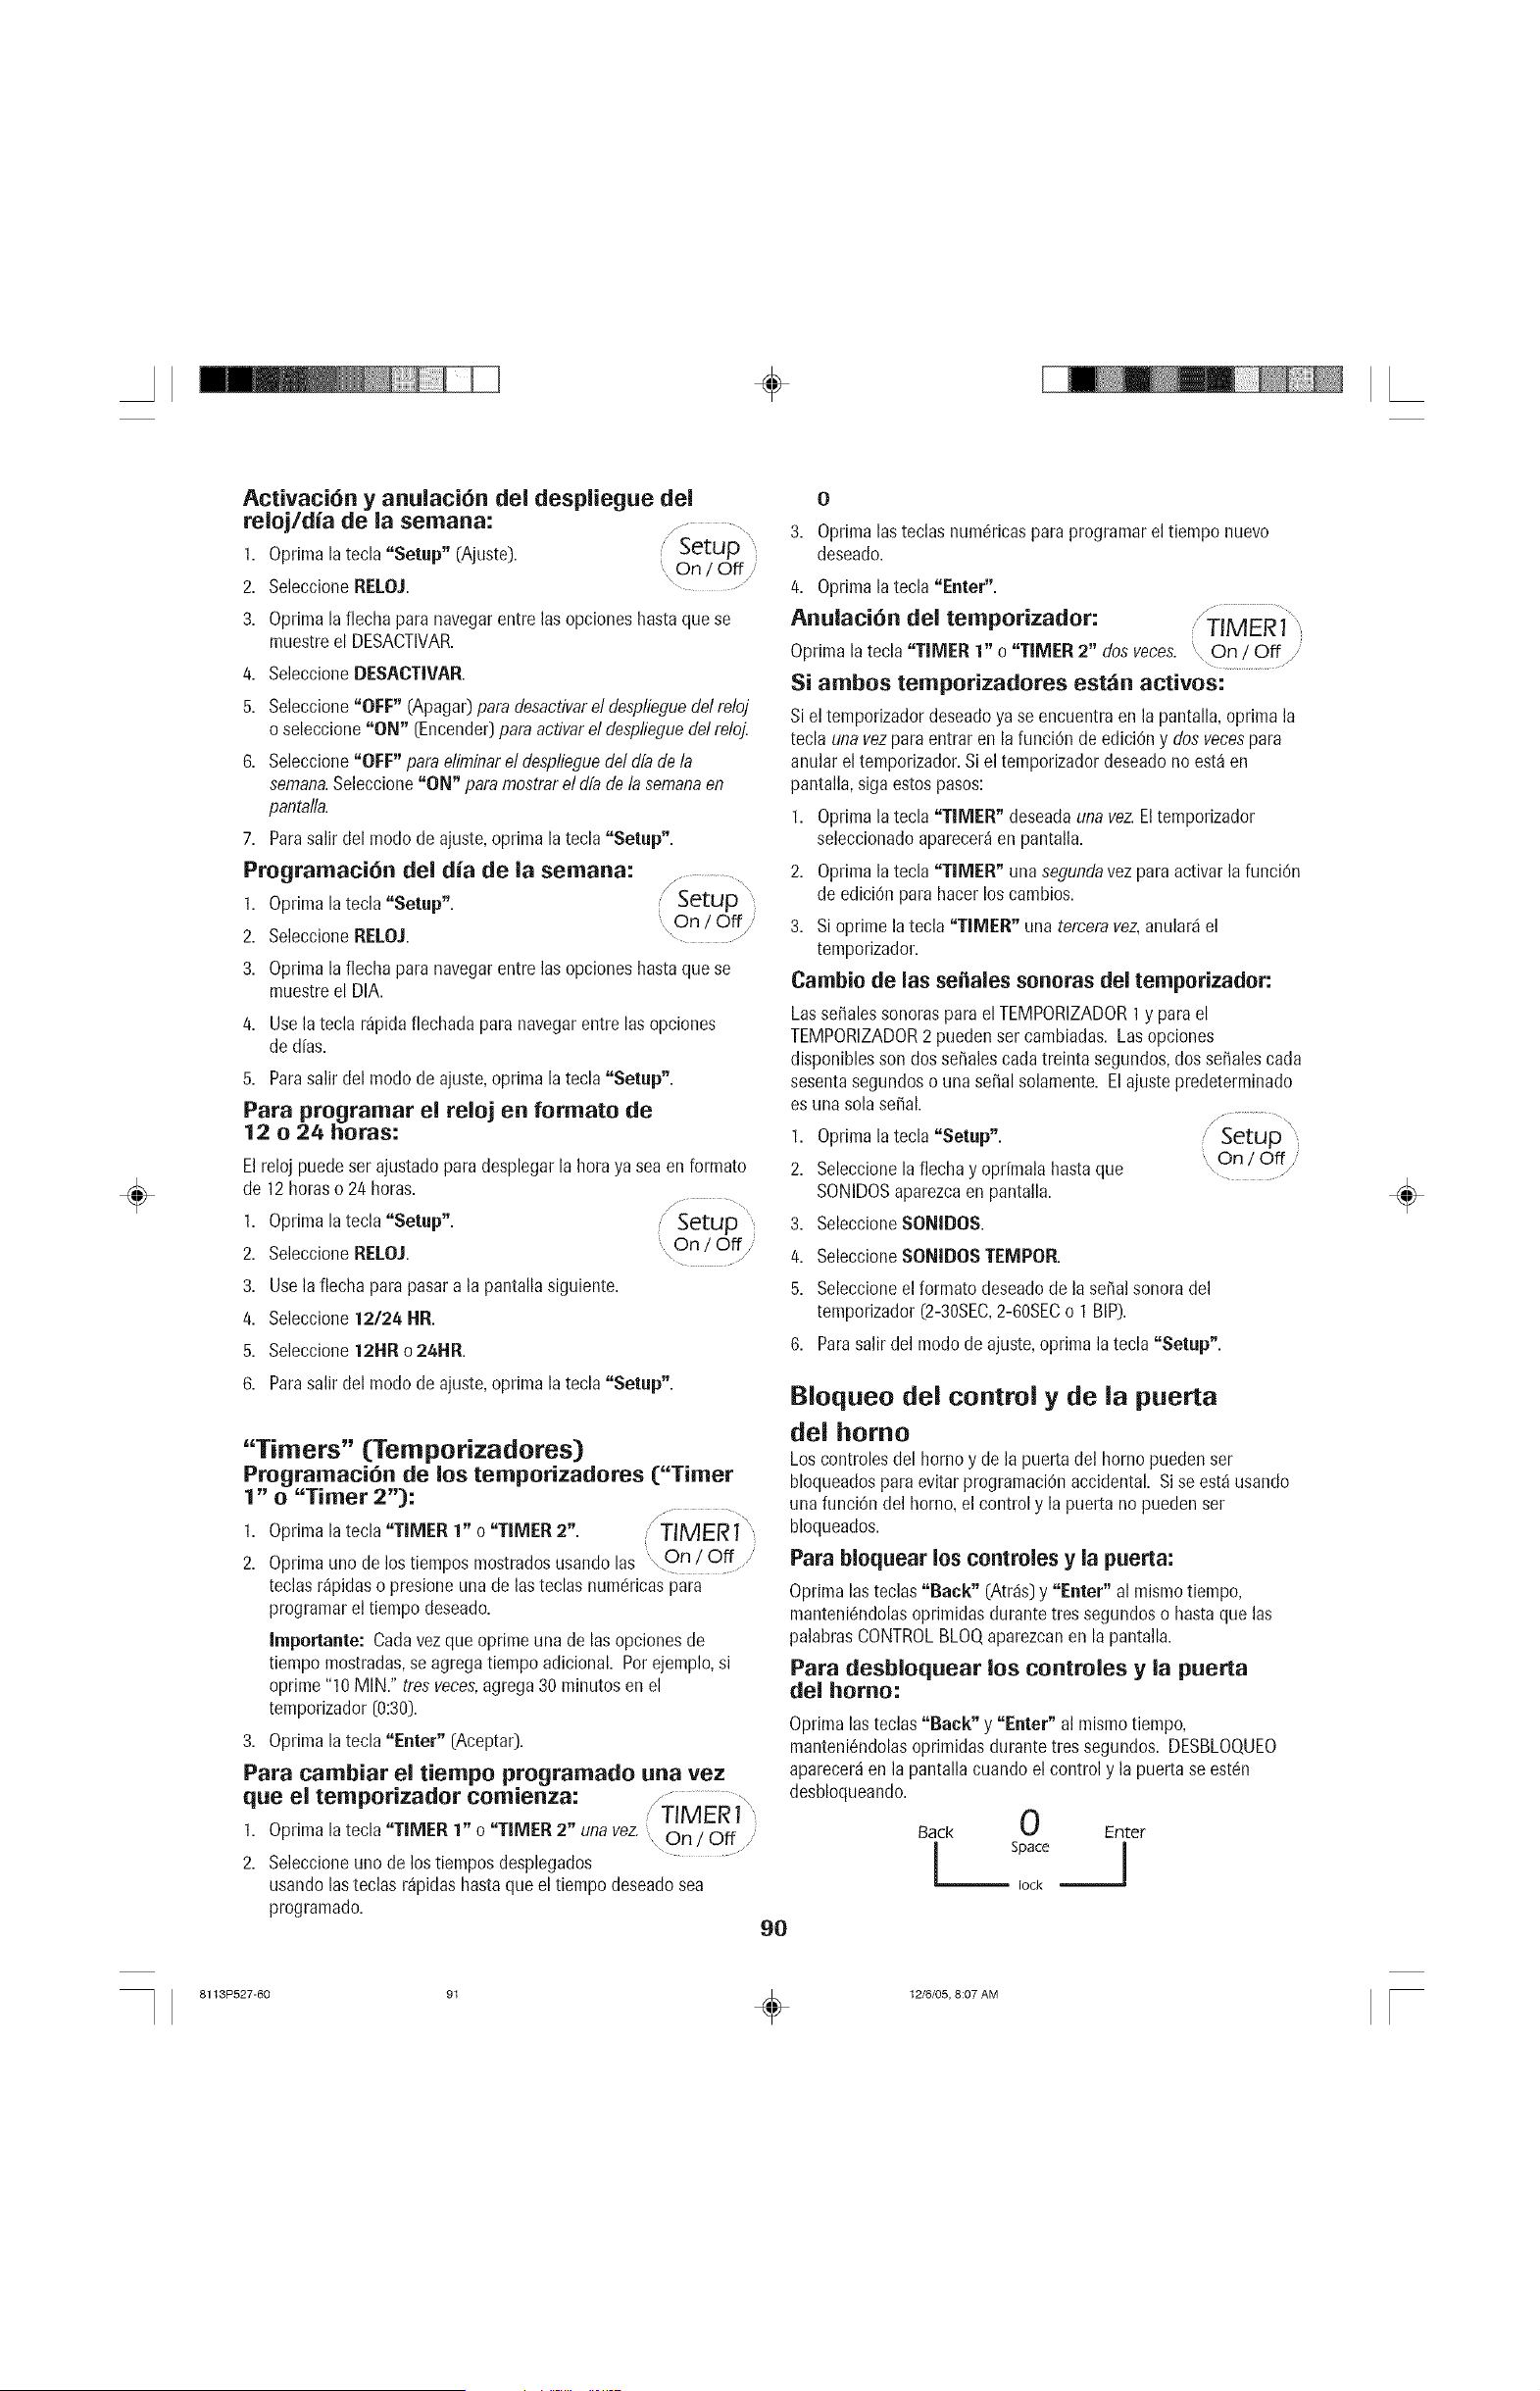
÷
÷
Activaci6n y anulaci6n del despliegue del
reloj/dia de la semana: j,.............
1. Oprima la tecla "Setup" (Ajuste). _etup
On/Off
2. SeleccioneRELOJ. ...............
3. Optima laflecha paranavegarentre Insopciones hastaquese
muestreel DESACTIVAR.
4. SeleccioneDESACTIVAR.
5. Seleccione"OFF" (Apaga0para desactivarel desplieguedel reloj
o seleccione"ON" (Encender)para activarel desplieguedel reloj.
6. Seleccione"OFF" para eliminarel desplieduedel dfade la
semana.Seleccione"ON" paramostrareldfa de la semanaen
pantalla.
7. Parasalir del mode de ajuste,oprima la tecla "Setup".
Programaci6n del din de la semana:
1. Oprima la tecla "Setup".
On/Off/
2. SeleccioneRELOJ. ...........
3. Oprima la flecha para navegarentre Insopcioneshasta quese
muestreel DIA.
4. Use la tecla r_pidaflechada paranavegarentre Insopciones
de d[as.
5. Parasalir del mode de ajuste,optima latecla "Setup".
Para programar el reloj en formate de
12 o 24 horus:
Elreloj puedeser ajustadoparadesplegarla heraya sea enformate
de 12 horaso 24 horas.
1. Oprima la tecla "Setup". / Setup
2. SeleccioneRELOJ. On / Off /
\ ....... /
3. Use la flecha para pasara la pantallasiguiente.
4. Seleccione12/24 HR.
5. Seleccione12HR o24HR.
6. Parasalir del mode de ajuste,optima latecla "Setup".
"Timers" (Temporizadores)
Programaci6n de los temporizadores ("Timer
1" o "Timer 2"):
f _
1. Oprima la tecla "TIMER 1" o "TIMER 2". /'TIMER 1"
2. Oprimauno de los tiempos mostradosusando las ,On ! Off/
teclas r_pidaso presioneunade Insteclas numc!ricaspara
programarel tiernpodeseado.
Impertante: Cadavez queoprime una de Ins opcionesde
tiernpo mostradas,se agregatiempo adicional. Perejemplo,si
oprime "10 MIN." tres veces,agrega 30minutes en el
temporizador[0:30).
3. Optima latecla "Enter" [Acepta0.
Para cambiar el tiempo programado una vez
que el temporizador comienza: /TIMER i"
1. Oprima la tecla "TIMER 1" o "TIMER 2" unavez,, On / Off
2. Seleccioneuno de los tiemposdesplegados
usando lasteclas r_pidashastaque el tiempo deseadosea
programado.
90
3. OprimaInsteclasnum6ricasparaprogramarel tiempo nuevo
deseado.
4. Optimala tecla "Enter".
Anulaci6n del temporizador:
Optima la tecla "TIMER 1" o "TIMER 2" dos veces. On / Off
Si ambos temporizadores est_n activos:
Siel temporizadordeseadoya se encuentraen la pantalla,oprimala
tecla una vezpara entrar en lafunci6n de edici6ny dos vecespara
anularel temporizador.Si el temporizadordeseadonoest_ en
pantalla,signestos pasos:
1. Optima la tecla "TIMER" deseadauna vez.Eltemporizador
seleccionadoaparecer_en pantalla.
2. Oprimala tecla "TIMER" una segundavezpara activarla funci6n
de ediciOnpara hacer loscurables.
3. Sioprime la tecla "TIMER" una terceravez,anular_iel
temporizador.
Cambio de Ins so,ales sonatas del temperizader:
Lasse_alessonoraspara el TEMPORIZADOR1 y parael
TEMPORIZADOR2 puedenser cambiadas.Lasopciones
disponiblesson dos seffalescadatreinta segundos,dos seffalescada
sesentasegundos o unase_al solamente.El ajustepredeterminado
es una solaserial.
/ .........................
1. Oprimala tecla "Setup". / Setup
on/off/
2. Seleccionela flechay opr[malahastaque ...............
SONIDOSaparezcaen pantalla.
3. SeleccioneSONIDOS.
4. SeleccioneSONIDOSTEMPER.
5. Seleccioneel forrnatodeseadode la sepalsonoradel
temporizador(2-30SEC,2-60SECo 1 BIP).
6. Parasalir del mode de ajuste,optima la tecla "Setup".
Bioqueo del control y de la puerta
del homo
Loscontrolesdel hornoy de la puerta del borne puedenser
bloqueadospara evitarprogramaci6naccidental. Sise est_ usando
unafunci6n del homo, elcontrol y la puerta no puedenset
bloqueados.
Para blequear los centreles y la puerta:
OprimaInsteclas"Back" (Atr_s]y "Enter" al mismotiempo,
manteni6ndolasoprimidas durantetres segundoso hasta que las
palabrasCONTROLBLOQaparezcanen la pantalla.
Para desbloquear los controles y la puerta
del homo:
OprimaInsteclas"Back" y "Enter" al mismotiempo,
manteni6ndolasoprimidas durantetres segundos. DESBLOQUEO
aparecer_en la pantallacuando el control y la puertase est6n
desbloqueando.
Back 0 Enter
÷
8113P527-60 91 _ 12/6/05, 8:07 AM
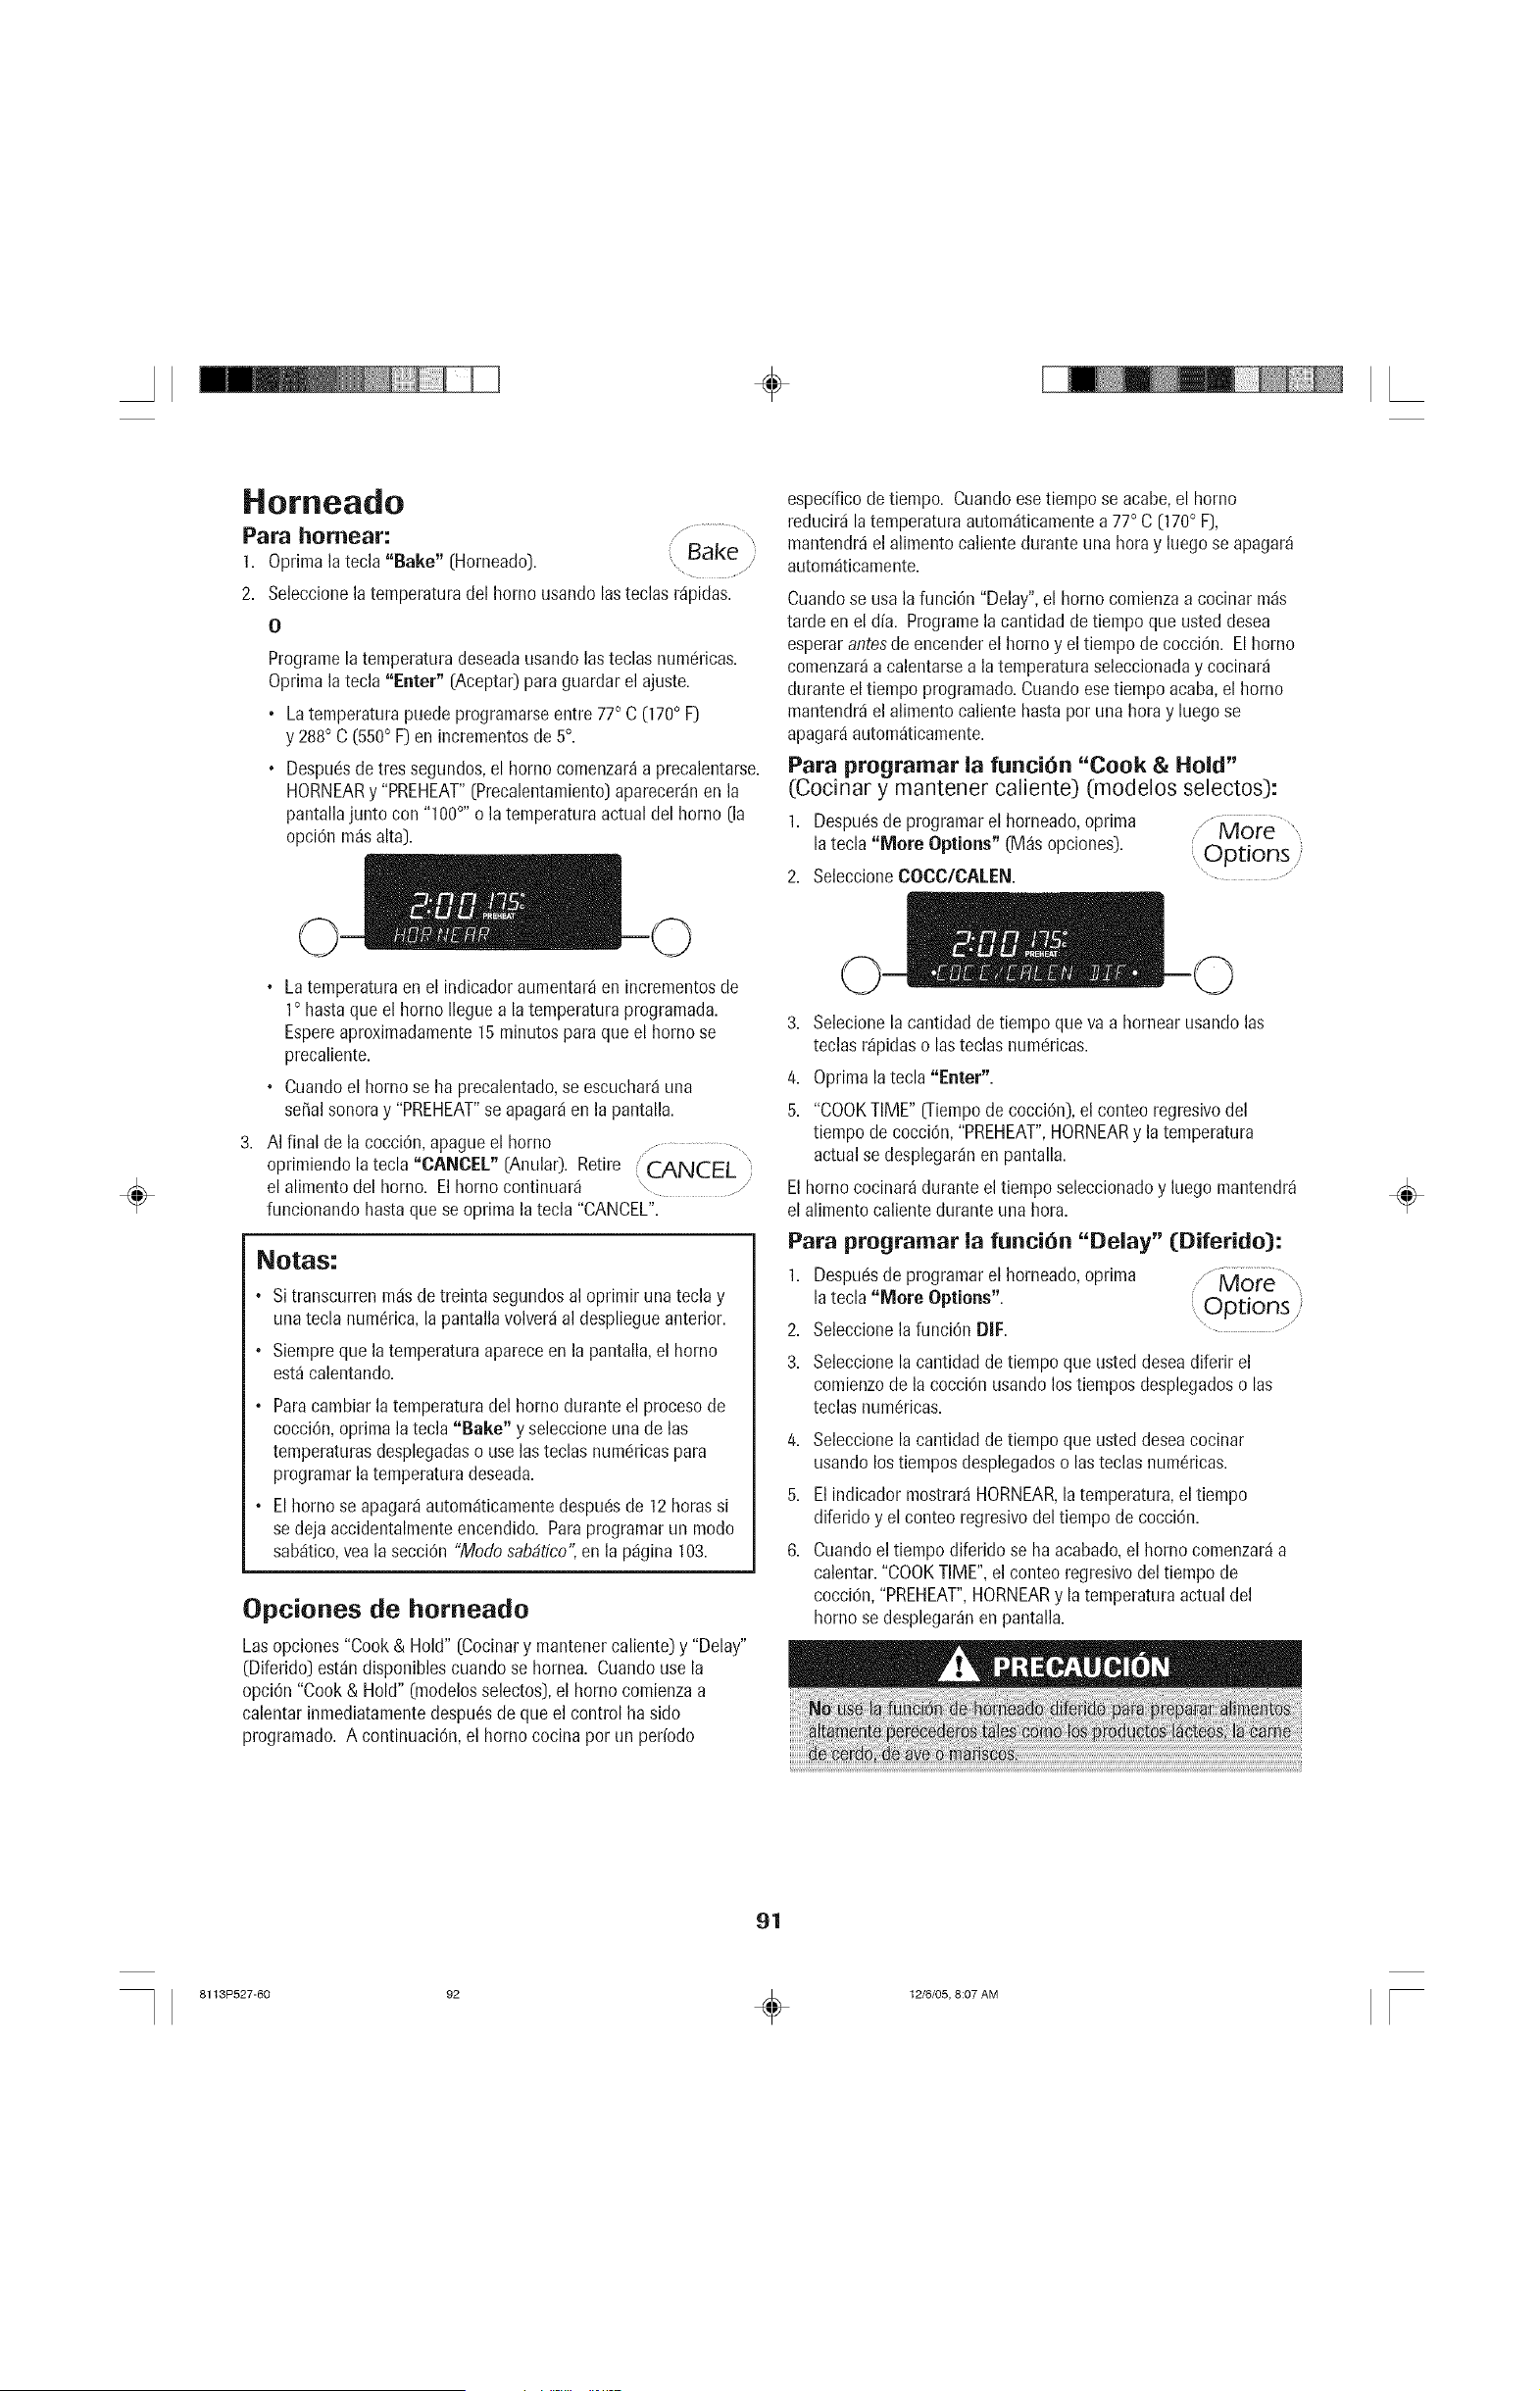
÷
Horneado
Para homear:
1. Oprimala tecla "Bake" (Horneado_. Bake :
2. Seleccionela temperaturadel horno usando lasteclas r_ipidas.
0
Programelaternperaturadeseadausandolasteclas numc!ricas.
Oprimala tecla"Enter" (AceptaOpara guardar el ajuste.
• La temperaturapuedeprogramarseentre 77° C (170° F)
y 288° C (550° F)en incrementosde 5°.
• Despuc!sdetres segundos,el homo comenzar_aprecalentarse.
HORNEARy "PREHEAT"(Precalentamiento)aparecer_inen la
pantallajunto con "100°'' o la temperaturaactualdel homo (la
opciOnm_salta).
especfficode tiempo. Cuandoesetiempo se acabe,el homo
reducir_ilatemperaturaautom_ticamentea 77° C (170° F),
mantendr_el alimento calienteduranteuna horay luego se apagar_
autom_ticamente.
Cuandose usa la funci6n "Delay",el homo comienzaa cocinarm_s
tarde en el d[a. Programelacantidad detiempo que usted desea
esperarantesde encenderel homo y el tiempode cocci6n. El homo
comenzar_a calentarsea la temperaturaseleccionaday cocinar_
duranteel tiempo programatic.Cuandoesetiempo acaba,el homo
mantendr_iel alimentocalientehasta pot una hora y luegose
apagar_iautom_ticamente.
Para programar la funci6n "Cook & Hold"
(Cocinar y mantener caliente) (modelos selectos):
/, ....
I. Despu_sde programarelhorneado,oprima " More
la tecla "More Options" (M_sopciones). Options/
2. SeleccioneCOCC/CALEN. ...........
÷
, Latemperaturaen el indicador aumentar_en incrementosde
1° hastaque el homo Ileguea la temperaturaprogramada.
Espereaproximadamente15minutospara queel homo se
precaliente.
• Cuandoel homo se haprecalentado,se escuchar_una
seffalsonoray "PREHEAT"se apagar_ien la pantalla.
AI final de la cocciOn,apagueel homo , .....................,
oprimiendo latecla "CANCEL" (AnulaO. Retire ( CANCEL )
el alimento del homo. El homo continuar_
funcionandohasta quese oprima la tecla"CANCEL".
Notas:
• Si transcurren m_isdetreinta segundosal oprimir una teclay
una tecla num6rica,la pantallavolver_ial despliegueanterior.
• Siempreque latemperaturaapareceen lapantalla, el homo
est_calentando.
, Paracambiar la temperaturadel homo duranteel proceso de
cocci6n,oprima la tecla "Bake" y seleccioneunade las
temperaturasdesplegadaso use lasteclas numc!ricaspara
programar latemperaturadeseada.
• El homo se apagar_autom_iticamentedespu6sde 12horassi
se deja accidentalmenteencendido. Paraprogramarun modo
sab_itico,vea lasecci6n "Modosabdtico",en lap_igina103.
Opciones de homeado
Lasopciones"Cook & Hold" (Cocinary mantenercaliente)y "Delay"
(Diferido)est_n disponiblescuandose hornea. Cuandouse la
opci6n "Cook& Hold" (modelosselectos),el homo comienzaa
calentarinmediatamentedespu_sde que el control ha sido
programatic. A continuaci6n,el homo cocinapor un periodo
3. Selecionela cantidadde tiempoqueva a hornearusandolas
teclas r_pidaso lasteclas numc!ricas.
4. Oprima la tecla "Enter".
5. "COOKTIME" O-iempodecocci6n),el conteoregresivodel
tiempode cocciOn,"PREHEAT",HORNEARy latemperatura
actualse desplegar_nen pantalla.
Elhomo cocinar_ durante eltiempo seleccionadoy luego mantendr_
elalimento calientedurante una hora.
Para programar la funci6n "Delay" (Diferido):
I. Despuc!sde programarelhorneado,optima
la tecla "More Options". Options:
2. Seleccionela funciOnDIF. "................
3. Seleccionela cantidadde tiempoque usteddeseadiferir el
comienzode la cocciOnusandolos tiempos desplegadoso las
teclas num6ricas.
4. Seleccionela cantidadde tiempoque usteddeseacocinar
usando lostiempos desplegadoso las teclasnum6ricas.
5. El indicadormostrar_HORNEAR,la temperatura,el tiempo
diferido y elconteo regresivodeltiempo de cocciOn.
6. Cuandoel tiempodiferido se ha acabado,el homo comenzarda
calentar."COOKTIME",el conteo regresivodel tiempo de
cocciOn,"PREHEAT",HORNEARy latemperaturaactual del
homo se desplegar_nen pantalla.
÷
91
8113P527-60 92 _ 12/6/05, 8:07 AM
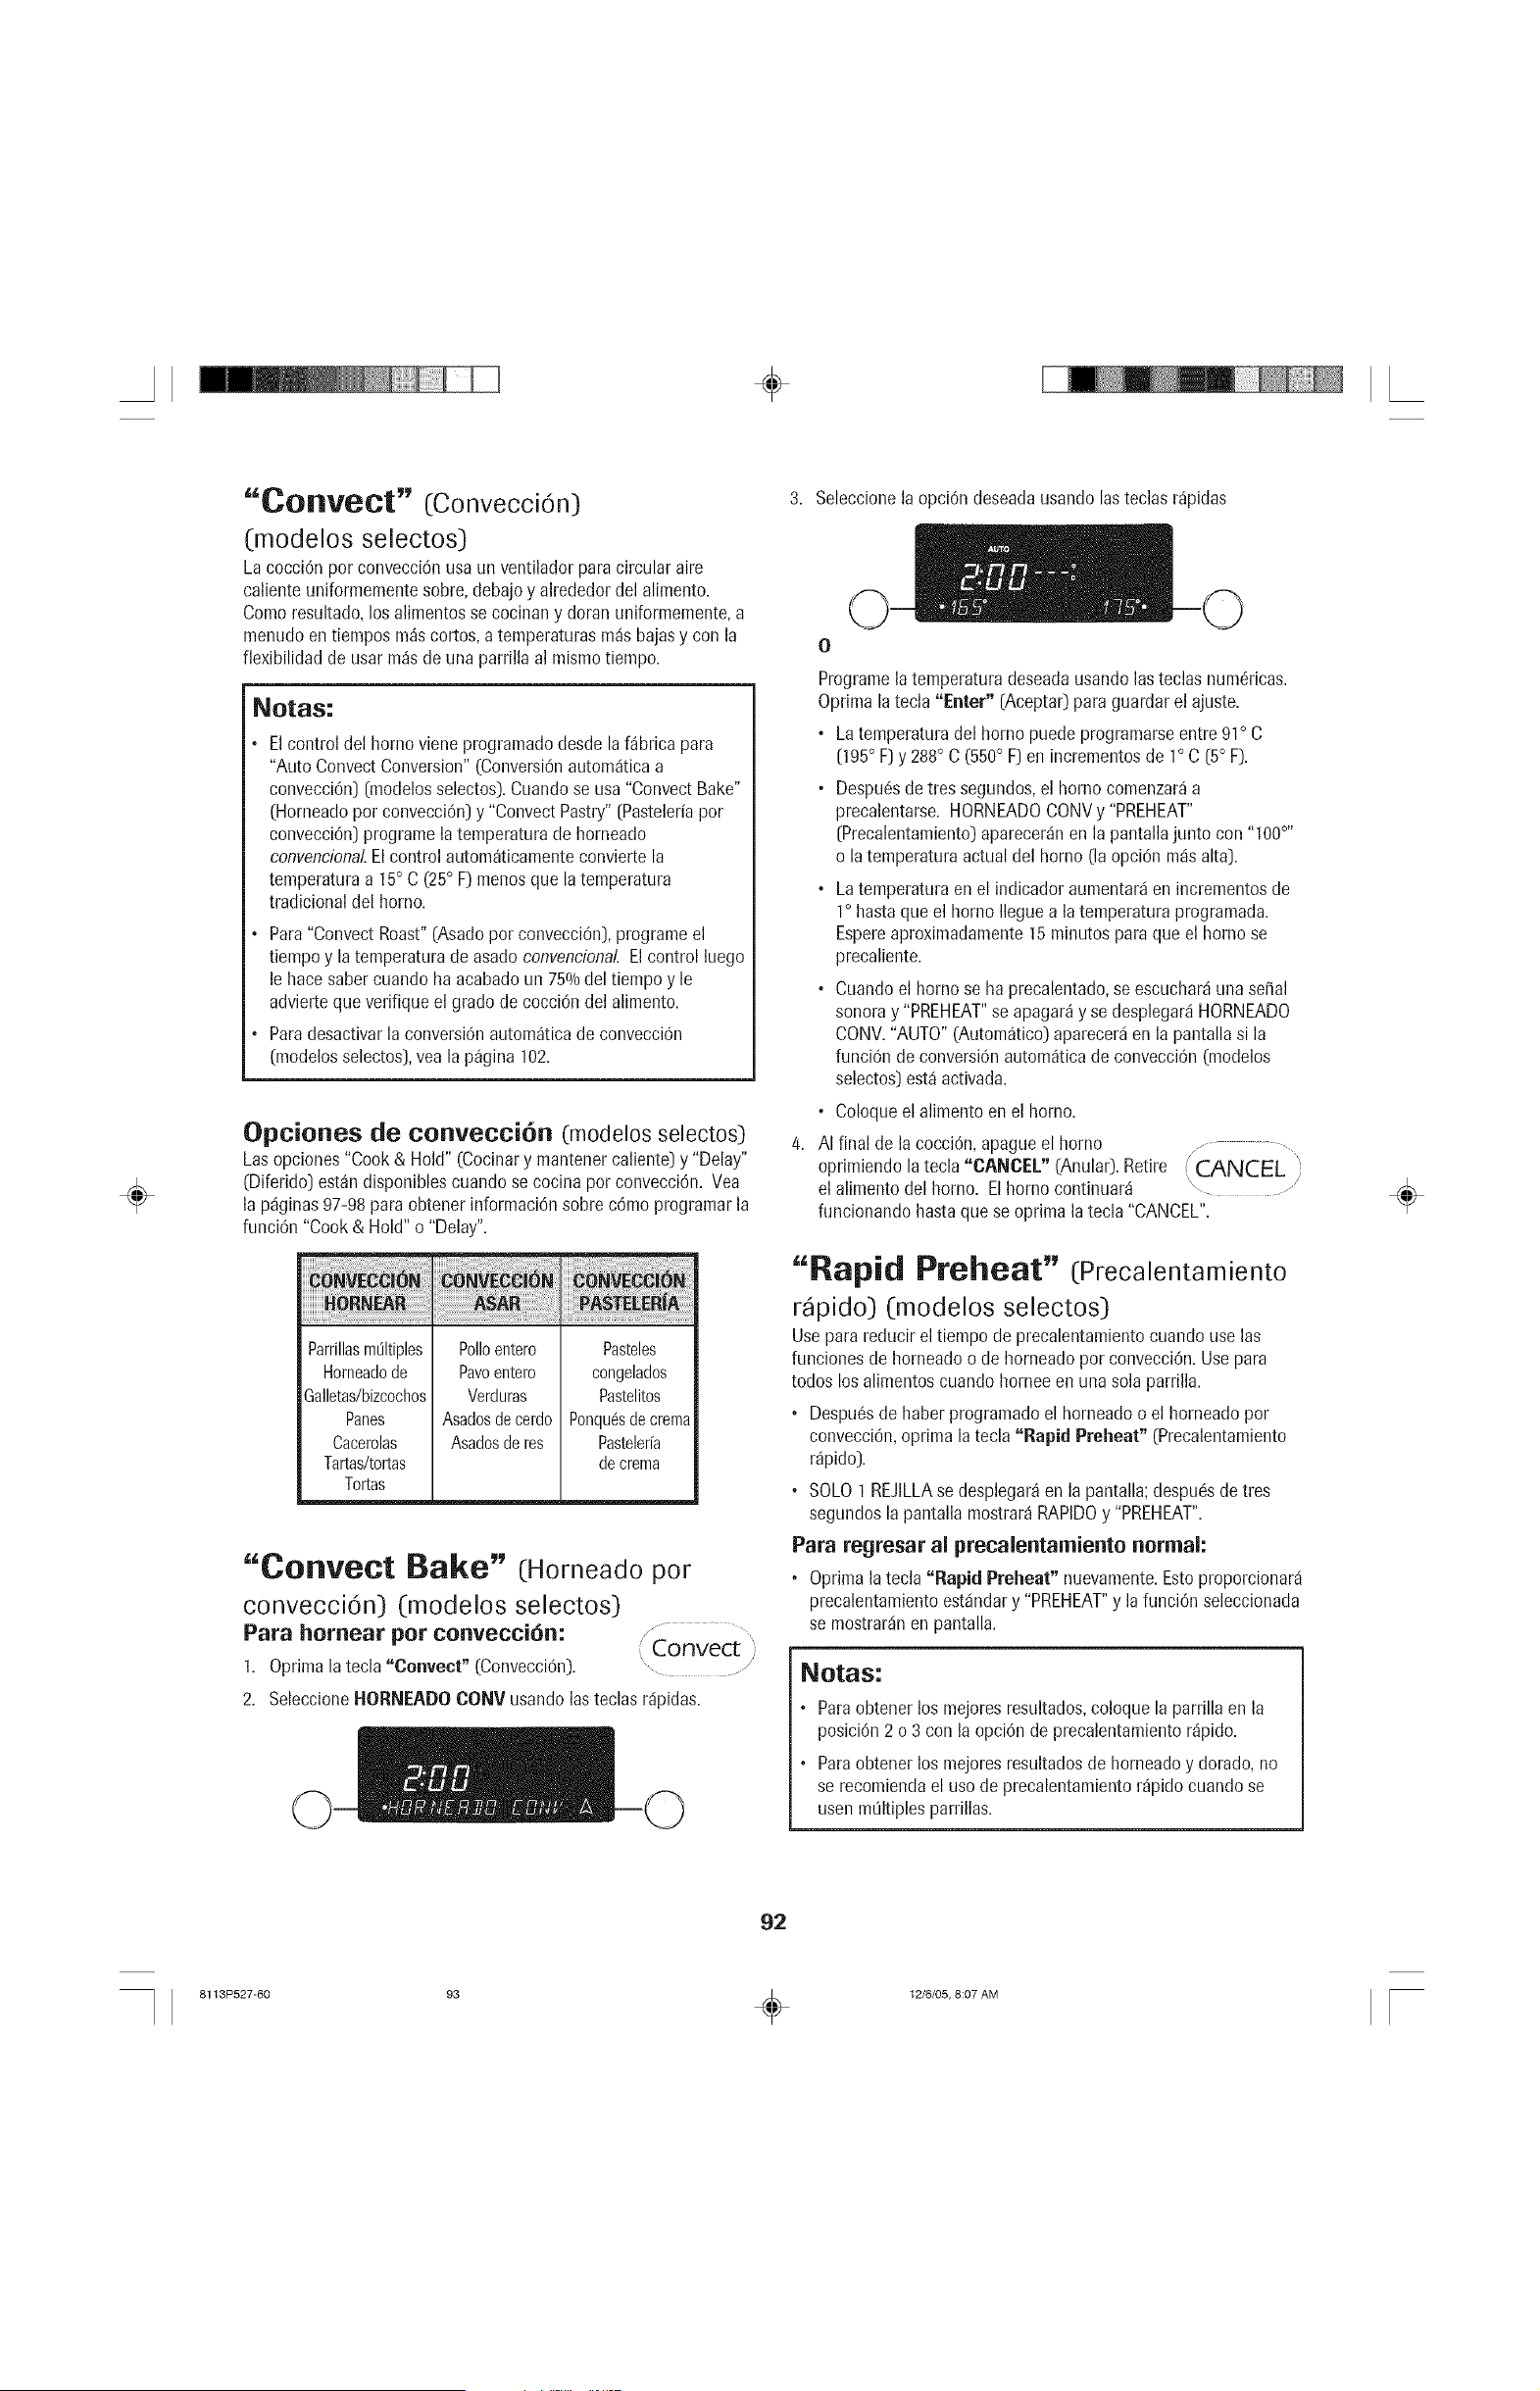
÷
÷
"CoBvect" (ConvecciOn)
(modelos selectos)
LacocciOnpor convecciOnusa un ventilador paracircular aire
calienteuniformementesobre, debajoy alrededordel alimento.
Comoresultado,los alimentosse cocinany doran uniformemente,a
menudoen tiempos m_scortos, a temperaturasm_isbajasy con la
fiexibilidadde usar m_sde una parrilla al mismotiempo.
Notas:
Elcontrol del homo viene programaticdesde la f_brica para
"Auto ConvectConversion"(ConversiOnautom4ticaa
convecciOn](modelosselectos).Cuandose usa "ConvectBake"
(Horneadopot convecciOn]y "ConvectPastry"(Pasteleriapor
convecciOn]programela temperaturade horneado
convencional.Elcontrol autom_ticamenteconviertela
temperaturaa 15° C (25° F) menosque latemperatura
tradicionaldel homo.
Para"ConvectRoast"(Asadopor convecciOn],programeel
tiempoy la temperaturade asadoconvencional.Elcontrol luego
le hace sabercuando ha acabadoun 75%deltiempo y le
advierteque verifiqueel grado de cocciOndel alimento.
Paradesactivarla conversionautom_tica de convecciOn
(modelosselectos],yea la p_gina 102.
Opciones de convecci6n (modelos selectos)
Lasopciones"Cook& Hold" (Cocinary mantenercaliente] y "Delay"
(Diferido] est_ndisponiblescuando se cocinapor convecciOn.Vea
la p4ginas97-98paraobtener informaciOnsobrecOmoprogramarla
funciOn"Cook & Hold" o "Delay".
ParrillasmOltiples
Horneadode
Galletas/bizcochos
Panes
Cacerolas
Tartas/tortas
Tortas
Polioentero
Pavoentero
Verduras
Asadosdecerdo
Asadosderes
Pasteles
congelados
Pastelitos
PonquOsde crema
Pastelerfa
de crema
"Oonveot Bake" (Horneado por
convecciOn) (modelos selectos)
// ..........
Para hornear per convecci6n: ( Convect
1. Oprima la tecla "Conveet" (ConvecciOn).
2. SeleccioneHORNEADOCONV usandoInsteclas r@idas.
3. Seleccionela opciOndeseadausandolasteclas r_pidas
ProgramelatemperaturadeseadausandoIns teclas numOricas.
Optima la tecla "Enter" [AceptaOparaguardar el ajuste.
• Latemperaturadel homo puedeprogramarseentre 91° C
(195° F]y 288° C (550° F] en incrementosde 1° C (5° F).
° DespuOsde tres segundos,el homo comenzar_a
precalentarse.HORNEADOCONVy "PREHEAT"
(Precalentamiento)aparecer4nen la pantallajunto con "100°''
o la temperaturaactualdel homo (In opciOnm4salta].
° Latemperaturaenel indicadoraumentar4en incrementosde
1° hastaque el homo Ileguea la temperaturaprogramada.
Espereaproximadamente15 minutos paraque el homo se
precaliente.
• Cuandoel homo se haprecalentado,se escuchar4una sepal
sonoray "PREHEAT"se apagar_y se desplegar4HORNEADO
CONV."AUTO"(Autom_tico)aparecer4en la pantallasi la
funciOnde conversionautom_ticade convecciOn(modelos
selectos]est_activada.
° Coloqueel alimentoen el homo.
AI final de la cocciOn,apagueel homo , .........................
oprimiendo latecla "CANCEL" (Anula0. Retire 'CANCEL i:
el alimento del homo. El homo continuar4 .......................
funcionandohasta quese optima la tecla "CANCEL".
"Rapid Preheat" (precalentamiento
Mpido) (modelos selectos)
Usepara reducir el tiempo de precalentamientocuando use Ins
funcionesde horneadoo de horneadopor convecciOn.Usepara
todoslos alimentoscuando horneeen una sola parrilla.
° DespuOsde haberprogramatic el horneadoo el horneadopor
convecciOn,optima latecla "Rapid Preheat" (Precalentamiento
r_pido].
, SOLOI REJILLAse desplegar_en la pantalla;despuOsde tres
segundosla pantalla mostrar_RAPIDOy "PREHEAT".
Para regresar al precalentamiento normal:
° Oprimala tecla "Rapid Preheat" nuevamente.Esto proporcionar_i
precalentamientoest_indary "PREHEAT"y la funciOnseleccionada
se mostrar_inen pantalla.
Notas:
° Paraobtener los mejoresresultados,coloque la parrillaen la
posiciOn2 o 3 con laopciOnde precalentamientor4pido.
° Paraobtener los mejoresresultadosde horneadoy dorado, no
se recomiendael uso de precalentamientor_pidocuando se
usen mOltiplesparrillas.
÷
92
8113P527-60 93 _ 12/6/05, 8:07 AM
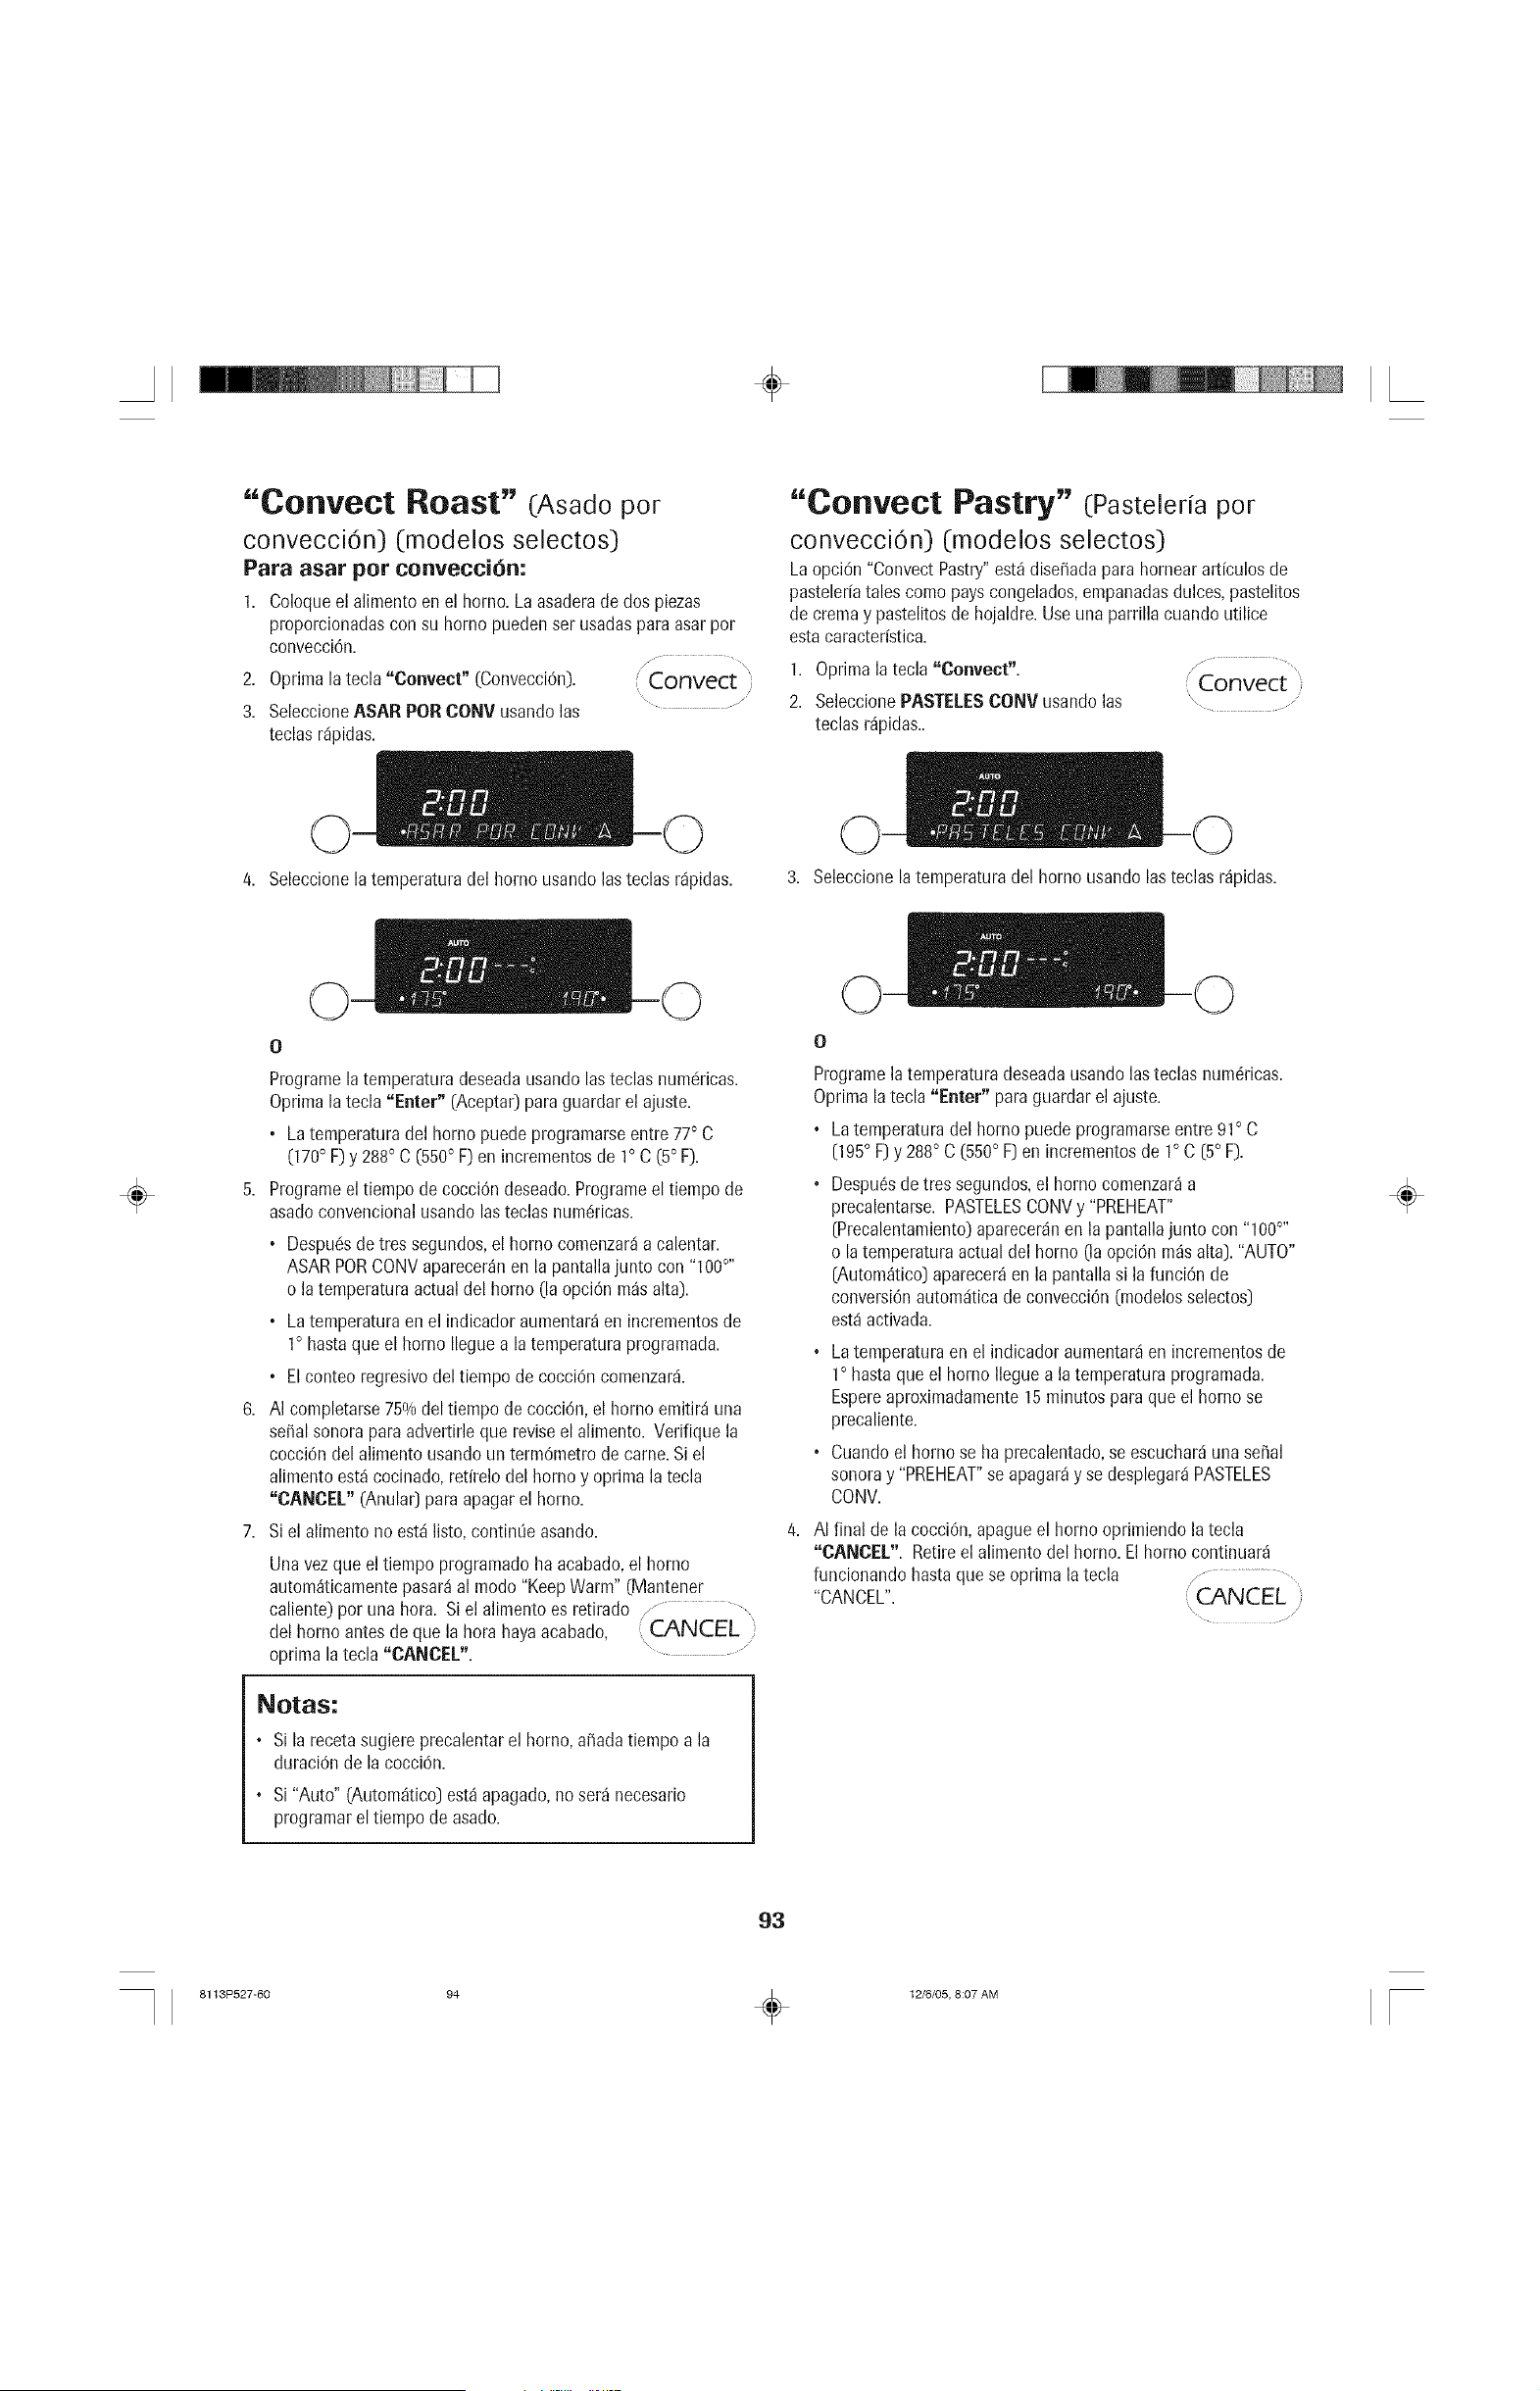
÷
"COI'IVeCt Roast" (Asado por
convecciOn) (modelos selectos)
Para asar pot conveccien:
1. Coloqueel alimentoen el homo. La asaderade dos piezas
proporcionadascon su homo puedenser usadasparaasarpor
convecciOn.
/ ............. \
2. Optima latecla "Convect" (ConvecciOn). ( Convect
/
3. SeleccioneASAR PORCONV usandolas ..................
teclas r@idas.
"Convect Pastry" (Pastelefiapor
convecci0n) (modelos selectos)
LaopciOn"ConvectPastry"est_ diserada para hornearart[culos de
pasteler[atales comopayscongelados,empanadasdulces,pastelitos
de cremay pastelitosde hojaldre.Useuna parrilla cuandoutilice
estacaracterfstica.
1. Optima la tecla "Conveet". ........................................
Convect )
2. SeleccionePASTELESCONV usandolas
teclas r_pidas..
4. Seleccionela temperaturadel homo usandolasteclas rdpidas. 3. Seleccionela temperaturadel homo usando lasteclas r_pidas.
÷
O
Programelatemperaturadeseadausandolas teclas numOricas.
Optima la tecla "Enter" (Aceptar)para guardarel ajuste.
• La temperaturadel homo puedeprogramarseentre 77° C
(170° F)y 288° C (550° F)en incrementosde 1° C (5° F).
5. Programeel tiempode cocciOndeseado.Programeel tiempo de
asadoconvencionalusando lasteclas numOricas.
6,
7,
• Despu_!sde tres segundos,el homo comenzar_ia calentar.
ASARPORCONVaparecer_nen la pantallajunto con "100°"
o la temperaturaactualdel homo (la opciOnm_s alta).
• La temperaturaen el indicadoraumentar_en incrementosde
1° hastaque el homo Ileguea la temperaturaprogramada.
• El conteo regresivodel tiempo de cocciOncomenzar&
AI completarse750/0deltiempo de cocciOn,el homo emitir_una
serialsonora paraadvertirle que reviseel alimento. Verifique la
cocciOndel alimento usandoun termOmetrode came. Siel
alimentoest_ cocinado,retfrelodel homo y optima la tecla
"CANCEL" (Anula0 paraapagarel homo.
Si el alimentono est,1listo,continOeasando.
Una vezque el tiempo programatic haacabado,el homo
autom_ticamentepasar_al modo "KeepWarm" (Mantener
caliente)pot una hora. Siel alimentoes retirado z............. ,
del homo antes deque la hora hayaacabado, CANCEL i
optima la tecla"CANCEL". .............
NOtaS:
• Si la recetasugiereprecalentarel homo,arada tiempo a la
duraciOnde la cocciOn.
• Si "Auto" (Autom_tico)est_apagado,no ser_ necesario
programareltiempo de asado.
Programela temperaturadeseadausandolasteclas numOricas.
Optima la tecla "Enter" paraguardar el ajuste.
° Latemperaturadel homo puedeprogramarseentre 91° C
(195° F) y 288° C (550° F)en incrementosde 1° C [5° F).
• Despu_sde tressegundos,el homo comenzar_a
precalentarse.PASTELESCONVy "PREHEAT"
(Precalentamiento)aparecer_nen la pantallajunto con "100°"
o la temperaturaactualdel homo (la opciOnm_salta). "AUTO"
(Autom_tico)aparecer_en la pantallasi lafunciOnde
conversionautom_iticadeconvecciOn(modelosselectos)
est_activada.
• La temperaturaen el indicador aumentar_en incrementosde
1° hastaque el homo Ileguea latemperaturaprogramada.
Espereaproximadamente15minutospara queel homo se
precaliente.
• Cuandoel homo se haprecalentado,se escuchar_iuna serial
sonoray "PREHEAT"se apagar_y se desplegar_iPASTELES
CONV.
AI final de la cocciOn,apagueel homo oprimiendo latecla
"CANOE[.". Retireel alimento del homo. El homo continuar_
funcionandohasta quese optima latecla / ...........................
"CANCEL". iiCANCEL ;
÷
93
8113P527-60 94 _ 12/6/05, 8:07 AM
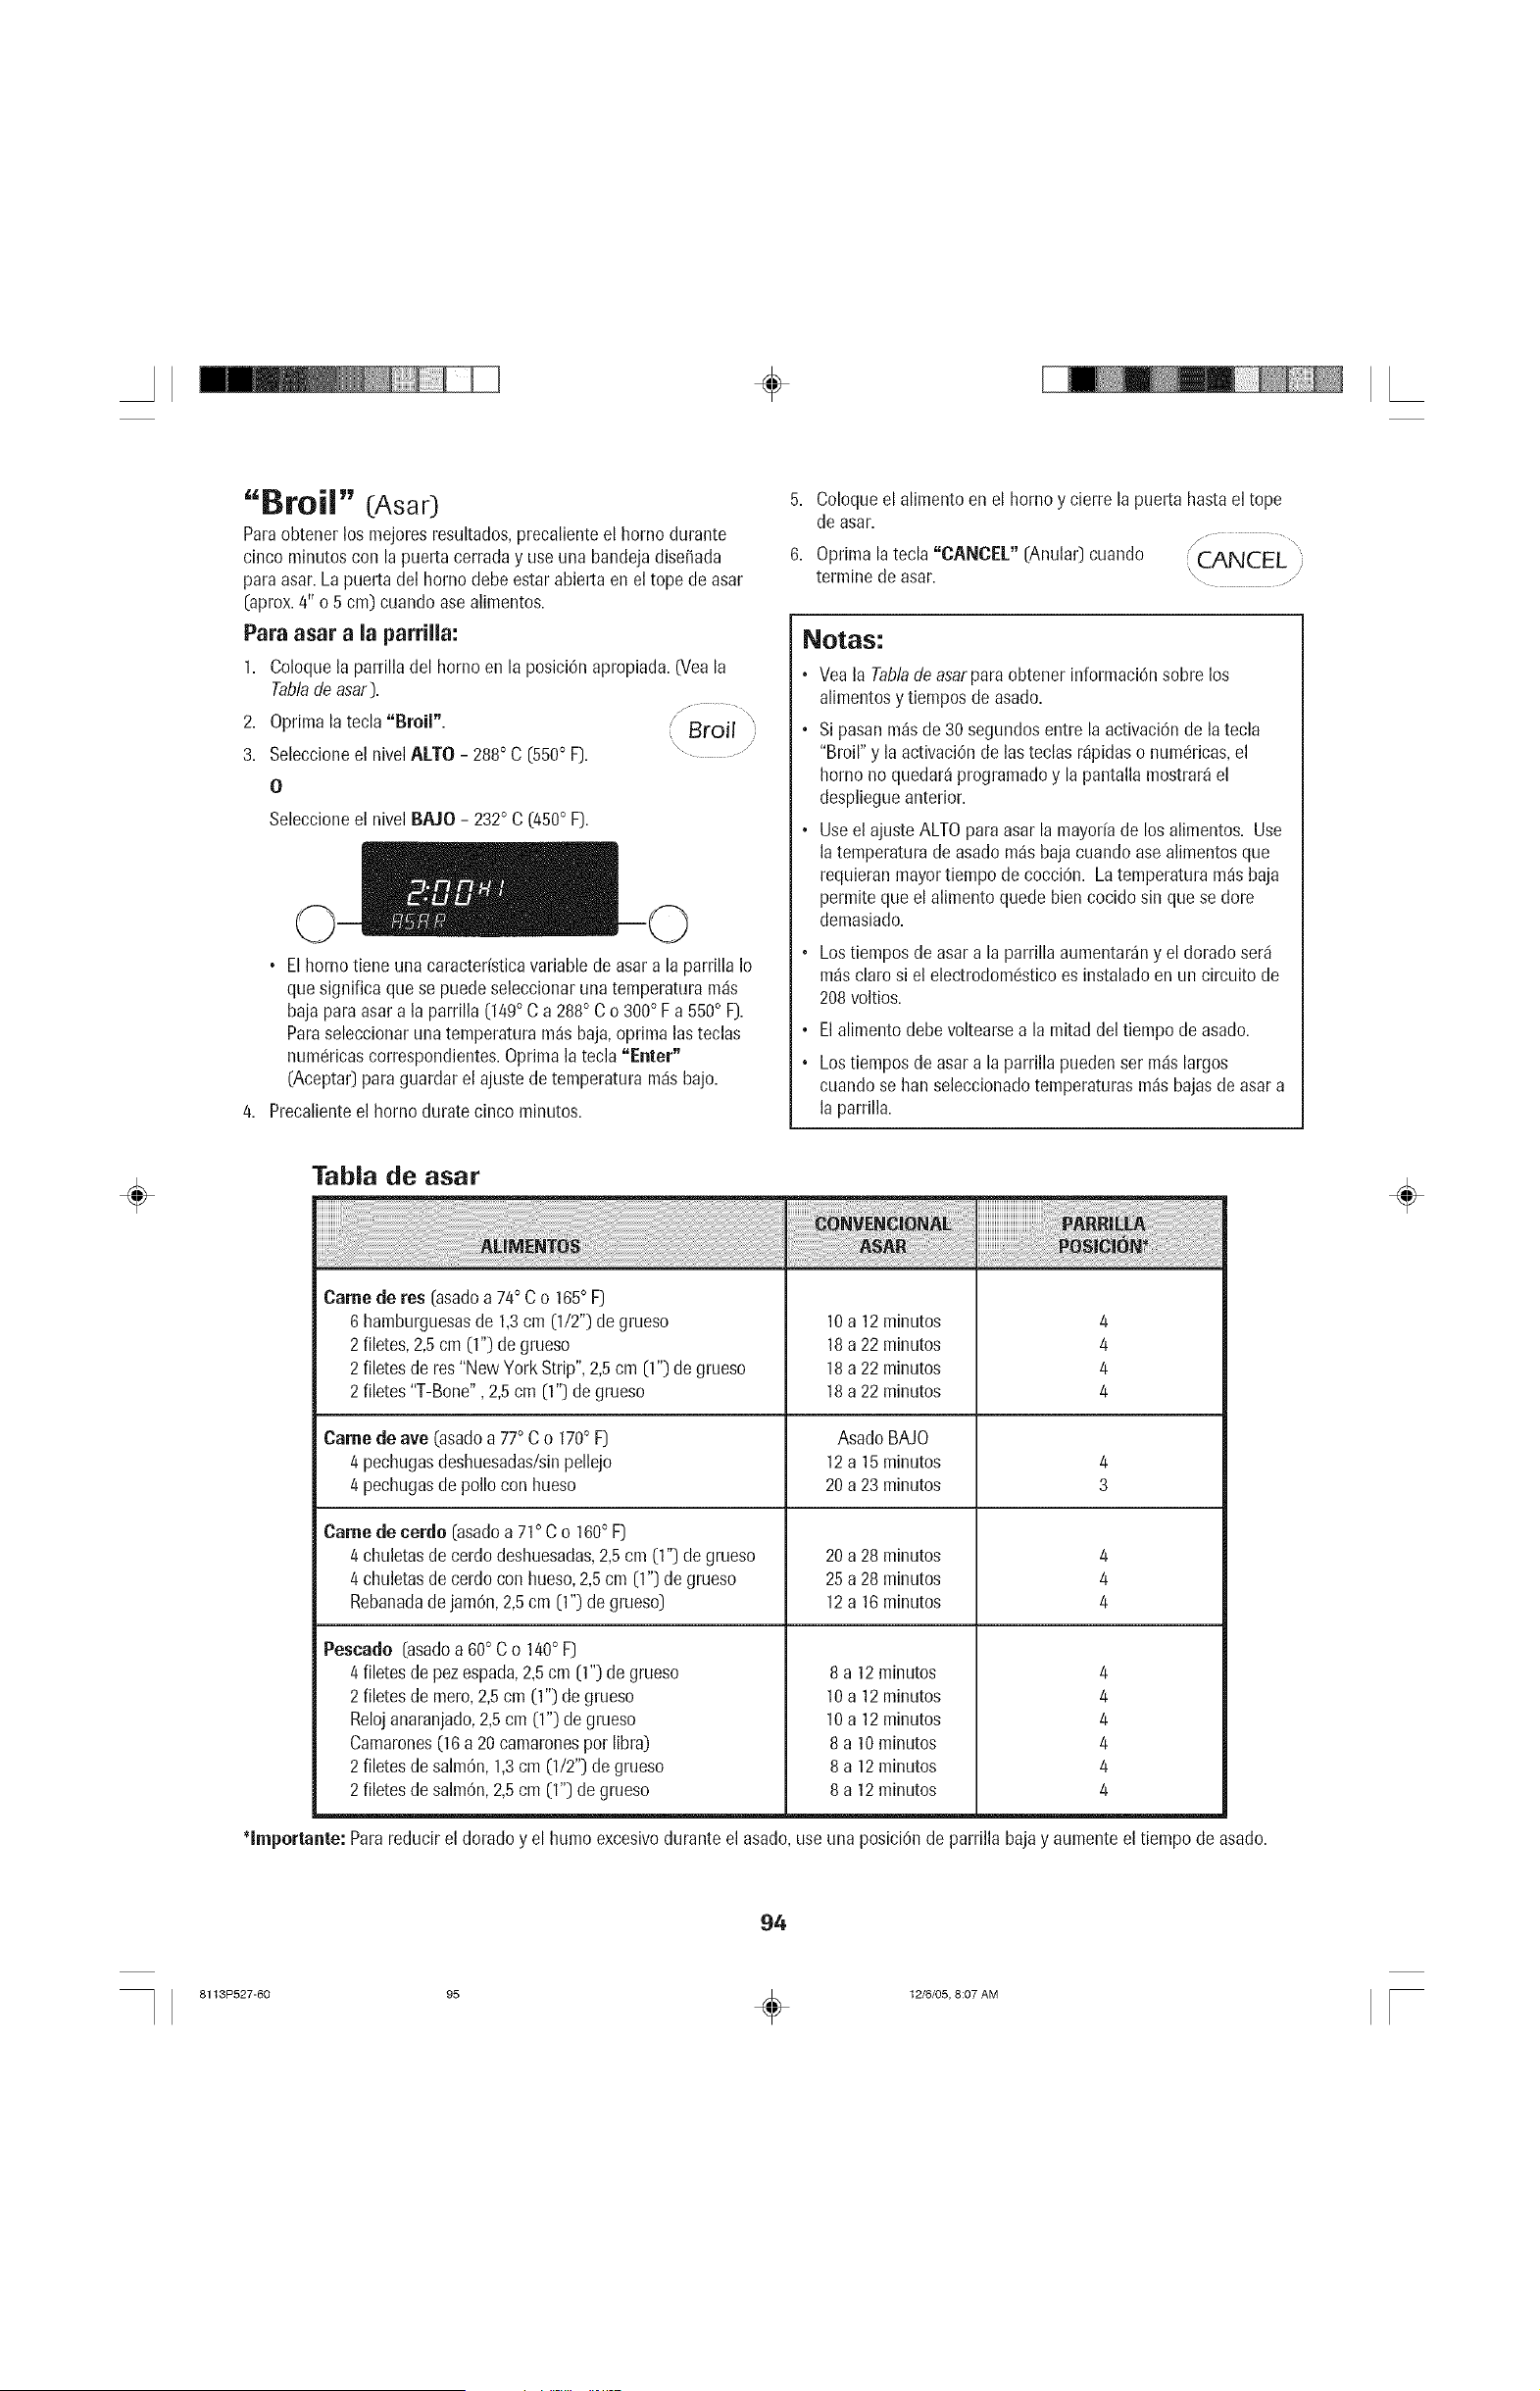
÷
"Broil" (Asa0
Paraobtener los mejoresresultados,precalienteel homo durante
cinco minutoscon la puertacerraday use una bandejadisefiada
paraasar. Lapuerta del homo debe estar abiertaen el tope de asar
(aprox.4" o 5 cm) cuandoase alimentos.
Para asar a la parrilla:
1. Coloquela parrilla del hornoen la posiciOnapropiada.(Veala
Tabladeasar).
2. Oprimalatecla "Broil". ( Broil "
3. Seleccioneel nivelALTO - 288° C [550° F). ............
O
Seleccioneel nivel BAJO - 232° C (450° F).
• El homo tiene una caracteristicavariablede asara la parrillaIo
que significa que se puedeseleccionaruna temperaturam_is
baja para asara la parrilla (149° C a 288° C o 300° F a 550° F).
Paraseleccionarunatemperaturam_s baja,oprima lasteclas
num_ricascorrespondientes.Oprimalatecla "Enter"
(Aceptar)para guardar el ajustedetemperaturam_isbajo.
4. Precalienteel homo durate cinco minutos.
5. Coloqueel alimento en el homo y cierre la puerta hastael tope
deasar.
/ ...........
6. Oprimalatecla "CANCEL" [Anular) cuando CANCEL
termine de asar. _ ,"
Notas:
• Vea la Tablade asarparaobtener informaciOnsobre los
alimentosy tiemposde asado.
° Sipasan m_sde 30 segundosentre la activaciOnde la tecla
"Broil" y la activaciOnde las teclas r_ipidaso numc!ricas,el
homo no quedar_programadoy la pantalla mostrar_el
despliegueanterior.
• Use el ajusteALTOparaasar la mayor[ade los alimentos. Use
la temperaturadeasado m_sbaja cuandoase alimentosque
requieranmayortiempo de cocciOn. Latemperaturam_s baja
permiteque el alimento quedebien cocido sin que se dore
demasiado.
, Lostiemposde asara la parrilla aumentar_ny el doradoser_i
m_sclaro si el electrodomc!sticoesinstaladoen un circuito de
208voltios.
o
°
Elalimento debevoltearsea la mitad del tiempo de asado.
Los tiemposde asara la parrilla puedenser m_islargos
cuandose banseleccionadotemperaturasm_sbajasde asara
la parrilla.
÷
Tabla de asar
÷
Came de res [asadoa 74° Co 165° F)
6 hamburguesasde 1,3cm (1/2") degrueso
2 filetes,2,5cm (1") de grueso
2 filetesde res"NewYork Strip",2,5cm [1") de grueso
2 filetes"T-Bone", 2,5cm [1") degrueso
Came de ave (asadoa 77° C o 170° F)
4 pechugasdeshuesadas/sinpellejo
4 pechugasde poliocon hueso
Came de cerdo [asadoa 71° C o 180° F)
4 chuletasde cerdodeshuesadas,2,5cm (1")de grueso
4 chuletasde cerdocon hueso,2,5cm [1") de grueso
Rebanadade jamOn,2,5cm [1") de grueso)
Pescado [asadoa 80° C o 140° F)
4 filetesde pezespada,2,5cm [1") de grueso
2 filetesde mero,2,5cm (1")de grueso
Relojanaranjado,2,5cm (1")de grueso
Camarones(16a20 camaronespot libra)
2 filetesdesalmon,1,3cm (1/2") degrueso
2 filetesdesalmon,2,5cm (1")de grueso
10 a 12 minutos
18 a 22 minutos
18 a 22 minutos
18 a 22 minutos
Asado BAJO
12 a 15 minutos
20 a 23 minutos
20 a 28 minutos
25 a 28 minutos
12 a 16 minutos
8 a 12 minutos
10 a 12 minutos
10 a 12 minutos
8 a 10 minutos
8 a 12 minutos
8 a 12 minutos
4
4
4
4
4
3
4
4
4
4
4
4
4
4
4
*lmportante: Parareducir el doradoy el humo excesivodurante el asado,use una posiciOnde parrilla bajay aumente el tiempode asado.
94
8113P527-60 95 _ 12/6/05, 8:07 AM
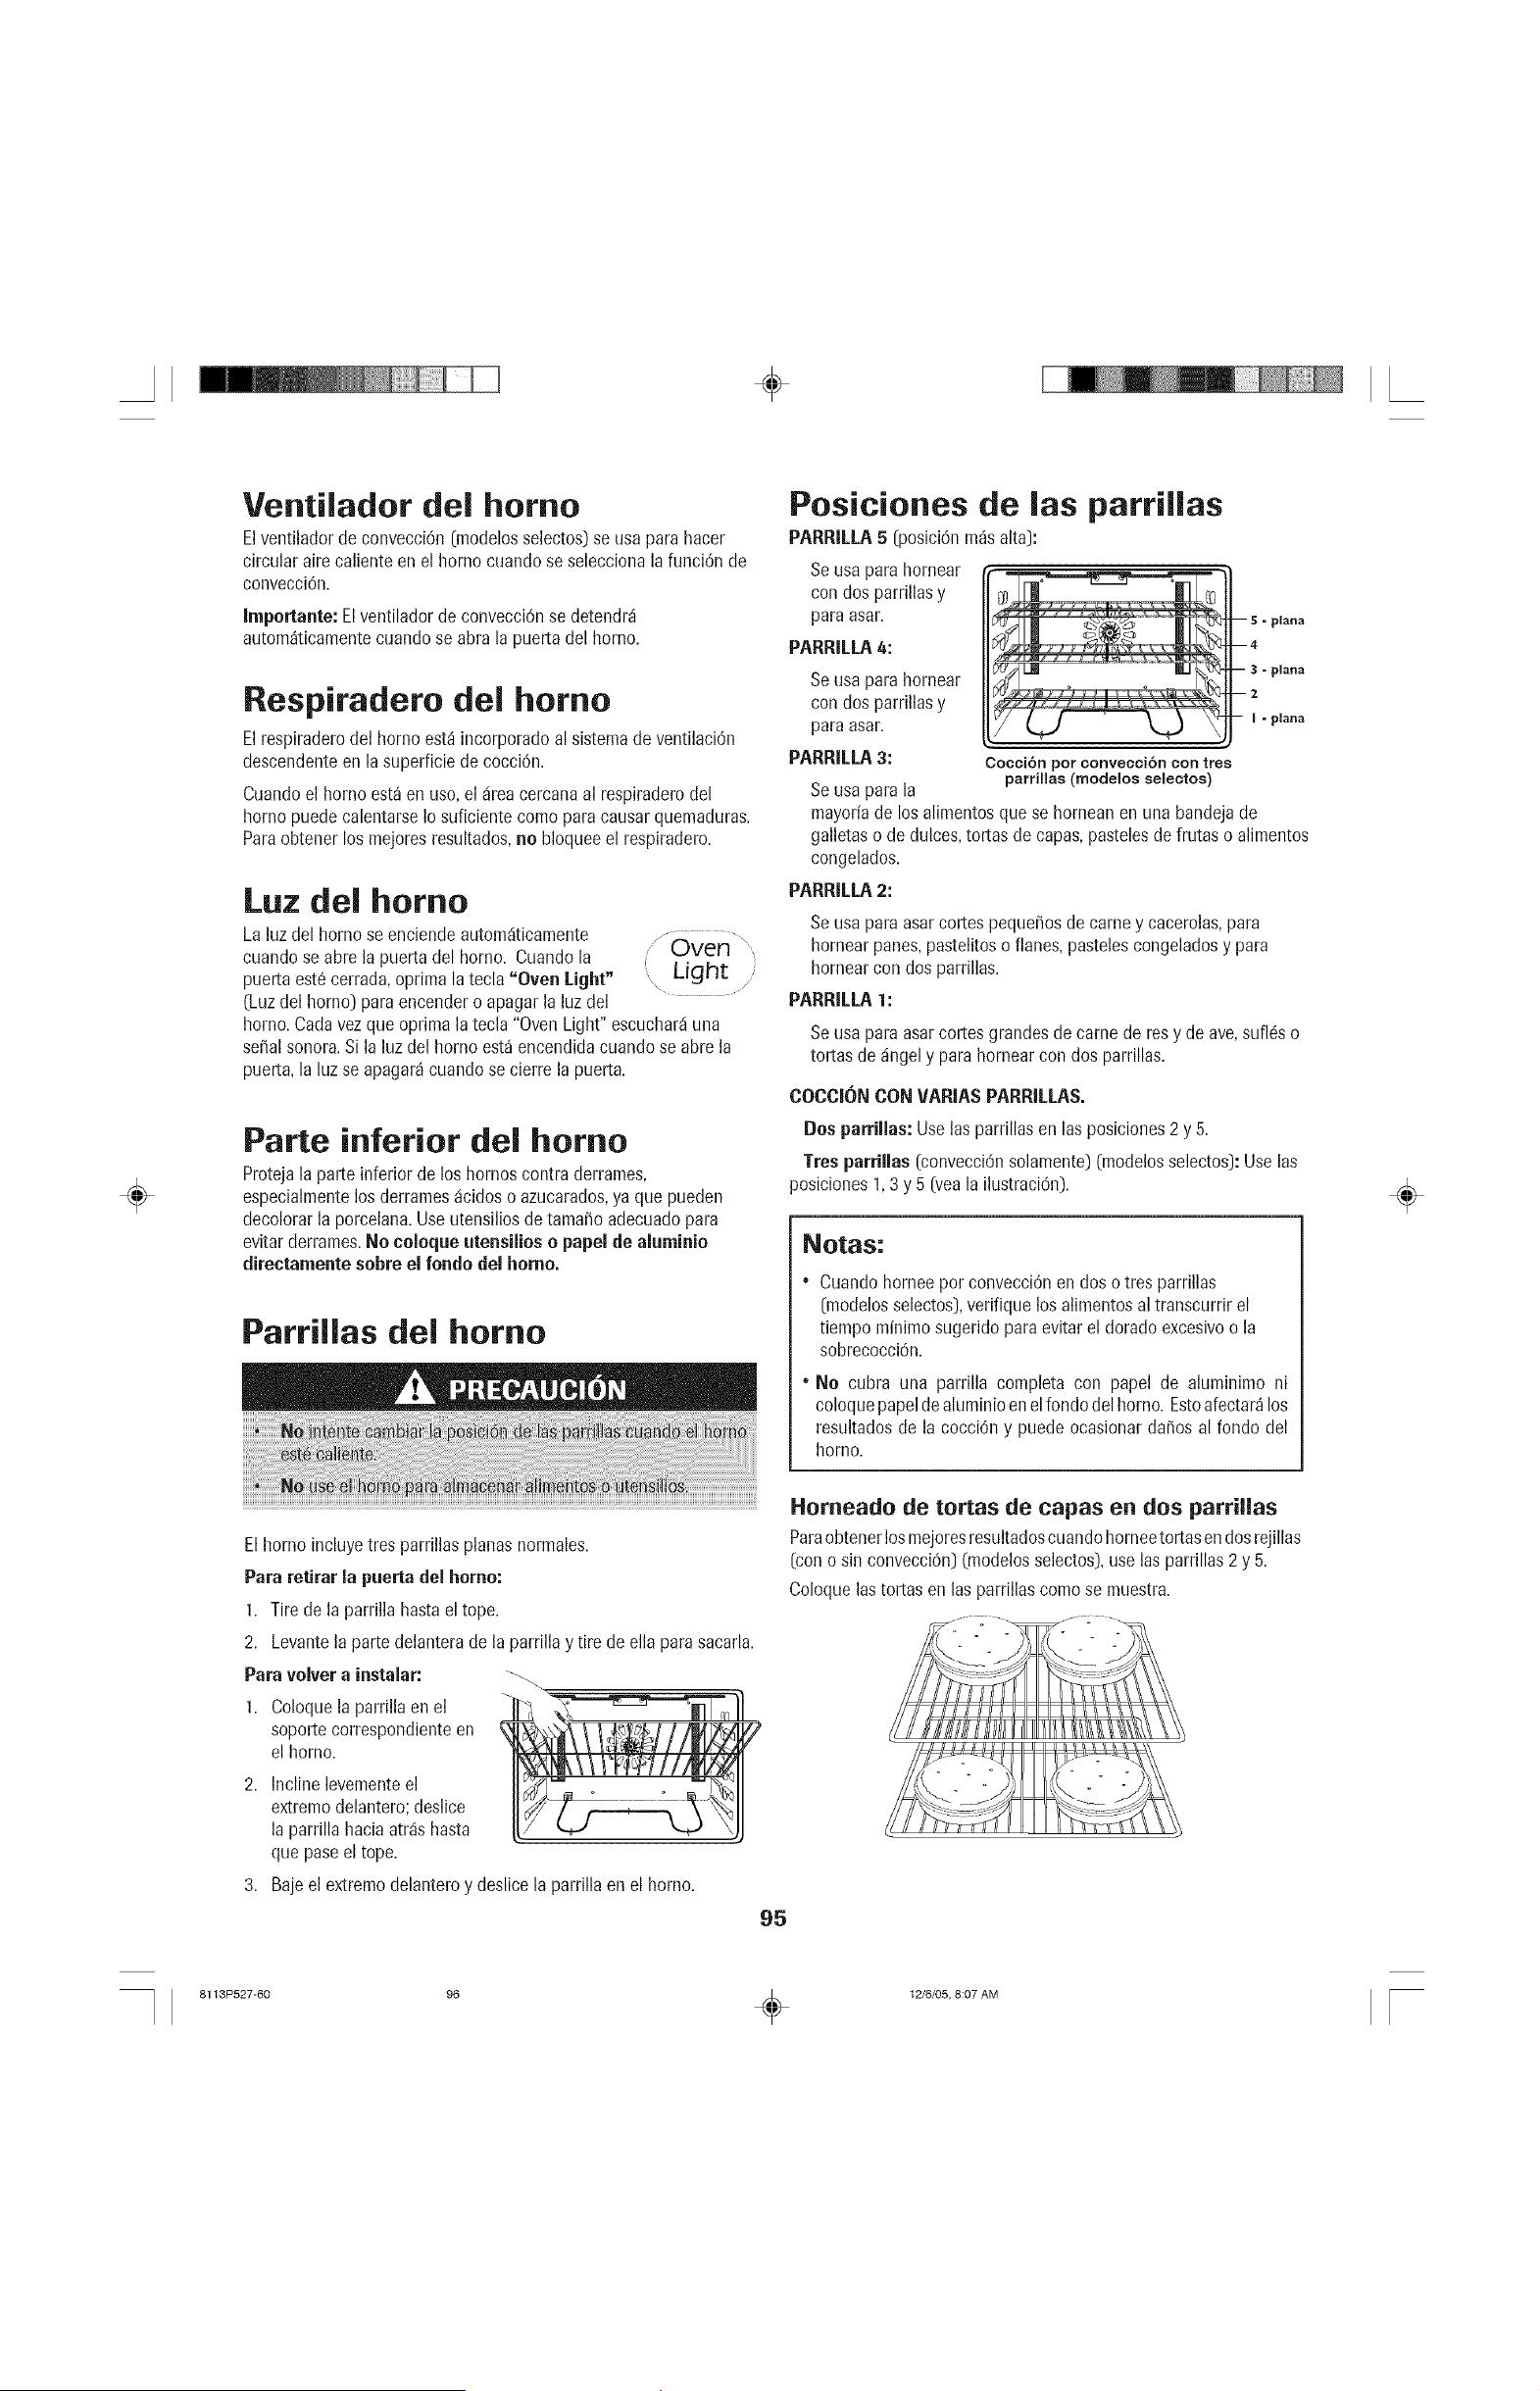
÷
÷
Ventilador del homo
Elventiladorde convecci6n[modelosselectos)se usa para hacer
circularaire calienteen el homo cuandose seleccionala funci6n de
convecci6n.
Irnportaate: Elventiladorde convecciOnse detendr_i
autom_ticamentecuandose abra la puertadel homo.
Respiradero del homo
Elrespiraderodel horno est_ incorporadoal sisteraadeventilaci6n
descendenteen lasuperficie de cocciOn.
Cuandoel homo est_ en uso, el _ireacercanaal respiraderodel
homo puedecalentarseIo suficiente comepara causarquemaduras.
Paraobtener los mejoresresultados,Be bloqueeel respiradero.
Luz del homo
Laluz del homo se enciendeautom_iticamente .........
cuandose abre la puertadel homo. Cuandola /Oven
Light
puertaest6 cerrada,optima la tecla "Oven Light...... //
(Luzdel homo) paraencendero apagarla luz del
homo.Cadavez queoprima la tecla "OvenLight" escuchar_iuna
serialsonora.Si lahz del homo est_ encendidacuandose abre la
puerta,la luzse apagar_cuandose cierre la puerta.
Parte inferior del homo
Protejalaparte inferior de los hornoscontraderrames,
especialmentelos defames acidoso azucarados,ya quepueden
decolorarla porcelana.Useutensiliosde tamafio adecuadopara
evitarderrames.No coloque utensilioso papel de aluminio
directamentesobre el rondo del homo.
Parrillas del homo
Posiciones de las parrillas
PARRILLA5 [posici6nm_saltar:
Seusa para hornear
con dos parrillasy
paraasar.
PARRILLA4:
Seusa para hornear
con dos parrillasy
paraasar.
PARRILLA3:
Seusa para la
-- 5 - plana
--4
-- 3 - plana
--2
-- I - plana
0o¢0i6n pot convecci6n con tres
parrillas (modelos selectos)
mayoriade los alimentosquese horneanen una bandejade
galletaso de dulces,tortas de capas,pastelesde frutas o alimentos
congelados.
PARRILLA2:
Seusa para asarcortespequefiosde camey cacerolas,para
hornearpanes,pastelitoso flanes,pastelescongeladosy para
hornearcon dos parrillas.
PARRILLA1:
Seusa para asarcortesgrandesde came de resy de ave,sufl6so
tortas de _ingely para hornearcon dos parrillas.
COCCIONCONVARIAS PARRILLAS.
Dos parrillas: Uselas parrillas en lasposiciones2y 5.
Tresparrillas [convecciOnsolamente)(modelosselectos]:Uselas
posiciones1,3 y 5 [veala ilustraci6n).
Notas:
= Cuando horneepot convecci6nen dos o tres parrillas
[modelosselectos],verifique los alimentosal transcurrir el
tiempo minimo sugeridoparaevitarel dorado excesivoo la
sobrecocci6n.
• No cubra una parrilla completa con papel de aluminimo ni
coloquepapeldealuminioen elfondo delhomo. Estoafectar_los
resultadosde la cocciOny puede ocasionardafios al fondo del
homo.
÷
Horneado de tortas de capas en dos parrillas
Elhomo incluyetres parrillas planasnormales.
Para retirar la puerta del homo:
1. Tirede laparrilla hastael tope.
2. Levantela parte delanterade la parrillay tire de ella parasacarla.
Para volver a instalar: _..
1. Coloquela parrillaen el
soportecorrespondienteen
el homo.
Paraobtenerlosmejoresresultadoscuandohorneetortasendosrejillas
[con o sin convecciOn)(modelosselectos),use las parrillas2y 5.
Coloquelastortas en las parrillascomose muestra.
Incline levementeel
extremodelantero;deslice
la parrilla haciaatr_ishasta
que paseel tope.
Bajeel extremodelanteroy deslicela parrillaen el homo.
95
8113P527-60 96 _ 12/6/05, 8:07 AM

÷
OPC|
÷
opciones
"Cook & Hold" (Cocinar y mantener caliente)
(modelos selectos) -" More ,,
1. Optima la tecla "Mere Options" [M_s opciones). Options,
2. SeleccioneCOOClON/CALENT. ................................
3. Programeel tiempode cocci6n usando lasteclas r_pidaso las
teclas numc!ricas.
4. Seleccionela funci6n HORN o CONVEC.
5,
6.
Cuandooprima HORNEAR,seleccionela temperaturausandolas
teclas r_pidaso lasteclas numc!ricas.
Cuandooprima la teclaCONVEC,seleccioneHORNEADO
CONV,ASAR PeR CONVo PASTELESCONV y programela
tempera-turadeseadausandolasteclas r@idas o lasteclas
num6ricas.
Elhomo cocinar_ durante eltiempo seleccionadoy luego mantendr_
el alimentocaliente durante una hera.El homo se apagar_
autom_ticamente.
Impertante:Si la receta recomiendaprecalentarel homo,a_ada
tiempo a la duraciOnde la cocci6n.
"Delay" (Diferir)
1. Optima latecla "Mere Options".
2. Optima laflecha paranavegarentre las opciones
hastaque se muestreDIFERIRen pantalla.
3. Seleccionela funci6n DIFERIR.
/More
Options
.......... /
4. Programeel tiempoa diferir usandolas teclas rdpidaso lasteclas
num6ricas.
5. SeleccioneHORNEADO,CONVECo LIMPIEZA y programe la
temperaturausandolas teclas r_pidaso lasteclas num6ricas.
Para programar un homeado diferido:
I. Sigalos pasos 1 a/4de la funciOn"Delay" (yeaarriba).
2. Elija una de lastemperaturasdesplegadaso use lasteclas
num6ricasparaprogramar la temperatura.
3. Elija el tiempo de cocci6n de lostiempos desplegadoso use las
teclas numc!ricaspara programarel tiempo de cocci6n.
4. La pantalla mostrar_"DELAY",la funci6nseleccionada,la
temperaturaprogramaday elconteo regresivodeltiempo
diferido.Cuandoel tiempodiferido termina,se muestrael tiempo
de cocci6ny el homo comienzaa precalentar.
Para programar an horneado per convecci6n
diferido: 0nodelosselectos)
1. Siga lospasos 1 a 4 de la funci6n "Delay" [yeaabajo a la izquierda).
2. Seleccionela funci6n HORNEADO,ASAR o PASTELES.
3. Elijauna de las temperaturasdesplegadaso use las teclas
numc!ricaspara programarlatemperatura.
/4. Elijael tiempo decocci6n de los tiemposdesplegadoso uselas
teclas num6ricaspara programarel tiempo de cocciOn.
5. Lapantalla mostrar_i"DELAY",la funciOnseleccionada,la
temperaturaprogramaday el conteo regresivodeltiempo diferido.
Cuandoel tiempo diferidotermina, se muestraeltiempo de cocciOn
y el homo comienzaa precalentar.
Para programar la autolimpieza diferida:
1. Siga lospasos 1 a/4de la funci6n "Delay" [yeaabajo a la izquierda).
2. RETPARRILLASse desplegar_ien la pantalla.Retire lasparrillas
del homo y seleccione CONTINUAR.
3. Seleccioneel nivel desuciedad[.EVEintroduciendoel nt_mero
200con lasteclas num6ricasparaprogramardos horasde limpieza.
Seleccioneel nivel de suciedadMED o INTENSe usandolas
teclas r_pidas.Hayuna espera brevemientrasla puertase bloquea.
/4. Lapantalla mostrar_i"DELAY",el tiempode limpiezay el tiempode
desbloqueode la puerta [on base al nivelde suciedad
seleccionado).Cuandoel tiempodiferido termine,se mostrar_el
tiempo de limpiezay el homo comenzar_ia precalentar.
Paramayorinformaci6nsobreautolimpieza,yea la p_igina77.
"Proofing" (Espajamiento) (modelos selectos)
Estacaracter[sticase utiliza paraque los productosde pan de
levadurase eleveny fermenten antesdel horneado.Haydos
m6todosdeespajamientodisponibles- RAPIDOy NORMAL.
Elfermentadoest_indaren el homo protege la masacontra los
cambiosdetemperaturay lascorrientesque comL_nmenteafectan
los resultadosdel espajamientoefectuadofuera del homo.
Elfermentador_pido proporcionaresultadosm_sr_pidossin da_ar
la levaduraque si se usa el fermentadoest_ndaro se deja la masa
reposarfueradel homo.
1. Optima la tecla "Mere Options". Options
2. SeleccioneESPAJAMIENTO. "....
3. SeleccioneRAPIDO o NORMAL CANCEL
/4. Cuandose hayacompletadoel espajamiento,retire".................
la masa del homo y oprima la tecla "CANCEL" [Anular).
Cent.
96
÷
8113P527-60 97 _ 12/6/05, 8:07 AM
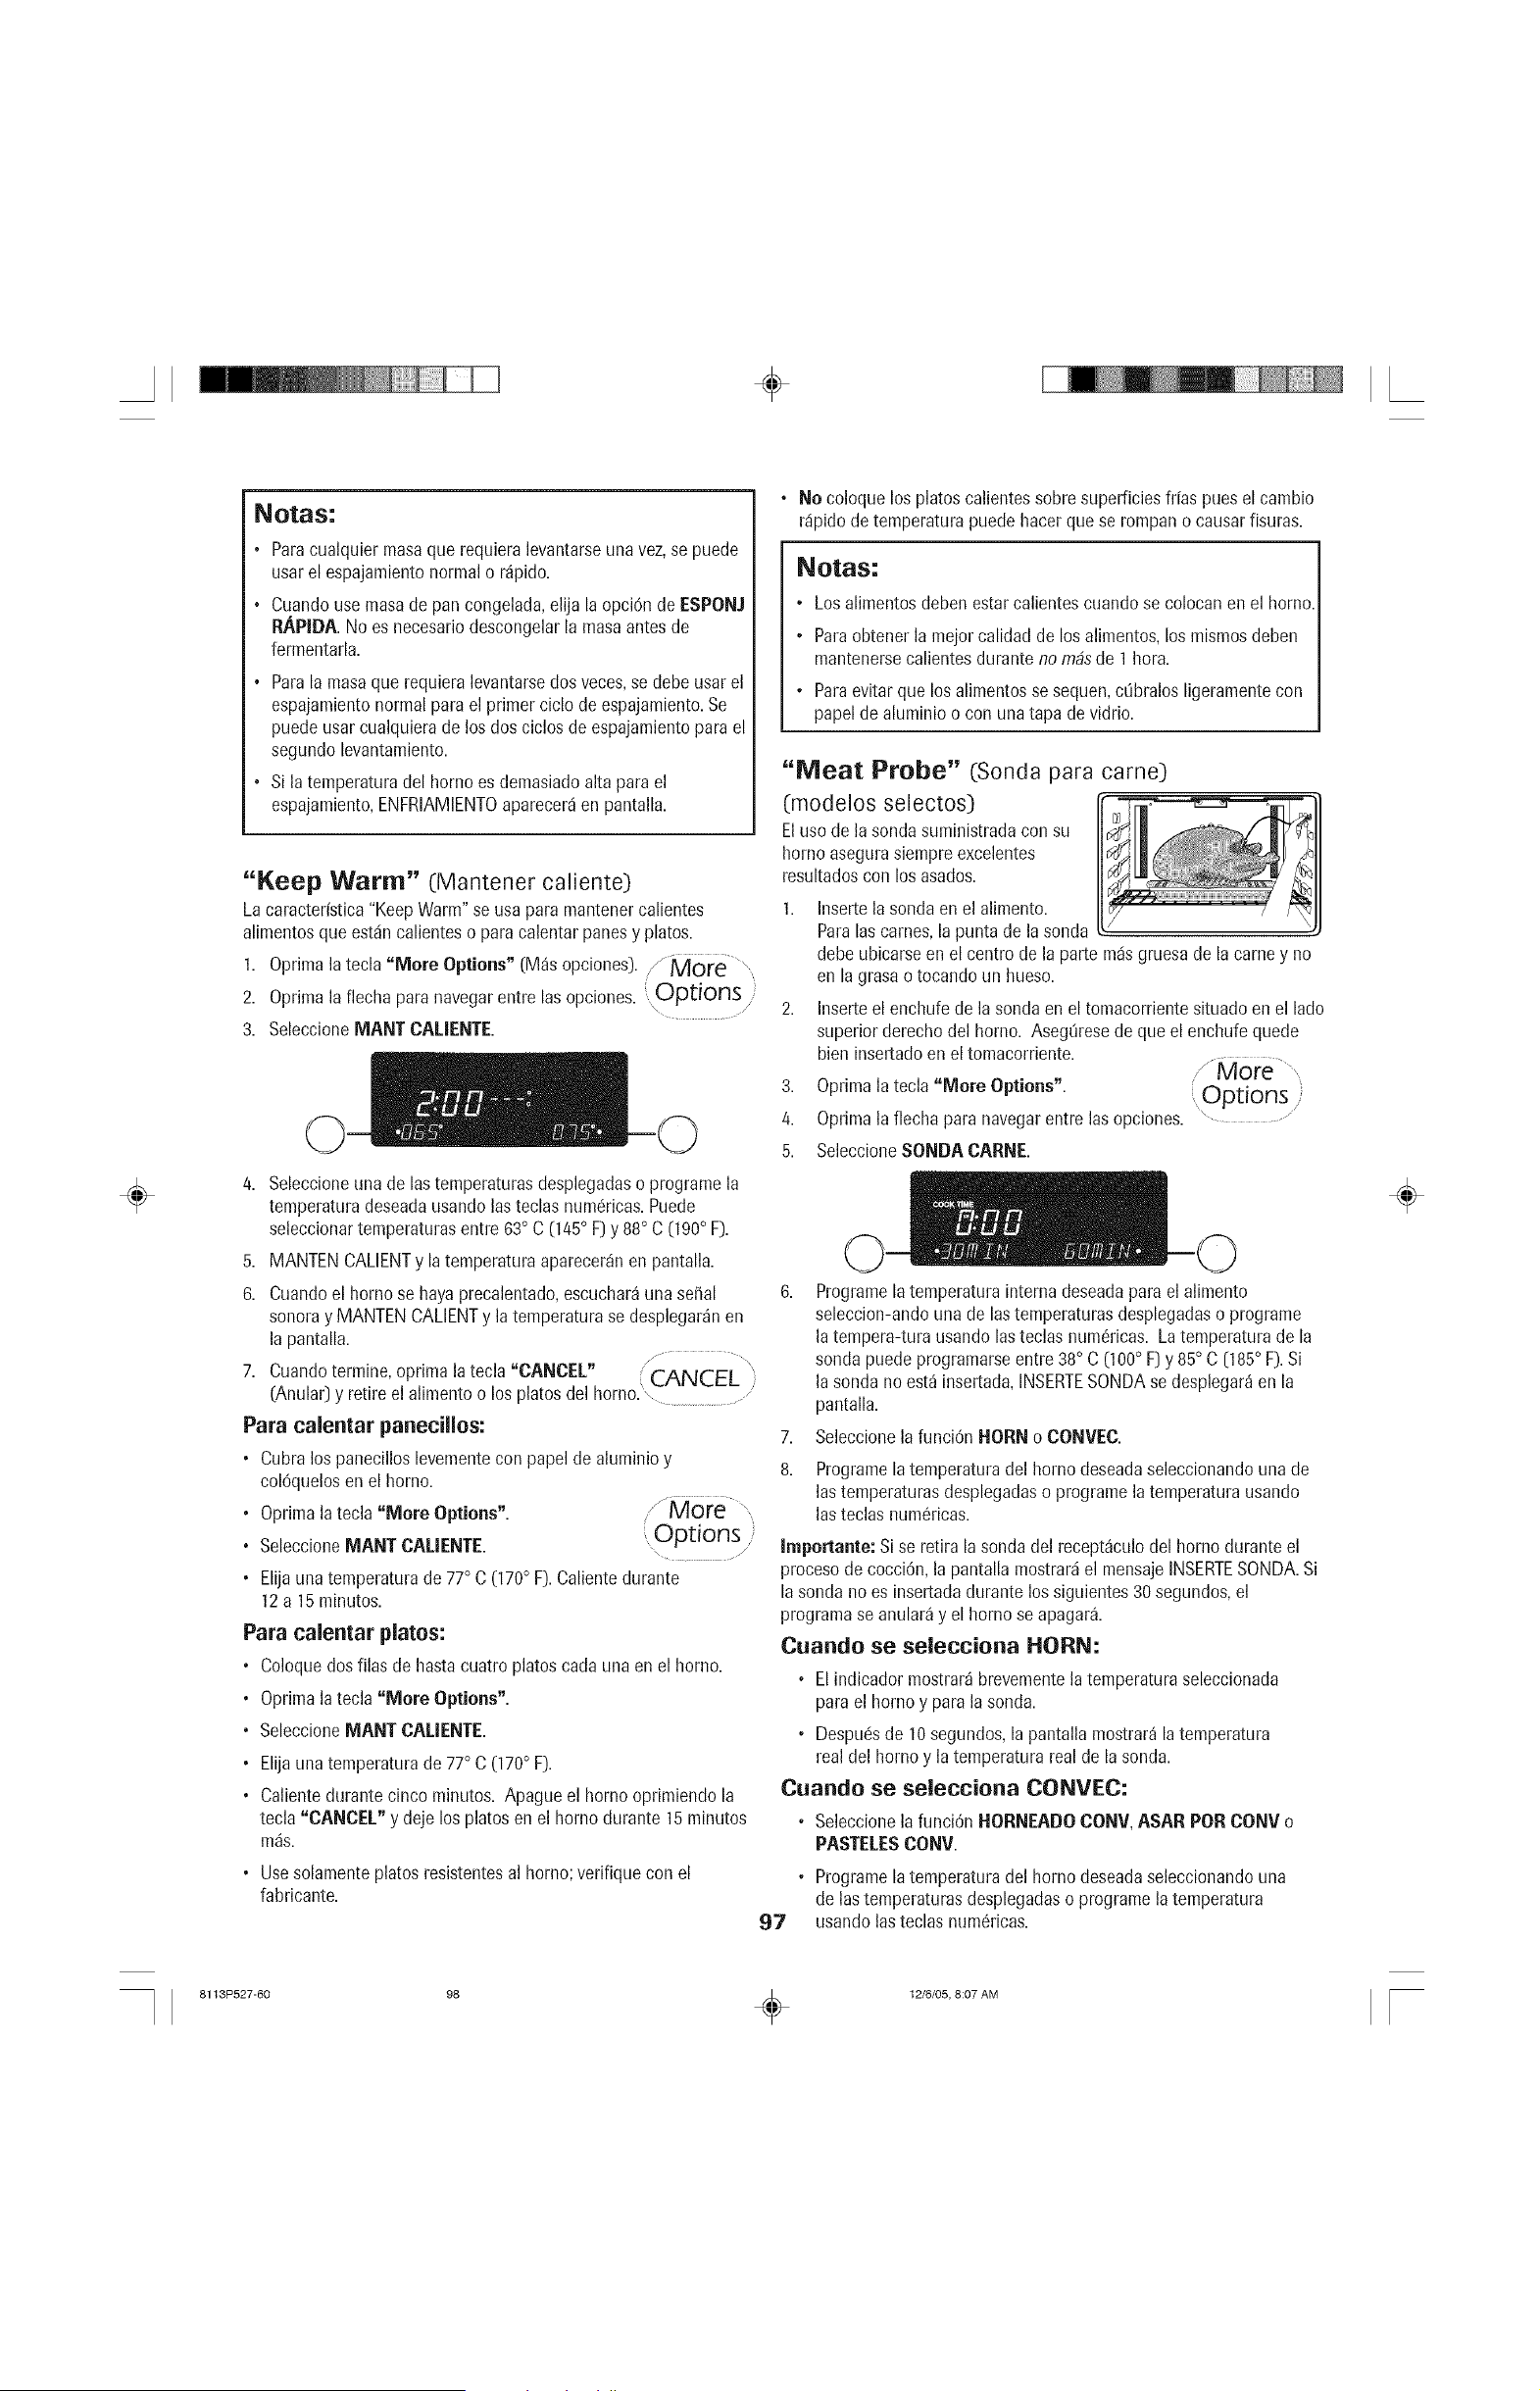
÷
÷
Not;Is:
, Paracualquiermasa que requieralevantarseuna vez,se puede
usar el espajamientonormalo r_pido.
, Cuandouse masade pan congelada,elija la opci6n de ESPONJ
RAPIDA.No es necesariodescongelarla masaantesde
fermentarla.
, Parala masaque requiera levantarsedos veces,se debe usar el
espajamientonormal para el primer ciclo de espajamiento.Se
puede usarcualquierade los dos ciclos de espajamientopara el
segundo levantamiento.
, Si la temperaturadel homo es demasiadoalta para el
espajamiento,ENFRIAMIENTOaparecer_en pantalla.
"Keep Warm" (Mantener caliente)
Lacaracter[stica"KeepWarm"se usa para mantenercalientes
alimentosqueest_incalienteso paracalentar panesy plates.
1. Oprima la tecla "More Options" (M_s opciones). /" M0re "
2. Oprima la flecha para navegarentre las opciones. ,Optionsj=_
3. SeleccioneMANT CALIENTE.
4. Seleccioneuna de las temperaturasdesplegadaso programela
temperaturadeseadausandolas teclas numc!ricas.Puede
seleccionartemperaturasentre 63° C (145° F)y 88° C (190° F).
5. MANTENCALIENTy la temperaturaaparecer_nenpantalla.
6. Cuandoel homo se hayaprecalentado,escuchar_una sepal
sonoray MANTENCALIENTy latemperaturase desplegar_nen
la pantalla.
// ................
7. Cuandotermine,oprima la tecla "CANCEL" "CANCEL
(Anular)y retire el alimentoo los platesdel homo.', ................................
Para caleatar panecillos:
• Cubralos panecillos levementecon papelde aluminioy
col6quelosen el homo.
° Oprimalatecla "More Options". / More "
Options
° SeleccioneMANT CALIENTE.............. /
• Elija unatemperaturade 77° C (170° F).Calientedurante
12a 15minutes.
Para calentar plates:
° Coloquedosfilas de hasta cuatroplates cada una en el horno.
° Oprimalatecla "More Options".
• SeleccioneMANT CALIENTE.
• Elija unatemperaturade 77° C (170° F).
° Calientedurante cincominutes. Apagueel homo oprimiendola
tecla "CANCEL" y deje los platesen el homo durante 15 minutes
m_s.
• Usesolamenteplates resistentesal homo; verifiquecon el
fabricante.
• No coloque los platescalientessobresuperficies fr[aspues el cambio
r_ipidodetemperaturapuede hacer que se rompano causarfisuras.
Notas:
• Losalimentosdebenestar calientescuandose colocanen el borne.
• Paraobtenerla meier calidad de losalimentos,losmismosdeben
mantenersecalientesdurante no rn#sde I hera.
° Paraevitarque losalimentosse sequen,c0bralosligeramentecon
papelde aluminio o con una tapa de vidrio.
"Meat Probe" (Sonda para came)
(modelos selectos)
Eluse de lasonda suministradacon su
homo asegurasiempreexcelentes
resultadoscon los asados.
1. Insertela sondaen el alimento.
Paralas carnes,lapunta de lasonda
debeubicarseen el centre de la parte m_isgruesa de lacame y no
en la grasaotocando un hueso.
2. Inserteel enchufede la sondaen el tomacorrientesituado enel lade
superiorderechodel homo. Aseg0resede que el enchufequede
bien insertadoen eltomacorriente.
/
, More
3. Oprimala tecla"More Options". [,ODtionsr
/
4. Oprimala flechapara navegarentre las opciones. ..................
5. SeleccioneSONDACARNE.
6. Programela temperaturainterna deseadapara el alimento
seleccion-andouna de lastemperaturasdesplegadaso programe
la tempera-tufa usando lasteclas num_ricas. Latemperaturade la
sonda puedeprogramarseentre 38° C (100° F)y 85° C (185° F).Si
la sonda no est_ insertada,INSERTESONDAse desplegar_en la
pantalla.
7. Seleccionela funci6n HORN o CONVEC.
8. Programela temperaturadel homo deseadaseleccionandounade
las temperaturasdesplegadaso programela temperaturausando
las teclas num6ricas.
Importante: Si se retira lasonda del recept_culodel homo duranteel
procesode cocciOn,la pantalla mostrar_iel mensajeINSERTESONDA.Si
la sonda no es insertadadurante lossiguientes30segundos,el
programase anular_y el homo se apagar_.
Cuando se selecciona HORN:
° Elindicador mostrar_brevementela temperaturaseleccionada
para el homo y parala sonda.
• Despu_sde 10segundos,la pantallamostrar_latemperatura
real del homo y latemperaturareal de lasonda.
Cuando se selecciona CONVEC:
° Seleccionela funci6n HORNEADOCONV,ASAR PeR CONV o
PASTELESCONV.
° Programela temperaturadel homo deseadaseleccionandouna
de lastemperaturasdesplegadaso programe latemperatura
97 usandolas teclas num6ricas.
÷
8113P527-60 98 _ 12/6/05, 8:07 AM
÷
÷
9,
10.
• La pantallamostrardbrevementela temperaturaseleccionada
parael homo y para la sonda.
, Despu6sde 10segundos,la pantallamostrardla temperatura
realdel homo y latemperaturareal de la sonda.
Cuandose Iogra latemperaturainterna seleccionadadel
alimento,el homo se apagard,y se oird una sepalsonora.
Retirela sonda del tomacorrientedel homo. La sonda estar4
caliente. Sujeteel enchufede la sonda con guantesde homo o
tomaollascuandola saquedel homo.
Notas:
, Lasonda debe ser sacadadel homo cuando no estdsiendousada.
• Debido al excelenteaislamientodel homo, el calor retenido
continOacocinandoel alimentohasta despu6sde que ha sonado
la sepaly el homo se ha apagado. Por esta raz6nes importante
sacarel alimentodel homo tan pronto como suene la sepalsonora
• Use la manijade la sonda parainsertarlao retirarla. No tire del
cable.
° La sonda est4 caliente despu6s de la cocci6n - use un
tomaollaso un guante de homo parasacarla.
• Paraproteger la sonda,si la came no est_completamente
descongelada,inserte lasonda despu6sde 1-2 horasde que la
camese est6 asando.
• Paralimpiar una sondafr[a, fr6telacon un paso con jab6n.
No sumerja la sonda en agua ni la lave en el lavavajillas.
2,
3
4
5
• Cierrela puerta con cuidado hastaque el espaciadormagndtico
entre en contacto con la puerta del homo. El imdn sostendrdel
espaciadoren la posici6ncorrecta duranteel procesode secado
y permiteque la puerta seaabierta en cualquiermomento
durante elsecado sin que pierda su posici6ncorrecta.
[mportaate: Si el espaciadornose coloca correctamente,el ventilador
de convecci6nno funcionard.
x .........
Optimala tecla "Conveet" [ConvecciOn). Convect i
Oprimala flechapara navegarentre las opciones. ...........
SeleccioneSECADO.
Temperaturas internas para los alimentos
Camede resmolida
Camefrescade res,ternera, Semicruda
cordero Tdrminomedio
Biencocida
Polio,Pavo Entero
Pechuga
Cerdo T_rminomedio
Biencocida
Jam6n,precocid_
74° C [165° F]
63° C fl45 ° F]
71° C (160° F]
77° C [170° F]
82° C (180° F]
77° C 070° F]
71° C (160° F]
77° C [170° F]
60°C f140°F)
"Drying" (Secado) (modelos selectos)
Paraobtener los mejoresresultados,utilice una rejillade secado.
Estasrejillaspermitenque el aire circule uniformementealrededordel
alimento.
Elventiladorde convecci6nfuncionarddurante elsecado.
Para programar el secado:
1 La puertadel homo debeser abierta
levementepara permitir que la humedad
escapedel horno durante el secado.
° Abra lapuerta del homo levemente.
° Coloqueel espaciadormagndticopara la puerta _ieza No.
8010P146-60]sobre el interruptoren el lado superior derecho
del marco del homo. El espaciadorproporciona unaabertura
entre el marco y la puerta del homo para permitirque la
humedadescape.
98
Seleccioneuna de Instemperaturasdesplegadaso programela
temperaturausandoInsteclas num6ricas. Puedeprogramar
temperaturasentre 38° C (100° F]y 93° C [200° F].
6. Enel indicador aparecerdSECADOy la temperatura. "PREHEAT"
[Precalentamiento)aparecerden pantalla hastaque el homo
alcancela temperaturaprogramada.
CANCEL,
7. Cuandoel secadohayaterminado,retire el ..................
alimentodel homo y optima la tecla "CANCEL" (Anular].
Sign la Gufade secadoen la pdgina99 paraconocer los tiemposde
secado. Verifique los alimentosal habertranscurrido eltiempo minimo
indicado.Enfr[elosalimentos hastatemperaturaambientepara probar
el nivelde secado.
Notas:
° Paraadquirirunarejilla de secado,p6ngaseen contactocon su
distribuidorJenn-Airy pidael kit deaccesorio"DRYiNGRACK"
(Rejillade secado]o Ilameal 1-800-JENNAIR(1-800-536-6247].
° La mayoriade Insfrutasy verdurassesecanbieny mantienensu
color cuandosesecana 60° C [140° F).Lacamey la cecinadeben
secarsea entre 63° C 045° F)y 66° C [150° F].Paraun sabor6ptimo,
sequeInshierbasa 38° C (100° F].Sinembargo,debidoa estabaja
temperatura,el tiempodesecadopuedealargarsehasta8 horns.
• Eltiempa de secada varia de acuerdo con Io siguiente:
Contenidode agua y az_car de[ alimento, tamafio de Ins piezas,
cantidadde aiimento que se est6secando y la humedad de[
aire.
• Verifiquelosalimentosal habertranscurridoelminimotiempo de
secado.Sequelos alimentosduranteun mayortiemposi es necesario.
° Lasfrutas quesetornan marronescuandose exponenalaire deben
settratadascon un antioxidante.Pruebeuno de lossiguientes
m6todos:
1. Moje lafruta en una mezcladedos terciosde jugo de lim6n
embotelladoy untercio de aguatemplada.
2. Remojelafruta enuna soluci6nde 1 cucharaditade_cido
asc6rbicoo un antioxidantecomercialen un litro de aguafria.
° Losalimentospuedengotearduranteel procesode secado.Despu6s
desecar alimentoscon alto contenidodcidoo azucarado,limpiela
parte inferiordel homocon agua y jabOn.Elacabadode porcelana
del homose puede decolorarsi Insmanchas_cidaso azucaradasno
se limpianantesde un ciclode altatemperaturao deautolimpieza.
• Sepuedesecar m_sde una parrillade alimentoa lavez.Sinembargo,
se requerir4un mayortiempo de secado.
• Consulteotrasfuentesde informaci6nen su bibliotecalocalo Ilamea
su serviciode extensi6ndel condadopara obtenermayorinformaci6n.
÷
8113P527-60 99 _ 12/6/05, 8:07 AM

÷
GuJa de secado (modelos selectos)
÷
_aRzaRas •
_graznos*
Oalflbures •
Cerezas
Nectarinasy
rnelocotones*
Conchade
LimOno
Naranja
Variedadesfirmes: "Graven"
"Stein","GrannySmith",
"Jonathan","Winesap",
"RomeBeauty","Newton".
"Blenheim/Royal"m_s
comunes.Los"Tilton"
tambic!nson buenos.
Variedadesfirmes
"Lambert","RoyalAnn",
"NapoleOn","Van"o "Bing".
Variedades"Freestone".
"Bartlett"
Frescaoenlatada.
Elijafrutas deconcha dspera.
No sequela conchade las
frutas con "colora_adido".
Lave,pelesi desea,elimine elcoraz6ny
corteen rebanadasde 32 mm(1/8").
Lave,cortepor la mitad,eliminelas
semillas.
Peley corteen rebanadasde 64 mm (1/4"].
Lavey eliminelostallos.Cortepor la mitad
y eliminelas semillas.
Cortepor la mitady eliminelassemillas.
Puedepelarlos,peroresultaen
fruta secade mejoraspecto.
Pele,cortepor la mitady elimineel coraz6n.
Lave,peley eliminelosojuelosespinosos.
Cortea Io largo y elimineel coraz6n
peque_o.Cortea Io anchoen rebanadas
de 1,27cm (1/2").
Lavebien.Peledelgadamentela 16 mm
(1/16"]a 32 mm (1/8") de la concha.No
use lamOdulablancaamargadebajode la
concha.
4 a 8 horas
18 a 24 horas
17 a 28 horas
18 a 28 horas
24 a 36 horas
24 a 36 horas
Enlatada:
14 a 18 horas
Fresca:
12 a 16 horas
I a 2 horas
Flexiblesa crujientes.Las
manzanas seoas se
preservanmejorcuando
est_inun poco crujientes.
Suaves,flexibles.
Flexiblesa crujientes.
Flexiblesy gomosos.
Flexiblesy gomosos.
Suavey flexible.
Suavey flexible.
Durasa fr4giles.
Tonlares
Zanahorias
Aji picante
"Plum","Roma"
"Danvers"de mediotama_o,
"Imperator",de centro rojo
"Chantenay"
"Ancho","Anaheim"
Cortepor la mitad,eliminelassemillas.
Coloquelos tomatescon el pellejodel
tomateen laparrilla.Pincheel pellejo.
No usezanahoriasde fibra dura ocon
coraz6nmeduloso.Lave,corte lostopesy
pelesi Io desea.Corte aIo anchoo
diagonalmenteen rebanadasde 64mm
(1/4").Cocineal vaporpor3 minutos.
Lave,cortepor la mitad y eliminelas
semillas.Pincheel pellejovariasveces.
12 a 18 horas
4 a 8 horas
4 a 6 horas
Durosa crujientes.
Durasa fr4giles.
Lasvainasdebenverse
arrugadas,de colorrojo
oscuroy crujientes.
Perejil,Menta, Enjuagueen aguafria. Sequecon una I a3 horas Fr_gilesy desmenuzables.
CJlantro,Salvia, toallade papel.Dejelostalloshastaque
Oregano las hojasestOnsecas,y luegodesOchelos.
AIbahaca Corte lashojas7,62cm (3")a 10,16cm (4") 2 a 5 horas Fr_gilesy desmenuzables.
desdeeltope de la plantajusto donde
comienzana brotar.Enjuaguelashojasen
aguafria.
*Frutasque requierenun antioxidanteparaevitarla decoloraci0ny la pc!rdidade losnutrientes.Consultelos mc!todosespedficosen lasnotasde
lap_gina98.
** La funciOnde apagadoautom_ticodespuOsde 12horasnofuncionar4durante el secado.
99
÷
8113P527-60 100 _ 12/6/05, 8:07 AM
÷
"Thaw and Serve" (Descongelar y serviO
(modelos selectos)
UseestafunciOnpara alimentoscongeladosque necesitanser
descongeladospero no cocinadosantesdeservir.
Para programar la funci6n descongelar y servir:
1. Coloqueel alimentoen el homo en la parrilla3.
j .........................
2. Oprima latecla "Convect" [ConvecciOn). ( Convect i:
3. Oprima laflecha paranavegarentre lasopciones.
4. SeleccioneDESCONG=SERVIR.
5. Seleccioneel nL_merode minutosde descongelaciOn.
Tabla para descongelar y servir
6,
7.
DESCONG-SERVIR,eltiempo de cocciOny el conteoregresivo
deltiempo de cocciOnaparecer_nenpantalla.
Si la descongelaciOntermina antesde queel tiempo haya
transcurrido,oprima latecla "CANCEL" [Anular) y retire el
alimentodel homo.Cuandoel tiempode z.........................,
cocciOnhayaterminado,el homo se apagar_y CANCEL )
emitir_una serialsonora. .......................................J
importante: Estacaracteffsticano debe usarsepara descongelar
carnesu otros alimentosquedeben ser cocinadosantesde servir.
÷
Pasteles y tortas compietas
Pasteles: de lim6n,con crema,
de pacana,de chocolate,
batatas,pastelde seda
Tortas: Vainilla,chocolate,
coco y tortas de tres
capas,torta de ponqu&
pastelde crema
Porcionesindividuales:
Rebanadasde pastel,rebanadas
torta, otros postresindividuales,
pastelitosrellenos,pastelitos
de crema
Torta de qaeso
Aperitivosprecocidos
re[lenosde came
1. Remuevael alimentocongeladode la cajay envoltorio.
2. Coloqueel alimentocongeladoen la parrilla central del
homo.
3. Usela funciOnde descongelar-servirdurante 15
minutos paratortasy 30 minutospara pasteles.
4. Retireel alimento del homo.
5. Corteen porcionesindividualesy coloque en platos.
6.Vuelvaa colocar los platos enel homo.
7. Usela funciOndedescongelar-servirde 10a 30 minutos.
1. Retireel alimento congeladodel envase.
2. Coloquela porciOnenel plato.
3. Coloqueel plato en la parrilla centraldel homo
4. Usela funciOndedescongelar-servirde 10a 30 minutos.
1. Remuevael alimentocongeladode la cajay envoltorio.
2. Coloqueel alimentocongeladoen la parrilla centraldel
homo.
3. Usela funciOndedescongelar-servirdurante30 minutos.
4. Retireel alimentodel homo.
5. Corteen porcionesindividualesy coloque en platos.
6.Vuelvaa colocar los platos enel homo.
7. Usela funciOndedescongelar-servirhasta por 15
minutossi Io desea.
1. Retireel alimento congeladodel envase.
2. Coloquela porciOnenel plato.
3. Coloqueel plato en la parrilla centraldel homo.
4. Usela funciOndedescongelar-servirdurante 10 a
15minutos.
I • Si descongeladurante 30 minutos,se
facilita cortar pastelesy tortas completasy
torta de queso.
, • Lastortas de capasrequierensolamente
15minutosantes de cortar.
i • Eltamafio y latextura del alimentoa
descongelarafectardneltiempo de la
funciOndescongelar-servir.
[ ° Lospostresm_sgrandeso densospueden
tomar mdstiempo paradescongelarse.
i ° Lasrebanadasde torta se descongelan
m_sr_pidamenteque las rebanadasde de
pastel.Las rebanadasde pastel de batata
puedentomar entre 20 y 30 minutos.
* Estacaracteristica solo puede ser usada con alimentos congelados "Thaw and Serve" (descongelar y serviO o "Ready to Serve"
(listo para serviO. NO intente descongelar carnes congeladas, carrie de ave o mariscos.
** No es necesario precalentar el horno.
÷
100
8113P527-60 101 _ 12/6/05, 8:07 AM
÷
AVOR|TOS
÷
"Favorites" (Favoritos)
Laopci6n "Favorites"guarda hasta 10de sus recetasfavoritas.Los
hornosde convecci6nvienencon cinco recetaspreprogramadas.
Para seleccionar aria receta de la lista
de recetas preprogramadas:
1. Optima latecla "Favorites". / Favorites
2. Seleccionela opci6n USTA RECETAS. On......./ Off /
3. Seleccionela recetadeseadaen lapantalla u optima la flecha
paradesplazarsea la recetadeseada.
4. Unavezque la recetaes seleccionada,el homo comenzar_a
precalentarde acuerdocon el programaseleccionado.
• Puedeoprimir la tecla "More Options" (M_sopciones) para
a_adir lasfuncionesCOCC/CALENo DIF.
Para crear una nueva reoeta favorita:
1. Oprimala tecla"Favorites".
2. Oprimala fiechapara navegarpor las opciones.
f .............. \
/ Favorites
On/Off /
3. SeleccioneCREARNUEVA con la tecla a la izquierda.
/4. Introduzcael nombreusando lasteclas.
5,
6.
7,
5. Cuandotermine,optima latecla "CANCEL" [Anula0 y retire el
alimentodel homo.
Para guardar la altima receta terminada: 8.
(Hornear,Horneadopot convecci6n,Asado por convecci6n,
PastelerfaporconvecciOn,Asado a laparrilla pot convecci6n,Secado, 9.
Mantenercaliente,Fermentado)
10.
1. Optima la tecla "Favorites". Favorites
2. Seleccionela opci6n GUARDARt)LTIMA. On / Off /
........... /
3. Introduzcael hombre usandolasteclas.
• Por ejemplo,paraguardar "lasagna",optima latecla <JKL>
tresvecespara la letra "L"; optima la tecla<ABC> una vez
para la letra "A"; optima la tecla<STU> una vezpara la letra
"S".Contin0easfhastaque hayaterminadola palabra.
4. Despuc!sde programarcada letra,esperetres segundoshasta
que aparezcauna lineaen el siguienteespaciou optima la tecla
"Enter" [Acepta0 antesde pasara la siguienteletra.
• Se puedenusar hasta 14letras incluyendolosespacios.
5. Cuandoel hombrede lareceta hayasido programatic,los Oltimos
ajustesse desplegar_indurantevarios segundos.
6. LISTARECETASse desplegar_en la pantalla para navegarpot las
opciones.
7. Optimala tecla "Favorites" para salir del men_
de recetasfavoritas.
• Porejemplo,paraguardar"lasagna",optima la tecla<JKL> tres
vecesparala letra "L"; oprima la tecla <,ABC> unavezpara la
letra 'W'; optimala tecla<STU> una vezparala letra "S".
ContinOeasfhasta que hayaterminado la palabra.
, Despu_sde programarcada letra, esperetres segundoshasta
que aparezcauna lineaen el siguiente espaciou optima latecla
"Enter" antesde pasara la siguienteletra.
, Sepueden usar hasta 14letras incluyendolos espacios.
Seleccionetecla"Enter" para guardarel hombre.
Seleccioneeltipo de cocciOn,comopor ejemplo HORNEAR,
HORNEADOCONV,ASARA LA PARR,etc.
Seleccionelatemperaturadel homo usandolas teclasr_pidas.
O
Programelatemperaturadeseadausando lasteclas num6ricas.
Afiada lafunciOn"Cook/Hold" [cocinadmantenercaliente)
seleccionandola opciOnSIo sakeesta funciOnseleccionandoNO.
Si elige SI,programeel tiempode cocciOnusandolas teclas
rdpidaso lasteclas num6ricas.
Mada la funciOn"Delay" (Diferido)seleccionandola opciOnSI o
sake estafunciOnseleccionandoNO.
11.Si elige Sl, prograrneel tiempo diferido usandolasteclas r@idas o
lasteclas numc!ricas.
12.Lapantalla mostrar_ilasopcionesprogrmadasy luego regresar_al
menOde recetasfavoritas.
13.Oprimala tecla"Favorites"para salir del menO
de recetasfavoritas.
Para editar aria receta guardada:
1. Oprimala tecla "Favorites".
2. Optima la flecha paranavegarentre lasopciones.
3. Seleccionela opci6n EDITAR RECETA.
/4.
/_. ........... %
Favorites
, On/Off
Elijala receta quedeseaeditar. Esposibleque deba oprimir las
teclasflechadasparaencontrar la receta.
Sigael menOpara cambiarlas opcionesde la recetasegOnIo
desee.
6. Lapantalla mostrar_el menOde recetasfavoritasnuevamente.
LISTARECETASaparecer_en pantalla.
7. Oprimala tecla "Favorites" para salir del men0 de recetas
favoritas.
÷
101
8113P527-60 102 _ 12/6/05, 8:07 AM
÷
Para borrar una receta favorita: / ...................
Favorites
1. Oprima la tecla "Favorites" [Favoritos). _ On / Off j
2. Oprima la flecha para navegarentre las opciones.
3. Seleccionela opci0n BORRARRECETA.
4. Busque la recetaque deseaborrar.Esposibleque debaoprimir
las teclasflechadasparaencontrar la receta.
5. Elcontrol le preguntardsi estdseguro deque deseaborrar esa
receta. SeleccioneSI o NO.
6. Optima la tecla "Favorites" parasalir del menQde recetas
favoritas.
Parasalir del ment3de recetasfavoritasen cualquier momento,
optimala tecla "Favorites".
÷
"Setup" (Ajuste)
1. Optimala tecla "Setup".
// ............. • •\
/ Setup
......On I Off j
\ ........... /
2. Usela flecha para desplazarsepor las opcionesde "Setup".
3. Seleccionela opci0n deseadausandolasteclas rdpidas.
Nora." Parasalir de una pantallasin hacer ningOncambio,optima
la tecla "Setup". La pantallavolveraa desplegarla horadel dfa. I
"Clock" (Reloj)
Usela opci0n"Clock" para:
• Programarla horadel dfa.
• Programarel dfa de la semana.
• Seleccionar"AM" o "PM" [modo de 12horassolamente).
• Seleccionarun formato de 12 o 24 horaspara el reloj.
• Apagar el reloj.
Idioma
Elidiomade las pantallaspuedeset programadoen inglds,francc!so
espa_ol. Paracambiar el idioma de inglOsa otro idioma:
1. Optima latecla "Setup".
2. Elija IDIOMA.
3. Use la flecha para pasara la pantallasiguientede ser necesario.
4. Seleccioneel idiomadeseado.
5. Optima latecla "Setup" parasalir del menOde configuraciOn.
"Auto Convect" (ConvecciOn autom_tica)
(modelos selectos)
Elhomo viene programadodesde laf_brica parala conversion
autom_ticade convecci0n.
"Auto ConvectConversion"reduceautomdticamentela temperatura
programadaen 15° C [25° F) para lasfunciones"ConvectBake"
[Horneadopor convecci0n)y "ConvectPastry"[Pastelerfapor
convecci0n).
Parala funci0n "ConvectRoast" [Asadopor convecci0n)el control le
advertir_cuando hayatranscurridoel 75%deltiempo de asado
programadopara quaverifique el grado decocci0n de los alimentos.
Notas:
Cuando use "Convect Bake" [Horneado por convecci0n) y
"Convect Pastry" [Pasteleria por convecciOn) con la opci0n "Auto
Convect Conversion" (ConversiOn automdtica de convecci0n)
apagada, reduzca la temperatura programada en 25° F 05°C).
Si se usa la funciOn "Convect Roasting" [Asado por convecciOn)
con la opciOn "Auto Convect Conversion" [ConversiOn
autom_tica de convecciOn) apagada, verifique el alimento
cuando haya transcurrido el 75% del tiempo tradicional.
Para desactivar la conversi6n autom_tica
de convecci6n:
1. Oprima la tecla "Setup".
2. Seleccionela opci0nCONVECCAUTOM.
3. SeleccioneDESACTIV.
// ........ \
i Setup
On/Offj
/
4,
Para reactivar la conversi6n autom_tica
de convecci6n:
1. Oprima la tecla "Setup".
2. Seleccionela opci0nCONVECCAUTOM.
3. SeleccioneACTIV.
Oprima latecla "Setup" parasalir del menQde configuraci0n.
Setup
On/Off /
\ /
4. Oprima la tecla "Setup" parasalir del ment]de configuraci0n.
÷
102
8113P527-60 103 _ 12/6/05, 8:07 AM
÷
÷
CIF
Laescala detemperaturadesplegadapuedeser cambiadade
Fahrenheita Celsius.
Para cambiar la escala:
1. Oprima la tecla "Setup" (Ajuste).
2. Use la flecha para pasara la pantallasiguiente.
3. SeleccioneC/F.
/ "x
/ Setup
On/Off/
/
4. Seleccionela escalade temperaturadeseada.
5. Optima latecla "Setup" parasalir del men0 de configuraci6n.
Mode sab tico
Elhorno est_programatic para apagarsedespu_sde 12horassi
usted Io deja accidentalmenteencendido.Elmodosabdticotiene
prioridad sobreestecierre automdticode 12 horusy puedeser
programadoparaque se activeautom_ticamenteo puedeset
programatic manualmentecomo se desee.
$61opuedeusar la fuci0n "Bake" (Hornear)o "Cook/Hold Bake"
[Horneadocon cocinary mantenercaliente)cuando el homo est_ en
el modosab_tico. Todaslasdemds funcionesson desactivadas.Si
cualquier funci6n que nosea "Bake" o "Cook/HoldBake" cuando
comienzael modosab_tico,dicha funci6n serdanulada.
Para activar el mode sab_tico:
1. Oprimala tecla"Setup" (Ajuste).
2. Oprimala flechapara navegarentre las opciones.
3. Seleccionela opciOnSABATICO.
4. SeleccioneAUTO o MANUAL.
On / Off ji
"Auto" (Autom_itico)le pedir_ que programelatemperaturade
horneadoel viernesalas 2:00p.m.y permanecer_ien modo
sab_ticopor 33 horas.MODOSABATACTse despliegaen la
pantallapor 90 minutos.Si deseausar "Bake" o "Cook/Hold
Bake" duranteel modo sab_itico,debeprogramarlasen este
momentoantesde que el modosab_iticoautom_tico est6
activado.
"Manual" co[ocaal homo en modo sab_ticoinstant_ineamente
durante72 horus.SABA,TICOy MODOSABATACT
aparecer_inen la pantalladurante cinco minutos. Si
deseausar "Bake" o "Cook/HoldBake" duranteel modo
sab_itico,debeprogramarlasen estemomento antesde que el
modosab_tico manualest6activado.
5. SeleccioneAOTIVo DESACTIV.
6. Oprimala tecla"Setup" para salir del men0 de configuraci6n.
Para anular el mode sub,rico:
Optimay mantengaoprimida la tecla"Setup" durante cinco
segundos.Elmodode horneadopuedeser anuladooprimiendo la
tecla "CANCEL" (Anular) durante el modo sab_itico.
Notas:
El homo no debeestar en uso para poder programarel modo
sab_tico.
El modosab_iticono puedeactivarsesi eltecladoo la puerta
est_nbloqueados.
Si el homo est_funcionando cuando el modosab_tico
comienza,noescuchar_se_alessonoras.
Todoslosavisos,mensajesy se_alessonorasestar_in
desactivadoscuando el modo sab_ticoest6activado.
Si deseautilizar la luz del homo en modo sab_itico,la misma
debeestar encendidaantesde activar estafunci6n.
Elciclo de autolimpiezay el bloqueoautom_ticode las puertas
no funcionan durante el modo sab_tico.
La temperaturade horneadopuede ser cambiadadurante el
modo sab_iticoactivo.Simplementeoprima latecla "Bake" y
luego introduzcalatemperaturadeseadausando lasteclas de
programaci6nr_pida.
Si oprimela tecla "CANCEL" se detendr_iel ciclo de
horneado,peroel control permanecer_en modosab_tico.
"Temp Adjust" (Ajuste de la temperatura)
Lastemperaturasdel homo son cuidadosamenteprobadasen la
f_brica. Esnormal notar unadiferencia entre la temperaturade
horneadoo en el doradoentre un homo nuevoy un homo usado.
A medidaque se usanlos hornos,la temperaturade los mismos
puedecambiar.
Ustedpuedeajustar latemperaturadel homo si consideraque el
mismono est,1horneandoo dorandocorrectamente. Paradecidir
cuantodebe cambiarla temperatura,programela temperaturadel
homo a 15° C (25° F) m_salta o m_sbaja que la temperatura
indicadaensu receta y luego hornee. Los resultadosdel primer
horneadole dar_n una mejor idea de cu_intodebeajustar la
temperatura.
Para ajustar la temperatura del homo:
1. Oprimala tecla"Setup".
2. Oprimala flechapara navegarentre las opciones.
3. SeleccioneAJUSTARTEMP.
/ \
/ Setup
On/Off/
........ ,/
4,
5.
Programelatemperaturadeseadausandolasteclas numc!ricas.
Seleccione"+/=" paraindicar un aumentoo reducci6nde la
temperatura. El cambiode temperaturase despliegaen la parte
superiorde la ventana.
/
Oprimala tecla"Eater" [Acepta0 o esperetres Setup
segundosparaaceptar los cambios. On / Off
\ ....... ,/
Optima la tecla "Setup" parasalir del men&
Latemperaturadel homo no necesitaser reajustadasi hay una falla
o interrupci6n de la energ[ael_ctrica.
Lastemperaturasde asadoy de autolimpiezanose pueden ajustar.
÷
103
8113P527-60 104 _ 12/6/05, 8:07 AM
÷
÷
208/240 V
Paramejoresresultadoscuandousa la funciOn"Bake" (Hornear),el
homo puedeser cambiado de240V a 208V si su hogar usa208V.
Para programar el homo a 208 V: _...........................,
1. Oprima la teda "Setup" (Ajuste). Setup
' On/Offi'
2. Optima laflecha paranavegarentre las opciones. .............
3. Seleccione 208/240 V.
4. Seleccione208V o 240V usandoInsteclas r@idas.
5. Optima latecla "Enter" (Aceptar)para guardarlos cambios.
6. Optima latecla "Setup" parasalir del men&
Tonos (Bips)
Sepuede ajustarel nt_meroy el volumen de InsseBalessonoras
emitidasal fin de la cocciOny al fin de la funciOndel temporizador.
Para ajustar las se_ales sonoras: _..............
/ Setup ,
On/Off '
\ ............ /
1. Optima latecla "Setup".
2. Optima laflecha paranavegarentre Ins opciones.
3. Seleccionela opciOnSONIDOS.
Para cambiar las se_ales sonoras al fin
de la cocciOn:
1.
2.
3.
4.
Signlos pasos 1 a 3 de la funciOn"Tones"[ronos) [vea arriba].
SeleccioneSONIDOS COCO.
Optima la flecha paranavegarentre las opciones.
Seleccione1=30 MIN para oir una serialsonoracada treinta
segundos.
O
Seleccione1=60 MIN para oir una sepalsonoracada sesenta
segundos.
O
Seleccione1 BIP para oir s61ouna sepalsonoraal final de la
cocciOn.
5. Optima latecla "Setup" parasalir.
Para cambiar las se_ales sonoras del temporizador:
1. Sign los pasos1 a3 de la funciOn"Tones"[vea arriba].
2. SeleccioneSONIDOS TEMPOR.
3. Optima laflecha paranavegarentre Ins opciones.
4. Seleccione2=30 SECparao[r dos se_alessonorascadatreinta
segundos.
O
Seleccione2=60 SECparaoff dos se_alessonorascadasesenta
segundos.
O
Seleccione1 BIP para oir sOlouna sepalsonoraal final del tiempo
programado.
5. Optima latecla "Setup" parasalir.
Para cambiar el volamen de las se_ales sonoras:
1. Sign los pasos1 a3 de la funciOn"Tones"[vea arriba].
2. Optima laflecha paranavegarentre Ins opciones.
3. SeleccioneVOLUMEN.
4. SeleccioneALTOparael volumenm4s alto.
O
SeleccioneMEDiANO para un nivel devolumen intermedio.
O
SeleccionesBAJO para el vokJmenm4s bajo.
5. Optimala tecla"Setup" parasalir.
"12 Hr Shutoff" (Apagado despues de 12 horas)
El homo se apagar4autom4ticamentedespuc!sde 12horasde
funcionamientosi Io dejaencendidoaccidentalmente.
Para desactivar esta caracteristica:
1. Optima la tecla "Setup".
2. Oprimala flechapara navegarentre las opciones.
3. SeleccioneAPAGADO DE 12H.
i Setup
On / Off
............. /
3. SeleccioneACTIV o DESACTIVusandoIns teclasr@idas.
4. Optimala tecla"Setup" parasalir.
Energy Saver (Ahorro de energia)
Paraahorrarenerg[a,la pantalla puedeserconfiguradapara apagarse
si no est_ en uso.
Para programar la caracteristica de ahorro de energia:
/, ...........
1. Oprimala tecla"Setup". Setup
2. Optimala flechapara navegarentre las opciones. On / Off/
3. SeleccioneAHORROENERGJA.
4. SeleccioneACTIVo DESACTIVusandoInsteclasr@idas.
5. Optimala tecla"Setup" parasalir.
Oprimacualquier tecla paraactivarel indicador.
"Service" (Servicio)
Esta4readel control del homo despliegael n0merogratis de atenciOn
al cliente de Jenn-Air. / ......................\
1. Optima la tecla"Setup". / Setup
On/Off,
x /
2. Oprimala flechapara navegarentre Insopciones. .............
3. Seleccionela opciOnSERViC[O.
4. Optimala tecla "Setup"para salir.
"Demo" (DemostraciOn)
Cuandose seleccionala funciOn"Demo" ustedver_una peque_a
presentaciOndescribiendoInscaracter[sticasde su nuevaestufa
Jenn-Air.
1. Optima la tecla "Setup".
2. Optimala flechapara navegarentre Ins opciones.
3. Seleccionela opciOnDEMO.
4. SeleccioneACTIVo DESACTIVusandoInsteclasr@idas.
5. Optimala tecla"Setup" parasalir.
104
/ Setup
, On / Off /
÷
8113P527-60 105 _ 12/6/05, 8:07 AM
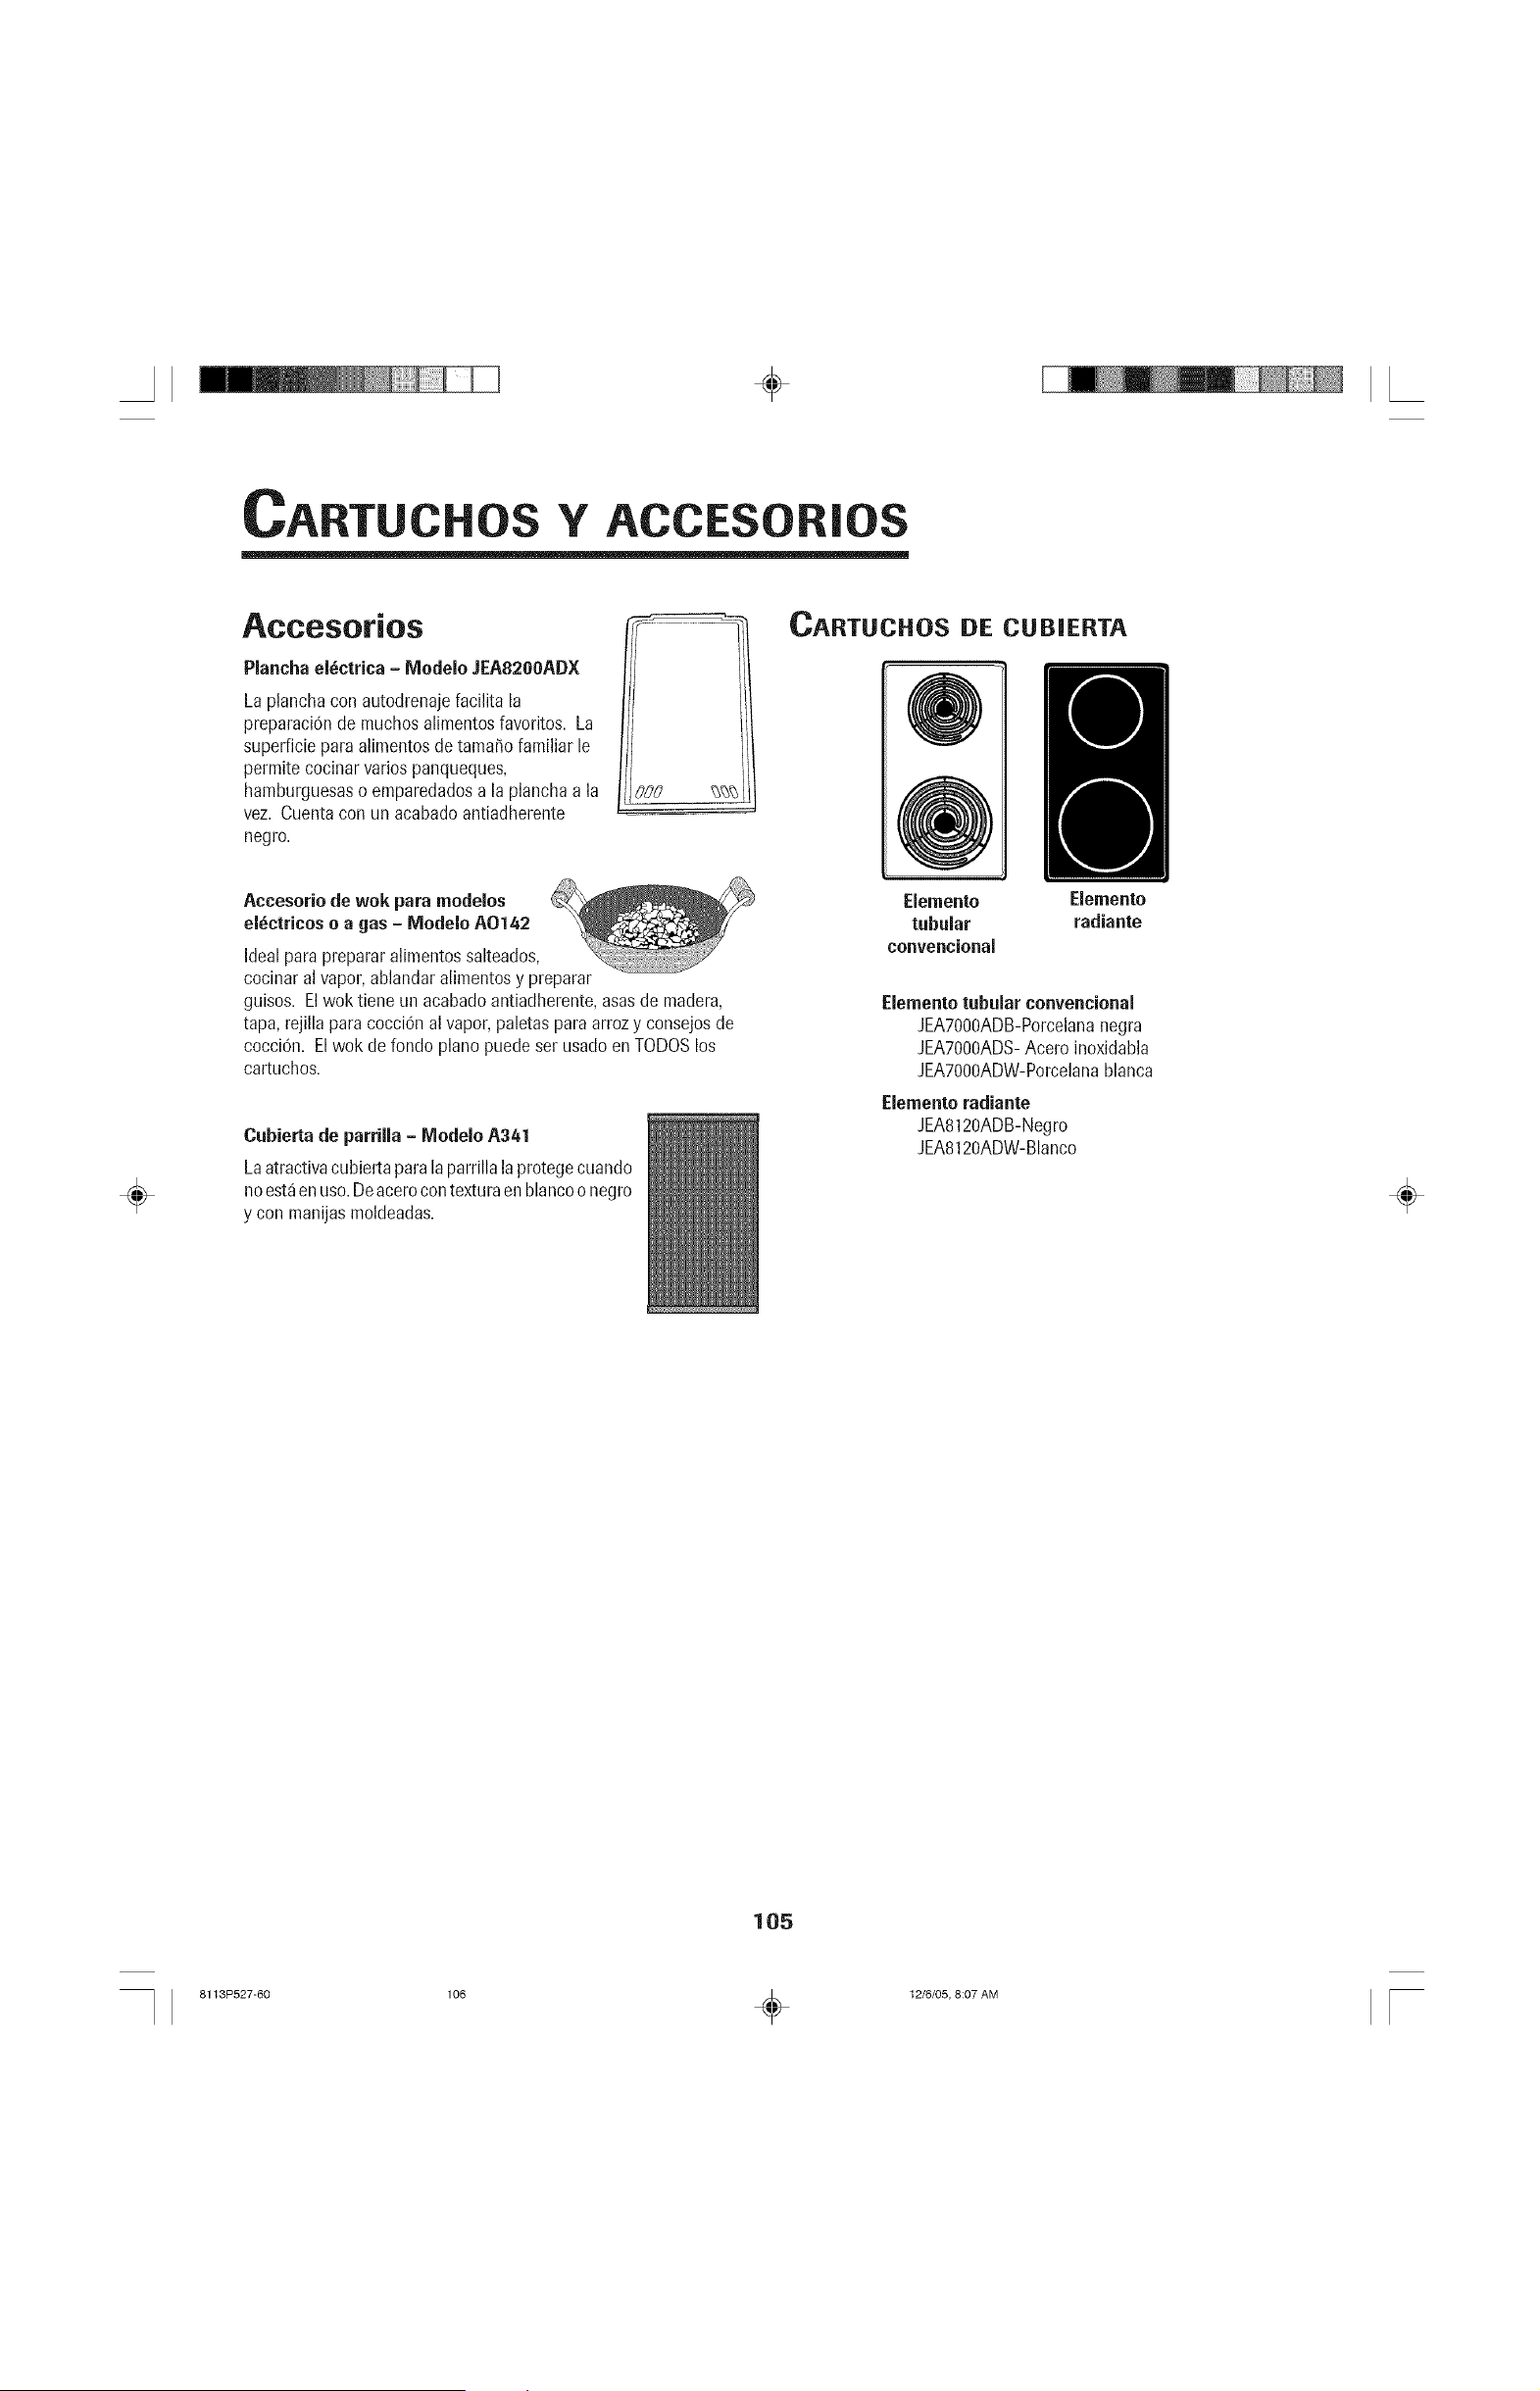
÷
CARTU Y
Accesorios
Plancha el_ctrica - Modelo JEA8200ADX
La planchacon autodrenajefacilita la
preparaci6nde muchosalimentosfavoritos. La
superficiepara alimentosdetama_ofamiliar le
permitecocinar variospanqueques,
hamburguesaso emparedadosa la planchaa la
vez. Cuentacon un acabadoantiadherente
negro.
CARTUCHOS DE CUB|ERTA
÷
Accesoriode wok para modeios
ei_ctricoso a gas - Modelo A0142
Ideal parapreparar alimentossalteados,
cocinaral vapor,ablandaralimentosy preparar
guisos. Elwok tiene un acabadoantiadherente,asasde madera,
tapa,rejilla paracocci6n al vapor,paletasparaarrozy consejosde
cocci6n. El wok de fondo pianopuede ser usadoen TODOSlos
cartuchos.
Cubierta de parrilla - Modelo A341
Laatractivacubiertaparala parrillala protegecuando
noest_en use.Deacerocontexturaen blancoo negro
y con manijasmoldeadas.
Elemento Elemento
tubular radiante
convencional
Eiementotubular conveneional
JEA7000ADB-Porcelananegra
JEAT000ADS-Acero inoxidabla
JEAT000ADW-Porcelanablanca
Elementoradiante
JEA8120ADB-Negro
JEA8120ADW-Blanco
÷
105
8113P527-60 106 _ 12/6/05, 8:07 AM

÷
÷ ÷
106
8113P527-60 107 _ 12/6/05, 8:07 AM
ARANTiA Y S
Lo que no cubren estas garantias:
1. Situacionesy dafios resultantesde cualquierade las siguienteseventualidades:
a. Instalaci6n,entregao mantenimientoinapropiados.
b. CualquierreparaciOn,modificaci0n,alteraci0no ajusteno autorizadopor
el fabricante o por un tc!cnicode servicioautorizado.
c. Mal uso,abuso,accidentes,uso irrazonableo hechosfotuitos.
d. CorrienteelOctrica,voltajeo suministroincorrectos.
e. Programaci6nincorrectade cualquierade los controles.
2. Lasgarantiasquedanhulas si los n_rnerosde serieoriginaleshan sido retirados,
alteradoso no son f_icilmentelegibles.
3. Bombillas.
4. Losproductoscompradosparauso comercialo industrial.
5. Elcosto del servicioo Ilamadade serviciopara:
a. Corregirerroresde instalaciOn.
b. Instruir al usuariosobre el usocorrecto del producto.
c. Transportarelelectrodomc!sticoal establecimientode servicioy el retornodel
productoal cliente.
6. Losdafiosconsecuenteso incidentalessufridos por cualquier personacomo resultado
del incumplimiento de estagarant[a.
Enalgunosestadosno se permite la exclusiono lirnitaciOnde dafiosconsecuenteso
incidentales,porIo tanto la limitaciOno exclusionanterior puedeno aplicarseen su caso.
Si necesita servicio
Prirneroleala secciOnde Iocalizaci6ny soluci6nde averfasen su gala de usoy cuidado
o Ilame al departamentode atenciOnalcliente de MaytagServices,LLC,Jenn-Air al
1-800-JENNAIR(1-800-536-6247)en los EstadosUnidosy Canad&
Para obtener servicio bajo la garantia
Paraubicar una compafi[ade servicioautorizadoerrsu Iocalidad,pOngaseerrcorrtacto
con el distribuidor dondeadquiri6 su electrodomOsticoo Ilameal departamentode
atenciOnalcliente de MaytagServices,LLC,Jenn-Air.Si no recibeserviciosatisfactorio
bajola garantfa,pot favor Ilameo escribaa:
MaytagServices,LLC
Attn: CAIR:_Center
P.O.Box2370,Cleveland,TN37320-2370
Enlos EstadosUnitiesy Canad_ liame al 1-8OO-JENNAIR(1=800=536=6247)
_Ota: Cuandose pongaen contactocon el departamentode atenciOnal
clientede Maytag Services,LLC,Jenn-Air acercade un problema,por favor
incluyala siguienteinformaciOn:
a. Su hombre,direcciOny nOmerodeteldono.
b. Los n8merosde modeloy de serie de su electrodomOstico.
c. Nombre y direcci0nde su distribuidory la fecha decompradel electrodomc!stico.
d. Una descripciOnclara del problemaque est_experimentando.
e. Pruebade compra.
Lasgu[asde usoy cuidado,losmanualesde servicioy la informaci0nsobrelas
piezaspuedensersolicitadasal departamentode atenci0nal cliente de
Maytag Services,LLC,Jenn-Air.
Form No. B/12/05 Part No. 8113P527 60 Rev. 1 @2005 Maytag Appliances Sales Co. Litho U.S.A.