Loading ...
Loading ...
Loading ...
10 ENGLISH
2. Replace the standard-equipped pad with an
optional hook-and-loop pad.
3. Re-tightenthescrewsrmlytosecurethehook-
and-loop pad.
1
3
2
Fig.14
►1. Abrasive paper 2. Pad 3. Dust-suction holes
4. Remove all dirt and foreign matter from the hook-
and-loop pad.
5. Attach a sheet of optional hook-and-loop abrasive
paper to the pad, aligning the dust-suction holes in the
paper with those in the pad.
1
2
3
Fig.15
►1. Abrasive paper 2. Pad 3. Dust-suction holes
6. Toremovetheabrasivepaper,peelitofromthe
edge.
Using triangular/rectangular abrasive
paper
Optional accessory
CAUTION: Make sure to install a hook-and-
loop pad correctly and securely. A loose attach-
ment will run out of balance and cause an excessive
vibration resulting in loss of control.
CAUTION: Be sure that a hook-and-loop pad
and abrasive paper are aligned and securely
attached.
CAUTION: Only use hook-and-loop abrasive
papers. Never use pressure-sensitive abrasive
papers.
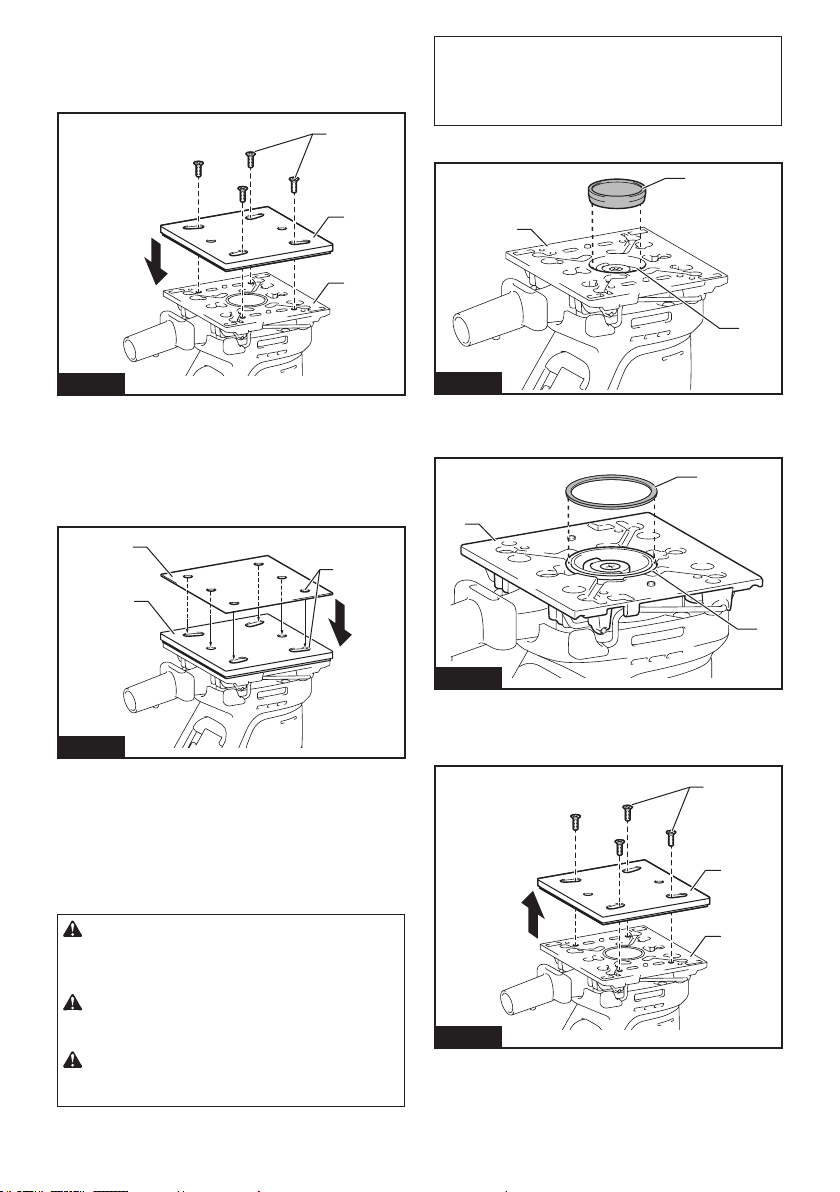
NOTICE: The cap or the O-ring may come out of
the sanding base while replacing the pad. Be sure
to set the cap or the O-ring back in the circular
hole or the circular groove around the center of
the base before installing the optional pad.
DBO480, DBO481
2
1
3
Fig.16
►1. Cap 2. Sanding base 3. Circular hole
DBO482
2
1
3
Fig.17
►1. O-ring 2. Sanding base 3. Circular groove
1. Loosen and remove the four screws securing the
pad to the sanding base.
1
3
2
Fig.18
►1. Screws 2. Pad 3. Sanding base
2. Replace the standard-equipped pad with a trian-
gular/rectangular pad.
Loading ...
Loading ...
Loading ...