Loading ...
Loading ...
Loading ...
15
3. Put the cooker hood on the hood bracket or on the two screws.
Tighten the two screws if needed. See 9.
4. Adjust the position and fix the cooker hood body with the safety
screws (2pcs ST4*30mm). See 10.Note: The 6mm holes for these
two screws are positioned on the back of the cooker hood. They are
accessible from underneath when the grease filters are removed.
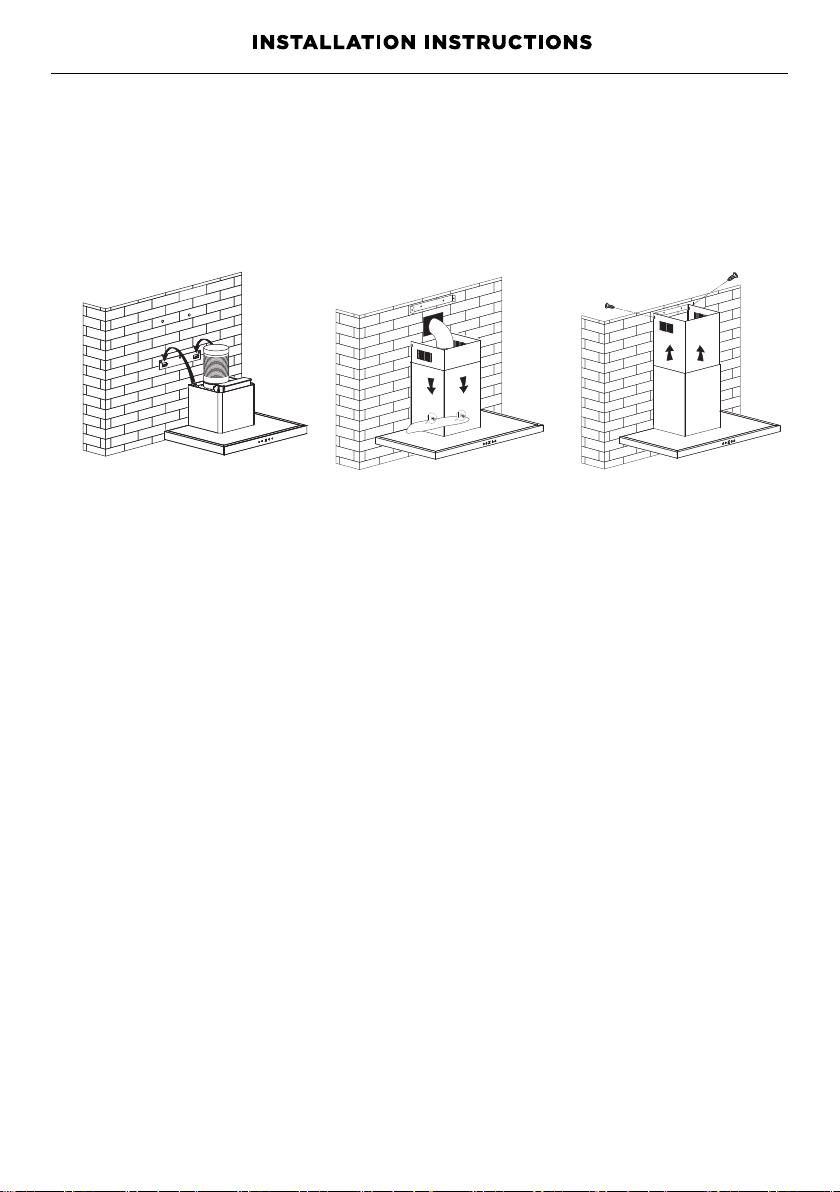
5. Extend the ducting through the hole to the external vent.
6. Plug the range hood in and turn the power on.
7. Adjust the height of the inside chimney to the position of the inside
chimney bracket and fix it with screws (2pcs ST4*8mm). See 11.
Recirculation Installation only
Install the recirculation
T-shaped plastic outlet
1. Use 4 pcs ST3*12 mm screws to attach the installation bracket onto the
T- shaped plastic outlet. See 12.
2. Adjust the width of the T-shaped plastic outlet to the width of the inside chimney
and secure it using 2p cs ST3*12mm screws. See 13.
3. Use 2pcs ST4*8mm screws to fix the T-shaped plastic outlet to the Inside chimney
bracket. See 13.
4. Fix the Insi de chimney bracket to the wall with 2pcs ST4*30mm screws. Use
wall plug s if required . See 14.
5. Secure the ducting to the inlet of the T-shaped plastic
6. Adjust the heig ht of the inside chimney a nd secure it to the Inside chimney
bracket wi th 2pcs ST4*8m m screws. See 15, 16 .
pic
pic
pic
pic
pic
pic
pic
pic
Pic 9
Pic 10
Pic 11
outlet.
(Accessory available)
Loading ...
Loading ...
Loading ...