Loading ...
Loading ...
Loading ...
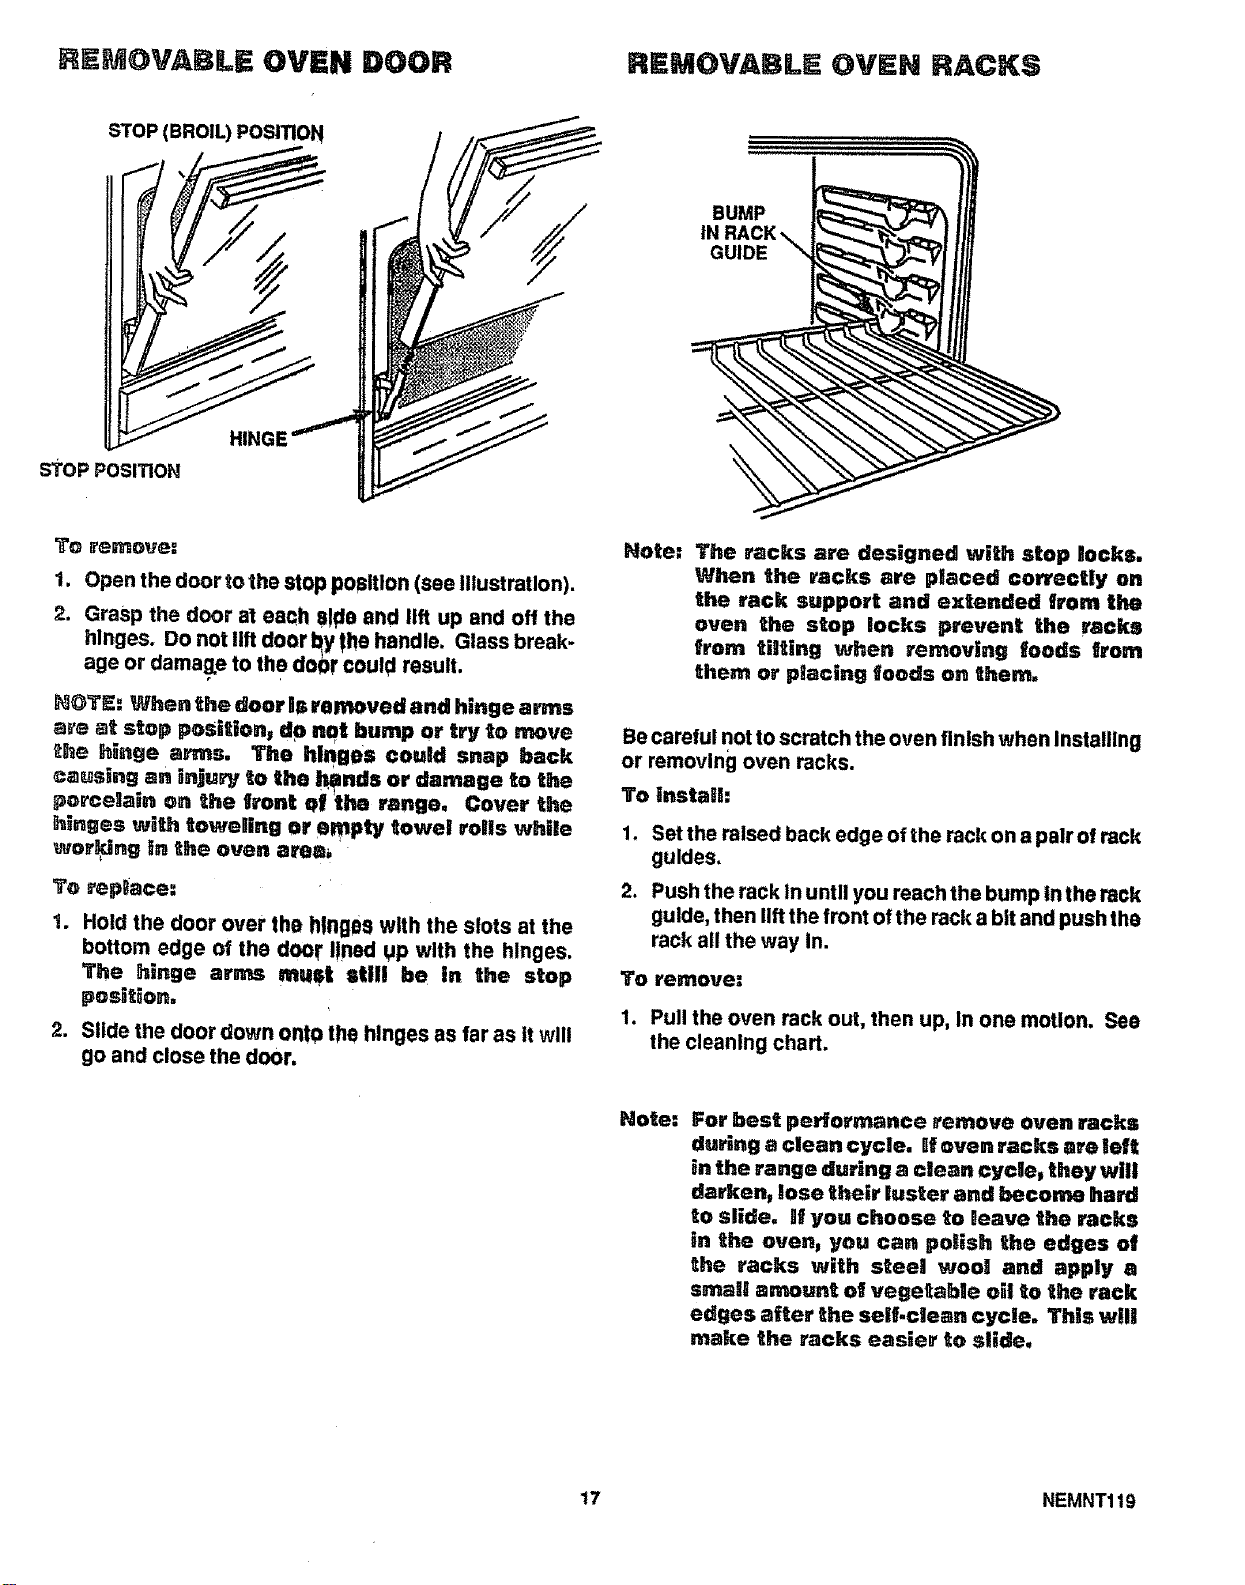
STOP(BROIL) POSITION
sToP POSITIOH
_'O reBnove,"
1. Open the door to the stop positlon (see Illustration).
2. Grasp the door at each slde end lift up and oft the
hinges. Do not lift door l_y|he handle. Glass break-
age or damage to the door could result.
MOTE: When the door Blsremoved and hinge arms
are at stop position, do not bump or try to move
_he hinge arms. The hinges could snap hack
causing an inju_ to the h_ands or damage to the
porcelain on the front O| the range, Cover the
hinges watJ_ toweling or empty towel rolls while
wor_ng In the oven aLq_a_
To replace:
_m
Hold the door over the hlngc)a with the slots at the
bottom edge o_ the doolr lined UP with the hinges.
The hinge arms must still be in the stop
position.
2. Slide the door down onto the hinges as far as it will
go and close the door.
Mote: The racks are designe ,_ with stop locks.
When the racks are placed co_reoUy on
the rack support and extemled item the
oven the stop locks prevent the racks
from tilting when removing foods from
them or placing foods on them,
Be careful not to scratch the oven finish when Installing
or removing oven racks.
To install:
2.
Set the raised back edge of the rack on s pair o! rack
guides.
Push the rack In until you reach the bump In the rack
guide, then lift the front of the rack a bit and push the
rack all the way in.
To remove:
1. Pull the oven rack out, then up, In one motion. See
the cleaning chart.
Note:
For best performance remove oven racks
during a clean cycle, nfoven racks are left
in the range during a clean cycle_ they will
darken, lose their luster and become hard
to slide, if you choose to leave the racks
in the oven, you can polish the edges of
the racks with steel wool and apply a
small amaunt of vegetable oil to the rack
edges after the self.ogean cycle, This will
make the racks easier to slide,
17 NEMNT119
Loading ...
Loading ...
Loading ...