Loading ...
Loading ...
Loading ...
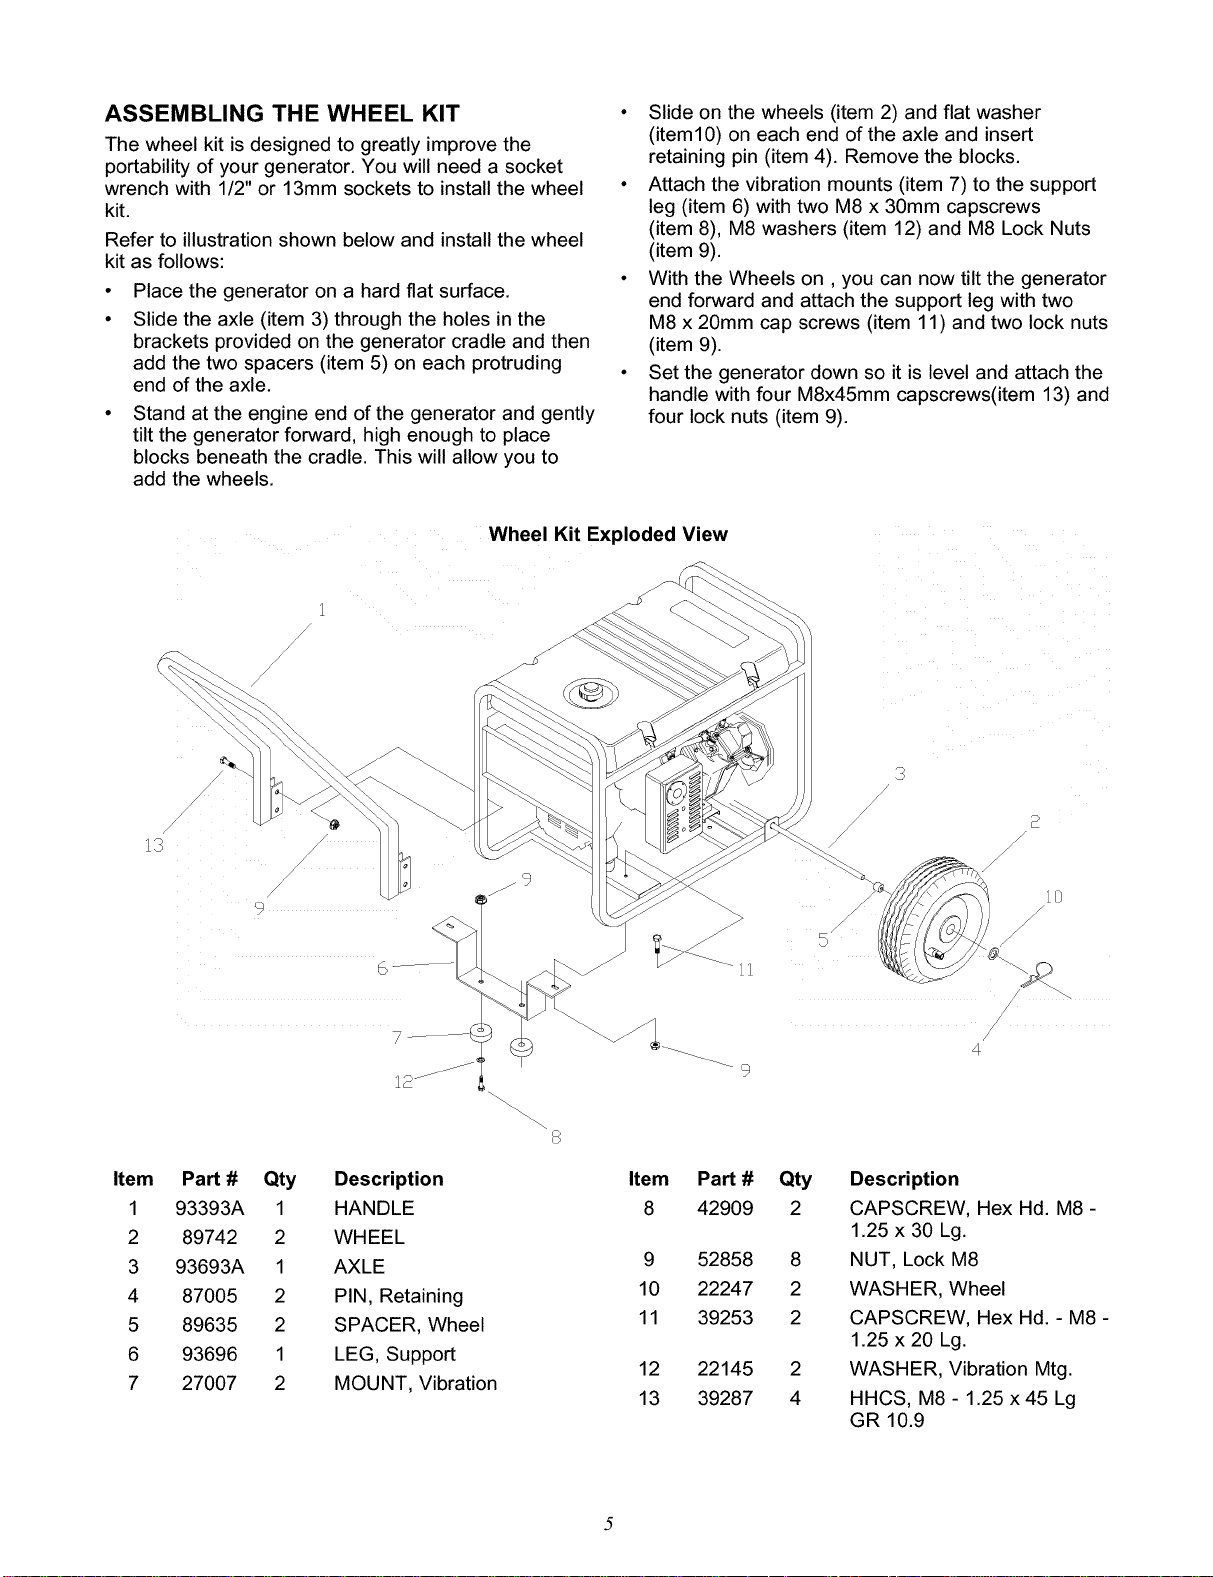
ASSEMBLING THE WHEEL KIT
The wheel kit is designed to greatly improve the
portability of your generator. You will need a socket
wrench with 1/2" or 13mm sockets to install the wheel
kit.
Refer to illustration shown below and install the wheel
kit as follows:
• Place the generator on a hard flat surface.
• Slide the axle (item 3) through the holes in the
brackets provided on the generator cradle and then
add the two spacers (item 5) on each protruding
end of the axle.
• Stand at the engine end of the generator and gently
tilt the generator forward, high enough to place
blocks beneath the cradle. This will allow you to
add the wheels.
• Slide on the wheels (item 2) and flat washer
(item10) on each end of the axle and insert
retaining pin (item 4). Remove the blocks.
• Attach the vibration mounts (item 7) to the support
leg (item 6) with two M8 x 30mm capscrews
(item 8), M8 washers (item 12) and M8 Lock Nuts
(item 9).
• With the Wheels on, you can now tilt the generator
end forward and attach the support leg with two
M8 x 20mm cap screws (item 11) and two lock nuts
(item 9).
• Set the generator down so it is level and attach the
handle with four M8x45mm capscrews(item 13) and
four lock nuts (item 9).
Wheel Kit Exploded View
Item
1
2
3
4
5
6
7
/
13
/
/
/
9
6
9
Pan # Qty
93393A 1
89742 2
93693A 1
87005 2
89635 2
93696 1
27007 2
Description
HANDLE
WHEEL
AXLE
PIN, Retaining
SPACER, Wheel
LEG, Support
MOUNT, Vibration
Item
8
9
10
11
12
13
Pan #
42909
52858
22247
39253
22145
39287
Qty
2
8
2
2
2
4
!
4
Description
CAPSCREW, Hex Hd. M8 -
1.25 x 30 Lg.
NUT, Lock M8
WASHER, Wheel
CAPSCREW, Hex Hd. - M8 -
1.25 x 20 Lg.
WASHER, Vibration Mtg.
HHCS, M8 - 1.25 x 45 Lg
GR 10.9
Loading ...
Loading ...
Loading ...