Loading ...
Loading ...
Loading ...
en Trouble shooting
24
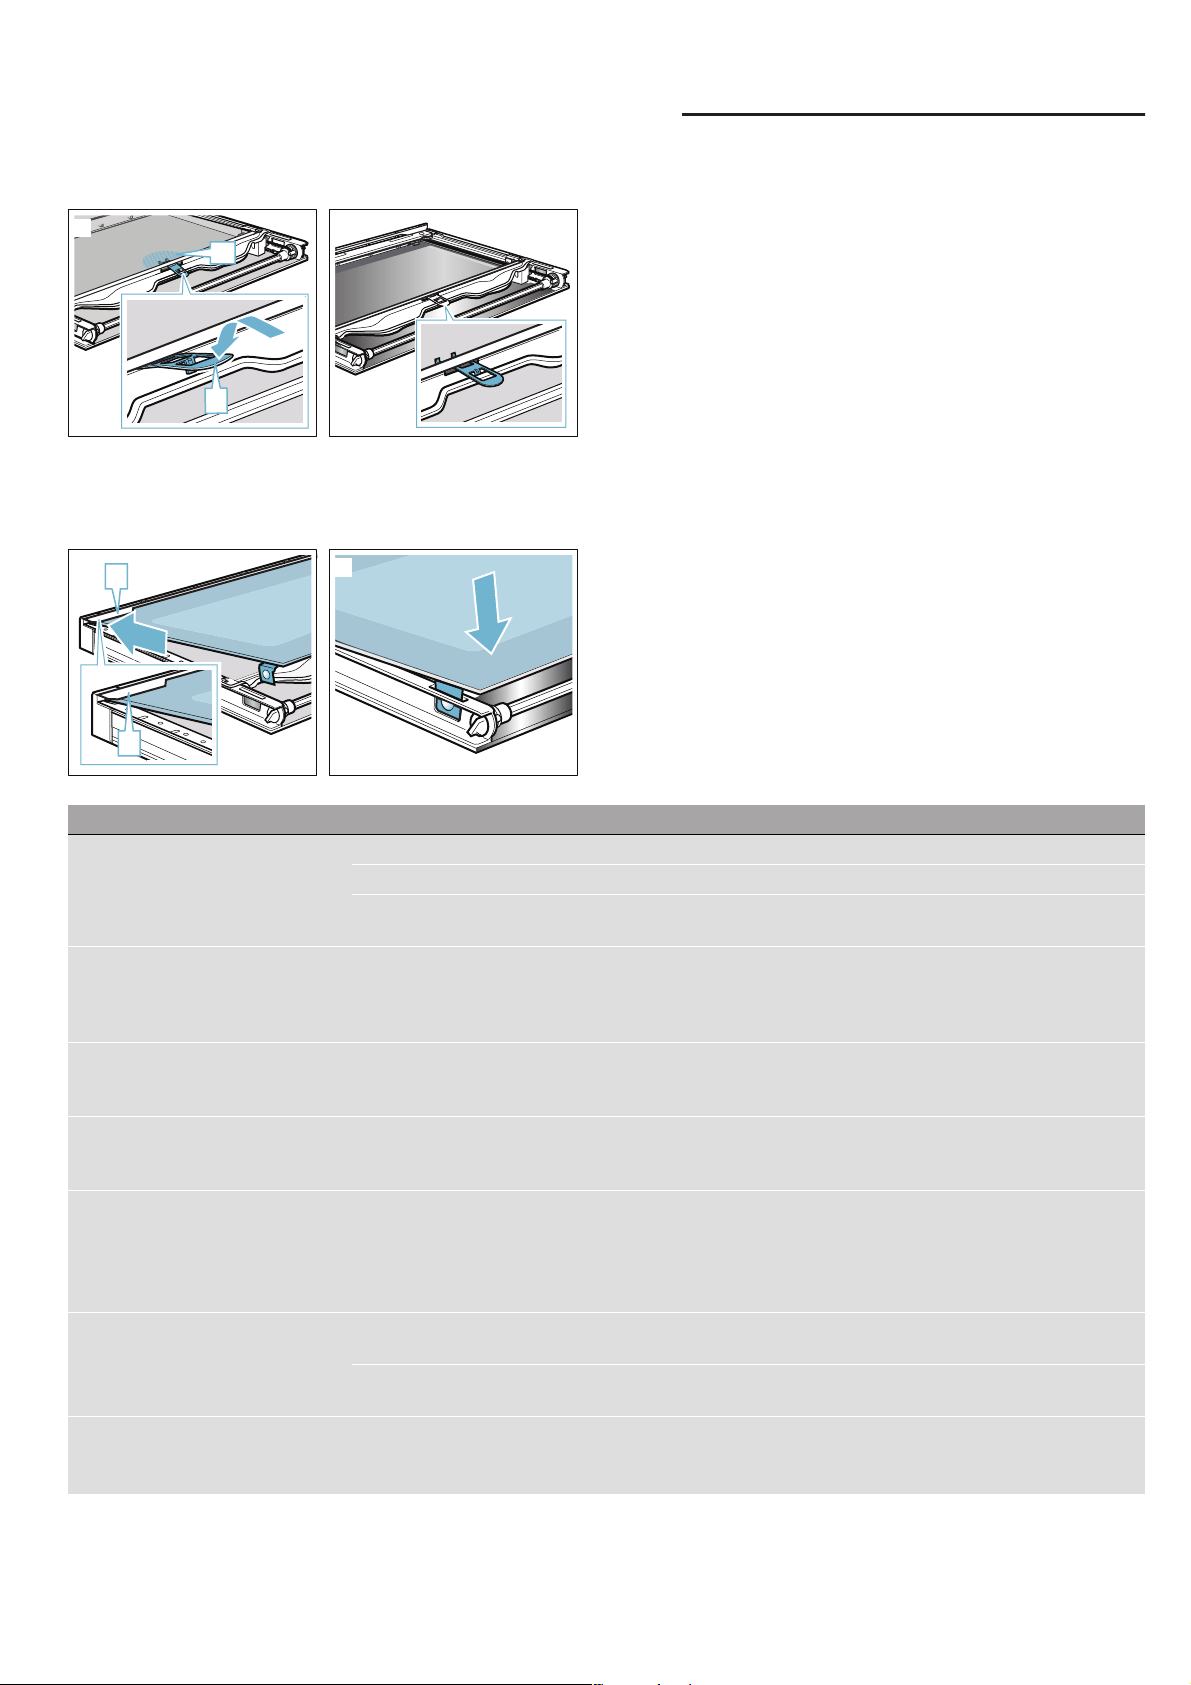
5. Push the intermediate panel downwards in the ƒ
area, insert the „ holder at an angle and push down
until it locks into place (Fig. &).
The holder is inserted (Fig. ').
6. Insert the inner glass into the mounting rail … at an
angle towards the back (Fig. ().
7. Push the inner glass downwards until it locks into
place (Fig. )).
3Trouble shooting
Trouble shooting
If a fault occurs, there is often a simple explanation.
Before calling the after-sales service, please refer to the
fault table and attempt to correct the fault yourself.
Tip: If a meal does not turn out exactly as you wanted,
refer to the "Tested for you in our cooking studio"
section.Here, you will find plenty of cooking tips and
notes.
:Warning – Risk of electric shock!
Incorrect repairs are dangerous. Repairs may only be
carried out and damaged power cables replaced by
one of our trained after-sales technicians. If the
appliance is defective, unplug the appliance from the
mains or switch off the circuit breaker in the fuse box.
Contact the after-sales service.
Fault table
:Warning – Risk of electric shock!
■ Work on the appliance electronics may only be
performed by a specialist.
■ Always disconnect the appliance from the power
supply when work is carried out on the electronics.
Switch off the circuit breaker or remove the fuse
from your household fuse box.
--------
F
E
G
G
Fault Possible cause Notes/remedy
The appliance does not work The plug is not plugged into the mains Connect the appliance to the power supply
Power cut Check whether other kitchen appliances are working
The circuit breaker is faulty Check in the fuse box to make sure that the fuse for
the appliance is OK
After switching on an operating mode,
a message is shown on the display
which indicates that the temperature
is too high
The appliance has not cooled down sufficiently Allow the appliance to cool down and switch the oper-
ating mode on again
The appliance cannot be switched on;
the 1 symbol is shown on the dis-
play
The automatic childproof lock is activated Press and hold the 0 touch button until the 1 sym-
bol goes out
The appliance cannot be operated
when it is switched on; the 1 symbol
is shown on the display
The childproof lock is activated Press and hold the 0 touch button until the 1 sym-
bol goes out
The appliance does not heat up; 6 is
shown on the display
Demo mode is activated in the basic settings Disconnect the appliance from the mains for approx.
10 seconds (switch off the circuit breaker in the fuse
box) and then deactivate demo mode in the basic set-
tings within 3 minutes
~ "Basic settings" on page 16
The appliance door cannot be
opened; the 5 symbol is shown on
the display
The appliance door is locked until the cooking com-
partment has cooled down
Wait until the 5 symbol goes out
The childproof lock locks the appliance door Press and hold the 0 touch button until the 5 symbol
goes out; adjust the childproof lock setting
"EXXXX" appears on the display, e.g.
"E0111"
Technical problem Switch the appliance off and back on again
If the message appears again, call the after-sales serv-
ice
Loading ...
Loading ...
Loading ...