Loading ...
Loading ...
Loading ...
Rails en
21
pRails
Rails
With good care and cleaning, your appliance will retain
its appearance and remain fully functional for a long
time to come. This will tell you how to remove the
shelves and clean them.
Detaching and refitting the rails
:Warning – Risk of burns!
The rails become very hot. Never touch the hot rails.
Always allow the appliance to cool down. Keep children
away from the appliance.
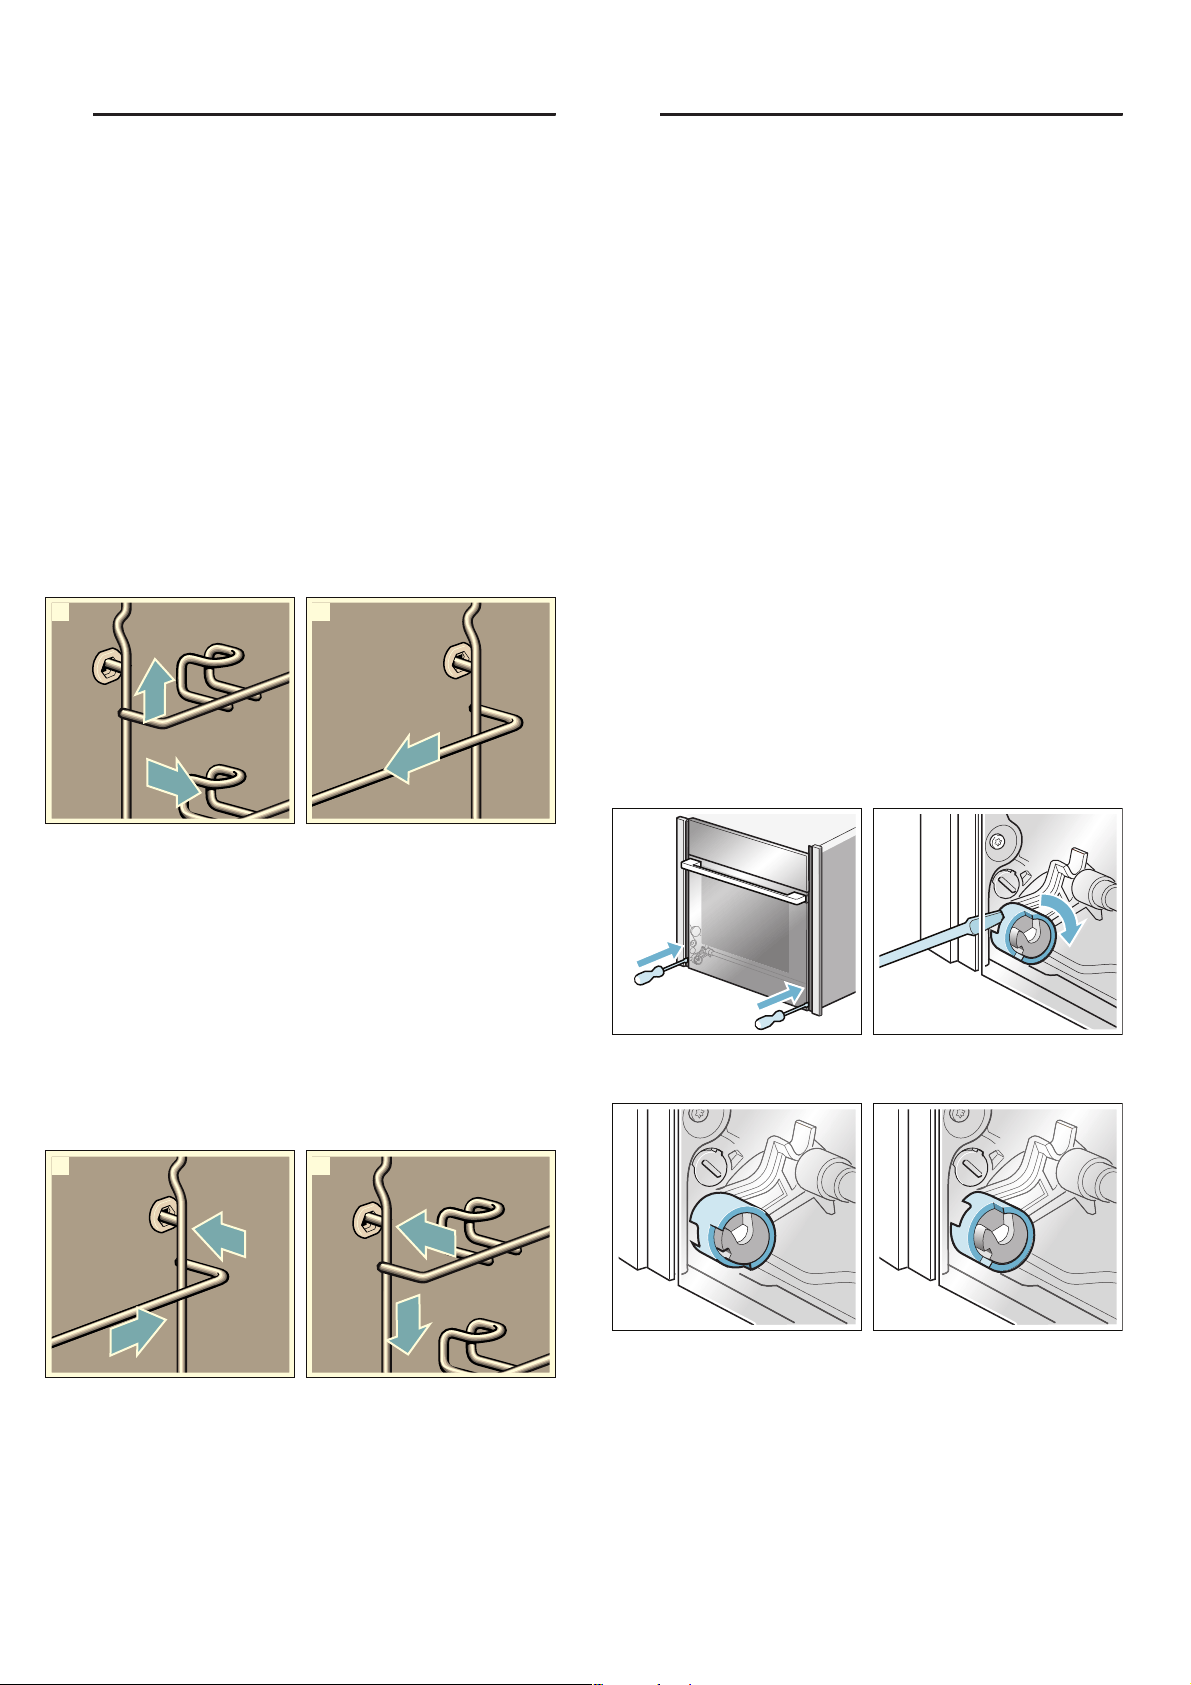
Detaching the rails
1. Lift the rail slightly at the front ‚ and detach it ƒ
(figure !).
2. Then pull the whole rail towards you and take it out
(figure
").
Clean the rails with
cleaning agent and a sponge. For stubborn deposits of
dirt, use a brush.
Attaching the rails
The rails only fit on the right or the left side. For both
rails, ensure that the retaining bracket is at the front.
1. First, insert the rail in the middle of the rear socket ‚,
until the rail rests against the cooking compartment
wall, and push it back ƒ (figure !).
2. Then insert the rail into the front socket „, until the
rail also rests against the cooking compartment wall
here, and press it downwards … (figure ").
qAppliance door
Appliance door
With good care and cleaning, your appliance will retain
its appearance and remain fully functional for a long
time to come. This will tell you how to remove the
appliance door and clean it.
Removing and fitting the appliance door
To clean the door panels, you can detach the appliance
door.
:Warning – Risk of injury!
The hinges of the appliance door may snap shut with
great force. Always fully turn the two locks for fitting and
removing the appliance door.
:Warning – Risk of injury!
If the appliance door has been removed without turning
both locking levers to their limit stops, the hinge may
snap shut. Do not reach into the hinge. Call the
aftersales service.
Removing the appliance door
1. Open the left- and right-hand hinge lock (Fig. !).
To do this, push the hinge lock (Fig. ") fully
upwards on both sides with a screwdriver.
Tip: Light up the gap using a torch so that you can
find the hinge lock.
Hinge lock closed (Fig. #)
Hinge lock opened (Fig. $)
2. Open the appliance door a little (Fig. %).
2
D
E
1
2
F
G
1
D
E
2I
1I
I
I
Loading ...
Loading ...
Loading ...