Loading ...
Loading ...
Loading ...
10 31-2000654 Rev. 3
Installation
Insert
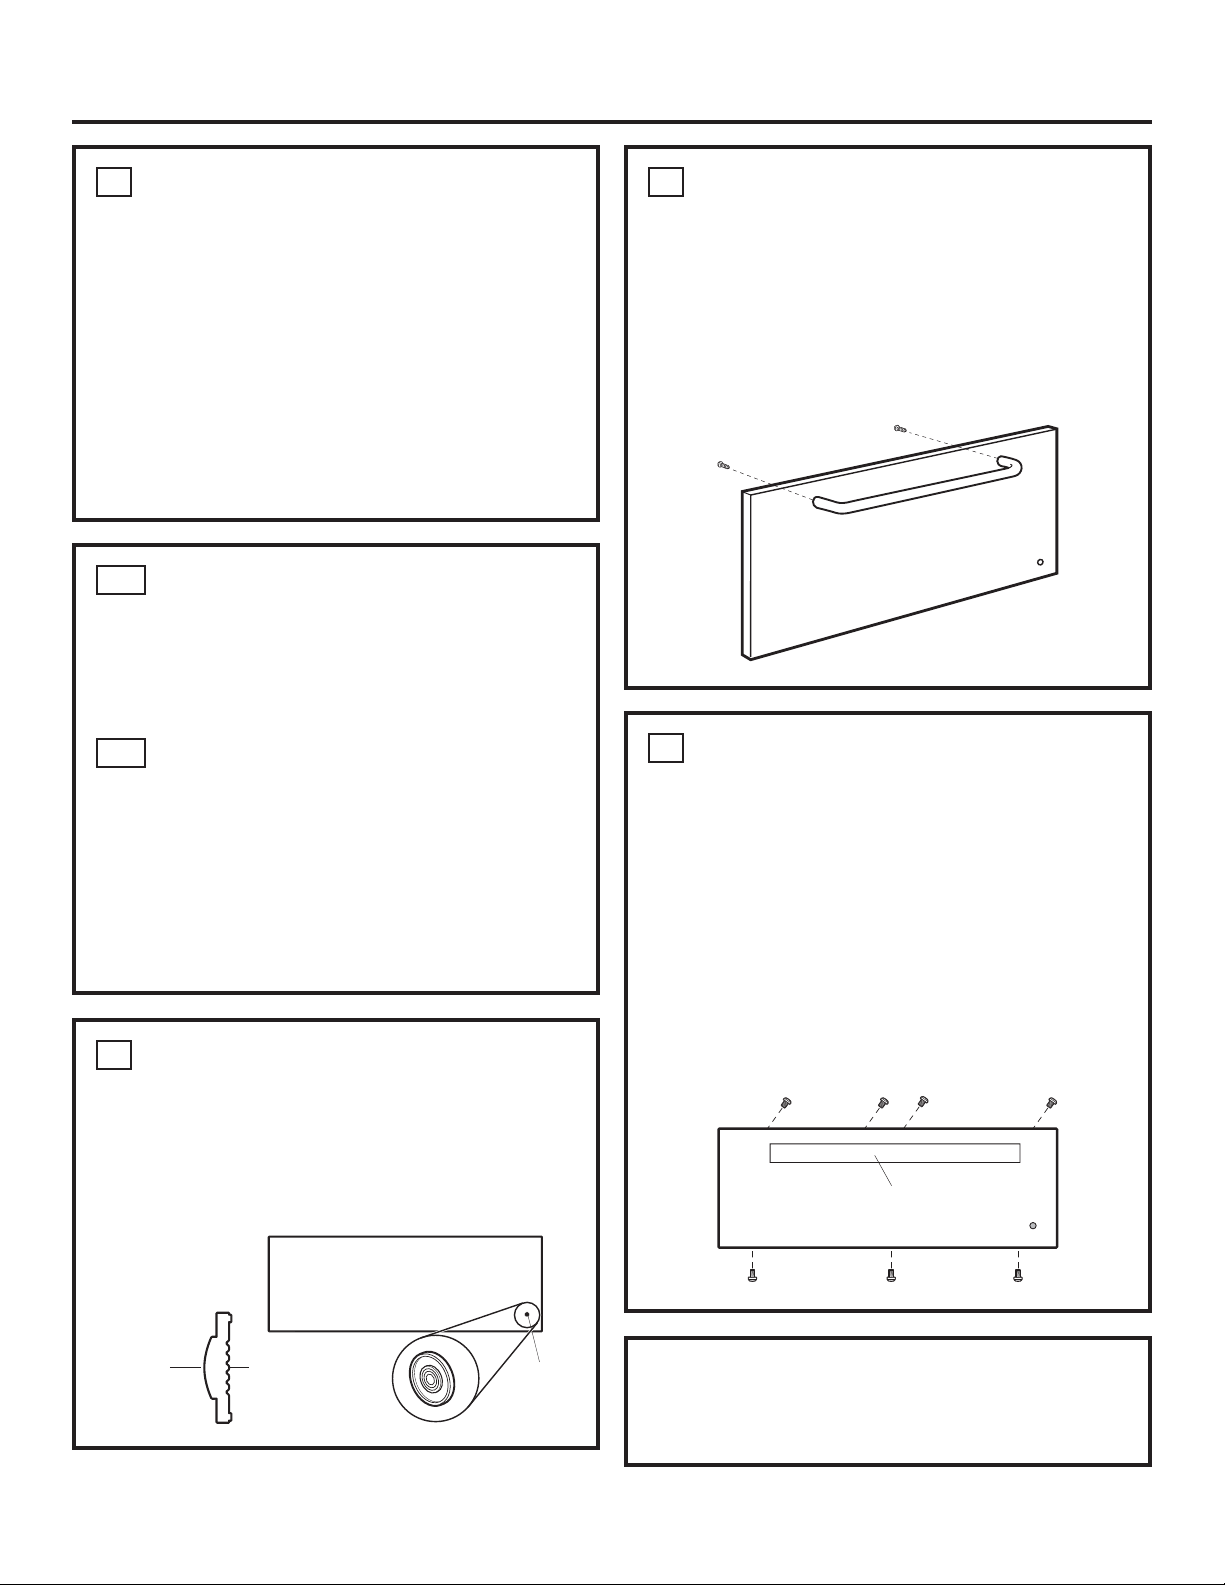
Jewel
Appearance
Side
This Side
A
gainst
Wood
Custom Handle
or Original Handle
4
SECURE CUSTOM PANEL TO
METAL MOUNTING PANEL
Ŷ/D\WKHFXVWRPSDQHODSSHDUDQFHVLGHGRZQRQD
clean surface.
Ŷ5HPRYHDOOWDSHDQGSDFNLQJPDWHULDOIURPWKH
metal panel.
Ŷ3ODFHWKHIODWVLGHRIWKHPHWDOSDQHORQWRWKHEDFN
side of the custom panel, with the mounting flanges
facing up.
Ŷ$OLJQWKHODPSKROHLQWKHSDQHOZLWKWKHPRXQWLQJ
panel.
Ŷ&RQILUPVTXDUHQHVVDQGFRUUHFWSRVLWLRQRIWKH
metal panel to the custom panel.
7
REINSTALL ORIGINAL HANDLE
OR OPTIONAL CUSTOM HANDLE
Ŷ$FXVWRPKDQGOHQRWVXSSOLHGPD\EHLQVWDOOHG
Ŷ'ULOOSLORWKROHVWKURXJKWKHIURQWRIWKHFXVWRP
panel and through the metal panel to match the
chosen handle.
NOTE: The handle screws should be installed through
the metal panel, the custom panel and into the
custom or original handle.
8
INSTALL ASSEMBLED PANEL TO
THE DRAWER
Ŷ'HWHUPLQHZKLFKKROHVLQWKHPHWDOSDQHOOLQHXS
with the holes in the exposed drawer front and
marked the screw hole locations onto the custom
panel.
Ŷ'ULOO´GHHSKROHVLQWRWKHFXVWRPSDQHOIRU
FOHDUDQFHWRWKHVFUHZV7KHVFUHZVZLOO
extend into the custom panel slightly.
Ŷ8VLQJWKHVFUHZVVXSSOLHGLQWKHEDJLQVWDOOWKH
custom panel assembly to the exposed drawer front
with seven screws.
Ŷ7KHRULJLQDOVFUHZVDUHQRWQHHGHG
NOTE:3URGXFWLPSURYHPHQWLVDFRQWLQXLQJHQGHDYRU
at Monogram Appliances. Therefore, materials,
appearance and specifications are subject to change
without notice.
6
INSTALL LAMP JEWEL
Ŷ7XUQWKHDVVHPEO\DSSHDUDQFHVLGHXS
Ŷ8VHSODVWLFWRZRRGDGKHVLYHWRVHFXUHWKHODPS
jewel to the front of the wood panel. On the side
with the bulge, (see illustration) apply a small bead
RIDGKHVLYHDURXQGWKHRXWVLGHHGJH3ODFHWKH
jewel into the drilled hole.
5A
FOR PANELS LESS THAN
3/4” THICK
Ŷ6HSDUDWHWKHFXVWRPSDQHODQGPHWDOSDQHO
Ŷ$SSO\DIHZKRUL]RQWDOEHDGVRIDGKHVLYHWRWKH
metal panel. Avoid adhesive within 1” of lamp hole
area and outer edges.
5B
FOR 3/4” (OR GREATER)
THICK PANELS
Ŷ6HSDUDWHWKHFXVWRPSDQHODQGPHWDOSDQHO
Ŷ8VHWKHPHWDOSDQHODVDWHPSODWH3RVLWLRQWKH
metal panel over the back side of the custom panel
and drill pilot holes. Drill pilot holes sized to match
screws being used (screws not provided).
NOTE: Select screw length carefully to avoid
penetration of the finished side.
Loading ...
Loading ...
Loading ...