
Loading ...
Loading ...
Loading ...
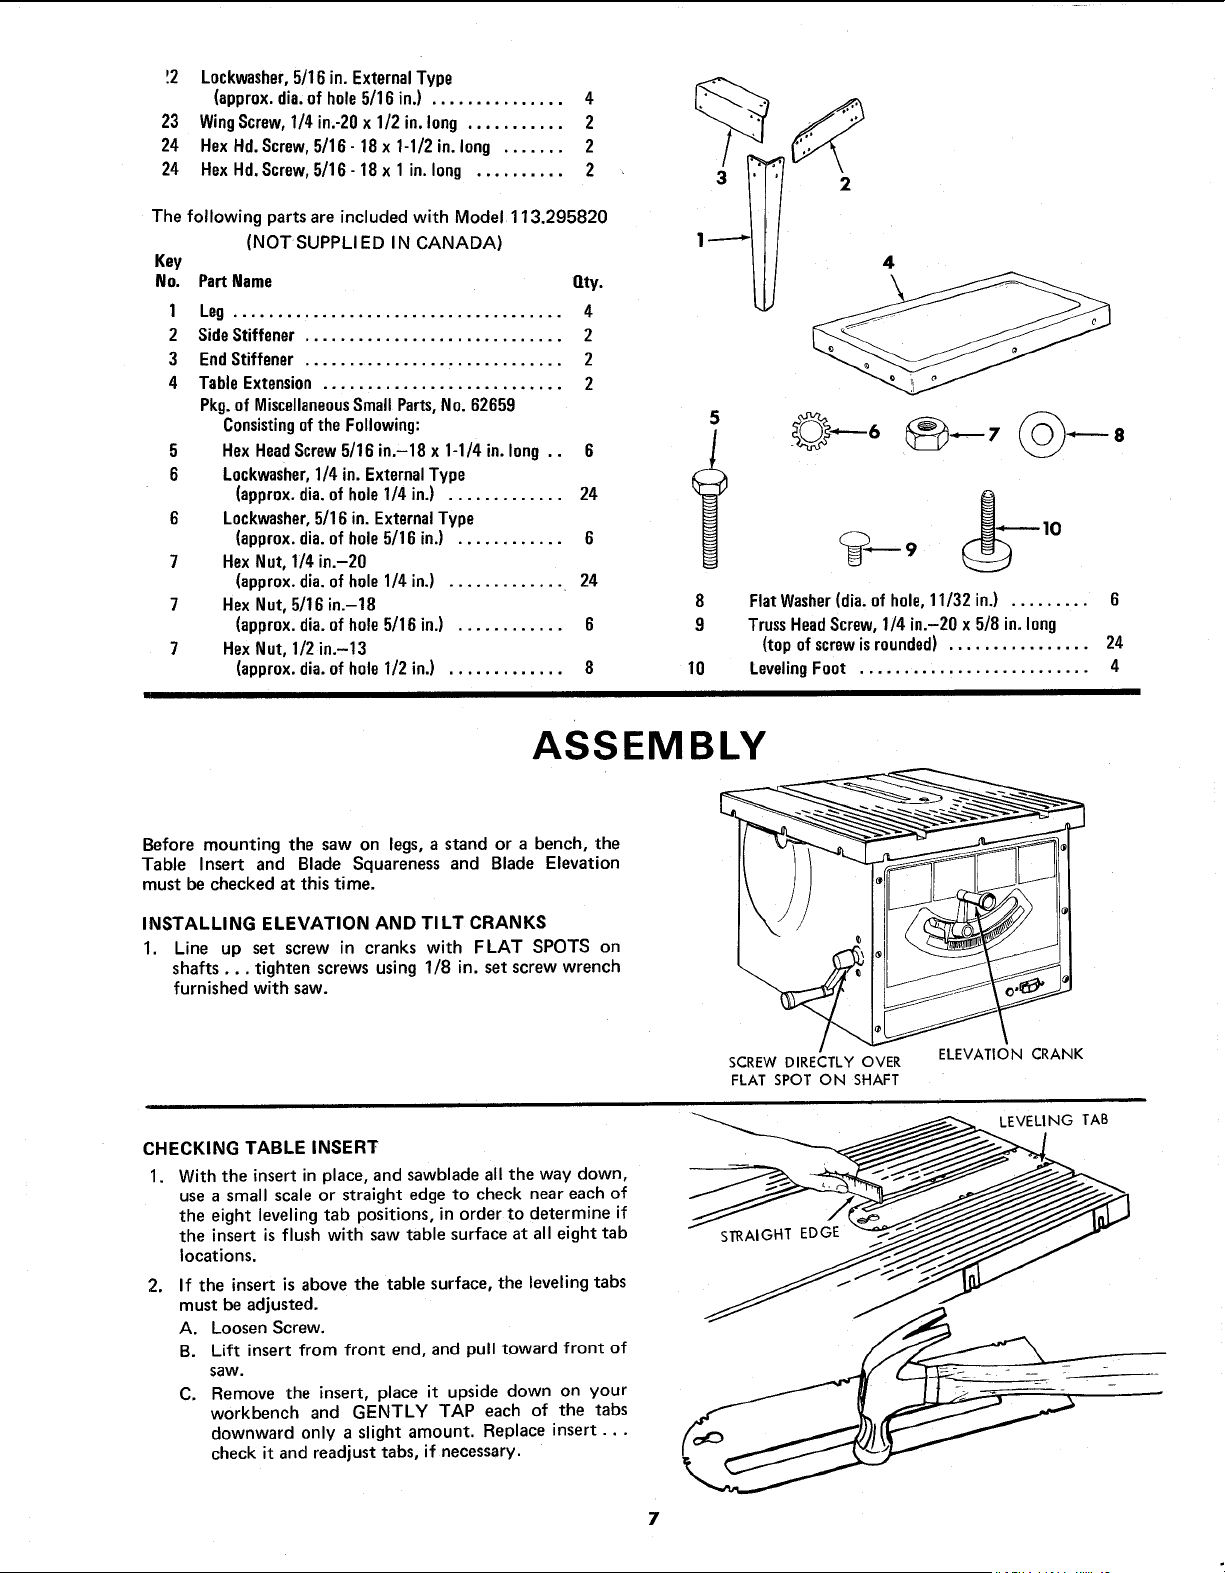
!2 Lockwasher,5/16 in. ExternalType
(approx.dia.of hole5/16 in.) ............... 4
23 WingScrew,1/4 in.-20x 1/2 in. long ........... 2
24 Hex Hd.Screw,5/16- 18 x 1-1/2 in.long ....... 2
24 Hex Hd.Screw,5/16 - 18 x 1in. long .......... 2
The following parts are included with Model 113.295820
(NOT SUPPLI ED IN CANADA)
Key
No. Part Name Qty.
1 Leg ..................................... 4
2 SideStiffener ............................. 2
3 EndStiffener ............................. 2
4 TableExtension ........................... 2
Pkg.of MiscellaneousSmall Parts,No. 62659
Consistingofthe Following:
5 Hex HeadScrew5/16 in.-18 x 1-1/4 in. long .. 6
6 Lockwasher,1/4 in. ExternalType
(approx.dia.of hole 1/4 in.) ............. 24
6 Lockwasher,5/16 in. ExternalType
(approx.dia.of hole 5/16 in.) ............ 6
7 HexNut, 1/4 in.-20
(approx.dia.ofhole1/4 in.) ............. 24
7 Hex Nut, 5/16 in.-18
(approx.dia.ofhole5/16 in.) ............ 6
7 HexNut, 1/2 in.-13
(approx.dia.ofhole1/2 in.) ............. 8
5
1
T
4
8
9
10
FlatWasher(dia. ofhole,11/32 in.) ......... 6
TrussHeadScrew, 1/4 in.-20 x 5/8 in. long
(top of screwisrounded) ................ 24
Leveling Foot .......................... 4
ASSEMBLY
Before mounting the saw on legs, a stand or a bench, the
Table Insert and Blade Squareness and Blade Elevation
must be checked at this time.
INSTALLING ELEVATION AND TI LT CRANKS
1. Line up set screw in cranks with FLAT SPOTS on
shafts.., tighten screws using 1/8 in. set screw wrench
furnished with saw.
SCREW DIRECTLY OVER
FLAT SPOT ON SHAFT
ELEVATION CRANK
CHECKING TABLE INSERT
1. With the insert in place, and sawblade all the way down,
usea small scale or straight edge to check near each of
the eight leveling tab positions, in order to determine if
the insert is flush with saw table surface at all eight tab
locations.
2. If the insert is above the table surface, the leveling tabs
must be adjusted.
A. Loosen Screw.
B. Lift insert from front end, and pull toward front of
saw.
C. Remove the insert, place it upside down on your
workbench and GENTLY TAP each of the tabs
downward only a slight amount. Replace insert ...
check it and readjust tabs, if necessary.
NG TAB
Loading ...
Loading ...
Loading ...