Loading ...
Loading ...
Loading ...
English - 87
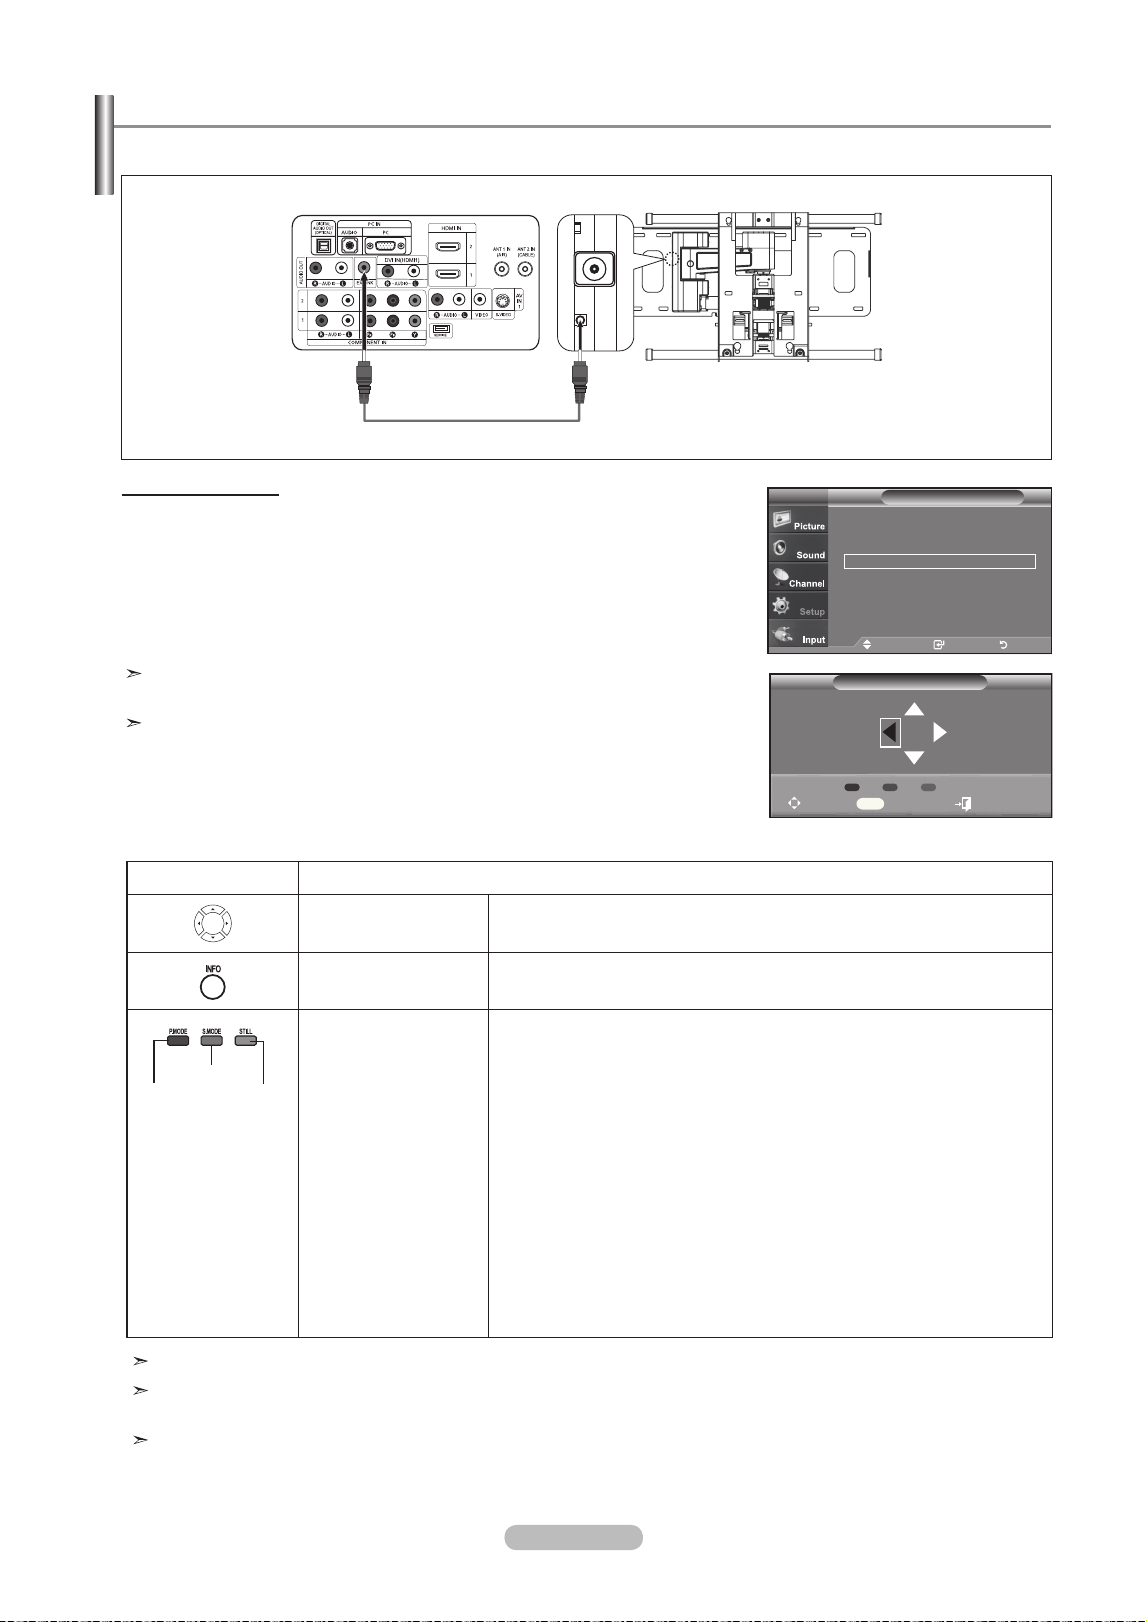
Once the wall mount is installed, the position of your TV can be easily adjustable.
using the remote Control buttons
For installation, refer to the Installation Manual provided.
For product installation and the installation and moving of the wall mount, make sure to consult a specialized installation
company.
This installation manual is to be used when attaching the wall mount to a wall.
When attaching to other building materials, please contact your nearest dealer.
button operations
Wall-mount angle
adjustment
Tilt Up, Tilt Down, Move right, Move left
Reset Moves to the initial installation position
Remembering the
position and moving
to the remembered
position
1. Select the direction buttons of the remote control.
2. Press the red button (Select Position 1).
3. Adjust the set to a desired position following the wall mount operating
procedures.
4. The position you adjusted last is memorized as Position 1.
5. By using the green button (Select Position 2), and the yellow button
(Select Position 3), you can save positions according to the procedures
above.
6. You can save 3 respective positions to the red button (Select Position 1),
green button (Select Position 2), and yellow button (Select Position 3).
If you press a button, the set automatically moves to that saved angle.
7. If you additionally move the set from a saved position, the last position is
saved as the “final position”.
Wall- mount adjustment (ln-t4053h) (Sold separately)
Entering the menu
1. Press the mEnu button to display the menu.
Press the ▲ or ▼ button to select “Setup”, then press the EntEr button.
2.
Press the ▲ or ▼ buttons to select “Wall-Mount Adjustment”,
then press the EntEr button.
3.
Adjust to the desired position using the ▲,▼,◄,► buttons.
4.
Press the ExIt button to exit.
If you press an arrow button when no OSD is displayed on the TV screen,
the Adjustment screen appears.
When you turn the power off, your TV moves to the initial installation position.
When you turn the power on, your TV moves to the last
remembered position you adjusted.
red
button
green
button
yellow
button
▲More
hdmI black level
: on ►
film mode : off
►
Wall mount adjusment
►
pIp
►
function help
: on ►
SW upgrade
►
SetuptV
move Enter return
Wall mount adjusment
position1
adjust Center Exit
Info
position 1 2 3
tV rear panel
Ex-lInK Cable (not supplied)
auto Wall-mount
BN68-01156B-02Eng-0329.indd 87 2007-03-29 �� 8:01:01
Loading ...
Loading ...
Loading ...