Loading ...
Loading ...
Loading ...
13
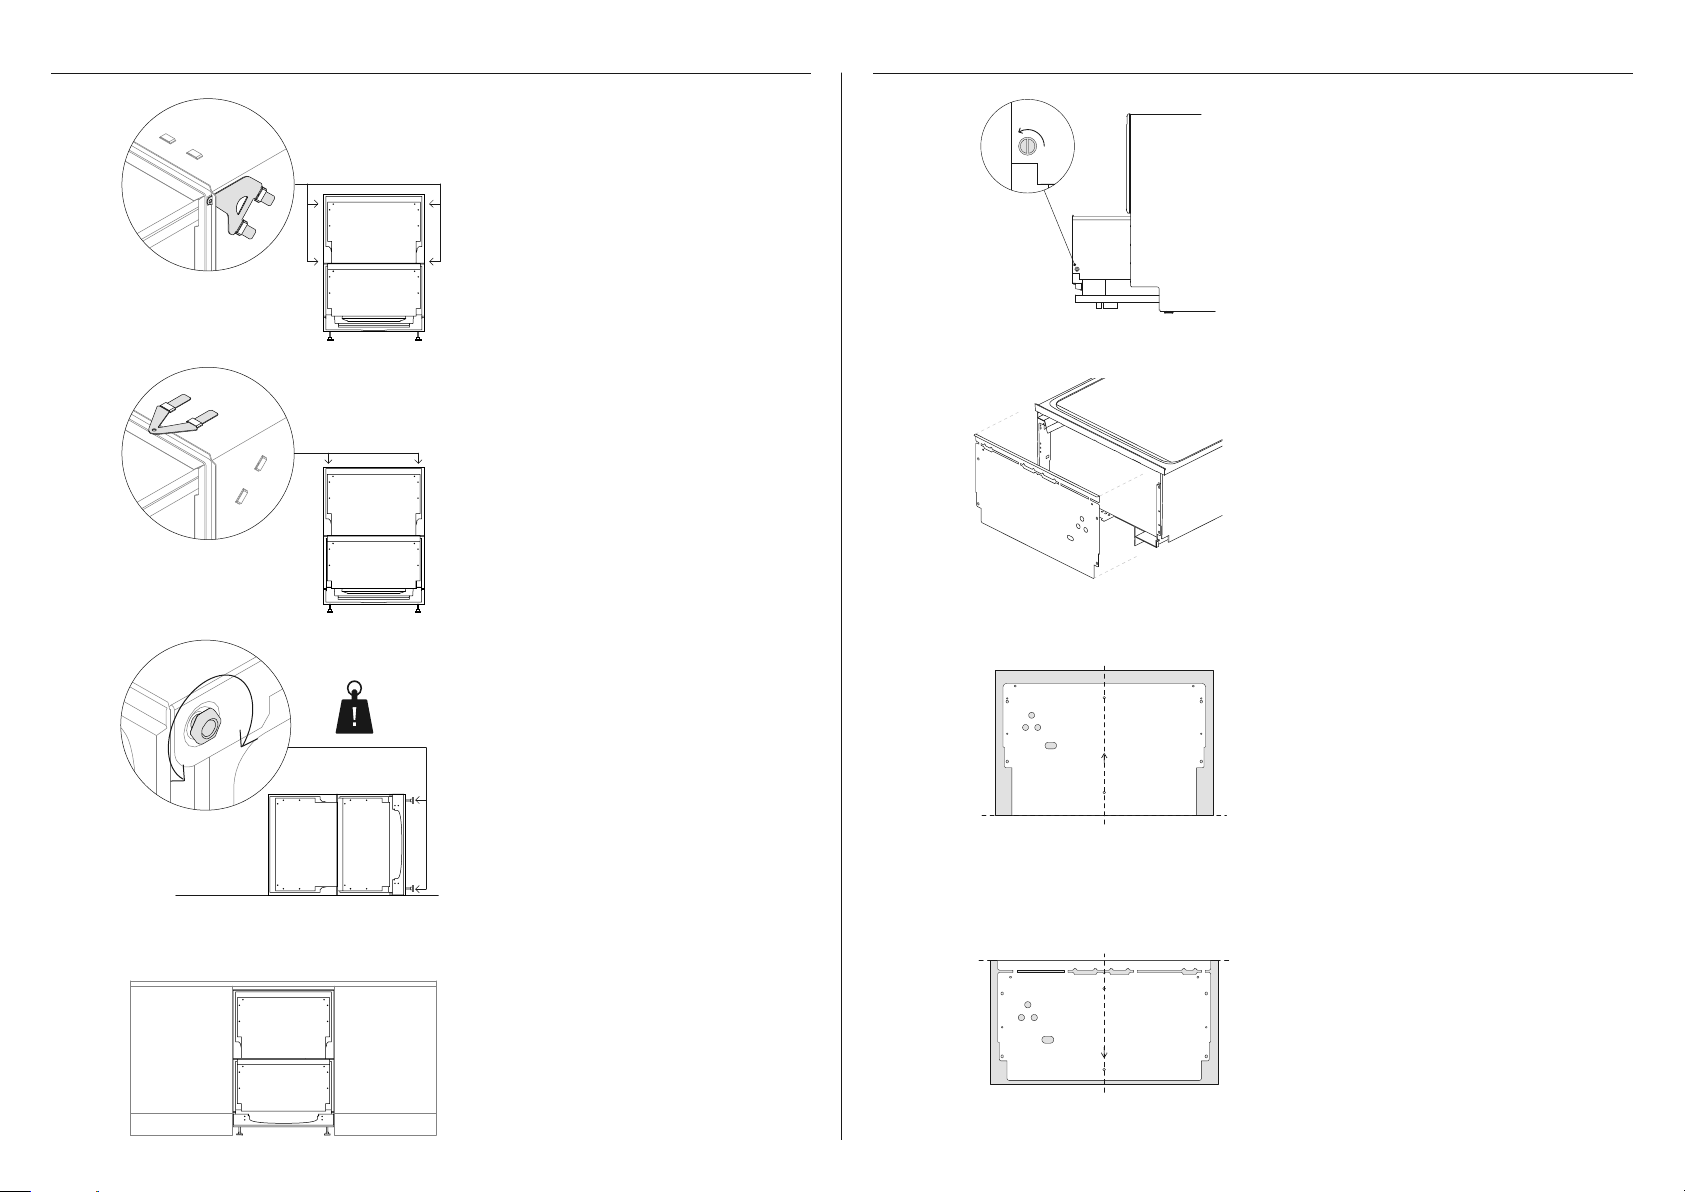
PUSH THE PRODUCT INTO THE CAVITY FIT CUSTOM DOOR PANELS
3
4
Level the DishDrawer™ Dishwasher
by carefully tipping it onto
protected surface.
Rotate each leg clockwise to increase
the height, and anticlockwise to
decrease. Stand upright when complete.
Minor adjustments can be made by
lightly tilting the product and rotating
each leg as desired.
Push the product into the cavity, pulling
the hoses through as you push to avoid
crushing or twisting them and taking
care not to bend the legs.
2
3
4
Carefully pull both brackets from
DishDrawer™ Dishwasher down and out
before unpluging the Knock-to-Pause
modules and earth wires.
Remove the Knock-to-Pause modules
from the back of the brackets.
On the back of the upper panel, mark
the centre and align the base of the
upper bracket with the base of the panel.
Secure using a minimum of 3 screws on
either side.
On the back of the lower panel, mark
the centre and align the top of the
upper bracket with the top of the panel.
Secure using a minimum of 3 screws on
either side.
If securing to cabinetry via method A
Secure all four side brackets to the
DishDrawer™ Dishwasher, aligning
bracket A with slot A and bracket B
with slot B.
Ensure the ends of the brackets are not
pushed into the chassis.
Optionally, fit the two top brackets for
additional stability. Ensure the brackets
are oriented correctly with the raised
locking barbs facing upwards.
Ensure the ends of the brackets are not
pushed into the chassis.
1
2
A
A
B
B
1
Remove both side pins from each drawer
by twisting a quarter-turn towards
the product front. Pull outwards to
remove pin.
Loading ...
Loading ...
Loading ...