Loading ...
Loading ...
Loading ...
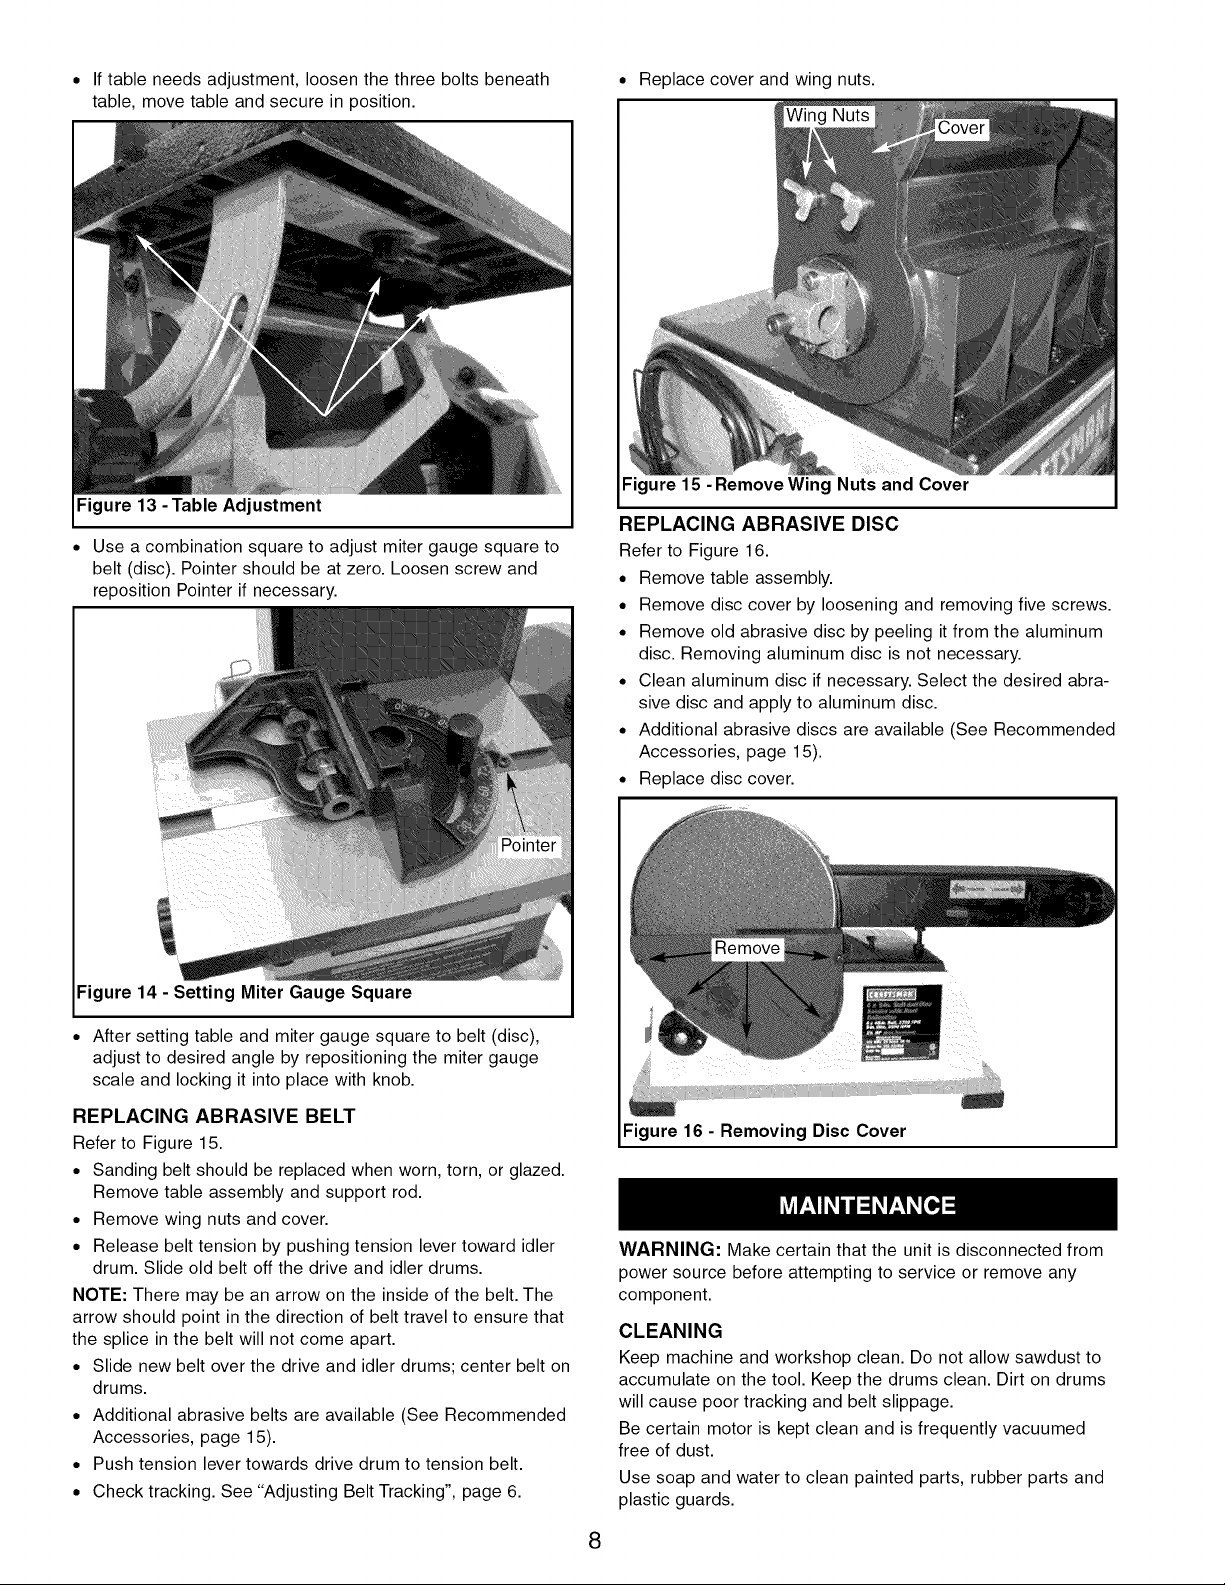
• If table needs adjustment, loosen the three bolts beneath
table, move table and secure in position.
Figure 13 - Table Adjustment
• Use a combination square to adjust miter gauge square to
belt (disc). Pointer should be at zero. Loosen screw and
reposition Pointer if necessary.
• Replace cover and wing nuts.
Figure 15 -Remove Wing Nuts and Cover
REPLACING ABRASIVE DISC
Refer to Figure 16.
• Remove table assembly.
• Remove disc cover by loosening and removing five screws.
• Remove old abrasive disc by peeling it from the aluminum
disc. Removing aluminum disc is not necessary.
• Clean aluminum disc if necessary. Select the desired abra-
sive disc and apply to aluminum disc.
• Additional abrasive discs are available (See Recommended
Accessories, page 15).
• Replace disc cover.
ii
Figure 14 - Setting Miter Gauge Square
• After setting table and miter gauge square to belt (disc),
adjust to desired angle by repositioning the miter gauge
scale and locking it into place with knob.
REPLACING ABRASIVE BELT
Refer to Figure 15.
• Sanding belt should be replaced when worn, torn, or glazed.
Remove table assembly and support rod.
• Remove wing nuts and cover.
• Release belt tension by pushing tension lever toward idler
drum. Slide old belt off the drive and idler drums.
NOTE: There may be an arrow on the inside of the belt. The
arrow should point in the direction of belt travel to ensure that
the splice in the belt will not come apart.
• Slide new belt over the drive and idler drums; center belt on
drums.
• Additional abrasive belts are available (See Recommended
Accessories, page 15).
• Push tension lever towards drive drum to tension belt.
• Check tracking. See "Adjusting Belt Tracking", page 6.
8
Figure 16 - Removing Disc Cover
WARNING: Make certain that the unit is disconnected from
power source before attempting to service or remove any
component.
CLEANING
Keep machine and workshop clean. Do not allow sawdust to
accumulate on the tool. Keep the drums clean. Dirt on drums
will cause poor tracking and belt slippage.
Be certain motor is kept clean and is frequently vacuumed
free of dust.
Use soap and water to clean painted parts, rubber parts and
plastic guards.
Loading ...
Loading ...
Loading ...