Loading ...
Loading ...
Loading ...
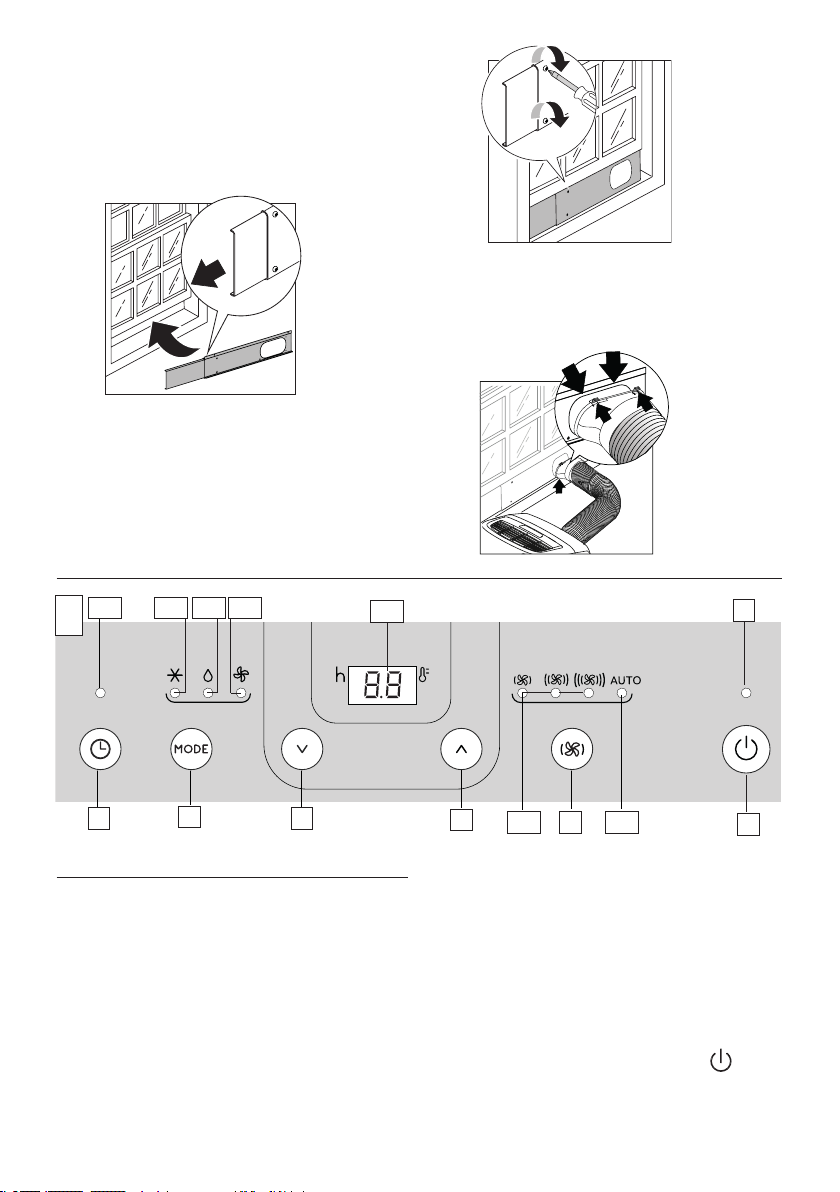
7
• Cut the adhesive strip foam to the desired length and place
it on the window.
• Position the extendable window bracket on the window sill
and fully extend the extendable window bracket inside the
window frame (g.3). The portion of the window bracket
with the greater depth should be placed along the bottom.
3
• Adjust the extendable window braket and then x the
length with two screws (g. 4) (If the extendable window
bracket is too large, it is possible to cut the plastic using a
saw.
4
• Hook the adapter for extendable window (B3) to the win-
dow bracket as shown in g. 5 inserting the bottom of the
adapter rst then pushing in the top to secure into place.
5
CONTROL PANEL
C1
C9C8 C10 C11
C2
C12
C13
C7
C5
C3
C4
C6
C
C14
DESCRIPTION OF THE CONTROL PANEL (C)
C1 ON/STAND-BY (on/o) button
C2 Mode selection key (air conditioning, dehumidifying, fan)
C3 Decrease key
C4 Increase key
C5 Ventilation speed selection key
C6 Timer button
C7 Stand-by indicator
C8 Timer indicator
C9 Air conditioning mode indicator
C10 Dehumidifying mode indicator
C11 Fan mode indicator
C12 Set temperature values, programmed on/o timer
C13 Auto ventilation speed indicator
C14 Ventilation speed indicator (min, med, max)
TURNING THE APPLIANCE ON AND OFF
Before connecting the plug to the power outlet, make sure that
the drainage hose caps (A10) (A11) located on the back of the
appliance are correctly inserted. Once plugged into the power
outlet, the stand-by indicator lights up. Press the
(C1) key
to turn on the appliance. When the appliance turns on it will be
activated with the last function set before it was shut o.
Loading ...
Loading ...
Loading ...