Loading ...
Loading ...
Loading ...
REPAIR AND ADJUSTMENT
13, Level Mower Housing Front to Rear Mower Adjustment
Adjust the mower while tractor is parked on level ground
or driveway. Make sure tire pressures are 14 PSI in front;
10 PSI in rear.
Side to Side Mower Adjustment
a. Move attachment rift lever to full "'UP"position
(Fig. 46).
b. Use a ruler to make sure bottom of curl at rear of
mower deck are the same height from the ground
on each side (Fig. 44).
Move attachment lift lever to full "'UP" position. After
leveling side to side, measure Bottom of Curl at FRONT
AND REAR OF MOWER. The bottom of curl at the R.H.
front flanges should measure 3/4"" lower than at the R.H.
REAR flange (Fig. 44). If adjustment is required follow
the procedure below.
a. To raise front of mower loosen nuts "'D". Screw
nuts "'C'" up onto suspension arms (Fig. 45).
NOTE: SCREW NUTS "'C'" ON BOTH SUSPEN-
SION ARMS THE SAME NUMBER OF TURNS
SO MOWER WILL REMAIN LEVEL. Tighten nuts
"'D'" securely.
C,
d.
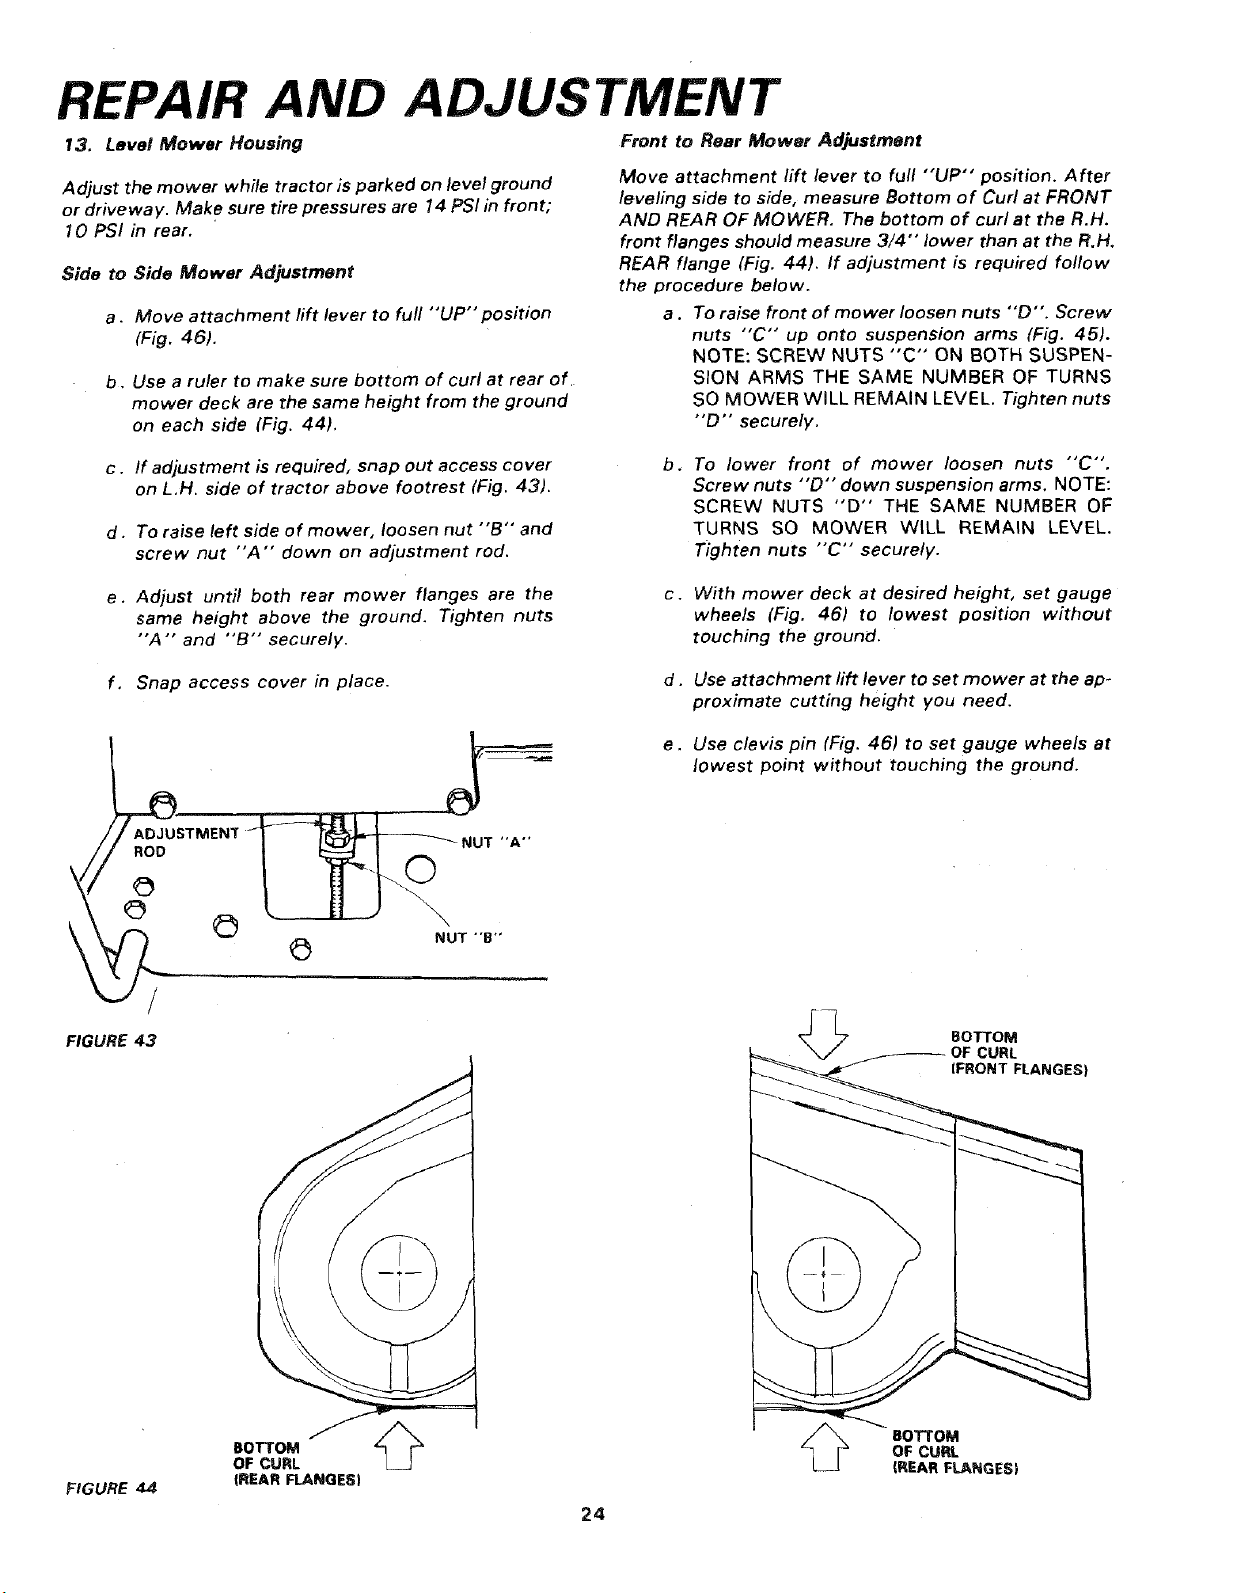
If adjustment is required, snap out access cover
on L,H. side of tractor above footrest (Fig. 43).
To raise left side of mower, loosen nut "'B'" and
screw nut "'A" down on adjustment rod.
b. To lower front of mower loosen nuts "'C".
Screw nuts "'D'" down suspension arms. NOTE:
SCREW NUTS "D" THE SAME NUMBER OF
TURNS SO MOWER WILL REMAIN LEVEL.
Tighten nuts "'C'" securely.
e. Adjust until both rear mower flanges are the
same height above the ground. Tighten nuts
"'A'" and "'B'" securely.
c. With mower deck at desired height, set gauge
wheels (Fig. 46) to lowest position without
touching the ground.
f, Snap access cover in place.
d . Use attachment lift lever to set mower at the ap-
proximate cutting height you need.
_AD JU'STMEN'I"
// .oo
FIGURE 43
NUT "A"
©
NUT "'B'"
e. Use clevis pin (Fig. 46) to set gauge wheels at
lowest point without touching the ground.
BOTTOM
CURL
IFRONT FLANGES)
FtGURE 44
BOTTOM
OF CURL
{REAR FLANGESI
24
_'_ BOTTOM
OF CURL
{REAR FLANGES)
Loading ...
Loading ...
Loading ...