Loading ...
Loading ...
Loading ...
IMPORTANT NOTE TO INSTALLER
Please read the following instructions carefully before installing your Washer.
These instructions should be retained for future reference.
We recommend you hire a professional for installation of this washer.
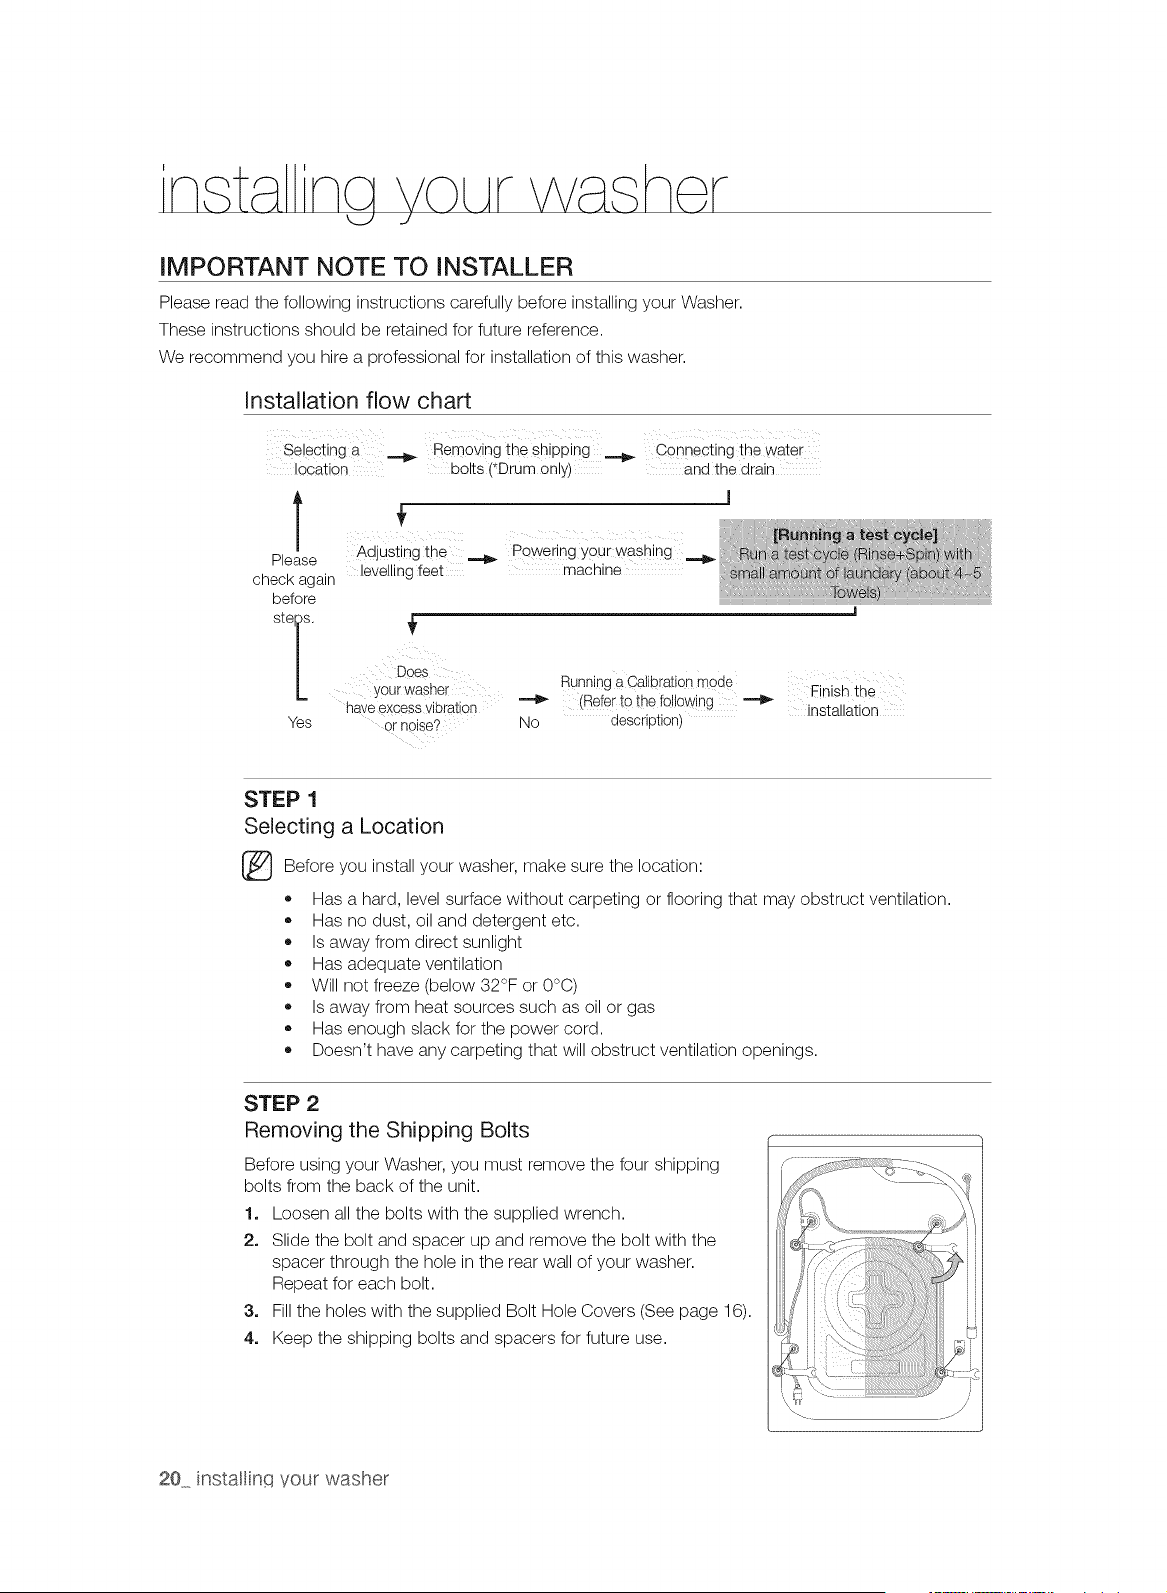
Installation flow chart
Selectinga _ Removing the sh!pping _ Connectingthewater
location bolts (*Drumonly)and the drain
Please
check again levellingfeet
before
st [:
YourWaSher
haveexcessvibration
Yes or noise?
_ii i iii i i ii i _ i
Adjusting the _ powering your washing
machine
Running a Calibration mode
(Referto the following _ Finish the
installation
No description)
STEP 1
Selecting a Location
Before install make the location:
you your
washer, sure
• Has a hard, level surface without carpeting or flooring that may obstruct ventilation.
Has no dust, oil and detergent etc.
Is away from direct sunlight
Has adequate ventilation
Will not freeze (below 32°F or O°C)
Is away from heat sources such as oil or gas
Has enough slack for the power cord.
Doesn't have any carpeting that will obstruct ventilation openings.
STEP 2
Removing the Shipping Bolts
Before using your Washer, you must remove the four shipping
bolts from the back of the unit.
1. Loosen all the bolts with the supplied wrench.
2. Slide the bolt and spacer up and remove the bolt with the
spacer through the hole in the rear wall of your washer.
Repeat for each bolt.
3. Fill the holes with the supplied Bolt Hole Covers (See page 16).
4. Keep the shipping bolts and spacers for future use.
20 instalinq your washer
Loading ...
Loading ...
Loading ...