Loading ...
Loading ...
4 5
CLEANING & CAREINSTALLATION & USE
INSTALLATION
Pots and pans
All common pots and pans: aluminium, stainless steel,
cast iron, ceramic, etc., may be used on your new gas
model cooktop. Ensure that the pots or pans are steady
and have flat bases to avoid dangerous spill-over of
hot liquids and wasted energy. A wok support has been
supplied with this appliance for use when cooking with
a round-bottom wok. The support is not necessary when
cooing with a flat-bottom wok.
Figure 3
WARNING
Never use asbestos mats, wire mats or grids, aluminium foil
as it can lead to overheating, cracked enamel. The warranty
will be void if these items are used and cause a failure. Woks
should only be used on the wok burner and wok support trivet.
CLEANING & CARE
CAUTION
Ensure the appliance is off and cool before cleaning.
Enamel
Persistent stains may require rubbing with a nylon scourer or
creamed powder cleansers. Household enamel cleaners are
available, follow the manufacturer’s instructions in their use.
CAUTION
Harsh abrasive cleaners, powder cleaners,
steel wool or wax polishes should not be used.
NOTE: You must read these warnings carefully before
installing or using the cooktop. If you need assistance,
contact your Customer Care Department.
The manufacturer will not accept liability, should the
instructions below or any other safety instructions
incorporated in this book be ignored.
INSTALLATION
• An authorised person must install this appliance and
MUST provide a certificate of compliance. This certificate
should be retained along with purchase information.
• Before using the appliance, ensure that all packing
materials are removed from the appliance.
• In order to avoid any potential hazard, the installation
instructions in this booklet, and any labels on the
appliance must be followed.
• Ensure that all specified vents, openings and air spaces
are not blocked.
• Where the appliance is built into a benchtop, the
benchtop material must be capable of withstanding 85°C.
• Ensure that the duplicate rating label (in the instruction
pack) is attached to a readily-accessible adjacent surface,
so that the cooktop can be easily identified in the case
of a service call.
SERVICING
• Servicing MUST only be carried out by authorised
personnel.
• To maintain safe operation, it is recommended that the
product be inspected every five years by an authorised
service person.
• If the supply cord is damaged, it must be replaced by an
authorised service person in order to avoid a hazard.
CLEANING
• Always ensure the appliance is turned off before cleaning.
• This appliance contains aluminium fittings. Do not use
caustic-based cleaners.
• Do not use steam cleaners, as this may cause moisture
build up on electrical components.
• Always clean the appliance immediately after any
food spillage.
CAUTION
• DO NOT place burners in a dishwasher.
CONTROLS
• Each burner is controlled by a control knob.
The markings on the control panel indicate which
burner the knob controls, and the settings for that
burner. (See Figure 2)
Note: Gas controls turn anticlockwise from ‘Off’ and
have limited movement.
Figure 2
LIGHTING BURNERS
Electronic ignition
These cooktops are fitted with mains powered ignition.
When the appliance has been connected and the power
is on, depressing any knob will release sparks to all burners.
To light a burner, depress the corresponding knob and
turn to the ‘High’ position (while depressing the knob).
The knob may be released once the flame is established.
Flame safeguard models
The knob must be turned to the ‘High’ position,
then pushed down as far as possible for approximately
5 seconds. If the flame goes out when the knob is released,
simply depress the knob again, this time holding it down
with slightly more force for the same length of time.
The height of the flame can be varied by turning the
control knob toward the ‘Low’ position.
WARNING
• Keep hands clear of burners when lighting.
• If burner does not light within 5 seconds, turn knob to ‘Off’
position, allow gas to disperse, then try lighting again.
• Burners MUST be operated between ‘HIGH’ and ‘LOW’
settings only.
In the absence of electrical power, carry out the ignition
directly to the burner with a hand-held ignition source.
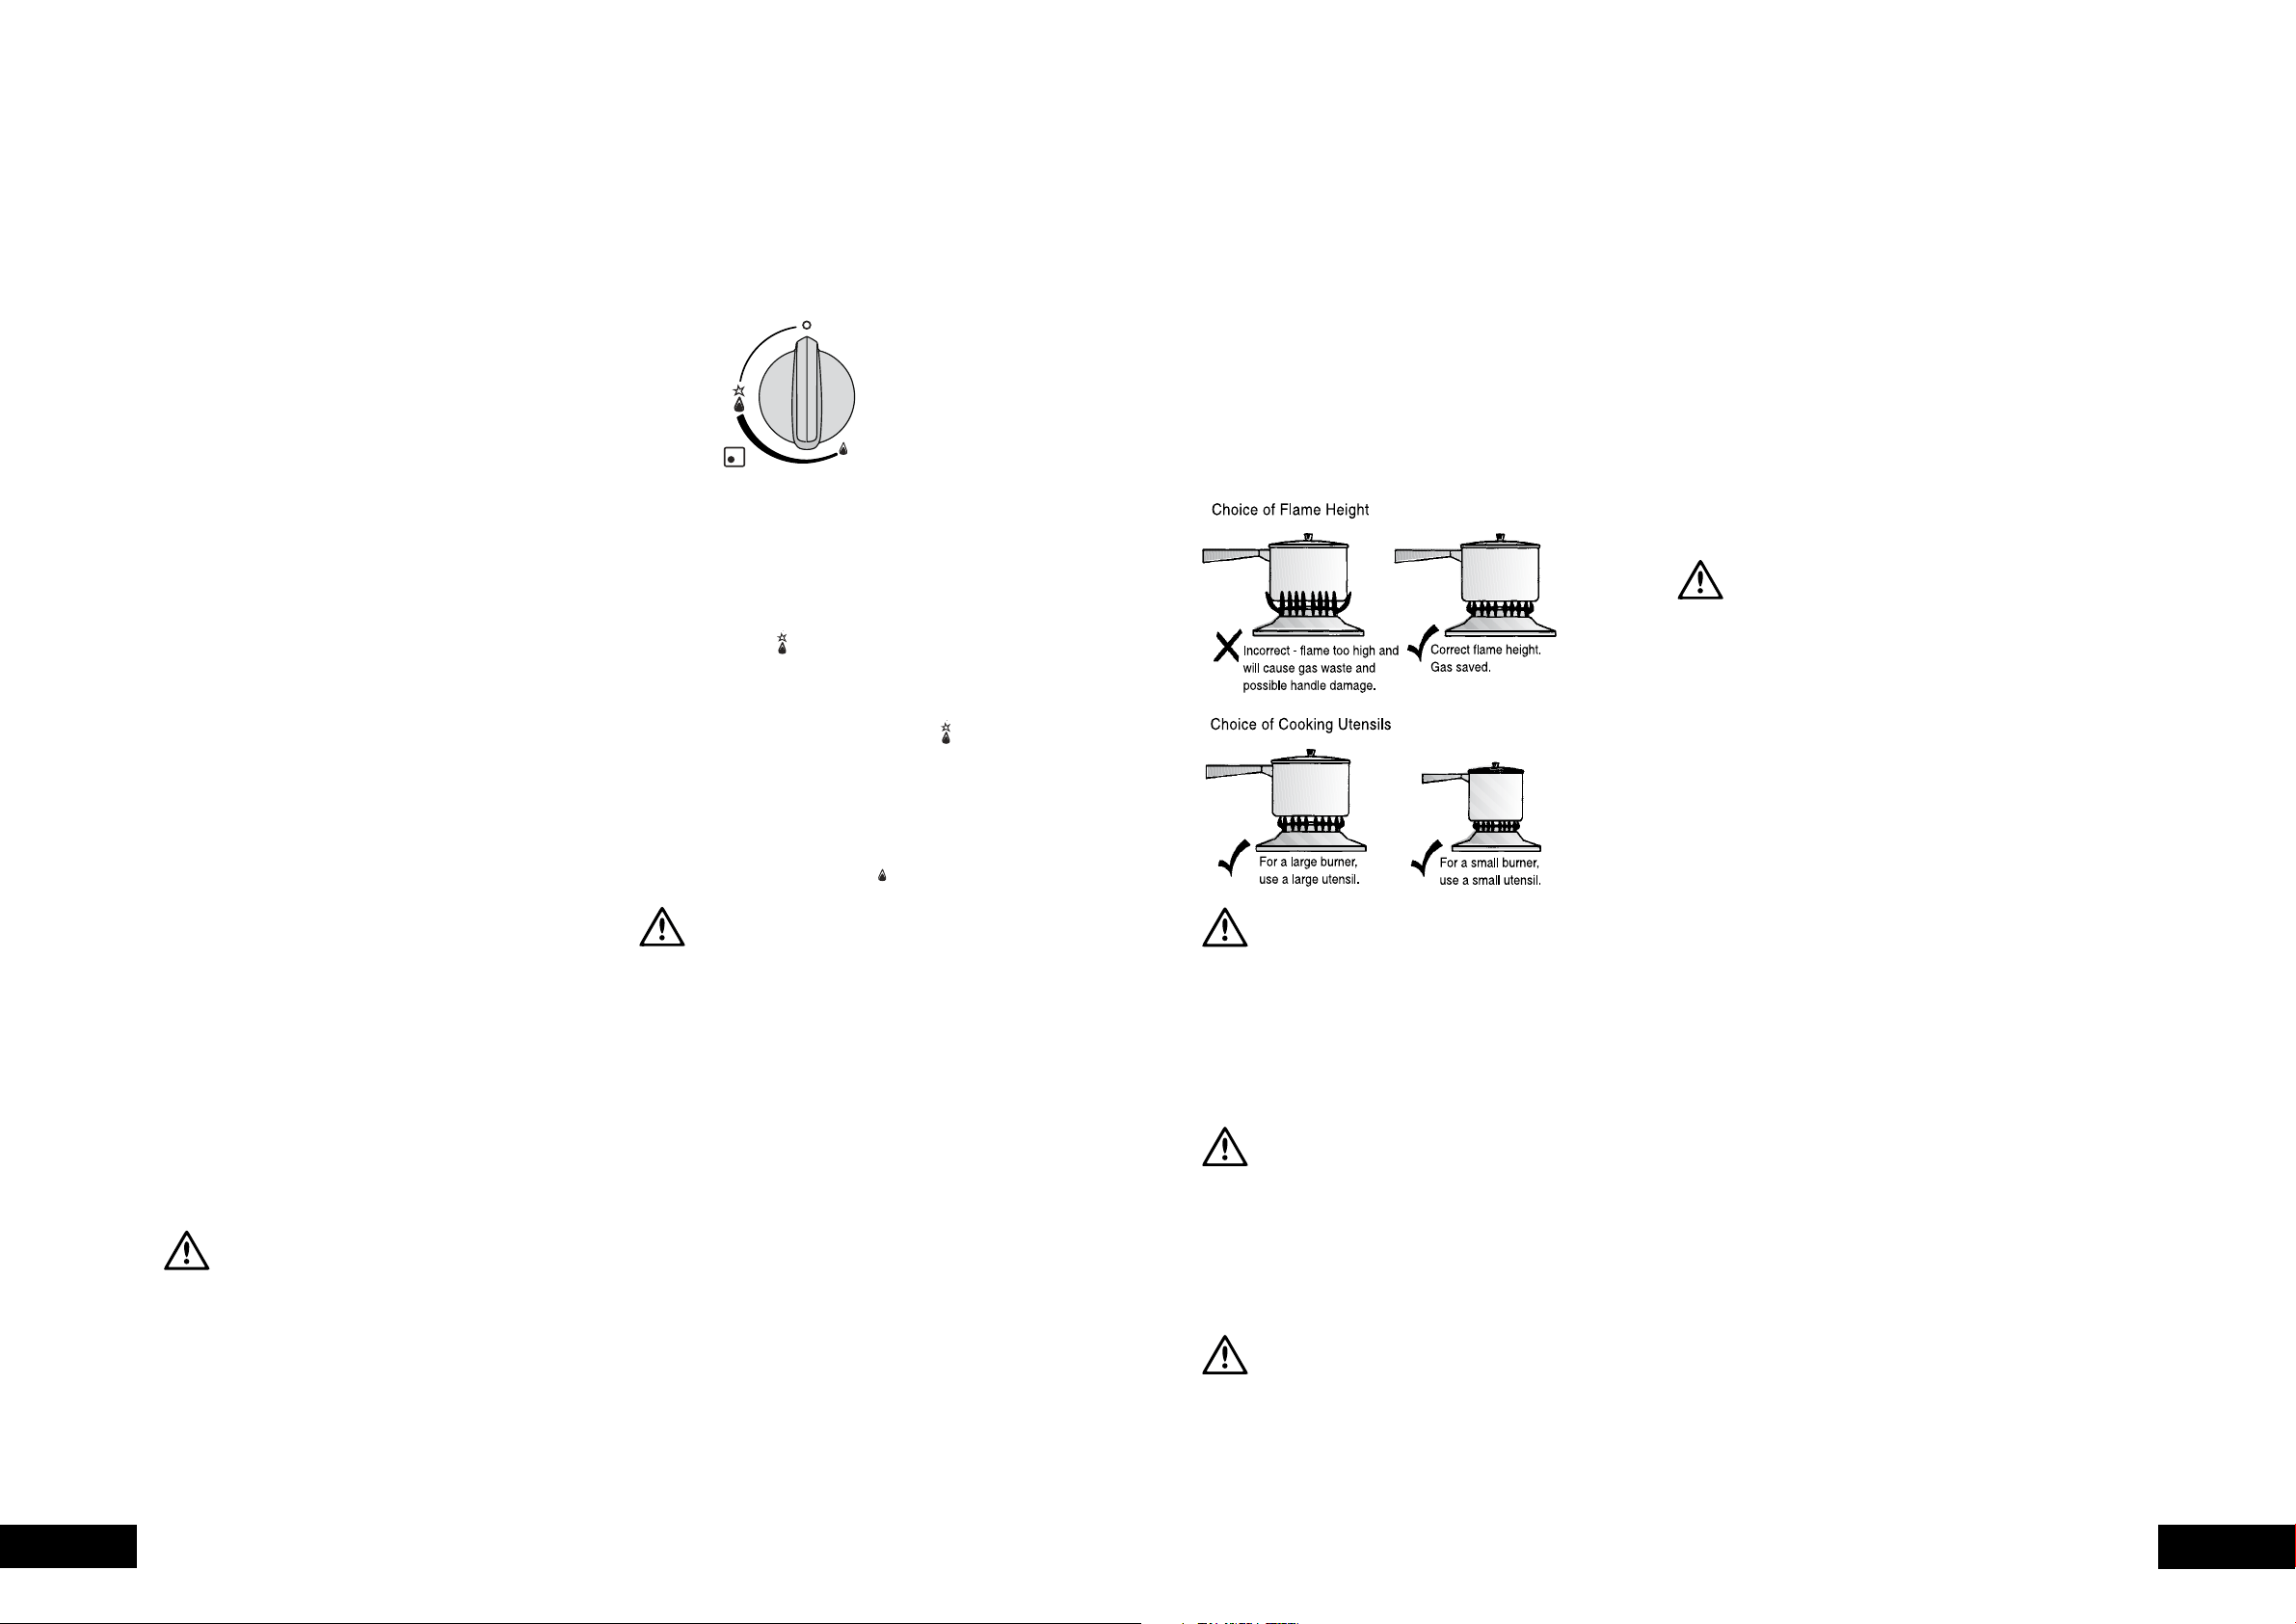
Choice of burners
For your convenience there is a choice of burners:
• A small burner for special low heat and slow cooking.
• A medium burner for normal cooking and simmering.
(one on 4-burner models and two on 5-burner models).
• A large burner for fast heating and large pots and pans.
• A wok burner for very fast heating using a wok or large
pot or pan.
To conserve gas, place the pan centrally over the burner
and adjust the flame so that it does not extend past the
edge of the pan (Figure 3). Do not boil food too rapidly.
A vigorous boil will not cook food any faster, and will
waste energy.
Stainless steel
Note: Ensure any oil is cleaned off the hob before first use,
otherwise it may cause the hob to turn a yellowish colour.
All grades of stainless steel may stain, discolour or attain
an adhering layer of grime in normal operation. To achieve
maximum surface appearance, stainless steel must be kept
clean by regularly using the following cleaning procedures,
thus ensuring good performance and long service life.
Wash with warm soapy water and rinse with clean water.
Where the stainless steel has become extremely dirty with
signs of surface discolouration, (due to periods of neglect
or misuse) use a stainless steel cleaner.
CAUTION
DO NOT use abrasive scourers or steel wool.
When removing these stains be sure to follow the polish
or brushing lines.
Trivets and burners
These can all be lifted off and removed for separate cleaning.
This appliance is fitted with single-piece burners (except
triple ring wok burner) for ease of cleaning. The burners
and trivets are removable for easy cleaning.
Note: When refitting the burners, ensure that they are
correctly seated.
Ensure burners are thoroughly dried after cleaning or spillage.
When cleaning the burners, ensure that all the flame ports
are free of any blockage. If necessary, use a toothpick or
brush to clear ports. The outer surface of the burners have
a polished finish and extra care needs to be taken to avoid
scratching this surface during cleaning. In instances of heavy
soiling, it may be necessary to apply a non-abrasive cleaning
compound and rub with a cloth until the soiling is removed
and then finish with a soft, dry cloth.
Note: DO NOT place burners in the dishwasher.
Ignition
GENTLY clean the spark plug and flame safe guard
sensor (where fitted) with a damp cloth to avoid lighting
difficulties. Ensure the electrode is dry before use.
Injector
Ensure the injector remains free of any foreign material.
If necessary, use a thin piece of wire to clear the orifice.
USING YOUR COOKTOP
Loading ...
Loading ...
Loading ...