Loading ...
Loading ...
Loading ...
ADJUSTMENTS
Priorto operatingyour tiller,carefullyread and followall instructions
below.Performall adjustmentsto verifyyourtiller is operatingsafely
andpropery.
Clutch Cable
NOTE:Servicethe enginewithoil andgasolinebeforecheckingthis
adjustment.Referto the separateEngineOperator'sManualpacked
withyourtillerfor properfuel andengineoil recommendations.
1. Positionthe tiller so thefront counterweightis againsta solid
object,suchas a wall.
2. With thegearselectionleverin NEUTRAL,start theengine.Refer
to the separateEngineOperator'sManual.
3. Standingon the right sideof the tiller,examinethe belt (insidethe
beltcover).It shouldnot be turning.
.
Donot putyourfingersunderthe belt cover.
f
If the beltturnswithoutthe bail engaged,adjustit by un-threading
the internallythreadedtubeat the end of the cablea fewturns
clockwise-- when standingin theoperator'sposition-- andthen
retightenthe nut againstthetube.SeeFigure10.
Internally
ThreadedTube
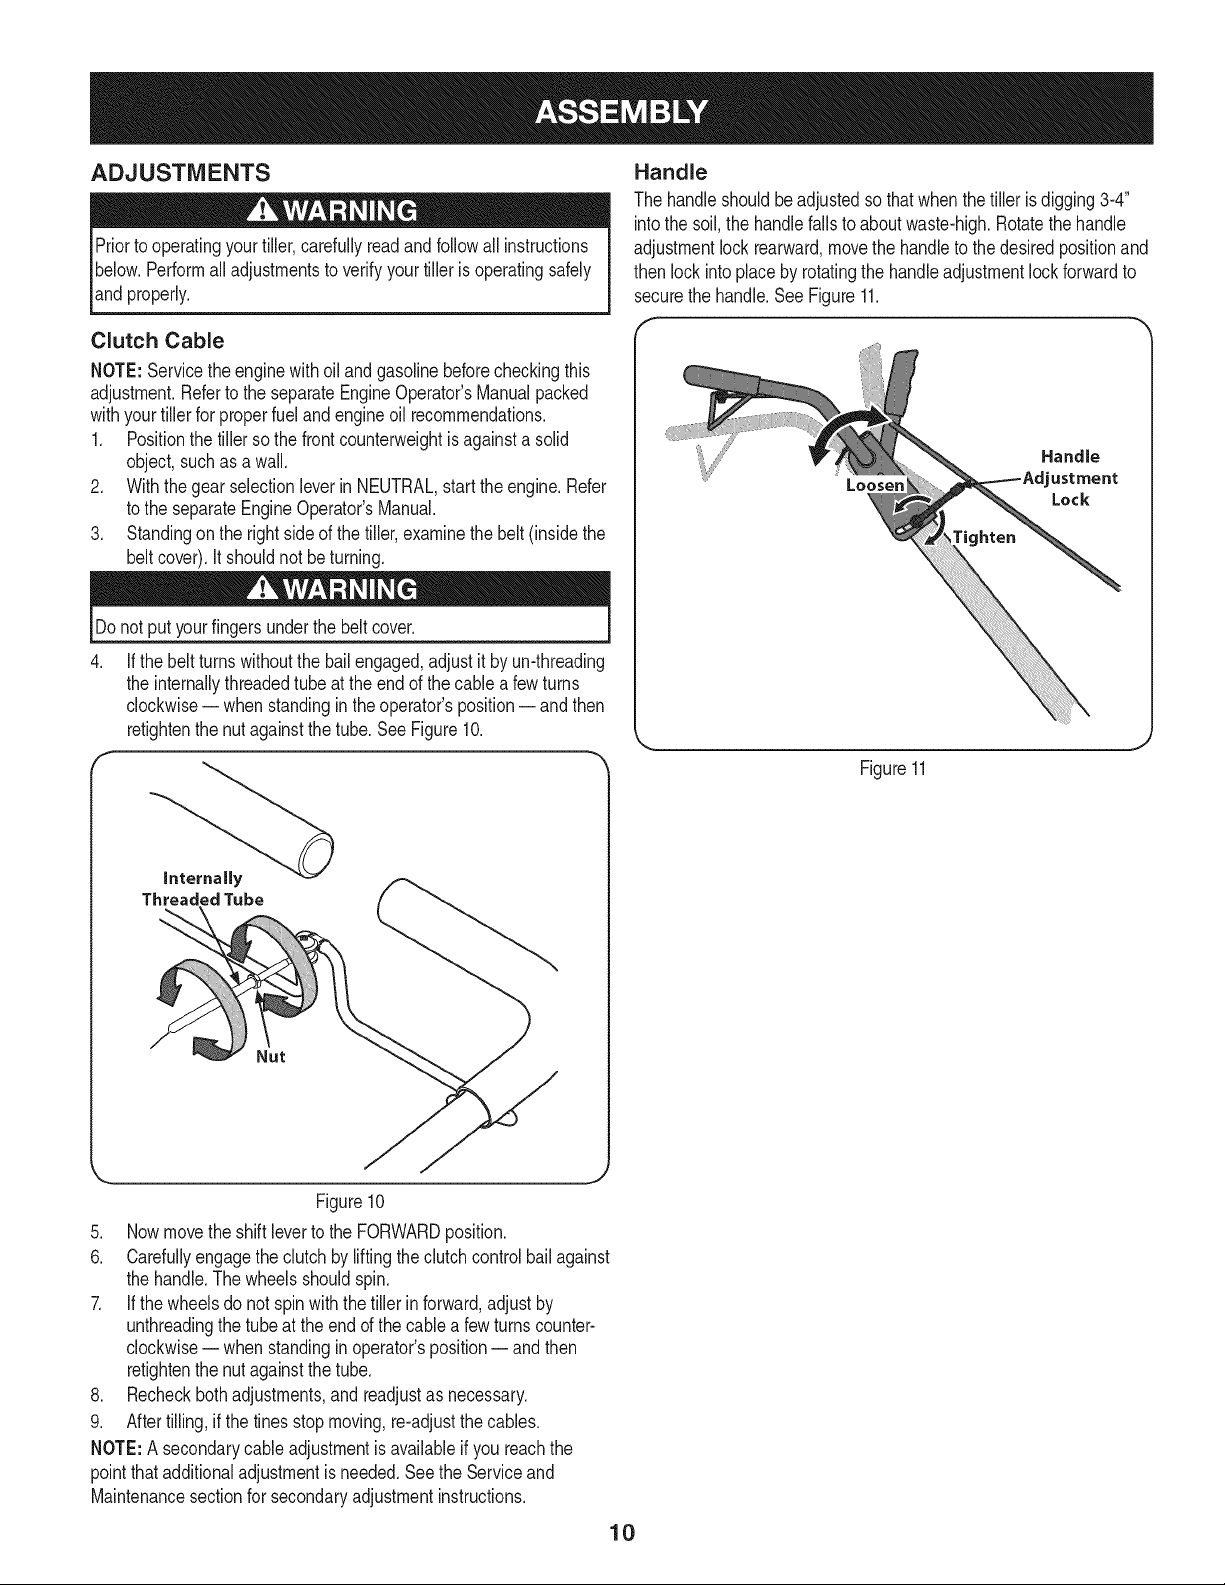
Handle
The handleshouldbeadjustedso thatwhenthe tiller is digging3-4"
intothe soil,the handlefallsto aboutwaste-high.Rotatethe handle
adjustmentlock rearward,movethe handleto thedesiredpositionand
then lock intoplace by rotatingthe handleadjustmentlockforwardto
securethe handle.See Figure11.
Loosen
tighten
Handle
ustment
Lock
Figure11
Figure10
5. Now movethe shiftleverto the FORWARDposition.
6. Carefullyengagethe clutchby lifting theclutchcontrol bail against
the handle.Thewheelsshouldspin.
7. If thewheelsdo not spinwiththe tiller inforward,adjustby
unthreadingthe tube at the endof the cablea fewturns counter-
clockwise-- when standingin operator'sposition-- andthen
retightenthe nut againstthetube.
8. Recheckbothadjustments,andreadjustas necessary.
9. After tilling,if the tines stop moving,re-adjustthe cables.
NOTE:A secondarycableadjustmentis availableif you reachthe
pointthat additionaladjustmentis needed.Seethe Serviceand
Maintenancesectionfor secondaryadjustmentinstructions.
10
Loading ...
Loading ...
Loading ...