Loading ...
Loading ...
Loading ...
TroubleshootJflg,Adjustmflts,& Service
FRONT
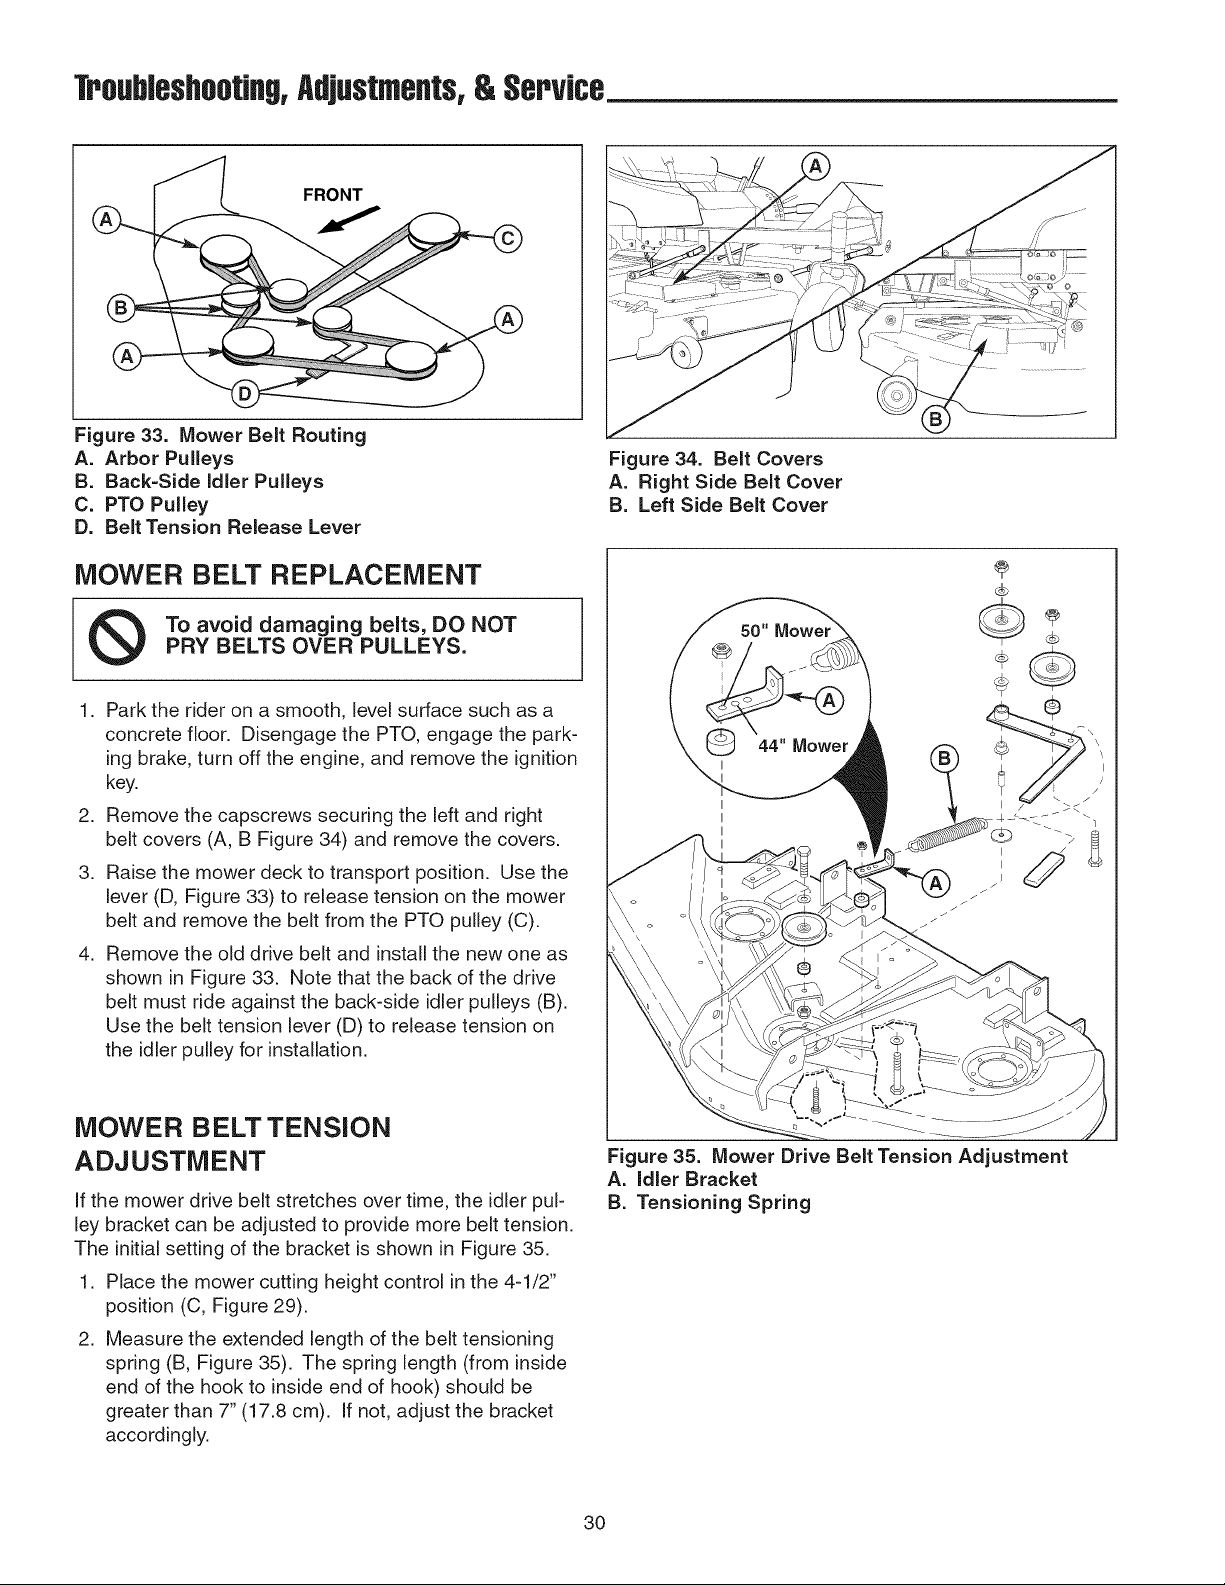
Figure 33. Mower BeJt Routing
A. Arbor Pulleys
B. Back-Side Idler Pulleys
C. PTO Pulley
D. BeJt Tension ReJease Lever
MOWER BELT REPLACEMENT
To avoid damaging belts, DO NOT
PRY BELTS OVER PULLEYS.
1. Park the rider on a smooth, level surface such as a
concrete floor. Disengage the PTO, engage the park-
ing brake, turn off the engine, and remove the ignition
key.
2. Remove the capscrews securing the left and right
belt covers (A, B Figure 34) and remove the covers.
3. Raise the mower deck to transport position. Use the
lever (D, Figure 33) to release tension on the mower
belt and remove the belt from the PTO pulley (C).
4. Remove the old drive belt and install the new one as
shown in Figure 33. Note that the back of the drive
belt must ride against the back-side idler pulleys (B).
Use the belt tension lever (D) to release tension on
the idler pulley for installation.
MOWER BELT TENSION
ADJUSTMENT
If the mower drive belt stretches over time, the idler pul-
ley bracket can be adjusted to provide more belt tension.
The initial setting of the bracket is shown in Figure 35.
1. Place the mower cutting height control in the 4-1/2"
position (C, Figure 29).
2. Measure the extended length of the belt tensioning
spring (B, Figure 35). The spring length (from inside
end of the hook to inside end of hook) should be
greater than 7" (17.8 cm). If not, adjust the bracket
accordingly.
Figure 34. Belt Covers
A. Right Side Belt Cover
B. Left Side Belt Cover
Figure 35. Mower Drive Belt Tension Adjustment
A. idler Bracket
B. Tensioning Spring
30
Loading ...
Loading ...
Loading ...