Loading ...
Loading ...
Loading ...
[_ WARNING]
The sliding fence must be extended to the left
when making bevel cuts. The sliding fences
note three bevel angles where the user must
adjust the fences to match the degree of the
bevel cut. Failure to extend the sliding fence
will not allow enough space for the blade to
pass through which could result in serious
injury. At extreme miter or bevel angles the
saw blade may also contact the fence.
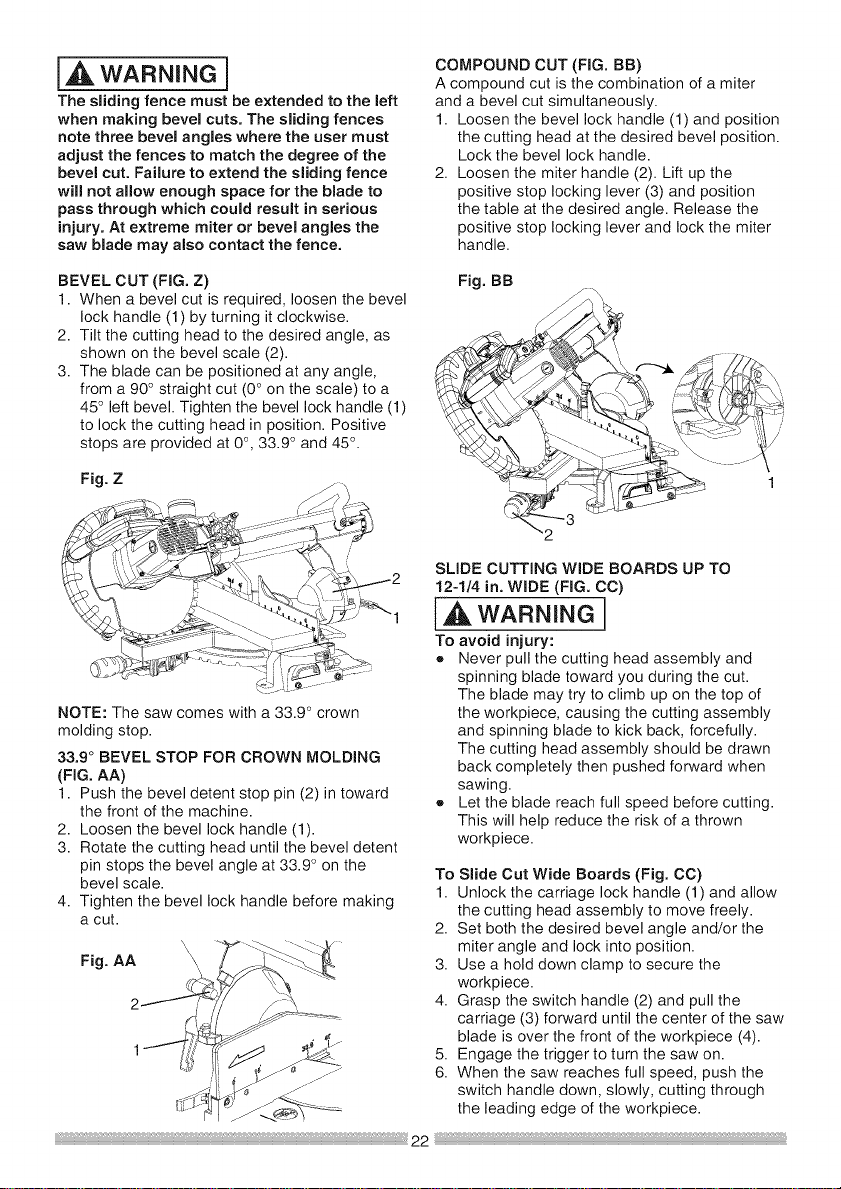
COMPOUND CUT (FIG. BB)
A compound cut is the combination of a miter
and a bevel cut simultaneously•
1. Loosen the bevel lock handle (1) and position
the cutting head at the desired bevel position•
Lock the bevel lock handle•
2. Loosen the miter handle (2). Lift up the
positive stop locking lever (3) and position
the table at the desired angle• Release the
positive stop locking lever and lock the miter
handle•
BEVEL CUT (FIG. Z)
1. When a bevel cut is required, loosen the bevel
lock handle (1) by turning it clockwise•
2. Tilt the cutting head to the desired angle, as
shown on the bevel scale (2).
3. The blade can be positioned at any angle,
from a 90° straight cut (0 ° on the scale) to a
45° left bevel• Tighten the bevel lock handle (1)
to lock the cutting head in position• Positive
stops are provided at 0°, 33.9° and 45°.
Fig. Z
NOTE: The saw comes with a 33.9 ° crown
molding stop.
33,9 ° BEVEL STOP FOR CROWN MOLDING
(FIG. AA)
1. Push the bevel detent stop pin (2) in toward
the front of the machine.
2. Loosen the bevel lock handle (1).
3. Rotate the cutting head until the bevel detent
pin stops the bevel angle at 33.9 ° on the
bevel scale.
4. Tighten the bevel lock handle before making
a cut.
Fig. AA
Fig. BB
\
SLIDE CUTTING WIDE BOARDS UP TO
12-1/4 in. WIDE (FIG. CC)
[a,wARninG
To avoid injury:
• Never pull the cutting head assembly and
spinning blade toward you during the cut.
The blade may try to climb up on the top of
the workpiece, causing the cutting assembly
and spinning blade to kick back, forcefully•
The cutting head assembly should be drawn
back completely then pushed forward when
sawing•
• Let the blade reach full speed before cutting•
This will help reduce the risk of a thrown
workpiece.
To Slide Cut Wide Boards (Fig. CC)
1. Unlock the carriage lock handle (1) and allow
the cutting head assembly to move freely.
2. Set both the desired bevel angle and/or the
miter angle and lock into position.
3. Use a hold down clamp to secure the
workpiece.
4. Grasp the switch handle (2) and pull the
carriage (3) forward until the center of the saw
blade is over the front of the workpiece (4).
5. Engage the trigger to turn the saw on.
6. When the saw reaches full speed, push the
switch handle down, slowly, cutting through
the leading edge of the workpiece.
Loading ...
Loading ...
Loading ...