
Loading ...
Loading ...
Loading ...
Alwaysstopengine,disconnectsparkplugwire,andgroundagainst
enginebeforeperformingany typeof maintenanceon yourmachine.
GENERAL RECOMMENDATIONS
• Alwaysobservesafetyruleswhenperformingany maintenance.
• Thewarrantyon thislawnmowerdoesnot coveritemsthathave
beensubjectedto operatorabuseor negligence.To receivefull
valuefromwarranty,operatormustmaintainthe equipmentas
instructedhere.
• Changingof engine-governedspeedwill voidenginewarranty.
• Alladjustmentsshouldbecheckedat leastonceeach season.
• Periodicallycheckall fastenersandmakesurethesearetight.
ENGINE MAINTENANCE
Spark Plug
Forgoodperformance,the sparkplugmustbeproperlygappedand
freeof deposits.Replacethe sparkplugannually.
1. Disconnectthe cap fromthe sparkplug,andremoveanydirt from
the sparkplugarea.
2. Usethe propersizesparkplugwrenchto removethe sparkplug.
NOTE: Replacewitha Champion®RC12YCsparkplug.
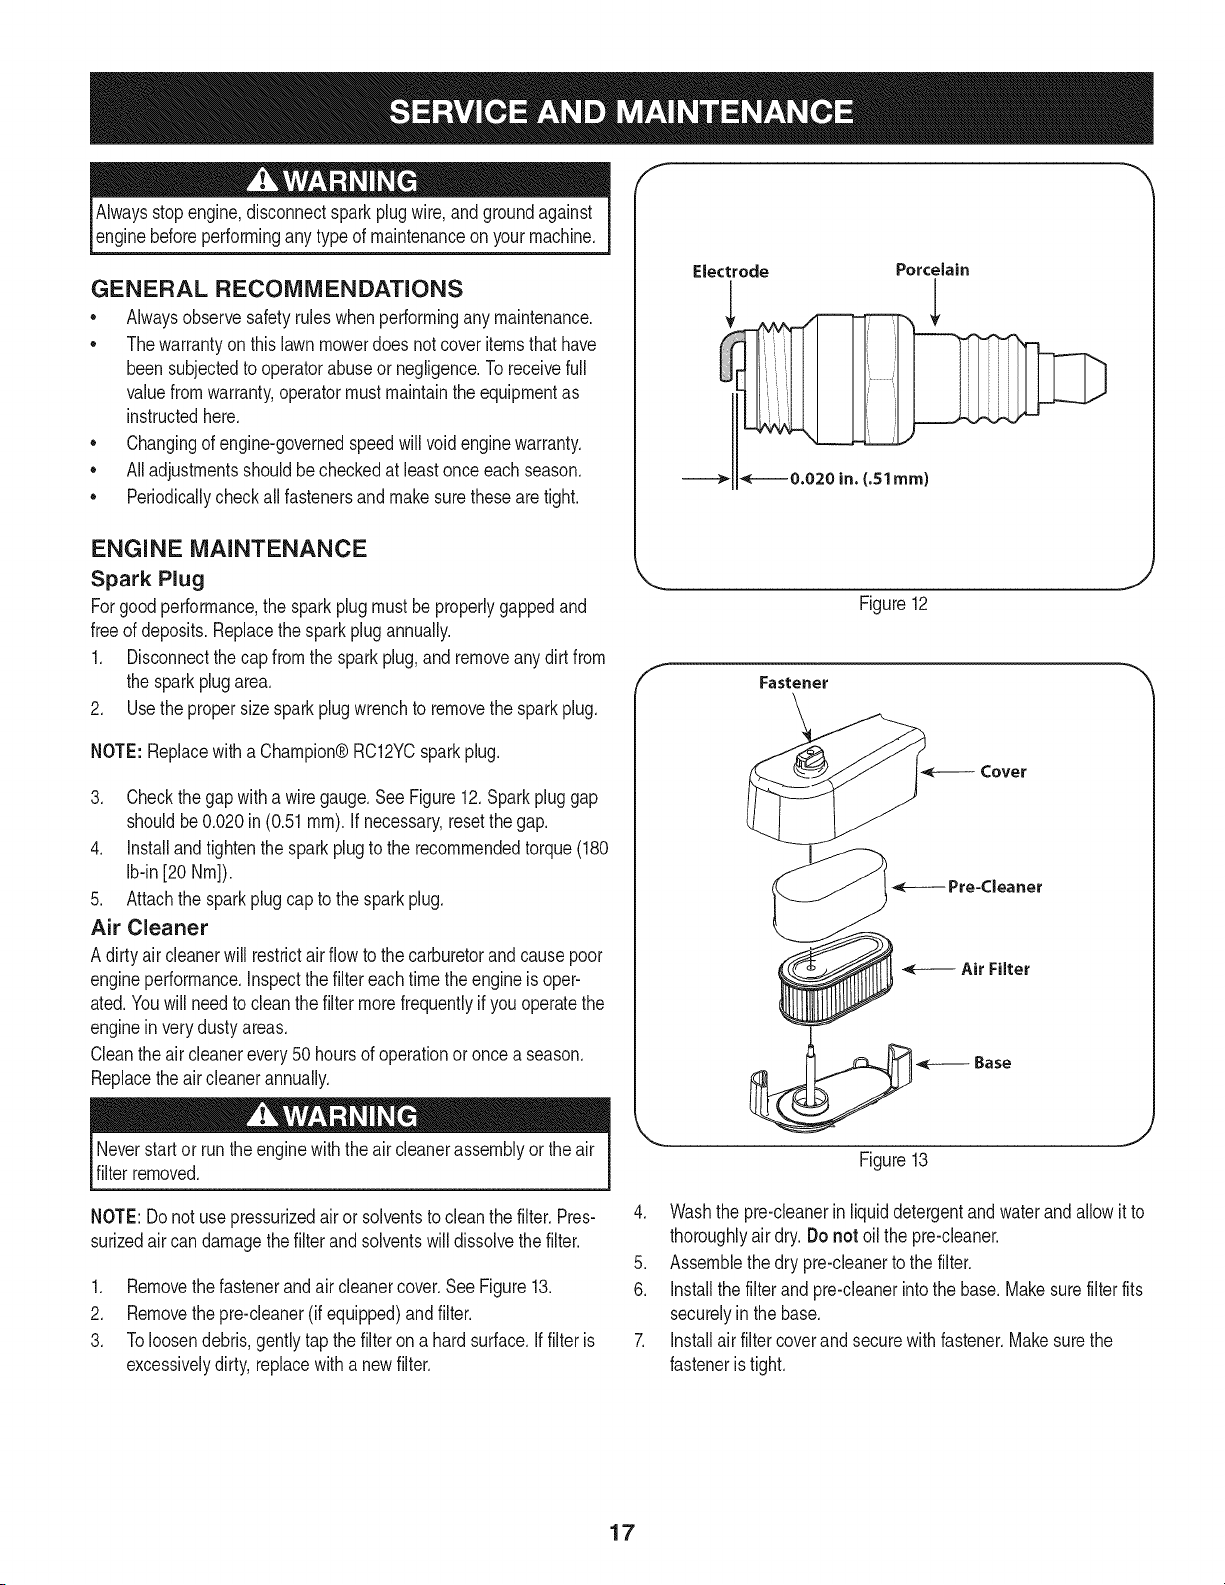
3. Checkthegapwitha wire gauge.SeeFigure12.Sparkpluggap
shouldbe0.020in(0.51ram).If necessary,resetthe gap.
4. installandtightenthe sparkplugto the recommendedtorque(180
Ib-in[20 Nm]).
5. Attachthe sparkplugcapto thesparkplug.
Air Cleaner
A dirty air cleanerwill restrictair flow to the carburetorand causepoor
engineperformance,inspectthe filtereachtimetheengineis oper-
ated.Youwill needto cleanthe filtermorefrequentlyif youoperatethe
enginein verydusty areas.
Cleantheair cleanerevery50hoursof operationoronce a season.
Replacetheaircleanerannually.
f
Electrode
Porcelain
Figure12
Fastener
Cover
Air Filter
Neverstartor runthe enginewiththe aircleanerassemblyor theair
filterremoved.
NOTE:Do notuse pressurizedair or solventsto cleanthe filter.Pres-
surizedair can damagethefilter and solventswill dissolvethefilter.
1. Removethefastenerand air cleanercover.See Figure13.
2. Removethepre-cleaner(if equipped)andfilter.
3. Toloosendebris,gentlytap the filterona hardsurface,if filteris
excessivelydirty, replacewitha newfilter.
Figure13
4. Washthe pre-cleanerin liquiddetergentandwaterandallowit to
thoroughlyair dry. Do not oil the pre-cleaner.
5. Assemblethe dry pre-cleanerto the filter.
6. installthe filter and pre-cleanerinto the base.Makesurefilterfits
securelyin the base.
7. installair filtercoverand securewith fastener.Makesurethe
fasteneris tight.
17
Loading ...
Loading ...
Loading ...