Loading ...
Loading ...
Loading ...
Installation instructions
3
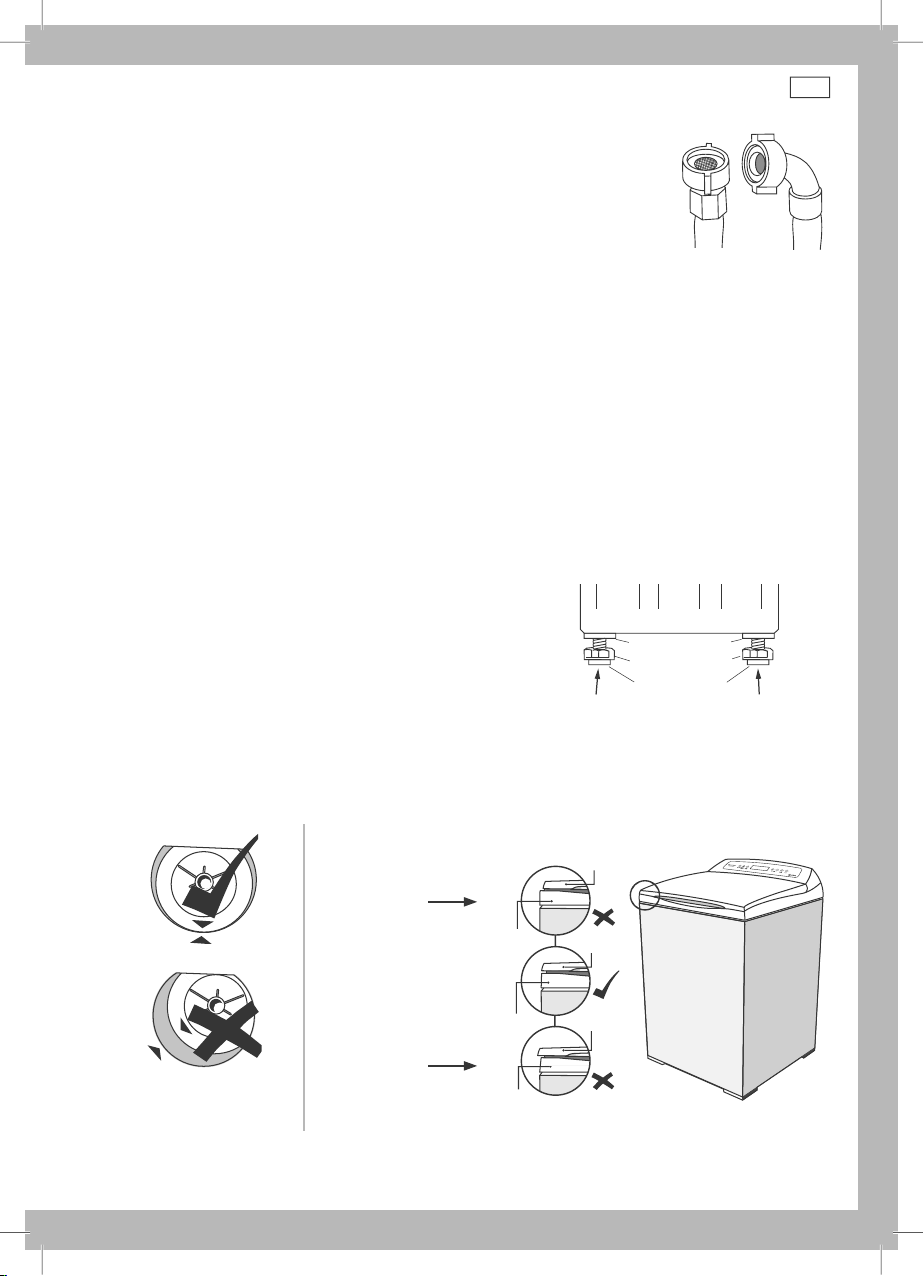
Fig.3 Inlet hose ends
Machine end
Tap end
Inlet hoses
Note: new hose sets provided with the machine are to be used to connect
the washer to the water mains. Old hose sets should not be re-used.
1
Connect the straight ends of the inlet hoses to the taps (there are washers
fitted in both ends). Connect the red connector hose to hot, and blue
connector hose to cold (if your hoses are colour-coded).
2
Connect the elbow ends of the inlet hoses to the corresponding machine
inlet valves.
Inlet valves are marked on the back of the machine.
H = Hot
C = Cold
Minimum height of taps to clear the top of the machine is 1150 mm.
Cold supply only:
If you only have a cold water supply, an inlet valve cap (blanking cap) MUST be connected to
the hot inlet valve. The cap prevents water leaking out of the hot valve. The cap is available from
your Fisher & Paykel Dealer or Authorised Repairer, Part No. 388491p. This appliance incorporates
backflow protection complying with AS3500.1. No further backflow protection is required for
connection to the water supply.
Note: your washer does not have an internal heater to heat water.
Inlet hose replacement
We recommend replacing the inlet hoses every 5 years. Hoses should be checked from time to
time and replaced if any wear, cuts, bulges or kinks are identified, or leaks are found.
Levelling your machine
It is IMPORTANT to level the machine to ensure
even spin performance.
1
Move the machine to its final position (we suggest
a minimum clearance of 20 mm each side).
2
Adjust the feet (by winding down or up to suit)
so the machine is level and does not rock.
To check if your machine is level:
Look down on the wash bowl and make sure it sits slightly forward of centre (see Diagram 1).
Close the lid. Visually check that the lid fits evenly on both sides.
If it does not look like the
diagram in the middle, adjust one of the feet slightly until it matches. The diagram on the top
and bottom are not correct (see Diagram 2).
Correct
To check levelling look
down on the wash bowl
Incorrect
Fig.5 To assess levelling, check lid alignment
Lid alignment
Lid
Topdeck
Lid
Lid
Topdeck
Topdeck
Wind right foot down
(out) to correct
Wind left foot down
(out) to correct
Diagram 1
Diagram 2
4
Turn on the water and check all hose connections for leaks. Check for leaks again after 24 hours.
Make sure there are no kinks in the hoses.
5
Uncoil the power cord, remove and discard the plastic pin cover, and plug into the wall socket.
Fig.4 Adjusting the levelling feet
Adjustable feet
Corner cabinets
Rubber insert
Loading ...
Loading ...
Loading ...