Loading ...
Loading ...
Loading ...
27
REFRIGERATOR USE
Opening and Closing Doors
There ar
e two fresh food compartment doors. The doors can
be opened and closed either separately or together. There is a
vertically hinged seal on left refrigerator door.
■ When left-side door is opened, hinged seal automatically folds
inward so that it is out of the way
.
■ When both doors are closed, the hinged seal automatically
forms a seal between two doors.
NOTE: When closing the door, the hinged seal should be in
correct position (be bent inside). Otherwise it will hit the right door
or the xing shaft.
The fresh food compartment door switch is located in top left and
right hinge cover.
■ For Freezer and Convertible Z one, door switch is located in
the bottom mullion.
■ The door switch uses magnet to sense door opening/closing.
■ Ensure ther
e are no magnet or electronic devices (Speaker,
Coolvox
®
etc.) within 7.62 cm of the hinge cap.
NOTE: The light will not turn on if door opening is not detected.
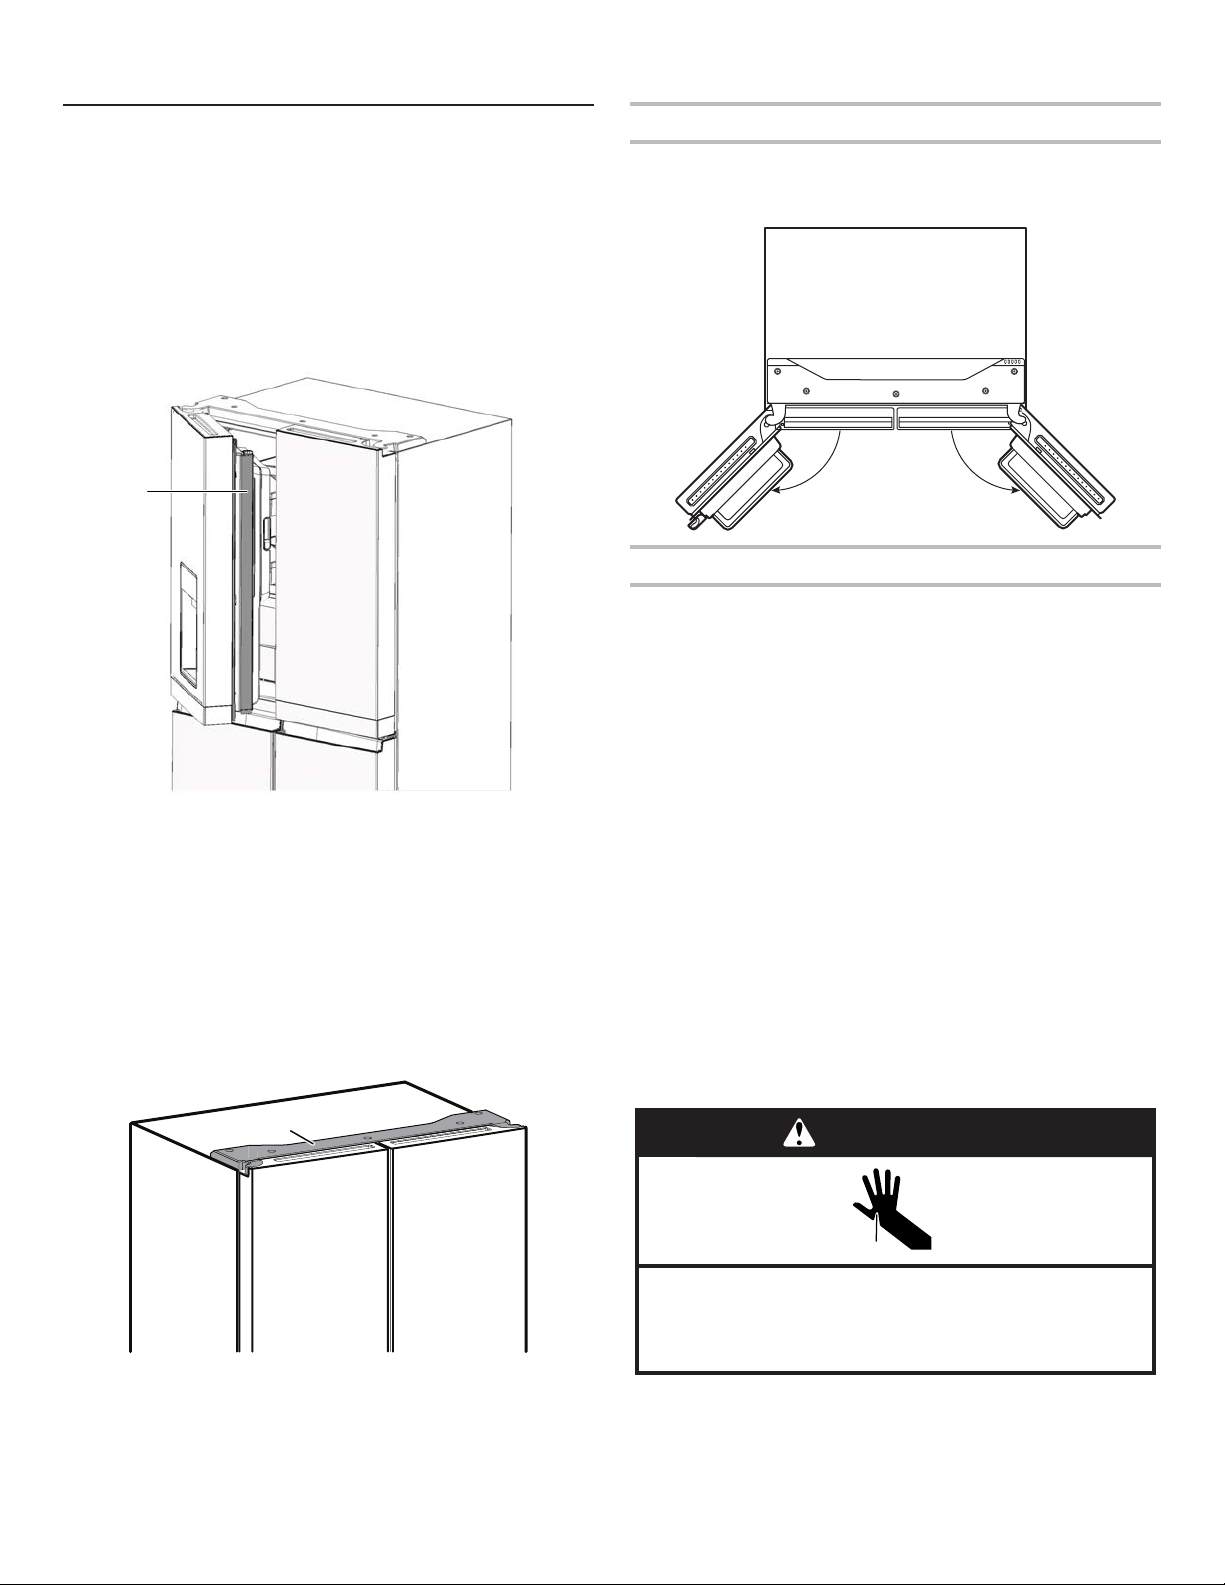
Shelf Height Adjustment
Shelf height can be adjusted by changing its location from bottom
support to upper support and vice versa.
■ Open right side door and left side door till 130º.
The Ice Dispenser
IMPORT
ANT:
n If the ice cubes are hollow or have an irr
egular shape, it could
be because of low water pressure. See the “Water Supply
Requirements” section.
n Ice travels from the ice storage bin thr
ough the dispenser
chute to the dispenser. To turn off the ice maker, see the
“Ice Maker and Storage Bin” section.
n The dispenser may continue to make noise and ice may
continue to dispense for several seconds after r
eleasing
the dispenser button or paddle.
To Clean the Ice Dispenser Chute:
Humidity causes ice to naturally clump together. Ice particles can
build up until the ice dispenser chute becomes blocked.
If ice is not dispensed regularly, it may be necessary to empty the
ice storage bin and clean the ice delivery chute, the ice storage
bin, and the area beneath the storage bin every 2 weeks.
n
If necessary, r
emove the ice clogging the storage bin and
delivery chute using a plastic utensil.
n Clean the ice delivery chute and the bottom of the ice storage
bin using a warm, damp cloth, and then dry thoroughly
.
To Dispense Ice - Paddle Dispensing
1. Select the desired type of ice by pr
essing CUBED ICE or
CRUSHED ICE.
Cut Hazard
Use a sturdy glass when dispensing ice.
Failure to do so can result in cuts.
WARNING
2. Press a stur
dy glass against the dispenser paddle. Hold the
glass close to the dispenser opening, so ice does not fall
outside of the glass.
IMPORTANT: You do not need to apply a lot of pressure to
the paddle to activate the ice dispenser. Pressing hard will not
make the ice dispense faster or in greater quantities.
A. Hinged seal
A
A. Hinge cover
130°
130°
A
Loading ...
Loading ...
Loading ...