Loading ...
Loading ...
Loading ...
24
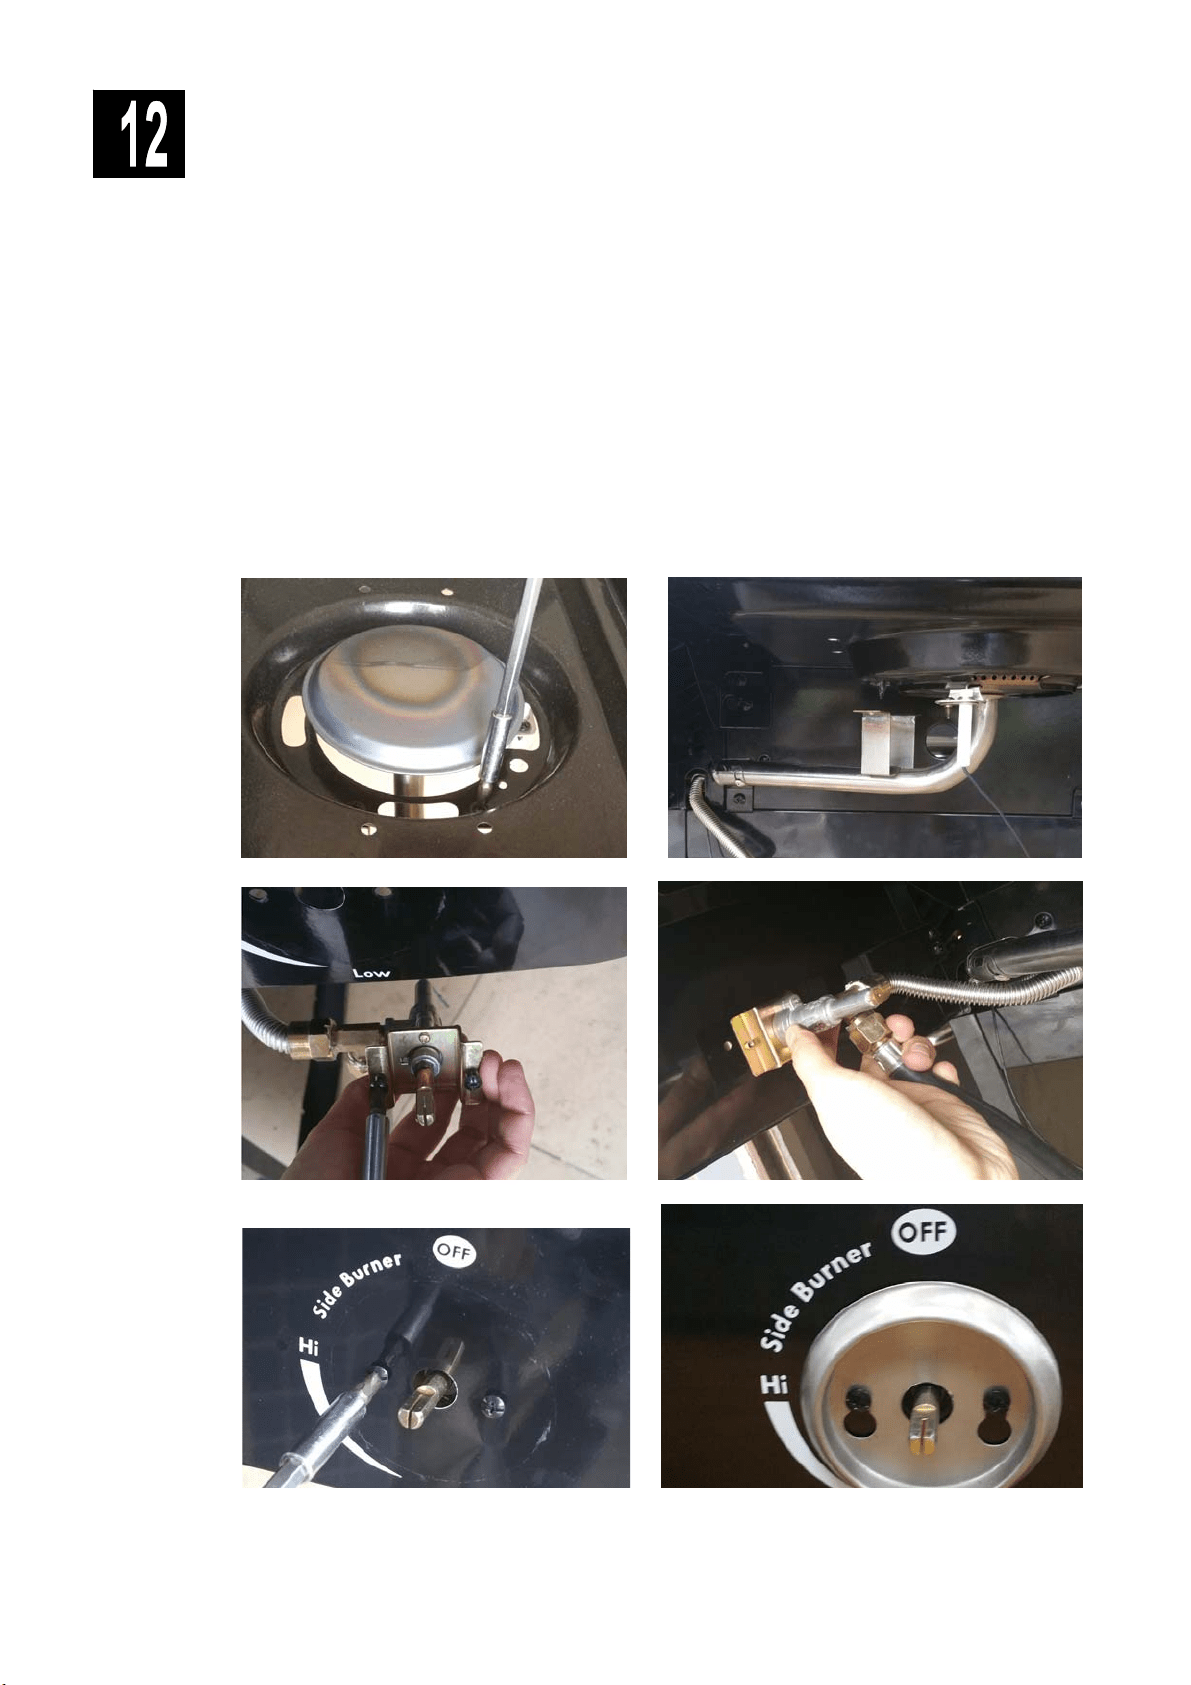
Side burner (The pictures just for your reference.)
□ Loosen side burner in side shelf. (B ). To loosen, unscrew and remove two front screws and washers
holding side burner in place. (A). Note: Do not loosen electrode screw.
□ Remove the 2 pre-installed screws from the valve stem and set them aside. (C)
□ Insert valve stem through hole in fascia. (D). Install previously removed 2 screws .Note: Do not tighten
these 2 screws until the bezel is attached to fascia and valve face.(E).
□ Insert bezel openings over valve stem and the 2 screws(F). Slide bezel down onto screws. Tighten the 2
screws to secure bezel to fascia(G).
□ Place side burner tube over the valve, making sure that valve is inside side burner tube. (H)
□ Push control knob onto side burner valve stem. (I)
□ Reattach side burner to side burner shelf with the 2 previously removed screws. Replace side burner
grate. (J)
□Remove igniter cap and nut pre-assembled to the electronic ignition module,and use them to attach
ignition module to the right fascia. Connect both igniter wires to the igniter module on the inside of the
right fascia. To connect, push igniter wire tips onto pins in igniter module.(K)
□Unscrew igniter cap from control panel. Insert (1) AAA battery (provided in blister pack) into battery slot
with positive end (+) facing outward. Screw igniter cap back onto panel. (L)
A B
C D
E
F
Loading ...
Loading ...
Loading ...