Loading ...
Loading ...
Loading ...
English
MAINTENANCE (CLEANING)
Routine maintenance must be done
every year. Please wear gloves during
the cleaning work.
Never use gasoline, benzene, thinner or
any other such chemicals for cleaning the
ventilating fan.
Do not immerse motor in water when cleaning.
Do not soak resin parts in water over 140°F (60°C).
Do not use cleaning sprays, solvents, or water on
or near the sensors.
WARNING
CAUTION
Disconnect power source before working
on unit.
INSTALLATION (RETROFIT)
2. Follow the step 1 , 4 , 5 , 7 on INSTALLATION
(NEW CONSTRUCTION). (Before connect the
circular duct to the adaptor, should pull down the
circular duct from the ceiling)
Disconnect power source before working
on unit.
5. Follow the step 10 to 13 on INSTALLATION
(NEW CONSTRUCTION).
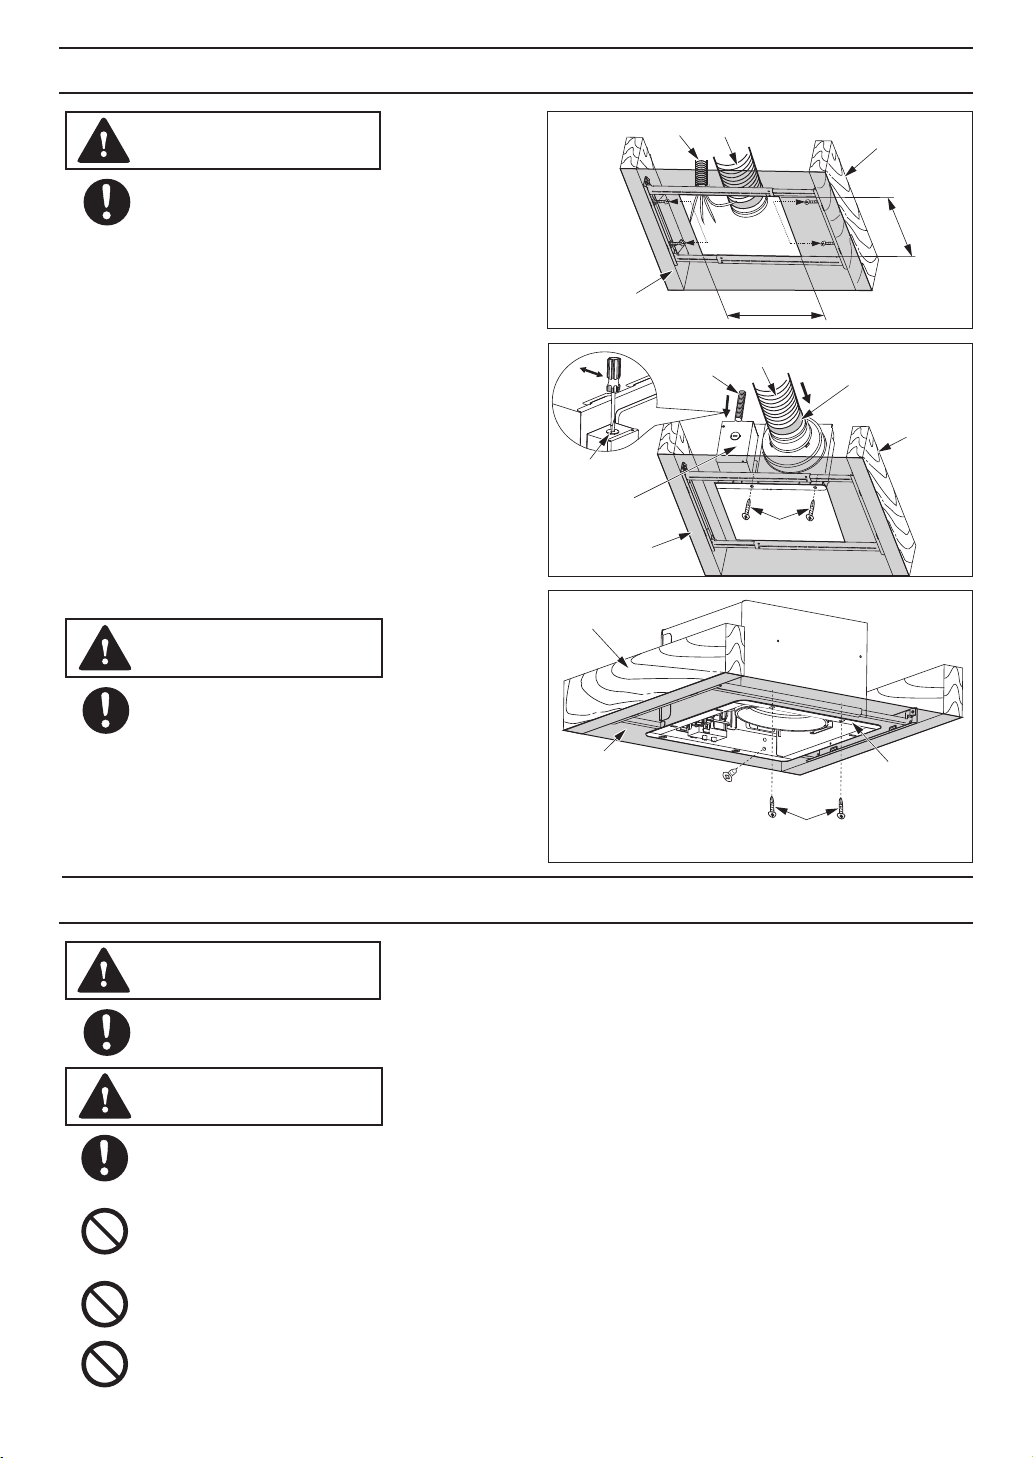
1.
Remove the existing fan and cut ceiling opening.
Secure the Flex-Z Fast bracket to joists
by drilling 4 tapping screws (ST4.2x20) which
have been fixed on it. Existing ductwork and
wiring left in place. (Fig.10)
TM
TM
3. Install the adaptor to Flex-Z Fast bracket by
using 2 self-drilling screws. (Fig.11)
TM
4. Secure the fan body to Flex-Z Fast bracket by
using 2 self-drilling screws, plug connector to
receptacle and secure the fan body to adaptor
by using machine screw (M4X8). (Fig.12)
Secure machine screw (M4X8) to the suitable
hole and not touch the Flex-Z Fast bracket.
Please fix the screw carefully to avoid screw
slip teeth.
TM
CAUTION
WARNING
Ceiling
Flange
Joist
Machine screw (M4X8)
2 Self-drilling screws (Fix the
flange and Flex-Z Fast
through the ceiling)
TM
bracket
Mastic or
approved
foil tape
2 Self-drilling screws
Ceiling
Joist
Knock-out
hole
Junction box
cover
Conduit
Circular duct
10 7/8
(275)
10 7/8
(275)
Conduit Circular duct
Joist
4Tapping
(
ST4.2x20)
Unit: inches (mm)
Fig.10
Fig.11
Fig.12
Ceiling (already existed)
screws
10
Loading ...
Loading ...